
ACKRV101 - Humidifier VAX - Free user manual and instructions
Find the device manual for free ACKRV101 VAX in PDF.


| Product Type | Humidifier |
| Brand | Vax |
| Model | ACKRV101 |
| Dimensions (W x D x H) | 200 mm x 200 mm x 300 mm |
| Weight | 1.5 kg |
| Power Supply | 220-240 V, 50 Hz |
| Power Consumption | 25 W |
| Water Tank Capacity | 3.0 L |
| Mist Output | Up to 300 ml/h |
| Noise Level | < 30 dB |
| Humidification Type | Ultrasonic |
| Coverage Area | Up to 30 m² |
| Auto Shut-Off | Yes, when water tank is empty |
| Filter Type | Demineralization cartridge (replaceable) |
| Mist Adjustment | Variable speed control |
| Water Level Indicator | Transparent water tank |
| Cleaning | Weekly cleaning with mild detergent; descale as needed |
| Suitable Water | Distilled or demineralized water recommended |
| Safety Features | Overheat protection, automatic power off |
| Spare Parts | Demineralization cartridge (model: VX-CART) |
| Warranty | 2 years |
Frequently Asked Questions - ACKRV101 VAX
User questions about ACKRV101 VAX
0 question about this device. Answer the ones you know or ask your own.
Ask a new question about this device
Download the instructions for your Humidifier in PDF format for free! Find your manual ACKRV101 - VAX and take your electronic device back in hand. On this page are published all the documents necessary for the use of your device. ACKRV101 by VAX.
USER MANUAL ACKRV101 VAX
natural_image
Three white industrial air purifiers labeled 'vax' with orange vertical stripes, no visible text or symbols on the devices themselves.ACKRV101
LET'S TALK SAFETY Basic Safety Precautions
This appliance is intended for household use only and NOT for commercial or industrial use.
- Only use the appliance indoors and keep away from wet areas.
- Keep fingers, hair and loose clothing away from moving parts and openings whilst using the appliance.
- This appliance can be operated by children aged from 8 years and above and persons with reduced physical, sensory or mental capabilities or lack of experience and knowledge, if they have been given supervision or instruction concerning use of the appliance in a safe way and understand the hazards involved. Children shall not play with the appliance.
- Cleaning and user maintenance shall not be made by children without supervision.
• Always position the appliance on a flat, stable, solid surface and never over stretch the power cord.
• Always remove the water tank and drain the appliance before carrying or transporting. - Position the appliance where dirty air is not drawn across your body or head while sitting or sleeping.
- This appliance produces mist. Keep away from valuables and other electronics.
× Don't
- Leave water stored in the water tank between uses.
- Place the appliance near sources of heat, such as stove tops, ovens, radiators, open fires, candles or computers.
- Move or tilt the appliance when in use. Leaking from the water reservoir may occur.
- Use the appliance if the power cord or plug is damaged. Please contact our Customer Service Line on: 0330 026 8455 (Mon-Fri 08:30-18:30 Sat 09:00-17:00).
- Use the appliance if it has been dropped, damaged or left outdoors.
-
Run the power cord under rugs, runners or carpets as it can be a trip hazard.
-
Pull, carry or trap the power cord under doors or sharp edges.
- Handle the plug or appliance with wet hands.
- Unplug the appliance by pulling on the power cord.
- Use the appliance in an area with toxic/explosive vapours/liquids, oxygen water tanks or near to flammable, combustible materials (lighter fluid, petrol, kerosene, chlorine, bleach and ammonia drain cleaner etc).
- Use the appliance with incorrect voltage as this may result in damage or injury to the user. The correct voltage is listed on the ratings label.
- Use without all filters in place.
- Add fragrance or scented oils to the water tank.
Do
• Always use clean fresh water in the water tank.
- Change the water daily and drain the appliance after every use.
- Inspect the appliance regularly and remove any dust/dirt build up as this may affect the airflow.
- Keep all openings/grills clear and free from obstruction and sources of heat, and open flames (including candles). Don't attempt to remove blockages with sharp objects as this may cause damage to the appliance.
- Turn off all controls on the appliance before disconnecting or connecting the power cord.
- Always replace the fuse in the plug with a 5amp fuse. Always protect the power cable from heat.
- Use only CE approved 5amp extension cords, non-approved extension cords may overheat.
• Take care to arrange the extension cord as it can be a trip hazard.
• Always switch off and unplug the appliance before performing maintenance or troubleshooting checks.
Please keep instructions for further use.
Contents
Lets talk safety 2-3
Getting to know your machine 5
Getting started 6-7
Using your machine 8-9
Taking care of your machine 10-13
What to do if it goes wrong 14
Getting in touch 15
Getting to know your machine
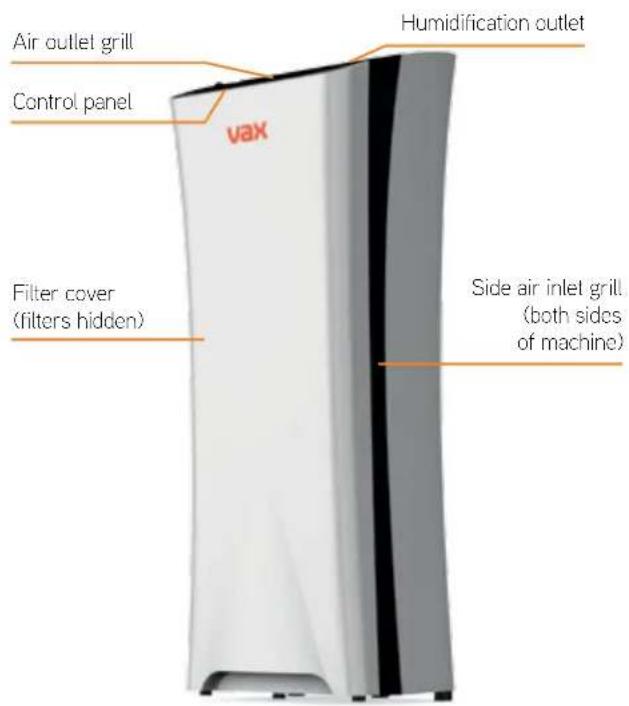
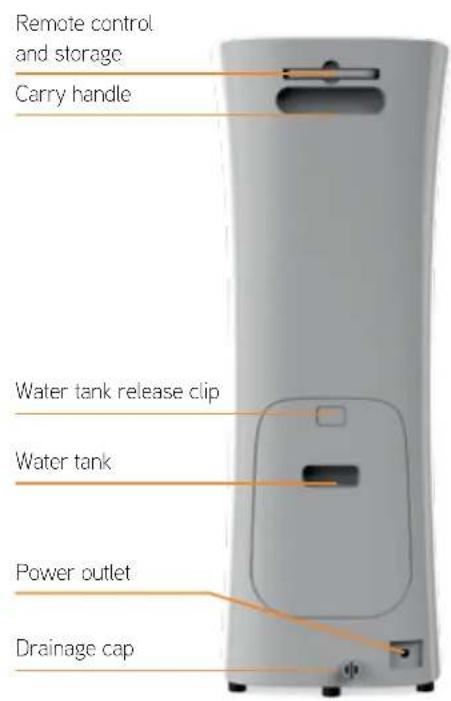
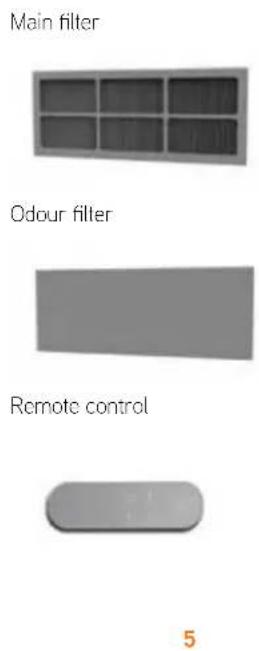
Getting started
BEFORE YOU BEGIN
IMPORTANT: Remove all packaging covering the appliance. Make sure the filters are in place and correctly fitted before switching on. Stand the machine on a hard flat surface away from sources of heat. Never block the air grills: keep them free from any obstruction.
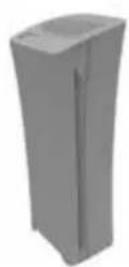
Stand the appliance on a hard flat surface. Make sure the air grills are free from any obstructions.
natural_image
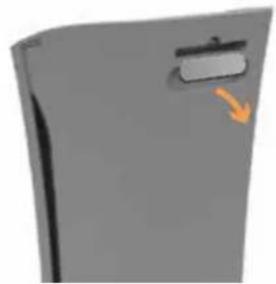
Close-up of a gray rectangular object with a small black clip and an orange arrow pointing downward (no text or symbols visible)Remove the remote control stored on board at the back of the machine.
natural_image
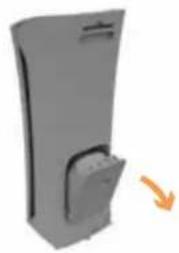
3D rendering of a gray rectangular device with a small protrusion and an orange arrow pointing to it (no text or symbols visible)Press the water tank release button and pull water tank to remove.
natural_image
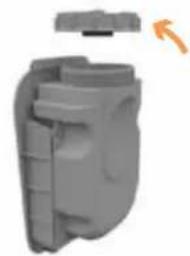
3D rendered mechanical component with a small protrusion and an orange arrow indicating rotation (no text or symbols)Twist the water tank cap anti-clockwise to remove.
natural_image
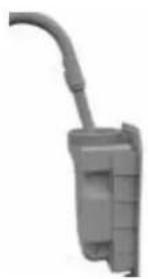
Close-up of a gray electrical plug with a curved cable (no text or symbols visible)Fill the water tank with water to the max fill line. To prevent build up of limescale especially in hard water areas, filtered water is recommended. Do not add any fragrances or scented oils to the water tank.
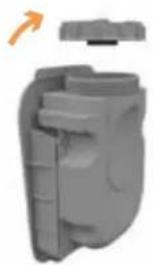
natural_image
3D rendered mechanical component with a small top and arrow indicator (no text or symbols)Replace the water tank cap twist clockwise to tighten.
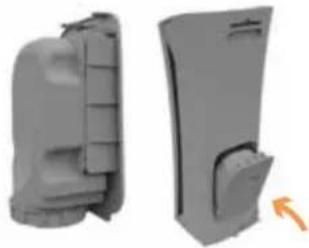
natural_image
Two 3D-rendered gray mechanical components with internal channels and a small orange arrow indicating a feature (no text or symbols)Turn the water tank so the cap is at the bottom. Line up the water tank with the machine inserting the bottom of the water tank into the machine first. Push back until water tank cover clicks into place.
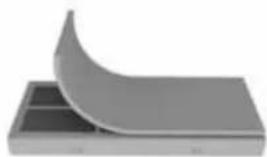
natural_image
3D rendered image of a curved metallic object placed on a rectangular base (no text or symbols visible)Check the supplied filters are properly in place and all plastic is removed before switching the machine on.
Using your machine
IMPORTANT: The control panel is touch sensitive, lightly press the controls. The remote control has the same operating functions as the control panel. When the machine is activated the digital humidity reading of the room and the spinning image of the fan will constantly be displayed. Humidification starts after the initial water cycle. Mist may not be visible in all conditions or if the water tank is empty.
Remote control
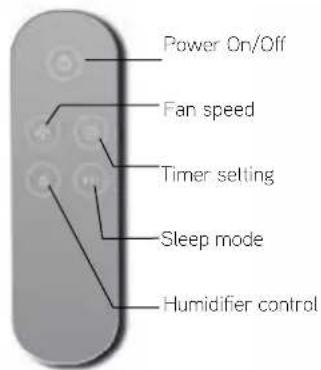
Using the control panel
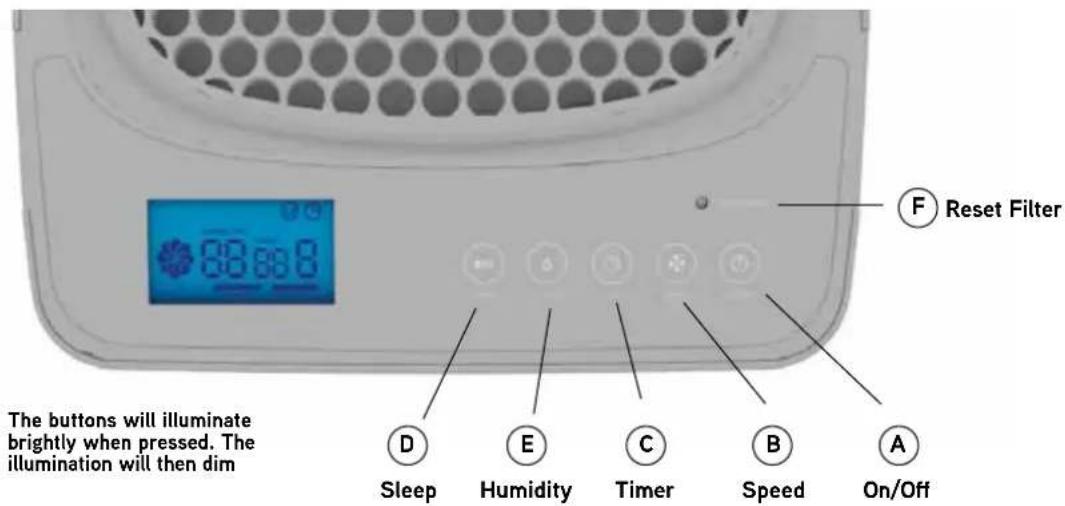
A On/Off
Press the 'On/Off' button once to switch the machine on. The air purifier will activate (the speed button on the control panel will also illuminate).
B Speed
The fan will activate on a medium speed when the machine is switched on. Press the 'speed' button to select the desired fan speed - Low, Med, High & Turbo. On the digital display panel a fan image will interpret the fan speed as the speed selected increases or decreases.
C Timer
The timer can be set between 1-8 hours. The number of hours selected will show on the display panel underneath the image of a clock face. Press the 'timer' button to select the number of timed hours required. Once the timer cycle has complete, the machine will run at a medium speed. If the timer is not set the machine will constantly operate at a medium speed. If the timer is set in standby mode, the appliance will turn on at a medium speed once the timer cycle has completed.
D Sleep
Press the 'sleep' button, the fan speed will select Low and the LCD on the machine will auto dim.
E Humidity
Press the 'Humidity' button to activate the humidifier and continue pressing to select the required humidity target. The target required will show on the display panel alongside the current RH% (Relative Humidity). Mist and vapour will disperse through the small grill behind the control panel. The humidifier will be switching on/off automatically every time the target RH% is below or equal to the current RH% until the tank runs empty or the humidifier function is switched off.
F Reset filter
After replacing filters, insert a small blunt instrument such as a pen nib into the reset insert and hold down for a few seconds to reset the filter life calculator. A beep sound will be heard to confirm the filter reset has been set.
Taking care of your machine
EMPTY WATER TANK
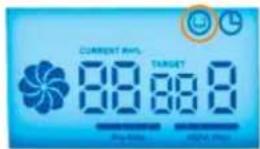
When the water tank is empty or runs dry in the humidification mode, the digital display will flash an empty water tank symbol. The water empty water tank symbol flashes even if the humidity is not on. Refill tank as specified in the 'Getting started' section of this guide.
EMPTYING THE WATER TANK AND DRAINING THE MACHINE
natural_image
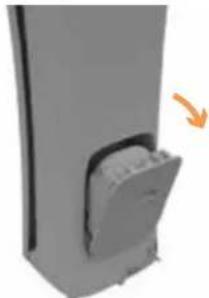
3D rendering of a mechanical component with an arrow indicating direction (no text or symbols)Turn off and unplug the unit. Press the water tank release button and pull to remove.
natural_image
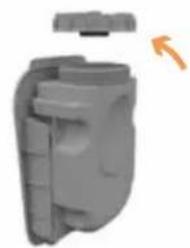
3D rendered mechanical component with a small protrusion and an orange arrow indicating direction (no text or symbols)Twist the water tank cap anti-clockwise and remove. Empty over a sink and rinse tank.
natural_image
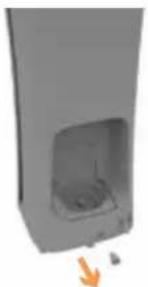
3D rendering of a gray rectangular object with an internal cavity and an orange arrow pointing downward (no text or symbols)Stand the machine over a sink or bath and pull to remove the drainage cap.
Do not leave water stored in the water tank between uses. The water tank should be emptied after each use and re-filled with fresh water before use.
CAUTION

natural_image
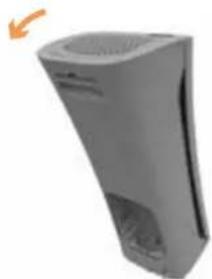
Exterior view of a desktop computer tower (no signage or text visible)Tilt the machine allowing the excess water to drain.
natural_image
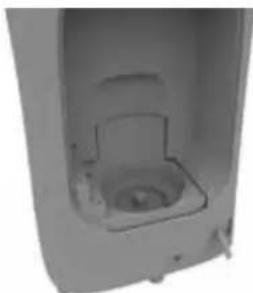
Interior view of a gray plastic appliance casing with a small vent and lid (no text or symbols visible)Using a dry cloth wipe the reservoir underneath where the water tank would sit.
natural_image
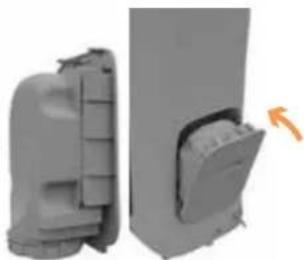
3D model of a gray plastic enclosure or holder with an orange arrow indicating a cut or change (no text or symbols visible)Make sure the water tank lid is tightly fitted and turn the water tank so the cap is at the bottom. Line up the water tank with the machine inserting the bottom of the water tank into the machine first. Push back until water tank cover clicks into place.
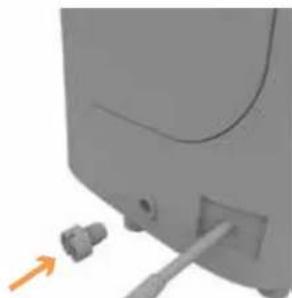
natural_image
Close-up of a computer monitor with a cable inserted, showing a small connector and an orange arrow pointing to it (no text or symbols visible)Push the drainage cap back into place, making sure it is correctly fitted.
Taking care of your machine
REPLACING THE FILTERS
The filter life bars on the display panel will decrease gradually throughout the use of the machine. When the filters need replacing the life bars will flash and the display panel will turn red.
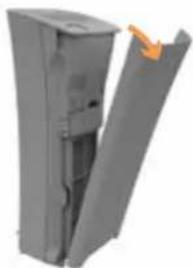
natural_image
Exterior view of a gray rectangular electronic device with a yellow clip and orange accent (no text or symbols visible)Turn off and unplug the unit. Pull either side of the front cover to remove.
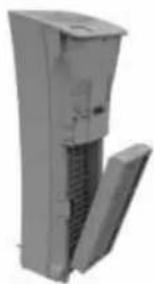
natural_image
Exterior view of a gray industrial device with a side panel and ventilation duct (no visible text or symbols)Pull to remove the filters from machine.
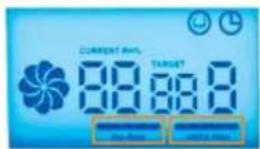
natural_image
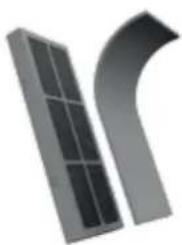
Two curved metallic panels with grid patterns, one tilted and one angled (no text or symbols)Remove all packaging from new filters. Line up odour filter, (the odour filter is reversible and can be fitted either side) press onto the hook and eye tabs to attach to main filter.
The filters should be replaced every 3-6 months dependent on use.
CAUTION

natural_image
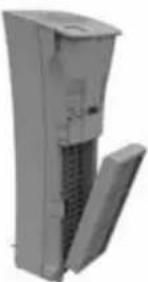
Exterior view of a gray industrial device with a side panel (no visible text or symbols)Line up and refit the new filters into the machine.
natural_image
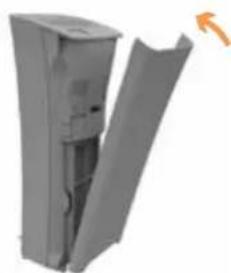
Exterior view of a gray plastic enclosure or enclosure with a folded lid and internal components (no text or symbols visible)Line up tabs on the bottom of the filter, cover with the tabs on the machine. In a hinge like manner push the cover until it clicks into place.
natural_image
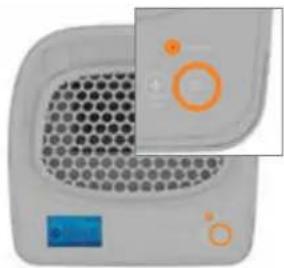
Close-up of a kitchen appliance with circular patterns and a blue LCD panel (no visible text or symbols)Plug the appliance into a power source and press the on button. Insert a small blunt instrument such as pen nib into the reset insert and hold down for a few seconds to reset the filter life calculator. A beep sound will be heard to confirm the filter reset has been set and the LCD screen will turn blue again.
What to do if it goes wrong
SolutionProblem
Why does my air purifier have no power?
- The plug may not be fully pushed into the electrical socket.
- Check the fuse in the plug. If this needs replacing, always replace with a 5amp British fuse.
- The front cover may not be secure. Check the front cover is securely fitted.
Go to 'Taking care of your machine'. - The filter may not be fitted correctly. Check the filter. Go to 'Taking Care of your machine'.
- Timer may have finished. Re-set the timer. Go to 'Using your machine'.
Why is water leaking from my machine?
- The machine may not have been positioned correctly. Place the machine on a flat, stable, solid surface.
- The water tank cap may not have been tightened. Go to 'Getting started'.
- The machine may have been moved or tilted with water in the water tank. Remove water tank, drain machine and wipe dry reservoir. Go to 'Taking Care of your machine'.
- The drainage cap may not be correctly fitted. Go to 'Taking Care of your machine'.
Why is the digital display on the control panel red?
- The water tank may be empty. Go to 'Taking Care of your machine'.
- The filters may need replacing. Go to 'Taking Care of your machine'.
We're here if you need us
Online: vax.co.uk/support
Call: (UK) 0844 412 8455 (ROI) 1-800 928 308
Monday-Friday 8:30am to 6:30pm, Saturday 9:00am to 5:00pm*
Alternatively, you can write to us at:
Vax Ltd., Kingswood Road, Hampton Lovett, Droitwich, WR9 0QH, UK
Getting in touch...
It's quick and easy to register for your FREE guarantee
Online at: vax.co.uk/guarantees
Please retain your original receipt for proof of purchase.
* Calls are charged at the UK local rate. Please make a note of the serial number and model number of the air purifier before calling.
^+ Registration required. Terms and conditions apply.
GET IN TOUCH

0330 026 8455

info@vax.co.uk

vax.co.uk

VaxVacuums

@VaxUK
EEC Statement of Compliance: Manufacturer/EEC importer: Vax Limited, hereby on our own responsibility, declare that the ACKRV101 manufactured in compliance with the following Directives: Safety: 2006/95/EC Low Voltage Directive. EMC: 2004/108/EC Electromagnetic Compatibility Directive.
Waste electrical products should not be disposed of with household waste. Please recycle where facilities exist. Check with your Local Authority or retailer for recycling advice.
© 2015 Vax Limited. All rights reserved. The VAX trade mark and Vax lozenge is the property of Techtronic Floor Care Technology Ltd and is registered in the EU and may be pending or registered in other countries.

CE
- LET'S TALK SAFETY Basic Safety Precautions
- This appliance is intended for household use only and NOT for commercial or industrial use.
- × Don't
- Do
- Contents
- Getting started
- BEFORE YOU BEGIN
- Using your machine
- A On/Off
- B Speed
- C Timer
- D Sleep
- E Humidity
- F Reset filter
- Taking care of your machine
- EMPTY WATER TANK
- REPLACING THE FILTERS
- What to do if it goes wrong
- SolutionProblem
- We're here if you need us
- Getting in touch...
- GET IN TOUCH
Brand : VAX
Model : ACKRV101
Category : Humidifier