
BV755BLC - DVD player BOSS - Free user manual and instructions
Find the device manual for free BV755BLC BOSS in PDF.


| Product Type | DVD Player |
| Brand | Boss |
| Model | BV755BLC |
| Dimensions (W x D x H) | 16.9 x 9.1 x 1.9 inches (43 x 23 x 4.8 cm) |
| Weight | 2.5 lbs (1.13 kg) |
| Power Supply | AC 100-240V, 50/60Hz |
| Disc Compatibility | DVD, DVD±R/RW, CD, CD-R/RW, VCD, SVCD |
| Playback Formats | MPEG-2, MPEG-4, DivX, XviD, MP3, JPEG |
| Video Outputs | HDMI, Composite (RCA), Component (YUV) |
| Audio Outputs | Digital Coaxial, Digital Optical, Stereo RCA |
| Remote Control | Included (IR) |
| Front Panel Controls | Power, Play, Pause, Stop, Next, Previous, Open/Close |
| Display | LED (front panel) |
| Region Code | 1 (NTSC) or 2 (PAL) - check region setting |
| Parental Control | Yes (adjustable rating) |
| Maintenance & Cleaning | Clean lens with a soft, dry cloth; keep away from liquids. Avoid using cleaning discs. |
| Safety Precautions | Do not disassemble; keep away from moisture and heat sources. Unplug during thunderstorms. |
| Spare Parts & Repairability | Contact Boss customer service or authorized repair centers for parts and repairs. |
Frequently Asked Questions - BV755BLC BOSS
User questions about BV755BLC BOSS
0 question about this device. Answer the ones you know or ask your own.
Ask a new question about this device
Download the instructions for your DVD player in PDF format for free! Find your manual BV755BLC - BOSS and take your electronic device back in hand. On this page are published all the documents necessary for the use of your device. BV755BLC by BOSS.
USER MANUAL BV755BLC BOSS
tech support: www.bossaudio.com/support/technical-support


0518
Poc® and iPhone® are trademarks of Apple, Inc. registered in the U.S. and other countries. ROSS Audio Systems is not affiliated with Apple, Inc. The Bluetooth® word mark and logo are registered trademarks owned by Bluetooth, LLC, Inc. and any use of such marks by ROSS Audio Systems is under license. Other trademarks and trade names are those of their respective owners.
USER'S MANUAL
BV755B
BLUETOOTH® | DVD/MP3/CD
AM/FM RECEIVER
FEATURING 6.2" (157 mm) WIDESCREEN TOUCHSCREEN DIGITAL TFT MONITOR
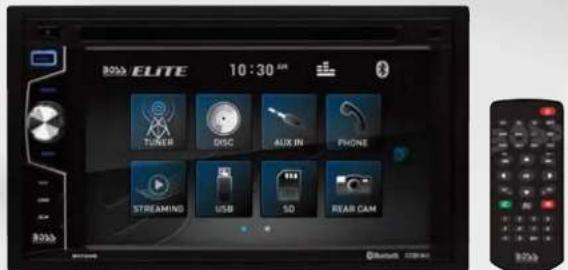


Bluetooth®
BOSS®
AUDIO SYSTEMS
ELITE
To ensure safety while driving
and to comply with laws,
drivers should not watch video or
operate the video device while driving.
Congratulations on your purchase of a Boss Audio Systems® Multimedia Receiver.
It has been designed, engineered and manufactured to bring you the highest level of performance and quality, and will offer you years of entertainment pleasure.
CONTENTS
General Information....1
Safety Notice 2
Accessories....3
Remote Control Operation....4
Unit Installation....6
Wires Connection Description....7
Panel Introduction......8
Main Menu Operation Instruction....9
Access Setup Interface....11
Clock Setup....11
General Setup....12
Audio Setup....13
Disc Setup....13
Other Setup....14
Tuner Operation....14
DISC/CD/USB/SD Playback....16
Media Playing—video/disc Form Playing 16
Media Playing—CD Audio 17
Source Menu of CD 18
USB/SD Music/Video/Picture 18
Bluetooth Operation....19
Bluetooth Operation Menu....19
Bluetooth Dialing....20
Bluetooth Call....20
Bluetooth Phone Book 21
Bluetooth Phone Call History 22
Bluetooth Music Streaming-A2DP 22
Bluetooth Pair device....22
Photo 23
Camera/Aux/AV Menu 24
Troubleshooting....25
SPECIFICATIONS
| Model No. | BV755B | ||
| General features | Fixed front panel 6.2 inch TFT screenFM/AM RadioRBDSDVD fully compatible withDVD/VCD/CD/MP3/MPEG4/JPEGFront USB & SD reader supportBuilt-in BluetoothAUX InputAV InputAV outputRear view cameraFront, Rear and Subwoofer Pre-Amp Output4*80W AMP power output maximumSteering wheel control | ||
| TFT screen | 800*480pixel | ||
| SD | 32G | ||
| Working power | 12 V | ||
| Max Output | 4*80W | ||
| Working Temperature | -20°C~70°C / -4°F~158°F | ||
| Size | 96.5*170.5*144mm | ||
| Weight | 1.92kg / 4.23lbs | ||
| Compatible Media | |||
| Picture | JPG/JPEG/BMP | ||
| Disc | CD/CD-R/CD-RW/DVD/DVD±R/DVD±RW | ||
| Audio file | MP3/WAV | ||
| Video file | .AVI | MP3 | MPEG-4 |
| MPG | AC-3 | MPEG-4 Visual | |
| MPEG-1/2 | |||
Please read and understand the following safety information before operating this unit.
The device is suitable for 12V power supply (requires grounding). Do not connect it to 24V power supply in trucks or buses, or else it will be damaged.
! Please use genuine discs, instead of incompatible and poor discs, or else it will damage the device or shorten the service life.
Without the guide of qualified personnel, do not replace the fuse, or else it may damage the device or cause fire.
⚠️ Please follow the traffic laws and regulations and do not watch program or operate the device when you are driving, to avoid accidents (excluding passengers watching through rear monitor).
To ensure safety and operate the device normally, please ask qualified personnel to install the device. do not disassemble or repair the device without authorization, to avoid damage and accidents. Please contact local car audio distributor for details.
Do not put the device in moist environment or water, to avoid electric shock, damage and fire due to short circuit.
The mechanical drive part of the monitor uses automatic precision transmission component. Do not pull, push or rotate the device by force or impact the TFT screen to avoid damaging the device.
Do not insert the audio plug of the vehicle into the master unit directly. please convert with the dedicated end cable provided by our company.
When install the unit, prevent metal objects falling into the master unit from the vents to avoid short circuit and damaging the device.
Safety Statement
For the safety of you and others, do not watch programs or operate the device when you are driving. It is prohibited by the laws and regulations.
The backing monitor function should be used as auxiliary means. we are not responsible for any accidents occurred during backing.
Below are the photos with the accessories included in the box.
Remote Control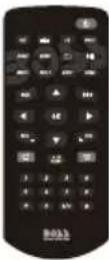 | Power Cable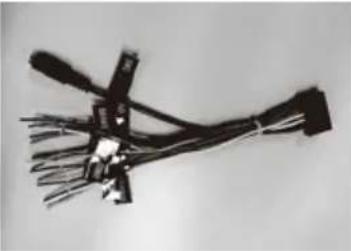 |
Mounting Brackets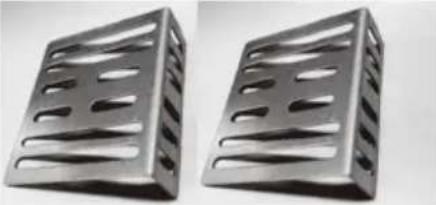 | Mounting Hardware Screw CM5*6mm 8pcs Screw CM5*6mm 8pcs |
Trim Ring/Touch Pen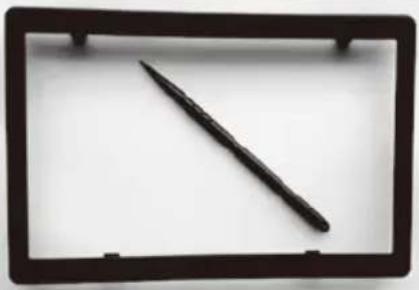 | |
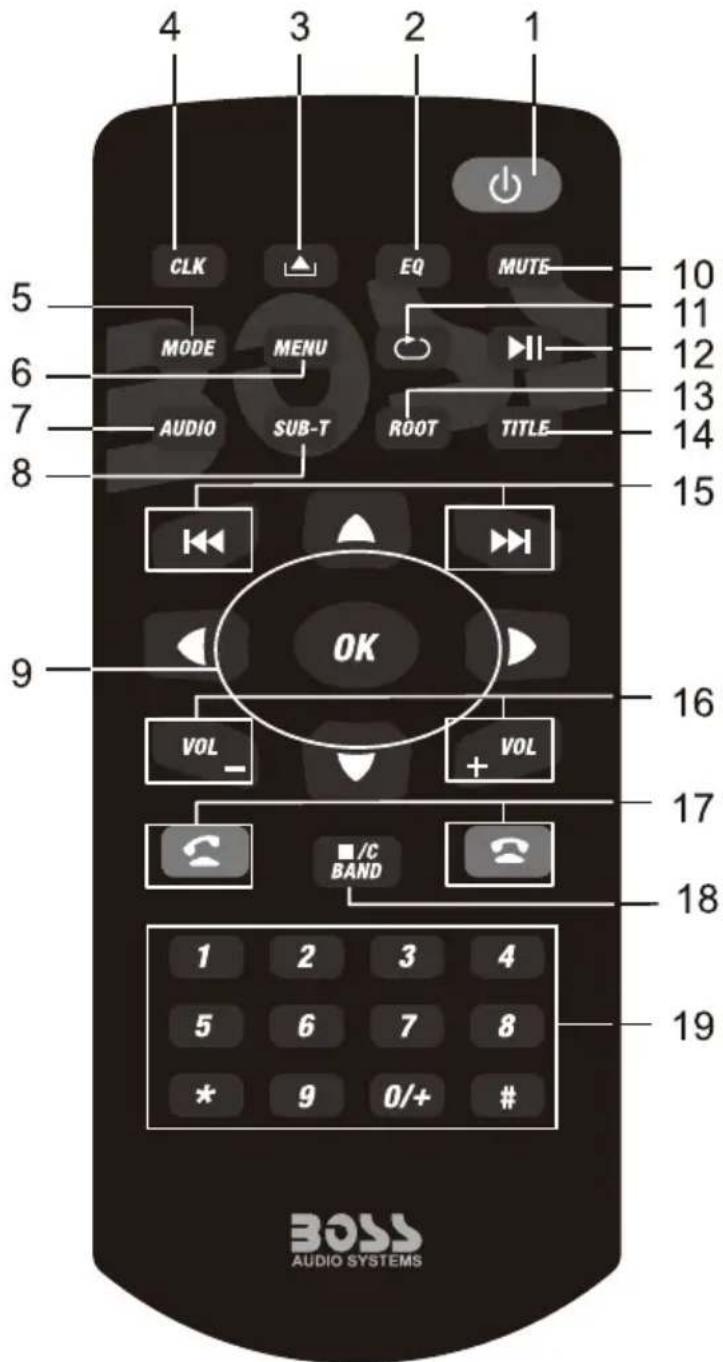
1.TURN ON/OFF
Press to turn on or turn off the unit.
2.EQ mode
Press to set EQ mode.
3.EJECT Key
Press to eject the Disc in the unit. And press again to load the Disc if you do not take out it.
4.CLK key
Press to show CLK, and press again back the last source.
5.MODE key
Press to change mode of the unit.
6.MENU key
Press Menu to return to the home menu.
7.Audio KEY
Press to change switch language in DVD mode, and switch left, right or stereo in VCD mode.
8.SUBTITLE Changing Key
Switch the subtitle during playing if the Disc have multiple subtitle.
9.Direction and OK key
If there is a Disc with root list menu, press direction key to move up/down/left/right, and press OK to confirm.
10.MUTE key
Press to mute the unit and press again to restore the volume.
11.REPEAT key
Under DISC/Music/Video mode, press to set the repeat mode.
12.Play/Pause
Press to switch play pause.
13. ROOT key
DVD playing mode, press to go into root list menu; VCD playing mode, press to turn on/off PBC function.
14. TITLE key
Under DVD playing mode, press to enter into title list menu.
15.Under Disc/music/video mode, press to choose previous/next song.
Under music list menu, press to choose PRE/NEXT music. Under RADIO mode, press to search frequency forward/backward.
16.VOLUME UP/DOWN key
Press to adjust volume up and volume down.
17. Receiving calls/call out; hang up.
18.STOP/C/BAND
In disc playing mode, press to STOP, press "ok" to start; In radio mode press to change band between FM1/FM2/FM3/AM1/AM2;
Press to enter RADIO mode, except DVD mode.
Delete wrong number when in phone mode.
19.Number key
Enter phone number in phone mode.
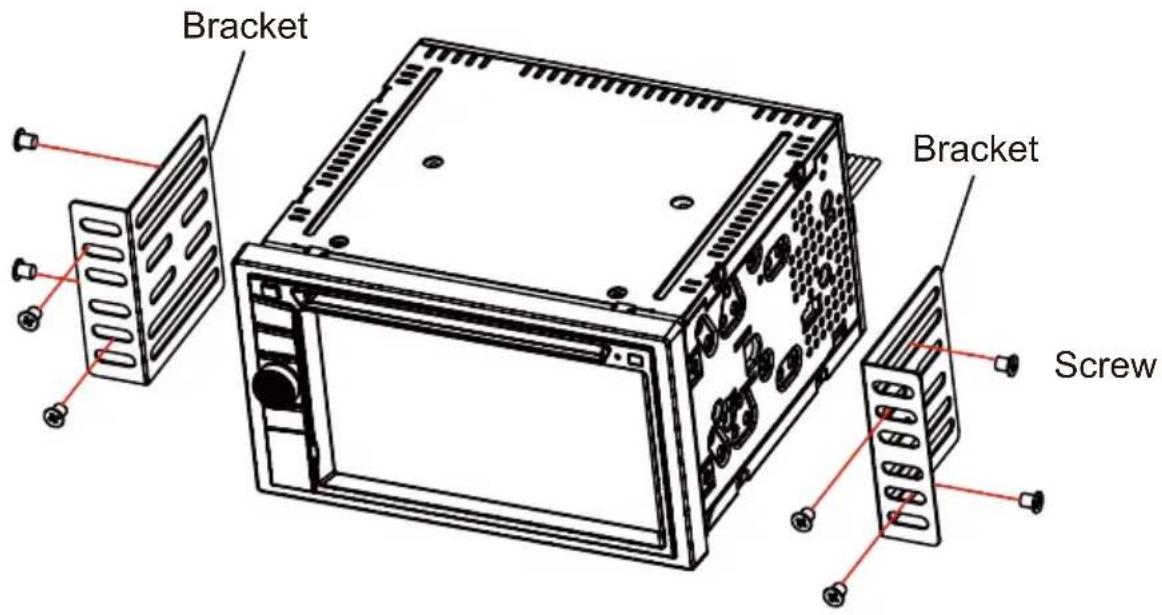
- Put the 2 brackets to the left and right side of the unit;
- Use screws to fix the brackets to the unit.
- Once the screws are attached, the brackets can be adjusted forward or aft depending on the installation requirements.
The Description of the Input/Output Interface
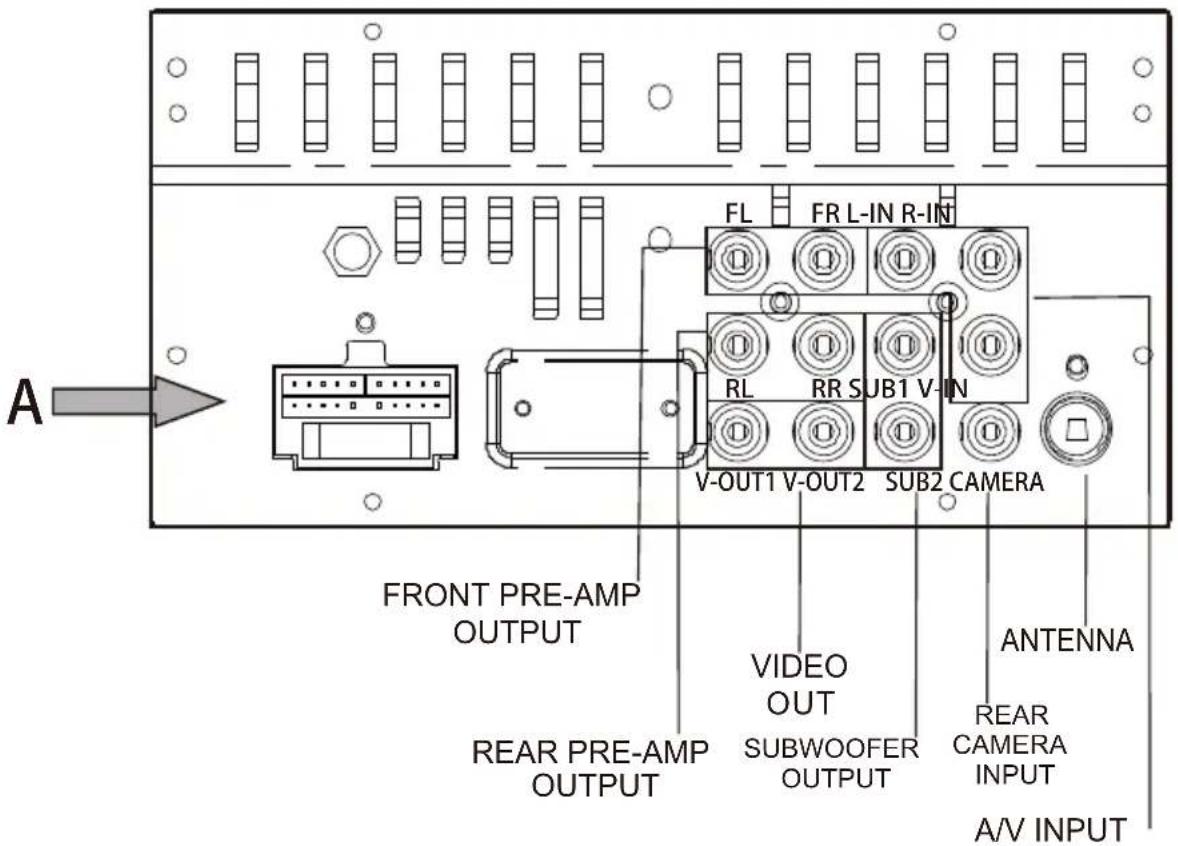
Connector A
YELLOW.....(B+)12V
RED....ACC(+12V)
ORANGE......ILLUMINATION
LT.GREEN.....PARKING BRAKE
VIOLET/WHITE.....REVERSE(+)
BLUE....ANT.CONT
BLACK......GROUND
BLUE/WHITE.....P.CONT
When there is a Disc in the unit, press EJECT to remove the Disc. And press again to load the Disc if you do not take out it.
2.MODE key
Press to select system mode (RADIO/DISC/AUX IN/PHONE /STREATNG/USB/SD/AV INPUT)
3. MENU key
Press to return to the home menu, press again to last source.
4.TURN ON/OFF & VOLUME UP/DOWN
Long touch to turn ON/OFF the unit. Short touch to activate the MUTE function and silence the audio output. Touch again to restore sound. Rotate to adjust the output volume UP or DOWN.
5.BAND key
For radio band conversion between FM1/FM2/FM3/AM1/AM2
6.Open to see AUX IN jack, SD slot, USB port and reset key.
MAIN MENU 1
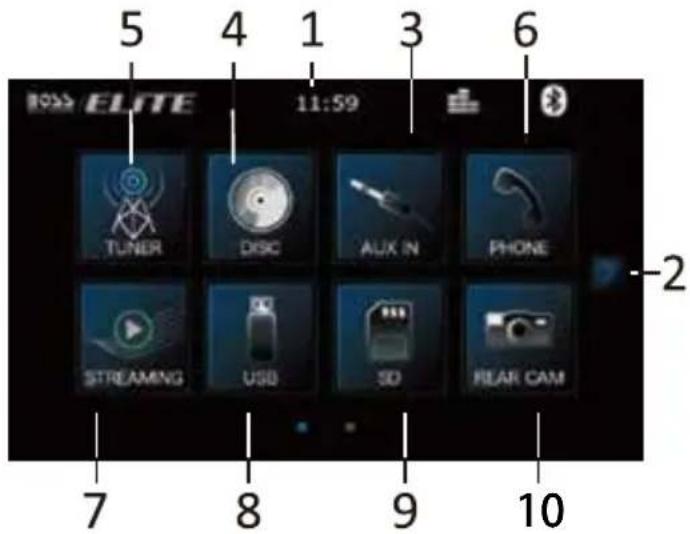
- Shows the present time of the unit.
- Press to go into main menu 2.
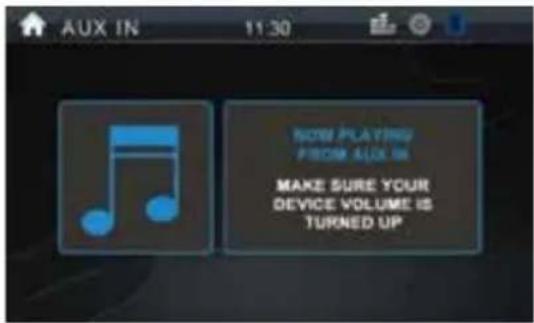
- Aux in Interface
- Tuner Interface
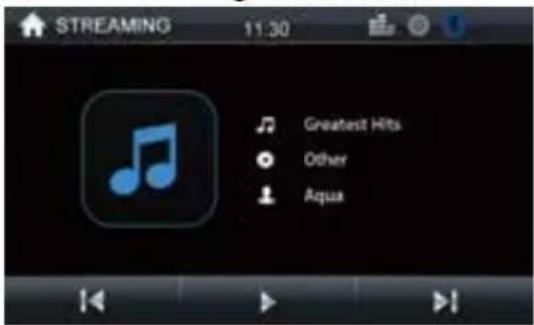
- Steaming Interface
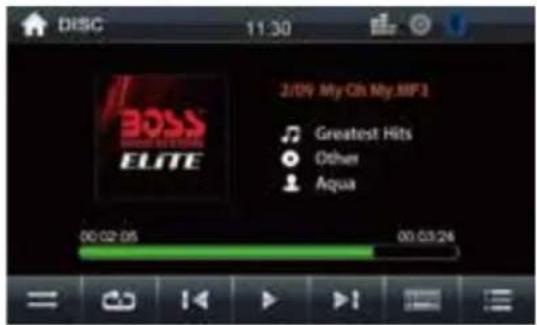
- Disc Interface
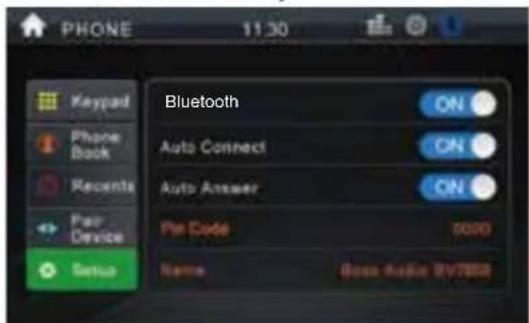
- Phone setup Interface
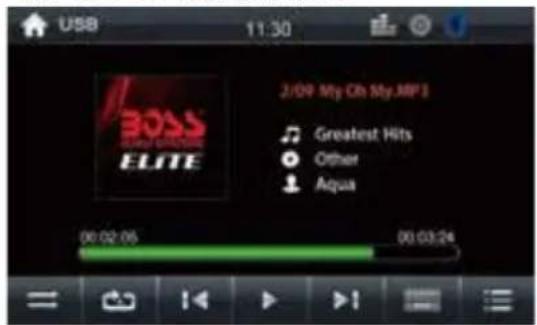
- USB Interface
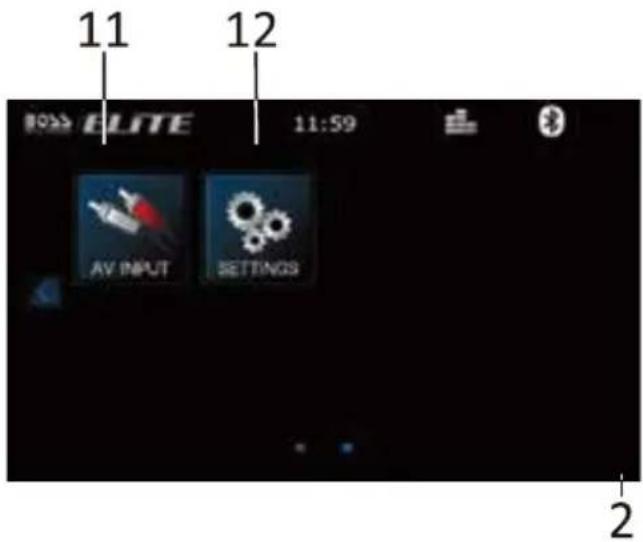
MAIN MENU 2
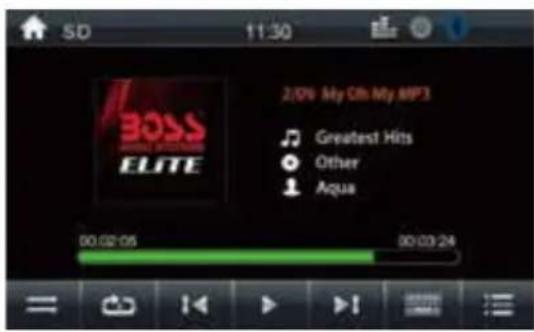
9. SD Interface
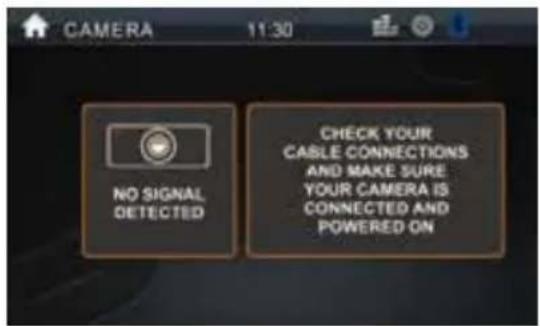
10. Camera Interface
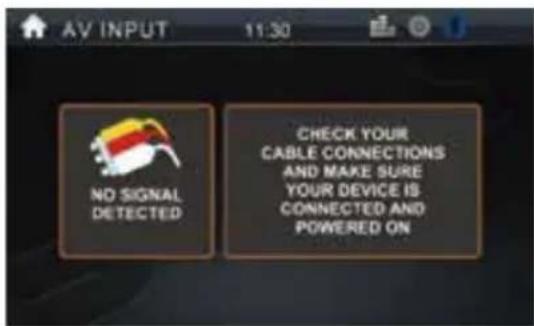
11. AV Interface
12. Settings Interface
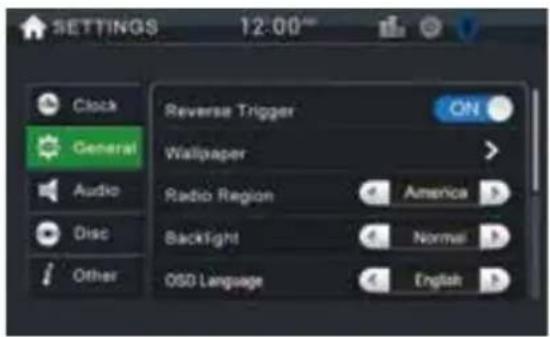
There are five menu in setup:
CLOCK SETUP-Menu 1
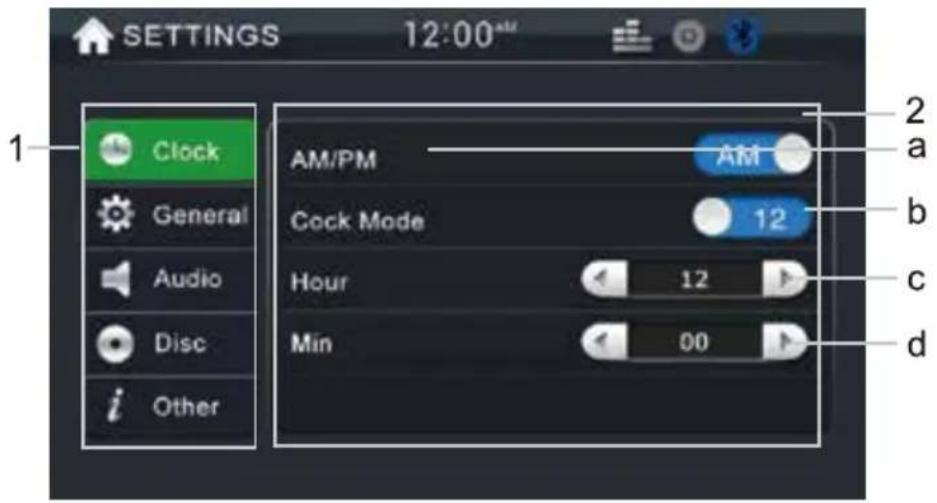
- Setup function area: Clock setup, General setup, Audio setup, Disc setup, Other setup.
- Subsidiary function area: Move up and down to see the general setup items.
a. Press to set AM/PM at 12hr mode.
b. Press to set clock mode: 24/12 hr.
c. Press to set hour.
d. Press to set minute.
GENERAL SETUP-Menu 2
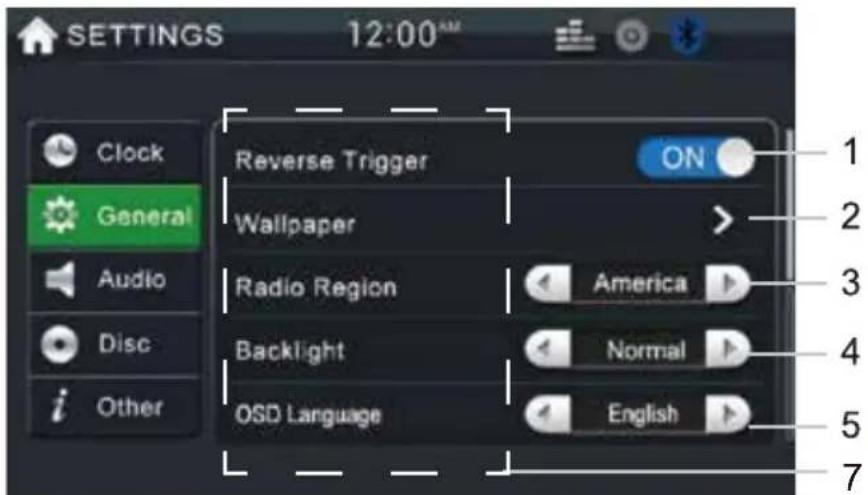
- Reverse trigger: Turn on if you have a rear view camera. Turn off if you haven't.
- Touch to set wallpaper
- Touch to choose radio field between: America/EU/Latin.
- Backlight dimmer selection: Night /Dark /Normal/Bright.
- Touch OSD language to select English/Spanish .
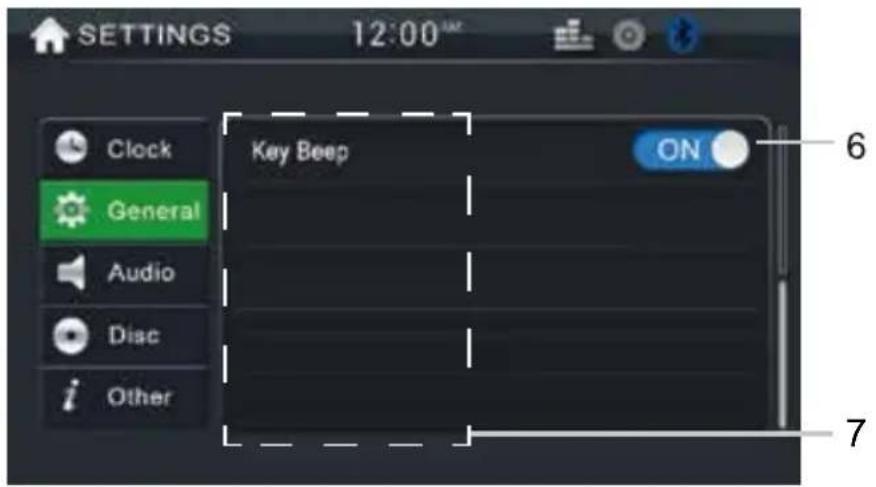
- Beep ON: When turned on, an audible beep tone confirms each function selection.
- Sliding up or down to enter into some other setup subsidiary functions.
AUDIO SETUP-Menu 3
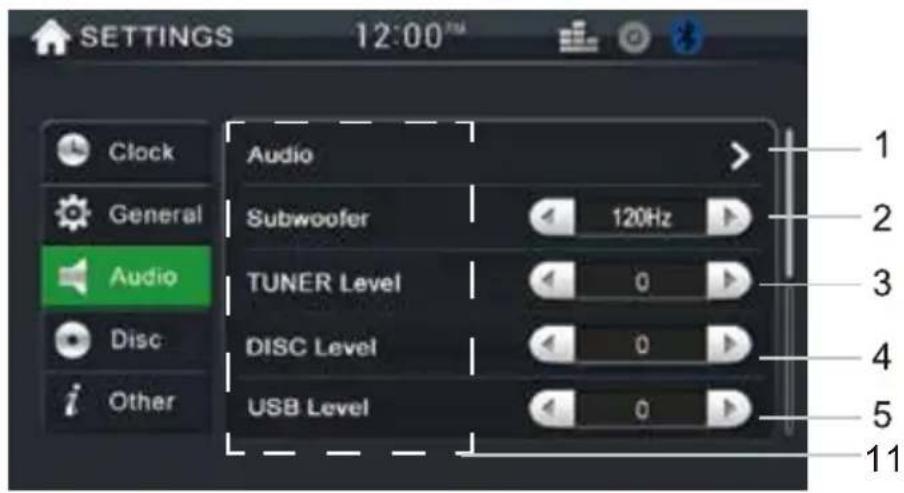
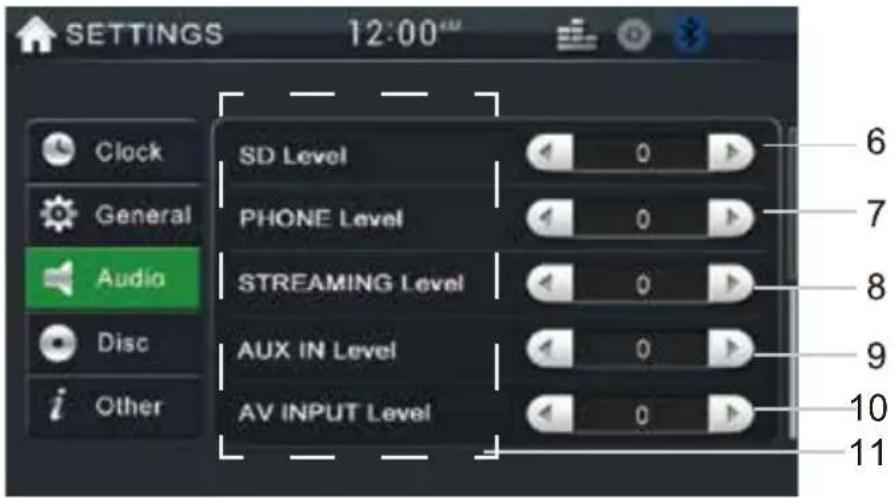
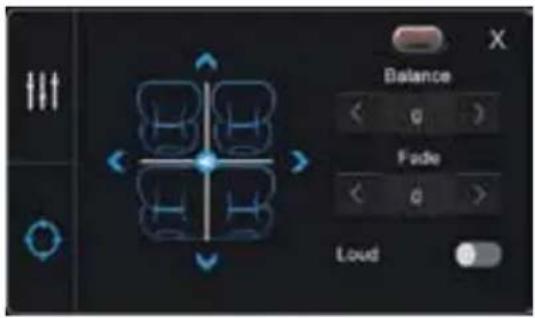
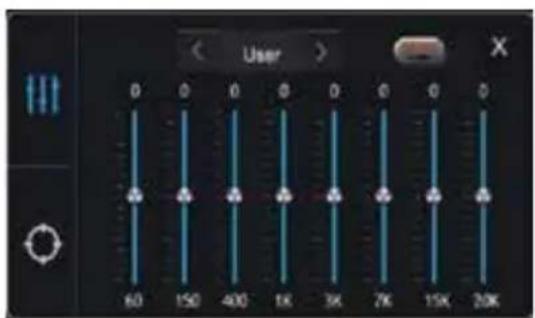
- Press to enter into EQ set up menu.
- Press Subwoofer to select: OFF, 80Hz, 120Hz, 160Hz
3-10. Press to set preset VOL. - Sliding up or down to enter previous functions.
DISC SETUP-Menu 4
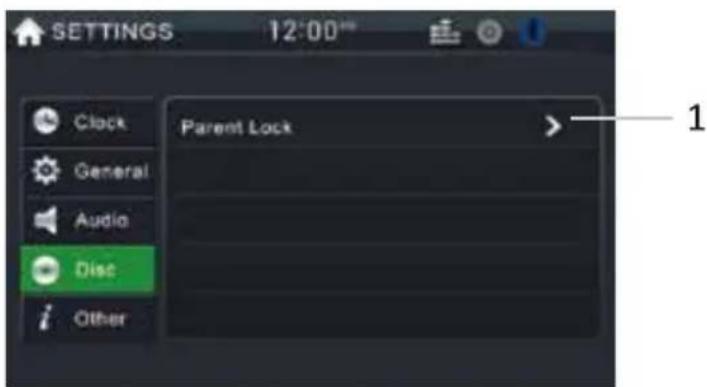
- Touch to set up the level of the DVD. Default password is 0000
OTHER SETUP-Menu 5
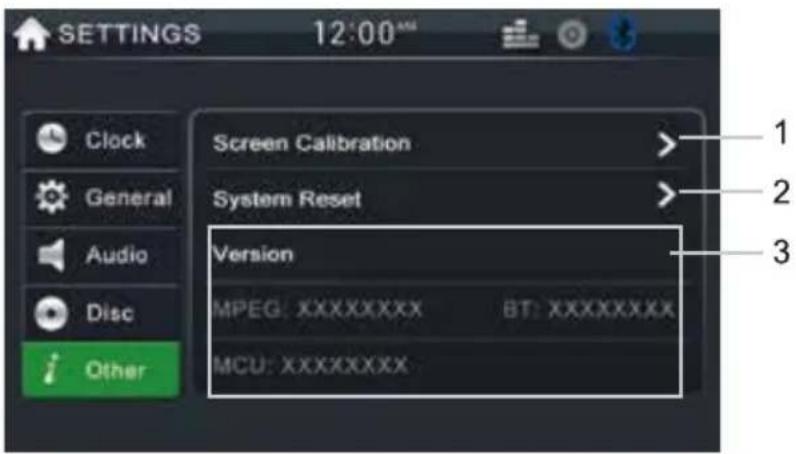
- Touch to enter calibrate menu.
- Load factory setting.
- Show the software version information.
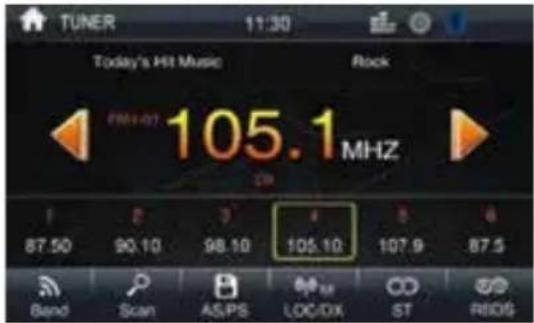
TUNER OPERATION
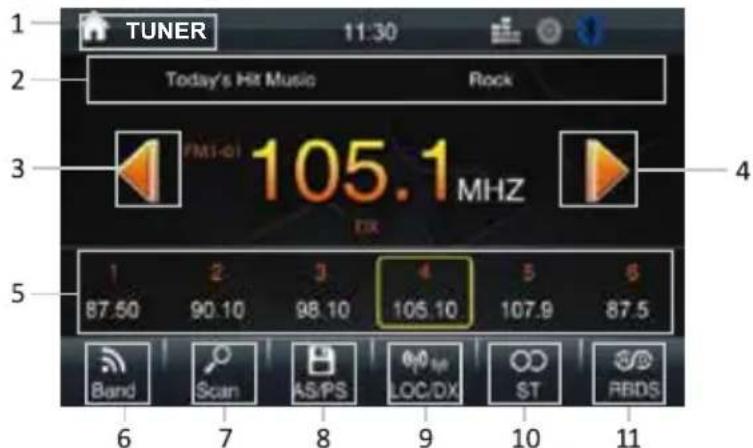
1.Show the present mode. Touch 📁 to go back home.
2.Show RBDS PS and PTY.
3. Short press to seek backward. Long press to enter manual mode and backward in step.
4. Short press to seek forward. Long press to enter manual mode and forward in step.
5.Preset stations area, long press to save current station.
6.Band changing:Click to change band between FM1/FM2/FM3/AM1/AM2.
7. Search the stations, play the searched one for 5S and go on to search next one and repeat this.
8. Short press for PS, long for AS.
9. LOC/DX : Touch to select Local or Distant broadcasting stations.
10. Stereo on/off: Click to turn on/off stereo when receiving a stereo signal.
- RBDS: Touch to enter RBDS setup menu. you can choose the program type you like to listen: news, sports, inform, etc.
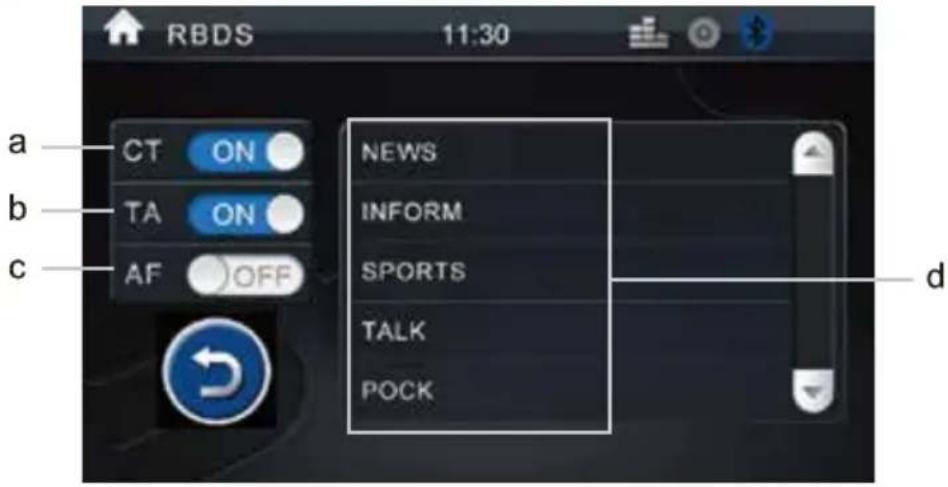
a.CT (Clock Time)
To provide current time correction information, the RBDS station can automatically correct the system clock of the receiver when the clock RBDS is opened.
b. TA(Traffic Announcement)
ON: When the traffic station is turned on, the radio will automatically search for traffic stations.
OFF: Repress [TA] button to close TA function. In other modes, traffic announcement will automatically switch to radio mode, after the traffic announcement is completed, it will automatically switch to the previous mode.
c. AF(Auto Frequency)
Touch the button to turn the AF function on/off. AF function is turned on, When the received station signals become weak, the radio will automatically fine-tune to other frequencies. When receiving an emergency announcing, the screen will display warning message.
d. PTY(Programming Type)
Touch the button the screen displays program types, users can search station according to program type.
Note: If RBDS is turned OFF, AF/TA/PTY will not function.
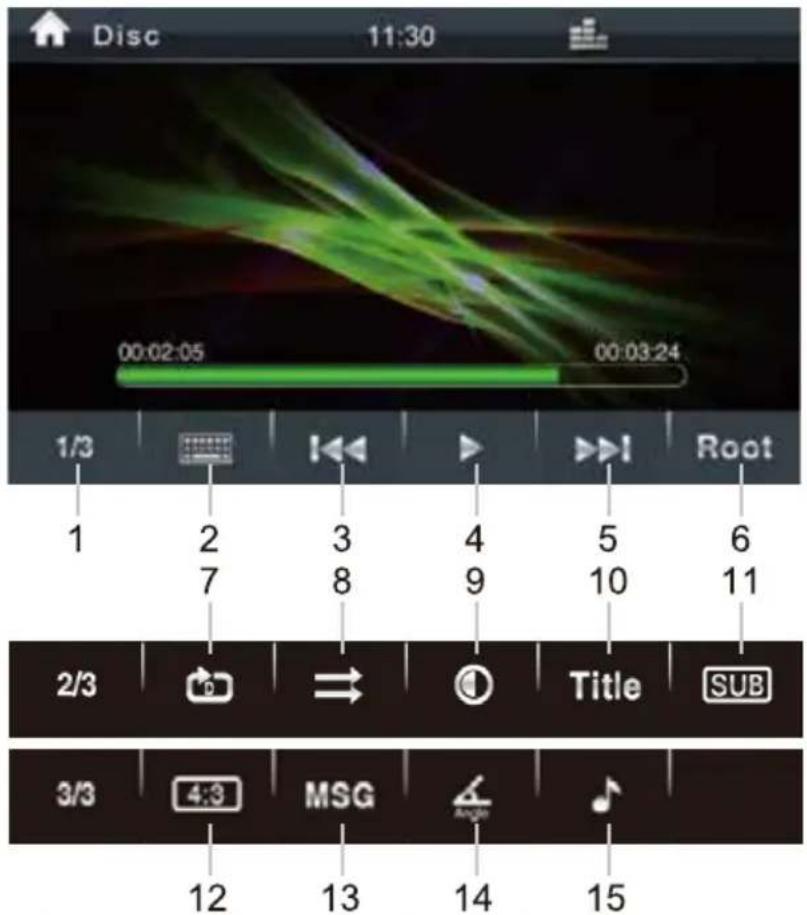
- Touch to select one of the three Menu Control Bars: 1/3, 2/3, 3/3.
- KEYPAD: Touch to select chapter of DVD.
- Short press to move to previous chapter, Long press to fast reverse.
4.PLAY/PAUSE: Touch to begin playback/pause. - Short press to move to next chapter, Long press to fast forward.
- Touch to enter DVD Menu.
- Touch to alter repeat mode in the following sequence:
• DVD: Repeat All, Repeat OFF, Repeat Chapter, Repeat Title.
• VCD (PBC OFF): Repeat All, Repeat OFF, Repeat Single. - Random play.
- Touch to setting menu of brightness and contrac.
- Touch to enter DVD Title.
- Touch to select the subtitle language if the disc is recorded in multiple languages.
- Touch to switch video 4:3 and 16:9.
- Touch to show in for mation of the video.
- Touch to select DVD video angle.
- Touch to select the audio language.
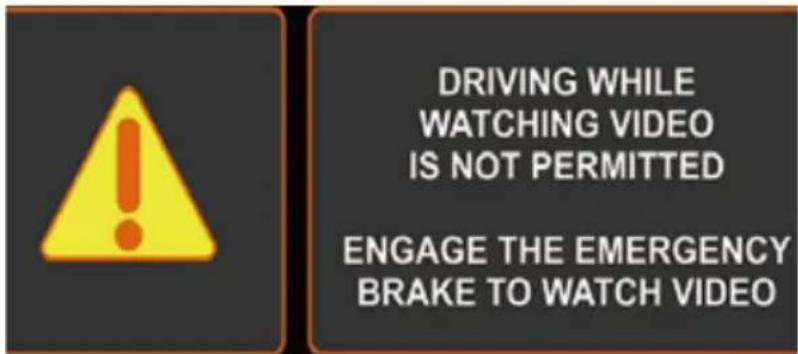
NOTE: When properly installed, a video cannot be displayed unless the parking brake is applied. If the parking brake wire is not installed correctly, the following message will appear.
MEDIA PLAYING—CD AUDIO
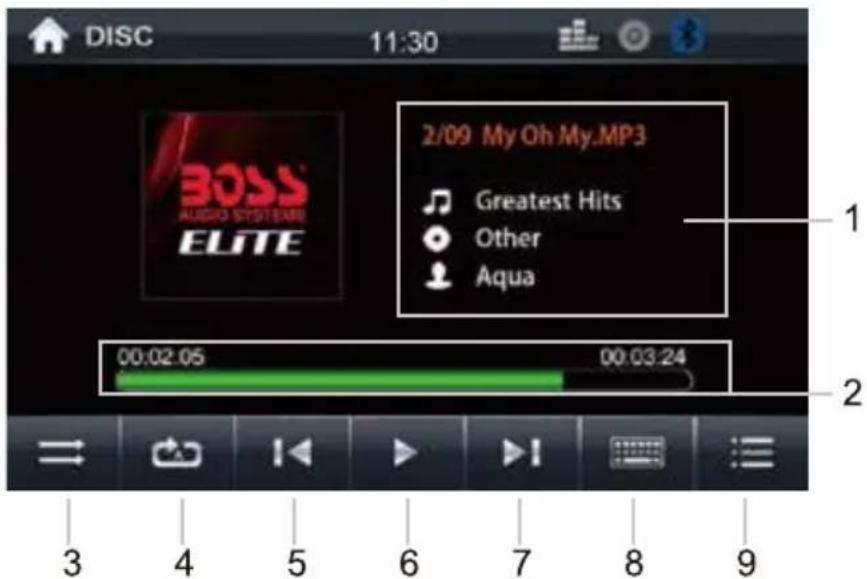
- Track now playing、Playing status、The disc type.
2.Time bar shows total time and playing time of the present song. - Random play.
- Repeat mode: Repeat the song or Repeat the disc.
- Touch to move to previous chapter.
6.PLAY/PAUSE: Touch to begin playback/pause. - Touch to move to next chapter.
- KEYPAD: Touch to select chapter of DVD.
- Touch to view the song list of the CD.
Source Menu of CD
Touch the SOURCE MENU(ICON 5) to access to the CD track menu to view or change tracks manually. Touch again to return to the playback of the current track.
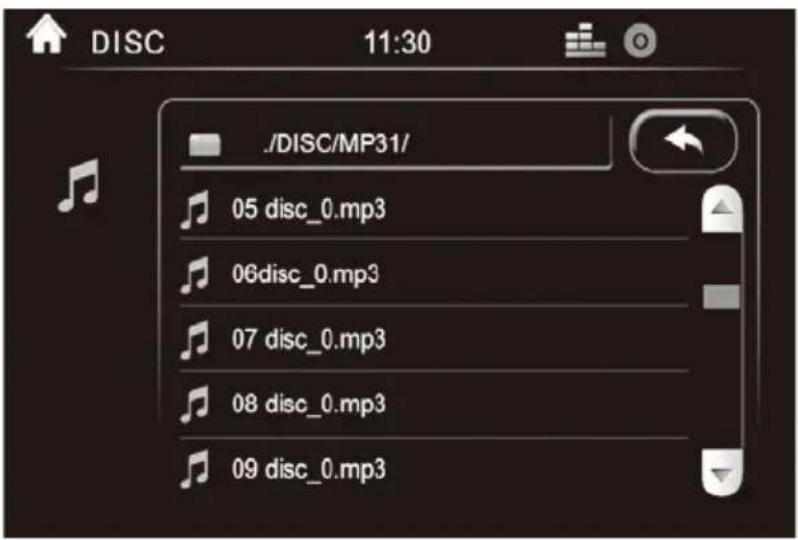
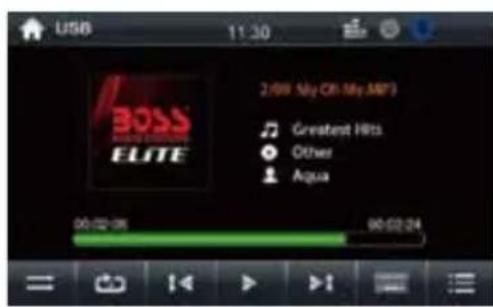
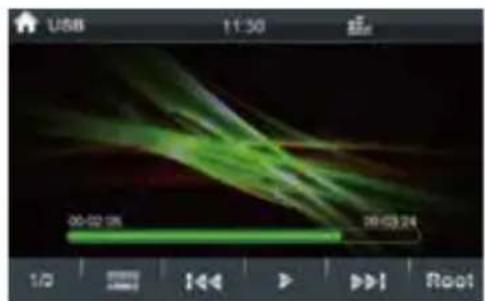
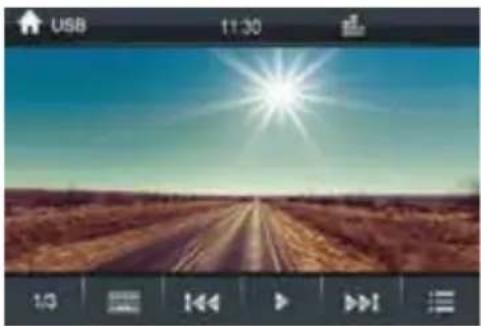
Press USB/SD in the main menu, music menu is all same with the Disc music. There is only one different: it will show more ID3 information on it such as: song name, singer.
natural_image
Sunset over a rural dirt road under a clear blue sky, displayed in a mobile app interface (no text or symbols on the scene itself)Click phone icon and will enter into Bluetooth function interface:
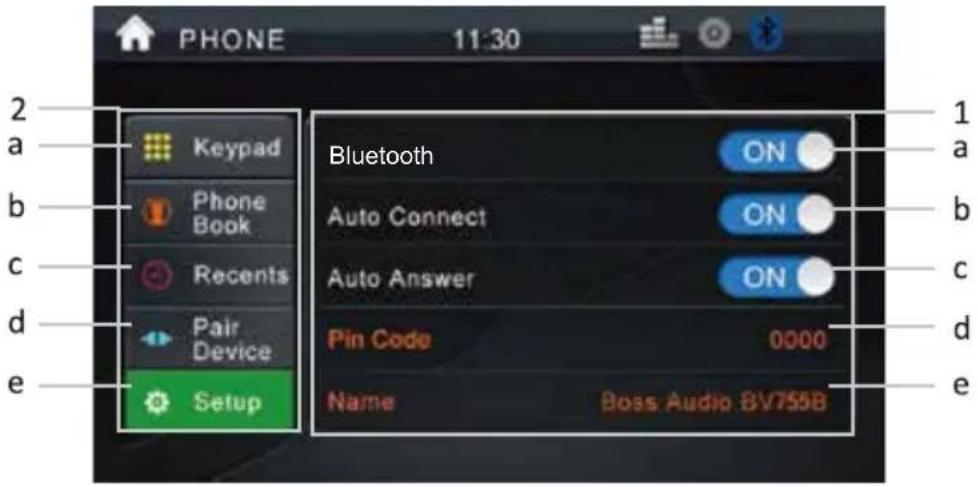
1. Bluetooth setting menu:
a.ON/OFF: Turn on and turn off of Bluetooth.
Turn on:show gray BT ✦ . and the icon turn blue when paired phone.
b. Connect automatically: Can connect the devices automatically which have already been connected before.
c. Anser automatically: Can turn on or turn off the function of listen to calls automatically.
d.PIN code: Default password"0000", and can be change by yourself click"0000"
e.Default Bluetooth name for this unit: Boss Audio BV755B
2. Function area:
a.Click and see the dialing keypad, users can dial no. and make phone calls.
b.Click to see the Bluetooth phonebook menu.
c.Click to see the Bluetooth call history.
d. Bluetooth pairing interface as following.
e. Bluetooth setting menu.
BLUETOOTH DIALING
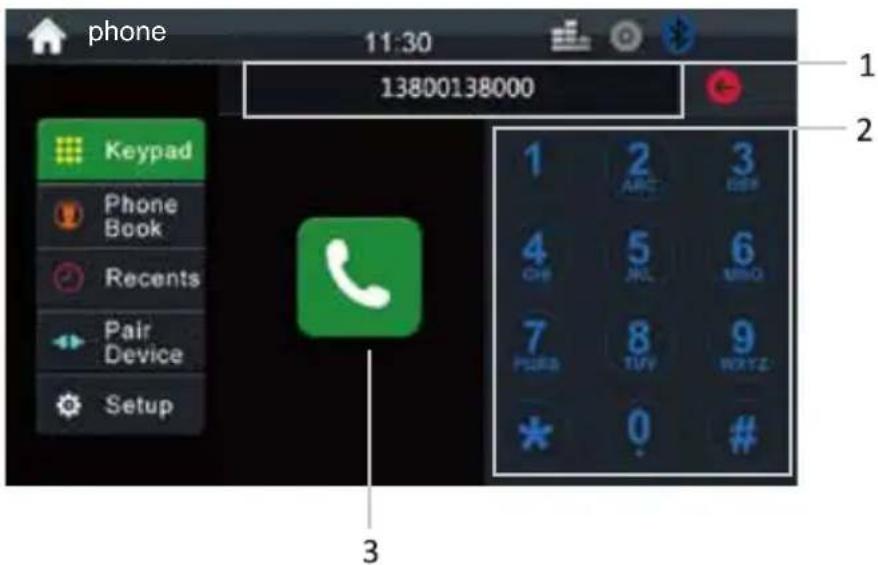
- Shows the number you press in, and press ← to delete wrong number.
2.Key area. - Touch to call out.
BLUETOOTH CALL
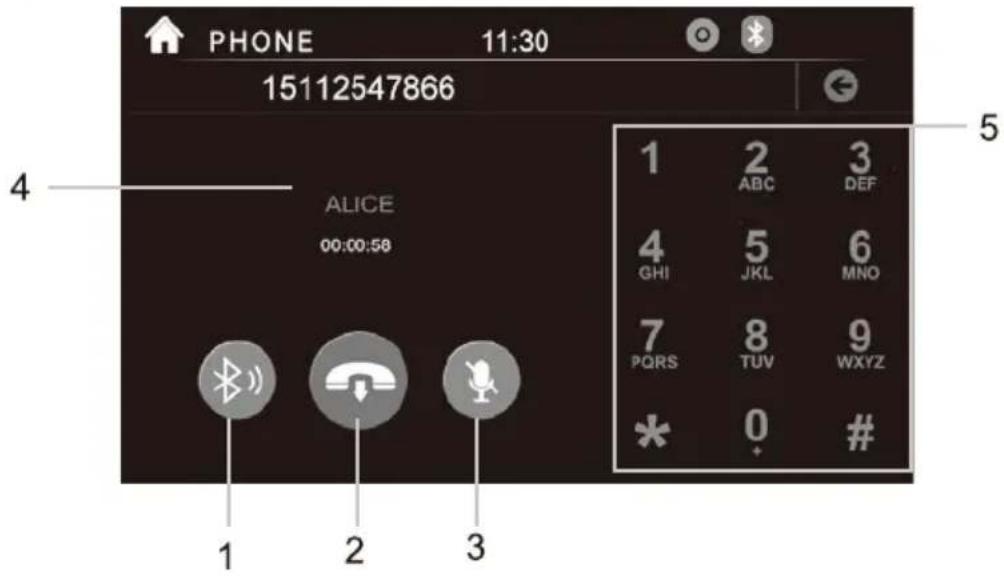
- Touch to select talk through phone or through Bluetooth.
- Press to hang up the phone call.
- Touch to mute or un-mute mic.
4.Show contact name.
5.Keypad area.
BLUETOOTH PHONE BOOK
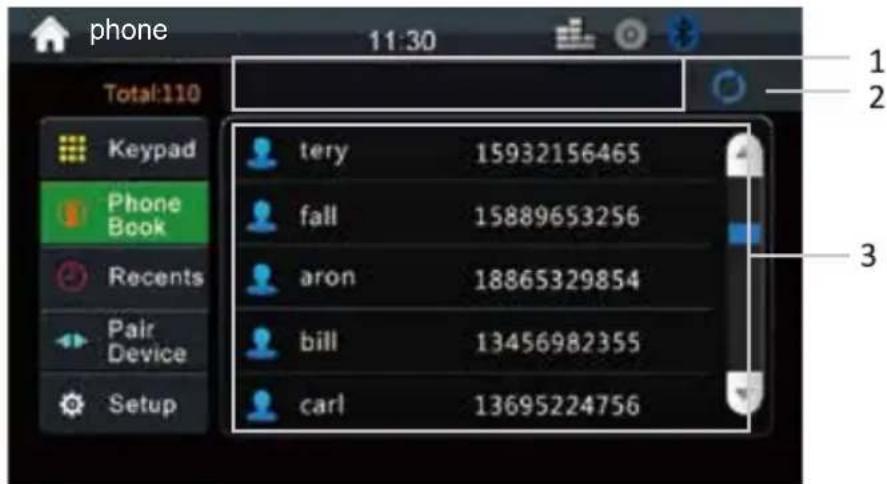
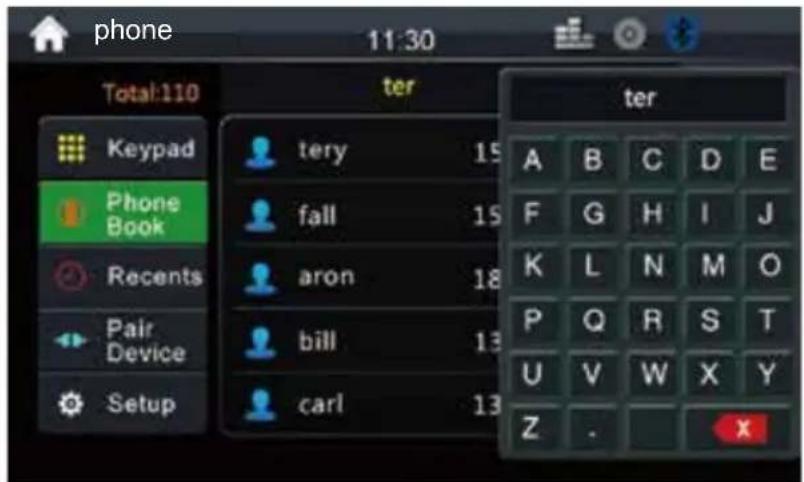
- Touch to enter name and search the wanted phone number.
- Click to sync phonebook.
- Contact list.
BLUETOOTH PHONE CALL HISTORY
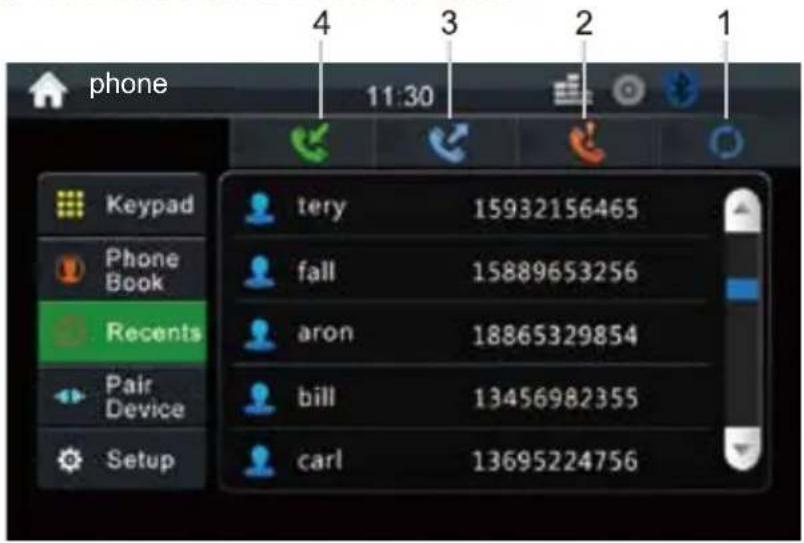
- Click to sync phonebook.
- Touch to show missed calls.
- Touch to show the dialed phone number.
- Touch to show the received phone number.
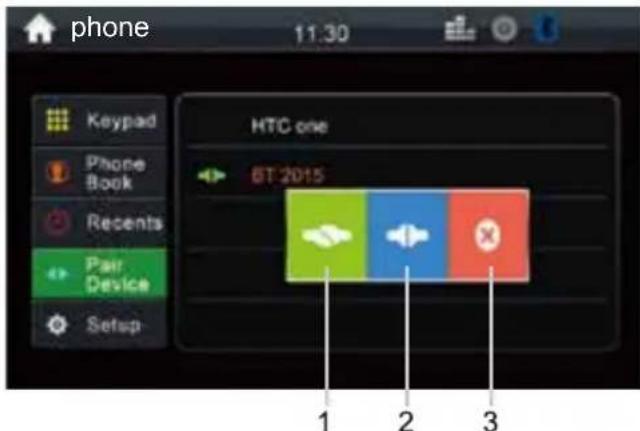
BLUETOOTH PAIR DEVICE
- Disconnect the phone.
2 Connect the phone.
3 Delete the phone.
PHOTO
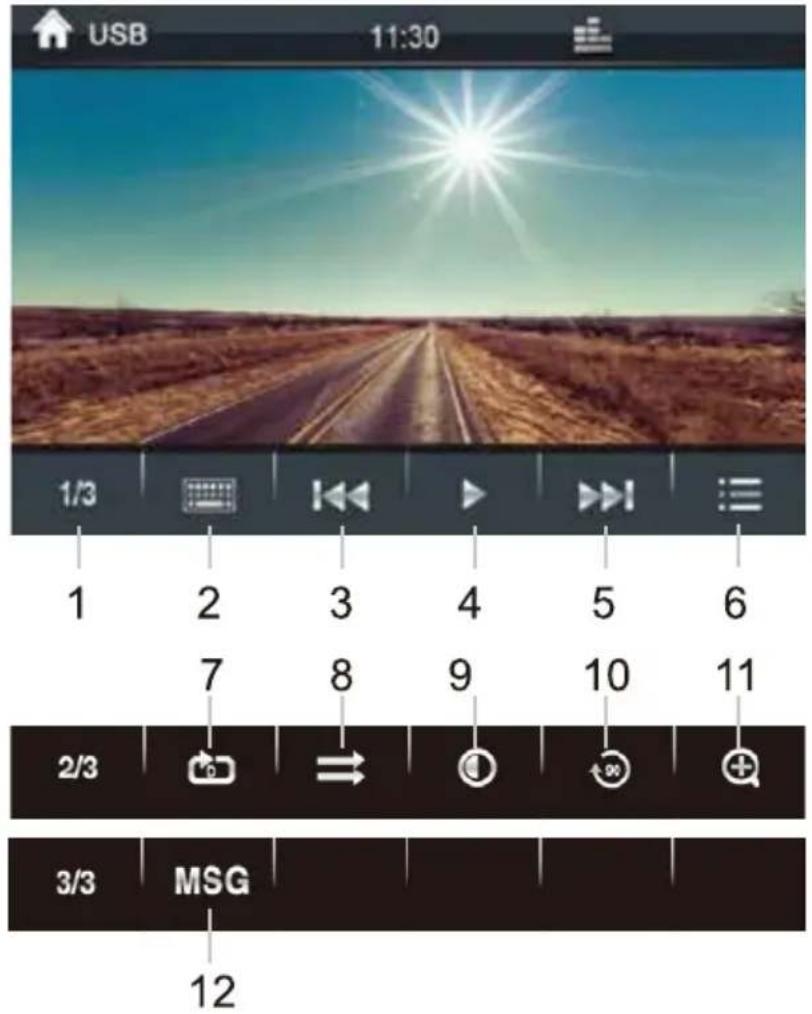
- Touch to select one of the two Menu Control Bars: 1/3, 2/3, 3/3.
- Keypad: enter number to select file.
3.Previous one. - PLAY/PAUSE: touch to begin play. Press again the icon to pause. During picture playing mode, one picture will be played for 5s automatically and goes to the next if you do not press it.
- Next one.
- List: Press to enter file list.
- Pead mode select.
- Random play.
9.Enter into setting menu for brightness, and contract. - Turn right 90 degrees.
11 Zoom out/in the present picture.
12.Show the number of the picture files.
CAMERA/AUX/AV MENU
CAMERA: Rear view function, the rear view video signal can display automatically when you reversing the car, and back to the last sources after reversing the car.
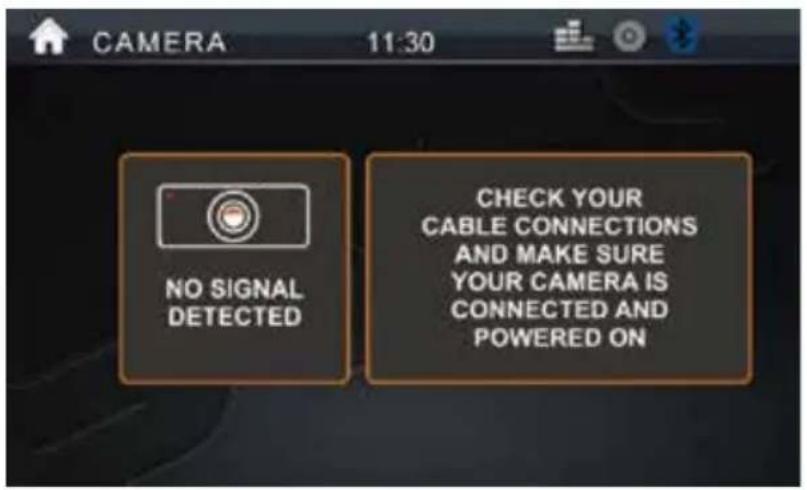
AUX IN: External audio input function
Connect the audio device to the unit by the 3.5mm jack in front of the panel and touch AUX INPUT icon.
AV INPUT: External video and audio input function
Connect the video and audio device to the unit by the RCA jacks and touch AV INPUT icon.
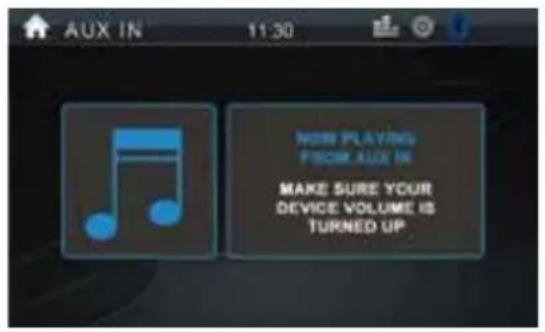
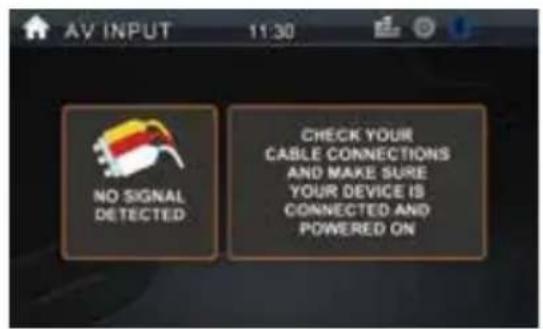
Table 1: Error message
| Media displayed | Cause | Corrective Action |
| Loading | Disc is being read | |
| No Disc/Bad Disc | Disc is dirty | Clean the disc |
| Disc is upside down | Insert Disc in right way | |
| Unknown Disc | Unsupported Disc type | Check the disc and change one |
| Error | Illegal mechanism operation | Press EJECT for 5s to reset loading mechanism |
Table 2: General problems
| Problem | Cause | Corrective Action |
| Unit will not power on | Radio fuse blown | Install new fuse with right rating |
| Car battery fuse blown | Install new fuse with right rating | |
| Illegal operation | Press the RESET button | |
| Screen touch is insensitive | Place of touch screen is offset | Go to setup menu and set the calibration |
| No audio output | Improper audio output connection | Check wiring and correct |
| VOLUME 0 | Turn up the volume | |
| Improper MUTE connection | Check wiring and TEL MUTE connection | |
| Speaker damaged | Change speakers | |
| Low audio output | Volume set too low | Increase the volume |
| Heavily biased volume balance | Check and adjust the channel balance to the center position | |
| Poor sound quality or distortion | Speaker power rating not compatible with unit | Connect proper speakers |
| Speaker is shorted | Check speaker contrast |
Table 3: TFT monitors
| Problem | Cause | Corrective Action |
| No image | Incorrect connection to parking wire | Check wiring and correct |
| Parking brake is not engaged | Stop vehicle in safe place and set parking brake ON | |
| Flashing image or interference appears on screen | DVD is not compatible with current TV system settings | Change setup to accommodate Disc |
| Improper video signal connections | Check wiring and correct | |
| Improper image, improper height/width ratio display | Improper aspect ratio setup | Use correct aspect ratio setting |
Table 4: Tuner
| Problem | Cause | Corrective Action |
| Weak station searching | Auto antenna is not fully extended | Connect the auto antenna properly |
| LOCAL function is activated | Turn LOCAL function OFF |
Table 5: Disc
| Problem | Cause | Corrective Action |
| Cannot insert Disc | Disc already inside unit | Eject the current Disc and insert the new one |
| Lots of noise during play, and stop then | Disc is scratched or warped | Use a new one in good condition |
| Disc is dirty or wet | Clean the Disc | |
| No repeat or searching while playing VCD | PBC is ON | Turn PBC OFF |
- USER'S MANUAL
- CONTENTS
- Safety Statement
- 1.TURN ON/OFF
- 2.EQ mode
- 3.EJECT Key
- 4.CLK key
- 5.MODE key
- 6.MENU key
- 7.Audio KEY
- 8.SUBTITLE Changing Key
- 9.Direction and OK key
- 10.MUTE key
- 11.REPEAT key
- 12.Play/Pause
- ROOT key
- TITLE key
- 15.Under Disc/music/video mode, press to choose previous/next song.
- 16.VOLUME UP/DOWN key
- Receiving calls/call out; hang up.
- 18.STOP/C/BAND
- 19.Number key
- Connector A
- 2.MODE key
- MENU key
- 4.TURN ON/OFF & VOLUME UP/DOWN
- 5.BAND key
- MAIN MENU 1
- MAIN MENU 2
- SD Interface
- Camera Interface
- AV Interface
- Settings Interface
- AUDIO SETUP-Menu 3
- DISC SETUP-Menu 4
- OTHER SETUP-Menu 5
- TUNER OPERATION
- a.CT (Clock Time)
- b. TA(Traffic Announcement)
- c. AF(Auto Frequency)
- d. PTY(Programming Type)
- Source Menu of CD
- Click phone icon and will enter into Bluetooth function interface:
- Bluetooth setting menu:
- Function area:
- BLUETOOTH PHONE BOOK
- BLUETOOTH PAIR DEVICE
- PHOTO
- CAMERA/AUX/AV MENU
Brand : BOSS
Model : BV755BLC
Category : DVD player