
SH16340N - Heating SWAN - Free user manual and instructions
Find the device manual for free SH16340N SWAN in PDF.


| Brand | Swan |
| Model | SH16340N |
| Product Type | Fan Heater |
| Power | 2000 W |
| Heat Settings | Low (1000 W) / High (2000 W) |
| Fan Settings | Fan only / Heat + Fan |
| Thermostat | Adjustable thermostat |
| Oscillation | Yes, wide angle |
| Dimensions (H x W x D) | 24 x 18 x 28 cm |
| Weight | 1.5 kg |
| Power Supply | 220-240 V ~ 50/60 Hz |
| Safety Features | Overheat protection, tip-over switch |
| Housing Material | Plastic, fire-resistant |
| Noise Level | Approx. 45 dB |
| Cleaning | Wipe with dry cloth, do not immerse |
| Spare Parts | Contact Swan customer service |
| Repairability | Repairs should be done by qualified personnel |
| Certification | CE, RoHS |
Frequently Asked Questions - SH16340N SWAN
User questions about SH16340N SWAN
0 question about this device. Answer the ones you know or ask your own.
Ask a new question about this device
Download the instructions for your Heating in PDF format for free! Find your manual SH16340N - SWAN and take your electronic device back in hand. On this page are published all the documents necessary for the use of your device. SH16340N by SWAN.
USER MANUAL SH16340N SWAN
Swan
designed for life
al fresco
Wall Mounted
Patio Heater
Model: SH16340N
Help line: 0333 220 6050
v1.0

IMPORTANT INFORMATION - RETAIN FOR FUTURE USE
- Warning! The heater must only be switched on when fully assembled and fitted to the wall.
- Read the instructions before using the appliance for the first time.
- The appliance must be installed following national regulations for use.
- It is necessary to be vigilant and supervise the appliance while children are close by.
- This appliance is only designed for domestic use. Use the heater only as indicated in the instructions. Any other use that does not conform to the supplier's instructions may cause material damage or personal injury
- Do not cover the appliance or restrict air flow.
- Do not leave this appliance unsupervised while it is on. When not being used, always ensure that the product is securely in the 'Off' position (O) and unplugged from the socket.
- If the power cable is damaged, it must be replaced by the manufacturer, their after-sales service or a similarly qualified person to avoid any hazards.
- Do not place the cable under a carpet or any heavy object, and do not cover.
- To avoid accidents, keep away from areas where people may trip. Do not place on unstable surfaces
- Do not place this appliance close to flammable fabrics, surfaces or liquids in order to avoid any risk of fire. Keep it well away from any source at risk of causing hazards and maintain it at a safe distance (whether this is the front, rear or sides). Do not use this appliance in locations such as garages, warehouses etc. where dangerous or flammable products are stored (paint, fuel, alcohol etc.).


IMPORTANT INFORMATION - RETAIN FOR FUTURE USE
- The appliance must not be placed just underneath an electric socket.
- Do not use this heating appliance close to a swimming pool, bath or shower
- Check that the voltage corresponds to that of the power supply (230v mains socket) To avoid any risk of electric shock, plug the appliance in with the pins fitted correctly into the socket.
- In the event that you need an extension cable, ensure that it is suitable for the appliance's power level.
- While the appliance remains plugged into the socket (wall socket) it is not disconnected from the power supply, even if it is switched off. The appliance must be completely unplugged before cleaning, services, maintenance, disassembly or even moving from one place to another.
- The power socket must always be equipped with an earth connection. If your domestic electrical installation is not earthed, you should not connect the appliance.
- WARNING: To avoid overheating, do not cover the heater.
- This appliance can be used by children aged from 8 years and above and persons with reduced physical, sensory or mental capabilities or lack of experience and knowledge if they have been given supervision or instruction concerning use of the appliance in a safe way and understand the hazards involved. Children shall not play with the appliance. Cleaning and user maintenance shall not be made by children without supervision.
- Appliances are not designed to be used in conjunction with a separate timer or with a control system used at a distance.
- Children under 3 years must be kept away unless constantly monitored.
- Some parts of this product can become very hot and cause burns. Particular attention has to be given where children and vulnerable people are present.

IMPORTANT INFORMATION - RETAIN FOR FUTURE USE
- Do not wrap the power supply cord around the unit
- Do not use this unit as a clothes drier or towel drier
- Do not use this unit as a sauna heater.
- Do not use this unit as a room heater.
- Do not use this unit for heating animal enclosures or pens
- Be aware that the product remains hot for a significant time after switching off.
- Do not use the product indoors as it does not have a thermostat to control room temperature.
OUTDOOR USE ONLY

TECHNICAL DATA
Description: Wall Mounted Patio Heater
Model: SH16340 (all colours)
Input Voltage: 220-240V
Frequency: 50Hz
Power consumption: 1600-1900 Watts


PARTS
Part List (refer to diagram)
| No Part name No Part name | ||
| 1 Expansion bolt M6*70 8 M8 nut with cover | ||
| 2 Steel board 9 Lower bracket | ||
| 3 Washer 10 Screw M8*70 | ||
| 4 Spring washer 11 Switch | ||
| 5 Screw nut M6 12 Control panel | ||
| 6 Screw knob M6*12 13 Remote control | ||
| 7 Upper bracket |
| Accessories Pack Check List | |
| Accessory Qty | |
| Steel board 1 | |
| Upper bracket 1 | |
| Expansion bolt M6*70 4 | |
| Screw knob M6*12 | 2 |
| M8 nut with cover | 1 |
| Screw M8*70 | 1 |
| M8 nut with cover | 1 |
Preparation
Unpack the carton. Take out the accessories pack. Make sure the accessories listed in the above Accessories Check List are included. If anything is missing, call the help line on the cover of this manual, You're going to need a cross head screw driver, a drill with hammer action and a spanner for the nut.
Assembly is much easier with two people.

WALL MOUNTING

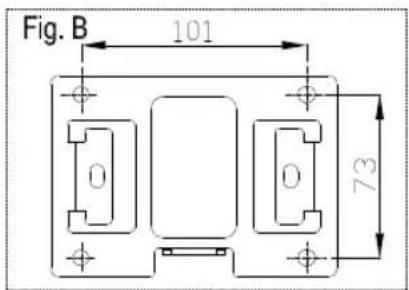
- The heater must be installed at least 1.8m from the ground and at least 50cm from any side wall or ceiling.
- Drill 4 holes on the ceiling or wall according to the size shown on Fig. B. Insert the 4 Expansion Bolts (1) into the holes.
-
Use a spanner to tighten the Nuts on the Expansion Bolts clockwise till they are securely located in the holes.
-
Unscrew the Screw Nuts [5] and set them aside with Washers [3] and Spring Washers [4] for use later.
- Put Steel Board [2] onto the ceiling or wall. Put 4 Expansion Bolts go through the 4 holes on Steel Board and fix it with the Washers, Spring Washers and Screw Nuts that you removed earlier
- Mount Upper Bracket [7] on Lower Bracket [9]. Screw it tightly with Screw M8*70 [10] as shown on Fig. A.
- For wall-mounted vertical installation, the switch panel needs to be lower most so rising heat doesn't damage the switch panel or power cord
- Mount the heater onto the wall or ceiling by sliding Upper Bracket into the opening on the Steel Board. Fix them together with 2 Screw Knobs M6*12 [6].
- Use a screw driver to loosen the Screw M8*70 [10] a little bit. Set the heater to a desired angle then tighten it again.. The adjustable angle is within 60 degrees. Fig.D

Swan 6

CEILING MOUNTING
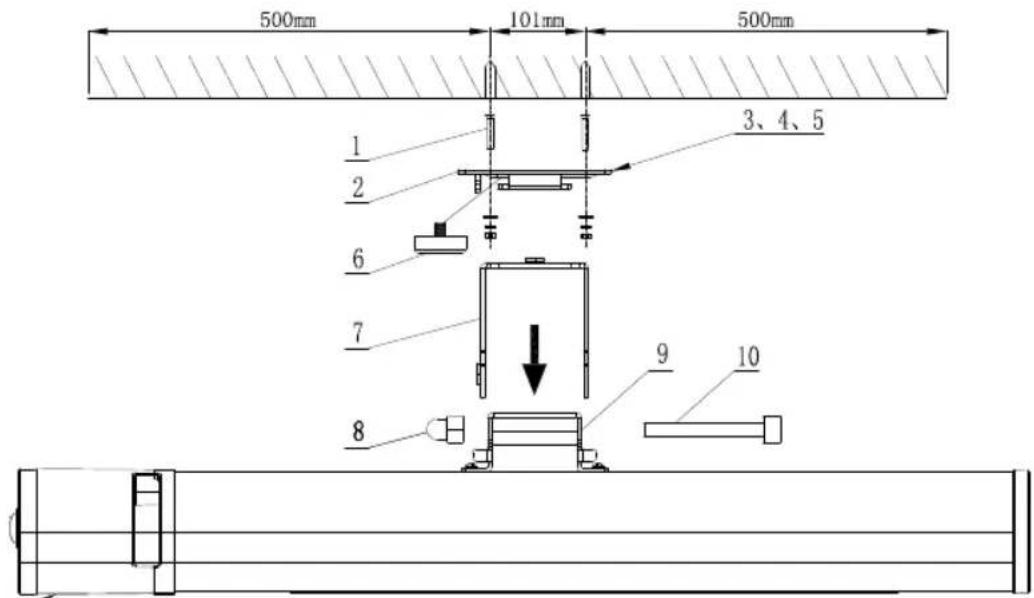
Ceiling mounting is the same method as wall mounting. Please ensure the wall or ceiling is sturdy enough to take the weight of the heater. Always take extra care when using ladders etc. Wear appropriate safety goggles when drilling.

HOW TO USE
Insert 2 x AAA batteries (not included) in the remote control unit. Please carefully observe correct polarity. Remove spent batteries to prevent battery corrosion from damaging the remote. Always use good quality, branded batteries.
- Plug in the unit to a 220-240V 13 Amp AC socket
- Press Switch on left side of the heater. LED indicator light stars flashing showing the heater is on standby. Press ON button on control panel (or ON button on remote control) to switch on the heater. To shift the heater to standby mode, press OFF button on control panel (or OFF button on remote control). LED indicator light will start flashing again.
- To switch off the heater, press Switch on left side of the heater accordingly.

CLEANING & MAINTENANCE
- Always unplug the appliance and keep it away from any socket before cleaning.
- To clean the outer surface of the appliance, use a lightly damp cloth. Then, dry it thoroughly with a soft, dry cloth before using again.
- Do not use any cleaning or chemical products of any kind. Do not let water enter the openings on the heater.
- Do not use wax or products that create a shine as they can react to heat and cause discolouration.
- When the appliance is not being used for prolonged periods, ensure that it is fully unplugged from the socket - preferably unmounted and in its original box.

WARRANTY
This product is guaranteed for 2 years from the date of original purchase. If any defect arises due to faulty materials of workmanship the faulty products must be returned to the place of purchase. Refunds or replacement is at the discretion of the store.
The following conditions apply:
- The product must be returned to the retailer with proof of purchase.
- The product must be installed and used in accordance with the instructions contained in this instruction guide.
- It must be used only for domestic purposes.
- It does not cover wear and tear, damage, misuse or consumable parts.
- Swan Products Ltd has limited liability for incidental or consequential loss or damage.
- This guarantee is valid in the UK and Eire Only.

BS PLUG
The wires in the mains lead are coloured in accordance with the following code:
BLUE
NEUTRAL
BROWN
LIVE
GREEN/YELLOW EARTH
As the colours of the wire in the mains lead of this appliance may not correspond with the colour markings identifying the terminals on your plug, proceed as follows:
The wire which is coloured BLUE must be connected to the terminal which is marked with the letter N or coloured black. The wire which is coloured BROWN must be connected to the terminal which is marked with the letter L or coloured red. The wire which is coloured GREEN/YELLOW must be connected to the terminal which is marked with the letter E or (earth symbol) and is coloured GREEN or GREEN/YELLOW.
WARNING: THIS APPLIANCE MUST BE EARTHED

DISPOSAL OF UNIT
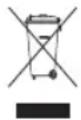
Appliances bearing the symbol shown here may not be disposed of in domestic rubbish. You are required to dispose of old electrical and electronic appliances like this separately. Please visit www.recycle-more.co.uk or www.recyclenow.co.uk for access to information about the recycling of electrical items. Please visit www.weeeireland.ie for access to information about the recycling of electrical items purchased in Ireland. The WEEE directive, introduced in August 2006, states that all electrical items must be recycled, rather than taken to landfill. Please arrange to take this appliance to your local Civic Amenity site for recycling, once it has reached the end of its life.

SWAN BRAND HERITAGE
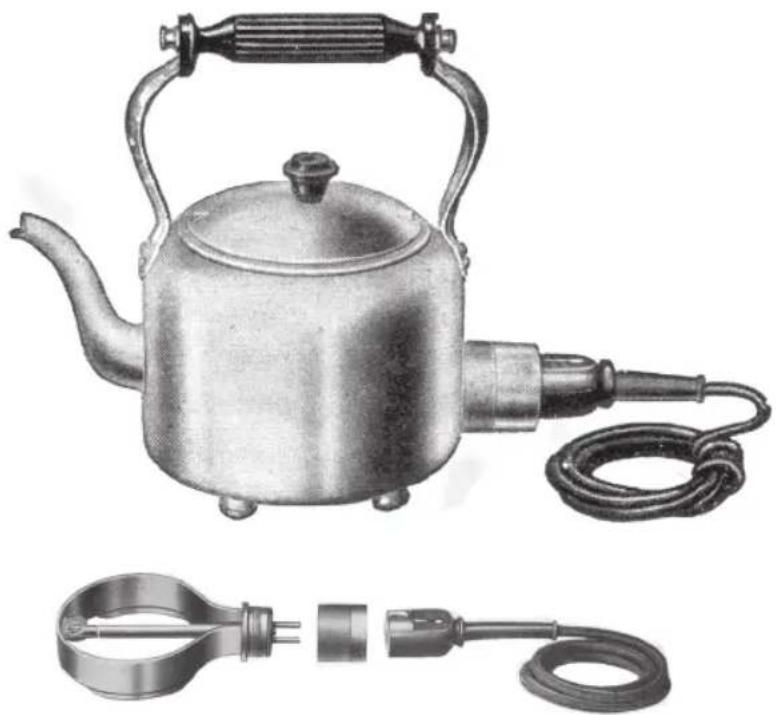
In 1933 Swan were the first to develop an electric heating element that could be immersed in water. This led to the Swan kettle range that could boil up to six pints of water in just over nine minutes - pretty hot for the time! These days it takes about two minutes for a Swan kettle to boil.




NOTES

www.swan-brand.co.uk

Scan this QR code to hear about our story

We love what we do

we're proud of our quality

Find us on Facebook
* on selected products
Copyright © Swan Products Ltd. PO Box 3117, Stoke-on-Trent ST4 9GD

Brand : SWAN
Model : SH16340N
Category : Heating