
VPC-HD2000EX - Camcorder SANYO - Free user manual and instructions
Find the device manual for free VPC-HD2000EX SANYO in PDF.


| Product Type | High Definition Digital Camcorder |
| Brand | SANYO |
| Model | VPC-HD2000EX |
| Video Resolution | Full HD 1080p (1920 x 1080 pixels) |
| Sensor | 1/2.33 inch CMOS, 8.0 megapixels |
| Optical Zoom | 5x |
| Storage Media | SD / SDHC memory card (up to 32 GB) |
| Power Supply | Rechargeable Lithium-ion battery (model DB-L50) |
| Dimensions (W x H x D) | Approx. 68 x 109 x 43 mm |
| Weight | Approx. 200 g (without battery or card) |
| Main Features | HD video recording, photo, image stabilization, face chaser, extended dynamic range (D-range) |
| Maintenance and Cleaning | Clean with a soft, dry cloth; avoid solvents; store in a dry, dust-free place |
| Safety | Do not expose to water; avoid shocks; do not disassemble the device |
| Spare Parts and Repairability | Battery, charger, USB cable, AV cable, user manual; repair by authorized center |
| General Information | User manual available for free download in PDF format; 227 pages |
Frequently Asked Questions - VPC-HD2000EX SANYO
User questions about VPC-HD2000EX SANYO
0 question about this device. Answer the ones you know or ask your own.
Ask a new question about this device
Download the instructions for your Camcorder in PDF format for free! Find your manual VPC-HD2000EX - SANYO and take your electronic device back in hand. On this page are published all the documents necessary for the use of your device. VPC-HD2000EX by SANYO.
USER MANUAL VPC-HD2000EX SANYO
This manual explains how to safely operate the VPC-HD2000EX,
VPC-HD2000 and VPC-HD2000GX.
Any information regarding only one of these products will be labeled as such.
Please read these instructions carefully before using the camera.
Make sure to read and understand the separate booklet "SAFETY MANUAL".
Keep this manual in a safe place for later reference.
Warning
TO PREVENT THE RISK OF FIRE OR ELECTRIC SHOCK, DO NOT EXPOSE THIS APPLIANCE TO RAIN OR MOISTURE.
FOR AMERICAN USERS
The following advisory is included in accordance with the laws of the State of California (USA):
WARNING:
This product contains chemicals, including lead, known to the State of California to cause cancer, birth defects or other reproductive harm. Wash hands after handling.
-
This equipment has been tested and found to comply with the limits for a Class B digital device, pursuant to Part 15 of the FCC Rules. These limits are designed to provide reasonable protection against harmful interference in a residential installation. This equipment generates, uses and can radiate radio frequency energy and, if not installed and used in accordance with the instructions, may cause harmful interference to radio communications. However, there is no guarantee that interference will not occur in a particular installation. If this equipment does cause harmful interference to radio or television reception, which can be determined by turning the equipment off and on, the user is encouraged to try to correct the interference by one or more of the following measures:
-
Reorient or relocate the receiving antenna.
- Increase the separation between the equipment and receiver.
- Connect the equipment into an outlet on a circuit different from that to which the receiver is connected.
-
Consult the dealer or an experienced radio/TV technician for help.
-
Changes or modifications not expressly approved by the party responsible for compliance could void the user's authority to operate the equipment.
Declaration of Conformity
Model number: VPC-HD2000
Trade Name: SANYO
Responsible party: SANYO FISHER COMPANY
Address: 21605 Plummer Street, Chatsworth, California 91311
Telephone No.: (818) 998-7322
This device complies with Part 15 of the FCC Rules. Operation is subject to the following two conditions:
(1) this device may not cause harmful interference, and
(2) this device must accept any interference received, including interference that may cause undesired operation.
FOR CANADIAN USERS
- This Class B digital apparatus complies with Canadian ICES-003.
FOR EU USERS
The symbol mark and recycling systems described below apply to EU countries and do not apply to countries in other areas of the world.
Your SANYO product is designed and manufactured with high quality materials and components which can be recycled and/or reused.
The symbol mark means that electrical and electronic equipment, batteries and accumulators, at their end-of-life, should be disposed of separately from your household waste.
Note:
If a chemical symbol is printed beneath the symbol mark, this chemical symbol means that the battery or accumulator contains a heavy metal at a certain concentration. This will be indicated as follows: Hg: mercury, Cd: cadmium, Pb: lead
In the European Union there are separate collection systems for used electrical and electronic equipment, batteries and accumulators.
Please, dispose of them correctly at your local community waste collection/ recycling centre.
Please, help us to conserve the environment we live in!

SANYO FISHER Sales (Europe) GmbH
Stahlgruberring 4, D-81829 München, Germany
SANYO Electric Co., Ltd.
1-1, Sanyo-cho, Daito City, Osaka 574-8534, Japan
FOR RUSSIAN USERS

A46
This product is certified by an official certification company which is authorized by the Russian Federation.
HOW TO READ THIS MANUAL
For first-time users
Please read the sections on "SETUP" and "SIMPLE" in this manual, as well as the included "QUICK GUIDE" to familiarize yourself with your camera's operation.
To use the various camera features
Please read the sections on "NORMAL" and "OPTION SETTINGS" in this manual. To view on a TV, please read the section on "OTHER DEVICES AND CONNECTIONS" in this manual. To connect to a computer, please see the "Xacti Software CD INSTRUCTION MANUAL".
To use additional features
To use a computer to edit the recorded data or to save data to a DVD, please read the "Xacti Software CD INSTRUCTION MANUAL".
You may find the answers to questions or problems concerning camera operation in the sections "COMMONLY ASKED QUESTIONS" (page 168) and "TROUBLESHOOTING" (page 176).
Symbols used in this manual
HINT Points giving some extended instructions or special points to pay attention to.
CAUTION Points that require special attention.
(page xx) Refer to the page indicated for detailed information.
SHOOT, PLAY BACK AND SAVE
Preparing the camera
1 Insert the SD Memory Card.
- An SD Memory Card is not included with your camera. Please purchase a commercially sold card.
- In this manual, the SD Memory Card is referred to as the "card".
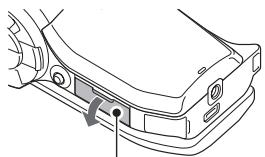
Card slot cover
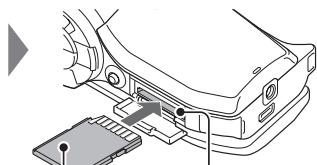
SD Memory Card
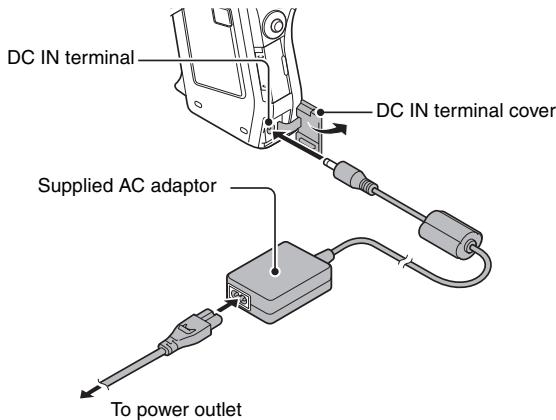
2 Connect the AC adaptor to the camera.
Shooting
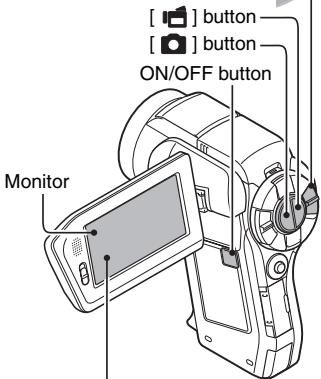
1 Set the REC/PLAY switch to REC.
2 Press the ON/OFF button for at least 1 second to turn the camera on.
- If the screen to set the date and time appears, press the MENU button 2 times to cancel it. For how to set the date and time, see page 43.
3 Record.
To record a video clip:
- Press the [ ] button to begin recording a video clip.
Press the [ ] button again to end the recording.
To take a photo:
- Press the [ ] button.
- A still image is captured.
REC/PLAY switch Set to REC
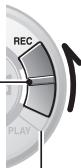
[ ] button [ ] button
ON/OFF button
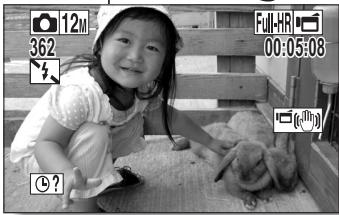
Before capturing those important shots, be sure to first take a test shot to confirm that your camera is set up and ready to go
- Sanyo declines any claim for compensation for recorded contents etc. in case of photographing or recording failure due to a chance camera or card flaw.
Playback
1 Set the REC/PLAY switch to PLAY.
- The display changes to the Playback Screen.
2 Select the image to play back.
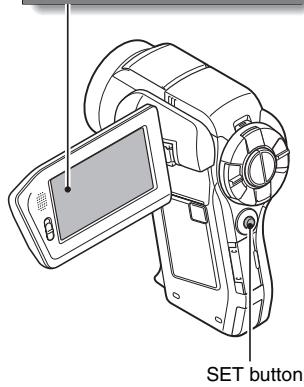
- Toggle the SET button left, right, up or down to move the orange frame to the image you wish to play back.
- The image information for the framed image is shown at the bottom of the screen.
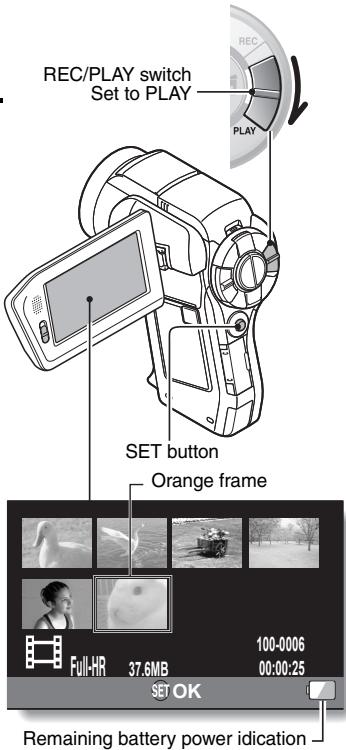
3 Press the SET button.
- Playback begins.
- Set the REC/PLAY switch to REC.
When you are finished using the camera...
Press the ON/OFF button for at least 1 second to turn the camera off.
To continue to the next operation...
Please confirm that your computer is connected to the Internet.
Burn your recorded video clips onto a DVD (Windows Vista)
Using the supplied CD-ROM (Xacti Software CD), you can store your captured images on a DVD. Detailed information about the Xacti Software CD can be found on page 4 in the Xacti Software CD INSTRUCTION MANUAL.
Install application programs
1 Set the supplied CD-ROM in your computer's DVD drive.
- The installation window opens.
2 Click on [Nero 8 Essentials].
- After clicking on an application program, follow the instructions shown on the monitor to install the program.
- Nero 8 Essentials works with both Windows XP and Windows Vista. For detailed information concerning the operating environment, please see page 5 in the Xacti Software CD INSTRUCTION MANUAL.
3 In the installation window, click on [Finish] and remove the CD-ROM from the computer's DVD drive.
- The supplied Nero 8 Essentials cannot be used to record Blu-ray Disks or AVCHD.
- To record Blu-ray Disks or AVCHD, please upgrade the Nero 8 Essentials software (a paid-for service).
Note that your computer must be connected to the Internet in order to complete this procedure. - Please see the Sanyo support page (page 16 in the Xacti Software CD INSTRUCTION MANUAL) or visit the following website for more information.
http://www.sanyo-dsc.com/
- When the installation window closes, a dialog box to connect to the website introducing Kodak's online service appears. Check the [No thanks!] option button, and then click on the [OK] button.
SHOOT, PLAY BACK AND SAVE
Connect your camera to a computer
Connect your camera to a computer, and copy the desired files to the computer.
1 Use the supplied dedicated USB interface cable to connect your camera to the computer.
2 Turn on the camera.
- The USB Connection Screen appears on the camera's monitor.
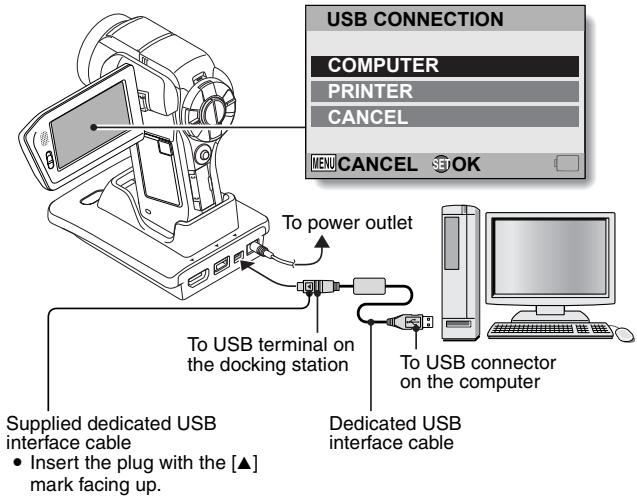
3 Select "COMPUTER", and press the SET button.
- The screen to select the computer connection mode appears.
4 Select "CARD READER", and press the SET button.
- The message [Found New Hardware] appears in the task tray, showing that the camera is recognized as a drive.
-
The card is recognized (mounted) as a disk, and the [XACTI (E:)] icon appears in the [My Computer] window.
-
The drive name (E:) may be different on your computer.
5 Copy the files from the card to the computer's hard disk.
- The data recorded with your camera are stored in the following folder. You can specify the folder on the hard disk to which to copy the files. XACTI (E:\DCIM***SANYO
(** represents numbers [page 12 in the Xacti Software CD INSTRUCTION MANUAL]).
- The drive name (E:) may be different on your computer.
HINT
- For information on how to copy all the camera's still image and video clip files at once, please see the support pages at the website below: http://www.sanyo-dsc.com/
SHOOT, PLAY BACK AND SAVE
Burn video clips onto a DVD (For Windows Vista users)
Here's how to write your recorded data onto a DVD in the mpg2 format. For information on other operations, please see the Help file for Nero Vision. To access the Nero Vision Help file, click the [?] button on the Nero Vision start screen.
1 Insert a blank DVD in your computer's DVD drive.
2 Click the Start button, and point to [All Programs] → [Nero 8], and click on [Nero Vision Essentials].
- Nero Vision starts up, and the start screen appears.
![SANYO VPC-HD2000EX - Click the Start button, and point to [All Programs] → [Nero 8], and click on [Nero Vision Essentials]. - 1](/content/2025/01/96660/images/c20ba6d6add3c0f61ee41efd9f6e0adb951af7d1111d59e5de2a166a048a0b7d.jpg)
- The specifications for the Nero 8 Essentials edition that is included with your camera are different from those of the commercially sold edition.
3 Under the "What would you like to do?" heading, point to [Make DVD] and click on [DVD-video].
- The Hints window opens, in which you can find an explanation of each screen.
- From the [Show hints when moving to page] menu in the Hints window select [Disable].
4 Click on "Third party patent activation" on the tool bar.
- The screen to activate third party patent activation (the certification process that enables you to use the functions) via the Internet or FAX appears.
- The activation process is necessary in order to create and play back DVDs, as well as to import and export MPEG-2 type files.
- Once the third party patent activation is completed, it will not be requested again.
- The number of times for third party patent activation is limited. When this limitation has been exceeded (by multiple installations, for example), please follow the instructions on the screen to contact Nero support.
5 Click the [Close] button.
- The screen to make a DVD-video opens.
- Click the [Back] button.
![SANYO VPC-HD2000EX - Click the [Close] button. - 1](/content/2025/01/96660/images/7453ca7ed9ec52f8b47d5142d954158c8a36f3581f8d08a385453168e0f98309.jpg)
6 Under the "What would you like to do?" heading, click [Add video files].
- The window to select files to burn to DVD opens.
7 Click on a file to burn to DVD.
- Click on the files while holding down the [Ctrl] key.
8 Click the [Open] button.
- The selected files are shown in the "Content" field.
![SANYO VPC-HD2000EX - Click the [Open] button. - 1](/content/2025/01/96660/images/19666223390ab586b366136249cdac89bd067a7423f89a0536bb2d552e8b8140.jpg)
- When you double-click a file in the "Content" field, the window to play the file appears. Click the [Next] button when you want to return to the previous window.
① Right-click on the file in the "Content" field that you wish to deselect.
- A pulldown menu appears.
② Click [Remove].
- The selected file is removed from the "Content" field.
9 Click the [Next] button.
- The window to edit the disk menu appears.
![SANYO VPC-HD2000EX - Click the [Next] button. - 1](/content/2025/01/96660/images/d637a40581ea706442667c5285f036419e12a5d3b18c58c69cfca314ae747b0f.jpg)
10 Click on one of the designs under "Templates", and then click the [Next] button.
- A preview of the selected design is shown.
![SANYO VPC-HD2000EX - Click on one of the designs under "Templates", and then click the [Next] button. - 1](/content/2025/01/96660/images/6ad9430f6218332cc5be51c4afc7bf79fc83ae035ccb4fdd40d5245b563a3ad6.jpg)
11 Click the [Next] button.
- The window to configure the DVD burn setup opens.
![SANYO VPC-HD2000EX - Click the [Next] button. - 1](/content/2025/01/96660/images/b4cca9d34017d87d0a564bd677404d732c67bcca9d6ce1cf0b5860ee6deff942.jpg)
12 Click the [Burn] button.
- Disk writing begins.
The process status is shown in the "Recording progress" field.
![SANYO VPC-HD2000EX - Click the [Burn] button. - 1](/content/2025/01/96660/images/ee8346590b1bf35b764a349249e1b58cbe181f1cc4cedd5f9dc614c7e4f25ffa.jpg)
- When the burn process is completed, a screen asking if you would like to save a log file of the burn process appears.
13 Click the [Yes] button.
- Enter a name for the log file.
14 Click the [Save] button.
- A screen for you to indicate the next operation appears.
SHOOT, PLAY BACK AND SAVE
15 Click the [Finish] button.
- A screen asking if you would like to save the project appears.
16 Click the [Yes] button.
- Enter a name for the project file.
17 Click the [Save] button.
- Nero Vision Essentials ends.
CAUTION
- When burning full high-definition (HD) images to a DVD, it may take some time to convert the video format, depending on your computer's capability.
- Commercially sold DVD software cannot be played back.
How was that? The convenient accessories not only let you immediately view images captured with the camera, but you can also upload images to your computer and create your original DVDs. Read the following explanations to find out how you can fully enjoy your camera's digital video feature.
CONTENTS
HOW TO READ THIS MANUAL
QUICK SEARCH BY OPERATION 6
CHECKING THE INCLUDED ACCESSORIES 11
How to use the accessories 13
ABOUT THE SEPARATELY SOLD ACCESSORIES AND
THE CARD 15
Separately sold accessories 15
Media cards that can be used with this camera 16
What "card" means in this manual 16
GETTING THE MOST OUT OF YOUR CAMERA 17
High-quality images with "Full High Definition" 17
Includes SIMPLE mode for quick-and-easy operation 18
Image stabilizer for sharp pictures 18
Sharp face shots 19
Xacti Library feature 19
Lots of accessories for optimal use of your captured images.....20
SYSTEM MAP 21
■ SETUP
PARTS NAMES 22
Camera 22
Docking station 25
Remote control unit 26
INSTALLING THE CARD 27
PREPARING THE DOCKING STATION 29
PREPARING THE REMOTE CONTROL UNIT 30
Prepare the battery 30
How to use the remote control unit 31
PREPARING THE POWER 33
Charging the battery pack 33
When using a power outlet 37
About recharging 39
About the temperature alert icon 39
TURING THE CAMERA ON AND OFF 40
Turning on the camera 40
Turning on the camera when the power save (sleep) mode is active 41
Turning off the camera 42
DATE AND TIME SETTING 43
SWITCHING BETWEEN THE RECORDING MODE AND PLAYBACK
MODE 46
1 English
SIMPLE MODE/NORMAL MODE 47
About the SIMPLE mode and NORMAL mode 47
Switching between the SIMPLE and NORMAL modes 48
Accessing/exitng the SIMPLE/NORMAL Mode Menu Screen ....49
Overview of the SIMPLE Mode Setting Screen 55
Overview of the NORMAL Mode Setting Screen 59
FIELD OF VIEW 67
SIMPLE
SHOOTING
BEFORE TAKING PICTURES 68
For best results 68
Using the autofocus 69
Select the recording size 71
Select the focus setting 72
Hints for taking pictures 73
How to save one frame from a video clip as a still image 87
SLIDESHOW PLAYBACK 88
PLAYBACK VOLUME 89
DELETING FILES 90
Delete single/delete all 90
Delete selected 91
PLAYBACK MODES 93
21-image display playback 93
Selecting the playback folder 94
Magnifying (zooming in) the image 95
CONTENTS
NORMAL
SHOOTING
RECORDING MENU 1 96
Video setting 96
Still image setting 100
Scene select setting 101
Filter setting 101
Self-timer setting 102
RECORDING MENU 2 103
Motion compensation (image stabilizer) setting 103
Focus range setting 104
Focus mode setting 105
Light-measuring mode setting 105
ISO sensitivity setting 106
RECORDING MENU 3 107
White balance setting 107
Exposure setting 108
Face chaser setting 109
Photo wide D-range setting 110
High sensitivity mode setting 111
Digital zoom setting 111
Exposure compensation 112
PLAYBACK
PLAYBACK MENU 1 114
Slideshow settings 114
File protect setting 115
Protect selected files 116
Resize 117
Rotate 117
PLAYBACK MENU 2 118
Correcting the contrast 118
Editing video clips 119
Printing instructions 129
FILE INFO DISPLAY 133
OPTION SETTINGS
DISPLAY THE OPTION SETTING MENU 134
INTRODUCTION TO THE OPTION SETTING MENU 135
Storage folder setting 141
Shortcut setting 142
Screen language 144
TV output setting 145
File No. continued setting 150
Formatting (initializing) 152
CHECKING THE REMAINING CARD MEMORY 153
Checking the remaining number of images and video recording time 153
For audio recordings 154
CHECKING THE REMAINING BATTERY PACK CHARGE 155
OTHER DEVICES AND CONNECTIONS
CONNECTING TO A TV
CONNECTING TO A STANDARD VIDEO INPUT TERMINAL 157
ENJOY HIGHER IMAGE QUALITY 158
Connect to the S-VIDEO terminal 158
Connect to the 480p/720p/1080i/1080p terminal 159
Connecting to the HDMI terminal 160
PLAYING BACK ON A TV 161
Xacti Library 162
CONNECTING TO A PRINTER
PRINTING 163
OTHER CONNECTIONS
CONNECTING A MICROPHONE/HEADPHONES 166
SHOE MOUNT 167
CONTENTS
APPENDICES
COMMONLY ASKED QUESTIONS 168
TROUBLESHOOTING 176
Camera 176
Docking station 186
Notes regarding the Scene Select feature and filters 188
SPECIFICATIONS 190
Camera 190
Camera connectors 194
Battery life 195
Possible No. of Images/Possible Shooting Time/ Possible Recording Time 196
Docking station 197
Remote control unit 197
Concerning the multi-indicator 198
Supplied AC adaptor 199
Supplied Li-ion battery pack 199
Others 200
Before capturing those important shots, be sure to first take a test shot to confirm that your camera is set up and ready to go 201
HINTS FOR TAKING PICTURES 202
Your camera has an abundance of convenient features and functions. From creating precisely the photo you want, to viewing images using various techniques, you can locate the exact operation for your purposes in the following table.
| Shooting/recording | ||
| Basic operation | Convenient functions | Additional functions |
| Getting started shooting/recording ·“VIDEO CLIP RECORDING” on page 74 ·“SHOOTING SINGLE SHOTS” on page 75 ·“Sequential shots” on page 100 ·“Audio recording” on page 97 | Log the date and time of your photos ·“DATE AND TIME SETTING” on page 43 Zoom in on the subject ·“MACRO-PHOTOGRAPHY (ZOOM)” on page 81 Close-up photography ·“Focus range” (super macro mode) on pages 56 and 62 ·“Select the focus setting” (super macro mode) on page 72 | For more accurate focus ·“How to use the manual focus” (manual focus) on page 104 Set the focus to a narrow range ·“Focus mode setting” on page 105 Reduce noise when recording ·“NOISE REDUCTION setting” on page 138 |
| Optimize the photo quality ·“Select the recording size” on pages 56 and 71. ·“Video setting” on pages 60 and 96 ·“Still image setting” on pages 60 and 100 | Set the camera's color/contrast characteristics ·“Image quality setting” on page 138 | |
| Capture fast-moving subjects ·“Scene select setting” (sports mode) on pages 60 and 101 Suppress camera shake effect ·“Video stabilizer” and “Photo stabilizer” on page 62 ·“Motion compensation (image stabilizer) setting” on page 103 | ||
| Shooting/recording | ||
| Basic operation | Convenient functions | Additional functions |
| Shoot in dark conditions ·“Exposure compensation” on page 112 ·“Using the flash” on pages 60 and 77 ·“Scene select setting” (night view portrait mode/fireworks mode/lamp mode) on pages 60 and 101 | ||
| Increase the camera's sensitivity ·“ISO sensitivity setting” on pages 62 and 106 ·“High sensitivity mode setting” on pages 64 and 111 | ||
| Photographing people ·“Scene select setting” (portrait mode/night view portrait mode) on pages 60 and 101 ·“Filter setting” (cosmetic filter) on pages 60 and 101 ·“Using the flash” (red-eye reduction) on pages 60 and 77 Sharp face shots ·“Face chaser setting” on pages 64 and 109 | ||
| Simplified operation for shooting/playback ·“SIMPLE MODE/NORMAL MODE” on page 47 | ||
| Photographing landscapes ·“Scene select setting” (landscape mode) on pages 60 and 101 | ||
| Take a self-photo ·“Self-timer setting” on page 102 | ||
| Make images lighter or darker ·“Exposure compensation” on page 112 ·“High sensitivity mode setting” pages 64 and 111 | Measure the brightness of a specific area ·“Light-measuring mode setting” on pages 62 and 105 Adjust the camera's sensitivity ·“ISO sensitivity setting” pages 62 and 106 For a more precise exposure setting ·“Exposure setting” (manual exposure control) on pages 64 and 108 | |
| Change the color of the images ·“Filter setting” (monochrome filter/sepiafilter) on pages 60 and 101 | Make white appear natural ·“White balance setting” on pages 64 and 107 | |
| Playback | ||
| Basic operation | Convenient functions | Additional functions |
| Getting started viewing images •“PLAYING BACK VIDEO CLIPS AND STILL IMAGES” on page 84 | Adjust the speaker volume •“PLAYBACK VOLUME” pages 58, 65 and 89 Search for image/ audio files •“21-image display playback” on page 93 •“Selecting the playback folder” on pages 66 and 94 Magnify an image •“Magnifying (zooming in) the image” on page 95 | Change the angle of view •“Rotate” on pages 65 and 117 Reduce the photo size •“Resize” on pages 65 and 117 |
| •“Audio playback” on page 98 | Adjust the speaker volume •“PLAYBACK VOLUME” on pages 58, 65 and 89 | |
| Continuous playback •“SLIDESHOW PLAYBACK” on pages 58, 65, 88 and 114 | ||
| Adjust the monitor brightness •“Adjusting the monitor brightness” on page 76 •“BRIGHTNESS setting” on page 138 | ||
| Playback on a TV •“PLAYING BACK ON A TV” on page 161 Set the TV system •“TV output setting” on pages 140 and 145 How to use Xacti Library •“Xacti Library” on page 162 | ||
| File managing/processing | ||
| Basic operation | Convenient functions | Additional functions |
| Search for image/audios files·“21-image display playback” on page 93·“Selecting the playback folder” on pages 66 and 94 | ||
| Delete files·“DELETING FILES” on pages 58, 65 and 90 | Protect files from accidental erasure·“File protect setting” on pages 65 and 115Format a card·“ Formatting (initializing)” on pages 140 and 152 | |
| Delete a part of a video clip and join video clips·“Editing video clips” on pages 66 and 119 | ||
| Specify the number of prints, index print, and date imprint·“Printing instructions” on pages 66 and 129 | ||
| View the settings that were in effect when the image/audios files were recorded·“FILE INFO DISPLAY” on page 133 | ||
| Using with a computer | ||
| Basic operation | Convenient functions | Additional functions |
| Use the camera as a card reader • “USING AS A CARD READER” on page 9 in the Xacti Software CD INSTRUCTION MANUAL | ||
| Copy files from your camera to a computer • “Connect your camera to a computer” on page ix | ||
| Burn files copied to the computer onto a DVD • “Burn video clips onto a DVD (For Windows Vista users)” on page xi | ||
| Playback • “About video clip files recorded with this camera” on page 13 in the Xacti Software CD INSTRUCTION MANUAL | ||
| Using as a webcam • “Using as a PC camera” on page 15 in the Xacti Software CD INSTRUCTION MANUAL | ||
| Record an image of the computer screen • “SCREEN CAPTURE” on page 17 in the Xacti Software CD INSTRUCTION MANUAL | ||
CHECKING THE INCLUDED ACCESSORIES
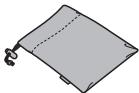
- Soft case (page 14): 1
Xacti Software CD (CD-ROM) (page 4 in the Xacti Software CD INSTRUCTION MANUAL): 1

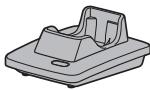
- Docking station (pages 25 and 29): 1
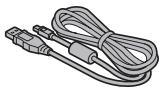
- Dedicated USB interface cable (page 7 in the Xacti Software CD INSTRUCTION MANUAL): 1
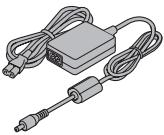
- AC adaptor and power cord (pages 29, 37 and 38): 1
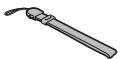
- Handstrap (page 13): 1
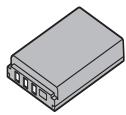
- Li-ion battery pack (page 34): 1
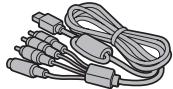
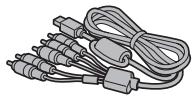
Dedicated S-AV interface cable (pages 157 and 158): 1
Dedicated component cable (page 159): 1
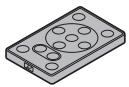
Remote control unit (pages 26, 30 to 32 and 83): 1
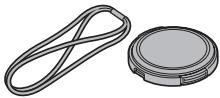
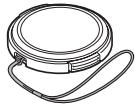
- Lens cap (page 13): 1
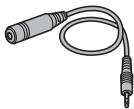
- Microphone connection cable (page 166): 1
- "SAFETY MANUAL" (safety precautions booklet) Please read this booklet carefully before using the camera.
Xacti Library Instruction Manual

FOR CALIFORNIA, U.S.A. ONLY Perchlorate Material - special handling may apply. The lithium battery used in this camera contains perchlorate material, which may require special handling. See www.dtsc.ca.gov/hazardouswaste/ perchlorate.
Dedicated USB converter cable: 1
For use with the Xacti Library feature

For microphone connection cable

- Quick Guide Included with model VPC-HD2000GX. Not included with other models.
How to use the accessories
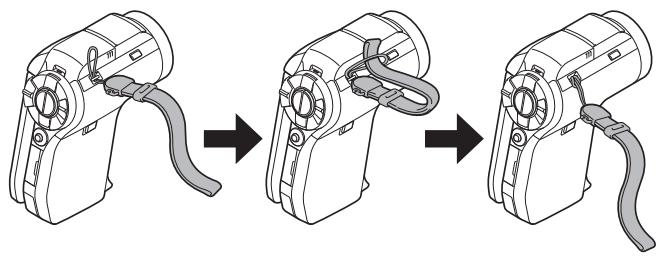
Handstrap
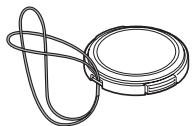
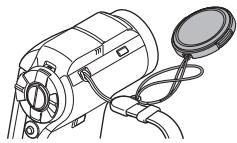
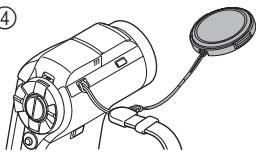
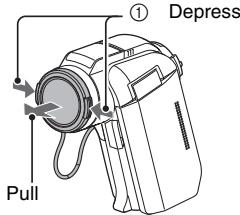
Lens cap
①

②
(3)

(4)

⑤

13 English
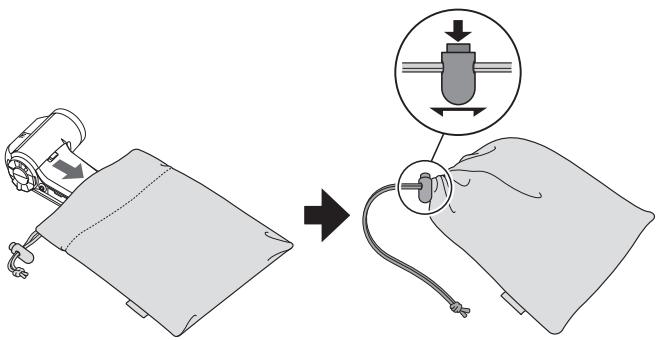
Soft case
ABOUT THE SEPARATELY SOLD ACCESSORIES AND THE CARD
Separately sold accessories
- HDMI cable VCP-HDMI01
Cable for connecting to the HDMI terminal on the docking station.
- Lithium-ion Battery Charger VAR-L50
Battery charger for the supplied or separately sold lithium-ion battery pack (DB-L50A).
- Lithium-ion Battery DB-L50
Same model as the supplied lithium-ion battery pack.
Wide Conversion Lens VCP-L07W
Expand your camera's wide-angle range.
- Tele Conversion Lens VCP-L16T
Make distant objects appear closer.
- Semi Fish-eye Lens VCP-L04F
For wide-angle shots close to the fisheye lens.
- Wireless microphone HM-W300
Record sound from the stereo microphone located at a distance from the camera.
Recommended accessory
- External microphone (Product code: 6450569692)
The recommended stereo microphone for this camera.
Media cards that can be used with this camera
The type of card that can be inserted into and used with this camera is:
- SD Memory Card
- SDHC Memory Card
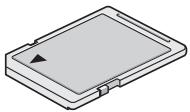
What "card" means in this manual
- In this manual, SD Memory Cards and SDHC Memory Cards that can be used in this digital camera are referred to as "card".
GETTING THE MOST OUT OF YOUR CAMERA
Your dual camera can record video clips in Full High Definition*. It includes an operation mode that lets even novice shutterbugs record and play back without getting flustered, as well as software with which you can easily create your original DVDs. In addition, it comes with the "Xacti Library" feature for saving recorded data to hard disk and managing files without using a computer.
High-quality images with "Full High Definition*” (pages 60, 71 and 96)
Your camera can capture full high definition (full HD) 1920 × 1080 -pixel video clips. Also, the H.264/MPEG-4 AVC standard is used for formatting video files. You get both compact file size and high picture quality in one high-performance camera.
- "Full High Definition" by SANYO Dual Camera signifies recording at a resolution of 1920 pixels horizontally ×1080 pixels vertically.
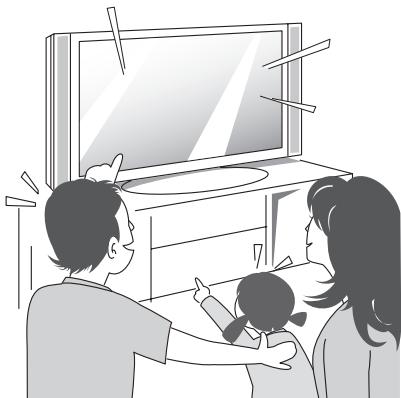
Includes SIMPLE mode for quick-and-easy operation (page 47)
Select from two recording/playback modes: the "SIMPLE mode" for users new to the camera, and the "NORMAL mode" for full use of all the camera's many features and functions.
Example:
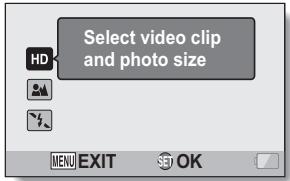
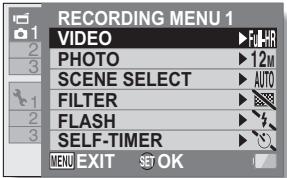
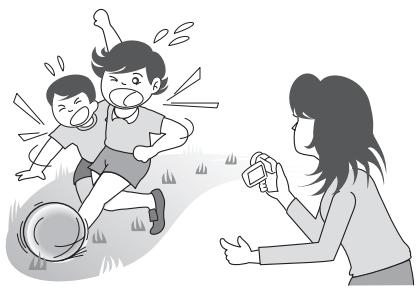
Image stabilizer for sharp pictures (pages 62 and 103)
Your camera can compensate for the camera shake that results in blurry images when you try to capture a fast-moving subject or zoom in on a subject. Image stabilizer functions for both video clip recording and still image shots are on board.
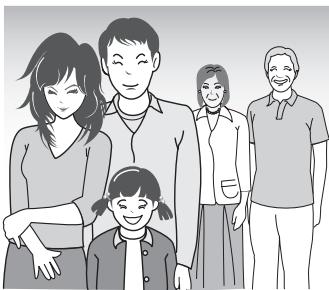
Sharp face shots (pages 64 and 109)
Your camera is equipped with a face recognition feature which detects the subject's face even when slightly lit from behind or in dim surroundings and automatically adjusts the focus and brightness to compensate. Now those otherwise perfect photos that are marred by shadowed faces can be minimized.
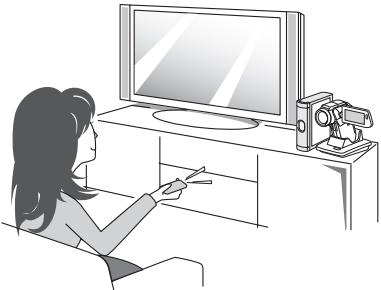
Xacti Library feature (page 162)
The Xacti Library feature feature allows you to save files recorded with your camera to a large-capacity hard disk without using a computer and play them back on your TV. No computer operation is involved. You can view full high-definition images right on your TV screen.
Lots of accessories for optimal use of your captured images (page 21, and page 4 in the Xacti Software CD INSTRUCTION MANUAL)
Use the accessory cables to view images on a TV or computer. Or connect the camera directly to a printer to make prints of your photos. And with the software in the supplied CD-ROM (Xacti Software CD), you can create your original DVDs and CDs.
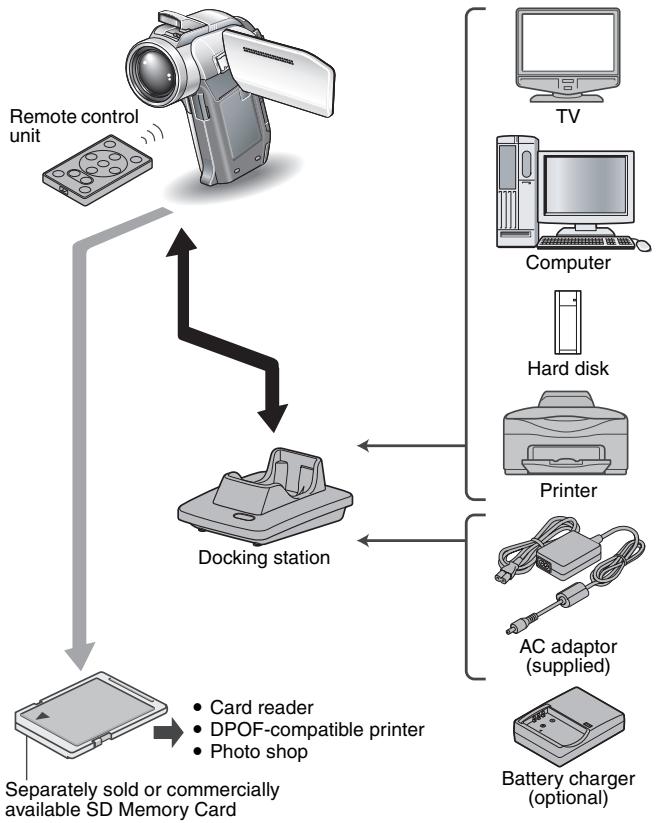
SYSTEM MAP
You can connect the camera to various devices to expand its capabilities.
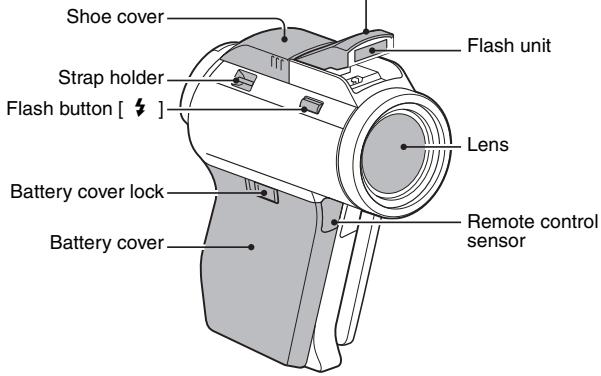
Camera
Front
Flash
- Extends when the flash button [ ] is pressed.
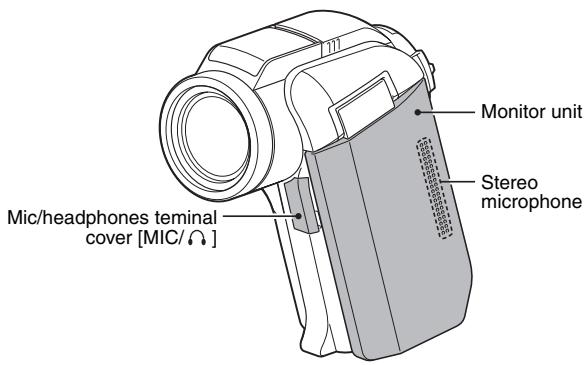
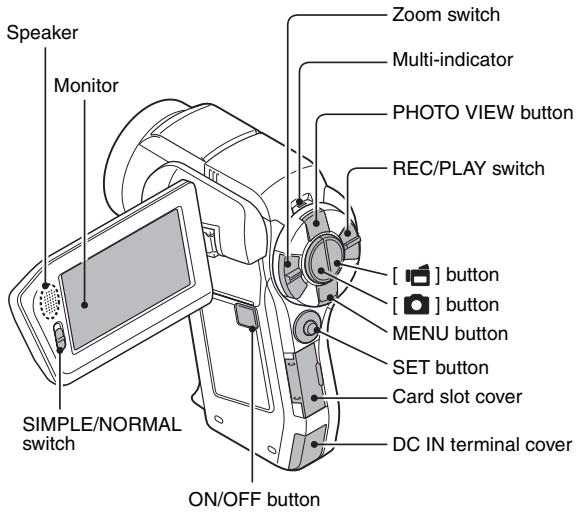
PARTS NAMES
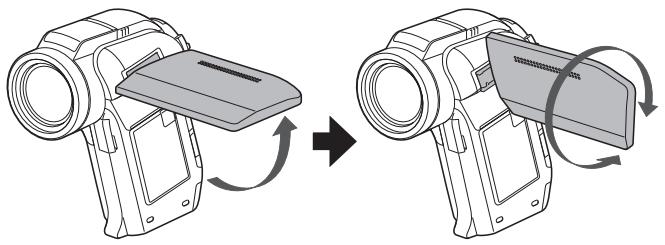
Rear
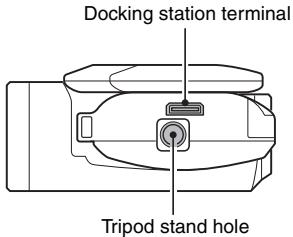
Bottom
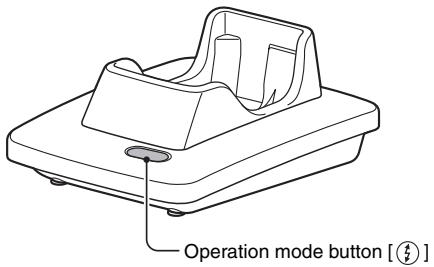
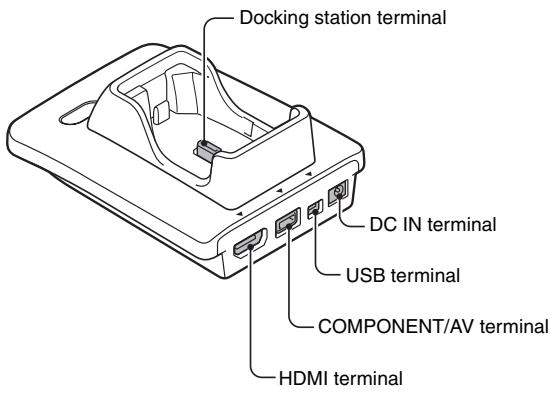
Docking station
Front
Rear
Remote control unit
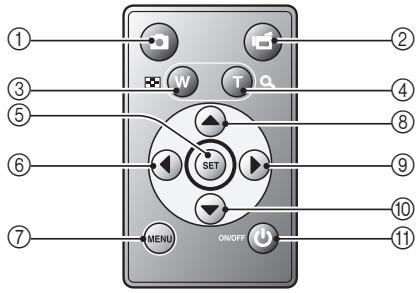
① [ ] button
② [ ] button
③ Works the same as pushing zoom switch toward the [W] ([■]) side
④ Works the same as pushing zoom switch toward the [T] ([O-]) side
⑤ SET button
(6) Works the same as toggling SET button to the left
⑦ MENU button
(8) Works the same as toggling SET button up
(9) Works the same as toggling SET button to the right
Works the same as toggling SET button down
ON/OFF button
- Works only when the camera is set in the docking station.
① [ ] button
② [ ] button
③ Works the same as pushing zoom switch toward the [W] ([■]) side
④ Works the same as pushing zoom switch toward the [T] ([O-]) side
⑤ SET button
(6) Works the same as toggling SET button to the left
⑦ MENU button
(8) Works the same as toggling SET button up
(9) Works the same as toggling SET button to the right
Works the same as toggling SET button down
ON/OFF button Works only when the camera is set in the docking station.
INSTALLING THE CARD
Be sure to format a newly purchased card or one that was used in another device before using it in your camera (pages 140 and 152). If an unformatted card is used, the card itself may become unusable.
1 Open the card slot cover, and insert the card in the card slot.
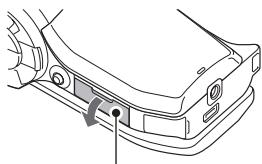
Card slot cover
2 Insert the card all the way in.
- Firmly insert the card until it clicks into place.
3 Close the card slot cover.
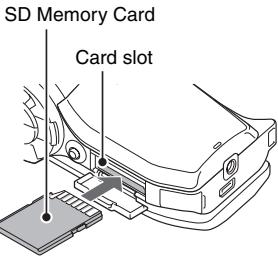
- To remove the card, press it in, and then release. The card will protrude slightly, and you can then pull it out.
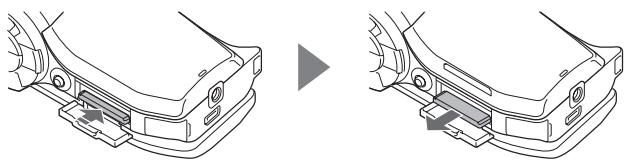
CAUTION
Do not attempt to forcibly remove the card
- Doing so may damage the card or the stored files.
If the multi-indicator is flashing red...
- Never remove the card when the multi-indicator is flashing red, as doing so may result in loss of files stored in the card.
PREPARED THE DOCKING STATION
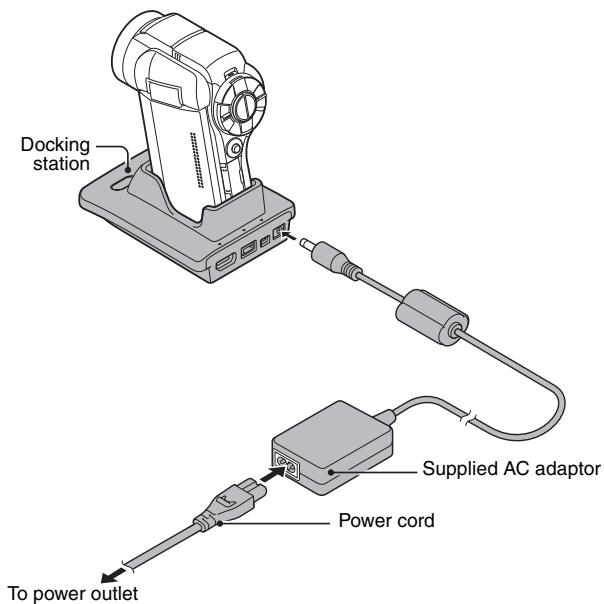
The supplied docking station is used to connect your camera to a computer, printer or TV, as well as to charge the battery pack installed in the camera.
1 Connect the docking station to a power outlet.
- Use the supplied AC adaptor and power cord.
PREPARED THE REMOTE CONTROL UNIT
The remote control unit can be used to take pictures and play them back with the camera.
Prepare the battery
A battery is already installed in the remote control unit at the time of purchase.
1 Pull out the battery insulating sheet.
- The remote control unit becomes operable when the insulating sheet is removed.
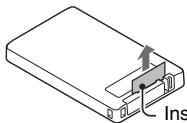
Insulating sheet
Replacing the remote control unit battery
Follow the procedure below to replace the CR2025 battery used in the remote control unit approximately every year (differing depending on the amount of use).
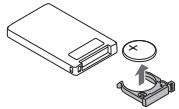
Remove the old battery
① Pull out the battery slot.
While pressing the tab, pull the battery slot out.
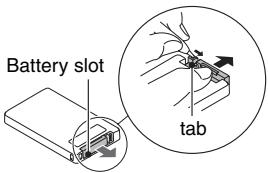
② Remove the battery.
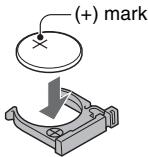
Insert a new battery
① Insert a new battery.
- First wipe the battery with a clean, dry cloth, and insert it with the (+) mark facing up.
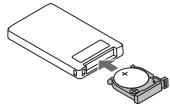
② Re-insert the battery slot.
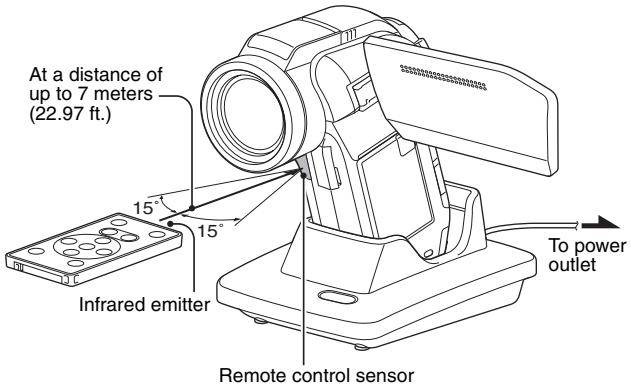
How to use the remote control unit
The remote control unit can be used at an angle that is displaced 15 degrees horizontally from the remote control sensor on the front of the camera, at a distance of up to 7 meters (22.97 ft.). When operating the remote control unit, remove any object that may obstruct the path between it and the remote control sensor.
CAUTION
- If the remote control unit is operated in sunlight or under inverter lighting, the remote control receiving range may become shorter. This is a characteristic of the infrared remote control unit and is not a defect. To avoid this malfunction when operating the remote control unit, take care to shield the remote control sensor from strong light.
Changing the remote control code
The remote control unit will also work with other Sanyo cameras that can be operated by infrared remote control. When more than one camera is present, it is recommended to change the remote control code to ensure that only the intended camera operates when the remote control unit is used. The remote control code is set to "RC CODE 1" at the time of purchase.
1 Aim the infrared emitter at the remote control sensor on the docking station.
2 Simultaneously press the MENU button and the [ ] button for at least 3 seconds.
3 Press a button on the remote control unit and check that the camera is receiving correctly.
- The remote control codes are retained even if the batteries in the remote control unit or camera are replaced.
- If the remote control codes for the remote control unit and the camera and do not match, the remote control unit cannot be used to operate the camera.
1 Aim the infrared emitter at the remote control sensor on the docking station.
2 Simultaneously press the MENU button and the [ ] button for at least 3 seconds.
PREPARING THE POWER
Please charge the supplied battery pack before using it. Power to the camera can also be supplied from a power outlet if the docking station or the AC adaptor is used.
Charging the battery pack
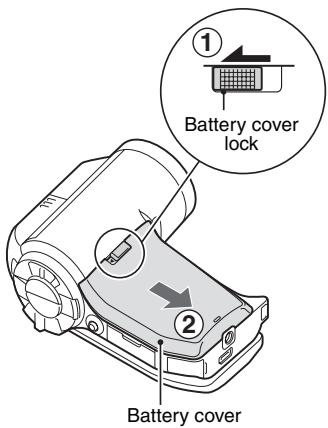
1
While pressing the battery cover lock, slide it (①), and pull out the battery cover toward the bottom of the camera (②).
- The battery cover comes off.
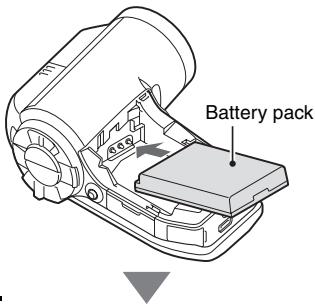
2 Insert the battery pack.
Take care that it is positioned correctly.
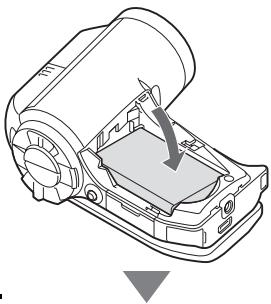
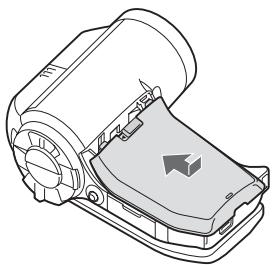
3 Replace the battery cover.
- Raise the edge of the battery pack to remove it.
4 Prepare the docking station (page 29).
5
Close the camera's monitor unit, and set the camera in the docking station.
- Set the camera securely, making sure that the camera is correctly oriented in relation to the terminal contacts in the docking station.
- Charging begins when the camera is set in the docking station.
During charging, the multiindicator is lit red. When charging is completed, the indicator turns off. - If the multi-indicator flashes red, it indicates that the battery pack is defective or the camera is not correctly set in the docking station. Reset the camera correctly in the docking station.
The charging time is approx. 200 minutes. - Charging is executed when the battery temperature is approximately 0 to 35°C (32 to 95°F ). If the battery temperature exceeds 35°C ( 95°F ), the safety mechanism will operate to automatically interrupt charging. The multi-indicator flashes red in this case also. After the battery cools down, charging begins again, and the multi-indicator lights red.
- The AC adaptor (supplied) can be connected to the camera's DC IN terminal to charge the battery.
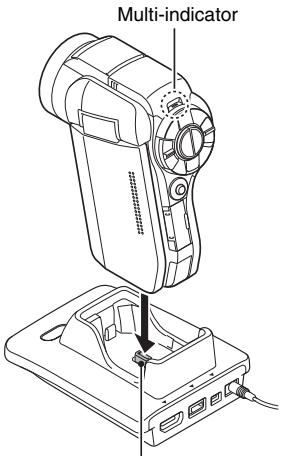
Docking station terminal
CAUTION
Using the camera when it is set in the docking station...
- You can photograph and view images while the camera is set in the docking station.
Do not charge the battery pack immediately after the camera has been in continuous use for a long time
- The battery pack becomes hot when the camera is used continuously for a long time. If you attempt to charge the battery pack in this state, the multi-indicator may flash red and it may not be possible to charge the battery pack. Wait until the battery pack has cooled down before attempting to charge it.
Does the battery pack appear swollen?
- The lithium-ion battery used in this camera may expand slightly when stored in a hot environment or repeatedly used, but this is not a safety hazard.
HINT
About the internal backup battery
- This camera's internal battery serves to maintain the date and time settings, as well as the shooting settings. The backup battery will be fully charged when the battery pack is kept in the camera continuously for about 2 days. In the fully charged state, the backup battery will maintain the camera settings for about 7 days.
When not using the camera for a long time, remove the battery pack
- A small amount of power is still used even if the camera is turned off, and it is therefore recommended that the battery pack be removed from the camera if it is not going to be used for a long time. Note that when the battery pack is removed for a long period, the time and date settings may be cleared. Before using your camera again, be sure to confirm that the camera settings are correct.
To prolong the life of the battery pack
-
Although the battery pack is an expendable item, you can maximize the life of the battery by heeding the following suggestions.
-
Do not leave the battery under the hot summer sun or exposed to other high-temperature environments.
- Do not continually recharge the battery when it is already fully charged. After fully charging it once, for example, use it for a while to partially discharge it before recharging it again.
- When the battery is not to be used for a long time, if possible store the partially charged (not fully charged) battery in a cool environment.
When using a power outlet
Power to the camera can be supplied from a power outlet if the docking station or the AC adaptor is used.
Using the AC adaptor
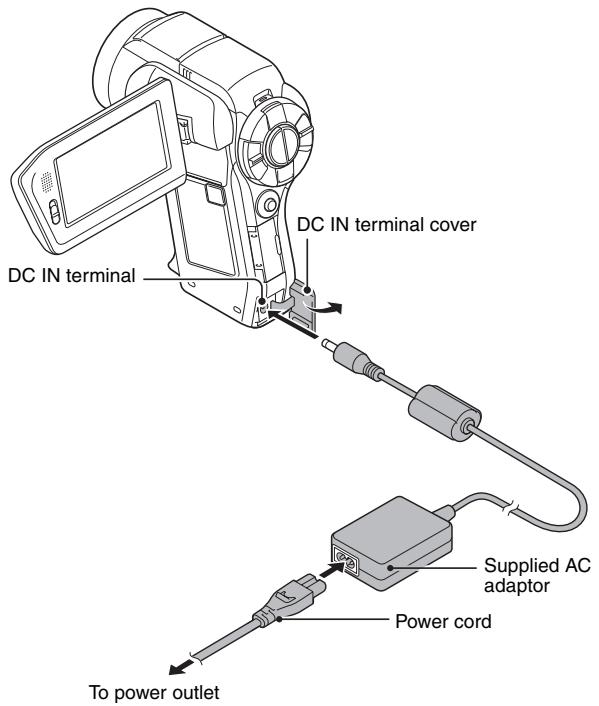
Using the docking station
Use the supplied AC adaptor and power cord to connect the docking station to a power outlet, and set the camera in the docking station.
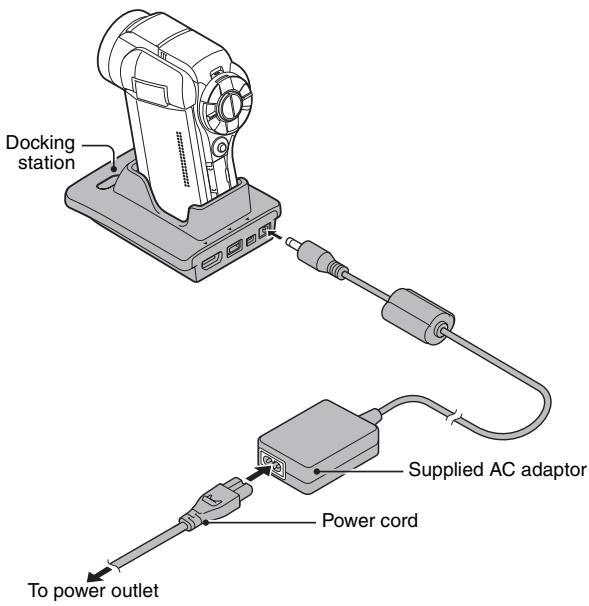
About recharging
Recharging takes place only when the camera is turned off, or when the power save function or the sleep function has been activated. Recharging does not take place when the camera is in the recording mode or playback mode.
About the temperature alert icon
During camera use, if the temperature of the battery or inside the camera (excluding the battery) rises, a temperature alert icon will appear as described below.
■ When the battery or internal camera (excluding battery) temperature rises during use
- During camera use, if the temperature of the battery or inside the camera (excluding the battery) rises, a icon lights on the monitor. It is still possible to record and play back even when the icon is lit; however it is advised that you discontinue use as soon as possible and turn the camera off.
- If the temperature rises further, the icon will start to flash, and the camera will turn off automatically.
The camera cannot be turned on until the temperature has dropped (or as long as the icon remains flashing). Please wait until the temperature has dropped before resuming use.
- During video recording, a countdown indicator will show the time starting about 15 seconds before shutdown. When the indicator shows 0 seconds, recording stops.
- If the camera is turned off while the temperature is high (that is, while the icon is flashing), it cannot be turned on again until the temperature has dropped (or as long as the icon remains flashing).
TURING THE CAMERA ON AND OFF
Turning on the camera
1 Set the REC/PLAY switch.
To shoot pictures:
Set to REC.
To play back images:
Set to PLAY.
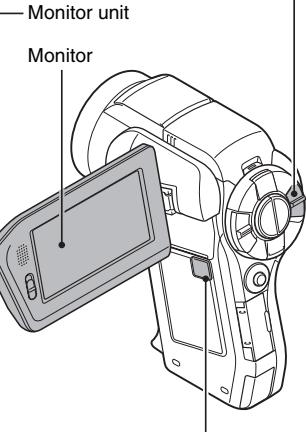
2 Open the monitor unit.
3 Press the ON/OFF button for at least 1 second.
The camera turns on.
- If the date and time have not been set, the screen to set the date and time is shown on the monitor.
REC/PLAY switch
Recording
Playback
ON/OFF button
Turning on the camera when the power save (sleep) mode is active
In order to preserve battery pack power, the power save (sleep) function will automatically turn off the camera after about 1 minute of no use during shooting, or about 5 minutes of no use during playback (factory-preset setting).
-
When the power save mode is active, you can restore the power by any of the following methods:
-
Move the REC/PLAY switch.
- Press the ON/OFF button.
- Press the [ ] or [ ] button.
- Press the SET or MENU button.
- Push the zoom switch.
- Move the SIMPLE/NORMAL switch.
-
Press the PHOTO VIEW button.
-
When the MENU button is used to turn on the camera, the screen to set the operation sounds appears.
-
After the power save mode has been active for about 1 hour, the camera will switch to the standby mode. In this case, you can restore the power by pressing the ON/OFF button, or by closing and then opening the monitor unit.
- When the AC adaptor is connected, the power save mode will become active about 5 minutes after the camera is turned on (factory-preset setting).
- The user can specify the time elapsed before the power save mode is activated (page 140).
- When the camera is connected to a computer or printer, the power save mode becomes active after about 12 hours.
1 Press the ON/OFF button for at least 1 second.
The camera turns off.
HINT
To immediately activate the power save mode
- Press the ON/OFF button briefly to activate the power save function.
About the standby mode
- To turn off the camera only briefly, you can close the monitor unit to put the camera in the standby mode. The standby mode uses almost no power. When the monitor unit is opened again, the camera turns on immediately and you are ready to shoot or view images without any delay.
CAUTION
If the ? icon appears...
- When a picture is taken, the date and time it was captured are recorded with it. If the date and time settings have not been completed (page 43), the date and time cannot be recorded with the captured images. For this reason, immediately after the camera is turned on, the "Set date and time" reminder briefly appears, after which the 92 icon is shown on the Recording Screen. To have the date and time recorded with the images, please complete this setting before capturing images.
DATE AND TIME SETTING
The camera will record the date and time an image or audio recording is taken so that you can display them during playback. Therefore, before capturing images, make sure the correct date and time are set.
To correct the date and time setting, please see under HINT on page 45.
Example: To set the clock to 7:30 p.m. on December 24, 2009
1 Turn on the camera (page 40), and press the SET button.
- The Clock Set Screen appears.
- Follow the procedures below to enable or disable the date display during playback, to set the display format for the date, and to set the date and time.
To display the Recording or Playback Screen, press the MENU button 2 times.
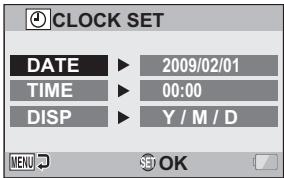
2 Set the date.
① Select“DATE”.
② Press the SET button.
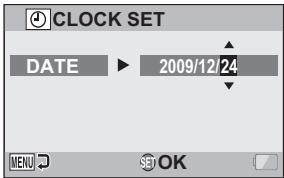
- The Set Date Screen appears.
③ Set the date to "2009/12/24".
-
The date is set in the following order: Set the year → Set the month → Set the day.
-
Toggle the SET button left or right to select year, month or day. Toggle the SET button up or down to increase or decrease the number.
④ Press the SET button.
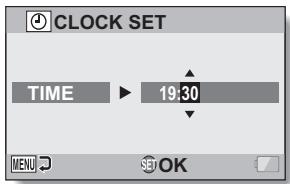
3 Set the clock.
① Select“TIME”.
② Press the SET button.
- The Set Time Screen appears.
③ Set the time to "19:30".
The time is set in the following order: Set the hour → Set the minute.
A 24-hour clock is used for the time display.
④ Press the SET button.
4 Set the order in which the date is displayed during playback.
① Select“DISP”.
② Press the SET button.
- The Set Date Format Screen appears.
③ Toggle the SET button up or down.
- Toggle the SET button up to change the displayed date order as follows:
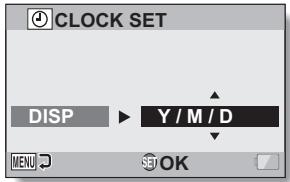

Toggle the SET button down to change it in the reverse order. ④ Press the SET button.
5 Press the MENU button.
- The date and time setting is completed.
- To display the Recording or Playback Screen, press the MENU button.
HINT
- Under normal conditions, while the battery pack is being replaced, an internal battery will maintain the date and time settings. However, there is a small chance the settings may be lost (the backup will last for about 7 days). It is recommended to check that the date and time settings are still correct after replacing the battery pack and before shooting or recording of any type (follow step 1).
To correct the date and time settings
① Turn on the camera.
② Display the Option Setting Menu [1] (page 134).
③ Select "CLOCK SET" and press the SET button.
-
The screen to set the date and time appears.
-
The current date and time settings are shown.
④ Select the line you wish to change, and make the correction.
SWITCHING BETWEEN THE RECORDING MODE AND PLAYBACK MODE
Switch between the recording mode (for recording) and the playback mode (for viewing your recorded images).
1 Turn on the camera (page 40).
2 Set the REC/PLAY switch to the desired mode.
For recording:
Set it to REC.
For playback:
Set it to PLAY.
REC/PLAY button
Recording mode
Playback mode
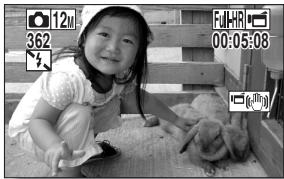
SIMPLE MODE/NORMAL MODE
About the SIMPLE mode and NORMAL mode
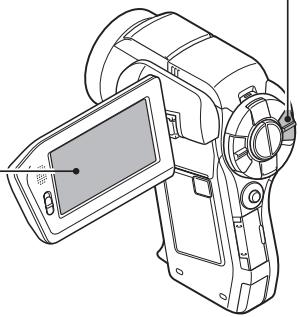
The "SIMPLE mode" comprises only those functions that are most often used and necessary to operate the camera, while the "NORMAL mode" enables full use of all the camera's many functions. Select the mode that is suitable for your purposes.
Switching between the SIMPLE and NORMAL modes
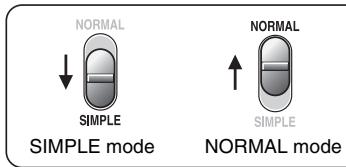
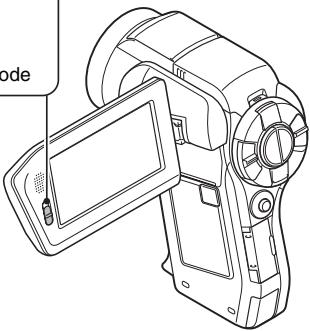
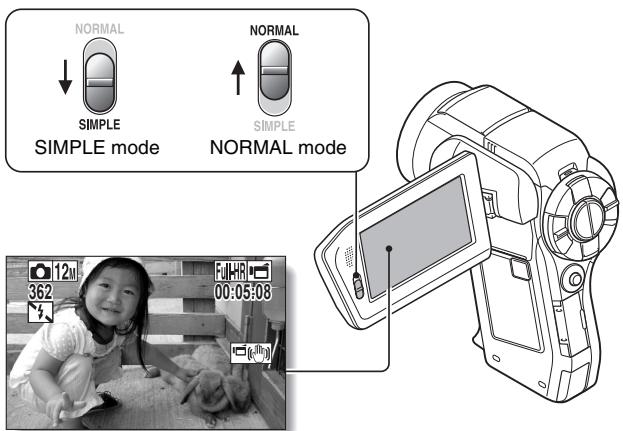
Use the SIMPLE/NORMAL switch, located next to the monitor, to switch between the SIMPLE and NORMAL modes.
1 Set the SIMPLE/NORMAL switch to the desired mode.
SIMPLE mode: Set it to SIMPLE.
NORMAL mode: Set it to NORMAL.
SIMPLE/NORMAL switch
Accessing/exiting the SIMPLE/NORMAL Mode Menu Screen
1 Set the camera to the recording or playback mode.
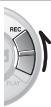
- Use the REC/PLAY switch to select the recording mode or playback mode.
To access the Recording Menu:
Set the switch to REC.
To access the Playback Menu:
Set the switch to PLAY.
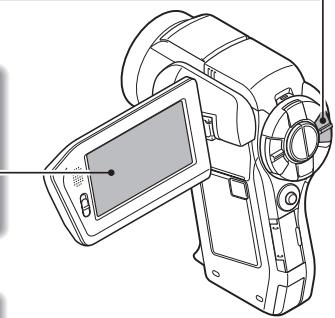
REC/PLAY switch
Recording mode
Playback mode
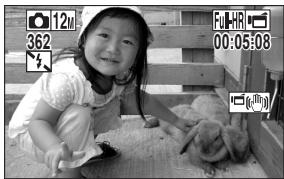


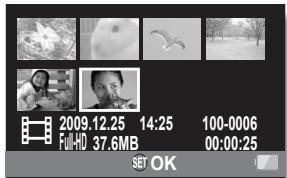
2009.12.25
14:25
100-0006
FullHR 37.6MB

00:00:25


Set the camera to the SIMPLE mode or NORMAL mode.
- Use the SIMPLE/NORMAL switch to select the desired mode.
To select the SIMPLE mode:
Set the switch to SIMPLE.
To select the NORMAL mode:
Set the switch to NORMAL.
SIMPLE/NORMAL switch
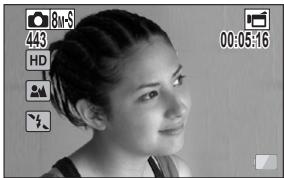
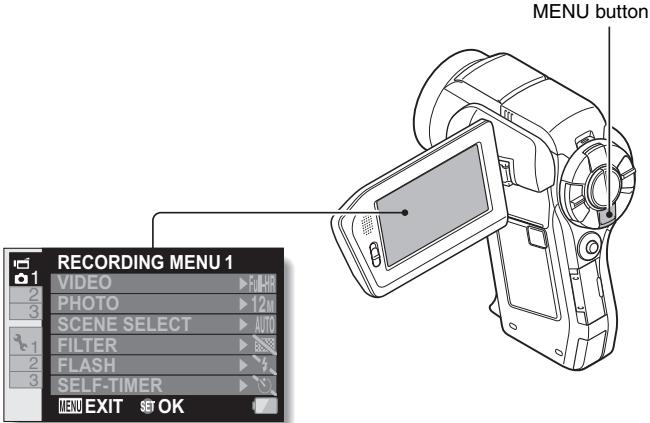
3 Press the MENU button.
- The Menu Screen for the mode you selected in steps 1 and 2 appears on the monitor.
Display the SIMPLE Mode Setting Menu → go to page 52, step 4. Display the NORMAL Mode Setting Menu → go to page 53, step 4.
- To cancel the Menu Screen, press the MENU button.
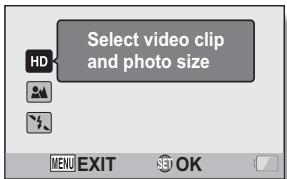
To access the SIMPLE Mode Setting Menu Screen
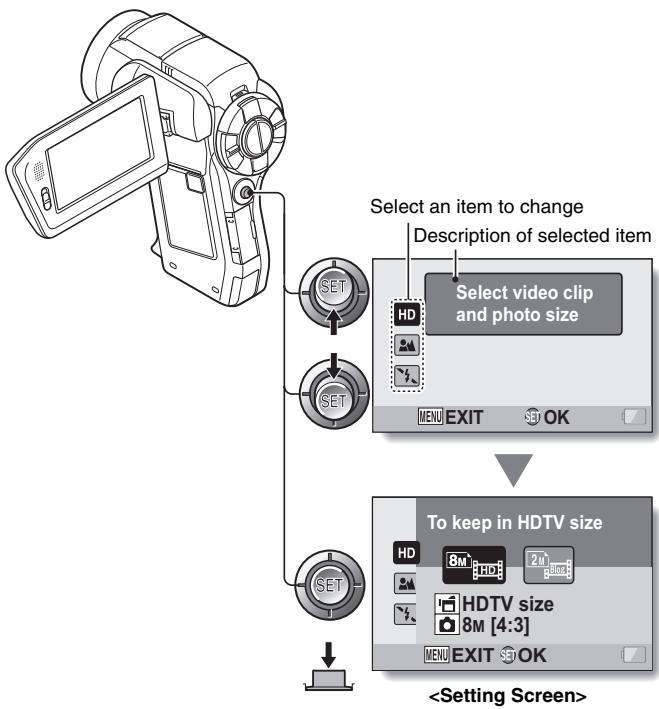
4 Toggle the SET button up or down to select the item you wish to change, and press the SET button.
- The Setting Screen for the selected item appears.
SIMPLE MODE/NORMAL MODE
To access a NORMAL Mode Setting Menu
4 Toggle the SET button up or down to select a tab.
- The Menu Screen for the selected tab appears.
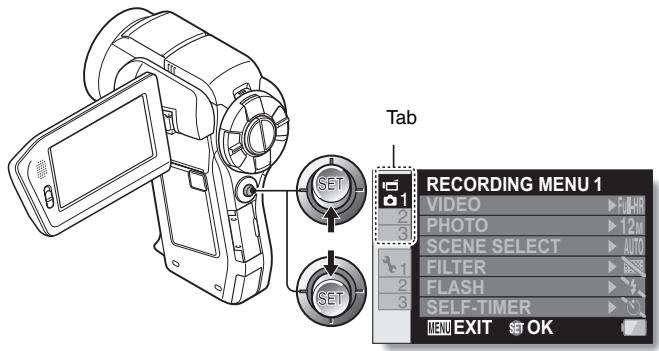
5 Toggle the SET button to the right.
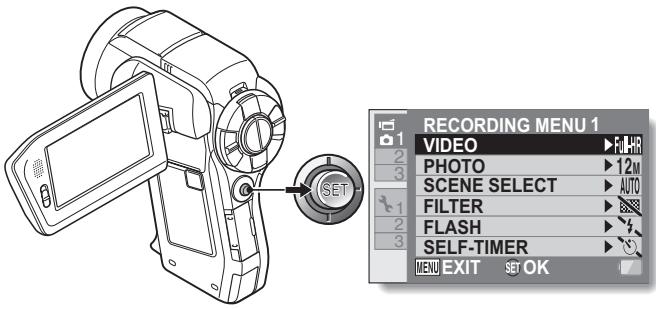
6 Toggle the SET button up or down to select the item you wish to change, and press the SET button.
- The Setting Screen for the selected item appears.
- To return to the Menu Screen, press the MENU button.
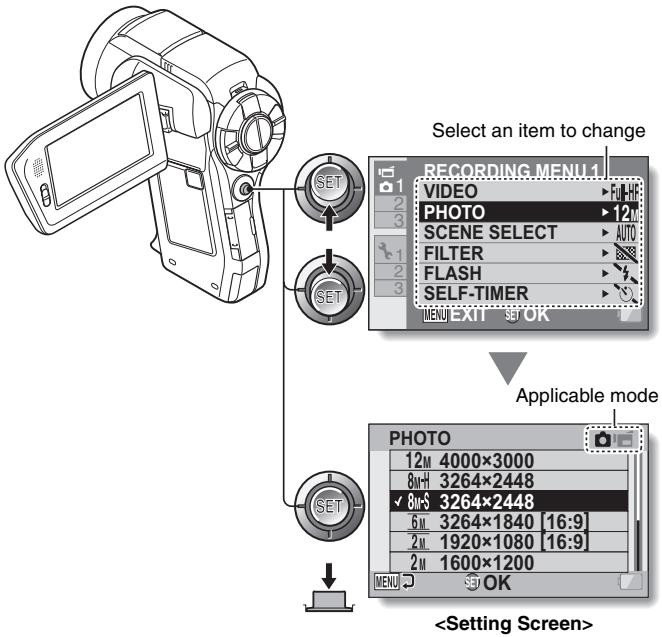
HINT
About the applicable mode indicator
- This indicator shows the shooting mode(s) for which the selected setting is effective.
: This setting is effective during still image shooting.
: This setting is effective during video clip recording.
: This setting is effective during still image shooting and video clip recording.
Overview of the SIMPLE Mode Setting Screen
SIMPLE Mode Recording Menu
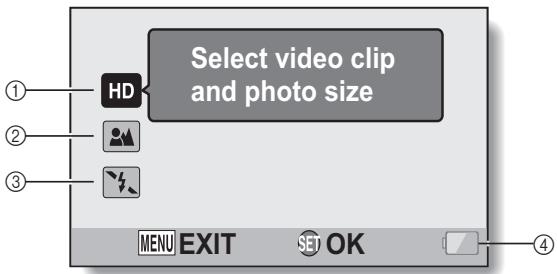
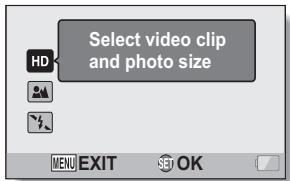
① Recording size (page 71)
- Select the video clip size to record.


The video clip size is 1920 × 1080 pixels, recorded at 60 fields/sec. The captured still image size is 3264 × 2448 (4:3) pixels.


The video clip size is 640 × 480 pixels, recorded at 30 frames/sec. The captured still image size is 1600 × 1200 (4:3) pixels.
② Focus range (page 72)
- Select the focus range that corresponds to the distance to the subject.

: The camera automatically focuses on the subject within a range of 50 cm (19.69 in.) to infinity (normal).

: The camera focuses on a subject within a range of 1 cm (0.39 in.) to 1 m (3.28 ft.) (super macro).
③ Flash (page 77)
- Specify how the flash will operate.
A: The camera detects the subject brightness and uses the flash only when necessary.
: The flash operates with every image captured regardless of the conditions.
: The flash does not operate even in dark situations.
: The camera detects the subject brightness and uses the flash only when required. At this time the flash operates in a manner that reduces the red reflection ("red-eye") in the subject's eyes.
④ Remaining battery power indication (page 155)
SIMPLE MODE/NORMAL MODE
SIMPLE Mode Playback Menu
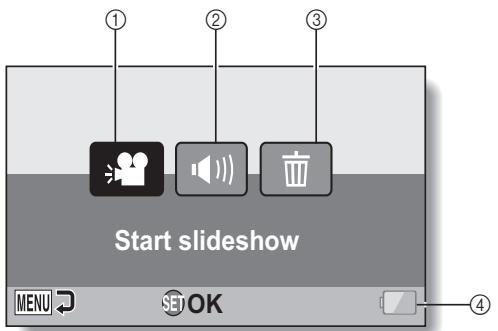
① Slideshow (page 88)
- Specify the slideshow settings and play the slideshow.
②Playback volume (page 89)
- Adjust the volume for video clip and audio file playback.
③ Delete (page 90)
- Delete files.
④ Remaining battery power indication (page 155)
Overview of the NORMAL Mode Setting Screen
NORMAL Mode Recording Menu
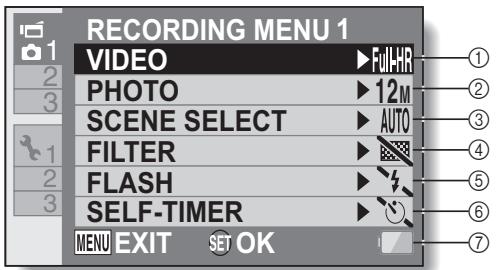
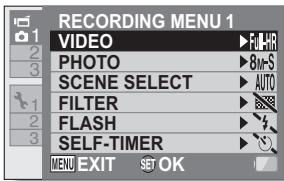
① Video clip settings (page 96)
FuhH: Record at 1920× 1080 pixels, 60 fps (60p).
FuhD: Record at 1920× 1080 pixels, 60 fields/s (60i).
F: Record at 1920× 1080 pixels,30 fps (30p).
Record at 1280 x 720 pixels, 30 fps (30p).
TSH: Record at 640× 480 pixels, 30 fps (30p).
Record at 448× 336 pixels, 240 fps (High-speed recording).
Record at 192× 108 pixels, 600 fps (High-speed recording).
:Make an audio recording.
② Still image settings (page 100)
12M]: Image size is 4000× 3000 pixels.
8mH: Image size is 3264× 2448 pixels (low compression).
[MR5]: Image size is 3264 × 2448 pixels (normal compression).
SM: Image size is 3264× 1840 pixels (16:9 aspect ratio).
2M: Image size is 1920 × 1080 pixels (16:9 aspect ratio).
2M : Image size is 1600× 1200 pixels.
Image size is 1280 × 720 pixels (16:9 aspect ratio).
03M: Image size is 640 × 480 pixels.
3264 × 2448-pixel sequential shots.
4: 2288× 1712 -pixel sequential shots.
③ Scene select (page 101)
AUTO: Full auto setting
Sports mode
: Portrait mode
: Landscape mode
: Night view portrait mode
: Snow & beach mode
:Fireworks mode
Lamp mode
④ Filter (page 101)
No filter
: Cosmetic filter
D:Monochrome filter
A: Sepia filter
⑤ Flash
[4A]: The camera will detect the subject brightness and use the flash only when necessary.
: The flash will operate with every image captured regardless of the conditions.
: The flash will not operate even in dark situations.
: The camera will detect the subject brightness and use the flash only when required. At this time the flash will operate in a manner that reduces the red reflection ("red-eye") in the subject's eyes.
6 Self-timer (page 102)
: Self-timer is off.
2 : Shooting begins 2 seconds after the [ ] or [ ] button is pressed.
10: Shooting begins 10 seconds after the [ ] or [ ] button is pressed.
⑦ Remaining battery power indication (page 155)
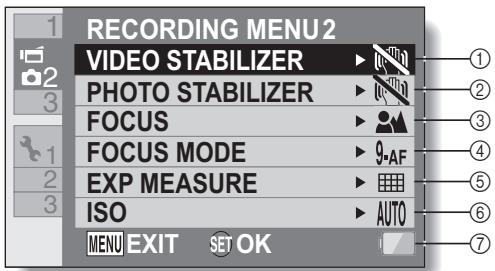
① Video stabilizer (page 103)
Compensate for camera shake during video clip recording.
: Record with image stabilizer on.
N: Record without image stabilizer.
② Photo stabilizer (page 103)
Compensate for camera shake during still image shooting.
: Shoot with image stabilizer on.
N: Shoot without image stabilizer.
③ Focus range (page 104)
- Select the focus range that corresponds to the distance to the subject.
: The camera automatically focuses on the subject with a range of 50 cm (19.69 in.) to infinity (normal).
MF: The focus can be set manually.
: The camera focuses on the subject within a range of 1 cm (0.39 in.) to 1 m (3.28 ft.) (super macro).
④ Focus area (page 105)
9-AF: 9-point range finder focus
- A F : Spot focus
⑤ Light-measuring mode (page 105)
Multi-section light measuring
: Center-weighted light measuring
: Spot light-measuring
⑥ ISO sensitivity (page 106)
AUTO: Sensitivity is set automatically (video clip recording: ISO 50 to 800; still image shooting: ISO 50 to 200)
50: Sets sensitivity to ISO 50
100: Sets sensitivity to ISO 100
200: Sets sensitivity to ISO 200
400: Sets sensitivity to ISO 400
800: Sets sensitivity to ISO 800
1600: Sets sensitivity to ISO 1600
3200: Sets sensitivity to ISO 3200 (video clip recording: ISO 1600)
- The indicated ISO value is the standard output sensitivity.
⑦ Remaining battery power indication (page 155)
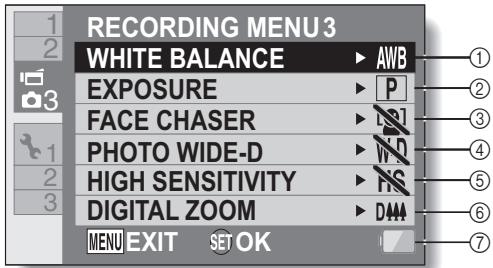
① White balance (page 107)
AWB: White balance is automatically adjusted depending on the ambient lighting (auto).
For shooting in sunny conditions (fair).
For shooting in overcast conditions (cloudy).
: For shooting under fluorescent lighting (fluorescent).
For shooting under incandescent lighting (incandescent).
For setting the most accurate white balance (one push).
② Exposure (page 108)
P: The exposure is set automatically.
S: Set the shutter speed manually.
A: Set the aperture manually.
M: Set the aperture and shutter speed manually.
③ Face chaser (page 109)
W-D: Enable wide D-range shooting.
N: Disable wide D-range shooting.
⑤ High sensitivity mode (page 111)
HS: Increased sensitivity.
NS: Normal sensitivity.
⑥ Digital zoom (page 111)
D44: Enable the digital zoom.
: Disable the digital zoom.
⑦ Remaining battery power indication (page 155)
SIMPLE MODE/NORMAL MODE
NORMAL Mode Playback Menu
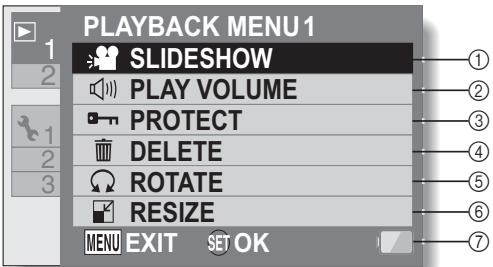
① Slideshow (page 114)
- Specify the slideshow settings and play the slideshow.
②Playback volume (page 89)
- Adjust the volume for video clip and audio file playback.
③ Protect (page 115)
- File protect setting (delete prohibited)
④ Delete (page 90)
- Delete files.
⑤ Rotate (page 117)
- Rotate a still image.
⑥ Resize (page 117)
- Reduce the resolution of a still image.
⑦ Remaining battery power indication (page 155)
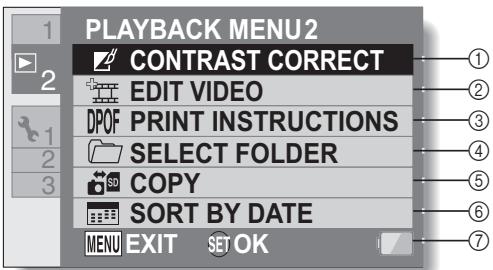
① Contrast correction (page 118)
- Correct the contrast in the image.
② Video clip edit (page 119)
- Edit video clips.
③ Printing instructions (page 129)
- Specify the printing instructions (DPOF settings).
④ Select folder (page 94)
- Select a folder to play back.
⑤ Copy
- Copy files from/to the card to/from the Xacti Library (displayed only when Xacti Library is used).
⑥ Sort by date
- Create dated folders and sort the files in one roll by date (displayed only when Xacti Library is used).
⑦ Remaining battery power indication (page 155)
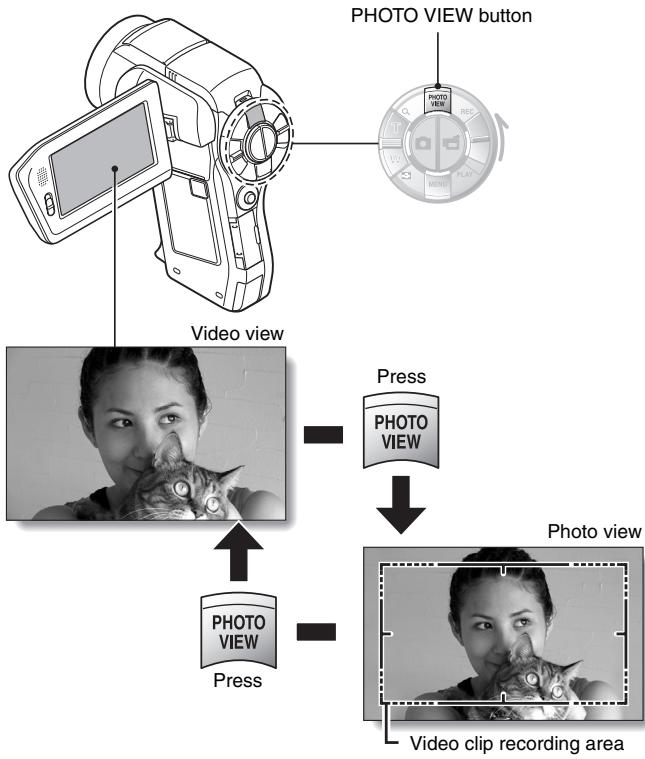
FIELD OF VIEW
You can select whether to display either the Photo View Recording Screen or the Video View Recording Screen. The field of view is easier to see when the Recording Screen for the specific recording mode is selected.
- The PHOTO VIEW button is disabled when the camera is connected to a TV.
BEFORE TAKING PICTURES
For best results
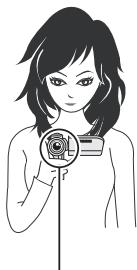
Hold the camera securely, keeping your elbows close to your body and making sure the camera is stable.
Correct hold
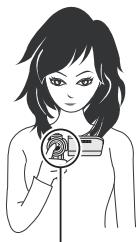
Incorrect hold
A finger is blocking the lens or flash.

Example 1: Grip the camera by wrapping the fingers of the right hand, from the little finger to the middle finger, around the camera, and hook the index finger above the lens.
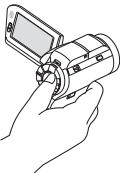
Example 2: Grip the camera by wrapping the fingers of the right hand, from the little finger to the index finger, around the camera.
Make sure that the lens and flash are not blocked by your fingers or the handstrap.
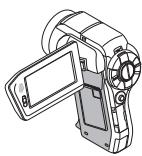
- Due to the characteristics of the camera, the outer surface may become warm during use, but this does not indicate a malfunction. (In particular, the area indicated by gray in the figure may become hot.)
- If the camera starts to feel uncomfortably hot during use, you might temporarily discontinue use until it cools down, or try holding it in your other hand for a while.
Please use a tripod or other support when using the camera for a long time.
Using the autofocus
The autofocus will work in almost all situations; however, there are certain conditions that may cause the autofocus function to not work properly. If the autofocus function is not working properly, set the focus range to capture images (page 72).
Conditions that may cause incorrect focus
The following examples are some of the situations where the autofocus function may not work.
- Subjects with low contrast, very bright subjects at the center of the image or dark subjects or locations Use the focus-lock function to lock the focus on an object with contrast at the same distance as the desired subject.
- Subjects without vertical lines
Use the focus-lock function to lock the focus while framing the subject vertically, then re-orient the camera to compose a horizontally framed image.
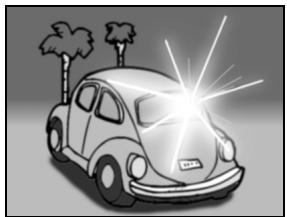
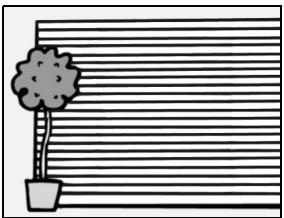
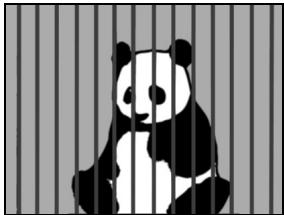
The following examples are some of the situations where the autofocus function may work, but not as desired.
- When both near and far objects are present
Use the focus-lock function to lock the focus on an object at the same distance as the desired subject, then reposition the camera to compose the picture.
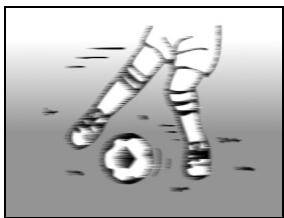
- Fast-moving subjects
Use the focus-lock function to lock the focus on an object at the same distance as the desired subject, then reposition the camera to compose the picture.
HINT
- Still images can be rotated when they are played back (pages 65 and 117).
- When the [ ] button is pressed halfway, the image in the monitor may waver vertically. This is the result of internal image processing and is not a malfunction. This wavering is not recorded and will not affect your images in any way.
- When the optical zoom is used or when the autofocus is operating, the image may appear to waver, but this is not a malfunction.
Select the recording size
The larger the image size (number of pixels), the better the image quality will be, but the file size will also be larger. Select the image quality that is correct for the intended purpose.
1 Display the SIMPLE Mode Recording Menu (page 49), select the recording size setting, and press the SET button.
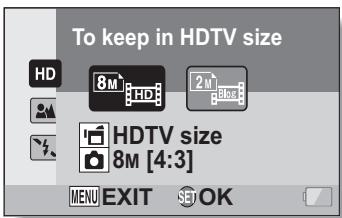
: The video clip size is 1920× 1080 pixels, recorded at 60 fields/sec. The captured still image size is 3264× 2448 (4:3) pixels.
The video clip size is 640 × 480 pixels, recorded at 30 frames/sec. The captured still image size is 1600 × 1200 (4:3) pixels.
2 Select the desired video clip recording size, and press the SET button.
- This completes the recording size setting.
Select the focus setting
Select the focus range corresponding to the distance between the camera and the subject.
1 Display the SIMPLE Mode Recording Menu (page 49), select the focus setting, and press the SET button.
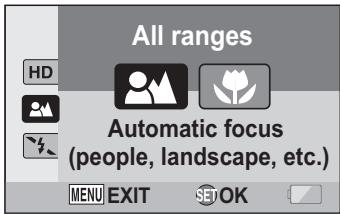
: The camera automatically focuses on the subject within a range of 50 cm (19.69 in.) to infinity (normal).
: The camera focuses on a subject within a range of 1 cm (0.39 in.) to 1.0m (3.28 ft.) (super macro).
2 Select the desired focus range, and press the SET button.
- This completes the focus range setting.
Hints for taking pictures
Muting the operation sounds
- The audio guidance that sounds when you operate the camera can be muted (page 136).
Where are the image and audio files saved?
- All the image and sound files are recorded on the card installed in the camera.
Taking pictures in backlight conditions...
- When taking pictures with the light coming from behind the subject, due to the characteristics of the lens, ghost patterns (flare phenomenon) may appear in the captured image. In this situation, it is recommended that you avoid taking pictures with the subject lit from behind.
While the image files are being recorded...
- While the multi-indicator is flashing red, the image files are being written to the memory, during which time it is not possible to capture another image. Another image can be captured after the flashing red indicator turns off. However, even when the multi-indicator is flashing red, depending on the camera's internal memory remaining capacity, in some cases the next image can be captured about 2 seconds after shooting.
Checking the last image shot (instant review)
- After shooting a picture, you can immediately view it by pressing the SET button once.
- During instant review of a video clip, normal play, fast reverse play, reverse frame-by-frame play and pause are available (page 85).
- If you wish to delete the image (for a video clip, it must be in the pause or stop mode), toggle the SET button up to access the delete function.
- You can view other images while the instant review display is showing by toggling the SET button to the left or right.
- Cancel the instant review display by toggling the SET button down.
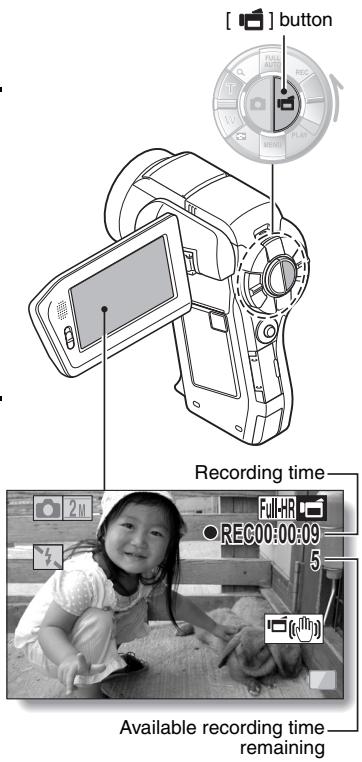
1 Turn on the camera (page 40), and set it to the recording mode (page 46).
2 Press the [ ] button.
- Recording begins.
- It is not necessary to keep the [ ] button pressed while recording.
- When the remaining recording time available for the currently recording clip becomes little, a countdown of the remaining recording time appears on the display.
3 End the recording.
- Press the [ ] button again to stop recording.
SHOOTING SINGLE SHOTS
Capture a still image (single-shot).
1 Turn on the camera (page 40), and set it to the recording mode (page 46).
2 Press the [ ] button.
① Press the [ ] button halfway.
- The autofocus operates, and the image is focused (focus lock).
② Continue to gently press the [ ] button all the way.
- The shutter releases and the image is captured.
- You can view the captured image on the monitor by keeping the [ ] button depressed when you capture the image.
① ②
![SANYO VPC-HD2000EX - Press the [ ] button. - 1](/content/2025/01/96660/images/be8e7b3e2ee886341293ac2323106020cba875afe296ff1abd143c4aa60bc59e.jpg)
![SANYO VPC-HD2000EX - Press the [ ] button. - 2](/content/2025/01/96660/images/43d7464976cd20306c5833800ab33eeb6056a081bcdc0c86756e862a12882383.jpg)
![SANYO VPC-HD2000EX - Press the [ ] button. - 3](/content/2025/01/96660/images/9773d3d30ef120864727cf3ff0fd74250df6f391b0d78fc9b246bcfe69779a35.jpg)
[] button
![SANYO VPC-HD2000EX - Press the [ ] button. - 4](/content/2025/01/96660/images/9786eb92bff4df5223fbf902dd05e5f021e8105322bdbd33a3214fda266e6aae.jpg)
Target mark
HINT
Adjusting the monitor brightness
- While the Recording Screen is active, you can quickly access the screen for adjusting the brightness of the monitor by pressing the MENU button for at least 1 second.
What is the camera focusing on?
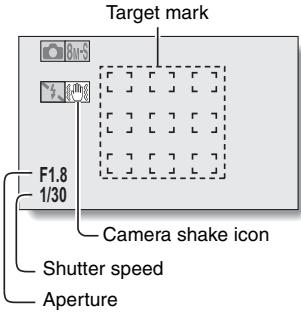
- A target mark on the monitor shows the area the camera is focusing on.
- The camera automatically determines the correct focus by measuring from 9 different focus points within the shooting area. If the target mark is at a position that is different from the point you wish to focus on, you can refocus, for example, by changing the shooting angle.
- The large target mark appears when the camera focuses on a wide area in the center of the screen.
The focus and exposure can be locked (in the NORMAL mode)
- By assigning an operation shortcut to the SET button (pages 138 and 142), you can set the autofocus or the exposure to a fixed setting. When the exposure setting is fixed, the AFO icon appears on the monitor; when the autofocus setting is fixed, the AFO icon appears on the monitor.
- When the focus range (pages 60 and 101) setting or scene select setting is changed, the focus lock is released.
The shutter speed and aperture are displayed (in the NORMAL mode)
- The shutter speed and aperture settings are shown on the Recording Screen. You can use them as a reference when shooting.
If the camera shake icon appears... (in the NORMAL mode)
- During still image shooting, if the shutter speed is slow and the possibility that the image may be blurred due to camera shake becomes high, the camera shake icon may appear on the monitor. In this case, use a tripod to stabilize the camera when shooting, or set the flash operation mode to automatic (pages 60 and 77).
- When shooting with the scene select function set to the fireworks mode, the camera shake icon always appears, but this is normal.
Using the flash
The flash is not only used for photographing under dark conditions, but is also convenient for example when the subject is in shadow or lit from behind. Your camera is equipped with four flash modes: red-eye reduction, auto flash, forced flash, and no flash. Select the flash mode that is suitable for the shooting conditions. The flash is available only when shooting single-shot still images.
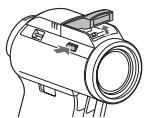
1 Press the 5 button to open the flash unit.
- The flash unit opens.
2 Display the SIMPLE Mode Recording Menu (page 49), select the flash setting, and press the SET button.
- The screen to select the flash operation appears.
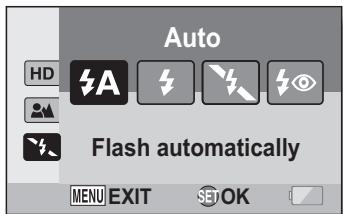
A: The camera detects the subject brightness and uses the flash only when necessary.
: The flash operates with every image captured regardless of the conditions.
: The flash does not operate even in dark situations.
: The camera detects the subject brightness and uses the flash only when required. At this time the flash operates in a manner that reduces the red reflection ("red-eye") in the subject's eyes.
3 Select the desired flash operation, and press the SET button.
- This completes the flash operation setting.
4 Press the [ ] button to take the picture.
CAUTION
Do not touch the flash unit when shooting
- The flash unit becomes very hot and may cause a burn. Avoid touching the flash unit when shooting.
HINT
- The flash cannot be used during video clip recording.
- By assigning an operation shortcut to the SET button (pages 138 and 142), you can change the flash mode from the Recording Screen (in the NORMAL mode).
SHOOT A STILL IMAGE WHILE RECORDING A VIDEO CLIP
You can capture a still image (a single-shot) while recording a video clip.
1 Turn on the camera (page 40), and set it to the recording mode (page 46).
2 Press the [ ] button.
3 When you see a scene you'd like to capture as a still image, press the [ ] button.
4 Press the [ ] button to end the video clip recording.

HINT
- When shooting a still image while recording a video clip, the flash does not operate.
- The photo stabilizer (pages 62 and 103) is inoperative.
- When the remaining video recording time becomes approximately 50 seconds, it will no longer be possible to capture a still image while recording a video clip. The exact remaining recording time at which this occurs will differ depending on the subject and on the recording size (page 71), as well as on the video clip recording mode (page 96). If you intend to capture a still image while recording a video clip, it is suggested that you take note of the remaining video recording time.
About the recording size of still images
- The size of a still image captured during video clip recording depends on the video clip recording size.
| Video clip recording size setting | Still image recording size |
| FullHR FullHD FullSH | 2M (16:9) |
| HD SHO | TSh (16:9) |
| TV SHO | 0.3M (4:3) |
- It is not possible to capture a still image while recording a video clip at a high recording speed (WHR, WHR).
It is not possible to capture sequential shots.
MACRO-PHOTOGRAPHY (ZOOM)
Your camera has two zoom functions: optical zoom and digital zoom.
1 Point the camera lens at the subject.
2 Push the zoom switch toward [T / ] or [W / 日 ] to compose the desired image.
[T/ ]: Zoom in on the subject.
[W/ ]: Zoom out.
- When the zoom switch is pushed, the zoom bar appears on the monitor.
- When moving the optical zoom, push the zoom switch lightly to zoom slowly, and press more strongly to zoom quickly.
- When the optical zoom factor is at maximum, zooming stops temporarily. When the zoom switch is pushed toward the [T / ] side again, the mode changes to the digital zoom mode and zooming continues.
3 Take the picture.
For video clip recording, see page 74.
For shooting single shots, see page 75.
For shooting sequential shots, see page 100.
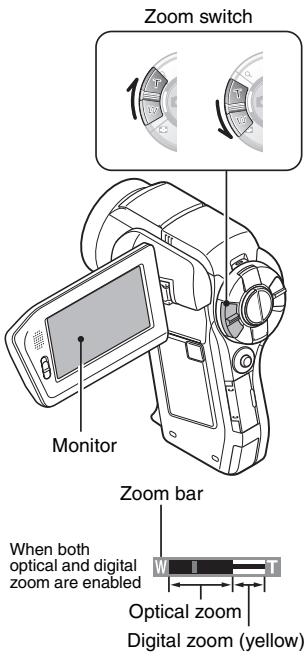
When optical zoom only is enabled
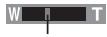
Pointer
HINT
About the "16x Advanced Zoom"
- During video clip recording, the "16x Advanced Zoom" function makes it possible to electronically magnify the image with no image degradation, and increase the magnification to a maximum 16x.
SHOOTING AND PLAYBACK WITH THE REMOTE CONTROL UNIT
The remote control sensor on your camera makes it possible to capture images and play them back using the supplied remote control unit.
1 Prepare the remote control unit (page 30).
2 Turn the camera on, and set the REC/PLAY switch to REC or PLAY.
- Set the REC/PLAY switch to REC for shooting, or to PLAY for playback.
3 Aim the remote control unit at the camera's remote control sensor.
- Open the monitor unit.
4 Press the buttons on the remote control unit to operate the camera.
PLAYING BACK VIDEO CLIPS AND STILL IMAGES
1 Set the REC/PLAY switch to PLAY.
2 Select the image to play back.
- Toggle the SET button left, right, up or down to move the orange frame to the file you wish to play back.
- The image information for the framed image is shown at the bottom of the screen.
3 Press the SET button.
- Playback begins.
During still image playback: Toggle the SET button down. During video clip playback: Toggle the SET button down once to stop video clip playback and toggle the SET button down again.
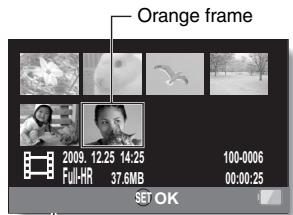
PLAYING BACK VIDEO CLIPS AND STILL IMAGES
Video clip playback operation
| To do this... | Do this | |
| Normal forward playback | Press the SET button. | |
| Stop playback | During playback, toggle the SET button down. | |
| Pause | During playback, press the SET button or toggle the SET button up. During accelerated playback, toggle the SET button up. | |
| To play back one image at a time (single-frame step) | During forward playback | After pausing playback, toggle the SET button to the right. |
| During reverse playback | After pausing playback, toggle the SET button to the left. | |
| Slow playback | During forward playback | After pausing playback, press and hold the SET button to the right. |
| During reverse playback | After pausing playback, press and hold the SET button to the left. | |
| To accelerate playback | Forward playback | During forward playback, toggle the SET button to the right. • The playback speed changes each time the SET button is toggled to the right, as follows: Normal playback → 2× → 5× → 10× → 15× Toggle the SET button to the left to resume normal playback speed. |
| Reverse playback | During forward playback, toggle the SET button to the left. • The playback speed changes each time the SET button is toggled to the left, as follows: 15× ← 10× ← 5× Toggle the SET button to the right to resume normal playback speed. | |
| Return to normal playback speed | Press the SET button. | |
| Adjusting the volume | Louder: During playback, push the zoom switch toward the [T] side. Softer: During playback, push the zoom switch toward the [W] side. | |
HINT
If the # # # appears on the playback Screen...
- The icon appears when playing back a file that was saved in segments (page 98). Although playback of these multiple files is continuous, there is a slight pause at the point where the files are joined.
PLAYING BACK VIDEO CLIPS AND STILL IMAGES
How to save one frame from a video clip as a still image
1 Play back the video clip. Pause the playback at the point you wish to "snap" a photo.
2 Press the [ ] button.
- The screen to select the aspect ratio of the still image appears. Select the desired aspect ratio, and press the [ ] button. Note, however, that if the video clip aspect ratio is 4:3, you cannot select 16:9.
- It is not possible to save a frame from a video clip that was recorded in the mode.
HINT
The file for a video clip is very large
- Therefore, be aware that if the video clip is uploaded to a computer to be played back, the computer may not be able to play back the video fast enough, making it appear jerky. (The video will always be displayed properly on the camera monitor or a television.)
- Depending on the card, shooting may end even before the possible shooting time indicated.
Display the video clip playback point
- During video clip playback, press the MENU button for at least 1 second to display a bar showing the current playback point in the video clip.
- Press the MENU button for about 1 second to cancel the bar.
CAUTION
During video clip playback, the sound of a motor is audible...
- During recording, the sound of the optical zoom movement or autofocus movement was recorded. This is not a malfunction.
If no audio is heard...
- The audio is not played back when the video clip is played back in the frame-by-frame, fast playback or reverse playback mode.
SLIDESHOW PLAYBACK
You can play back files in succession with the "slideshow playback" feature.
1
Display the SIMPLE Mode
Playback Menu (page 49), select the slideshow setting, and press the SET button.
:Play back all files.
: Play back video clips and audio files.
: Play back still image files.
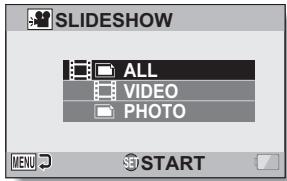
2
Select the type of file to play back, and press the SET button.
- Slideshow playback begins.
- To stop slideshow playback, press the SET button or MENU button.
HINT
About the slideshow settings
- The slideshow settings can be changed from the NORMAL Mode Playback Menu (page 114).
PLAYBACK VOLUME
Adjust the playback volume for video clips and audio files.
1 Display the SIMPLE Mode Playback Menu (page 49), select the playback volume setting, and press the SET button.
- The volume control bar appears.
2 Toggle the SET button to the left or right to set the volume, and press the SET button.
- The playback volume is set, and the display returns to the SIMPLE Mode Playback Menu.
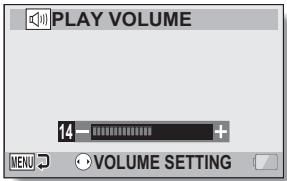
HINT
The volume can be adjusted during playback
- During video clip or audio file playback, if you push the zoom switch toward [T / ] or [W / ] , the volume control bar will appear, allowing you to adjust the volume.
In the NORMAL mode
- When you select "PLAY VOLUME" from the NORMAL Mode Playback Menu and press the SET button, the volume control bar appears.
DELETING FILES
You can delete files if you no longer need them. You can delete single files, selected files or all the files at one time.
Delete single/delete all
1
Display the SIMPLE Mode
Playback Menu (page 49), select the delete setting, and press the SET button.
DELETE SINGLE:
Removes one file at a time.
DELETE SELECTED: deletes the selected fi (page 91).
DELETE ALL:
Deletes all files.
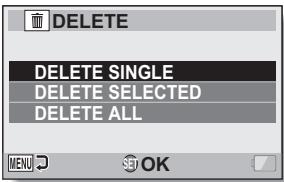
2
Select the desired delete mode, and press the SET button.
- The Delete Confirmation Screen appears.
- Toggle the SET button to the left or right to select the file you wish to delete.
- There is no confirmation screen when deleting single files. Please make sure that the displayed image is one you wish to delete.
- Toggle the SET button to the left or right to confirm the files to delete.
3 Select "DELETE", and press the SET button.
- The currently displayed file is deleted.
- To delete other files, select the files, select "DELETE" and press the SET button.
- The Delete Confirmation Screen again appears. To delete the files, select "YES", and press the SET button. When file delete is completed, "No image" is shown.
Delete selected
Delete selected files.
1 Display the SIMPLE Mode Playback Menu (page 49), select the delete setting, and press the SET button.
2 Select "DELETE SELECTED", and press the SET button.
- The screen to select files to delete appears.
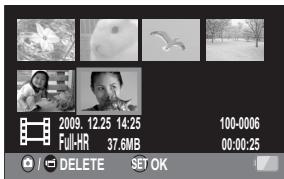
3 Select an image you wish to delete.
- Toggle the SET button left, right, up or down to move the orange frame to the file you wish to delete.
4 Press the SET button.
- The selected file is marked with the delete icon [ ]
- Up to 100 files can be selected.
- To cancel a delete selection and remove the delete icon from a file, move the orange frame to the marked file and press the SET button.
5 Press the [a] button.
- The Confirm Delete Screen appears.
6 Select "YES", and press the SET button.
- The selected files are deleted.
HINT In the NORMAL mode
- When you select "DELETE" from the NORMAL Mode Playback Menu and press the SET button, the Delete Screen appears.
CAUTION
- Files that are protected from accidental delete cannot be deleted. To delete protected files, set the protect setting for the files to off (pages 65 and 115), and then follow the file delete procedure.
21-image display playback
1 Display the image you wish to play back.
2 Push the zoom switch toward the [W] side.
- The 21-image display appears.
3 Select the image to play back.
- Toggle the SET button up, down, left or right to move the orange frame to the desired image, and press the SET button.
Instead of pressing the SET button, you can push the zoom switch toward the [T / ] side to show the 8-image display. - If the zoom switch is pushed toward the [W] side while the 21-image display is shown, the display changes to the screen to select the playback folder (page 94).
It is not possible to perform the file delete or file protect settings on the 21-image display.
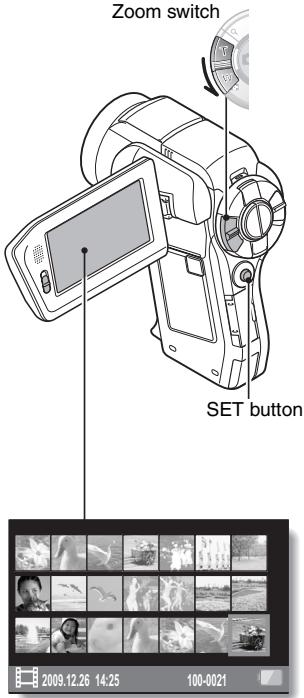
Selecting the playback folder
If the card contains multiple folders, you can select from which folder you would like to play back.
1 Display the Playback Screen.
2 Push the zoom switch toward the [W] side twice.
- The screen to select the playback folder appears.
- If the zoom switch is pushed toward the [T / ] side, the camera changes to the 21-image display (page 93).
![SANYO VPC-HD2000EX - Push the zoom switch toward the [W] side twice. - 1](/content/2025/01/96660/images/704a595370c4c98d509e3f9c5a843a85a7f55ee8cc3a7c1d736dc8c7149f06c4.jpg)
3 Toggle the SET button up or down to move the orange frame to the desired folder, and press the SET button.
- The files in the selected folder are displayed in the Playback Screen.
HINT
In the NORMAL mode
- When you select "SELECT FOLDER" from the NORMAL Mode Playback Menu and press the SET button, the screen to select the playback folder appears.
Magnifying (zooming in) the image
1 Display the image that you want to magnify.
- For a video clip, pause playback at the place you want to magnify.
2 Push the zoom switch toward the [T / O ] side once.
- Magnification is enabled.
- The image is magnified, and the central portion of image is displayed.
- Toggle the SET button to view different parts of the magnified image.
To magnify:
Magnification increases each time the zoom switch is pushed toward the [T / ] side.
To return to normal size:
Magnification decreases each time the zoom switch is pushed toward the [W] side.
- Press the SET button to return to the normal (100%) view.
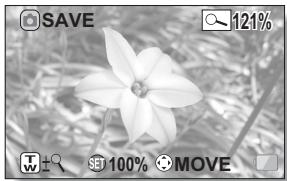
HINT The magnified portion of the image can be saved as a separate image
- Press the [ ] button. The magnified portion is saved as a new still image.
RECORDING MENU 1
Video setting
You can record video clips in either the HD mode (16:9 horizontal to vertical aspect ratio) or the SD mode (4:3 aspect ratio). In addition, the higher the frame rate number, the smoother playback will be. However, as with the recording size, the file size is also proportionately larger, using up more memory. This menu is also used when making audio recordings.
CAUTION
When editing video clips...
- In order for video clips to be joined, they must have been photographed in the same mode.
- Video clips that were photographed in different modes cannot be joined.
Restrictions when or is set
- When the camera is connected to a TV, the image is shown on the camera monitor in the recording mode, and on the TV in the playback mode.
- When the [ ] button is pressed, a video clip is recorded for about 10 seconds. Recording is discontinued when the [ ] button is pressed again.
- The following recording functions are not available.
Capturing a still image during video clip recording
Zoom
Image stabilizer
Scene select (fixed at AUTO)
Manual exposure
Face chaser recording
High sensitivity mode recording
Photo wide-D range recording
Noise reduction
- You cannot record when the possible recording time is less than about 12 seconds.
- If the AE lock setting is active, it is canceled when the or setting is set.
RECORDING MENU 1
Audio recording
Audio recording
1 Select , and press the SET button.
- The audio recording mode is enabled.
- The menu display is canceled if the MENU button is pressed.
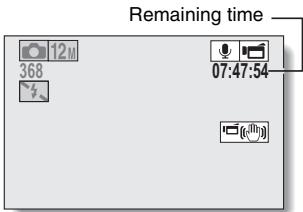
2 Press the [ ] button.
Audio recording begins. During recording, appears in the monitor. It is not necessary to continue pressing the [ ] button while recording.
![SANYO VPC-HD2000EX - Press the [ ] button. - 1](/content/2025/01/96660/images/99485d4a1a5dc79e2a1ce080fad79acf96b4315e79982cef9e04f9c41f1e931c.jpg)
3 End the recording.
- Press the [ ] button again to stop recording.
HINT
You can capture a still image during an audio recording
- Press the [ ] button during audio recording to capture a 0.3M still image. About files saved in segments
- If the continuous recording time of a voice memo exceeds about 13 hours, the recorded file is saved once, and the recording continues in a new file. When recording a video clip whose file size exceeds 4 GB, the recorded file is saved once, and the recording continues in a new file. (These 4 GB segments are automatically created. The recording session continues until you stop recording, but video clip or voice memo recording is temporarily interrupted while the file is being saved.)
Audio playback
1 Select an audio file, and press the SET button. Playback begins.
RECORDING MENU 1
| To do this... | Do this | |
| Normal playback | Start playback | Press the SET button. |
| Pause | Press the SET button. Toggle the SET button up. | |
| Stop playback | Toggle the SET button down. | |
| Fast forward/ fast reverse | Fast forward | During playback, toggle the SET button to the right. Each time the SET button is toggled to the right, the speed increases. If the SET button is toggled to the left during fast forward, the speed decreases. |
| Fast reverse | During playback, toggle the SET button to the left. Each time the SET button is toggled to the left, the speed increases. If the SET button is toggled to the right during fast reverse, the speed decreases. | |
| Pause | Toggle the SET button up. | |
| Return to normal playback | Press the SET button. | |
| Volume adjustment | Louder | During playback, push the zoom switch toward the [T/○-] side. |
| Soffer | During playback, push the zoom switch toward the [W/■] side. | |
CAUTION
If no audio is heard...
- The audio is not played back when the audio recording is played back in the fast playback or fast reverse mode.
Still image setting
For still images, you can select either the 4:3 or 16:9 horizontal to vertical aspect ratio. This menu is also used for shooting sequential shots.
Sequential shots
1 Select or , and press the SET button.
- The camera changes to the sequential shots mode.
2 Press the [ ] button.
- Shooting begins. Shooting continues as long as the [ ] button is kept pressed.
HINT
What is the maximum number of images in a sequential shots sequence?
图:9 images (6 fps)
4:15 images (12 fps)
- If you continue shooting even after the maximum number of images has been captured, recording does not stop.
- If you continue shooting after the maximum number of images has been captured, subsequent captured images will overwrite the sequence already captured, beginning from the first image in the sequence.
About the focus when shooting sequential shots
- When sequential shots are captured, the autofocus operates when the [ ] button is pressed halfway, fixing the focus.
Can the flash be used?
- The flash does not operate when shooting sequential shots.
Did the angle of view change?
- When shooting sequential shots, the angle of view relative to that of still image shooting may change.
- At the setting, the images are captured with an enlarged angle of view in comparison to other recording modes.
About the PHOTO NR (page 138) setting
- During sequential shots shooting, the PHOTO NR setting automatically turns OFF.
Scene select setting
You can select from various preset settings (aperture, shutter speed, etc.) for specific shooting conditions.
HINT
- To return to normal photography, select AUTO from the scene select menu, and press the SET button.
- When capturing images using the lamp l , fireworks or night view portrait setting, use a tripod or other method to stabilize the camera.
- If the recording size is set to KSHR or KSHR , the scene select function will be fixed at AUTO.
- In the sequential shots mode, it is not possible to select night view portrait ★, fireworks , or lamp
- A table showing the limitations for settings corresponding to scene select icons other than Auto is on page 188.
Filter setting
The filter feature changes image characteristics such as color tones, to apply unique effects to the photographed image.
HINT
- To return to normal photography, select from the filter menu, and press the SET button.
- A table showing the limitations for settings corresponding to filter icons other than is on page 189.
Self-timer setting
By assigning an operation shortcut to the SET button (pages 138 and 142), you can set the self-timer from the Recording Screen.
HINT
To pause or cancel the self-timer function...
- If the [ ] button or [ ] button is pressed again before the shutter is released, the self-timer countdown temporarily stops. Press the [ ] button or [ ] button one more time to restart the self-timer.
- To cancel self-timer photography, select the icon from the self-timer menu, and press the SET button.
- The self-timer is automatically reset to off after the power save mode is activated and the camera turned off.
When 10 is selected...
- When the [ ] button or [ ] button is pressed, the multi-indicator will blink for about 10 seconds, and then the image is captured. Also, 4 seconds before the shutter releases, the indication shown in the illustration appears on the monitor.
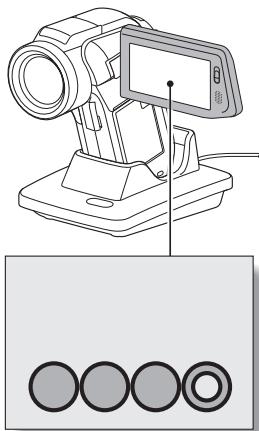
If you swivel the monitor unit to its farthest position, the image on the monitor will be inverted.
RECORDING MENU 2
Motion compensation (image stabilizer) setting
Your camera can minimize a jittery picture by compensating for unintentional hand motion.
HINT
If the motion compensation does not seem to be working...
- Due to the mechanical characteristics of this function, it may not be possible for the camera to compensate for violent motion.
- If the digital zoom (page 81) is being used, the large magnification factor may make it difficult for the motion compensation function to work correctly.
- When the scene select function is set to night view portrait or lamp, the motion compensation effect may be insignificant.
Can't set the "photo stabilizer" setting?
-
The photo stabilizer is automatically turned off after any of the following operations.
-
Pressing the flash button [ ] to open the flash unit.
- Setting the exposure to S, A or M (pages 64 and 108).
- Setting the photo wide D-range setting (pages 64 and 110) to "ON".
- Setting the still image NR (noise reduction) setting (page 138) to "ON".
- Starting video clip recording.
- Setting the camera to the sequential shots mode (pages 60 and 100).
When motion compensation is enabled,
- The following icons are shown on the monitor:
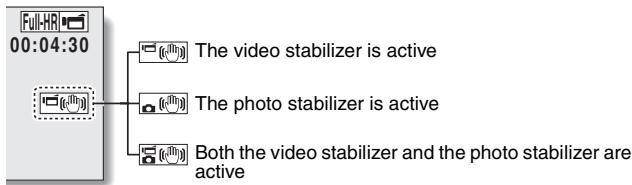
Did the scene select setting change?
- When the photo stabilizer is set to , if the scene select setting is , it will automatically change to AUTO.
Focus range setting
How to use the manual focus
1 Select MF, and press the SET button.
- The focus distance adjustment bar appears.
2 Toggle the SET button to the left or right to adjust the focus distance, and press the SET button.
- The focus distance is set, and you are returned to the Recording Screen.
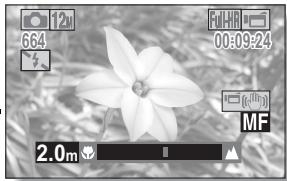
HINT
About the focus range
- The focus distance indication shows the distance between the center of the lens and the subject.
- In some cases there may be a slight variance between the distance (numerical figure) you set in the manual focus mode and the actual distance.
About zoom movement when using the manual focus
- If the focus distance is set to 70 cm (27.56 in.) or less, the zoom changes to the largest setting that is suitable for that focus distance.
- When the focus distance is set to 70 cm (27.56 in.) or less, the zoom will function only within the range at which the image is focused.
About the super macro mode
- When the focus range is set to super macro, the zoom is temporarily set to the wide end.
- By assigning an operation shortcut to the SET button (pages 138 and 142), you can change the focus range setting from the Recording Screen.
Focus mode setting
When the spot focus setting is selected, the focus mark + appears in the center of the monitor.
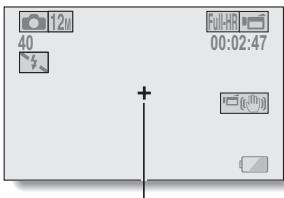
Focus mark
Light-measuring mode setting
When spot light-measuring is selected, the light-measuring spot mark appears in the center of the monitor.
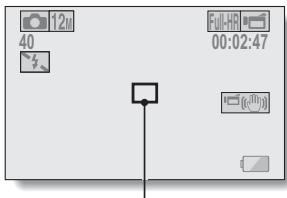
Light-measuring spot mark
ISO sensitivity setting
With the initial settings, the ISO sensitivity is automatically set according to the brightness of the subject. However, the ISO sensitivity can be set to a fixed setting.
HINT
- At the AUTO setting, the ISO sensitivity is set automatically (video clip recording: ISO 50 to 800; still image shooting: ISO 50 to 200).
- When the ISO sensitivity is set to [3200], video clips, as well as still images captured during video clip recording, will be recorded at ISO [1600].
- By setting a higher ISO sensitivity, you can set faster shutter speeds and capture images in darker locations, but noise in the captured images may increase or the images may be irregular.
- By assigning an operation shortcut to the SET button (pages 138 and 142), you can change the ISO setting from the Recording Screen.
CAUTION
Does the image appear to flicker when recording a video clip?
- If recording a video clip under fluorescent lights with the ISO sensitivity set to [400] or higher, a noticeable flicker may appear in the image.
RECORDING MENU 3
White balance setting
This camera automatically adjusts the white balance under most lighting conditions. However, if you want to specify the lighting conditions or change the overall tone of the image, the white balance can be manually set.
How to use the one push setting
1 Select the icon.
2 Fill the entire screen with a plain white card (or piece of paper, etc.), and press the SET button.
- This completes the white balance setting.
HINT
To cancel the white balance setting
- Select AWB, and then press the SET button.
Exposure setting
The shutter speed and aperture size can be set individually.
1
Select the desired icon from the exposure menu, and press the SET button.
① Toggle the SET button up or down to select aperture value or shutter speed.
② Toggle the SET button left or right to change the setting for the selected parameter.

2
Press the SET button.
- This completes the exposure setting.
HINT
- To prevent the effects of camera shake at slow shutter speeds, it is recommended to use a tripod or other method to stabilize the camera.
- A slow shutter speed may be useful for photographing in a darker environment, but noise in the image may be increased.
- To minimize noise in the image, complete the noise reduction setting (page 138).
- The exposure setting automatically becomes P if the scene select function is active.
- In the sequential shots mode, the shutter speed is faster than 1/30 sec.
- Even if the shutter speed is set to slower than 1/29 sec., the shutter speed during video clip recording is 1/30 sec.
- If the exposure setting is set to , or , by assigning an operation shortcut to the SET button (pages 138 and 142), you can select the , or exposure setting from the Recording Screen.
Face chaser setting
As you record, the face chaser detects the subject's face, and adjusts the brightness and focus in a way that produces a clear and bright photo of the subject's face.
HINT
When the face chaser is set to ON...
Each face in the Recording Screen is marked with a green frame.
- Faces that are in focus are marked with a double green frame.
- When shooting begins, the frames marking the faces that are in focus change to orange.
- If the scene select function setting was fireworks or landscape, it automatically changes to AUTO.
- The light measuring mode changes to multi-section light measuring.
- When you play back an image that was captured using the face chaser function and magnify it, the magnified image will be centered on the face(s) that were focused on.
CAUTION
- The face chaser function does not work while the digital zoom is being used.
- The face chaser function does not work when zooming in or out.
- The face chaser function may not work when the subject's face in the monitor is relatively small or appears dark.
Photo wide D-range setting
By using the photo wide D-range feature, even in an image comprised of both bright and dark subjects, all the subjects will be captured at a natural brightness level. For example, when a strong backlight is created, as can occur when photographing in bright surroundings, a subject in a bright background appears completely white. Furthermore, the details of dark areas created by the shadows of a backlight are normally obscured in blackness. Shooting with the photo wide D-range function smoothly adjusts the brightness levels from light areas to dark areas.
HINT
Other settings during photo wide D-range shooting
- When the photo wide D-range is set to "ON", the following settings automatically change as indicated.
Flash (page 60): Disabled (no flash)
Exposure (pages 64 and 108): P
Photo stabilizer (page 103):
Scene select fireworks (page 101): AUTO
When sequential shots is active (page 100): [8M-S]
Noise reduction (page 138): "PHOTO NR" is "OFF"
- During video clip recording, the photo wide D-range is automatically switched to "OFF".
- The field of view of captured images will appear slightly narrow.
CAUTION
- When the scene select function is set to night view portrait or lamp, the photo wide D-range effect may be insignificant.
- The photo wide D-range function does not work when the shutter speed is slower than 1/60.
- The photo wide D-range effect may be insignificant if you are shooting in an extremely bright or extremely dark environment.
- Note that the exposure time during photo wide D-range shooting is comparatively longer than for normal shooting.
- When there are smear or flare effects in the image, or when it is misty, shooting with the photo wide D-range function enabled may in some cases produce an unnatural appearing image.
- Depending on the surrounding conditions, for example, when the light sources of light and dark areas are different, an unnatural appearing image may be produced.
- Image processing after shooting may take some time.
High sensitivity mode setting
When you shoot in the high sensitivity mode, the captured image appears even brighter than that specified by the ISO sensitivity and exposure compensation settings.
CAUTION
Limitations of the high sensitivity mode
- When the shutter speed is reduced to create a bright image, video clip motion will appear uneven during playback.
- When shooting in a dark environment, the autofocus and auto exposure may not function effectively.
- If the video clip setting is 2SSH1 or 2SSH2 ,it changes to FuHHD.
Digital zoom setting
This setting allows you to specify whether or not the digital zoom is enabled during zoom shooting.
HINT
- The digital zoom does not function in the following situation: When the still image mode is set to 12M .
Exposure compensation
By assigning the exposure compensation operation shortcut to the SET button (pages 138 and 142), you can make the image lighter or darker when capturing images.
1 Assign the operation shortcut to the SET button (pages 138 and 142).
2 Toggle the SET button in the direction for which the operation shortcut was assigned.
- The exposure compensation bar appears.
3 Toggle the SET button to the left or right to adjust the exposure.
- The exposure compensation numerical value is shown at the left end of the exposure compensation bar.
The exposure compensation can be set to a value from -1.8EV to +1.8EV . - The exposure compensation bar is canceled when the MENU button or the SET button is pressed.
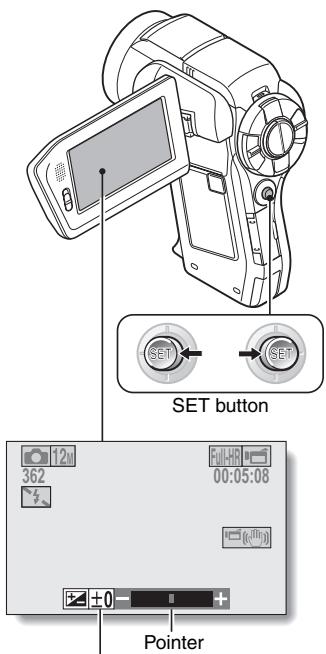
Exposure compensation bar
HINT
The exposure compensation setting is canceled in the following cases:
- When the pointer is set to the center position.
- When the camera is set to the playback mode.
After the power is turned off. - When the camera is set to the standby mode.
PLAYBACK MENU 1
Slideshow settings
Specify the settings for playing back files continuously in a " Slideshow" format. In a slideshow of still images, you can set the transition time, transition effects and BGM.
Changing a setting
1 Select the item you wish to change, and press the SET button.
2 Toggle the SET button up or down to change the setting.
3 Press the SET button.
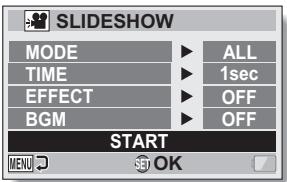
Begin the slideshow
1 Select "START" and press the SET button.
- Slideshow playback begins.
- To stop slideshow playback, press the SET button or MENU button.
HINT
BGM for video clips?
- When video clips are played back in a slideshow, the recorded audio track is played back; the BGM is not played.
File protect setting
Prevent accidental erasure of image and audio files.
Protect files one by one
1 Display the file that you want to protect from accidental erasure, and display the NORMAL Mode Playback Menu (page 49).
2 Select "PROTECT" and press the SET button.
3 Select "PROTECT SINGLE" and press the SET button.
- "LOCK" appears.
- If the protect mode has already been enabled for the file, then "UNLOCK" appears.
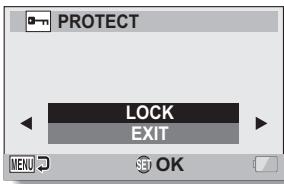
4 Toggle the SET button up or down to select "LOCK", and press the SET button.
The protect mode is set for the file.
- The protect mark indicates that the file is locked.
CAUTION
- Even if the protect mode is set for certain files, they will be deleted if the card is reformatted.
HINT
To select a different image in steps 2 and 3...
- Toggle the SET button to the left or right.
To cancel the protect mode for a file...
- Display the desired file and repeat steps 1 to 3. The protect mark ⇒ will disappear and the protect mode is canceled.
Protect selected files
Select multiple files to protect.
1 Display the NORMAL Mode Playback Menu (page 49).
2 Select "PROTECT" and press the SET button.
3 Select "PROTECT SELECTED" and press the SET button.
- Toggle the SET button left, right, up or down to move the orange frame to the file you wish to protect.
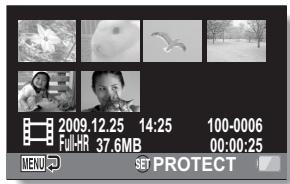
4 Press the SET button.
- The selected file is marked with the protect icon [a-n].
- To cancel a protect selection and remove the protect icon from a file, move the orange frame to the marked file and press the SET button.
PLAYBACK MENU 1
Resize
A captured image can be resized to a smaller size and saved as a separate image.
HINT
Why can't the image be resized?
- An image can be resized only to a smaller (or the same) size, not to a larger size.
Rotate
Captured still images can be rotated to the correct orientation for viewing.
HINT
- An image for which the protect mode has been enabled cannot be rotated. To rotate a protected image, cancel the protect mode before beginning the rotate image procedure (pages 65 and 115).
PLAYBACK MENU 2
Correcting the contrast
Correct the contrast in a photo.
HINT
If the "Contrast correction not successful" message appears...
- The camera was not able to successfully repair the image.
- The correction function works to automatically edit flaws that the camera detects in captured images. In some cases, the camera may fail to correct a flaw.
Concerning the date and time information for the saved image
- When an image is corrected and saved, the recorded date and time of capture (Exif information) remains unchanged from the original image. However, the file date shown on the computer changes to the date and time the image was revised.
Editing video clips
You can trim away unwanted portions from a video clip and save it as a new video clip (video clip cutting [extracting]). You can also join video clips together and save them as one separate clip ("joining").
Procedure to cut (extract) a portion of a video clip
Specify the frames (1, 2) where the video clip is to be cut.
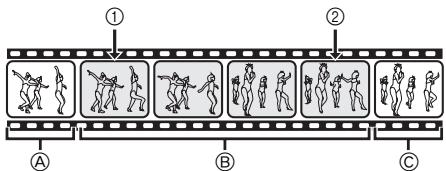

Extract the specified portion.
[Two ways to cut the video clip]
- Trim away portions A and C , and save portion B .
- Delete portion ⑧ , and join portions ④ and ⑥ .
![SANYO VPC-HD2000EX - [Two ways to cut the video clip] - 1](/content/2025/01/96660/images/52017aa5222c98c70a6249016de3cf0081135f0f74adedd6c87634a323f32acb.jpg)
![SANYO VPC-HD2000EX - [Two ways to cut the video clip] - 1](/content/2025/01/96660/images/01e39cc1fc8f1ec9b2e70acd4d4a2003008ec7d58d1edfaa2b7e8e2cce1d39d4.jpg)
The original video clip is not affected.
![SANYO VPC-HD2000EX - [Two ways to cut the video clip] - 1](/content/2025/01/96660/images/a8f0cadc1a27120145aab4272cbd6780f67c4ab344b82fdbc2257be934588382.jpg)
(You can also choose to erase the original video clip when the new clip is saved.)
Procedure to join video clips
Specify the video clip that will come first.

Specify the video clip that you wish to append (join).

Join the video clips.
The video clips are joined.
- The original video clips are not affected. (You can also choose to erase the original video clips when the new clip is saved.)


CAUTION
Caution when editing video clips
- When editing video clips, do not move the REC/PLAY switch. If you move the REC/PLAY switch while editing video clips, not only will the editing not be properly completed, but the original video clip may also be erased.
- As the number or size of the video clips increases, the card memory may become full, making it impossible to edit or save the video clips. In this case, you will need to free some of the memory on the card by deleting files that are no longer necessary (pages 65 and 90).
Regarding the capture date of the saved files
- The capture date of edited images changes to the date that the files are saved.
Video clip cutting (extracting)
1 Display the video clip from which you wish to extract a segment.
2 Display the NORMAL Mode Playback Menu (page 49), select "EDITVIDEO", and press the SET button.
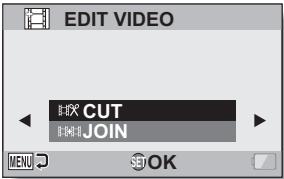
3 Select "CUT" and press the SET button.
- The Cutting Screen appears.
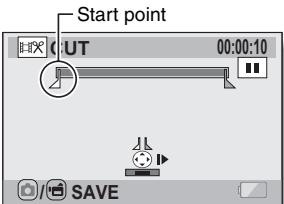
4 Specify the start point of the extract.
- Use the procedure below to specify the frame from which the video clip extract will start.
- Play the video clip until approximately the desired point, pause the video clip, then play the video clip one frame at a time, stopping at the start point of the extract. This will be the first frame of the extract.
- If the start point of the video clip is also the start point of the extract, proceed to step 5.
Play:
After pausing playback, press and hold the SET button to the right for about 2 seconds for forward playback, or to the left for reverse playback.
Pause:
During playback, press the SET button.
Accelerated playback:
During playback, toggle the SET button to the left or right to change the playback speed.
Single frame:
After pausing playback, toggle the SET button to the right to move forward one frame, or to the left to move back one frame.
5 Toggle the SET button up.
- The start point of the video clip extract is set, and the screen to specify the end point appears.
- Specify the end point of the extract by following the same procedure as in step 4.
① Toggle the SET button down.
Each time the SET button is toggled down, the sections to delete and the sections to save are reversed.
② Specify the end point of the extract. The frame following the end point of the extract will be the start point of the latter portion to be joined.
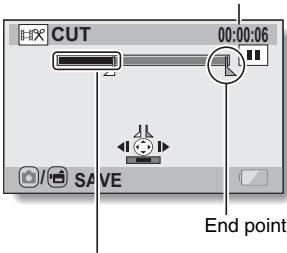
Approximate playback time
Portion to be deleted
6 Press the [ / ] button.
- A screen appears for you to select either to save the edited video clip as a new (separate) file, or to delete the original video clip and replace it with the edited video clip.
SAVE AS NEW:
The edited video clip will be saved as a new file. The original video clip remains unchanged.
OVERWRITE:
The original video clip will be deleted. Only the edited video clip will be saved.
REVIEW CLIP:
Play back the edited video clip before saving it.
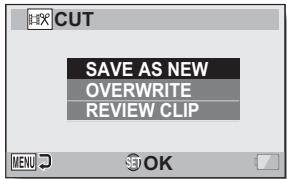
7 Select the desired option, and press the SET button.
- Editing starts.
- When editing ends, you are returned to the NORMAL Mode Playback Menu.
HINT
- You will not be able to overwrite the file if the original file is protected.
- If the "Card full" message appears, you will need to free some of the memory by deleting files that you do not need to keep.
CAUTION
Warning concerning the battery pack remaining charge
- During the editing of lengthy video clips, the time to process the large amount of data can become quite long. To avoid problems caused by the battery pack becoming depleted in the middle of video clip editing, before starting to edit be sure that a sufficiently charged battery pack is installed in the camera, or connect the AC adaptor.
- It is recommended that a computer be used to edit long video clips.
CAUTION
- Video clips that were photographed in different modes cannot be joined.
1 Display the NORMAL Mode Playback Menu (page 49), select "EDIT VIDEO", and press the SET button.
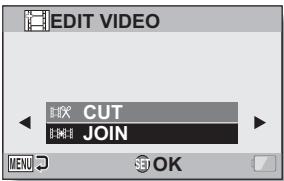
2 Select "JOIN" and press the SET button.
- The 8-image playback display for video clips appears.
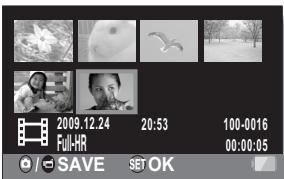
3 Move the orange frame to the video clip you wish to join, and press the SET button.
- The specified video clip is labeled with a number.
- Up to 9 video clips can be selected.
- To cancel a selection and remove the number label from a video clip, select the video clip and press the SET button.
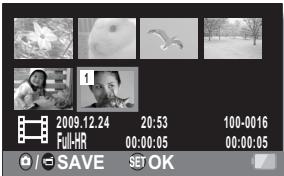
4 Press the [O/0] button.
- A screen appears for you to select either to save the joined video clip as a new (separate) file, or to delete the original video clips and replace them with the joined video clip.
SAVE AS NEW:
The joined video clip will be saved as a new file. The original video clips remain unchanged.
OVERWRITE:
The original video clips will be deleted. Only the joined video clip will be saved.
REVIEW CLIP:
Play back the joined video clip before saving it.
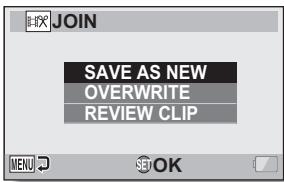
5 Select the desired option, and press the SET button.
- Editing starts.
- When editing ends, you are returned to the NORMAL Mode Playback Menu.
HINT
- If the file size of the video clip after editing exceeds 4 GB, it is not possible to either "SAVE AS NEW" or "OVERWRITE".
- You will not be able to overwrite the file if the original file is protected. If you want it to be erased, you will need to first remove the protection (pages 65 and 115).
- If the "Card full" message appears, you will need to free some of the memory by deleting files that you do not need to keep.
CAUTION
Warning concerning the battery pack remaining charge
- During the editing of lengthy video clips, the time to process the large amount of data can become quite long. To avoid problems caused by the battery pack becoming depleted in the middle of video clip editing, before starting to edit, be sure that a sufficiently charged battery pack is installed in the camera, or connect the AC adaptor.
- It is recommended that a computer be used to edit long video clips.
Printing instructions
In addition to using your printer to print out still images captured with your camera, as with conventional film, you can have prints made at shops offering digital print services. Moreover, this camera is DPOF-compatible, so you can use the camera to specify the number of prints, whether or not the date is displayed on the print, and also to request an index print.
Display the Printing Instructions Screen
1 Display the NORMAL Mode Playback Menu (page 49), select "PRINT INSTRUCTIONS", and press the SET button.
ALL IMAGES:
The specified printing instructions apply to all the images.
EACH IMAGE:
The printing instructions are specified for each individual image.
INDEX:
All the still images are printed as miniature images (thumbnail images), several images on one print.
ALL CLEAR:
Clear all the printing instructions.
This cannot be selected if no printing instructions have been specified for the image.
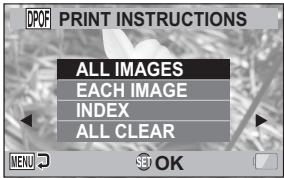
HINT
Printing a single frame from a video clip
- To print with a printer or have the digital print service shop print out a still image from a video clip, you must first save it (extract still) as a still image (page 87).
About the DPOF format
- DPOF (Digital Print Order Format) is a print order format. You can connect your camera to a DPOF-compatible printer to produce your prints. You can also set the printing instructions for the desired images, and then have the requested images printed automatically (page 164).
About the finished prints
- Rotated images (pages 65 and 117) will be printed in their original orientation.
- The quality of the print output will differ depending on the print service and printer used.
Specifying date imprinting and print quantities
You can specify printing instructions for each individual image (EACH IMAGE), or apply the printing instructions to all the images (ALL IMAGES).
1 Display the Printing Instructions Screen (page 129).
2 Select "ALL IMAGES" or "EACH IMAGE".
ALL IMAGES:
The printing instructions are applied to all the images.
EACH IMAGE:
The printing instructions are applied only to the image currently displayed.
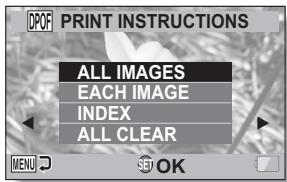
3 Press the SET button.
- The Date/Copies Print Screen appears.
- If "EACH IMAGE" was selected, toggle the SET button to the left or right to display the desired image to print.
- The printing instructions that are currently active for the displayed image are shown. You can toggle the SET button to the left or right to confirm the printing instructions for each image.
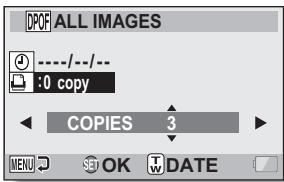
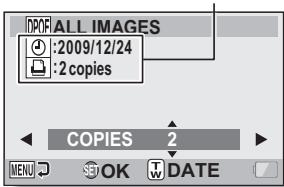
Printing instructions
Completed printing instructions>
4 Specify whether the date is displayed on the print, and the number of prints.
-
Toggle the SET button up or down.
-
The quantity indication changes.
Display the desired number of prints.
-
Press the SET button.
-
The number of prints is set.
From the screen on which the number of prints is set, press the zoom switch.
- Press the SET button.
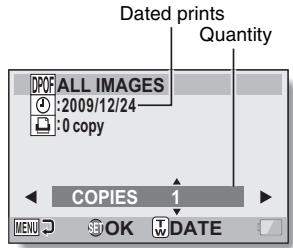
5 Press the MENU button.
- The printing instructions for the requested print quantities and dated prints are stored.
- The display returns to the Printing Instructions Screen.
HINT
Can't specify dated prints?
- Dated prints are not possible for photos that were captured before the camera's date and time setting was completed.
Index print
Printing out many small images on one sheet is called an "index print". This is convenient for use as a list of the images you have captured.
FILE INFO DISPLAY
On the Information Screen you can check what the settings were when a file was recorded with your camera.
1 Display the desired file on the camera monitor.
2 Press the MENU button for at least 1 second.
- The Information Screen appears.
- If the MENU button is pressed again, the Information Screen is canceled.
① Video clip mode settings
② Image or sound number
③ Protect setting
④ File size
⑤ Shooting or recording time
⑥ Exposure compensation setting
⑦ Aperture value
⑧ Shutter speed
⑨ Remaining battery charge
Date and time of image
⑪ Still image resolution settings
ISO sensitivity setting
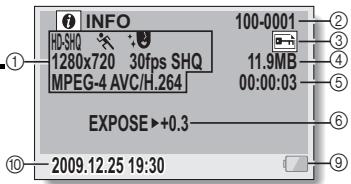
- WARNING
- FOR AMERICAN USERS
- DECLARATION OF CONFORMITY
- FOR CANADIAN USERS
- FOR EU USERS
- NOTE
- SANYO FISHER SALES (EUROPE) GMBH
- SANYO ELECTRIC CO., LTD
- FOR RUSSIAN USERS
- HOW TO READ THIS MANUAL
- FOR FIRST-TIME USERS
- TO USE THE VARIOUS CAMERA FEATURES
- TO USE ADDITIONAL FEATURES
- SYMBOLS USED IN THIS MANUAL
- SHOOT, PLAY BACK AND SAVE
- PREPARING THE CAMERA
- 1 INSERT THE SD MEMORY CARD
- 2 CONNECT THE AC ADAPTOR TO THE CAMERA
- SHOOTING
- 1 SET THE REC/PLAY SWITCH TO REC
- 2 PRESS THE ON/OFF BUTTON FOR AT LEAST 1 SECOND TO TURN THE CAMERA ON
- 3 RECORD
- TO RECORD A VIDEO CLIP
- TO TAKE A PHOTO
- BEFORE CAPTURING THOSE IMPORTANT SHOTS, BE SURE TO FIRST TAKE A TEST SHOT TO CONFIRM THAT YOUR CAMERA IS SET UP AND READY TO GO
- PLAYBACK
- 1 SET THE REC/PLAY SWITCH TO PLAY
- 2 SELECT THE IMAGE TO PLAY BACK
- 3 PRESS THE SET BUTTON
- WHEN YOU ARE FINISHED USING THE CAMERA
- TO CONTINUE TO THE NEXT OPERATION
- BURN YOUR RECORDED VIDEO CLIPS ONTO A DVD (WINDOWS VISTA)
- INSTALL APPLICATION PROGRAMS
- 1 SET THE SUPPLIED CD-ROM IN YOUR COMPUTER'S DVD DRIVE
- 2 CLICK ON [NERO 8 ESSENTIALS]
- 3 IN THE INSTALLATION WINDOW, CLICK ON [FINISH] AND REMOVE THE CD-ROM FROM THE COMPUTER'S DVD DRIVE
- CONNECT YOUR CAMERA TO A COMPUTER
- 1 USE THE SUPPLIED DEDICATED USB INTERFACE CABLE TO CONNECT YOUR CAMERA TO THE COMPUTER
- 2 TURN ON THE CAMERA
- 3 SELECT "COMPUTER", AND PRESS THE SET BUTTON
- 4 SELECT "CARD READER", AND PRESS THE SET BUTTON
- 5 COPY THE FILES FROM THE CARD TO THE COMPUTER'S HARD DISK
- HINT
- BURN VIDEO CLIPS ONTO A DVD (FOR WINDOWS VISTA USERS)
- 1 INSERT A BLANK DVD IN YOUR COMPUTER'S DVD DRIVE
- 2 CLICK THE START BUTTON, AND POINT TO [ALL PROGRAMS] → [NERO 8], AND CLICK ON [NERO VISION ESSENTIALS]
- 3 UNDER THE "WHAT WOULD YOU LIKE TO DO?" HEADING, POINT TO [MAKE DVD] AND CLICK ON [DVD-VIDEO]
- 4 CLICK ON "THIRD PARTY PATENT ACTIVATION" ON THE TOOL BAR
- 5 CLICK THE [CLOSE] BUTTON
- 6 UNDER THE "WHAT WOULD YOU LIKE TO DO?" HEADING, CLICK [ADD VIDEO FILES]
- 7 CLICK ON A FILE TO BURN TO DVD
- 8 CLICK THE [OPEN] BUTTON
- 9 CLICK THE [NEXT] BUTTON
- 10 CLICK ON ONE OF THE DESIGNS UNDER "TEMPLATES", AND THEN CLICK THE [NEXT] BUTTON
- 11 CLICK THE [NEXT] BUTTON
- 12 CLICK THE [BURN] BUTTON
- 13 CLICK THE [YES] BUTTON
- 14 CLICK THE [SAVE] BUTTON
- 15 CLICK THE [FINISH] BUTTON
- 16 CLICK THE [YES] BUTTON
- 17 CLICK THE [SAVE] BUTTON
- CAUTION
- CONTENTS
- SETUP
- 1 ENGLISH
- SIMPLE
- NORMAL
- OPTION SETTINGS
- OTHER DEVICES AND CONNECTIONS
- CONNECTING TO A TV
- CONNECTING TO A PRINTER
- OTHER CONNECTIONS
- APPENDICES
- CHECKING THE INCLUDED ACCESSORIES
- HOW TO USE THE ACCESSORIES
- 13 ENGLISH
- ABOUT THE SEPARATELY SOLD ACCESSORIES AND THE CARD
- SEPARATELY SOLD ACCESSORIES
- RECOMMENDED ACCESSORY
- MEDIA CARDS THAT CAN BE USED WITH THIS CAMERA
- WHAT "CARD" MEANS IN THIS MANUAL
- GETTING THE MOST OUT OF YOUR CAMERA
- HIGH-QUALITY IMAGES WITH "FULL HIGH DEFINITION*” (PAGES 60, 71 AND 96)
- INCLUDES SIMPLE MODE FOR QUICK-AND-EASY OPERATION (PAGE 47)
- EXAMPLE
- IMAGE STABILIZER FOR SHARP PICTURES (PAGES 62 AND 103)
- SHARP FACE SHOTS (PAGES 64 AND 109)
- XACTI LIBRARY FEATURE (PAGE 162)
- LOTS OF ACCESSORIES FOR OPTIMAL USE OF YOUR CAPTURED IMAGES (PAGE 21, AND PAGE 4 IN THE XACTI SOFTWARE CD INSTRUCTION MANUAL)
- SYSTEM MAP
- CAMERA
- FRONT
- FLASH
- PARTS NAMES
- REAR
- BOTTOM
- DOCKING STATION
- REMOTE CONTROL UNIT
- INSTALLING THE CARD
- DO NOT ATTEMPT TO FORCIBLY REMOVE THE CARD
- IF THE MULTI-INDICATOR IS FLASHING RED
- PREPARED THE DOCKING STATION
- 1 CONNECT THE DOCKING STATION TO A POWER OUTLET
- PREPARED THE REMOTE CONTROL UNIT
- PREPARE THE BATTERY
- 1 PULL OUT THE BATTERY INSULATING SHEET
- REPLACING THE REMOTE CONTROL UNIT BATTERY
- REMOVE THE OLD BATTERY
- ① PULL OUT THE BATTERY SLOT
- ② REMOVE THE BATTERY
- INSERT A NEW BATTERY
- ① INSERT A NEW BATTERY
- ② RE-INSERT THE BATTERY SLOT
- HOW TO USE THE REMOTE CONTROL UNIT
- CHANGING THE REMOTE CONTROL CODE
- PREPARING THE POWER
- CHARGING THE BATTERY PACK
- 1
- 2 INSERT THE BATTERY PACK
- 3 REPLACE THE BATTERY COVER
- 4 PREPARE THE DOCKING STATION (PAGE 29)
- 5
- CLOSE THE CAMERA'S MONITOR UNIT, AND SET THE CAMERA IN THE DOCKING STATION
- WHEN USING A POWER OUTLET
- USING THE AC ADAPTOR
- USING THE DOCKING STATION
- ABOUT RECHARGING
- ABOUT THE TEMPERATURE ALERT ICON
- WHEN THE BATTERY OR INTERNAL CAMERA (EXCLUDING BATTERY) TEMPERATURE RISES DURING USE
- TURING THE CAMERA ON AND OFF
- TURNING ON THE CAMERA
- 1 SET THE REC/PLAY SWITCH
- 2 OPEN THE MONITOR UNIT
- 3 PRESS THE ON/OFF BUTTON FOR AT LEAST 1 SECOND
- TURNING ON THE CAMERA WHEN THE POWER SAVE (SLEEP) MODE IS ACTIVE
- 1 PRESS THE ON/OFF BUTTON FOR AT LEAST 1 SECOND
- TO IMMEDIATELY ACTIVATE THE POWER SAVE MODE
- ABOUT THE STANDBY MODE
- IF THE ? ICON APPEARS
- DATE AND TIME SETTING
- 1 TURN ON THE CAMERA (PAGE 40), AND PRESS THE SET BUTTON
- 2 SET THE DATE
- 3 SET THE CLOCK
- 4 SET THE ORDER IN WHICH THE DATE IS DISPLAYED DURING PLAYBACK
- 5 PRESS THE MENU BUTTON
- TO CORRECT THE DATE AND TIME SETTINGS
- SWITCHING BETWEEN THE RECORDING MODE AND PLAYBACK MODE
- 1 TURN ON THE CAMERA (PAGE 40)
- 2 SET THE REC/PLAY SWITCH TO THE DESIRED MODE
- SIMPLE MODE/NORMAL MODE
- ABOUT THE SIMPLE MODE AND NORMAL MODE
- SWITCHING BETWEEN THE SIMPLE AND NORMAL MODES
- 1 SET THE SIMPLE/NORMAL SWITCH TO THE DESIRED MODE
- ACCESSING/EXITING THE SIMPLE/NORMAL MODE MENU SCREEN
- 1 SET THE CAMERA TO THE RECORDING OR PLAYBACK MODE
- TO ACCESS THE RECORDING MENU
- TO ACCESS THE PLAYBACK MENU
- SET THE CAMERA TO THE SIMPLE MODE OR NORMAL MODE
- TO SELECT THE SIMPLE MODE
- TO SELECT THE NORMAL MODE
- 3 PRESS THE MENU BUTTON
- TO ACCESS THE SIMPLE MODE SETTING MENU SCREEN
- 4 TOGGLE THE SET BUTTON UP OR DOWN TO SELECT THE ITEM YOU WISH TO CHANGE, AND PRESS THE SET BUTTON
- TO ACCESS A NORMAL MODE SETTING MENU
- 4 TOGGLE THE SET BUTTON UP OR DOWN TO SELECT A TAB
- 5 TOGGLE THE SET BUTTON TO THE RIGHT
- 6 TOGGLE THE SET BUTTON UP OR DOWN TO SELECT THE ITEM YOU WISH TO CHANGE, AND PRESS THE SET BUTTON
- ABOUT THE APPLICABLE MODE INDICATOR
- OVERVIEW OF THE SIMPLE MODE SETTING SCREEN
- SIMPLE MODE RECORDING MENU
- SIMPLE MODE PLAYBACK MENU
- OVERVIEW OF THE NORMAL MODE SETTING SCREEN
- NORMAL MODE RECORDING MENU
- NORMAL MODE PLAYBACK MENU
- FIELD OF VIEW
- BEFORE TAKING PICTURES
- FOR BEST RESULTS
- USING THE AUTOFOCUS
- CONDITIONS THAT MAY CAUSE INCORRECT FOCUS
- SUBJECTS WITHOUT VERTICAL LINES
- WHEN BOTH NEAR AND FAR OBJECTS ARE PRESENT
- FAST-MOVING SUBJECTS
- SELECT THE RECORDING SIZE
- 1 DISPLAY THE SIMPLE MODE RECORDING MENU (PAGE 49), SELECT THE RECORDING SIZE SETTING, AND PRESS THE SET BUTTON
- 2 SELECT THE DESIRED VIDEO CLIP RECORDING SIZE, AND PRESS THE SET BUTTON
- SELECT THE FOCUS SETTING
- 2 SELECT THE DESIRED FOCUS RANGE, AND PRESS THE SET BUTTON
- HINTS FOR TAKING PICTURES
- MUTING THE OPERATION SOUNDS
- WHERE ARE THE IMAGE AND AUDIO FILES SAVED
- TAKING PICTURES IN BACKLIGHT CONDITIONS
- WHILE THE IMAGE FILES ARE BEING RECORDED
- CHECKING THE LAST IMAGE SHOT (INSTANT REVIEW)
- 2 PRESS THE [ ] BUTTON
- 3 END THE RECORDING
- SHOOTING SINGLE SHOTS
- ADJUSTING THE MONITOR BRIGHTNESS
- WHAT IS THE CAMERA FOCUSING ON
- THE FOCUS AND EXPOSURE CAN BE LOCKED (IN THE NORMAL MODE)
- THE SHUTTER SPEED AND APERTURE ARE DISPLAYED (IN THE NORMAL MODE)
- IF THE CAMERA SHAKE ICON APPEARS... (IN THE NORMAL MODE)
- USING THE FLASH
- 1 PRESS THE 5 BUTTON TO OPEN THE FLASH UNIT
- 2 DISPLAY THE SIMPLE MODE RECORDING MENU (PAGE 49), SELECT THE FLASH SETTING, AND PRESS THE SET BUTTON
- 3 SELECT THE DESIRED FLASH OPERATION, AND PRESS THE SET BUTTON
- 4 PRESS THE [ ] BUTTON TO TAKE THE PICTURE
- DO NOT TOUCH THE FLASH UNIT WHEN SHOOTING
- SHOOT A STILL IMAGE WHILE RECORDING A VIDEO CLIP
- ABOUT THE RECORDING SIZE OF STILL IMAGES
- MACRO-PHOTOGRAPHY (ZOOM)
- 1 POINT THE CAMERA LENS AT THE SUBJECT
- 2 PUSH THE ZOOM SWITCH TOWARD [T / ] OR [W / 日 ] TO COMPOSE THE DESIRED IMAGE
- 3 TAKE THE PICTURE
- ABOUT THE "16X ADVANCED ZOOM
- SHOOTING AND PLAYBACK WITH THE REMOTE CONTROL UNIT
- PLAYING BACK VIDEO CLIPS AND STILL IMAGES
- HOW TO SAVE ONE FRAME FROM A VIDEO CLIP AS A STILL IMAGE
- 1 PLAY BACK THE VIDEO CLIP. PAUSE THE PLAYBACK AT THE POINT YOU WISH TO "SNAP" A PHOTO
- THE FILE FOR A VIDEO CLIP IS VERY LARGE
- DISPLAY THE VIDEO CLIP PLAYBACK POINT
- DURING VIDEO CLIP PLAYBACK, THE SOUND OF A MOTOR IS AUDIBLE
- IF NO AUDIO IS HEARD
- SLIDESHOW PLAYBACK
- 2
- PLAYBACK VOLUME
- 1 DISPLAY THE SIMPLE MODE PLAYBACK MENU (PAGE 49), SELECT THE PLAYBACK VOLUME SETTING, AND PRESS THE SET BUTTON
- 2 TOGGLE THE SET BUTTON TO THE LEFT OR RIGHT TO SET THE VOLUME, AND PRESS THE SET BUTTON
- THE VOLUME CAN BE ADJUSTED DURING PLAYBACK
- IN THE NORMAL MODE
- DELETING FILES
- DELETE SINGLE/DELETE ALL
- 3 SELECT "DELETE", AND PRESS THE SET BUTTON
- DELETE SELECTED
- 1 DISPLAY THE SIMPLE MODE PLAYBACK MENU (PAGE 49), SELECT THE DELETE SETTING, AND PRESS THE SET BUTTON
- 2 SELECT "DELETE SELECTED", AND PRESS THE SET BUTTON
- 3 SELECT AN IMAGE YOU WISH TO DELETE
- 4 PRESS THE SET BUTTON
- 5 PRESS THE [A] BUTTON
- 6 SELECT "YES", AND PRESS THE SET BUTTON
- HINT IN THE NORMAL MODE
- 21-IMAGE DISPLAY PLAYBACK
- SELECTING THE PLAYBACK FOLDER
- 1 DISPLAY THE PLAYBACK SCREEN
- 2 PUSH THE ZOOM SWITCH TOWARD THE [W] SIDE TWICE
- 3 TOGGLE THE SET BUTTON UP OR DOWN TO MOVE THE ORANGE FRAME TO THE DESIRED FOLDER, AND PRESS THE SET BUTTON
- MAGNIFYING (ZOOMING IN) THE IMAGE
- 1 DISPLAY THE IMAGE THAT YOU WANT TO MAGNIFY
- 2 PUSH THE ZOOM SWITCH TOWARD THE [T / O ] SIDE ONCE
- TO MAGNIFY
- TO RETURN TO NORMAL SIZE
- HINT THE MAGNIFIED PORTION OF THE IMAGE CAN BE SAVED AS A SEPARATE IMAGE
- RECORDING MENU 1
- VIDEO SETTING
- WHEN EDITING VIDEO CLIPS
- RESTRICTIONS WHEN OR IS SET
- AUDIO RECORDING
- 1 SELECT , AND PRESS THE SET BUTTON
- YOU CAN CAPTURE A STILL IMAGE DURING AN AUDIO RECORDING
- AUDIO PLAYBACK
- STILL IMAGE SETTING
- SEQUENTIAL SHOTS
- 1 SELECT OR , AND PRESS THE SET BUTTON
- WHAT IS THE MAXIMUM NUMBER OF IMAGES IN A SEQUENTIAL SHOTS SEQUENCE
- ABOUT THE FOCUS WHEN SHOOTING SEQUENTIAL SHOTS
- CAN THE FLASH BE USED
- DID THE ANGLE OF VIEW CHANGE
- ABOUT THE PHOTO NR (PAGE 138) SETTING
- SCENE SELECT SETTING
- FILTER SETTING
- SELF-TIMER SETTING
- TO PAUSE OR CANCEL THE SELF-TIMER FUNCTION
- WHEN 10 IS SELECTED
- RECORDING MENU 2
- MOTION COMPENSATION (IMAGE STABILIZER) SETTING
- FOCUS RANGE SETTING
- HOW TO USE THE MANUAL FOCUS
- 1 SELECT MF, AND PRESS THE SET BUTTON
- 2 TOGGLE THE SET BUTTON TO THE LEFT OR RIGHT TO ADJUST THE FOCUS DISTANCE, AND PRESS THE SET BUTTON
- ABOUT THE FOCUS RANGE
- ABOUT ZOOM MOVEMENT WHEN USING THE MANUAL FOCUS
- ABOUT THE SUPER MACRO MODE
- FOCUS MODE SETTING
- LIGHT-MEASURING MODE SETTING
- ISO SENSITIVITY SETTING
- RECORDING MENU 3
- WHITE BALANCE SETTING
- HOW TO USE THE ONE PUSH SETTING
- EXPOSURE SETTING
- PRESS THE SET BUTTON
- FACE CHASER SETTING
- PHOTO WIDE D-RANGE SETTING
- OTHER SETTINGS DURING PHOTO WIDE D-RANGE SHOOTING
- HIGH SENSITIVITY MODE SETTING
- LIMITATIONS OF THE HIGH SENSITIVITY MODE
- DIGITAL ZOOM SETTING
- EXPOSURE COMPENSATION
- 1 ASSIGN THE OPERATION SHORTCUT TO THE SET BUTTON (PAGES 138 AND 142)
- 2 TOGGLE THE SET BUTTON IN THE DIRECTION FOR WHICH THE OPERATION SHORTCUT WAS ASSIGNED
- 3 TOGGLE THE SET BUTTON TO THE LEFT OR RIGHT TO ADJUST THE EXPOSURE
- PLAYBACK MENU 1
- SLIDESHOW SETTINGS
- CHANGING A SETTING
- BEGIN THE SLIDESHOW
- FILE PROTECT SETTING
- PROTECT FILES ONE BY ONE
- PROTECT SELECTED FILES
- RESIZE
- ROTATE
- PLAYBACK MENU 2
- CORRECTING THE CONTRAST
- EDITING VIDEO CLIPS
- PROCEDURE TO CUT (EXTRACT) A PORTION OF A VIDEO CLIP
- EXTRACT THE SPECIFIED PORTION
- [TWO WAYS TO CUT THE VIDEO CLIP]
- PROCEDURE TO JOIN VIDEO CLIPS
- JOIN THE VIDEO CLIPS
- CAUTION WHEN EDITING VIDEO CLIPS
- REGARDING THE CAPTURE DATE OF THE SAVED FILES
- VIDEO CLIP CUTTING (EXTRACTING)
- 4 SPECIFY THE START POINT OF THE EXTRACT
- PLAY
- PAUSE
- ACCELERATED PLAYBACK
- SINGLE FRAME
- 5 TOGGLE THE SET BUTTON UP
- 6 PRESS THE [ / ] BUTTON
- SAVE AS NEW
- OVERWRITE
- REVIEW CLIP
- 7 SELECT THE DESIRED OPTION, AND PRESS THE SET BUTTON
- WARNING CONCERNING THE BATTERY PACK REMAINING CHARGE
- 4 PRESS THE [O/0] BUTTON
- 5 SELECT THE DESIRED OPTION, AND PRESS THE SET BUTTON
- PRINTING INSTRUCTIONS
- DISPLAY THE PRINTING INSTRUCTIONS SCREEN
- 1 DISPLAY THE NORMAL MODE PLAYBACK MENU (PAGE 49), SELECT "PRINT INSTRUCTIONS", AND PRESS THE SET BUTTON
- ALL IMAGES
- EACH IMAGE
- INDEX
- ALL CLEAR
- PRINTING A SINGLE FRAME FROM A VIDEO CLIP
- ABOUT THE DPOF FORMAT
- ABOUT THE FINISHED PRINTS
- SPECIFYING DATE IMPRINTING AND PRINT QUANTITIES
- 1 DISPLAY THE PRINTING INSTRUCTIONS SCREEN (PAGE 129)
- 2 SELECT "ALL IMAGES" OR "EACH IMAGE
- 4 SPECIFY WHETHER THE DATE IS DISPLAYED ON THE PRINT, AND THE NUMBER OF PRINTS
- CAN'T SPECIFY DATED PRINTS
- INDEX PRINT
- FILE INFO DISPLAY
- 1 DISPLAY THE DESIRED FILE ON THE CAMERA MONITOR
- 2 PRESS THE MENU BUTTON FOR AT LEAST 1 SECOND
- DISPLAY THE OPTION SETTING MENU
- TO ACCESS A SETTING SCREEN
- INTRODUCTION TO THE OPTION SETTING MENU
- SHOW ALL
- DATE & TIME
- COUNTER
- OFF
- XACTI
- TURN ON/OFF
- SHUTTER
- KEY SW
- AUDIO GUIDE
- OPERATION VOL
- TAB 2
- VIDEO NR
- PHOTO NR
- WIND SOUND NR
- TAB 3
- STORAGE FOLDER SETTING
- 1 SELECT "REC FOLDER", AND PRESS THE SET BUTTON
- 2 PRESS THE SET BUTTON
- SHORTCUT SETTING
- SELECT "SHORTCUTS", AND PRESS THE SET BUTTON
- RECOMMENDED SETTINGS
- SELECT THE SET BUTTON OPERATION TO WHICH YOU WISH TO ASSIGN THE FUNCTION, AND PRESS THE SET BUTTON
- 3 TOGGLE THE SET BUTTON UP OR DOWN
- SCREEN LANGUAGE
- 1 SELECT "LANGUAGE", AND PRESS THE SET BUTTON
- 2 SELECT THE DESIRED LANGUAGE, AND PRESS THE SET BUTTON
- TV OUTPUT SETTING
- 2 SELECT THE DESIRED SETTING, AND PRESS THE SET BUTTON
- 3 TOGGLE THE SET BUTTON UP OR DOWN TO SELECT THE DESIRED PARAMETER
- ABOUT THE HDMI-CEC FUNCTION
- RELATION BETWEEN "TV TYPE" SETTING AND TV DISPLAY
- FILE NO. CONTINUED SETTING
- FORMATTING (INITIALIZING)
- CAUTION DURING FORMATTING
- FORMATTING ERASES THE DATA
- CAUTION REGARDING DISPOSING/TRANSFERRING THE CARD (RECOVERING DATA FROM A REFORMATTED CARD)
- CHECKING THE REMAINING CARD MEMORY
- CHECKING THE REMAINING NUMBER OF IMAGES AND VIDEO RECORDING TIME
- 1 SET THE REC/PLAY SWITCH TO REC, AND TURN ON THE CAMERA
- FOR AUDIO RECORDINGS
- 1 SET THE CAMERA TO THE AUDIO RECORDING MODE (PAGE 97)
- CHECKING THE REMAINING BATTERY PACK CHARGE
- 1 DISPLAY THE RECORDING MENU OR PLAYBACK MENU (PAGE 49)
- CONNECTING TO A STANDARD VIDEO INPUT TERMINAL
- ENJOY HIGHER IMAGE QUALITY
- CONNECT TO THE S-VIDEO TERMINAL
- CONNECT TO THE 480P/720P/1080I/1080P TERMINAL
- CONNECTING TO THE HDMI TERMINAL
- PLAYING BACK ON A TV
- AUDIO PLAYBACK: SEE PAGE 98
- INSERT AND PULL OUT THE CABLE CAREFULLY
- ABOUT THE DISPLAY WHEN THE "PAL" TV SYSTEM IS SELECTED (PAGE 145) AND THE SUPPLIED S-AV INTERFACE CABLE IS USED TO CONNECT THE CAMERA TO THE TV
- XACTI LIBRARY
- CAUTION WHEN DISCONNECTING CABLES
- PRINTING
- 3 SELECT "PRINTER", AND PRESS THE SET BUTTON
- 4 THE PICTBRIDGE PRINTING MODE IS ACTIVATED
- 5 SELECT THE DESIRED TYPE OF PRINTING, AND PRESS THE SET BUTTON
- TO CANCEL PRINTING
- ABOUT PRINTING ALL THE IMAGES
- ABOUT DPOF PRINTING
- ABOUT THE PRINTER SETTINGS
- CAUTION WHEN CONNECTING A PRINTER
- CONNECTING A MICROPHONE/ HEADPHONES
- SHOE MOUNT
- ABOUT CONNECTABLE DEVICES
- COMMONLY ASKED QUESTIONS
- TROUBLESHOOTING
- NOTES REGARDING THE SCENE SELECT FEATURE AND FILTERS
- FILTER
- ABOUT THE SCENE SELECT FUNCTION AND FOCUS RANGE SETTINGS
- SPECIFICATIONS
- POSSIBLE NO. OF IMAGES/POSSIBLE SHOOTING TIME/ POSSIBLE RECORDING TIME
- CONCERNING THE MULTI-INDICATOR
- OTHERS
- IF IMAGES ARE BLURRED EVEN WHEN THE AUTOFOCUS IS USED
- HOW THE AUTOFOCUS WORKS
- REASONS FOR UNFOCUSED IMAGES
- PREVENTING BLURRED IMAGES
- PHOTOGRAPHING A MOVING SUBJECT
- HOW TO PHOTOGRAPH A MOVING SUBJECT
- SHOOTING PORTRAITS (PORTRAIT MODE [Q])
- POINTS
- PHOTOGRAPHING MOVING SUBJECTS (SPORTS MODE
- NIGHT PHOTOGRAPHY (NIGHT VIEW PORTRAIT MODE )
- PHOTOGRAPHING SCENERY (LANDSCAPE MODE
Brand : SANYO
Model : VPC-HD2000EX
Category : Camcorder