
EB-X70 - Smartphone PANASONIC - Free user manual and instructions
Find the device manual for free EB-X70 PANASONIC in PDF.
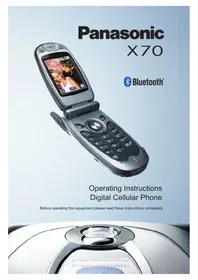


| Product Type | Digital Cellular Phone (Smartphone) |
| Network Bands | GSM 900/1800/1900, GPRS |
| Dimensions (H x W x D) | 88 mm x 48 mm x 24 mm |
| Weight | 95 g (including battery) |
| Battery Type | Li-ion, 680 mAh, 3.7 V |
| Talk Time (GSM) | 1.5 – 5 hours |
| Standby Time (GSM) | 75 – 250 hours |
| Talk Time (Bluetooth On) | 1.4 – 4.6 hours |
| Standby Time (Bluetooth On) | 60 – 170 hours |
| Charging Time | Up to 120 minutes |
| Display | Main display and case screen (clock/status) |
| Camera | Digital camera with zoom, self-timer, multi-shot |
| Connectivity | Bluetooth v1.1, Infrared, GPRS, CSD |
| Memory | Contacts: 500 + SIM, File storage: 4 MB, Max download: 100 kB |
| Supported Audio Formats | MIDI, iMelody, AMR, SMAF, WAV (select) |
| Supported Image Formats | GIF87a, GIF89, JPEG, WBMP, BMP, PNG |
| Features | Voice dial, SMS, MMS, Email, WAP browser, Organiser, Calculator, Converter, Schedule, Alarms, Voice recorder, Melody composer, Games, Vibrating alert, Quiet mode |
| SIM Type | 3V only |
| SAR Value | 0.459 W/kg (at ear) |
| Operating Temperature | Charging: +5°C to +35°C; Storage: -20°C to +60°C |
| Accessories Included | Fast Travel Charger (EB-CAX70UK/EU), Bluetooth headset optional |
| Safety | Complies with EU R&TTE directive; use approved accessories only |
| Care & Maintenance | Keep away from liquids, extreme temperatures; do not disassemble; charge in well-ventilated area |
Frequently Asked Questions - EB-X70 PANASONIC
User questions about EB-X70 PANASONIC
0 question about this device. Answer the ones you know or ask your own.
Ask a new question about this device
Download the instructions for your Smartphone in PDF format for free! Find your manual EB-X70 - PANASONIC and take your electronic device back in hand. On this page are published all the documents necessary for the use of your device. EB-X70 by PANASONIC.
USER MANUAL EB-X70 PANASONIC
Operating Instructions
Digital Cellular Phone
Before operating this equipment, please read these instructions completely.

Contents
Contents 3
Important information 5
Care and maintenance 9
Overview of features ..... 11
SIM and battery 12
Quick start 14
Your phone 20
Display icons 22
Menu structure 24
Voice calls 26
Text entry 35
Settings 38
Contacts list 58
Games 67
Browser 69
Camera 74
Messaging 80
Data folders 100
Organiser 111
Connect 121
Accessories 130
Troubleshooting 133
Contents
Glossary 137
Specifications 139
EU warranty and licensing 141
Personal settings and notes 149
Index 152
Important information
Thank you for purchasing this Panasonic digital cellular phone. This phone is designed to operate on GSM networks – GSM900, GSM1800 and GSM1900. It also supports GPRS for packet data connections. Please ensure the battery is fully charged before use. We, Panasonic Mobile Communications Co., Ltd., declare that the EB-X70 conforms with the essential and other relevant requirements of the directive 1999/5/EC.
A Declaration of Conformity to this effect can be found at
http://www.panasonicmobile.com
Panasonic Mobile Communications Co. Ltd. (Panasonic)
This phone must be used in compliance with any applicable international or national law or any special restrictions governing its use in specified applications and environments. This includes but is not limited to use in hospitals, aircraft, whilst driving and any other restricted uses.
It is recommended that you create a copy or backup as appropriate for any important information and data which you store in your phone's memory. In order to avoid accidental loss of data, please follow all instructions relating to the care and maintenance of your phone and its battery. Panasonic accepts no liability for any and all losses howsoever arising from any loss of data, including but not limited to direct and indirect losses (to include, but not limited to consequential loss, anticipated savings, loss of revenue).
Your phone has the capability of storing and communicating personal information. It is recommended that you take care to ensure that any personal or financial information is stored separately from your phone. You should use the security features, such as Phone Lock and/or SIM Lock, provided in the handset as a measure of protection for information held. Panasonic accepts no liability for any and all losses howsoever arising from any loss of data, including but not limited to direct and indirect losses (to include, but not limited to consequential loss, anticipated savings, loss of revenue).
Your phone has the capability of downloading and storing information and data from external sources. It is your responsibility to ensure that in doing this you are not infringing any copyright laws or other applicable legislation. Panasonic accepts no liability for any and all losses howsoever arising from any loss of data or any such infringement of copyright or IPR, including but not limited to direct and indirect losses (to include, but not limited to consequential loss, anticipated savings, loss of revenue).
You are advised to take appropriate care over the use of the internal camera. It is your responsibility to ensure that you have permission to take photographs of people and objects and that you do not infringe any personal or third party rights when using the camera. You must comply with any applicable international or national law or other special restrictions governing camera use in specified applications and environments. This includes not using the camera in places where the use of photographic and video equipment may be prohibited. Panasonic accepts no liability for any and all losses
Important information
howsoever arising from any infringement of copyright or IPR, including but not limited to direct and indirect losses.
The display layouts and screenshots within this document are for illustrative purposes and may differ from the actual displays on your phone. Panasonic reserves the right to change the information in this document without prior notice.
Display images are simulated. Actual images may differ.
Safety considerations
You should read and understand the following information as it provides details for operating your phone in a manner which is both safe to you and your environment, and conforms to any legal requirements regarding the use of cellular phones.

A Fast Travel Charger (EB-CAX70UK or EB-CAX70EU) is supplied with the phone. Other recommended equipment for charging is the Car Charger (EB-CDX70).
This equipment should only be charged with approved charging equipment, to ensure optimum performance and avoid damage to your phone. Other usage will invalidate any approval given to this apparatus and may be dangerous. Ensure the voltage rating of the Fast Travel Charger is compatible with the area of use when travelling abroad.

Use of a battery pack other than that recommended by the manufacturer may result in a safety hazard.
Never expose the battery to extreme temperatures (in excess of 60°C). If you use a feature that keeps the key backlight on continuously for a long time, for example, Camera, Games, or Browser, you will reduce your battery life. To maintain longer battery life, set the key backlight off. See Setting the key backlight on page 39.

Switch off your cellular phone when in an aircraft. The use of cellular phones in an aircraft may be dangerous to the operation of the aircraft, disrupt the cellular network and may be illegal. Failure to observe this instruction may lead to the suspension or denial of cellular phone services to the offender, or legal action or both.

Do not incinerate or dispose of the battery as ordinary rubbish. The battery must be disposed of in accordance with local legislation and may be recycled.

It is advised not to use the equipment at a refuelling point. Users are reminded to observe restrictions on the use of radio equipment in fuel depots, chemical plants or where blasting operations are in progress.

It is imperative that the driver exercises proper control of the vehicle at all times. Do not hold a phone while you are driving; find a safe place to stop first. Do not speak into a handsfree microphone if it will take your mind off the road. Always acquaint yourself thoroughly with restrictions concerning the use of cellular phones within the area you are driving and observe them at all times.

Care must be taken when using the phone in close proximity to personal medical devices, such as pacemakers and hearing aids.
Do not leave the camera facing direct sunlight, as this may impair its performance.

For most efficient use hold the phone as you would any normal phone. To avoid deterioration of signal quality or antenna performance, do not touch or cup the antenna area while the phone is switched on. (See SAR on page 8). Unauthorised modifications or attachments may damage the phone and violate applicable regulations. The use of an unapproved modification or attachment may result in the invalidation of your guarantee – this does not affect your statutory rights.
This equipment should only be used with Panasonic approved accessories to ensure optimum performance and avoid damage to your phone. Panasonic is not responsible for damages caused by using non-Panasonic approved accessories. This Panasonic mobile phone is designed, manufactured and tested to ensure that it complies with the specifications covering RF exposure guidelines applicable at the time of manufacture, in accordance with EU, USA FCC, and Australian ACA regulations.
Please refer to our website for latest information/standards compliance in your country/region of use.
http://www.panasonicmobile.com
SAR
European union - RTTE
THIS PANASONIC PHONE (MODEL EB-X70) MEETS THE EU REQUIREMENTS FOR EXPOSURE TO RADIO WAVES.
Your mobile phone is a radio transmitter and receiver. It is designed and manufactured not to exceed the limits for exposure to radio frequency (RF) energy recommended by The Council of the European Union. These limits are part of comprehensive guidelines and establish permitted levels of RF energy for the general population. The guidelines were developed by independent scientific organisations through periodic and thorough evaluation of scientific studies. The limits include a substantial safety margin designed to assure the safety of all persons, regardless of age and health.
The exposure standard for mobile phones employs a unit of measurement known as the Specific Absorption Rate, or SAR. The SAR limit recommended by The Council of the European Union is 2.0 W/kg.* Tests for SAR have been conducted using standard operating positions with the phone transmitting at its highest certified power level in all tested frequency bands. Although the SAR is determined at the highest certified power level, the actual SAR level of the phone while operating can be well below the maximum value. This is because the phone is designed to operate at multiple power levels so as to use only the power required to reach the network. In general, the closer you are to a base station antenna, the lower the power output.
Before a phone model is available for sale to the public, compliance with the European R&TTE directive must be shown. This directive includes as one essential requirement the protection of the health and the safety for the user and any other person. The SAR value for this model phone, when tested for use at the ear, for compliance against the standard was 0.459 W/kg. While there may be differences between the SAR levels of various phones and at various positions, they all meet the EU requirements for RF exposure.
* The SAR limit for mobile phones used by the public is 2.0 watts/kilogram (W/kg) averaged over ten grams of tissue. The limit incorporates a substantial margin of safety to give additional protection for the public and to account for any variations in measurements. SAR values may vary depending on national reporting requirements and the network band.
For SAR information in other regions please look under product information at http://www.panasonicmobile.com/health.html
Care and maintenance

Pressing any of the keys may produce a loud tone. Avoid holding the phone close to your ear while pressing the keys.

Extreme temperatures may have a temporary effect on the operation of your phone. This is normal and does not indicate a fault.
If you use your phone in a temperature over 40°C for a long time, the display quality may deteriorate.

Do not modify or disassemble the equipment. There are no user serviceable parts.

Do not subject the equipment to excessive vibration or shock. Do not drop the battery.

Avoid contact with liquids. If the equipment becomes wet immediately remove the battery and contact your dealer.
Never throw a battery into a fire. It may explode.

Do not leave the equipment in direct sunlight or a humid, dusty or hot area.

Keep metallic items that may accidentally touch the terminals away from the equipment/battery.
Batteries can cause property damage, injury, or burns if terminals are touched with a conductive material (i.e. metal jewellery, key, etc.).
Care and maintenance

Always charge the battery in a well ventilated area, not in direct sunlight, between +5°C and +35°C. It is not possible to recharge the battery if it is outside this temperature range.

When connecting the phone to an external source, read the operating instructions of the equipment for the correct connection and safety precautions. Ensure the phone is compatible with the product it is being connected to.

When disposing of any packing materials or old equipment check with your local authorities for information on recycling.
Overview of features
Your phone has the following features:
Bluetooth ® connectivity
Use this to make and receive calls using wireless Bluetooth ® Headsets or Car Kits. Also to transfer data to and from PCs, Laptops, other mobile phones and devices that support Bluetooth ® .
Calculator
Use this to perform basic calculations.
Camera
Use the digital camera to take pictures to send in your messages or use as your wallpaper.
Converter
Use this to convert currency values when you are abroad.
Games
Use this to play games on your phone.
Infrared connectivity
Use this to transfer information between your phone and another device that has an infrared port.
MMS (Multimedia Messaging)
Use this to send and receive pictures and sounds.
Schedule
Use this to set reminders for important events.
SMS (text messaging)
Use this to send and receive text messages.
SMS Chat
Use this to have a text conversation.
Synchronization
Use this to synchronize your Schedule and Contacts List with an external server.
Voice dial
Use this to dial a number by talking to the phone.
WAP browser
Use this to access the Internet.
SIM and battery
Fitting and removing the SIM
You insert the SIM into the back of the phone, underneath the battery.
If your SIM contains contact details, the first time that you browse your contacts list after fitting a new SIM, you are asked whether you want to transfer the SIM data to your phone.
Fitting the SIM
Fitting and removing the battery
Before you remove the battery, ensure that the phone is switched off and that the charger is disconnected from the phone.
Fitting the battery
Removing the battery
Charging the battery
The battery must be fitted in the phone before you connect the charger. Press the button on the top of the connector and insert it into the base of the phone.
Note: Do not force the connector as this may damage the phone and/or the charger.
Connect the charger to the mains power supply. When the phone is charging, the charging indicator lights and a flashing icon appears in the main display and the case screen.

When charging is complete, turn off the mains power supply and disconnect the charger. While the battery is charging, the following icons appear on the phone's display and case screen.
| While charging Charging complete | ||
| Phone on | →Flashing | |
| Phone off | →Flashing No icon. | |
| Charging problem | Charge fault icon (X)See Troubleshooting on page 133 for details of what to do. |
Low battery warning
When the battery power is low, a warning tone sounds, and a flashing low battery icon ( × ) is displayed. If this happens during a conversation, end your call immediately. The power automatically shuts off after the warning tone. You need to fully recharge your battery, see Charging the battery on page 13. You can still make and receive calls while the battery is charging.
Quick start
Note: Some services are network dependent or may only be available on a subscription basis. Some functions are SIM dependent. For more information contact your service provider.
Switching the phone on and off
To switch the phone on or off, press and hold ✗.
If you have set an animation and greeting, these are displayed. The phone starts in idle mode.
Making calls
Ensure that the phone is switched on, the network operator logo is displayed and the signal strength icon shows that network coverage is available in the current area.
▶ From idle mode, enter the area code and phone number. Press
Locking the keypad
You can lock the keypad to avoid accidentally making calls when the phone is in your bag or pocket.
▶ From idle mode press and hold Ⓞ. ▶ Select Keyguard. ▶ Press Ⓞ twice.
To unlock the keypad:
Press ① twice.
Camera mode
To change to camera mode either select Camera from the main menu (press ☐ twice), or press ☑ from idle mode if the shortcut key is set for camera.
Leaving camera mode
To leave camera mode press Ⓞ to return to idle mode.
Taking a picture
When you are in camera mode, move the phone around until you can see the image you want on the preview screen. ▶ Press Ⓞ to capture the image.
If you decide that you do not want the image that you have taken, you can press 📄 to delete it.
Setting the wallpaper
The wallpaper is a picture that displays when the phone is in idle mode.
▶ Select Menu > Data Folders. ▶ Find a picture. ▶ Select Menu > Use As > Wallpaper.
Or
▶ Select Menu > Settings > Display > Wallpaper. ▶ Select the folder where the picture is stored. ▶ Select your picture.
Setting the ring type
▶ Select Menu > Data Folders. ▶ Find a sound. ▶ Select Menu > Use As. ▶ Select the type of call.
Or
▶ Select Menu > Settings > Alerts > Ring Type. ▶ Select the type of call that you want to change. ▶ Select the folder where your sound is stored. ▶ Select your sound.
Setting quiet mode
In quiet mode the microphone amplifies your voice, so you can whisper and still be heard by the person on the other end of the call. You should use quiet mode in situations where you do not want to disturb the people around you.
In quiet mode, the phone will not ring when you receive a call or message, unless you set a ring volume for quiet mode.
From idle mode, press and hold #*.
Or
Select Menu > Settings > Alerts > Quiet Mode > On/Off > On.
Quick start
Using your browser
Before you can start using your browser, you need to contact your service provider. When your phone is set up to access the internet see Home page on page 70 for information about using the browser.
Creating a multimedia message

Use the Create option on the Messaging menu to create a multimedia (MMS) message.
▶ Select Create > MMS. Press ▶ Select Addr:. ▶ Select Edit to enter an address. Enter an address. ▶ Select Subj:. ▶ Select Edit to enter a subject. Enter a subject.
▶ Select the item that you want to enter.
When your message is complete, select Ok.
To send your message, press 📄 or press Ⓧ and select Send.
To save your message, press Ⓧ and select Save. Your message is stored in the Outbox, so you can send it or edit it later.
Creating a text message

Use the Create option on the Messaging menu to create a text (SMS) message.
▶ Select Create > SMS. ▶ Enter your text. ▶ Press Ⓞ. ▶ Select Ok or Cancel. ▶ Press Ⓞ to send the message. ▶ Enter the phone number. ▶ Press Ⓞ. ▶ Select Ok or Cancel. If you selected Ask as your Receipt option, then you are asked 'Request Delivery Confirmation?' Press Ⓞ, then select No or Yes.
Setting up the Bluetooth® headset
The Bluetooth® headset may be included with your phone or it is available as an optional accessory (EB-BHX70). It gives you wireless, handsfree operation up to approximately 10 metres.
Before you can use the headset you need to pair the headset and the phone.
First you need to turn on Bluetooth® on the phone:
Select Menu > Connect > Bluetooth > On/Off > On, or select Menu > Organiser > Connect > Bluetooth > On/Off > On.
The Bluetooth® icon appears on the screen.
You now need to set up the headset. For more details, please refer to the Headset Operating Instructions.
To turn the EB-BHX70 headset on and make it discoverable, hold down the main function key for 10 seconds.
Note: The headset is only discoverable for a few minutes. If it is not discovered during this period, the pairing will fail. You can try again by making the headset discoverable again.
Quick start
Finally you need to Pair the devices:
▶ On the phone select Discover & Pair. As the phone Discovers devices it displays them on the screen. When the headset name appears in the list you can select Stop to stop the search. If the phone does not Discover your headset, check that your headset is still Discoverable and press 📋 to try again. ▶ Highlight the headset in the list. ▶ Select Pair. Enter the Bluetooth® Passkey provided with the headset.
Note: The Passkey for Panasonic EB-BHX70 Bluetooth® Headset is 0000.
The Pairing will fail if you enter the wrong Passkey. Press Retry to try again.
You can select Paired Devices to confirm that the devices are Paired. This lists all the devices that are Paired with the phone.
Once the headset and phone are Paired, you can use the headset to make and answer calls. To make calls from your EB-BHX70 headset, the headset must be on. Press the main function button on your headset, then, after the tone, use voice dialling. To answer a call with your EB-BHX70 headset, the headset must be on. When the headset rings, press the main function button to answer the call. To end a call press the main function button again.
Setting up Bluetooth® car kits
Your phone works with a wide range of Bluetooth® car kits. With a Bluetooth® car kit you can operate your phone handsfree without plugging it into a car holder.
Before you can use your car kit you need to Pair it with the phone.
First you need to turn on Bluetooth® on your phone:
Select Menu > Connect > Bluetooth > On/Off > On, or select Menu > Organiser > Connect > Bluetooth > On/Off > On.
The Bluetooth® icon appears on the screen.
You now need to make the car kit Discoverable:
▶ Turn on the car kit. Make the car kit Discoverable. (See car kit instructions. Some car kits are permanently Discoverable).
Finally you need to pair the devices:
▶ On the phone, select Discover & Pair. As the phone discovers devices, it displays them on the screen. When the car kit name appears in the list, you can select Stop to stop the search. ▶ If the phone does not discover your car kit, press 📄 to try again. ▶ Highlight the car kit in the list. ▶ Select Pair. Enter the Bluetooth passkey provided with the car kit.
You can select Paired Devices to confirm that the devices are paired. This lists all the devices that are paired with the phone.
Once the car kit and phone are paired, you can make calls and answer calls using the car kit. To make calls from your car kit, press the green call button on your car kit, then, after the tone, use voice dialing. To answer a call with your car kit, press the green call button. To end a call, press the red end call button on your car kit.
Note: Voice dial recordings must be loud to ensure confirmation is audible when using some car kits.
Your phone
Ear piece
Main display
Left soft key

Use to:
Access the contacts
List from idle mode.
Switch between text entry types.
Select the option in the left-hand selection area.
Call key
Keypad
@ Key @
Use to:
Go to the Browser default home page from idle mode.
Microphone

Accessory Connector
Navigation Key
This is a multi function key. It is represented by Ⓧ in the text. Press the edges of this key to move around the display.
Right Soft Key

Use to:
Cancel the current option.
Return to the previous menu.
Delete last character in text entry.
Select the option in the right hand selection area
End Call Key


Display icons
After some operations, the display automatically clears after three seconds or when you press any key.
Status icons
The status icons are displayed according to the currently activated functions. The antenna, GSM signal strength and battery icons are displayed when the phone is switched on and connected to a network.


Registered to a non-home network - Roaming.

The selected line number of the current call when using a SIM that has two lines. This is SIM dependent.

The call you are currently listening to when you are connected to more than one call. Any other calls listed on the display are on hold. This is SIM dependent.

Call divert on.

New message received. A flashing envelope indicates that your message store is full.

GPRS service available.

Antenna. Indicates that you can make a call. If it is the only icon displayed, you can only make emergency calls.

GSM signal strength: ■- weak signal, ■- strong signal.

Battery level: ☐ – full, ☑ (flashing) – low.

Abnormal battery charging

All tones off or ring volume off.

Vibration alert on.


Quiet mode on.

Phone lock on.

Alarm set.

Bluetooth® on. Flashes when Discoverable.
Menu structure
The nine main menus are as follows:
Note: The menus may not display in the same order or with the same icons as listed here. The order and icons vary according to your service provider.


Settings
1 Display Browse
2 Alerts 2 Create
3 Keys 3 Voice Dial
4 Phone Settings 4 Groups
5 Clock 5 Settings
6 Call Service 6 SIM
7 Call Divert Settings
8 Security
9 Network
10 Defaults
Contacts List
1 Browse
2 Create
3 Voice Dial
4 Groups
5 Settings
6 SIM
7 Storage
Games
1 Home Page
2 Bookmarks
3 Enter URL
4 Page Memo
5 Push Message
6 Browser Settings
7 Server List
8 Cookie
9 Last Status


Messaging
1 Settings
2 Inbox
3 Broadcasts
4 Voice Mail
5 Create
6 e - m a i l
7 Data Folders
8 Outbox
9 SMS Chat
Data Folders
1 My Pictures
2 My Sounds
3 My Themes
4 User 1 - 5
Organiser
1 Synchronization
2 Contacts List
3 Converter
4 Business Card
5 Schedule
6 Calculator
7 Alarm
8 Memo
9 Receive Object
Connect
1 Bluetooth
2 Infrared Dialup
3 Receive Object
s s C a r d
(1)
Navigation key
The navigation key is a multi-function key. You use the top, bottom, left and right edges to move around the display. These actions are indicated by ⬅, ♀, ◀ and ○ in this user guide. You press the centre of the navigation key ⭕ to:
- Access the menu system.
- Display a submenu.
- Select a highlighted menu item.
- Confirm a selection.
- Select the item in the primary selection area. ● Take a picture with the camera
Menu shortcuts
When you are familiar with the menu system, you can enter the menu number instead of navigating through the display menus. For example, to browse your contacts list:
From idle mode, press Ⓞ, 2, 1.
Voice calls
Making calls
Ensure that the phone is switched on, the network operator logo is displayed, and the antenna and signal strength icons (T) show that network coverage is available in the current area.
▶ From idle mode, enter the area code and phone number. Press
Ending calls
Press
Answering a call
To receive a call the phone must be switched on and the signal strength icon (###) must be displayed.
To answer a call, press any key except ✗.
Answering a call handsfree
Press and hold ↗.
Note: Do not hold the phone to your ear when in handsfree mode.
Sending DTMF tones during a call
You can send DTMF tones during a call to access voice mail, paging and computerised home banking. For example, you may need to enter a number to remotely access voice mail messages.
To send DTMF tones during a call, press the required digit keys.
Rejecting a call
If you do not want to answer an incoming call, press 📄.
Note: If you do not answer a call, or reject a call, the number of incoming calls missed is displayed. Press any key to clear the display.
Making international calls
If you know the international number, you can enter it in the normal way, followed by the area code and phone number.
You can use the automatic international access code (+), to dial international numbers without knowing the code for the international exchange.
▶ From idle mode, press and hold 0+ until + is displayed. ▶ Use ⬇ to scroll through a list of country codes. ▶ Select the code you want. Enter the area code and phone number. Press
Note: Many countries/regions include an initial 0 in the area code. In most cases, you should omit this when dialling international numbers. If you have difficulties making international calls, contact your service provider.

Making emergency calls
To make an emergency call, the antenna symbol (T) must be present.
If a SIM is installed, enter 112 and press 📋.
If a SIM is not installed, press Ⓞ, select SOS, press Ⓞ.
Note: Making emergency calls without a SIM installed is country or network operator dependent.
Voice calls
Voice calls using Bluetooth® headset or car kit
Making calls
You can use voice dial (see Creating a voice dial entry on page 61 for instructions on how to use voice dial) to make voice calls from your Bluetooth® headset or car kit without pressing any keys on your phone. With some headsets and car kits you can also redial the last number (refer to your headset or car kit instructions for details).
To make a voice dial call using your Bluetooth® headset or car kit:
Press the main function button on the EB-BHX70 headset, or the green call button on most car kits. Wait for the tone. Your phone displays Please Call Voice Command. Speak the voice command. Your phone repeats the voice dial entry back for confirmation. If you hear a double tone, then the voice command has failed. Your phone dials the number.
To end the call, press the main function button on the EB-BHX70 headset, or the red end button on most car kits.
Note: Bluetooth® must be switched on (Connect > Bluetooth > On/Off > On) and your Bluetooth® headset or car kit must be paired with your phone, see Discovering and Pairing devices on page 122 for details.
Your voice dial recordings need to be loud to ensure that they are audible when you use a car kit.
Receiving calls
You can answer voice calls using your Bluetooth® headset or car kit without pressing any keys on your phone.
When the Bluetooth® headset or car kit rings, press the main function button on the EB-BHX70 headset or the green call button on most car kits. This answers the call with audio on the headset or car kit.
To end the call, press the main function button on the EB-BHX70 headset, or the red end button on most car kits.
Note: Only the default Bluetooth® audio device will ring. If this device is switched off or out of range, you can answer the call from any other paired headset or car kit. See Selecting default audio device on page 123 for details of how to select the default audio device.
Rejecting calls
To reject an incoming call:
▶ Wait until the headset or car kit rings. Press and hold down the main function key on the EB-BHX70 headset until you hear a low tone, or press the red end button on most car kits.
Transferring calls from handset to Bluetooth® headset or car kit
If you make a call using your handset, you can transfer the call to your headset or car kit once the call is connected.
▶ Press the main function button on the EB-BHX70 headset, or the green call button on most car kits. The display reads Voice Call Bluetooth.
Alternatively, you can select Menu > Bluetooth. The display reads Transferring Audio to Bluetooth, then changes to Bluetooth Audio Transfer Complete.
Note: If you transfer the call using the Menu, then the call is transferred to the default audio device. See Selecting default audio device on page 123 for information about selecting your default audio device.
Transferring a call from Bluetooth® headset or car kit to handset
If you are making a call using your headset or car kit, you can transfer the call to your handset.
▶ On the handset, select Menu. ▶ Select Handset.
Using automatic redial
If a connection is unsuccessful, press Ⓞ when Ok is displayed. To stop redialling, press Ⓞ when Cancel or C is displayed.
Using hotkey dialling
If you have set up hotkey dialling, you can press and hold a digit key to call contacts on your Contacts List. As each entry in your Contacts List is stored in a numbered location, press and hold the digit key relating to that location. To turn on hotkey dialling see Enabling and disabling hotkey dialling on page 64.
Voice calls
Displaying caller ID
Note: This is network dependent ⚠.
If the caller's number and name are stored in your Contacts List, they can be displayed during an incoming call.
Note: Caller ID may not always be available.
Setting the ear piece volume
During a call press ⬇ to adjust the ear piece volume.
Note: You can adjust the volume for the personal handsfree, Bluetooth ® headset or Bluetooth ® car kit accessories in the same way.
Swapping between handsfree and handheld modes
From handheld to handsfree
Press
Select Handsfree.
From handsfree to handheld
Press ☐ twice.
Holding a call
Press Ⓞ.
Select Hold.
Resuming a call
Press Ⓞ.
Select Resume.
Press Ⓞ.
Making a second call
Note: This is network dependent.
If Call Waiting is enabled, you can make a second call. You can check your call waiting status from Settings > Call Service > Calls > Call Waiting.
Note: You cannot make more than one fax or data call at a time.
You must end all voice calls before you can make or receive a fax or data call.
Press ▶ Select contact number to dial. ▶ Select Recall. Press
The first call is put on hold.
Receiving a second call
Note: This is network dependent ⚠.
If Call Waiting is enabled, you can receive a second call. You can check your call waiting status from Settings > Call Service > Calls > Call Waiting.
Note: You cannot receive more than one fax or data call at a time.
You must end all voice calls before you can make or receive a fax or data call.
Accept or reject a second call
Press ▶ Select Accept or Reject.
Note: If you accept the second call, the current call is put on hold.
End current call and receive second call
Press ▶ Press 🔍 to answer the second call.
Voice calls
Operating during two calls
Swapping between calls
An icon (☐) indicates the current call, when connected to two calls.
Press Ⓞ. Select Swap to change to the other call.
Ending current call
Press Ⓞ. Select End.
Ending both calls
Press ✗.
Transferring a call
When you are connected to two calls, you can connect them together, and end your connections, leaving the two callers to talk to each other.
Press Ⓞ. Select Trans.
Note: You cannot do this while in multi-party mode.
Multi-party calls
Note: This is SIM dependent ☐.
In a multi-party call three to six people can have a conversation at the same time. You can swap between a multi-party call and another call as you do for two separate calls.
Enabling a multi-party call
With two calls connected (one active and one on hold), press Ⓞ. Select Merge.
All three parties can now talk to each other.
Adding people
You can add people to the multi-party call (up to a maximum of five), either by making a call or accepting an incoming call. You can then merge the new call into the multi-party.
Press ▶ Select Merge.
Note: When you make a call or accept an incoming call, the multi-party call is placed on hold. The other callers in the multi-party call can continue to talk to each other while on hold from you.
Splitting a multi-party call
You can select a caller from the multi-party call and remove their connection, so that you can talk privately to them.
Press ▶ Select Option. ▶ Select a caller. ▶ Select Split.
The selected caller is split from the multi-party and the multi-party call is placed on hold. The remaining multi-party callers can still talk to each other.
Rejoining a multi-party call
When you have finished talking to an individual you can rejoin the multi-party call:
Press ▶ Select Merge.
Ending a single connection to a multi-party call
Press ▶ Select Option. ▶ Select a caller. ▶ Select End.
Note: You cannot end an individual caller if you have a call on hold or another call is incoming.
Ending all connections to a multi-party call
Press
Note: This ends all calls, including those on hold or split from the multi-party call.
Voice calls
Using the notepad
During a call you can enter numbers that you may want to dial when you have finished the call. You can make a note of these numbers on the notepad.
Enter the number. When you have finished your call, press 🔒 to dial the number. Or press ☐ while the number is displayed to store the number in your Contacts List. The current call remains active.
In call options
During a call select Menu > Menu to access the following menus:
Schedule, Browser, Contacts List, Messaging and Memo.
For information on using these menus, see the relevant section in this user guide.
Text entry
You use alphanumeric characters to enter details into the Contacts List, to create text and e-mail messages.
There are five different text entry modes: normal (ABC or abc), Greek (ABΓ), extended alphabet (AÄÅ), numbers (0–9) and T9® (T9). To change your text entry mode press 📋, or select Menu > Input Mode, and select the mode that you want. The icon for the current mode appears in the information area on the display. To change between upper and lower case letters press ✕. The table below shows the characters that you can enter in the different text modes.
 |
Note: The characters available in T9®, depend on the language you are using.
Text entry
T9®
Using T9® reduces the number of key presses required.
When in T9® mode:
▶ Press a key once for any letter you require on that key. The desired letter may not be displayed. Continue pressing other keys until the end of a word is reached. ▶ Check that the word has been typed correctly before continuing to the next word. If the combination of letters typed has produced a word which is not the one you require, press ⬇ or Ⓞ+ until the correct word is displayed. ▶ Continue to the next word. If the word you require is not in the internal dictionary, you can enter it using the Normal mode, or add it to the internal T9® dictionary.
Adding entries to the T9® dictionary
If the internal T9® dictionary does not contain a word, name, or abbreviation that you require, you can add it. Words that you add to the T9® dictionary are available for future use.
From Normal, Extended or Greek mode, enter the required word. When the word is complete, press 📄 to select T9® entry mode.
T9® is a trademark of Tegic Communications Inc. T9® Text Input is licensed under one or more of the following: U.S. Pat Nos. 5,818,437, 5,953,541, 5,187,480, 5,945,928, and 6,011,554; Canadian Pat No. 1,331,057; United Kingdom Pat No. 2238414B; Hong Kong Standard Pat. No. HK0940329; Republic of Singapore Pat No. 51383; Euro. Pat No. 0 842 463 (969272260.8) DE/DK, FI, FR, IT, NL, PT, ES, SE, GB: and additional patents are pending worldwide.
Entering text
In Normal, Greek and Extended modes, each time you press a key in quick succession the next character available on that key is displayed. For example, to enter 'c' you need to press three times in quick succession. To enter the displayed character, release the key or press another key. The cursor then moves to the next position. If you want to enter two consecutive letters from the same key, for example 'on' or 'll', you may need to press to move to the next position.
You can also select characters from the character list. You can display the character list by pressing and holding a text entry key, or by selecting Menu >Char.List. Only the characters available in your current text entry mode are displayed.
Editing text
Press ⬇ to move up or down one line of text.
Press ◀ to move left or right one character.
Press ☐ to delete the character to the left of the cursor.
Press and hold 📋 to delete the current line.
If you move the cursor over a character and press another key, the new character is inserted immediately before the selected character.
Cut, copy and paste
You can cut, copy and paste text from other messages or contacts list entries on your phone.
To cut text:
▶ Select Menu > Cut. ▶ Move to the start of the text that you want to cut, and select Start. ▶ Use ◀ to highlight the text that you want to cut, and select Stop.
To copy text:
▶ Select Menu > Copy. ▶ Move to the start of the text that you want to copy, and select Start. ▶ Use ◀ to highlight the text that you want to copy, and select Stop.
You can only paste text if you have previously cut or copied some text. To paste text:
▶ Move where you want to paste the text. ▶ Select Menu > Paste.

Settings
Use the Settings menu to personalise your phone.
Display
![graph TD A["Display"] --> B["Wallpaper On/Off Show"] A --> C["Brightness Backlight Time"] A --> D["Key Backlight"] A --> E["Clock/ Calendar"] A --> F["Case Screen"] A --> G["Operator Notice"]](/content/2026/05/965659/images/dc3a5c6e6184600b50104fe760616ebf632dbc9541fa244d4bd2ff507a69fe47.jpg)
Setting the wallpaper
The wallpaper is a picture that displays when the phone is in idle mode.
▶ Select Wallpaper. ▶ Select your picture.
If your picture is not in the folder, press 📋 then select another folder.
Changing the start up events
The start up events are an animation that you can select and a greeting that you enter. These appear when you turn on the phone. The animation is also shown when you turn off the phone.
![graph TD A["On/Off Show"] --> B["Animation Greeting"] B --> C["Select one of the preset animations"] B --> D["Off"] B --> E["Enter the text of your greeting"]](/content/2026/05/965659/images/22a4085bb1eca96253e96b63a35fbc26e1e9c86c4f531d38d0406e0d9c18e3b8.jpg)
Setting the brightness
You can adjust the brightness of the display. To make the display brighter select +1, to dim the display select -1.
▶ Select Brightness. ▶ Use ⬇ to move between +1, 0 and -1. Press
Setting the backlight time
The Backlight Time is the time that your screen remains lit when you are not using your phone.
▶ Select Backlight Time. ▶ Select from 10 seconds, 30 seconds and 60 seconds.
Note: Setting the Backlight Time to 60 seconds can reduce the talk and standby time of your battery.
Setting the key backlight
The Key Backlight illuminates your phone's keys.
▶ Select Key Backlight. ▶ Select On or Off.
Note: Turning on the Key Backlight can reduce the talk and standby time of your battery.
Displaying the clock/calendar in idle mode
You can choose whether or not to display a clock or calendar on the screen when in idle mode. Use ⬇ to move between the options.
![graph TD A["Clock/Calendar"] --> B["Remove Clock/ Calendar"] A --> C["Calendar Digital"] A --> D["Clock"] A --> E["Analogue Clock"]](/content/2026/05/965659/images/92defdb075797c6d2327d78c7a0dbc68655907f44b7f203e16361bad1fef4119.jpg)
Changing the case screen settings
The Case Screen is the screen on the front of the phone. It has a clock, icon area, incoming message area and call alerts area.
![graph TD A["Case Screen"] --> B["Backlight Colour"] A --> C["OrientationContrast Case Screen"]](/content/2026/05/965659/images/333ccf3a73010efb44eb2843f2b288bd25cd30469ca6e5fd6544b58b12435d13.jpg)
Settings
Changing the contrast
▶ Select Contrast. ▶ Use ⬇ to move between 0 and 10. ▶ Select Ok.
Changing the backlight colour
You set the backlight colour, to see what type of call you are receiving, or what mode you are in when the phone is closed. You can set the backlight colour for:
- Alarm/Schedule
- Voice Calls
- Fax Calls
- Data Calls
- Messages ● MMS Notify ● WAP Services
- Voicemail
- Camera Mode
- Others
To set your backlight colours:
▶ Select BacklightColour. ▶ Select the item you want to change. ▶ Select a colour.
Changing the orientation
The orientation changes the alignment of the information on the case screen.
▶ Select Orientation. ▶ Select Left or Right.
Changing the case screen display
▶ Select Case Screen. ▶ Select from Clock/Status, Analogue and Digital.
If you select Clock/Status, the battery level and GSM signal strength appear in the information area.
Operator notice
Note: This option is SIM dependent.
If you disable Operator Notice, you will not receive messages from your service provider.
Alerts
![graph TD A["Alerts"] --> B["Ring Volume"] A --> C["Ring Type Quiet Mode"] A --> D["Vibration Alert"] A --> E["Melody Composer"] A --> F["Voice Recorder"] A --> G["Auto Answer"]](/content/2026/05/965659/images/f1ca15277226f7d541b8ac8f78922a3dd37b7f2f38f100e6999bde4bd6cf8b17.jpg)
Changing the ring volume
You can change the ring volume so that you can hear your phone ring. For example, in a noisy environment you may want to set the volume to maximum.
▶ Select Ring Volume. ▶ Use ⬇ to move between 0 and 4 on the volume scale. ▶ Press Ⓞ to select the new volume level.
Note: This option is unavailable if you are in quiet mode.
Setting the ring type
Use ring type to select the sound you want to hear when you receive a call.
▶ Select Ring Type. ▶ Select the type of call that you want to change. ▶ Select your sound.
If your sound is not in the folder press 📋 then select another folder.
Setting quiet mode
In quiet mode the microphone amplifies your voice, so you can whisper and still be heard by the person on the other end of the call. You should use quiet mode in situations where you do not want to disturb the people around you.
In quiet mode, the phone will not ring when you receive a call or message, unless you set a ring volume for quiet mode.
![graph TD A["Quiet Mode"] --> B["Ring Volume VibrationOn/Off"] B --> C["On Off"] B --> D["0 - 4"] B --> E["Continuous Intermittent Off"]](/content/2026/05/965659/images/356e85eb577b75daddc102bb9e31881a2ed4ab7f0ceb61f984f137c8ec132a19.jpg)
Settings
Setting a vibration alert
If you set a vibration alert, the phone vibrates when you receive a call or message. This setting is separate from the vibration alert that you set for quiet mode.
▶ Select Vibration Alert. ▶ Select from Continuous, Intermittent and Off.
Creating a ring type
Select Melody Composer > Create. Using the following table, enter the notes, rests, and durations to create your melody.
| Key | 1st press 2 | nd press 3 | rd press 4 | th press 5 | th press |
 | C2 C3 C4 C1 | ||||
 | D2 D3 D4 D1 | ||||
 | E2 E3 E4 E1 | ||||
 | F2 F3 F4 F1 | ||||
 | G2 G3 G4 G1 | ||||
 | A2 A3 A4 A1 | ||||
 | B2 B3 B4 B1 | ||||
 | Rest | ||||
 | 1/8 1/4 1/2 1 1/16 | ||||
 | Sharp |
When you have completed your melody, you can save it:
Press Select > Ok. Enter a name. Select Save. Select the folder where you want to save your melody.
At any time during your composing, you can press 📄 to play back your melody.
Once you have saved your melody, you can edit it.
Select Edit from the Melody Composer menu. Select the data folder where your melodies are stored. Select the melody you want to edit. Select Edit. Use the relevant keys to insert new notes and rests.
Note: The only restriction on the number of melodies you can compose is the space remaining in your data folders.
Recording a voice message
You can record a message to use as your ring type.
Select Voice Recorder > Record. Record your message. Store the recording in a data folder.
You can now select and use this sound in the same way as you do for any other ring types.
Once you have recorded a voice message, you can edit it. Select Edit from the Voice Recorder menu, then edit it as necessary.
Setting auto answer
When auto answer is on, and your phone is connected to a car kit or personal handsfree adaptor, incoming calls are automatically answered.
Select Auto Answer > On.
To turn off auto answer:
Select Auto Answer > Off.
Keys
![graph TD A["Shortcut Key Keyguard Key Volume Key Tone Answer"] --> B["Key"] C["Keys"] --> A](/content/2026/05/965659/images/33a2925c624ae034c268d030dcc70b7d7da804adf95a842a1a3020ef5c542ea5.jpg)
Choosing the function for the shortcut key
The right soft key (☐) is a shortcut key from idle mode. You can choose which function you want this key to access. The default is camera.
▶ Select Shortcut Key. ▶ Select the function that you want.
Settings
Setting the keyguard
The keyguard stops the keypad being accessed.
Note: When the keyguard is on, you must turn it off before you can use the phone.
▶ Select Keyguard. ▶ You are asked ‘Guard Keypad?’. Press Ⓞ.
You can also set the keyguard directly from the idle screen:
▶ Press and hold down Ⓞ. ▶ Select Keyguard. ▶ You are asked ‘Guard Keypad?’. Press Ⓞ.
To turn off the keyguard:
▶ From idle mode press Ⓞ. ▶ You are asked 'Free keypad?'. Press Ⓞ.
Changing the key volume
The key volume is the volume of the tone made when you press a key.
▶ Select Key Volume. ▶ Use ⬇ to move the volume level between 0 and 4.
Changing the key tone
The key tone is the sound made when you press a key.
▶ Select Key Tone. ▶ Select the tone you want.
Choosing the key to use for the answer key
You can choose whether to use any key or just the send key (💡) to answer a call.
▶ Select Answer Key. ▶ Select Any Key or Send Key.
Phone settings
![graph TD A["Phone Settings"] --> B["Language DTMF Length"] A --> C["All Tones Active Flip Warning"] A --> D["Tones"] A --> E["Camera Tones"] A --> F["User Messages"]](/content/2026/05/965659/images/6286aa682bf275d751965b3f30dd7a8a2347e5518c02a554dfbb828a1ae4a6a2.jpg)
Changing the language
You can change the language that the phone uses for display messages and text entry.
▶ Select Language. ▶ Select DisplayLanguage or Tegic Language. ▶ Select the language.
Note: Tegic language is the language used by T9® text entry. For more information on T9® text entry, see Entering text on page 36.
Changing the DTMF length
DTMF stands for Dual Tone Multi-Frequency. You can send DTMF tones during a conversation to access voice mail, paging and computerised home banking. For example, you may need to enter a number to remotely access voice mail messages.
▶ Select DTMF Length. ▶ Select Long or Short.
Turning tones on and off
You can turn on or off all tones or just warning tones.
▶ Select All Tones or Warning Tones. ▶ Select On or Off.
Active flip
If you enable active flip, you can answer a call by opening the phone, end the call by closing the phone and reject a call by pressing the memo/camera shutter key.
▶ Select Active Flip. ▶ Select On or Off.
Selecting camera tones
The camera tone is the sound the phone makes when you take a picture.
▶ Select Camera Tones. ▶ Select a tone type.
Settings
Editing user messages
The phone contains some standard user messages that you can send to other people. You can edit these messages to suit you.
▶ Select User Messages. ▶ Select the message you want to edit. ▶ Edit the message.
Clock
![graph TD A["Clock Set Current"] --> B["Location"] B --> C["Display Format"] C --> D["Away Clock Power Time"] C --> E["Clock"]](/content/2026/05/965659/images/298482ac258b9ec486135f7e4e8cbefa39518ad57da3925bf4e2e50c53557574.jpg)
Setting the clock
![graph TD A["Clock Set"] --> B["Time Set Home\nSummertime"] A --> C["Away\nSummertime"] A --> D["Home Area"] A --> E["Time Difference"] A --> F["Auto Adjustment"]](/content/2026/05/965659/images/6b8129fd2a161eb5b94b7712e0c568eae635003a265537e992c2724f662f310b.jpg)
Setting the time
Use this to set the current time and date on your phone.
▶ Enter the date (day/month/year). ▶ Enter the time (24 hour clock)
Setting summertime
You can set summertime when you are at home or away. When you set summertime, the clock automatically moves on by one hour.
▶ Select Home Summertime or Away Summertime. ▶ Select On or Off.
Setting your home area
▶ Select Home Area. ▶ Select World List to choose a country. Select the country you are in. ▶ Select City List to choose a city. Select the city closest to your current location.
Auto adjusting the time difference
If you are away, in a country with one time zone, then the time difference can be adjusted automatically.
Select Clock Set > Auto Adjustment > On.
The phone gets your location from the local network provider, and adjusts the clock automatically.
Setting the time difference
If you are away, in a country with more than one time zone, then you can set the time difference manually.
▶ Select Clock Set > Time Difference. ▶ Select the difference from your home area.
Changing your location
You can change your location so that the phone's clock automatically adjusts depending on whether you are at home or abroad. All the clocks on the phone display the time of the selected location.
▶ Select Current Location. ▶ Select Home or Away.
If you select Away, you may need to adjust the time difference, so your clock is correct. To do this see Setting the time difference on page 47.
Changing the display format
You can choose how you want the time and date to display.
▶ Select Display Format ▶ Select from the displayed list of date and time formats.
Changing the appearance of the away clock
You can choose how you want the away clock to display.
▶ Select Away Clock. ▶ Select from Off, Large Clock or Case Clock.

Setting the power on and off times
You can use this to set the phone to turn itself on or off automatically at a specified time.
Select Power Time. Select --:-- On or --:-- Off. If times are already set, these times appear before the words On and Off. Select --:-- or the existing time. Enter the time you want the phone to power on or off. Set whether these power on/off times are Repeat Daily, Once, or Disabled. Press 📄 to save your settings.
Settings
Disabling the power on and off times
Select the power on or off time. Select the frequency option. Select Disabled. Press 📄 to save your alarm settings.
Or
Highlight the power on or off time. Press 📄 to cycle through Repeat Daily, Once, or Disabled. Stop at Disabled. Press Ⓞ then 📋 to save your alarm settings.
Caution: You need to ensure that the times you set will not automatically power on when you are in an aircraft, medical facility, etc. See Important information on page 5.
Call service
![graph TD A["Call Service"] --> B["Calls Call"] A --> C["Connections Send My"] A --> D["Service"] A --> E["Number"]](/content/2026/05/965659/images/f2c07b9c2180a794a0cb3e18cff121d5b1307a0c1ac23f29b496dd9bb3d2f00a.jpg)
Note: The functions available are SIM dependent.
Calls
![graph TD A["Calls"] --> B["Last Call Timer All Calls Timer Call Waiting Caller's ID Withhold ID"] B --> C["End"]](/content/2026/05/965659/images/369d4e757861c87361cf085737502483fc2af7fc90ab933db7602d95fccaaa69.jpg)
Viewing the length of your last call
Select Calls > Last Call Timer. The length of your last call is displayed.
Viewing the combined length of all your outgoing or incoming calls
Select Calls > All Calls Timer. Select Incoming or Outgoing. The combined length of all your incoming or outgoing calls since the timer was last reset is displayed.
Once you have seen the total time you can reset the timer:
Press Ⓞ. You are asked 'Reset Total Time?'. Press Ⓞ. Enter the lock code.
Note: The lock code is preset to 0000. For security you should change this to a four figure number that you can remember, see Changing the phone lock code on page 53.
Checking the status of call waiting, caller's id and withhold id
Note: This is network dependent ⚠.
Select Calls. Select Call Waiting, Caller's ID or Withhold ID. The status is displayed.
For Call Waiting, you can change the status:
If Call Waiting is disabled and you want it enabled, select Menu > Enable.
If Call Waiting is enabled and you want it disabled, select Menu > Disable.
Connections
![graph TD A["All Connections"] --> B["All Connections"] B --> C["Connections"] style A fill:#f9f,stroke:#333 style B fill:#ccf,stroke:#333 style C fill:#cfc,stroke:#333](/content/2026/05/965659/images/f7ae029a7540459f136fd52d8223ae8983beaf7ccede71aabb500ade184b1fc5.jpg)
Viewing details of your last connection
Select Connections > Last Connection.
The time and data transfer details are displayed.
Settings
Viewing the combined details of your previous connections
Select Connections > All Connections.
The combined length of all your incoming or outgoing calls since the timer was last reset is displayed.
Once you have seen all the details, you can reset the total time and data:
Press Ⓞ. You are asked 'Reset Total Time and Data?'. Press Ⓞ. Enter the lock code.
Note: The lock code is preset to 0000. For security, you should change this to a four-figure number that you can remember. See 'Changing the phone lock code' on page 53.
Allowing incoming calls during data transfer
With this enabled, you can transfer data and accept incoming calls on your phone. With this disabled, you cannot answer incoming calls while you are transferring data.
Select Connections > Call Priority. Select On or Off.
Service charges
Note: This is SIM and service provider dependent. This option is only available for 'Pay as you go' SIMs.
To maintain control over the cost of calls that you make, you can set the phone to restrict its use to a specified number of units.
Setting the unit price
First you need to enter a price per unit. This is the amount that your service provider charges for one unit of call time.
Select Service Charges > Price/Unit. Enter your PIN2. Enter the currency unit (maximum 3 characters). Enter the unit price.
Setting the maximum unit level
Use this to set the maximum cost of the calls that you can make.
▶ Select Service Charges > Max Cost. ▶ Select Menu > Edit. Enter your PIN2. Enter the maximum number of units (the corresponding cost is displayed).
Note: The duration of one unit may vary during the day at peak and off-peak times. The call charge information may not be an accurate reflection of the tariffs charged by your service provider.
Disabling the maximum unit level
Use this to disable your maximum cost setting.
▶ Select Service Charges > Max Cost. ▶ Select Menu > Disable. ▶ Confirm that you want to disable this setting. Enter your PIN2.
Setting a warning level
You can set a warning to indicate that you have almost reached your maximum cost.
Note: This is SIM dependent ☐.
▶ Select Service Charges > Warning At. Enter a value in units at which you want the warning to sound.
Viewing the remaining cost
You can see how many units you have left before you reach your maximum cost level.
Select Service Charges > Cost Left.
Viewing the used cost
You can see how many units you have used.
Select Service Charges > Call Meter
Settings
Sending your number
Note: This is network dependent ⚠.
If your network supports this function, you can decide whether you want your phone number to be sent when you make a call.
Note: You must be registered with a service provider before you can choose to send your number.
▶ Select Send My Number. ▶ Select from Network Set, On and Off.
If you select Network Set, your network's default setting is used.
Call divert

Divert Voice Divert Fax Divert Data Cancel All Status
Setting and cancelling diverts
To set diverts for specific call types:
▶ Select the type of call you want to divert. ▶ Select Set. ▶ Select from All, When Busy, When No Reply and When Unreachable. ▶ Enter the number to divert to.
To cancel diverts for specific call types:
▶ Select the type of call you want to cancel the divert on. ▶ Select Cancel. ▶ Select from All, When Busy, When No Reply and When Unreachable.
To cancel all diverts:
Select Cancel All. Confirm that you want to cancel all the diverts you have set.
Viewing the divert status
Select Status. Use the down arrow to scroll through the list; only one item appears at a time on the screen.
Security
![graph TD A["Security"] --> B["Phone Lock Call Bar PIN Fixed Dial Barred"] A --> C["PIN2"] A --> D["Dial"]](/content/2026/05/965659/images/34b38c4b574a7753742084515d8934fc0a12ab3859b4c9246eaab8577545a17d.jpg)
Setting and cancelling the phone lock
Note: You can also set the phone lock by holding down the circle button on the idle screen, then following the instructions below.
When the phone lock is set, you can only use the phone to receive incoming calls and to make emergency calls.
Select Phone Lock > On/Off > On. Enter the lock code.
The lock icon is displayed on the screen.
When the phone lock is on, you have to enter the lock code from the idle screen before you can use the phone.
Note: The phone lock code is preset to 0000. For security, you should change this to your own four-figure number, see Changing the phone lock code on page 53.
To cancel the phone lock:
Select Phone Lock > On/Off > Off. Enter the lock code.
Changing the phone lock code
You can change the phone lock code to a four-figure number that you find easy to remember.
▶ Select Phone Lock > Change Code. ▶ Enter the current phone lock code. ▶ Enter the new phone lock code. ▶ Verify the new phone lock code.
Settings
Setting and cancelling call bar
Call barring restricts certain types of incoming and/or outgoing calls, using a password provided by your service provider. When you check the status of the Call Bar, your phone must be registered with a network. You can set call barring for voice, fax and data calls.
▶ Select Call Bar. ▶ Select the type of call that you want to bar. ▶ Select Set or Cancel. ▶ Select when you want to bar the calls. Enter the password, provided by your service provider.
Note: You can change your password to something that you find easy to remember, see Changing the password on page 54.
To cancel all the current call bars:
▶ Select Call Bar > Cancel All. ▶ Enter the password. ▶ Confirm that you want to cancel all the set call bars.
Viewing the call bar status
You can see whether you have any call types barred.
▶ Select Call Bar > Status. ▶ Use ⬇ to scroll through the list, only one item at a time appears on the screen.
Changing the password
You can change the password to something that you find easy to remember.
▶ Select Call Bar > Password. ▶ Enter the password, supplied by your service provider. ▶ Enter the new password. ▶ Verify the new password.
Enabling and disabling PIN and PIN2
The PIN protects your phone against unauthorized use. If you enable the PIN, you have to enter it every time you turn on the phone.
You need PIN2 to set fixed dial numbers.
Your PIN and PIN2 are supplied by your service provider.
Note: If you enter the PIN or PIN2 incorrectly three times, the phone will lock and you will need to enter the PUK or PUK2 code. If you enter the PUK or PUK2 code incorrectly ten times, your phone will no longer operate. All information stored in the SIM will be lost, and you will need to replace the SIM. Contact your service provider for the PUK and PUK2 codes. Contact your service provider for more details.
▶ Select PIN or PIN2. ▶ Select Enable/Disable. ▶ Select On or Off. ▶ Enter the PIN or PIN2.
Changing the PIN
You can change the PIN to an eight-figure number that you find easy to remember.
▶ Select PIN. ▶ Select Change. Enter the PIN. Enter the new PIN. ▶ Verify the new PIN.
Note: You can only change the PIN when it is enabled.
Settings
Enabling and disabling fixed dial
Fixed dial is part of the Contacts List, but with added security. When you enable fixed dial:
● You can only dial numbers that are in the fixed dial store - If you manually dial a number, it must match one in the fixed dial store. - If you store, edit or delete a phone number, you have to enter your PIN2.
To enable or disable fixed dial:
▶ Select Fixed Dial. ▶ Select On or Off. ▶ Enter your PIN2, provided by your service provider.
When you enable fixed dial, in the Contacts List you can only browse the numbers that are in the fixed dial store.
Enabling and disabling barred dial
When you enable barred dial you can no longer dial the numbers that you entered as barred dial numbers. You can use this to stop certain numbers being dialled.
To enable or disable barred dial:
▶ Select Barred Dial. ▶ Select On or Off. ▶ Enter your password.
Network
![graph TD A["Network"] --> B["New Network"] A --> C["Search Mode"] A --> D["Network List"]](/content/2026/05/965659/images/e45f420811aa260ad22a76a3c1a1eb14bda37a9b7e9038b2c900d7f8d2f2291b.jpg)
Changing to a new network
When you are not in your home country or region, you may be able to use a network that you are not directly subscribed to. This is called roaming.
Note: National Law may not permit roaming in your home region.
Use the options on the Network menu to select a network that is available in your current location.
▶ Select New Network. ▶ Select a new network.
An X appears in the information area if you cannot register with the selected network.
Search mode
You can set the Search Mode to Automatic or Manual. When the Search Mode is Manual, the phone only uses the selected network. If coverage is lost, you need to select another network. When the Search Mode is Automatic, the phone automatically reselects a new network to maintain network availability.
Network list
In Automatic Mode, the phone uses the Network List to find a new network. The location numbers in the Network List show the search priority. You can change the list as follows:
Insert stores a new network in the currently displayed location, and moves other networks down.
Edit overwrites the old network with a new one.
Delete deletes the currently displayed network.
Ok selects the currently displayed network.
Defaults
Use this to return your personal settings to their factory default. You cannot return the Phone Lock or Language to their default settings.

Contacts list
Use the Contacts List menu to store a person's phone numbers, e-mail addresses, company name, picture and other information. You can also set
up how your contacts list is organised and displayed.
Browse
This menu only applies to contacts stored on your phone. For contacts stored on the SIM see SIM on page 65.
![graph TD A["Browse"] --> B["Select a contact"] B --> C["Create Infrared Bluetooth --> SIMDelete"] C --> D["View Recall"]](/content/2026/05/965659/images/c942e8202aee676e275a4440dc07a0be40efb3f5f691489f423867c57edec8a3.jpg)
Note: When you create or edit any of your entries, you must press 📄 to save your changes, or they will be lost.
View. Displays all the details for the entry you selected. You need to scroll down the screen to see all the information.
Recall. Displays the phone number for the entry you selected. You can either call it or change it. To call it press 🔒.
Delete. Deletes the entry.
Create. Creates a new entry in the Contacts List.
Infrared. Sends the details of the current entry to another device via the infrared port. See "Send your details to an infrared device" on page 115.
Bluetooth. Sends the details of the current entry to another Bluetooth® device. See "Send your details to a Bluetooth® device" on page 115.
Note: To receive a contact entry from another infrared or Bluetooth® device, use Receive Object. See "Receive object" on page 120.
-> SIM. Copies the details of the current entry to the SIM.
Create
Note: When you create or edit any entries, you must remember to press 📄 to save your changes, or they will be lost.
Creating a new contact
▶ Select an item. Enter the data using the keypad, or select an item from the list available.
For each contact you can enter:
| Item Number of characters | |
| First name 16 | |
| Last name 16 | |
| Home number 40 | |
| Work number 40 | |
| Mobile number 40 | |
| Other number 40 | |
| Home e-mail 80 | |
| Work e-mail 80 | |
| Other e-mail 80 | |
| URL 80 | |
| Title 16 | |
| Company 16 | |
| Note | 32 |
| Photo | Select a picture from the list or take a picture with the camera |
| Group name Select a group from the list. | |
| Ring type Select a tone from the list. | |
| Vibration alert | Select a vibration type from the list. |
| Case screen colour | Select a colour from the list. |
| Location | 3 (up to 500 locations) |
When you have entered all the details, press 📄 to save the contact.
Note: Location is the location number in your Contacts List.
If you put a contact in a group which has a ring type, case screen colour and vibration alert, then these options are not available for the individual contact.
Entering DTMF digits in a phone number
You can enter DTMF digits at the end of a phone number, so that these numbers are automatically sent after the main phone number.
▶ Enter the phone number. ▶ Press and hold 0+ until a P is displayed at the end of the phone number. Enter the DTMF digits, for example, the number to access voice mail messages.
When you call this number the DTMF tones will be sent after 3 seconds.
Entering a picture
You can choose from Camera and Select. Choose Camera to take a picture with the phone's camera.
▶ Select Camera. ▶ Take the picture. ▶ Press 📋 to return to the Contact.
Choose Select to select a picture from your Data Folders.
'Wild' numbers
Wild numbers are spaces that you can store in a phone number. You must fill the wild numbers before you can dial that phone number. You can use wild numbers in conjunction with fixed dial, to, for example, restrict calls to a specific area by storing the area code then adding the remainder of the number when it is recalled.
To enter a wild number:
While entering a phone number, press and hold 0+, until _ is displayed.
When you recall this phone number, enter the required number to replace the wild number.
Voice dial
With voice dial you can save a number using your voice. You can then dial the number by saying the name that you want to call.
Creating a voice dial entry
▶ Select Voice Dial. ▶ Select Add. ▶ Select a contact. ▶ Select Recall. ▶ Select Ok. ▶ Hold the phone about 20cm away from your mouth. Speak clearly into the microphone to record the required name.
For each entry you are prompted to record the name a second time, so that the phone recognises your voice and intonation.
When you have finished recording, the display shows whether or not the recording was successful. If the recording failed, you need to try again. You can try as many times as you need to.
Note: Each recording is short, so be ready to speak soon after initiating the recording.
Recalling a voice dial entry
▶ From idle mode press and hold ⬇ or ♀. ▶ Say clearly the name that you want to recall. ▶ Press 🔒 to call the number.
Dialling a voice dial entry
You can set up voice dial to dial a voice dial number directly from idle mode, so you don't have to press 🔒 to call the number.
▶ Select Voice Dial. ▶ Select On/Off. ▶ Select On.
To turn it off select Off.
Note: Use voice dial to make calls from your Bluetooth ® headset or car kit.
Voice dial recordings must be loud to ensure that confirmation is audible when using some car kits.
Contacts list
Editing a voice dial entry
▶ Select Voice Dial. ▶ Select an entry. ▶ Select from Add, Play and Delete.
Add. Add a new Voice Dial entry.
Play. Listen to the recording for the selected entry.
Delete. Delete the selected entry.
Groups
From the Groups menu, you can set up groups of contacts. You can use groups to collect together types of entries, for example, business, friends and family. You can give each group a suitable title, for quick access to the entries.
Creating a group
▶ Select a preset group name or one of the available user group names from the list. You can enter a name, ring type, vibration alert and case screen colour.
Note: If you already have ring type, vibration alert and case screen colour set for an individual that you add to the group, then the group's settings are used in preference to those set for the individual.
Viewing a group
Once you have created a group, you can view its settings.
▶ Select the group on the list. ▶ Select View from the menu.
From this view you can then edit the group settings:
▶ Select the item that you want to edit. ▶ Select Edit. ▶ Make your changes. ▶ Select Ok to make your changes or Cancel to revert to the original.
You can revert to the original settings by selecting Reset.
Previewing a group
This simulates an incoming call, so that you can review your settings and see if they are what you want.
▶ Select a group. ▶ Select Preview.
You can then adjust your settings using View.
Adding and removing members
Once you have created a group, you can add or remove members.
To add a new member:
▶ Select the group on the list. ▶ Select Members from the menu. ▶ Select Add. ▶ Select a contact from your list.
Or
▶ Highlight the group on the list. Press ▶ Select Add. ▶ Select a contact from your list.
To remove a member:
▶ Select the group on the list. ▶ Select Members from the menu. ▶ Highlight a contact. ▶ Select Remove to remove this contact from the group.
Or
▶ Highlight the group on the list. Press ▶ Highlight a contact. ▶ Select Remove to remove this contact from the group.
Contacts list
Settings
![graph TD A["Sort by Display by Separator Hotkey"] --> B["Settings"] C["Dialling"] --> B D["Voice Dial"] --> B](/content/2026/05/965659/images/e9d92cd19053f674043c7c4490c4f0be36b21b056be4302e74702a252312e0f3.jpg)
Setting how to sort or search entries
You can choose how to sort and search the entries in your Contacts List.
▶ Select Sort by or Display by. ▶ Select First Name or Last Name.
Setting how to display entries
You can choose how to display the entries in your Contacts List.
▶ Select Separator. ▶ Select Space or Comma.
Enabling and disabling hotkey dialling
With hotkey dialling, you can press and hold the digit key that relates to a location number to call contacts on your Contacts List. For example, to call the contact in location 3 of your Contacts List, press and hold 3def.
To enable hotkey dialling, select Hotkey Dialling, then select either SIM Phonebook or Mobile Phonebook.
To disable hotkey dialling, select Hotkey Dialling > Off.
Enabling and disabling voice dialling
With voice dialling, you can call a contact by speaking into the microphone.
▶ Select Voice Dial. ▶ Select On or Off.
To set up voice dial numbers see Creating a voice dial entry on page 61.
SIM
This shows the contacts stored on your SIM.
![graph TD A["View Recall"] --> B["Select a contact"] C["Create --> Phone ProfileDelete"] --> B](/content/2026/05/965659/images/1add82c55af4c7caf4e0d4e23b40e68e06c4b3f27cd4701741aea46541eb03c1.jpg)
Note: When you create or edit any of your entries, you must press 📄 to save your changes, or they will be lost.
View. Displays all the details for the entry you selected. You need to scroll down the screen to see all the information.
Recall. Displays the phone number for the entry you selected. You can either call it or change it. To call it press 🔒.
Delete. Deletes the entry.
Create. Creates a new entry in the Contacts List.
Note: For a SIM entry you can only enter a name, phone number and location.
-> Phone. Copies the details of the current entry to the phone.
Profile. Displays the entry's profile.
Creating fixed dial number entries
Note: Before you can create a fixed dial number entry, you have to enable Fixed Dial (see Enabling and disabling fixed dial on page 56).
Fixed dial is part of the Contacts List, but with added security. When you enable fixed dial:
● You can only dial numbers that are in the fixed dial store - If you manually dial a number, it must match one in the fixed dial store. - If you store, edit or delete a phone number, you have to enter the PIN2, provided by your service provider.
You enter the contact details using the Create option on the SIM menu. When you save the entry you have to enter your PIN2. The number is stored in the fixed dial store on your SIM.
Contacts list
Creating barred dial number entries
Note: Before you can create a barred dial number entry you have to enable Barred Dial (see Enabling and disabling barred dial on page 56).
When you enable barred dial you can no longer dial the numbers that you entered as barred dial numbers. You can use this to stop certain numbers being dialled.
You enter the contact details using the Create option on the SIM menu. When you save the entry you have to enter your password.
Storage
This shows the amount of space you have used on your SIM and your phone. Use ⬇ to move between the two.
You can copy all the SIM contacts to the phone or copy all the phone contacts to the SIM:
▶ Select Menu > Copy All. ▶ Select SIM to phone or Phone to SIM.
You can delete all the SIM contacts or all the phone contacts:
▶ Select Menu > Delete All. ▶ Select SIM Contacts or Phone Contacts.

Games
The games that are on your phone are network dependent. If you have four games listed then you have embedded games and should follow the instructions in the Embedded games section. If you have one game listed then you have downloadable games and should follow the instructions in the Downloadable games section.
Embedded games
![graph TD A["Games"] --> B["Space War"] A --> C["RollerKid Panko Crazy"] A --> D["Cobra"] A --> E["Demo Welcome SettingsInstructions"]](/content/2026/05/965659/images/425bd4aff33302dc6ff153a7143acdc716fe9835efbcafdc4ce3bc91ce3db410.jpg)
To play the embedded games, select the required game, then follow the on-screen instructions.
Demo
Select this to see a demonstration of a game.
Welcome
Select this to read the welcome screen.
Instructions
Select this to see general instructions for playing the games.
Settings
![graph TD A["Settings"] --> B["Sound VibrationsNickname Backlight"]](/content/2026/05/965659/images/5d6e77bbb3d56139c490078dfcfa9b7fd9528b93f800cac4aa68ee20c1f336ff.jpg)
Nickname
Use this to create a name to use when you play games. When you first select this item, it displays No nickname. Use ☐ to delete the existing text, then enter your nickname.
Sound
Use this to set the sound level for your games. You can select from Off, Low, Medium and High.
Games
Vibrations
If you turn vibrations on, the phone vibrates when a target is hit in the game. You can select from On and Off.
Backlight
Use this to set your key backlight. You can select from Off, On 30s and Always on.
Note: If you select Always on, this may affect the talk and standby time of your battery.
Downloadable games
Note: This is network dependent.

Wallbreaker Catalogue News Instructions Settings
You have one embedded game - Wallbreaker. You can download one other game.
Note: When you download a new game it overwrites the previously downloaded game.
Catalogue
This displays a list of the games that you can download. To download a game:
▶ Select a game. ▶ Details of the game are displayed. ▶ Press 📄 to download the game. ▶ Confirm that you want to download the game.
The game is downloaded to your phone.
News
Displays SMS broadcast messages from Infusio TM , the games provider.
Instructions
Select this to see information about downloading games, and general instructions for playing the games.
Settings
This is the same as the Settings menu for embedded games. See Settings on page 67.

Browser
Use the Browser menu to access Internet services supported by the network, such as news, weather reports and sport.
Server list
Before you can access the Internet, your SIM must be data enabled and the configuration information must be entered.
Note: The configuration information may have been pre-programmed by your service provider. If you modify these settings, your browser may no longer work.
Once you have set up a server you need to select the new server and select Set to activate the new setting.
You can manually set up five servers on your phone.
![graph TD A["Server List"] --> B["Auto"] A --> C["<1> to <5>Server"] C --> D["Edit"] D --> E["Profile Name"] D --> F["Home URL"] D --> G["Linger Time Security"] D --> H["Gbpsayer IP"] D --> I["Type"] I --> J["Circuit Switch"] I --> K["GPRS"]](/content/2026/05/965659/images/e516215f6505e0ecc67961535a53758543181949bcde95575070675e08e62d41.jpg)
For Circuit Switch, select Set, then select Edit and set:
- Digital Dial number
- Analogue Dial number ● Circuit Type. Select from Digital and Analogue.
- User ID
- User Password
For GPRS, select Set, then select Edit and set:
- Access Point Name
- User ID
- User Password ● Authentication. Select from Normal, Encrypted and None.
Browser
Home page
To start the browser, select Home Page (to start the browser from idle mode press the @ key).
This opens the browser at your service provider's home page. This is recalled from the cache each time you start the browser. The cache is the phone's memory where pages that you have previously downloaded are stored.
The phone remains off line (i.e. not connected to a server) when it recalls pages from the cache.
The browser menu
The browser has its own menu, which you use when an Internet page is currently displayed, either on line or off line. To access this menu press 📋.
![graph TD A["Browser"] --> B["Home Page"] A --> C["Current URL"] A --> D["Page Memo"] A --> E["Reload"] A --> F["Cookie"] A --> G["Clear Cache"] B --> H["Bookmarks Enter URL"] C --> I["Save Image"] D --> J["Browser Images"] E --> K["Push Message"] F --> L["Exit"]](/content/2026/05/965659/images/ed0502dfaeb9a05ef71a5d8242819d862df2fd5b044b0f4563a1b5b08da110ec.jpg)
Home Page. Displays the page defined by your service provider.
Bookmarks. Saves the current page as a bookmark, so you can return to it another time.
Current URL. Displays the current URL.
Enter URL. Enter the address of the URL that you want to go to.
Page Memo. Saves the currently displayed page.
Save Image. Saves the currently displayed image.
Reload. Reloads and updates the current page.
Browser Images. Disables images, to display a page more quickly.
Cookie. Enable, disable or delete cookies.
Push Message. View all your push messages.
Clear Cache. Deletes the page(s) in the cache, and displays the Home Page.
Exit. Stops the browser.
Navigating pages
- Scroll up one line at a time. Focus on a link if there is one.
Scroll down one line at a time. Focus on a link if there is one.
Focus on the previous link. If there is no previous link, it behaves like ♂.
Focus on the next link. If there is no next link, it behaves like ♀.
If there is a left arrow icon in the right selection area of the screen, this key returns you to the previous page. If there is a tick icon in the right selection area of the screen, this key opens a new menu.
Display the browser menu. Follow a highlighted link.
indicates an image that cannot be displayed.
indicates on line browsing GPRS mode (non secure).
indicates on line browsing GPRS mode (secure).
indicates on line browsing CSD mode (non secure).
indicates on line browsing CSD mode (secure).
Bookmarks
This lists the bookmarks that you have stored. Select a bookmark from the list to go directly to that page.
Adding a bookmark
▶ While viewing content, select Bookmarks from the Browser menu. ▶ Select .
Deleting bookmarks
▶ While viewing content, select Bookmarks from the Browser menu. ▶ Press ☐ to select Menu. ▶ Select from Delete This, Delete Any and Delete All.
Renaming a bookmark
▶ Select Bookmarks from the Browser menu. ▶ Select Menu > Edit Title. ▶ Press and hold 🔒 to delete the current name. ▶ Enter the new name.
Browser
Grouped bookmarks
If you have set your bookmarks to display in groups (see Bookmarks on page 73), then you can highlight a group and select Menu, to make changes to that group. The options are:
Edit Title. Change the title of the group.
Display. Select List to display your bookmarks as one list.
Delete All. Delete all the bookmarks in that group.
Enter URL
Use this to enter a URL to go to a known site.
Page memo
Use this to view a previously saved page.
Push message
Push messages are SMS messages that the phone receives that relate to the browser. Use this to view the received messages.
Browser settings
![graph TD A["Browser Settings"] --> B["Colour Priority"] A --> C["Font Size Arrange"] A --> D["Colour"] A --> E["Browser Images"] A --> F["Bookmarks Push Reception"]](/content/2026/05/965659/images/a8e6b8629726358b1848aea1978adbdb21bf1213ba000cbd3f00ed30c0952612.jpg)
Use this to customise the browser interface.
Setting the colour priority
You can choose whether to use your colour settings, or those set by the Internet site that you are viewing.
▶ Select Colour Priority. ▶ Select from Prefer Content and Prefer User's.
Setting the font size
You can choose the font size of the text.
▶ Select Font Size. ▶ Select from Large, Standard and Small.
Arranging the colour
You can set the colours for your background, text, visited site and new site.
▶ Select Arrange Colour. ▶ Select from Background, Text Colour, Visited Site or New Site. ▶ Select a colour.
Enabling and disabling the browser images
If you disable browser images, pages display more quickly.
▶ Select Browser Images. ▶ Select from On and Off.
Bookmarks
You can choose whether to have one list of bookmarks, or whether to group your bookmarks.
▶ Select Bookmarks. ▶ Select from List and Group.
If you select Group, you can set up five different groups to store your bookmarks.
Enabling and disabling push reception
If you enable Push Reception, you will receive all the push messages sent by your service provider.
▶ Select Push Reception. ▶ Select from On and Off.
Cookie
Cookies are information saved about a site to allow you to access it more quickly when you return to it.
If you want the phone to save cookies, select Cookie > Enable > On.
If you do not want the phone to save cookies, select Cookie > Enable > Off.
To delete an existing cookie, select Cookie > Delete.
Last status
This displays the status of the last site that you visited. If your browser stops working, you may need this information to find the problem.

Camera
Note: Before you use the camera you should set the date and time. See Setting the clock on page 46.
You can take pictures with the built-in camera, and send them in multimedia (MMS) and e-mail messages, or use them as wallpaper.

Changing to camera mode
To change to camera mode either select Camera from the main menu, or press ☑ from idle mode.
Leaving camera mode
To leave camera mode press 📄 to return to idle mode.
Taking a picture
When you are in camera mode, move the phone around until you can see the image you want on the preview screen. ▶ Press Ⓞ to capture the image.
If you decide that you do not want the image that you have taken, you can press 📋 to delete it.
Taking a self-portrait
You can take a self-portrait using the shutter button on the side of the phone.
▶ Ensure that the phone is in camera mode. ▶ Close the phone. ▶ View the image in the self-portrait mirror. ▶ Press the shutter button on the side of the phone.
You can use this image in the same way as any other picture that you take with the camera.
Saving a picture
When you take a picture, it is automatically given a default name and stored in a data folder. You can change the name of the picture using Rename, see Renaming the picture on page 77.
Incoming calls when in camera mode
If you receive an incoming call while you are in camera mode, the phone leaves camera mode and switches to the incoming call. If a captured image is on the preview screen, it is saved in My Folders > My Pictures. If you want to use the image when you have completed your call, go to My Folders > My Pictures and select the image.
Using your picture
![graph TD A["Take a picture"] --> B["MMS e-mail Edit Rename Delete"] B --> C["End"]](/content/2026/05/965659/images/7d97163276971a4f7c4ce171cff20bf3075665a12ea9ca9395356d186eaef7d1.jpg)
Once you have taken a picture, press Ⓞ to access the menu.
Sending the picture in a multimedia or e-mail message
Select MMS or e-mail.
A multimedia or e-mail message is opened, with the picture already embedded or attached.
Camera
Editing the picture
When you have finished editing the picture, you must press Ⓞ to save your changes.
▶ Select Edit. Press

Brightness Effect Frame Size Format Trim
Changing the brightness
▶ Select Brightness. ▶ Press ◦ to make it lighter or ◀ to make it darker.
Changing the effect
Use this to change your picture's colours by using an effect.
▶ Select Effect. ▶ Select from Sepia, Monochrome and Negative.
Selecting a frame
Use this to enhance your picture, by adding one of the predefined frames.
▶ Select Frame. Select from a list of frames. You can preview the frame by highlighting it then pressing Ⓞ.
Changing the size
Use this to make your picture larger or smaller.
▶ Select Size. ▶ Choose Width or Height. ▶ Select Edit. ▶ Enter the percentage by which you want to change the size. ▶ Press Ⓞ.
Note: This does not cut your image, it compresses and/or stretches it. To cut your image, use Trim.
Changing the format
▶ Select Format. ▶ Choose from JPEG Fine, JPEG Normal, JPEG Economy and PNG.
JPEG Economy produces a small file but with a low resolution.
JPEG Normal produces a file which is acceptable for most uses.
JPEG Fine and PNG produce large files with high resolution.
Trimming your picture
Use this to select and save just a small part of your picture.
▶ Select Trim. ▶ Use ◆ to increase and decrease the size of the box to include just the part of the picture that you want. ▶ First adjust up and left, then press Ⓞ to adjust down and right. The white corner of the box indicates the directions that you can go. When you have the selection you want, press Ⓞ to select the area. Press
Renaming the picture
▶ Select Rename. ▶ Use ☐ to remove the existing text. ▶ Enter the new text. Press Ⓞ. ▶ Select Ok to save your changes or Cancel to revert to the old name.
Deleting the picture
▶ Select Delete or press 📄. ▶ Press Ⓞ to confirm, or ⊙ to cancel.
Close up picture
When the image is on the preview screen, press ⬆ to see a close up picture. This zooms in on the centre of the image. Press ⬇ to return to the original image.
Brightness adjustment
You can set the brightness of an image both before and after taking the picture. The brightness can be increased or decreased by two levels.
Changing brightness while taking a picture
When the image is on the preview screen, press the up arrow to make it lighter or the left arrow to make it darker. The brightness icon at the top of the screen changes to show how much lighter or darker you have made the image.
Camera
Changing brightness after taking a picture
See Changing the brightness on page 76.
Preview screen menu
![graph TD A["Preview Screen"] --> B["Photo Light Twilight Effect Format Capture"] A --> C["Frame"] A --> D["Mode"]](/content/2026/05/965659/images/a4fd52a8cee643e2646dbc79698cd71b7e8dd2eb8181670da9a76fa692cc734a.jpg)
These are all set up using the same basic method:
When the required image is shown in the preview screen, press the document button. Then select the required option, then the required setting, and press the clipboard button to leave the menu.
Photo light
Turns on a light on the front of the phone.
Twilight
Turn Twilight on when taking pictures in low light conditions.
Effect
With Effect you can choose from Off, Sepia, Monochrome or Negative.
Frame
This places a border round the image. You can preview the frame by highlighting it then pressing Ⓞ.
Format
With Format you can choose the format for saving your image.
JPEG Economy produces a small file but with a low resolution.
JPEG Normal produces a file which is acceptable for most uses.
JPEG Fine and PNG produce large files with high resolution.
Capture mode
With Capture Mode you can choose from:
Single Shot takes a single picture.
Multi Shot captures images at 1 second intervals while you hold Ⓧ down, to a maximum of six images.
Self Timer delays the taking of an image.
Remote takes a picture immediately, then returns to the capture screen.

Messaging
From the Messaging menu you can send and receive MMS, SMS and e-mail messages.
The nine menus are as follows:


Settings
1 MMS
2 SMS
3 e-mail
Inbox
1 MMS
2 SMS
3 e-mail
Broadcasts
1 Receive
2 Message List
3 Topics
4 Languages
Voice Mail
1 Voice Mailbox
e List
Create
1 MMS
2 SMS
3 e-mail


1 Send/Receive
Data Folders
1 My Pictures
2 My Sounds
3 My Themes
4 User 1 - 5
Outbox
1 MMS
2 SMS
3 e-mail
SMS Chat
MMS
MMS stands for Multimedia Message Service. With MMS you can attach images and music to text messages. The recipient can play the images and music as a slide show.

Settings
Use Settings to set up MMS to suit your requirements.
![graph TD A["Settings"] --> B["MMS"] B --> C["Send Options"] B --> D["Receive Options"] B --> E["Player Mode"] B --> F["Server List"] B --> G["Font Size"] B --> H["Display Restore"] B --> I["Defaults"]](/content/2026/05/965659/images/a612bca2b1df7893df4b0dca75bf85dee93b96d08fd2f3a3a4292cebba68fafd.jpg)
Configuring MMS
Note: Your MMS settings may have been pre-configured by your service provider. MMS may not work if you change these settings.
You must configure your MMS before you can send or receive MMS messages. You can create up to three server profiles on the phone.
![graph TD A["Server List"] --> B["Server Auto"] A --> C["<1> to <3>"] C --> D["Edit"] D --> E["Profile Name"] D --> F["Server URL"] D --> G["Gateway IP"] D --> H["Bearer Type"] H --> I["Circuit Switch"] H --> J["GPRS"]](/content/2026/05/965659/images/dd27d1e182e113f243864f9519f8a7b638728d1b3715738b987cd998cad52708.jpg)
For Circuit Switch, select Set, then select Edit and set:
- Digital Dial number
- Analogue Dial number ● Circuit Type. Select from Digital and Analogue.
- User ID
- User Password
For GPRS, select Set, then select Edit and set:
- Access Point Name
- User ID
- User Password
- Authentication. Select from Normal, Encrypted and None.
Note: Once you have set up a server you need to select the new server and select Set to activate the new setting.
Messaging
Setting send options
![graph TD A["Send Options"] --> B["Req. Deliv. Recpt"] A --> C["Req. Read Recpt"] A --> D["Send Own Addr."] A --> E["Lifetime"]](/content/2026/05/965659/images/1113d018bc547ec31ae0d7e4670a03fee87da8bb545f3a6ffcf92c6d79346eab.jpg)
You set send options to determine what happens to messages that you send.
Req. Deliv. Recept. Decide whether or not you want confirmation that your message has been delivered. Select Yes or No.
Req. Read Recept. Decide whether or not you want confirmation that your message has been read. Select Yes or No.
Send Own Addr. Choose whether or not to let the recipient see your address. You can only show your address if your service provider allows. Select Show or Hide.
Lifetime. Set the time limit for the lifetime for sent messages. Select Maximum or Manual. If you select Manual, you need to enter the number of hours (1 - 99).
Setting receive options
![graph TD A["Receive options"] --> B["Auto Reception"] A --> C["Anon. Sender"] A --> D["Advertisement Delivery Receipt"] A --> E["Read Receipt"] A --> F["Roaming Retrieve"]](/content/2026/05/965659/images/1cbedc9f54891125f5a0f90e85386b046e520453a30306197ebe4e6817c1b28e.jpg)
When you have selected a message type, you can select how you want to deal with it.
| Message type Options | |
| Auto Reception Auto Retrieve, Ask | |
| Anon. Sender Accept, Reject | |
| Advertisement Accept, Reject | |
| Delivery Receipt Permit, Reject | |
| Read Receipt Permit, Reject | |
| RoamingRetrieve Ask, Pending, Off |
Setting the player mode
Player Mode determines whether an audio attachment is played automatically, or manually.
▶ Select Player Mode. ▶ Select Automatic or Manual.
Setting the font size
You can set the font size to use in your messages.
▶ Select Font Size. ▶ Select from Large, Standard and Small.
Setting what is displayed
You can decide whether to display the subject or the address in your inbox and outbox.
▶ Select Display. ▶ Select Inbox or Outbox. ▶ Select Subject or Address.
Restoring defaults
To cancel all the options that you have set select Restore Defaults.
Create

Use Create to create an MMS message.
![graph TD A["Create"] --> B["MMS"] B --> C["Ok Picture"] B --> D["Texta"] B --> E["Sound Play Slide Option"]](/content/2026/05/965659/images/e997c77c3f601361891364c4b7cd4d8734c3b09ac52abb4edd5a99e8da9a0514.jpg)
Select Create > MMS. Press Select the item that you want to enter. When your message is complete, select Ok. Select Addr:. Select Edit to enter an address. Enter an address. Select Subj:. Select Edit to enter a subject. Enter a subject.
Messaging
To send your message, press 📄 or press Ⓧ and select Send.
To save your message press Ⓧ and select Save. Your message is stored in the Outbox, so you can send it or edit it later.
You can send a camera image, text, a picture from a data folder and/or a sound from a data folder.
To send a camera image:
Select Camera as your item in Creating an MMS message. Take a picture. Press 📋 to return to the MMS message.
To send a picture:
Select Picture as your item in Creating an MMS message. Select a folder. Select the picture.
To enter text:
Select Text as your item in Creating an MMS message. Enter the text. Select Ok or Cancel.
To attach an audio file:
Select Sound as your item in Creating an MMS message. Select a folder. Select the audio file.
User messages
While entering text, you can enter one of the predefined user message in your MMS message:
▶ Select Menu > User Msg. A list of the user defined messages is displayed. ▶ Select the message you require. ▶ Press Ⓞ.
To edit a user message, see Editing user messages on page 46.
Inbox
The messages you receive are stored in the Inbox.

Select Inbox > MMS.
If there are messages waiting, a number appears by Waiting. You need to retrieve these messages before you can play any audio files attached to them.
Retrieving a message
▶ Select Waiting. ▶ Highlight a message. ▶ Press ☐ to retrieve the message.
When you have retrieved a message it is available in Receive. The number of retrieved messages appears by Receive.
![graph TD A["Waiting"] --> B["Read"] A --> C["Retrieve"] A --> D["Save Addr"] A --> E["Sort"] A --> F["Delete"] A --> G["Delete All"] B --> H["Reject"] C --> I["Retrv All"] D --> J["Call"] E --> K["Display"] F --> L["Keep"]](/content/2026/05/965659/images/f4f13188ec73043b2d9216730d8d23cd3890a80d0dd58c1657dd4d7ca1ffe413.jpg)
When you select a message from the Waiting menu, you can choose from:
Read. Displays the message header. Press 📋 to retrieve the message.
Reject. Do not retrieve the selected message.
Retrieve. Retrieves the selected message.
Retrv All. Retrieves all waiting messages.
Save Addr. Saves the address of the selected message.
Call. Call the person who sent the selected message.
Sort. Sorts your messages.
Display. Displays the selected message.
Delete. Deletes the selected message.
Keep. Keeps a message for you to retrieve later.
Delete All. Deletes all messages.
Messaging
Reading received messages
Once you have retrieved a message, you can view it and play attached audio files.
▶ Select Receive. ▶ Highlight a message. ▶ Press 📄 to play the message.
![graph TD A["Receive"] --> B["Read"] A --> C["Save Addr"] A --> D["Sort"] A --> E["Delete"] A --> F["Delete All"] D --> G["Play"] D --> H["Call"] D --> I["Display"] D --> J["Keep"]](/content/2026/05/965659/images/1da2200bf828bfdc33a7ba408a7aba7ec7ad9c8dd57e209ea9ddb4bc1335ed5c.jpg)
When you select a message from the Receive menu, you can choose from:
Read. Displays the message header.
Play. Plays the message.
Save Addr. Saves the address of the current message.
Call. Call the person who sent the message.
Sort. Sorts your messages.
Display. Displays the selected message.
Delete. Deletes the selected message.
Keep. Keeps a message for you to read later.
Delete All. Deletes all messages.
Viewing your messages status
To see a summary of waiting, received, sent, draft and pending messages select Memory Status.

Outbox
To access your Outbox select Outbox > MMS.
From your outbox you can view all your draft, pending and sent MMS messages. You can also see a summary of your memory status.
You can highlight a message, then press Ⓞ to get the following menu options. The available options depend on whether you are looking at a draft, pending or sent message.
Read. Displays any text in the message.
Send. Sends the selected message.
Play. Plays the message.
Send All. Sends all the messages in the list.
Save Addr. Saves the address of the selected message.
Sort. Sorts your messages.
Display. Displays the selected message.
Delete. Deletes the selected message.
Keep. Keeps a message for you to read later.
Delete All. Deletes all messages.
SMS
SMS is usually called text messaging. With text messaging you can send and receive text. You can receive, display, edit and send text messages of up to 459 characters to mobile phones on your service provider's network or any network that has a roaming agreement. The actual number of characters available depends on the language you use. You can only send text messages to phones that have text messaging functionality.

Settings
The following functions are all available from Settings > SMS.
![graph TD A["Settings"] --> B["SMS"] B --> C["Recipient Group"] B --> D["Auto Delete"] B --> E["Lifetime Message Centre"] B --> F["Receipt Protocol Review"]](/content/2026/05/965659/images/b6046172ae3ef6c0c0f79e250024ab8407d1638f6dc4a3ddf3147e4e6d8b302d.jpg)
Message centre
You must enter the message centre number before you can send text messages.
Note: The message centre number may have been pre-programmed on the SIM.
▶ Select Message Centre. ▶ Enter the message centre number in international dial format (see Making international calls on page 27).
Note: The message centre number is provided by your service provider.
Messaging
Recipient group
You can preset the destination of text messages. There are five recipient groups. You can store up to ten destinations in each group.
To name or rename a group:
▶ Highlight a group number or name. ▶ Press Ⓞ. ▶ Select Rename. ▶ Enter a new name.
To add names to a recipient group:
▶ Highlight a group number or name. ▶ Press Ⓞ. ▶ Select Select. ▶ Select Entry. ▶ Select required name. ▶ Select Recall. ▶ To add another name press 📄. ▶ Select Entry. ▶ Select required name. ▶ Select Recall.
When you have added all the names, press ☐.
Auto delete
You can set this to automatically delete messages. You select from:
Off. Turns off Auto Delete.
Received Read. Overwrites the oldest read message.
Received Any. Overwrites the oldest read message or the oldest unread message if there are no read messages.
Lifetime
This is the time that your message is stored at the message centre. The message centre keeps trying to deliver the message until the message is delivered, or the Lifetime expires.
You can choose whether you want to receive a confirmation when your message has been delivered. You select from Yes, No and Ask. If you select Ask, you are asked if you want to receive a delivery confirmation whenever you send a message.
Protocol
The Message Centre may be able to convert your message to the format specified by the selected protocol.
Review
You can see how many messages are stored in your SIM or in your phone. You can store up to 15 messages in your SIM (depending on your SIM), and 200 in your phone. If your SIM storage is full or nearly full, you can move messages to your phone storage. To move a message from SIM to mobile:
▶ Select Inbox > SMS. ▶ Highlight the message. Press ▶ Select Move. ▶ Confirm that you want to move the message from the SIM to your phone.
Create

Use Create to create an SMS message.
▶ Select Create > SMS. ▶ Enter your text. ▶ Press Ⓞ. ▶ Select Ok or Cancel. ▶ Press Ⓞ to send the message. ▶ Enter the phone number. ▶ Press Ⓞ. ▶ Select Ok or Cancel. If you selected Ask as your Receipt option, then you are asked 'Request Delivery Confirmation?' Press Ⓞ, then select No or Yes.
User messages
You can enter one of the predefined user message in your SMS message:
▶ Select Menu > User Msg. A list of the user defined messages is displayed. ▶ Select the message you require. ▶ Press Ⓞ.
To edit a user message, see Editing user messages on page 46.
Messaging
Sending SMS to a fixed line
There are the following special requirements when you send an SMS message from your mobile phone to a fixed line phone.
Sending a new message
▶ Enter your message text, and include the fixed line number somewhere in the message. The number can be at any point in your message, but you must enter the number with a hash at the beginning and the end, for example #01234 567890#. ▶ Send the message to “Big Mobile” on 07786 201010.
Replying to a message from a fixed line
▶ Select Reply. ▶ Enter your message text, and include the fixed line number somewhere in the message. The number can be at any point in your message, but you must enter the number with a hash at the beginning and the end, for example #01234 567890#. ▶ Select Send.
Inbox
☑ Indicates that you have received a new message. A flashing envelope indicates that your message store is full.

Received text messages are stored in your Inbox.
Select Inbox > SMS to see a list of your received messages.
Message options
![graph TD A["Select a message"] --> B["Read Reply Forward Chat Move Delete AllDelete"]](/content/2026/05/965659/images/c1546258f4de1d377115c3b922a387f57ea2884607628d25472b529ecf49976e.jpg)
Read. Display any text in the message.
Reply. Reply to the person who sent the message.
Forward. Forward the message to someone else.
Chat. Read sent and received messages with another party on one screen.
▶ Select Chat. Enter the phone number you want to chat with. Enter a nickname. This can be up to 18 characters long. ▶ Send and receive messages. ▶ Press 📄 to end the chat.
When you receive a message in chat mode, the text appears above your previous message.
If your phone is not in chat mode when you receive a reply to a chat message, it is received as normal SMS.
If you receive a voice call while you are in chat mode, you can accept the incoming call and return to chat mode at the end of the call.
To save a chat message session select Menu > Save.
Move. Move the message to your phone or SIM memory.
Delete. Delete the message.
Delete All. Delete all messages.

Outbox
To access your Outbox select Outbox > SMS.
From your outbox you can view all your sent text messages.
You can select a message, and choose from the following options:
Edit. Edit the message.
Send. Send the message.
Read. Read the message.
Chat. Read sent and received messages with another party on one screen.
Select Chat. Enter the phone number you want to chat with. Enter a nickname. This can be up to 18 characters long. Send and receive messages. Press ✅ to end the chat.
When you receive a message in chat mode, the text appears above your previous message.
If your phone is not in chat mode when you receive a reply to a chat message, it is received as normal SMS.
If you receive a voice call while you are in chat mode, you can accept the incoming call and return to chat mode at the end of the call.
To save a chat message session select Menu > Save.
Create. Create another text message.
Move. Move the message to your phone or SIM memory.
Delete. Delete the message.
Delete All. Delete all messages.
Messaging

Broadcasts
Broadcasts are messages sent on a variety of subjects by your service provider.
Topics
Before you can receive broadcasts, you need to specify the topics of information that you want to receive.
▶ Select Topics. Press Ⓞ. ▶ Select Insert. ▶ Use ⬇ to page through the list of available topics. ▶ Press Ⓞ to select a topic.
If you want to specify more than one topic, keep paging through the topics and select all the ones that you want.
Turning broadcasts on and off
If you are busy, or do not want to receive broadcasts for a while, you can turn them off, and turn them on again later.
▶ Select Receive. ▶ Select On or Off.
Message list
The Message List stores the last broadcast messages that you received. You can delete messages from here.
Languages
You can change the language for your broadcast messages.
▶ Select Language. ▶ Select Menu > Edit. ▶ Select the language from the list.

SMS chat
With SMS Chat you can read sent and received messages with another party on one screen.
Use this to start a call in chat mode.
Enter the phone number you want to chat with. To enter a number using the keypad: Enter the number, then select Menu > Ok. To select a number from the contacts list: Press 📋 to go to the Contacts List.
Select the contact.
Select Recall.
Confirm the number, select Menu > Ok.
Enter a nickname. This can be up to 18 characters long. ▶ Select Menu > Ok. Enter your message. ▶ Select Menu > Send. Press 📧 to end the chat.
You can also enter a user message in your chat.
▶ Select Menu > User Msg. A list of the user defined messages is displayed. ▶ Select the message you require. Press
To edit a user message, see Editing user messages on page 46.
To save a chat message session select Menu > Save.
Messaging
You can send and receive e-mails via the mail servers of an Internet Service Provider (ISP) that supports POP3/SMTP protocols.
Before you can use the Internet e-mail feature your SIM must be data enabled, and you must have a contract with an ISP.

Settings
The following functions are all available from Settings > e-mail.
Server list
You must configure your e-mail before you can send or receive e-mail messages.
![graph TD A["Server List"] --> B["Edit"] B --> C["Profile Name"] B --> D["Mail Address"] B --> E["SMTP Setting"] B --> F["POP3 Setting"] B --> G["Bearer Type"] B --> H["Primary DNS"] B --> I["Secondary DNS"] B --> J["Edit <1> to <3>"]](/content/2026/05/965659/images/36520bfac8535bafd6f209752b6e3fe91fb679fdd477c965058ed8ddb029ec9d.jpg)
Use the following method to set the server options:
Select the required option. Enter the option details or select the required setting.
Repeat these steps until you have set all the required options.
| Server profile option Settings | Options Options | ||
| Profile Name Name for account, e.g. ISP name. | |||
| Mail Address Reply to address for sent e-mails | |||
| SMTP Setting SMTP server | User IDPasswordAuthentication On | Off | |
| Server profile option Settings Options | |||
| POP3 Setting POP3 server | User IDPasswordMail delivery Leave MsgDelete Msg | ||
| Bearer Type Circuit switch | GPRS | Digital Dial #Analogue Dial #Circuit TypeUser IDUser PasswordAccessPointNameUser IDUser PasswordAuthentication Normal | Encrypted None |
| Primary DNS Name Server | at ISP(Normally set automatically unless ISP gives details) | ||
| Secondary DNS Name Server | at ISP(Normally set automatically unless ISP gives details) | ||
Note: Once you have set up a server, you need to select the new server and select Set to activate the new setting.
Messaging
Options![graph TD A["Options"] --> B["EncodeSend Options Review"] B --> C["Recipient Group"] B --> D["Signature Auto Quote"] B --> E["Display Lang."] B --> F["UTF-8"]](/content/2026/05/965659/images/467d8642c5a5918c9f1bb69bc5664af813f777749759fb8c25ade359b454f373.jpg)
Recipient Group. Use to preset the destination of e-mail messages. There are five recipient groups. You can store up to ten destinations in each group.
Signature. Use this to insert essential information in outgoing messages, for example, disclaimer.
Auto Quote. Use this to attach text from the message that you are replying to. Set to On or Off.
Create

Use Create to create an e-mail message.
Select Create > e-mail. Highlight To, Cc or Bcc. Press ☐ twice to select an entry from your Contacts List. Or press ⬤ and select Edit. Select Menu > Add, then enter the e-mail address. Repeat the previous steps until you have added all the recipients. Highlight Subj to enter a subject line. Select Edit. Enter text, then select Menu > OK. Highlight Message to enter your message. Select Edit. Enter text, then select Menu > OK. To attach a file, highlight File. Select Edit. Select Menu > Add. Select the required folder. Select the required file, then select Menu > OK.
User messages
You can enter one of the predefined user messages in your e-mail message:
Select Menu > User Msg. A list of the user-defined messages is displayed. Select the message you require. Press
To edit a user message, see Editing user messages on page 46.
Send/Receive
You can send and receive e-mails at the same time. This sends any unsent messages in your Outbox, and downloads any messages that are in your server mailbox to your phone's Inbox.

You access this function from e-mail.
▶ Select e-mail > Send/Receive. ▶ Agree to send any unsent messages in your Outbox. ▶ Agree to download any new messages that are on the mail server to your Inbox. The number of messages appears next to the Inbox.
Note: If no messages are sent or received and the connection is left idle, it terminates after 60 seconds.
Inbox

Your received e-mail messages are stored in your Inbox.
▶ Select Inbox > e-mail. ▶ Select a message. ▶ Select View.
Messaging
Message status
The following icons indicate the status of a message:

Read or sent message.

Unread or unsent message.

Message is locked.

Broken message that is too long for the phone, or the message contains an attachment.
Received messages options
With the message displayed, press ☐.
Select from:
Reply. Send a reply to the sender.
Reply to All. Send a reply to all the people who were sent the message.
Forward. Send the message to another person.
Make. Create a new message to send to the sender or save the sender's address in your contacts list.
Sort. Sort all the messages in your inbox.
Display. Change the e-mail display to Subject or Address.
Protect/Unprotect. Use Protect to stop the message being overwritten when your Inbox is full. If a message is protected and you no longer want it to be protected, select Unprotect.
Delete. Deletes the message.
Delete All. Delete all the messages in your Inbox.
Properties. View details of the message, for example, file size (Kb).

Voice mailbox
Before you can use voice mail, you may need to contact your service provider.
▶ Select Voice Mailbox. ▶ Press Ⓞ. ▶ Select Recall. ▶ Press ⬇ to dial the number.
Follow the instructions given by your service provider at this number.

Data folders
You can access your Data Folders directly from the top level menu. For details on the Data Folder options, see Data folders on page 100.
Managing your inbox and outbox
When your Inbox or Outbox is full, any new messages that you create or receive will overwrite existing messages, starting with the oldest. To prevent messages being overwritten you should regularly clean up your lists, deleting any messages that you no longer require.

Data folders
Use data folders to store your pictures, sounds and themes. There are three predefined folders for My Pictures, My Sounds and My Themes. These may contain preloaded files. There are five empty folders. You can customise any of these folders. The maximum capacity of Data Folders is 4Mb, and it can hold up to 900 files. The maximum file size is 100kB.
Note: You cannot change or forward wallpaper and ring type files that you have downloaded from the Internet.
Changing the SIM does not affect the contents of the data folders.
The phone can only display files that are in one of the supported formats. See Specifications on page 139 for the supported formats.
My pictures
![graph TD A["Select a picture"] --> B["View"] A --> C["MMS"] A --> D["Copy"] A --> E["Delete"] A --> F["Bluetooth"] A --> G["Slide Show"] C --> H["Edit"] D --> I["Rename"] E --> J["Move"] F --> K["Infrared"] G --> L["Properties"] G --> M["Use As"]](/content/2026/05/965659/images/4637b4ece574868fac94313ecd3ae97988b10cd31a08c7dc5eeef0d77db0c2e7.jpg)
Viewing stored pictures
Select the folder where your pictures are stored. ▶ Select the picture that you want to view. ▶ Press 📄, or press Ⓞ and select View.
Editing stored pictures
From the Edit menu you can change the Brightness, Effect, Frame, Size, Format and Trim of a stored picture. When you have edited the picture, press 📄 to save your changes.
Select the folder where your pictures are stored. ▶ Select the picture that you want to edit. ▶ Select Edit. Press
Note: You cannot use this for predefined wallpaper files.
For information about these options, see Editing the picture on page 76.
Sending a picture by MMS
Select the folder where your pictures are stored. ▶ Select the picture that you want to send. ▶ Press Ⓞ and select MMS. ▶ Select an address from the address list, or press 📄 to select an address from your Contacts List.
A new MMS message is opened with the picture already embedded.
Note: You cannot use this for predefined wallpaper files.
Renaming a picture
▶ Select the folder where your pictures are stored. ▶ Select the picture that you want to rename. Press ▶ Select Rename. Remove the existing text using 📄, then enter the new name.
Note: You cannot use this for predefined wallpaper files.
Data folders
Copying or moving a picture
▶ Select the folder where your pictures are stored. ▶ Select the picture that you want to copy or move. ▶ Press Ⓞ. ▶ Select Copy or Move. ▶ Select the folder to move or copy to.
Note: The default folder is the last one that you copied or moved to. You cannot use this for predefined wallpaper files.
Deleting a picture
▶ Select the folder where your pictures are stored. ▶ Select the picture that you want to delete. ▶ Press Ⓞ. ▶ Select Delete. ▶ Confirm delete.
Note: You cannot use this for predefined wallpaper files.
Sending a picture via infrared
Set up the devices so that the infrared ports are pointing at each other, and within the effective range of infrared connection.
Ensure that there are no obstructions between the devices.
▶ Select the folder where your pictures are stored. ▶ Select the picture that you want to send. ▶ Press Ⓞ. ▶ Select Infrared.
Note: You cannot use this for predefined wallpaper files.
Sending a picture via Bluetooth®
▶ Select the folder where your pictures are stored. ▶ Select the picture that you want to send. ▶ Press Ⓞ. ▶ Select Bluetooth. Select the Bluetooth® device from the list of Paired Devices or select Find to Discover another Bluetooth® device.
Note: You cannot use this for predefined wallpaper files.
Viewing the image properties
You can see the image name, the date and time that it was created, its size, whether or not it is copyrighted and whether or not you can forward and copy the file.
▶ Select the folder where your pictures are stored. ▶ Select the picture that you want. ▶ Press Ⓞ. ▶ Select Properties.
Using images as a slide show
You can display the images in the folder as a slide show, starting with the current image. Each image displays for five seconds. You can select Pause to stop the slide show, and Cont to continue with the slide show.
▶ Select the folder where your pictures are stored. ▶ Select the picture. ▶ Press Ⓞ. ▶ Select Slide Show.
Using the picture as your wallpaper
▶ Select the folder where your pictures are stored. ▶ Select the picture that you want. ▶ Press Ⓞ. ▶ Select Use As. ▶ Select Wallpaper.
Your wallpaper is updated to use the selected picture.
Data folders
My sounds
![graph TD A["Select a sound"] --> B["Play"] A --> C["MMS"] A --> D["Copy"] A --> E["Delete"] A --> F["Bluetooth"] A --> G["Use As"] C --> H["Edit"] D --> I["Rename"] E --> J["Move"] F --> K["Infrared"] G --> L["Properties"]](/content/2026/05/965659/images/cfaa2e135610673d65fc43a90c47c06b8b49c4284d1a2bd147aa0a3191a11c18.jpg)
Note: The functions available depend on the type of sound file.
Playing stored sounds
Select the folder where your sounds are stored. ▶ Select the sound that you want to play. ▶ Press 📄, or press Ⓞ and select Play.
Editing stored sounds
▶ Select the folder where your sounds are stored. ▶ Select the sound that you want to edit. ▶ Select Edit.
See Creating a ring type on page 42, for information on how to edit a sound.
Note: You cannot use this for polyphonic ring types or music files.
Sending a sound by MMS
▶ Select the folder where your sounds are stored. ▶ Select the sound that you want to send. ▶ Press Ⓞ and select MMS. ▶ Select an address from the address list, or press 📄 to select an address from your Contacts List.
A new MMS message is opened with the sound already embedded.
Note: You cannot use this for polyphonic ring types or music files.
Renaming a sound
▶ Select the folder where your sounds are stored. ▶ Select the sound that you want to rename. Press ▶ Select Rename. Remove the existing text using 📄, then enter the new name.
Note: You cannot use this for polyphonic ring types or music files.
Copying or moving a sound
▶ Select the folder where your sounds are stored. ▶ Select the sound that you want to copy or move. Press ▶ Select Copy or Move. ▶ Select the folder to move or copy to.
Note: The default folder is the last one that you copied or moved to. You cannot use this for polyphonic ring types or music files.
Deleting a sound
▶ Select the folder where your sounds are stored. ▶ Select the sound that you want to delete. Press ▶ Select Delete. ▶ Confirm delete.
Note: You cannot use this for polyphonic ring types or music files.
Sending a sound via infrared
Set up the devices so that the infrared ports are pointing at each other, and within the effective range of infrared connection.
Ensure that there are no obstructions between the devices.
▶ Select the folder where your sounds are stored. ▶ Select the sound that you want to send. Press ▶ Select Infrared.
Note: You cannot use this for polyphonic ring types or music files.
Data folders
Sending a sound via Bluetooth®
▶ Select the folder where your sounds are stored. ▶ Select the sound that you want to send. ▶ Press Ⓞ. ▶ Select Bluetooth. Select the Bluetooth® device from the list of Paired Devices or select Find to Discover another Bluetooth® device.
Note: You cannot use this for polyphonic ring types or music files.
Viewing the sound properties
You can see the file name, the date and time that it was created, its size, whether or not it is copyrighted and whether or not you can forward and copy the sound.
▶ Select the folder where your sounds are stored. ▶ Select the sound that you want. Press Ⓞ. ▶ Select Properties.
Using the sound as your ring type
▶ Select the folder where your sounds are stored. ▶ Select the sound that you want. Press ▶ Select Use As. ▶ Select the type of call you want to use the ring type. ▶ Your ring type is updated to use the selected sound.
My themes
The phone has seven predefined themes. A theme contains a colour scheme. It may also contain a wallpaper and/or a ringtone. You use a theme to change the look and feel of your phone.
Note: The seven predefined themes only contain a colour scheme. They set the colours used on your screen. They do not contain a wallpaper or a ringtone.
![graph TD A["Select a theme"] --> B["Properties"] A --> C["Use As"]](/content/2026/05/965659/images/0186527ff5a0cc4749fd702ec84f34118713ba6200a31a8ec4be9395b605c883.jpg)
Viewing the theme properties
You can see the theme name, the date and time that it was created, its size, whether or not it is copyrighted, and whether or not you can forward and copy the theme.
Select the folder where your themes are stored. Select the theme that you want. Press Select Properties.
Using the theme
This changes the colours used on your screen to those in the selected theme. If the theme contains a wallpaper, it also updates the wallpaper on your phone to that in the selected theme. If the theme contains a ringtone, this is saved to your My Sounds folder. The ringtone on your phone is not updated automatically.
Select the folder where your themes are stored. Select the theme that you want. Press Select Use As > Theme.
Data folders
Manipulating folders
From the list of folders available, highlight a folder, and press 📄.
![graph TD A["Folder"] --> B["Rename Slide ShowMemory Delete All"] B --> C["..."]](/content/2026/05/965659/images/7349599c9ab8730f96f87076feee1bfc8c4fd88b91ac98c483eb130b5e1cc497.jpg)
Memory
Select Memory to display the percentage of memory used and the number of files currently in the folder.
Rename
Select Rename to rename the folder.
Slide show
Select Slide Show to display all the images stored in the folder in the order listed as a slide show. Each image displays for five seconds. You can select Pause to stop the slide show, and Cont to continue with the slide show.
Note: You can only do this for folders that contain graphics files.
Delete all
Select Delete All to delete all the downloaded contents of the folder. If the folder does not contain any downloaded files, nothing is deleted.
Downloading wallpapers, ringtones and themes
You can download images to use as wallpaper, melodies to use as ringtones and themes to change the look of your phone. The Panasonic website is
http://www.panasonicbox.com.
Note: The Panasonic Box service is country and network operator dependent.
For a list of supported countries and operators:
▶ Go to http://www.panasonicbox.com. ▶ Select your region. Click on FAQ. Click on General. ▶ View the list of currently supported countries and network operators.
Before you can download any files you need to register with Panasonic Box.
▶ Go to http://www.panasonicbox.com. ▶ Select your region. ▶ Click on User Registration. ▶ Follow the instructions on the screen.
To access the site from your phone, you need to save the URL as a bookmark.
▶ Select Browser. ▶ Select Enter URL. ▶ Enter http://wap.panasonicbox.com. ▶ Select Ok. The Panasonic WAP home page is displayed.
Downloading a colour logo
Log in to Panasonic Box. ▶ Select Logos and press Ⓞ. ▶ Select the category of the logo that you want to download and press Ⓞ. ▶ Select the number of the colour logo you want to download and press Ⓞ. ▶ Check whether this is the logo you want to download, select Download and press Ⓞ. ▶ Press 📄 to select Menu. ▶ Select Save Image. ▶ Select the folder where you want to save the image.
Downloading a ringtone
Log in to Panasonic Box. ▶ Select Ringtones and press Ⓞ. ▶ Select the category of the ringtone that you want to download and press Ⓞ. ▶ Select the number of the ringtone you want to download and press Ⓞ. ▶ Select Download and press Ⓞ. ▶ Press Ⓞ to save the ringtone. ▶ Select the folder where you want to save the sound.
Downloading a theme
Log in to Panasonic Box. ▶ Select Themes and press Ⓞ. ▶ Select the category of the theme that you want to download and press Ⓞ. ▶ Select the number of the theme you want to download and press Ⓞ. ▶ Select Download and press Ⓞ. ▶ Press Ⓞ to save the theme. ▶ Select the folder where you want to save the theme.
Data folders
Setting up a downloaded theme
To set up the colours and wallpaper associated with your theme see Using the theme on page 107.
To set up the ringtone associated with your theme, see Using the sound as your ring type on page 106.
Note: Not all downloadable themes on Panasonic Box have ringtones. Some contain only a colour scheme and a wallpaper.

Organiser
The menus are as follows:


Synchronization
1 Sync Schedule 2 Sync Contacts 3 Server 4 Restore Schedule 5 Restore Contacts
Contacts List
1 Browse
2 Create
L3iVoice Dial
4 Groups 5 Settings 6 SIM 7 Storage
Converter Business Card
1 View 2 Bluetooth 3 Infrared
Schedule

Calculator Alarm Memo


1 Record 2 Playback 3 Delete
Receive object
This option is SIM dependent
Connect
This option is SIM dependent

Synchronization
Use this to synchronize your Contacts List and Schedule with data on an external server. You may need to do this if you store this type of information on several devices, and you want them all to be the same.
Setting your servers.
Note: Your server settings may have been pre-configured by your service provider. If you change them, you may not be able to synchronize with the server.
Before you can synchronize your data, you need to set up your servers. These are the servers that control your Internet connection.
Organizer
![graph TD A["Server List"] --> B["Edit"] B --> C["Profile Name"] B --> D["Gateway IP"] B --> E["Bearer Type"] E --> F["Circuit Switch"] E --> G["GPRS"] style A fill:#f9f,stroke:#333 style B fill:#ccf,stroke:#333 style C fill:#cfc,stroke:#333 style D fill:#fcc,stroke:#333 style E fill:#cff,stroke:#333…](/content/2026/05/965659/images/cbb5238ae0aed873a3e4785bec8fbc7ea8558d35cf93eed22efeefaadec52a24.jpg)
For Circuit Switch, select Set, then select Edit and set:
- Digital Dial number
- Analogue Dial number ● Circuit Type. Select from Digital and Analogue.
- User ID
- User Password
For GPRS, select Set, then select Edit and set:
- Access Point Name
- User ID
- User Password
- Authentication. Select from Normal, Encrypted and None.
Note: Once you have set up a server you need to select the new server and select Set to activate the new setting.
Synchronizing your contacts list
Before you can synchronize your contacts list, you have to set up a connection to the external database. You can set up two connections.
▶ Highlight Sync Contacts. ▶ Select Edit. ▶ Select a connection. ▶ Select Edit. Enter the information about the connection.
You need to set:
● Profile Name. This can be whatever you want to call the connection. - Server Name. Enter the server URL. ● Server Database. Enter the name of the database. ● Server User ID. Enter your user ID. ● Server Password. Enter your user password
You can just send changes to the external database, or send all your records to the external database.
To just send changes to the external database:
▶ Select Sync Contacts. ▶ Select the server.
To send all your records to the external database:
▶ Select Restore Contacts. ▶ Select the server.
Synchronizing your schedule
Before you can synchronize your schedule, you have to set up a connection to the external database. You can set up two connections.
▶ Highlight Sync Schedule. ▶ Select Edit. ▶ Select a connection. ▶ Select Edit. ▶ Enter the information about the connection.
You need to set:
● Profile Name. This can be whatever you want to call the connection. - Server Name. Enter the server URL. ● Server Database. Enter the name of the database. - Server User ID. Enter your user ID. ● Server Password. Enter your user password
You can just send changes to the external database, or send all your records to the external database.
To just send changes to the external database:
▶ Select Sync Schedule. ▶ Select the server.
To send all your records to the external database:
▶ Select Restore Schedule. ▶ Select the server.
Organiser

Contacts list
This accesses the same options as the Contacts List menu on the main menu. See Contacts list on page 58 for information on these options.

Converter
Use the converter to convert from/to a home currency using a conversion rate that you enter.
Entering an initial conversion rate
▶ Select Converter > Edit. Enter your abbreviation for the home currency (maximum three characters). Enter your abbreviation for the foreign currency (maximum three characters). ▶ Enter the current currency conversion rate.
Once you have entered a conversion rate it is retained in the phone. You can edit the conversion rate and currency abbreviation.
Converting a value
▶ Confirm that the conversion rate is correct, if not select Edit to edit it. ▶ Enter the amount to convert.
Reversing the currency conversion
When you have accepted the conversion rate and are ready to enter the value to convert, you can swap the currencies to convert from the foreign currency into the home currency.
▶ Select Swap. ▶ Enter the value to convert.

Business card
With Business Card you can enter some details about you, and send them to a Bluetooth® or infrared device.
Entering details
▶ Select View. ▶ Select the item you want to enter or change. ▶ Select Edit. Enter the text. ▶ Press 📋 to save the card.
You can enter the following information:
| Item Number of characters | |
| First name 16 | |
| Last name 16 | |
| Home number 40 | |
| Work number 40 | |
| Mobile number 40 | |
| Other number 40 | |
| Home e-mail 80 | |
| Work e-mail 80 | |
| Other e-mail 80 | |
| URL 80 | |
| Title 16 | |
| Company name 16 | |
| Note 32 | |
| Photo | Select a picture from the list or take a picture with the camera. |
Send your details to a Bluetooth® device
Select Bluetooth.
The phone searches for another Bluetooth® device. Select Stop when the Bluetooth® device is displayed.
Select the Bluetooth® device from the list or select Find to Discover another Bluetooth® device.
Send your details to an infrared device
Set up the devices so that the infrared ports are pointing at each other, and within the effective range of infrared connection.
Ensure that there are no obstructions between the devices.
Select Infrared.
Note: To receive a business card from another infrared or Bluetooth® device, use Receive Object. See Receive object on page 120.
Organiser

Schedule
Use the schedule to register reminders for events and for planning holiday periods.
Caution: You need to ensure that any settings made in the schedule will not automatically power on the phone when you are in an aircraft, medical facility, etc. See Important information on page 5.
Creating a reminder
Select Menu > Create. Press Enter. Enter the start date. Enter the end date. Select the next menu item. Enter the start time. Enter the end time. Select the next menu item. Select from Once, Daily, Weekly, and Yearly. Select the next menu item. Enter any notes that you want to make. Select the next menu item. Select a ring type. Press □ to save the entry.
Viewing a reminder
Highlight a date. Select View or select Menu > View. Select the reminder. Select Detail.
Deleting a reminder
Highlight a date. Select Menu > Delete. Select from Day, Past, and All.
Day: deletes all the reminders on the selected day.
Past: deletes all reminders prior to the selected day.
All: deletes all reminders.
Setting a holiday reminder
Select Menu > Options. Select Holiday Set. Select Day or Day of the week. Press and hold ☐ to remove the current date. Enter the new date. Repeat for each day of holiday as required.
Note: Dates that you set as holiday dates are shown in red.
Deleting holiday reminders
Select Menu > Options. Select Holiday Set. Select Holiday List. Select required holiday date. Select Delete. Confirm delete.
To delete all your holiday reminders:
Select Menu > Options. Select Holiday Set. Select All Clear. Confirm delete.
Changing the schedule layout
You can decide which day you want to have at the start of the week.
Select Menu > Options > Start of week. Select the day.
Jumping to a date
Rather than scrolling through each month on the schedule, you may want to go straight to a specific date to see whether you have any reminders set.
Select Menu > Jump. Press and hold ☐ to remove the current date. Enter the date you want to go to. Select Ok.
Organiser

Calculator
The four function calculator performs simple calculations - addition, subtraction, multiplication and division.
▶ Select Calculator. Enter a number (maximum 10 digits). ▶ Use ◆ to select the arithmetic operator. Enter another number (maximum 10 digits). ▶ If the calculation is complete, press 📄 to get the result. If the calculation is not complete, enter numbers and arithmetic operators until the calculation is complete, then press 📄 to get the result.
Note: To enter a decimal point, press #* .

Alarm
Sets the time, frequency, and tone for an alarm call. You can set up to four alarms.
Setting an alarm
▶ Select --:-- to enter a new alarm, or select an existing alarm time to edit. ▶ Select --:--. Enter the time. ▶ Select the next menu item to set the frequency of the alarm. ▶ Choose from Repeat Daily and Once. ▶ Select the next menu item to set an alarm tone. ▶ Select the folder where your sound is stored. ▶ Select a sound. ▶ Press ☐ to save your alarm settings.
Once you have set an alarm, you can highlight it and use 📄 to cycle through Repeat Daily, Once, or Disabled. The icon next to the alarm time changes to show which option you have selected.
Disabling an alarm
▶ Select an existing alarm time. ▶ Select the frequency option. ▶ Select Disabled. ▶ Press □ to save your alarm settings.
Or
▶ Highlight an existing alarm time. ▶ Press 📋 to cycle through Repeat Daily, Once, or Disabled. ▶ Stop at Disabled. ▶ Press Ⓞ then 📋 to save your alarm settings.

Memo
Use the Memo to record a two-way conversation during a call, and to use the phone as a voice recorder. You can record up to four memos. The maximum length of each memo is 14 seconds.
Note: You can press the memo key on the side of the phone to access the memo function from idle mode.
If you install a different SIM, you will lose your current memos.
When you have filled the four memo storage areas, any new recording overwrites the oldest memo.
Caution: You are responsible for the security of a recorded message. You should ask for the other party's consent before recording.
Recording a memo
Select Record. Record your message. Press Ⓞ to stop recording. Press Ⓞ to start recording the next memo.
Recording a conversation
To start recording during a call, press Ⓐ and select Memo, or press the memo key on the side of the phone. A tone sounds when recording starts and again when it stops. To stop recording, press
Organiser
Playing back a recording
Select Playback. Select a recording.
To stop playing, press Ⓞ twice.
Note: You can use the notepad during playback. See Using the notepad on page 34.
Volume control during playback
While playing back a recording, use ⬇ to adjust the volume.
Deleting a recording
Select Delete. Select the recording. Confirm delete recording.

Receive object
Note: This option is SIM dependent.
Use this to receive data such as contact entries, pictures, sounds or themes from another infrared or Bluetooth® device. For details see Receiving objects via infrared on page 128, or Receiving objects via Bluetooth® on page 124.

Connect
Note: This option is SIM dependent.
This option contains the same items as the main Connect menu. For details on the Connect options, see Connect on page 121.

Connect
From the Connect menu you can set up your Bluetooth® and infrared dialup connections and receive data from other devices.
Note: You can access the Connect menu from the top level menu or via the Organiser menu. This is SIM dependent.
Your phone can be used as a modem to connect a laptop or desktop PC to the Internet via Bluetooth®, infrared or USB Data Cable. For further information please refer to the documentation on the CD-ROM, or to the Panasonic website www.panasonicmobile.com/support/software.
Bluetooth®
![graph TD A["Bluetooth"] --> B["On/Off Discover & Pair"] A --> C["Make D'coverable"] A --> D["Paired Devices"] A --> E["Settings"]](/content/2026/05/965659/images/5609ecf3624e1551d057fbf84a19d5a19f8255c8ca534defc3a1cfa10436dd9e.jpg)
Bluetooth® provides wireless connections from your phone to headsets, car kits, PC's, laptops and other devices. It uses a radio link which provides fast and reliable transmission of data and voice without the need for a line of sight connection. It operates over a distance of about 10 metres, although you may be able to achieve a distance of up to 30 metres.
You can use Bluetooth® on your phone to:
● Make and receive voice calls using a Bluetooth® headset or car kit. - Transfer pictures, sounds, themes or other data files to or from PC's, laptops or other mobile phones that support Bluetooth®. - Send and receive electronic business cards with other mobile phones that support Bluetooth®. - Connect a computer to the Internet so you can send e-mails or browse websites. - Connect to a computer to send and receive faxes.
Turning Bluetooth® on and off
When Bluetooth® is on, the Bluetooth® icon (✗) is displayed at the top of the main display. If you leave Bluetooth® on, you can make and answer calls using your Bluetooth® headset or car kit, send e-mails, and browse websites without pressing any keys on your phone.
Note: Leaving Bluetooth® on reduces the phone's standby time by about 20%.
Connect
▶ Select On/Off. ▶ Select On or Off.
If Bluetooth® is active and you choose to turn it off, you are prompted to confirm the disconnection.
Note: You can send and receive pictures, sounds, themes, contact details, and other data when Bluetooth® is off. Your phone automatically switches Bluetooth® on while the transfer is taking place, then switches it off when the transfer is complete.
Discovering and Pairing devices
To use your Bluetooth® headset or car kit with your phone to make voice calls, or to use your Bluetooth® enabled laptop to connect to the Internet, you must pair them with your phone. You only need to do this once for each device; thereafter, your phone remembers these devices and stores them in its Paired Devices list. Your phone can be paired with up to ten devices.
▶ Select Discover & Pair. This lists all discoverable Bluetooth® devices within about 10 metres. ▶ When the device appears in the list, select Stop. ▶ Highlight the device in the list. ▶ Select Pair. Enter the Bluetooth® Passkey.
If the device you want to pair with is not listed, then check that it is discoverable. Some Bluetooth® devices are not discoverable even if they are within 10 metres range. Most Bluetooth® headsets and car kits must be put into discoverable mode. This is a security feature to prevent other Bluetooth® devices from pairing with your headset or car kit.
The pairing will fail if you enter the wrong Passkey. Most Bluetooth® headsets and car kits use a fixed 4-digit Passkey, e.g., the Passkey for the Panasonic EB-BHX70 headset is 0000. For other devices such as a PC, laptop, or another mobile phone that don't use a fixed Passkey, enter the same Passkey on both devices. This can be anything from 1 to 16 digits long.
Note: Some manufacturers may use the term PIN, Password, or Passcode instead of Passkey.
Your phone only supports Passkeys that use numbers, not letters.
Making the phone Discoverable
You can also pair with another Bluetooth® device by making your phone discoverable and letting the other Bluetooth® device initiate the pairing. To make your phone discoverable:
Select Make Discoverable. Select Start.
Your phone will be Discoverable for five minutes. While the phone is Discoverable, the Bluetooth® icon flashes. If you Pair your devices in less than five minutes you can turn off Discoverable mode:
Select Make Discoverable. Select Stop.
If you take longer than five minutes to Pair your devices, your phone automatically turns off Discoverable mode and you have to start it again.
Viewing, editing and deleting your Paired devices
To see what devices you currently have Paired select Paired Devices, and look at the list on the screen.
If you have no Paired devices, you can select Find to Discover a device.
You can select an item on the list and choose to edit it or delete it. If you choose Edit, you can rename the device.
Note: Your phone can be Paired with up to ten devices.
Selecting default audio device
If your phone is Paired with more than one audio device (headsets, car kits, etc.) then the last device that you Paired is your default audio device. When you transfer audio to Bluetooth® during a call you transfer to the default audio device. When you receive a call, only the default audio device rings.
If you want to change the default audio device:
Select Paired Devices. Highlight the device that you want to be the default. Select Menu > Make Default.
Note: If the Make Default option is not available, then this device is already the default device.
Connect
Viewing your Bluetooth® settings
Your Bluetooth® name is the name reported to other Bluetooth® devices when they pair or exchange data with your phone. By default, the name is Panasonic X70, but we recommend that you change it.
To view your Bluetooth® name and address, select Settings.
To edit the name, select Menu > Edit.
You cannot change your Bluetooth® address.
Sending objects via Bluetooth®
You can send data from Contacts List, Data Folders, and Business Card.
For Contacts List, select > Contacts List > Browse > Bluetooth.
For Data Folders, highlight the object you want to send. Press Ⓐ. Select Bluetooth.
For Business Card, select Organiser > Business Card > Bluetooth. Select the device from the list.
Receiving objects via Bluetooth®
From the Connect menu, select Receive Object.
The phone waits for incoming data from either Bluetooth® or infrared port. If data is received from a Bluetooth® device, you are asked if you want to accept the data. You do not need to pair with the other Bluetooth® device.
Note: If Bluetooth® is off when you send or receive objects, your phone automatically switches Bluetooth® on while the transfer is taking place, then switches it off when the transfer is complete.
When you receive Calendar or Contacts List data, these applications are launched, and you are prompted to save the received data.
When you receive multimedia data, the Data Folders are opened, and you can choose where to save the file.
Connecting your computer to the Internet via Bluetooth®
You can use Bluetooth® to connect your computer (laptop, notepad or PC) to your phone without using any cables. Your phone acts as a modem. You can use it to connect your computer to the Internet for web browsing, sending and receiving e-mails and transferring files (FTP).
Your Internet connection can be circuit switched (CSD) which gives a connection speed of up to 9.6 kbps or GPRS which gives a connection speed of up to 57.6 kbps. With GPRS you are usually only charged for the amount of data sent and received, not for the duration
of the connection. Also, with GPRS, you can still make and receive voice calls while accessing the Internet, although the GPRS connection is suspended during the voice call.
Note: To use CSD you must subscribe to your network operator's CSD service. To use GPRS you must subscribe to your network operator's GPRS service.
To set up your computer and phone you need to:
- Subscribe to CSD or GPRS service.
- Install Bluetooth® on your computer. ● Pair your computer with your phone. ● Install the Data Connection Assistant software on your computer.
- Set up a dial up connection on your computer to access the Internet via your phone.
Note: Installation instructions for your computer may vary depending on your computer's operating system, web browser, Bluetooth Adaptor, etc. For further information please refer to the documentation on the CD-ROM, or to the Panasonic website www.panasonicmobile.com/support/software.
Installing Bluetooth® on your computer
If your computer does not have Bluetooth® built in, you need to:
- Get a Bluetooth USB or PCMCIA adaptor.
- Plug the Bluetooth® adaptor into your computer. ● Install the software provided with the adaptor.
Pairing your computer with your phone
You need to pair your phone with your computer. You can do this from the phone in the same way as you pair with a Bluetooth® headset (see Discovering and Pairing devices on page 122) or you can do it from the computer:
First you need to turn on Bluetooth on the phone:
Select Menu > Connect > Bluetooth > On/Off > On.
The Bluetooth icon appears on the phone.
Then make the phone discoverable:
Select Menu > Connect > Bluetooth > Make Discoverable > Start/Stop > Start.
On your computer, run your Bluetooth® application.
Select Find Bluetooth Devices.
Your computer should discover your phone.
On your computer select Pair, then enter the passkey (any number from 1 to 16 digits).
On your phone enter the same passkey then select Ok.
Connect
Installing the Data Connection Assistant software
The Data Connection Assistant software is supplied with your phone on the CD-ROM, or it can be downloaded from www.panasonicmobile.com.
Follow the instructions provided to install the Data Connection Assistant.
Note: Select Other/Skip modem install for operation with Bluetooth.
Once the Data Connection Assistant is installed, you need to set up a connection to your Bluetooth® modem:
Select Start > Programs > Panasonic Data Connection Assistant > Data Connections.
If you are using a circuit switched connection:
▶ Select Make New Connection. ▶ Select Modem - (Panasonic X70 or Bluetooth COM port from the Select a Device window). Enter the phone number for your Internet Service Provider (ISP).
If you are using a GPRS connection:
▶ Select Make New GPRS Connection (GPRS). ▶ Select Modem - (Panasonic X70 or Bluetooth COM port from the Select a Device window). Enter the Access Point Name (APN) supplied by your GPRS network operator.
Note: With some Bluetooth® USB adaptors you may need to add a modem on the correct COM port for the Data Connection Assistant. To do this on your computer, select Start > Settings > Control Panel > Phone and modem options > Add > COMn, where n is the Bluetooth® COM port number.
Setting your computer's dial-up connection
From your web browser:
▶ Select Start > Program > Panasonic Data Connection Assistant ▶ Select the previously created data connection, then select the Connect option from the File menu. Enter your user name and password and select Connect.
Once connected you can:
- Browse web sites using your computer’s web browser software, e.g. Internet Explorer.
- Send and receive e-mails using your e-mail software application.
- Send and receive files to and from a server connected to the Internet using FTP software.
Note: For further details see the Data Connection Assistant documentation.
Faxing from your computer via Bluetooth®
You can use Bluetooth® to connect your computer (laptop, notepad or PC) to your phone without using any cables. Your phone acts as a fax modem. You can use it for sending and receiving faxes.
Once it is set up, whenever you send a fax from your computer it will use Bluetooth® to connect to the phone, then your phone will dial the fax number.
To send and receive faxes you must subscribe to your network operator's fax service. This gives you a second number for receiving incoming faxes.
To set up your computer and phone you need to:
- Subscribe to fax service.
- Install Bluetooth on your computer. See Installing Bluetooth® on your computer on page 125.
- Pair your computer with your phone. See Pairing your computer with your phone on page 125. Install fax software on your computer, e.g. WinFax Pro (www.symantec.com).
- Install the Data Connection Software on your computer. See Installing the Data Connection Assistant software on page 126.
- Set up your computer's fax application software to send and receive faxes via your phone. Ensure that you select the Panasonic X70 Bluetooth® modem port in your Fax application.
Infrared dialup
You can use the infrared connection to transfer information between your phone and another device with an infrared port. You can also use the infrared connection between your phone and your computer to access the Internet and to send and receive faxes from your computer.
Preparing for infrared connection
Place your phone and the other device within the effective range of the infrared connection.
▶ Ensure that there are no obstructions between the two devices. ▶ Ensure that the infrared ports of the devices point at each other. If you use a PC, you need to set up infrared connection on the PC. For example, Start > Settings > Control Panel > Infrared > Options Tab > Enable Infrared Communication.
Connect
Sending objects via infrared
You can send data from Contacts List, Data Folders and Business Card.
For Contacts List, select > Contacts List > Browse > Infrared.
For Data Folders, highlight the object you want to send. Press Ⓞ. Select Infrared.
For Business Card, select Organiser > Business Card > Infrared.
Press Ⓞ to stop the transmission at any time.
Receiving objects via infrared
From the Connect menu select Receive Object.
The phone waits for incoming data from either Bluetooth ® or infrared port. If data is received from an infrared device you are asked if you want to accept the data.
Customising your phone via infrared
To customise your phone you can download ring tones, wallpapers, phone books and other data from your computer via infrared (or the USB charge data cable EB-UCX70). You can do this using the Handset Manager software on your CD-ROM.
Connecting your computer to the Internet via infrared
You can use Infrared to connect your computer (Laptop, Notepad or PC) to your phone without using any cables. Your phone acts as a modem and it can be used for connecting your computer to the Internet for web browsing, sending/receiving e-mails, and transferring files (FTP).
To set up your computer and phone you need to:
- Subscribe to CSD or GPRS service
- Install the Data Connection Assistant software on your computer. See Installing the Data Connection Assistant software on page 126.
- Set up a dial up connection on your computer to access the Internet via your phone. See Setting your computer's dial up connection on page 126.
Note: Installation instructions regarding your computer may vary depending on your computer's operating system, web browser, etc.
Faxing from your computer via Infrared
You can use Infrared to connect your computer (Laptop, Notepad or PC) to your phone without using any cables. Your phone acts as a Fax modem and it can be used for sending and receiving Faxes.
Once set up, whenever you send a Fax from your computer it will use Infrared to connect to your phone, then your phone will dial the Fax number.
To send and receive Faxes you must subscribe to your network operator's Fax service. This gives you a second phone number on which to receive incoming Faxes.
To set up your computer and phone you need to:
- Subscribe to Fax service ● Install Fax software on your computer such as WinFaxPro (www.symantec.com)
- Install the Data Connection Assistant software on your computer (See Installing the Data Connection Assistant software on page 126.)
- Set up your computer's Fax application software to send/receive faxes via your phone. Ensure that you select the Panasonic X70 infrared modem port in your Fax application.
USB charge data cable (EB-UCX70)
You can connect your phone to your computer with the USB charge data cable (EB-UCX70). With this you can:
- Access the Internet from your computer, using your phone as a modem.
- Send and receive faxes from your computer.
- Download ring tones, wallpapers, phone books and other data to customise your phone.
You should use this in conjunction with the software on the CD-ROM.
Note: Refer to the documentation on the CD-ROM, or to the Panasonic website www.panasonicmobile.com/support/software.
Accessories
Bluetooth® headset (EB-BHX70)

You can use a Bluetooth® headset to make handsfree calls within approximately 10 metres of your phone.
Car charger (EB-CDX70)

Top up your battery in your vehicle by attaching this to your cigarette lighter socket.
Car holder (EB-KAX70)

This can be mounted in your vehicle to store your phone. Can be used with car charger and personal handsfree to provide basic in-car handsfree operation.
Carry case (EB-YKX70)

This hip case protects your phone, and can be attached to your belt to keep it close at hand.
Fast travel charger (EB-CAX70UK)

Carry this wherever you go so you can always recharge your battery.
Fast travel charger (EB-CAX70EU)

Li-Ion battery (EB-BSX70)

Double your talk time by having a spare battery.
Personal handsfree (EB-EMD87)

Talk and move while keeping your hands free, by using a personal handsfree. Put the ear piece in your ear and the adaptor in the side of the handset, and talk.
USB and charging data cable (EB-UCX70)

Use this to connect your phone to a PC, so you can:
- Connect your PC to the Internet;
- Send faxes from your PC;
- Download ring tones, wallpapers, phone books and other data to customise your phone.
You should use this in conjunction with the software on the CD-ROM.
CD-ROM
PC Software
The CD-ROM supplied with your X70 phone contains software applications which allow you to manage the information in your phone from a Personal Computer (PC), and to enable your PC to communicate with the Internet through your phone. These applications include:
Data Connection Assistant Software
The Panasonic Data Connection Assistant Software allows you to connect a laptop or desktop PC to the Internet and other network services via your X70 mobile phone. For further information please refer to the documentation on the CD-ROM, or to the Panasonic website www.panasonicmobile.com/support/software.
X70 Handset Manager
With Handset Manager you can easily manage your phone information on a PC and synchronize it back to the phone. This information includes contacts, messages, calendar and the image or sound data held in your X70. For further information please refer to the documentation on the CD-ROM, or to the Panasonic website www.panasonicmobile.com/support/software.
Installing the Software
The software is compatible with PCs and laptops running Microsoft Windows™ 98 or later. On most PCs the software should auto-install when the CD-ROM is inserted into the CD drive. If not, then autoplay must be manually selected in Windows Explorer. Follow the instructions that appear on the PC screen to install the software.
Troubleshooting
Please contact your dealer, if any problem persists, or if your problem is not dealt with here.
| Problem Cause Remedy | ||
| Phone will not switch on. The network you are using and the condition of the battery can affect battery life. | Check that the battery is fully charged and correctly connected to the phone. | |
| Short battery life for a new battery. | The network you are using and the condition of the battery can affect battery life. | |
| Leaving Bluetooth® on reduces standby battery life by about 20%. | Turn Bluetooth® off if you are not using it. | |
| Short battery life for an old battery. | The battery has worn out Replace with a new fully charged battery. | |
| The charging indicator does not light, the battery level indicator does not appear and the phone cannot be switched on when charging. | The battery is not attached to the phone or when the battery has been deeply discharged the phone will take a short time until the indicator lights. | Leave the phone charging the battery for a few minutes before the indicator is lit and attempting to switch it on. |
| Battery fails to charge. The battery is not attached to the phone. | Ensure the battery is fitted to the phone prior to commencing charging. | |
| Battery has been connected to the phone after the Fast Travel Charger has been switched on. | ||
| Charge fault icon (☒) on phone with charge LED on, while charging the battery. | The charging temperature limits have been exceeded. | Leave the charger connected. Charging will automatically resume when the temperature falls. |
| Charge fault icon (☒1) on phone with charge LED off, while charging the battery. | There is a problem charging the battery. | Disconnect then reconnect the charger. If the problem persists, contact your service provider. |
| Calls cannot be made. The phone is locked. Enter the lock code to unlock the phone. | ||
| Calls cannot be made from Fixed Dial Store. | Check your SIM supports Fixed Dial.Check if the Fixed Dial is switched on.Check the phone number is stored in the Fixed Dial. | |
| Calls cannot be received. The phone is not switched on. | Switch the phone on. | |
| Incoming calls are barred. Disable the incoming call barring. | ||
| The phone is not registered to a network. Move to a coverage area and operate your phone after it has registered with a network. | ||
| Emergency calls cannot be made. | You are not in a GSM coverage area. | Check that the antenna symbol T is displayed – move to a coverage area and operate your phone when the antenna symbol is displayed. |
| Phone numbers cannot be recalled from Contacts List | The phone is locked. Enter the lock code to unlock the phone. | |
| Phone number has been restricted. | Switch off restriction. | |
| X70 does not Discover another Bluetooth® device. | The other Bluetooth® device may not be in Discoverable mode. | Put the other device into Discoverable mode. |
| X70 fails to Pair with another Bluetooth® device | Incorrect Passkey entered. | Check Passkey and retry. |
| X70 may already be Paired with 10 devices. | Delete a device from the Paired Devices list. | |
| X70 is not Discovered by other Bluetooth® devices | X70 is not in Discoverable mode. | Put the X70 into Discoverable mode. |
| Call is terminated when closing the phone | Active Flip is enabled. | Disable Active Flip. |
Important error messages
These are some of the important error messages which may be displayed.
| Area Not Allowed. Roaming in the selected area is not allowed. | |
| Network Not Allowed. Roaming with the selected network is not allowed. | |
| Security Failure. The network has detected an authentication failure because your SIM is not registered with that network – contact your service provider. | |
| SIM Blocked/Contact service provider. | The SIM is blocked because one of the PIN/PIN2 unblocking keys (PUK/PUK2) has been entered incorrectly ten times – contact your service provider. |
| SIM Error. The phone has detected a problem with the SIM – switch the phone off and then back on; if the message is still displayed contact your service provider. | |
| SIM Invalid. The SIM has failed one or more of the SIM personalisation checks – contact your service provider. | |
| Function Unavailable. The selected feature is either not supported by the SIM or is not available with the current subscription – contact your service provider. | |
| PIN2 Invalidated. The PIN2 is blocked permanently because the wrong PUK2 has been entered ten times, services controlled by PIN2 cannot be used – contact your service provider. | |
Troubleshooting
| Message Rejected Store Full. | A message has been received but the message store is full – to receive messages, delete some of the currently stored messages or set messages to Auto Delete. |
| Phone Number Too Long (Max:20). | The edited or newly created Contacts List number is too long for the SIM. |
| Warning Store Full Continue? | The message area is full. Your messages cannot be stored until some of the currently stored messages are deleted. |
| Verification Failure. On changing the phone lock code, verification of the new code is incorrect – retry changing the lock code with correct verification. | |
| Incorrect Lock Code. Disabling or enabling the lock code has failed due to incorrect entry of the lock code – re-enter lock code. | |
| Incorrect PIN/PIN2/PUK/PUK2. | The entered code is incorrect – re-enter code correctly. |
| Auto Redial List Full. Redial list of unsuccessfully dialled numbers is full – switch the phone off and then on again. | |
Glossary
| APN Access Point Name. Gateway from GRPS network to other networks, e.g. Internet. | |
| Bluetooth® | Short range wireless connection for voice and data transfer. |
| CHAP Challenge Handshake Authentication Protocol. A security feature for the GPRS network. | |
| CSD Circuit Switched Data. Connection method used by your phone for data services such as web browsing, e-mail and fax. In this mode your phone acts like a dial up modem with a data rate of up to 9.6 kbps. With CSD you are charged for the duration of your connection, and you cannot receive voice calls while you are using CSD. To use your phone's CSD capability you must subscribe to your network operator's CSD service. | |
| Discover | Search for other Bluetooth® devices. |
| Discoverable | Allow other Bluetooth® devices to discover your device. |
| DTMF Tones Dual Tone Multi-Frequency tones allow you to communicate with computerised phone systems, voice mailboxes etc. | |
| GPRS General Packet Radio Service. The name give to the advanced mobile packet data communications system that your phone supports. This system gives increased data rates compared to a Circuit Switched Data (CSD) connection. It is usually charged on the amount of data transferred not on the connection time. To use your phone's GPRS capability you must subscribe to your network operator's GPRS service. | |
| GSM Global System for Mobile Communications. The name given to the advanced digital mobile phone system that your phone uses. | |
| ISP Internet Service Provider. | |
| Network Operator The organization responsible for operating a GSM network. | |
| Pair | Form a permanent association between two Bluetooth® devices. |
| PAP Password Authentication Protocol. A security feature for the GPRS network. | |
Glossary
| Passkey A one to sixteen digit number entered when Pairing Bluetooth devices. Used as a security measure to prevent unauthorised Pairing. Also known as PIN, Password or Passcode by other manufacturers. |
| Password Used for the control of the Call Bar. Supplied by your service provider. |
| PIN Personal Identification Number used for SIM security. Supplied by your service provider. If the PIN is entered incorrectly 3 times, the PIN will be blocked. |
| PIN2 Personal Identification Number used for the control of Fixed Dial Store and Call Charge metering. Supplied by your service provider. If the PIN2 is entered incorrectly 3 times, the PIN2 will be blocked. |
| PUK/PUK2 PIN/PIN2 Unblocking Key. Used to unblock the PIN/PIN2. Supplied by your service provider. If the PUK/PUK2 is entered incorrectly 10 times, the PUK/PUK2 will be blocked. |
| Registration The act of locking on to a GSM network. This is usually performed automatically by your phone. |
| Roaming The ability to use your phone on networks other than your Home network. |
| Service Provider The organization responsible for providing access to the GSM network. |
| SIM Subscriber Identity Module. A small smart-card which stores unique subscriber and user-entered information such as Contacts List entries and Short Messages. Supplied by your service provider. |
| WAP Wireless Application Protocol. The communication standard which enables you to download resources from the Internet to your phone. |
Specifications
Bands supported .... GSM900 Class 4, GSM1800 Class 1 GSM1900
Standby Time 75 – 250 hours
Standby Time (Bluetooth ® on) ..... 60 – 170 hours
Talk Time.... 1.5 – 5 hours
Talk Time (using Bluetooth ® ) ..... 1.4 – 4.6 hours
Note: Talk and standby time are dependant upon network conditions, SIM usage, battery condition and LCD backlight setting.
Temperature Range
Charging .... +5°C - +35°C
Storage \dots -20°C - +60°C
Weight: 95 g (including battery)
Dimensions
Height 88 mm
Width 48 mm
Depth. 24 mm
Supply Voltage 3.7 V DC, 680 mAh Li-ion
Antenna .... Fixed
Charge Time .... Up to 120 min.
Note: Charging time is dependant on usage and battery condition.
SIM Type 3 V only
Contacts List Memory 500 + SIM
Animation Themes 2
Memo & Voice Recorder 4 x 14 seconds
Games. 4 or 2 (depends on service provider)
Backlight colours 8
Ringtones 15 Fixed (depends on Data Folder)
Schedule Up to 100 entries
Alarms 4
Graphics Formats Supported . . . . . . . . GIF87a, GIF89, JPEG, WBMP BMP, PNG
Maximum File Download Size ..... 100 kB
Maximum File Storage 4 Mb
Specifications
Audio Formats Supported ..... MIDI, iMelody, AMR, SMAF, WAV
Note: Limitation of MIDI: Format 0 and 1 are supported
Limitation of SMAF: 16 polyphonic SMAF
Limitation of WAV: CD quality WAV (16 bit Linear PCM/44.1kHz/stereo) is not supported. Only the following formats are supported:
8 bit Linear PCM/4 kHz/mono
8 bit Linear PCM/8 kHz/mono
16 bit Linear PCM/4 kHz/mono
16 bit Linear PCM/8 kHz/mono
Bluetooth® Version 1.1
Bluetooth® Class 2
Bluetooth® Range .... up to 10 metres
Bluetooth® Profiles .... Headset, Handsfree, DUN, OBEX FAX
WAP 1.2.1 protocol stack
EU warranty and licensing
EU/EEA – Wide guarantee is applicable in the EU/EEA and Switzerland.
Panasonic GSM European Service Guarantee Conditions
Dear Customer,
Thank you for buying this Panasonic digital cellular telephone. The Panasonic GSM European Service Guarantee only applies while travelling in countries other than where the product was purchased. Your local guarantee is applicable in all other cases. If your Panasonic GSM telephone requires service while abroad, please contact the local service company shown on this document.
The Guarantee
The applicable period of the European wide guarantee for GSM is generally 12 months for the main body and 3 months for the rechargeable battery. With respect to a product used in a country other than a country of purchase, notwithstanding what is stated in the conditions below, the customer will benefit, in that country of use, from these guarantee periods of, respectively, 12 and 3 months, if these conditions are more favourable to him than the local guarantee conditions applicable in such country of use.
Conditions of Guarantee
When requesting guarantee service the purchaser should present the warranty card together with proof of purchase, to an authorised service centre.
The guarantee covers breakdowns due to manufacturing or design faults; it does not apply to other events such as accidental damage, however caused, wear and tear, negligence, adjustment, modification or repair not authorised by us.
Your sole and exclusive remedy under this guarantee against us is the repair, or at our option the replacement, of the product, or any defective part or parts. No other remedy, including, but not limited to, incidental or consequential damage or loss of whatsoever nature shall be available to the purchaser.
This is in addition to and does not in any way affect any statutory or other rights of consumer purchasers. This guarantee applies in countries shown on this document at the authorised service centres detailed for that country.
UK
Service Centres in England Tel. +44 8705 159159
IRL
Service Centres in Ireland Tel. +353 1 2898333
Panasonic Service Center Dresden
SERKO GmbH
EU warranty and licensing
EU warranty and licensing
Signalstyrkan
Kungsholmstorg 4
104 22 Stockholm
Tel. +46 08-6542500
CR service
Industribyn 3
232 37 Malmö
Tel. +46 040-430030
SF
Tel. +32 09/386 67 67
TOP SERVICE
Westerloseweg 10
2440 GEEL
Tel. +32 014/54 67 24
TELECTRO SC
EU warranty and licensing
ANTALYA BRANCH OFFICE
ALTINDAĞ MAH. 146 SOKAK ÖFKOÇ
APT.NO:9/1-2A ANTALYA
Tel: 90-242-243 23 70 / 3 Lines
Fax: 90-242-243 23 72
EU/EEA – Wide Guarantee: Conditions applicable in any country other than the country of original purchase.
When the purchaser finds the appliance to be defective, he should promptly contact the proper sales company or national distributor in the EU/EEA country where this guarantee is claimed, as indicated in the "Product Service Guide" or the nearest authorised dealer together with this guarantee and proof of date of purchase. The purchaser will then be informed whether:
(i) the sales company or national distributor will handle the repair service; or (ii) the sales company or national distributor will arrange for trans-shipment of the appliance to the EU/EEA country where the appliance was originally marketed; or (iii) the purchaser may himself send the appliance to the sales company or national distributor in the EU/EEA country where the appliance was originally marketed.
If the appliance is a product model which is normally supplied by the sales company or national distributor in the country where it is used by the purchaser, then the appliance, together with this guarantee card and proof of date of purchase, should be returned at the purchaser's risk and expense to such sales company or distributor, which will handle the repair service. In some countries, the affiliated sales company or national distributor will designate dealers or certain service centres to execute the repairs involved.
If the appliance is a product model which is not normally supplied in the country where used, or if the appliance's internal or external product characteristics are different from those of the equivalent model in the country where used, the sales company or national distributor may be able to have the guarantee repair service executed by obtaining spare parts from the country where the appliance was originally marketed, or it may be necessary to have the guarantee repair service executed by the sales company or national distributor in the country where the appliance was originally marketed.
In either case, the purchaser must furnish this guarantee card and proof of date of purchase. Any necessary transportation, both of the appliance and of any spare parts, will be at the purchaser's risk and expense, and there may be a consequent delay in the repair service.
Where the consumer sends the appliance for repair to the sales company or national distributor in the country of use of the appliance, the service will be provided on the same local terms and conditions (including the period of guarantee coverage) as prevail for the same model appliance in the country of use, and not the country of initial sale in the EU/EEA. Where the consumer sends the appliance for repair to the sales company or national distributor in the EU/EEA country where the appliance was originally marketed, the repair service will be provided on the local terms and conditions prevailing in the country of initial sale in the EU/EEA.
Some product models require adjustment or adaptation for proper performance and safe use in different EU/EEA countries, in accordance with local voltage requirements and safety or other technical standards imposed or recommended by applicable regulations. For certain product models, the cost of such adjustment or adaptation may be substantial and it may be difficult to satisfy local voltage requirements and safety or other technical standards. It is strongly recommended that the purchaser investigates these local technical and safety factors before using the appliance in another EU/EEA country.
This guarantee shall not cover the cost of any adjustments or adaptations to meet local voltage requirements and safety or other technical standards. The sales company or national distributor may be in a position to make the necessary adjustments or adaptations to certain product models at the cost of the purchaser. However, for technical reasons it is not possible to adjust or adapt all product models to comply with local voltage requirements and safety or other technical standards. Moreover, where adaptations or adjustments are carried out the performance of the appliance may be affected.
If in the opinion of the sales company or national distributor in the country where the appliance is used the purchaser has the necessary adjustments or adaptations to local voltage requirements and technical or safety standards properly made, any subsequent guarantee repair service will be provided as above indicated, provided the purchaser discloses the nature of the adjustment or adaptation if relevant to the repair. (It is recommended that the purchaser should not send adapted or adjusted equipment for repair to the sales company or national distributor in the country where the appliance was originally marketed if the repair relates in any way to the adaptation or adjustment.)
This guarantee shall only be valid in territories subject to the laws of the European Union and the EEA.
Please keep this guarantee with your receipt.
EU warranty and licensing
Licensing
Bluetooth®

Bluetooth®
The Official Bluetooth Membership Site
The Bluetooth® word and mark are owned by the Bluetooth SIG, Inc. and any use of such marks by Panasonic is under license. Other trademarks and trade names are those of their respective owners.
In-Fusio

THE MARI'S NAME CONNECTION
In-Fusio have developed specific software called ExEn for the purpose of downloading and playing games from mobile handset.
In-Fusio is a trademark or registered trademark of In-Fusio, France.
Tegic
T9® is a trademark of Tegic Communications Inc. T9® Text Input is licensed under one or more of the following: U.S. Pat Nos. 5,818,437, 5,953,541, 5,187,480, 5,945,928, and 6,011,554; Canadian Pat No. 1,331,057; United Kingdom Pat No. 2238414B; Hong Kong Standard Pat. No. HK0940329; Republic of Singapore Pat No. 51383; Euro. Pat No. 0 842 463 (969272260.8) DE/DK,FI, FR, IT, NL, PT, ES, SE, GB: and additional patents are pending worldwide.
CP8 Patent
Panasonic Mobile Communications Co., Ltd. 2003.
Information in this document is subject to change without notice. No part of these instructions may be reproduced or transmitted in any form or by any means without obtaining express permission from Panasonic Mobile Communications Co., Ltd.
C€0168①
Personal settings and notes
Use the table below to record your GSM/GPRS WAP settings.
| Item Provisioning Information Setting No 1 | Provisioning Information Setting No 2 | Provisioning Information Setting No 3 | Provisioning Information Setting No 4 | Provisioning Information Setting No 5 | |
| Name | |||||
| Home URL | |||||
| Linger Time | |||||
| Gateway IP | |||||
| Security | Non secure/ Secure (Delete One) | ||||
| Bearer Type | |||||
| Circuit Switched (GSM) | |||||
| Digital Dial # | |||||
| Analogue Dial # | |||||
| Circuit Type | |||||
| User ID | |||||
| User Password | |||||
| Packet Switched (GPRS) | |||||
| Access Point Name | |||||
| User ID | |||||
| User Password | |||||
| Authentication | Normal/ Encrypted/ None (PAP) (Chap) | ||||
Personal settings and notes
Notes
The Serial Number can be found on the outside of the phone under the battery. For your convenience we recommend that you note the following details as a record of your purchase.
| Part Number | |
| Serial Number | |
| Dealer Name | |
| Purchase Date |
Index
A
Active flip .....45
Adjusting the time difference Automatically .....47 Manually .....47
Alarm Disabling .....119 Setting .....118
All calls details .....50 Answer key .....44
Answering a call .....26 By opening phone .....45 Handsfree .....26
Auto answer ....43 Automatic power off ....47
Automatic power on ....47 Automatic redial ....29
B
Backlight time .....39
Barred dial Disabling ....56 Enabling ....56 Setting numbers ....66
Battery Charging ....13 Fitting ....12 Removing ....12
Bluetooth® Business card ....115 Car kit ....18 Default audio device ....123 Discover and Pair ....122 Faxing ....127 Headset ....17 Internet access ....124 Make Discoverable ....123
Making calls ..... 28 Paired devices ..... 123 Passkey ..... 122 Receive object ..... 124 Receiving calls ..... 28 Rejecting calls ..... 29 Sending a picture ..... 103 Sending a sound ..... 106 Transferring calls ..... 29
Bookmarks Adding .... 71 Deleting .... 71 Grouped .... 72 Grouping .... 73 Renaming .... 71
Broadcasts Message list ..... 92 Off ..... 92 On ..... 92 Selecting topics ..... 92
Browser images Disabling ....73 Enabling ....73
Business card Entering details ..... 114
C
Calculator .... 118 Calendar on idle screen .... 39 Call bar Cancelling .... 54 Current status .... 54 Setting .... 54
Call waiting status 49
Caller ID 30
Caller's ID status ..... 49
Camera
Capture mode 79
Close up 77
Tones 45
Zoom 77
Camera image
Brightness adjustment ..... 77
Capture mode 79
Effect 78
Format 78
Frame 78
Photo light 78
Twilight 78
Camera mode ..... 14, 74
Case screen 39
Backlight colour ..... 40
Clock 40
Contrast 40
Orientation 40
Changing your network ..... 56
Choosing your answer key ..... 44
Circuit Switched Data ..... 137
Clock
Away clock display ..... 47
Changing location ..... 47
Display format 47
Home area 46
On idle screen 39
Set time 46
Set time difference ..... 47
Summertime 46
Composing a melody ..... 42
Contacts list
Browsing 58
New entry 59
Cookies
Deleting 73
Disabling 73
Enabling 73
Copying
Picture 102
Sound 105
Creating a ring type ..... 42
CSD 137
Currency converter
Converting a value ..... 114
Initial conversion rate ..... 114
Reversing rates ..... 114
D
Deleting
Downloaded files ..... 108
Holiday reminder ..... 117
Memo 120
Picture 77,102
Reminder 116
Sound 105
Display brightness ..... 38
Display icons 22
Display language 45
Diverts
Cancelling 52
Current status 52
Setting 52
Downloading ringtones ..... 108
Downloading wallpapers ..... 108
DTMF tones
Length 45
Sending 26
Duration
All calls 49
Last call 48
E
Ear piece volume .... 30
Index
Editing
Sound 104
Text 37
User messages .....46
Creating a message .....96
Message status .....98
Reading a message .....97
Received message options . .98
Receiving a message ..... 97
Send options .....96
Sending a message .....97
Server list 94
Emergency calls .....27
Ending calls .....26
F
Fixed dial
Disabling .....56
Enabling ....56
Setting numbers .....65
G
Games
Downloadable .....68
Embedded 67
General Packet Radio Service . 137
GPRS 137
Greeting 38
Groups 62
H
Handheld to handsfree ..... 30
Handsfree to handheld .....30
Holding a call ....30
Hotkey dialling .....29, 64
|
Icons 22
Idle screen calendar .....39
Image
Brightness 76
Effects 76
Format 77
Frame 76
Size 76
Trim 77
Image properties ..... 103
Images as slide show ..... 103
In call options 34
Incoming calls
During data transfer ..... 50
In camera mode 75
Infrared
Business card ..... 115
Preparing for connection .. 127
Receive object 128
Sending a picture ..... 102
Sending a sound ..... 105
Sending data 128
International calls ..... 27
K
Key backlight 39
Key tone 44
Key volume 44
Keyguard 14,44
L
Last call details ..... 49
Low battery warning ..... 13
M
Making a second call .... 31
Making calls ..... 14, 26
Managing your inbox 99
Managing your outbox ..... 99
Manipulating folders ..... 108
Melody composer ..... 42
Memo 119
Deleting 120
Play back....120
Recording a conversation .. 119
Memory information ..... 108
Menu shortcuts 25
MMS
Configuring 81
Creating a message ..... 16, 83
Entering user messages ..... 84
Messages status ..... 86
Outbox 86
Player mode 82
Reading messages ..... 86
Receive options ..... 82
Retrieving messages ..... 85
Send options 82
Sending a picture ..... 101
Sending a sound ..... 104
Moving
Picture 102
Sound 105
Multi shot 79
Multi-party calls 32
N
New contact 59
Notepad 34
P
Password 54
Phone defaults 57
Phone lock
Cancelling 53
Changing the code ..... 53
Setting 53
Phone off 14
Phone on 14
Picture
As wallpaper 103
Brightness 76
Effects 76
Format 77
Frame 76
Size 76
Trim 77
PIN
Changing 55
Disabling 55
Enabling 55
PIN2
Disabling 55
Enabling 55
Playing a sound ..... 104
Q
Quiet mode ..... 15, 41
R
Receive object 120
Receiving a second call ..... 31
Rejecting a call 26
Reminder
Creating 116
Deleting 116
Deleting holiday reminder . 117
Holiday reminder ..... 117
Viewing 116
Remote 79
Renaming
Picture 77,101
Sound 105
Resuming a call 30
Returning to default settings ... 57
Ring type ..... 15, 41, 106
Ring volume 41
Roaming 56
S
Safety considerations ..... 6
Index
SAR 8
Saving a picture .....75
Schedule
Changing the layout .....117
Jumping to a date .....117
Self timer 79
Self-portrait....75
Send your number .....52
Service charges .....50
Disable maximum level ....51
Maximum level .....51
Remaining cost .....51
Unit price ....50
Used cost....51
Warning level .....51
Shortcut key .....43
SIM
Fitting .....12
Removing .....12
Single shot 79
Slide show....103, 108
SMS
Auto delete .....88
Chat....93
Creating a message .....17, 89
Message centre .....87
Message lifetime .....88
Message options .....90
Message receipt .....88
Outbox....91
Protocol .....88
Receiving a message ..... 90
Recipient group .....88
User messages .....89
View stored messages .....89
Sound
As a ring type .....106
Properties .....106
Speed dialling .....64
Start up animation 38
Status icons 22
Swapping between calls ..... 32
Synchronizing
Contacts list 112
Schedule 113
T
T9® 36
Adding to dictionary ..... 36
Taking a picture ..... 15, 74
Tegic language 45
Text
Copying 37
Cutting 37
Editing 37
Pasting 37
Text language 45
Theme properties ..... 107
Transferring a call 32
Turning tones off 45
Turning tones on 45
Using a theme ..... 107
Vibration alert 42
Viewing a picture ..... 100
Voice dial 61
Voice mail 98
Voice message 43
Voice recorder 119
Wallpaper 15,38,103
Wild numbers 60
Withhold ID status 49
- CONTENTS
- IMPORTANT INFORMATION
- HTTP://WWW.PANASONICMOBILE.COM
- SAFETY CONSIDERATIONS
- SAR
- EUROPEAN UNION - RTTE
- CARE AND MAINTENANCE
- OVERVIEW OF FEATURES
- BLUETOOTH ® CONNECTIVITY
- CALCULATOR
- CAMERA
- CONVERTER
- GAMES
- INFRARED CONNECTIVITY
- MMS (MULTIMEDIA MESSAGING)
- SCHEDULE
- SMS (TEXT MESSAGING)
- SMS CHAT
- SYNCHRONIZATION
- VOICE DIAL
- WAP BROWSER
- SIM AND BATTERY
- FITTING AND REMOVING THE SIM
- FITTING AND REMOVING THE BATTERY
- CHARGING THE BATTERY
- LOW BATTERY WARNING
- QUICK START
- SWITCHING THE PHONE ON AND OFF
- MAKING CALLS
- LOCKING THE KEYPAD
- CAMERA MODE
- LEAVING CAMERA MODE
- TAKING A PICTURE
- SETTING THE WALLPAPER
- SETTING THE RING TYPE
- SETTING QUIET MODE
- USING YOUR BROWSER
- CREATING A MULTIMEDIA MESSAGE
- CREATING A TEXT MESSAGE
- SETTING UP THE BLUETOOTH® HEADSET
- SETTING UP BLUETOOTH® CAR KITS
- YOUR PHONE
- LEFT SOFT KEY
- NAVIGATION KEY
- RIGHT SOFT KEY
- DISPLAY ICONS
- STATUS ICONS
- MENU STRUCTURE
- SETTINGS
- CONTACTS LIST
- MESSAGING
- DATA FOLDERS
- ORGANISER
- CONNECT
- MENU SHORTCUTS
- VOICE CALLS
- ENDING CALLS
- ANSWERING A CALL
- ANSWERING A CALL HANDSFREE
- SENDING DTMF TONES DURING A CALL
- REJECTING A CALL
- MAKING INTERNATIONAL CALLS
- MAKING EMERGENCY CALLS
- VOICE CALLS USING BLUETOOTH® HEADSET OR CAR KIT
- RECEIVING CALLS
- REJECTING CALLS
- TRANSFERRING CALLS FROM HANDSET TO BLUETOOTH® HEADSET OR CAR KIT
- TRANSFERRING A CALL FROM BLUETOOTH® HEADSET OR CAR KIT TO HANDSET
- USING AUTOMATIC REDIAL
- USING HOTKEY DIALLING
- DISPLAYING CALLER ID
- SETTING THE EAR PIECE VOLUME
- SWAPPING BETWEEN HANDSFREE AND HANDHELD MODES
- HOLDING A CALL
- RESUMING A CALL
- MAKING A SECOND CALL
- RECEIVING A SECOND CALL
- OPERATING DURING TWO CALLS
- SWAPPING BETWEEN CALLS
- ENDING CURRENT CALL
- ENDING BOTH CALLS
- TRANSFERRING A CALL
- MULTI-PARTY CALLS
- ENABLING A MULTI-PARTY CALL
- ADDING PEOPLE
- SPLITTING A MULTI-PARTY CALL
- REJOINING A MULTI-PARTY CALL
- USING THE NOTEPAD
- IN CALL OPTIONS
- TEXT ENTRY
- T9®
- ADDING ENTRIES TO THE T9® DICTIONARY
- ENTERING TEXT
- EDITING TEXT
- CUT, COPY AND PASTE
- TO CUT TEXT
- TO COPY TEXT
- DISPLAY
- CHANGING THE START UP EVENTS
- SETTING THE BRIGHTNESS
- SETTING THE BACKLIGHT TIME
- SETTING THE KEY BACKLIGHT
- DISPLAYING THE CLOCK/CALENDAR IN IDLE MODE
- CHANGING THE CASE SCREEN SETTINGS
- CHANGING THE CONTRAST
- CHANGING THE BACKLIGHT COLOUR
- CHANGING THE ORIENTATION
- CHANGING THE CASE SCREEN DISPLAY
- OPERATOR NOTICE
- ALERTS
- CHANGING THE RING VOLUME
- SETTING A VIBRATION ALERT
- CREATING A RING TYPE
- RECORDING A VOICE MESSAGE
- SETTING AUTO ANSWER
- KEYS
- CHOOSING THE FUNCTION FOR THE SHORTCUT KEY
- SETTING THE KEYGUARD
- CHANGING THE KEY VOLUME
- CHANGING THE KEY TONE
- CHOOSING THE KEY TO USE FOR THE ANSWER KEY
- PHONE SETTINGS
- CHANGING THE LANGUAGE
- CHANGING THE DTMF LENGTH
- TURNING TONES ON AND OFF
- ACTIVE FLIP
- SELECTING CAMERA TONES
- EDITING USER MESSAGES
- CLOCK
- SETTING THE CLOCK
- SETTING THE TIME
- SETTING SUMMERTIME
- SETTING YOUR HOME AREA
- AUTO ADJUSTING THE TIME DIFFERENCE
- SETTING THE TIME DIFFERENCE
- CHANGING YOUR LOCATION
- CHANGING THE DISPLAY FORMAT
- CHANGING THE APPEARANCE OF THE AWAY CLOCK
- SETTING THE POWER ON AND OFF TIMES
- DISABLING THE POWER ON AND OFF TIMES
- OR
- CALL SERVICE
- CALLS
- CONNECTIONS
- SERVICE CHARGES
- SETTING THE MAXIMUM UNIT LEVEL
- DISABLING THE MAXIMUM UNIT LEVEL
- SETTING A WARNING LEVEL
- VIEWING THE REMAINING COST
- VIEWING THE USED COST
- SENDING YOUR NUMBER
- CALL DIVERT
- SETTING AND CANCELLING DIVERTS
- VIEWING THE DIVERT STATUS
- SECURITY
- SETTING AND CANCELLING THE PHONE LOCK
- CHANGING THE PHONE LOCK CODE
- SETTING AND CANCELLING CALL BAR
- VIEWING THE CALL BAR STATUS
- CHANGING THE PASSWORD
- ENABLING AND DISABLING PIN AND PIN
- CHANGING THE PIN
- ENABLING AND DISABLING FIXED DIAL
- ENABLING AND DISABLING BARRED DIAL
- NETWORK
- CHANGING TO A NEW NETWORK
- SEARCH MODE
- NETWORK LIST
- DEFAULTS
- BROWSE
- CREATE
- CREATING A NEW CONTACT
- ENTERING DTMF DIGITS IN A PHONE NUMBER
- ENTERING A PICTURE
- WILD' NUMBERS
- CREATING A VOICE DIAL ENTRY
- RECALLING A VOICE DIAL ENTRY
- DIALLING A VOICE DIAL ENTRY
- EDITING A VOICE DIAL ENTRY
- GROUPS
- CREATING A GROUP
- VIEWING A GROUP
- PREVIEWING A GROUP
- ADDING AND REMOVING MEMBERS
- SETTING HOW TO SORT OR SEARCH ENTRIES
- SETTING HOW TO DISPLAY ENTRIES
- ENABLING AND DISABLING HOTKEY DIALLING
- ENABLING AND DISABLING VOICE DIALLING
- SIM
- CREATING FIXED DIAL NUMBER ENTRIES
- CREATING BARRED DIAL NUMBER ENTRIES
- STORAGE
- EMBEDDED GAMES
- DEMO
- WELCOME
- INSTRUCTIONS
- NICKNAME
- SOUND
- VIBRATIONS
- BACKLIGHT
- DOWNLOADABLE GAMES
- CATALOGUE
- NEWS
- BROWSER
- SERVER LIST
- HOME PAGE
- THE BROWSER MENU
- NAVIGATING PAGES
- BOOKMARKS
- ADDING A BOOKMARK
- DELETING BOOKMARKS
- RENAMING A BOOKMARK
- GROUPED BOOKMARKS
- ENTER URL
- PAGE MEMO
- PUSH MESSAGE
- BROWSER SETTINGS
- SETTING THE COLOUR PRIORITY
- SETTING THE FONT SIZE
- ARRANGING THE COLOUR
- ENABLING AND DISABLING THE BROWSER IMAGES
- ENABLING AND DISABLING PUSH RECEPTION
- COOKIE
- LAST STATUS
- CHANGING TO CAMERA MODE
- TAKING A SELF-PORTRAIT
- SAVING A PICTURE
- INCOMING CALLS WHEN IN CAMERA MODE
- USING YOUR PICTURE
- EDITING THE PICTURE
- CHANGING THE BRIGHTNESS
- CHANGING THE EFFECT
- SELECTING A FRAME
- CHANGING THE SIZE
- CHANGING THE FORMAT
- TRIMMING YOUR PICTURE
- RENAMING THE PICTURE
- DELETING THE PICTURE
- CLOSE UP PICTURE
- BRIGHTNESS ADJUSTMENT
- CHANGING BRIGHTNESS WHILE TAKING A PICTURE
- CHANGING BRIGHTNESS AFTER TAKING A PICTURE
- PREVIEW SCREEN MENU
- PHOTO LIGHT
- TWILIGHT
- EFFECT
- FRAME
- FORMAT
- CAPTURE MODE
- INBOX
- BROADCASTS
- VOICE MAIL
- OUTBOX
- MMS
- CONFIGURING MMS
- SETTING WHAT IS DISPLAYED
- RESTORING DEFAULTS
- USER MESSAGES
- RETRIEVING A MESSAGE
- READING RECEIVED MESSAGES
- VIEWING YOUR MESSAGES STATUS
- SMS
- MESSAGE CENTRE
- RECIPIENT GROUP
- AUTO DELETE
- OFF. TURNS OFF AUTO DELETE
- LIFETIME
- PROTOCOL
- REVIEW
- SENDING SMS TO A FIXED LINE
- SENDING A NEW MESSAGE
- REPLYING TO A MESSAGE FROM A FIXED LINE
- MESSAGE OPTIONS
- TOPICS
- TURNING BROADCASTS ON AND OFF
- MESSAGE LIST
- LANGUAGES
- SEND/RECEIVE
- MESSAGE STATUS
- RECEIVED MESSAGES OPTIONS
- VOICE MAILBOX
- MANAGING YOUR INBOX AND OUTBOX
- MY PICTURES
- VIEWING STORED PICTURES
- EDITING STORED PICTURES
- SENDING A PICTURE BY MMS
- RENAMING A PICTURE
- COPYING OR MOVING A PICTURE
- DELETING A PICTURE
- SENDING A PICTURE VIA INFRARED
- SENDING A PICTURE VIA BLUETOOTH®
- VIEWING THE IMAGE PROPERTIES
- USING IMAGES AS A SLIDE SHOW
- USING THE PICTURE AS YOUR WALLPAPER
- MY SOUNDS
- PLAYING STORED SOUNDS
- EDITING STORED SOUNDS
- SENDING A SOUND BY MMS
- RENAMING A SOUND
- COPYING OR MOVING A SOUND
- DELETING A SOUND
- SENDING A SOUND VIA INFRARED
- SENDING A SOUND VIA BLUETOOTH®
- VIEWING THE SOUND PROPERTIES
- USING THE SOUND AS YOUR RING TYPE
- MY THEMES
- VIEWING THE THEME PROPERTIES
- USING THE THEME
- MANIPULATING FOLDERS
- MEMORY
- RENAME
- SLIDE SHOW
- DELETE ALL
- DOWNLOADING WALLPAPERS, RINGTONES AND THEMES
- DOWNLOADING A COLOUR LOGO
- DOWNLOADING A RINGTONE
- DOWNLOADING A THEME
- CONVERTER BUSINESS CARD
- CALCULATOR ALARM MEMO
- RECEIVE OBJECT
- SETTING YOUR SERVERS
- ORGANIZER
- SYNCHRONIZING YOUR CONTACTS LIST
- YOU NEED TO SET
- SYNCHRONIZING YOUR SCHEDULE
- ENTERING AN INITIAL CONVERSION RATE
- CONVERTING A VALUE
- REVERSING THE CURRENCY CONVERSION
- BUSINESS CARD
- ENTERING DETAILS
- SEND YOUR DETAILS TO A BLUETOOTH® DEVICE
- SEND YOUR DETAILS TO AN INFRARED DEVICE
- CREATING A REMINDER
- VIEWING A REMINDER
- DELETING A REMINDER
- SETTING A HOLIDAY REMINDER
- DELETING HOLIDAY REMINDERS
- CHANGING THE SCHEDULE LAYOUT
- JUMPING TO A DATE
- ALARM
- SETTING AN ALARM
- DISABLING AN ALARM
- MEMO
- RECORDING A MEMO
- RECORDING A CONVERSATION
- PLAYING BACK A RECORDING
- DELETING A RECORDING
- BLUETOOTH®
- TURNING BLUETOOTH® ON AND OFF
- DISCOVERING AND PAIRING DEVICES
- MAKING THE PHONE DISCOVERABLE
- VIEWING, EDITING AND DELETING YOUR PAIRED DEVICES
- SELECTING DEFAULT AUDIO DEVICE
- VIEWING YOUR BLUETOOTH® SETTINGS
- SENDING OBJECTS VIA BLUETOOTH®
- RECEIVING OBJECTS VIA BLUETOOTH®
- CONNECTING YOUR COMPUTER TO THE INTERNET VIA BLUETOOTH®
- INSTALLING THE DATA CONNECTION ASSISTANT SOFTWARE
- SETTING YOUR COMPUTER'S DIAL-UP CONNECTION
- FAXING FROM YOUR COMPUTER VIA BLUETOOTH®
- INFRARED DIALUP
- PREPARING FOR INFRARED CONNECTION
- SENDING OBJECTS VIA INFRARED
- RECEIVING OBJECTS VIA INFRARED
- CUSTOMISING YOUR PHONE VIA INFRARED
- CONNECTING YOUR COMPUTER TO THE INTERNET VIA INFRARED
- FAXING FROM YOUR COMPUTER VIA INFRARED
- USB CHARGE DATA CABLE (EB-UCX70)
- ACCESSORIES
- BLUETOOTH® HEADSET (EB-BHX70)
- CAR CHARGER (EB-CDX70)
- CAR HOLDER (EB-KAX70)
- CARRY CASE (EB-YKX70)
- FAST TRAVEL CHARGER (EB-CAX70UK)
- FAST TRAVEL CHARGER (EB-CAX70EU)
- LI-ION BATTERY (EB-BSX70)
- PERSONAL HANDSFREE (EB-EMD87)
- USB AND CHARGING DATA CABLE (EB-UCX70)
- CD-ROM
- PC SOFTWARE
- DATA CONNECTION ASSISTANT SOFTWARE
- X70 HANDSET MANAGER
- INSTALLING THE SOFTWARE
- TROUBLESHOOTING
- IMPORTANT ERROR MESSAGES
- GLOSSARY
- SPECIFICATIONS
- TEMPERATURE RANGE
- DIMENSIONS
- EU WARRANTY AND LICENSING
- PANASONIC GSM EUROPEAN SERVICE GUARANTEE CONDITIONS
- DEAR CUSTOMER
- THE GUARANTEE
- CONDITIONS OF GUARANTEE
- UK
- IRL
- SF
- EU/EEA – WIDE GUARANTEE: CONDITIONS APPLICABLE IN ANY COUNTRY OTHER THAN THE COUNTRY OF ORIGINAL PURCHASE
- LICENSING
- TEGIC
- CP8 PATENT
- PERSONAL SETTINGS AND NOTES
- INDEX
- A
- B
- C
- D
- E
- EDITING
- F
- FIXED DIAL
- G
- H
- IMAGE
- INFRARED
- K
- L
- M
- N
- P
- Q
- R
- S
- T
Brand : PANASONIC
Model : EB-X70
Category : Smartphone