
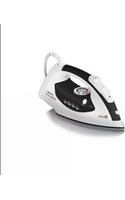
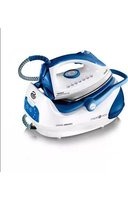
SI9020TTN - Iron SWAN - Free user manual and instructions
Find the device manual for free SI9020TTN SWAN in PDF.


| Product Type | Steam Iron |
| Brand | Swan |
| Model | SI9020TTN |
| Power | 2000 W |
| Voltage | 220-240 V ~ 50/60 Hz |
| Water Tank Capacity | 300 ml |
| Soleplate Material | Stainless Steel |
| Continuous Steam | Up to 30 g/min |
| Steam Burst | Up to 120 g/min |
| Spray Function | Yes |
| Anti-Drip System | Yes |
| Self-Clean Function | Yes |
| Vertical Steam | Yes |
| Auto Shut-Off | Yes (30 sec horizontal, 8 min vertical) |
| Cord Length | 2 m |
| Cord Storage | 360° Swivel |
| Weight | 1.2 kg |
| Dimensions (L x W x H) | 26 x 12 x 15 cm |
| Descalable | Yes (use vinegar or descaler) |
| Spare Parts Available | Yes (soleplate, water tank, etc.) |
Frequently Asked Questions - SI9020TTN SWAN
User questions about SI9020TTN SWAN
0 question about this device. Answer the ones you know or ask your own.
Ask a new question about this device
Download the instructions for your Iron in PDF format for free! Find your manual SI9020TTN - SWAN and take your electronic device back in hand. On this page are published all the documents necessary for the use of your device. SI9020TTN by SWAN.
USER MANUAL SI9020TTN SWAN
2400W
STEAM GENERATOR
WITH ONE TOUCH TEMPERATURE CONTROL
Instruction Manual
MODEL: SI9020TTN

Contents
Important Safeguards 04
UK Wiring Instructions 05
Parts and Features 06
Fabric Setting Chart 08
Ironing Temperature Setting Guide 09
How to use your Steam Station
Prepare the Appliance for Use 10
Fill Water Tank | |
Steam Ironing 12
Dry Ironing 13
Vertical Steam Ironing 14
Auto Shut Off Function 14
Handle 15
Cord Storage 16
Replacement of Filter 16
Anti-Calc System 17
Emptying and Storing 17
Cleaning and Maintenance 17
Troubleshooting 18
Additional Information 19
Important Safeguards
I. Make sure to read all the safety precautions below and look at the illustrations before you start using the appliance.
-
Use the appliance for its intended use only.
-
The appliance is intended for household use only.
-
In order to protect against the risk of electric short, do not immerse iron power base into water or any other liquids.
-
Connect the appliance only to an alternating current of the voltage specified on the rating plate and only to an earthed socket. To avoid a circuit overload, do not operate another high wattage appliance in the same circuit.
-
The appliance should always be turned to OFF before plugging or unplugging from outlet. Never yank cord to disconnect from outlet; instead, grasp plug and pull to disconnect.
-
Do not allow power cord or supply hose to touch hot surface.
-
Always disconnect the plug of the appliance from electrical outlet when filling with water or emptying and when not in use.
-
Do not operate the appliance with a damaged cord or if the appliance has been dropped or damaged. To avoid a hazard such as the risk of electric shock, do not disassemble the appliance, it must be taken to a qualified serviceman or manufacturer or its service agent for examination and repair. Incorrect re-assembly can cause a risk of electric shock when the iron is used.
-
Place the iron out of reach of children. Close supervision is necessary for any appliance being used by or near children. Do not leave the iron unattended while connected to the supply mains.
-
Always place the appliance on a stable, level and horizontal surface or ironing board.
-
Always place the iron on the iron rest plate horizontally. Do not put the hot iron onto the power cord or the supply hose.
-
Burns can occur from touching hot metal parts, hot water or steam. Use caution when using the appliance. If the iron is placed onto the iron rest plate during use, the iron rest plate may become a hot surface. Do not touch the iron rest plate and the sole-plate until they have cooled down completely.
-
Never use the iron facing towards people because the steam can cause burns.
- Never twist the supply hose during use.
- The iron must not be left unattended while it is connected to the mains supply.
- The iron must be used and rested on a stable surface.
- When placing the iron on its stand, ensure that the surface on which the stand is placed is stable.
- The iron is not to be used if it has been dropped, if there are visible signs of damage or if it is leaking.
- If the supply cord is damaged, it must be replaced by the manufacturer, its service agent or similarly qualified persons in order to avoid a hazard.
- The appliance is not intended for use by children or other persons without assistance or supervision if their physical, sensory or mental capabilities prevent them from using it safely. Children should be supervised to ensure that they do not play with the appliance.
- The appliance could produce a noise level of < 70 dB during operation when no water is in the water tank.
UK Plug Wiring Instructions
The wires in the mains lead are coloured in accordance with the following code:
BLUE NEUTRAL
BROWN LIVE
GREEN/YELLOW EARTH
As the colours of the wire in the mains lead of this appliance may not correspond with the colour markings identifying the terminals on your plug, proceed as follows:
The wire which is coloured BLUE must be connected to the terminal which is marked with the letter N or coloured black. The wire which is coloured BROWN must be connected to the terminal which is marked with the letter L or coloured red.
The wire which is coloured GREEN/YELLOW must be connected to the terminal which is marked with the letter E or (earth symbol) and is coloured GREEN or GREEN/YELLOW.
WARNING: THIS APPLIANCE MUST BE EARTHED
Parts and Features
I. Water tank
2. Handle
3. Soleplate
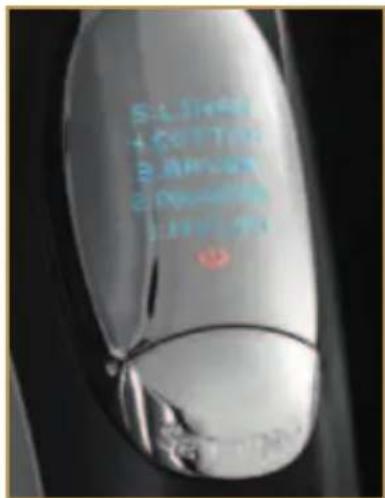
4. Fabric setting display
5. Selection button
6. Steam release
7. Power cord/Connecting supply
8. Power cord (not shown)
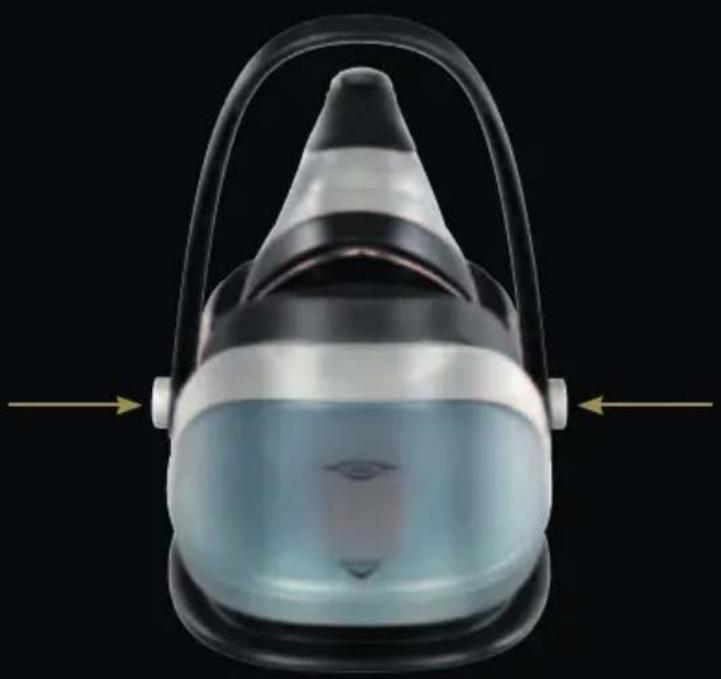
9. Handle button
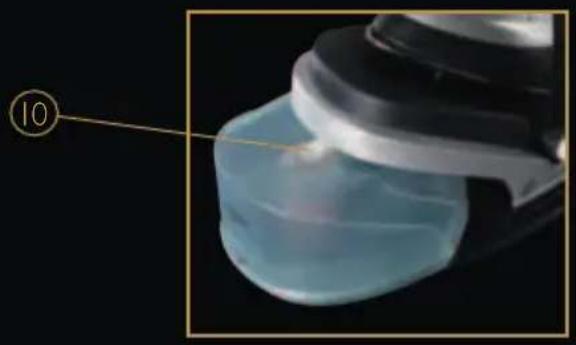
10. Filter
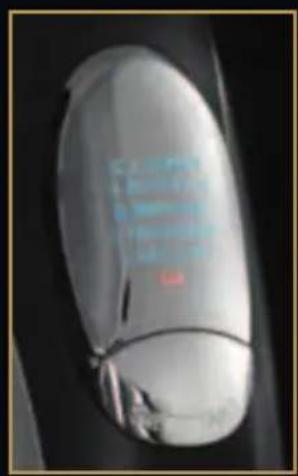
Fabric setting display

Fabric Setting Chart
| Temperature Setting | NYLON POLYESTER RAYON COTTON LINEN | ||||
| Fabric | Synthetics Silk Nylon Acrylic Acetate | Wool Polyester | Synthetics Wool Polyester | Cotton Wool | Polyester Cotton Linen |
| Ironing Instruction | Dry ironing | Dry iron on the wrong side of the fabric | Steam iron | Steam iron | Steam iron |
| Steam Selection | —— |  |  |  |  |

Ironing Temperature Setting Guide
- Follow the ironing instructions on the garment label. If there is no instruction label, but you know what kind of fabric it is, please refer to the fabric setting chart described opposite.
- The fabric setting chart is only valid for plain fabrics and not for materials to which finishes, glosses etc, have been applied. Textiles to which some kind of finish has been applied (gloss, crinkle, relief etc.) is best ironed at a lower temperature.
- First sort laundry according to ironing temperature setting guide: wool with wool, cotton with cotton, etc.
- The iron heats up more quickly than it cools down. Therefore, start ironing articles that need to be ironed at the lowest temperature, such as those made of synthetic fibres.
- If the fabric consists of various kinds of fibres, always select the temperature required by the most delicate fibres, i.e. the lowest temperature. If, for example, an article consists of 60% polyester and 40% cotton, according to the fabric setting chart it should be ironed for polyester.
- If you do not know what kind of fabric the article is made of, iron a piece of the material which is not visible when you wear it to find out the appropriate temperature for your articles.
- Pure woolen fabrics (100% wool) should be ironed with the iron setting to steam ironing position. It is advisable to set the selection control button to "COTTON" position and use a dry pressing cloth.
- When steam ironing woolen fabrics, shiny patches may occur. You may prevent this by turning the article inside out and ironing the reverse side.
- After using steam ironing for cotton fabrics, do not iron articles requiring a lower temperature (such as nylon etc.) immediately. It is advisable to adjust the selection button to the lower setting, waiting for about 2-4 minutes until the blue indicator light turns off, and then you can start ironing.
Important Hints
Do not fill water tank with vinegar, starch, chemically descaled water or descaling agents.
How to use your Steam Station
Prepare the Appliance for use
- Check if the rating indicated in the rating plate corresponds to the main voltage in your home.
- Press handle button to lay handle down. (When handle is lifted up, the unit is shut off. It will be ON when handle is laid down).
- Remove the protective foil or sticker or card from the sole-plate.
- Fully unwind and straighten the power cord and the supply hose.
- Place the appliance on a stable, level and horizontal surface such as an ironing board.
- Place the iron onto the iron rest plate horizontally at the base unit.
Fill Water Tank
I. Press the water tank lock upwards and slide the detachable water tank outwards from the base.
2. Take the filter upwards out from the water fill hole.
(You can take the filter out of the opening for filling water into water tank, or fill water into water tank directly with the filter already in the opening).
3. Fill the water tank up to or below the "MAX" fill line with clean tap water.
4. Replace filter back into water filling hole.
5. Replace the water tank into the base unit again. It will be locked in place with the base when a "click" sound is heard.
6. Always pour out the remaining water after use.
7. When the water level reaches a low level or is empty, pump will provide sound to indicate refilling. You must stop using the appliance immediately and refill the water tank as mentioned above.
Note:
When the water level in the tank falls below a certain level, the pump will make a noise. When this happens, stop ironing and refill the tank.

Steam Ironing
I. Fill water tank with clean tap water referring to the filling instructions. For better performance, please immerse filter in water for several minutes before installing it into the water tank.
-
Connect the appliance to a suitable socket outlet. The power indicator light (red) “ ⏻ will light up on the iron unit showing that the unit has been connected to the power supply.
-
Set selection button to desired position according to fabric setting chart on page 08. The setting indicator light (blue) on the iron unit will blink slowly to indicate the unit is heating up. When the blue indicator light changes to a steady light and an audible “Bi” signal is produced, the desired temperature has been reached and it is ready for steam ironing. During use, temperature indicator light will sometimes blink and sometimes be a steady light. This does not indicate a defect or hazard - this is because the appliance temperature is constant.
-
Before first use, clean the iron unit as following methods: Take the iron up from the base unit, press steam button underneath the handle to allow steam ON for 30 seconds, and then OFF for 30 seconds. This cycle should be repeated for 2 times. When blue indicator light stop blinking, it is ready for use.
-
During steam ironing, steam should be automatically adjusted according to sole-plate temperature.
-
After use, put iron unit back onto the base unit again, set selection button to " 🔊", and then unplug the appliance from main socket.
-
Slide out the water tank and pour out the remaining water.
Note:
a. For first use, it is normal that a slight vibrating sound may occur from the electrical pump inside the base unit for a few seconds when steam ironing is started. It is because there is air inside the filter. It will stop when the air inside the filter has been pumped out. If this abnormal condition continues to happen for more than 60 seconds, please check whether water tank and filter is assembled correctly.
b. When set at "NYLON" position, no steam is released since dry ironing is most suitable.
c. When fabric setting is set at "POLYESTER" / "RAYON" / "COTTON" "LINEN", steam will automatically vary according to sole-plate temperature. The pump will stop working and no steam released when the sole-plate temperature becomes too low. It will resume once reheated to the desired temperature.
Dry Ironing
- Connect the appliance to a suitable socket outlet and lay handle down. Power indicator light (red) “ 🍼on iron unit will light up indicating that the unit has been connected to the power supply.
- Set selection button to desired position according to fabric setting chart (page 08). Blue indicator light on iron unit will blink slowly to indicate the unit being heated up. When the blue indicator light changes to a steady light and an audible “Bi” signal produced, the desired temperature has been reached. During use, blue indicator light will cycle from blinking to a steady light and then from steady mode to ON.
- After use, put iron unit back onto the base unit again, turn selection button to "and then unplug the appliance from main socket.
Note:
When changing your temperature setting from higher setting to lower, you should not start ironing immediately since it may cause burns to your fabrics. Please wait till blue indicator light lights up steadily, and then start ironing.
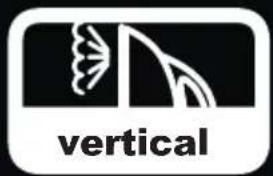
Vertical Steam Ironing
- Follow the steam ironing process, and then hold the iron in a vertical position between 5cm and 15cm away from the hanged fabrics.
- Press down steam switch, this will create vertical steam.
- This feature is especially used for removing creases from hanging clothes and curtains.
- Never directly perform steam ironing on people.
Auto Shut Off Function
The appliance will come into auto shut off mode along with audible "Bi..." signal when it has been used for 60 minutes continuously with temperature set at any setting and power indicator light "💡" will blink. Press selection button to reset another 60 minutes cycle if continuous use is necessary.
(Once each setting is pressed, the unit will reset time)
Handle
A handle is attached to the base unit for carrying the appliance. It also serves as a power on/off switch: Lifting the handle up turns power OFF and putting the handle down turns power ON.
Before use, please put the handle in the down position as follows:
- Press down the two handle buttons at the same time, and then lay the handle down.
- After use, allow the appliance to completely cool down then wind the power cord around the cord storage of base unit and put the iron onto the base unit.
- Lift the handle up until a “click” sound is heard. This indicates that the handle has been locked in place and you can now carry the appliance by the handle.

Cord Storage (optional)
The unique design for cord storage of base unit provides not only beautiful features but also easy storage.
I. After use, unplug the unit from the mains socket. Pour out the remaining water from the water tank after the unit has completely cooled down.
-
Rest iron on power base, fold connecting supply in half and wind the connecting supply counter-clockwise around cord slot of the base unit. Next tie the power cord and connecting supply with cord tie. Wind the remaining power cord clockwise around the cord slot, then put plug between connecting supplies in order to tighten fully.
-
Store the appliance well for further use.
Replacement of Filter
Method:
-
Slide water tank out from base unit, take the filter out from the water tank, and then replace with a new one.
-
After new filter has been installed into water tank, fill water into water tank to MAX fill level, and then slide water tank back into base unit.
(Immerse filter in water for several minutes in order to gain better performance in future use).
Anti-Calc System
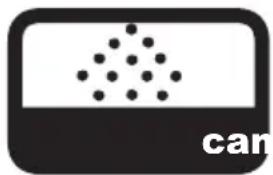
I. The filter is designed to reduce the build-up of limescale which occurs during steam ironing to prolong the working life of your iron. However, please note that the filter will not completely stop the natural process of limescale build-up.
2. The filter should be replaced with a new one after 2-3 months. The iron can still be used with a clogged filter. However, limescale will most probably be built up in the steam chamber. This happens depending on the quality of your local water quality. You should replace the filter as soon as possible or mix your water with 50% distilled water.
Emptying and Storing
I. Disconnect the appliance from the power supply and allow the appliance to cool down for at least 60 minutes.
2. After use, slide out the water tank and pour out all of the remaining water.
3. Wind the power cord around cord storage of the base unit.
4. The iron should be placed on the iron rest plate and they can be stored together.
Cleaning and Maintenance
I. Unplug the appliance from the mains supply and let the iron cool down.
2. Clean the iron with a damp cloth.
3. Wipe off limescale and any other deposits from the soleplate with a damp cloth or non-abrasive (liquid) cleaner.
4. Never clean the iron under the tap.
Troubleshooting
| Problems Possible Causes Solution | ||
| Iron won't heat. Incorrect connection to the mains socket. | Re-plug the unit to mains socket. | |
| Handle has not been laid down. | ||
| Temp setting is at " 🔊" position. | ||
| Unknown malfunctions. | ||
| No steam comes out when pressing steam switch after the desired temperature is reached. | Temperature setting is at NYLON position. | Select the required ironing temperature according to fabric setting chart. |
| No water in water tank. | Fill water into water tank. | |
| Filter has not been properly installed into water tank. | Install filter into water tank. | |
| Water tank has not been properly installed. | Slide water tank into the power base until a “click” sound is produced and it will be locked into place. | |
| “ 🔊” blinks quickly, other fabric indicators turn off, buzzer sound a “Bi”. No buttons work. It will resume when re-powered again. | Defects with internal circuit causing unit to enter self protect mode. | Re-power the unit again. If it still can not resume, please take it to its service agent or similarly qualified persons for repair. |
2 Year Guarantee
This product is guaranteed for two years from the date of original purchase. If any defect arises due to faulty materials or workmanship faulty products must be returned to place of purchase. Refunds or replacement is at the discretion of the store.
The following conditions apply:
- The product must be returned to the retailer with original proof of purchases.
- The product must be installed and used in accordance with the instruction contained in this instruction guide.
• It must be used only for domestic purposes. - It does not cover wear and tear, damage, misuse or consumable parts.
• Swan has no responsibility for incidental or consequential loss or damage. - Valid in the UK and Eire only.
Disposal of Unit
Disposal instructions for Swan items in accordance with the WEEE directive. Appliances bearing the symbol shown here may not be disposed of in domestic rubbish. You are required to dispose of old electrical and electronic appliances like this separately. Please visit www.recyclemore.co.uk, or www.recylcenow.co.uk for access to information about the recycling of electrical items. The WEEE directive, introduced in August 2006, states that all electrical items must be recycled, rather than taken to landfill. Please arrange to take this appliance to your local Civic Amenity site for recycling, once it has reached the end of its life.
Helpline
01733 404703
Spares References
SI9020TTN-001: Anti-Calc Filter
Distributed by
Swan Products Ltd
PO Box 3117
Stoke-on-Trent
ST4 9GD
Made in China
Please note the photographs and illustrations within this manual are for illustration purposes only.


- CONTENTS
- IMPORTANT SAFEGUARDS
- UK PLUG WIRING INSTRUCTIONS
- PARTS AND FEATURES
- FABRIC SETTING CHART
- IRONING TEMPERATURE SETTING GUIDE
- IMPORTANT HINTS
- HOW TO USE YOUR STEAM STATION
- PREPARE THE APPLIANCE FOR USE
- FILL WATER TANK
- NOTE
- STEAM IRONING
- DRY IRONING
- VERTICAL STEAM IRONING
- AUTO SHUT OFF FUNCTION
- HANDLE
- CORD STORAGE (OPTIONAL)
- REPLACEMENT OF FILTER
- METHOD
- ANTI-CALC SYSTEM
- EMPTYING AND STORING
- CLEANING AND MAINTENANCE
- TROUBLESHOOTING
- 2 YEAR GUARANTEE
- DISPOSAL OF UNIT
- HELPLINE
- SPARES REFERENCES
Brand : SWAN
Model : SI9020TTN
Category : Iron