
RM40C - Lawn mower COBRA - Free user manual and instructions
Find the device manual for free RM40C COBRA in PDF.


| Product Type | Lawn Mower |
| Model | RM40C |
| Brand | Cobra |
| Cutting Width | 40 cm (16 inches) |
| Power Source | Electric (corded) |
| Motor Power | 1400 W |
| Cutting Height Adjustment | Central lever, 25-75 mm, 6 positions |
| Grass Bag Capacity | 40 liters |
| Weight | 12 kg |
| Dimensions (L x W x H) | 70 x 45 x 30 cm |
| Wheel Size | Front: 150 mm, Rear: 200 mm |
| Mulching Function | Yes (mulching plug included) |
| Side Discharge | Yes |
| Cable Length | 10 m |
| Safety Features | Two-hand operation, blade brake |
| Maintenance | Clean after use, sharpen blade annually |
| Spare Parts Availability | Blades, belts, wheels available |
| Noise Level | 94 dB(A) |
| Vibration Level | 4.5 m/s² |
Frequently Asked Questions - RM40C COBRA
User questions about RM40C COBRA
0 question about this device. Answer the ones you know or ask your own.
Ask a new question about this device
Download the instructions for your Lawn mower in PDF format for free! Find your manual RM40C - COBRA and take your electronic device back in hand. On this page are published all the documents necessary for the use of your device. RM40C by COBRA.
USER MANUAL RM40C COBRA
Henton and Chattell Ltd., London Road, Nottingham NG2 3HW UK
www.cobragarden.co.uk

WARNING:
For your own safety please read this manual before attempting to operate your new unit. Failure to follow instructions can result in serious personal injury. Spend a few moments to familiarize yourself with your mower before each use. Keep this manual in a safe place, so that the information is available at all times. If you give the equipment to any other person, hand over these operating instructions and safety regulations as well.
Intended use
- The equipment may only be used for the tasks it is designed to handle. Any other use is deemed to be a case of misuse. The user/operator and not the manufacturer will be liable for any damage or injuries of any kind caused as a result of this.
- The petrol lawn mower is intended for private use i.e. for use in home and gardening environments. Private use of the lawn mower refers an annual operating time generally not exceeding that of 50 hours, during which time the machine is primarily used to maintain small-scale, residential lawns and home/hobby gardens. Public facilities, sporting halls, and agricultural/forestry applications are excluded.
- Please note that our equipment has not been designed for use in commercial, trade or industrial applications. Our warranty will be voided if the machine is used in commercial, trade or industrial businesses or for equivalent purposes. The operating instructions as supplied by the manufacturer must be kept and referred to in order to ensure that the lawn mower is properly used and maintained. The instructions contain valuable information on operating, maintenance and servicing conditions.
- Important Due to the high risk of bodily injury to the user, the lawn mower may not be used to trim bushes, hedges or shrubs, to cut scaling vegetation, planted roofs, or balcony-grown grass, to clean (suck up) dirt and debris off walkways, or to chop up tree or hedge clippings. Moreover, the lawn mower may not be used as a power cultivator to level out high areas such as molehills. For safety reasons, the lawn mower may not be used as a drive unit for other work tools or toolkits of any kind.
CE
- EC-DECLARATION OF CONFORMITY
| EC Declaration of Conformity | |
| We herewith declare, | Cobra Garden MachineryHenton & Chattell Ltd, London Road, Nottingham NG2 3HW United Kingdom |
| That the following machine complies with the appropriate basic safety and health requirements of the EC Directive based on its design and type, as brought into circulation by us. | |
| In case of alteration of the machine, not agreed upon by us, this declaration will lose its validity | |
| Machine Description: | Lawn Mower |
| Machine Type: | RM40C (DYM1663QR) RM40SPC (DYM1664QR)RM40SPB (DYM1564QNR) RM40SPCE (DYM1664QDR) |
| Displacement | 98.5 cm3125 cm3135 cm3 |
| Max, Cutting width | 400 mm |
| Measured sound power level: | 92.7dB(A) 91.1dB(A)93.5dB(A) 91.5dB(A) |
| Guaranteed sound power level: | 96dB(A)Notified Body for EC Directive 2000/14/EC:0036TUV SÜD Industrie Service GmbHWestendstrasse 199 • 80886 München • Deutschland |
| Applicable EC Directives | 2006/42/EC 2004/108/EC 2006/86/EC2000/14/EC 97/68/EC 2014/30/EU |
| Applicable Harmonized Standards | EN ISO 5395-1 EN ISO 14982EN ISO 5395-2 |
| Authorized Signature/Data | Peter J. Chaloner 02-12-2014 |
| Title of Signatory | Managing Director |
| Name and address of the person authorised to compile the technical file | Cobra Garden MachineryHenton & Chattell Ltd, London Road, Nottingham NG2 3HW United Kingdom |
CONTENTS
SECTION 1 SYMBOLS MARKED ON THE PRODUCT....4
SECTION 2 GENERAL SAFETY RULES....4
SECTION 3 PARTS DESCRIPTION....8
SECTION 4 TECHNICAL DATA....9
SECTION 5 ASSEMBLY....9
SECTION 6 OPERATION INSTRUCTIONS....12
SECTION 7 MAINTENANCE INSTRUCTIONS 16
SECTION 8 LUBRICATION INSTRUCTIONS 16
SECTION 9 CLEANING.... 16
SECTION 10 STORAGE INSTRUCTIONS (OFF SEASON).... 18
SECTION 11 TROUBLESHOOTING GUIDE.... 20
SECTION 12 WARRANTY.... 21
SECTION 13 ENVIRONMENT....21
SECTION 14 EC-DECLARATION OF CONFORMITY.... 22
- Use extreme caution when reversing or pulling the lawn mower towards you.
- Stop the blade if the lawn mower has to be tilted for transportation when crossing surfaces other than grass, and when transporting the lawn mower to and from the area to be mowed
- Never operate the lawn mower with defective guards, or without safety devices, for example deflectors and/or grass catchers, in place.
- Caution: The lawnmower shall not be operated without either the entire grass catcher or self-closing discharge opening guard in place.
- Do not change the engine governor settings or over speed the engine.
- Before starting the engine disengage all blades and drive clutches.
- Keep your feet well away from the blade when starting the engine and in accordance with the instructions.
- Do not tilt the lawn mower when starting the engine and always start on a flat surface free from long grass.
- Do not start the engine when standing in front of the discharge chute.
- Never put hands or feet near or under rotating parts. Keep clear of the discharge opening at all times.
- Always ensure the engine is fully switched off before picking up/carrying the Lawnmower.
- Stop the engine and disconnect the spark plug wire, make sure that all moving parts have come to a complete stop and, where a key is fitted remove the key, make sure engine has had time to cool.
- Before unclogging chute and clearing blockages.
- Before checking, cleaning or working on the lawn mower.
- After striking a foreign object. Inspect the lawnmower for damage and make repairs before restarting.
- If the lawn mower starts to vibrate abnormally (check immediately).
- Stop the engine and disconnect the spark plug wire, make sure that all moving parts have come to a complete stop and, where a key is fitted remove the key, make sure engine is completely cooled.
- Whenever you leave the lawn mower.
- Before refuelling.
- Reduce the throttle setting during engine shut down and, if the engine is provided with a shut-off valve, turn the fuel valve off at the conclusion of mowing.
- Keep all nuts, bolts and screws tight to be sure the equipment is in safe working condition.
- Never store the equipment with petrol in the tank inside a building where fuel vapours can reach an open flame or spark or where the temperature is high.
- Before storage allow the engine to cool.
- Clean and maintain the lawnmower before storage.
- To reduce the fire hazard, keep the engine, silencer, battery compartment and petrol storage area free of grass, leaves, or excessive grease.
- Check the grass catcher and deflector frequently for wear or deterioration.
- Replace worn or damaged parts for safety. Genuine parts should always be used as parts of inferior quality can damage the equipment and compromise safety.
- If the fuel tank has to be drained, this should be done outdoors. Always ensure engine is completely cooled before starting this task.
- If the blade needs to be removed, wear strong gloves to prevent injury to hands and fingers. Check the blades balance after sharpening.
- When transporting the machine make sure you close the fuel cut off. Be careful to ensure weight is evenly distributed. Wear strong gloves.
- When tilting the machine never tilt towards the air filter as this may become damaged with fuel.
- Never crank the engine when the spark plug is removed.
Maintenance and Storage
CAUTION! The engine must have completely cooled down before storing the lawnmower.
NOTE:
- When storing any type of power equipment in an unventilated or material storage shed, care should be taken to rust-proof the equipment. Using a light oil or silicone, coat the equipment, especially cables and all moving parts.
- Be careful not to bend or kink cables.
- If the starter rope becomes disconnected from the rope guide on the handle, disconnect and ground the spark plug wire. Depress the blade control handle and pull the starter rope out from the engine slowly. Slip the starter rope into the rope guide bolt on the handle.
Transport
Turn the engine off and allow the engine to cool down. Then disconnect the spark plug wire and empty the fuel tank according to the instructions in the engine manual, Ensure not to bend or damage the cutter when pushing the lawnmower over obstacles.
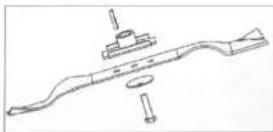
Fig.12
9.3 BLADE MOUNTING TORQUE
Center Bolt 40Nm-50Nm, to insure safe operation of your unit. All nuts and bolts must be checked periodically for correct tightness.
After prolonged use, especially in sandy soil conditions, the blade will become worn and lose some of the original shape. Cutting efficiently will be reduced and the blade should be replaced. Replace with an approved factory replacement blade only. Possible damage resulting from blade unbalance condition is not the responsibility of the manufacturer. When you change the blade, you must use the original type marked on the blade (Please contact your local dealer to order a replacement)
9.4 ENGINE
Refer to the separate engine manual for engine maintenance instructions.
Maintain engine oil as instructed in the separate engine manual packed with your unit. Read and follow instructions carefully. Service the air filter cleaner as per the separate engine manual under normal conditions. Clean every few hours under extremely dusty conditions. Poor engine performance and flooding usually indicates that the air cleaner should be serviced.
To service the air cleaner, refer to the separate engine manual packed with your unit.
The spark plug should be cleaned and the gap reset once a season. Spark plug replacement is recommended at the start of each mowing season. Check the engine manual for correct plug type and gap specifications. Clean the engine regularly with a cloth or brush. Keep the cooling system (blower housing area) clean to permit proper air circulation, which is essential for engine performance and life. Be certain to remove all grass, dirt and combustible debris from the exhaust area.

WARNING: Never touch a rotating cutting blade.
10. STORAGE INSTRUCTIONS (OFF SEASON)
The following steps should be taken to prepare the lawn mower for storage.
- Empty the tank after the last mowing of the season.
a) Empty the petrol tank with a suction pump.

CAUTION! Do not drain the petrol in closed rooms, in close proximity of open fire, etc. Do not smoke petrol fumes can cause an explosion or fire.
b) Start the engine and let it run until it has used up all remaining petrol and stalls.
c) Remove the spark plug. Use an oil can to fill approx. 20 ml oil into the combustion chamber. Operate the starter to evenly distribute the oil in the combustion chamber. Replace the spark plug.
-
Clean and grease the lawnmower carefully as described above under "Lubrication".
-
Slightly grease the cutter to avoid corrosion.
-
Store the lawnmower in a dry, clean and frost-protected place.
-
Frequently check the fuel lines and fittings for damage and cracks, replace if necessary
-
Never start the engine with the air filter cover removed.
-
Carefully clean the mower and grass bag after use to remove debris as this can damage and corrode. Fertilisers and top dressings are particularly corrosive.
-
In time your chassis may peel because of the abrasive action of the debris making contact. This can be remedied by touching up paintwork where necessary to prevent corrosion.
-
Improper maintenance, use of non-conforming replacement components, or the removal or modification of safety components can damage the lawnmower and injure the operators seriously.
-
Only use the recommended blades and spare parts by the manufacturer. The use of non-genuine parts can damage the machine and injure the operators. Keep the lawnmower in good working condition.
-
If the blade stopping device doesn't work, please contact service center for help.

Warning: Do not touch rotating blade.

Warning: Refuel in a well ventilated area with the engine stopped.
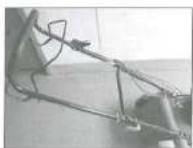
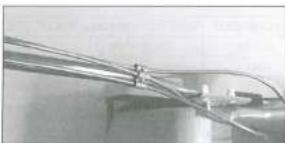
natural_image
Close-up of a mechanical or electrical component with wires and connectors (no visible text or symbols)Fig.1E for RM40SPB
Fig.1D
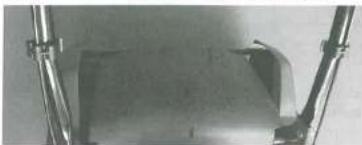
natural_image
Close-up of a metallic mechanical component with a rectangular base and metal brackets (no visible text or symbols)Fig.1F for engine RM40C, RM40SPC and RM46SPCE
5.2 ASSEMBLE THE GRASS CATCHER
Drop the cloth bag through the metal bracket, open up the reinforced rim on the three sides by hand or using a screwdriver. Wrap and then clench the reinforced material around the metal support brackets on the three sides to secure the bag in position. (Fig.2A/2B/2C/2D/2E)
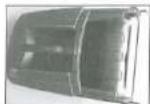
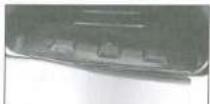
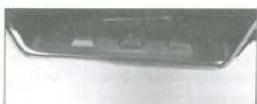
Fig.2C
Fig.2A
Fig.2B
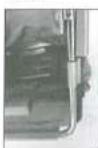
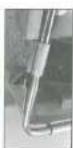
Fig.2D
Fig.2E
Avoid cutting wet grass: For effective mowing do not cut wet grass, because it tends to stick to the underside of the deck preventing proper mowing of the grass clippings.
General Recommendations: The recommended cut for mowing is 1/3 the length of the grass, to ensure a healthy drought resistant lawn. When mowing long grass you may have to cut the lawn in two passes, lowering the blade another 1/3 of the length for the second cut and perhaps cutting in a different pattern than was used the first time. Overlapping the cut a little on each pass will also help to clean up any stray clippings left on the lawn. The mower should always be operated at full throttle to get the best cut and allow it to do the most effective job of mowing.
Clean underside of deck: Be certain to clean the underside of the cutting deck after each use to avoid a build-up of grass, which may affect the grass collection. The lawnmower is ideal for collecting leaves during the autumn months. Make sure they are dry and are not laying too thick on the lawn. Do not wait for all the leaves to be off the trees before you mow.

WARNING: If the mower blade strikes a foreign object, then stop the engine. Remove the wire from the
spark plug, thoroughly inspect the mower for any damage and repair the damage before restarting and operating the mower. Extensive vibration of the mower during operation is an indication of serious damage. The unit should be promptly inspected and repaired.
6.7 GRASS CATCHER
There is a level indicator on the top of the grass catcher that shows whether the catcher is empty or full:
- The level indicator inflates if the catcher is not full during mowing. (Fig. 9A)
- If the catcher is full, the indicator collapses; once this happens stop mowing immediately and empty the catcher, make sure it is clean and ensure its meshwork is clear of grass clippings. (Fig. 9B)

IMPORTANT:
Keep the grass catcher indicator vents clear at all times, to ensure that it functions correctly.
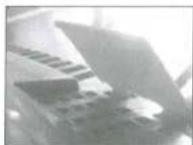
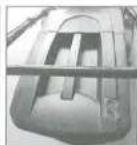
Fig. 9A
Fig. 9B
6.8 DECK
The underside of the mower deck should be cleaned after each use to prevent a buildup of grass clippings, leaves, dirt or other matter. If this debris is allowed to accumulate, it will invite rust and corrosion, and may prevent proper mulching. The deck may be cleaned by tilting the mower and scraping clean with a suitable tool (make certain the spark plug wire is disconnected).
6.9 HEIGHT ADJUSTMENT INSTRUCTIONS

AUTION: Do not at any time make any adjustment to lawnmower without first stopping the engine and
disconnecting the spark plug wire.
During operation, tightly hold the brake handle with both hands.
Note: During operation, when the brake handle is released, the engine will stop and thus stop the lawnmower from operating.
Warning! In order to avoid any unintentional start-ups of the lawn mower, it comes equipped with an engine brake which must be pulled back before the engine can be started. When the engine control lever is released it must return to its initial position, at which point the engine automatically switches off.
Note: Engine brake (brake handle): Use the lever to stop the engine. When you release the lever the engine and the blade stop automatically. To mow, hold the lever in the working position. Before you start to mow, check the start/stop lever several limes to be sure that it is working properly. Ensure that the tension cable can be smoothly operated (i.e. is not catching or kinking in any way)
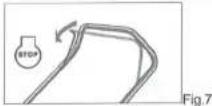
6.4 TO STOP ENGINE
CAUTION: The blade continues to rotate for a few seconds after the engine is shut off.
-
Release the brake control handle to stop the engine and blade.
-
Disconnect and ground the spark plug wire as instructed in the separate engine manual to prevent accidental starting while equipment is unattended.
6.5 CONNECTION FOR AUTO DRIVE - SELF PROPELLED (For RM40SPB RM40SPC RM40SPCE)
After starting the engine, push the Self-drive control handle forward towards the upper handle, the lawnmower will move forward automatically at a speed of about 3.6 km/h, release the self-drive handle, the lawnmower will stop moving.
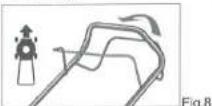
CAUTION: your mower is designed to cut normal residential grass of a height no more than 250mm.
Do not attempt to mow through unusually tall dry or wet grass (e.g., pasture) or piles of dry leaves. Debris may build up on the mower deck or contact the engine exhaust presenting a potential fire hazard.
6.6 FOR THE BEST RESULTS WHEN MOWING
Clear lawn of debris: Be sure that the lawn is clear of stones, sticks, wire or other objects, which could be accidentally thrown out by the mower in any direction and cause serious injury to the operator and others as well as damage to property and surrounding objects.
-
To fit: raise the rear cover and hitch the grass catcher on the rear of mower. (Fig. 2F, Fig.2G, Fig. 2H)
-
To remove: grasp and lift the rear cover, remove grass catcher.
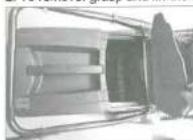
Fig. 2F
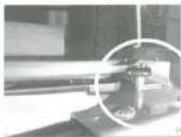
Fig. 2G
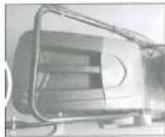
Fig.2H
5.3 STARTER HANDLE
Engage the Brake control handle then move the starter handle from the engine to the rope guide.
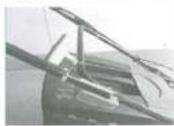
Fig.3A for the Briggs engine
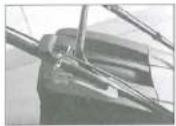
Fig.3B for the Cobra engine
5.4 HEIGHT OF CUT
Apply outward pressure to disengage the lever from the rack. Move lever forward or back to adjust height. (Fig.4 and see clause 6.9)
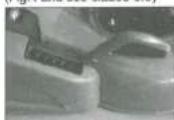
Fig. 4
5.5 Rear Roller
Your mower features a rear roller, which helps cut right up to the edge of borders and creates a traditional striped lawn finish. It is recommended to alternate the direction of mowing periodically, to improve turf growth. Vary the height of cut depending on the lawn and weather conditions.
Fig.5A
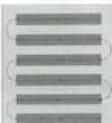
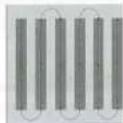
Fig.5B Change the cutting pattern alternate weeks
6. OPERATING INSTRUCTIONS
6.1 BEFORE STARTING
Service the engine with Petrol and oil as instructed in the separate engine manual packed with your mower. Read instructions carefully. Always check the oil level before starting.

WARNING! Petrol is highly flammable.
Store fuel in containers specifically designed for this purpose.
Refuel outdoors only, before starting the engine. Do not smoke while refueling or handling fuel.
Never remove the cap of the fuel tank or add petrol while the engine is running or when the engine is hot.
If petrol is spilled, do not attempt to start the engine, but move the machine away from the area of spillage and avoid creating any source of ignition until petrol vapours have dissipated.
Replace all fuel tanks and container caps securely.
Before tipping the lawn mower to maintain the blade or drain oil, remove fuel from tank.

WARNING: Never re-fuel tank indoors, with the engine running or until the engine has been allowed to
cool for at least 15 minutes after running.
6.2 TO START THE ENGINE AND ENGAGE THE BLADE
-
The unit is equipped with a rubber boot over the end of the spark plug, make certain the metal loop on the end of the spark plug wire (inside the rubber boot) is fastened securely over the metal tip on the spark plug. For RM40C RM40SPB:
-
Press the primer bulb 3-5 times before starting the engine. (Fig.6A RM40C RM40SPB)
3.1 When starting the engine and operating, turn throttle choke lever to "position. (Fig.6B)
For RM40SPC RM40SPCE
3.2 When starting cool engine, turn throttle choke lever to * |▼| * position. (Fig.6C)
When starting a warm engine and operating, turn throttle choke lever to " | ♦ | " position. (Fig.6D)
For All Models:
- Standing behind the mower grasp the brake control handle and hold it against the upper handle as shown in fig.6E.
- Grasp the starter handle as shown Fig. 6E and pull up rapidly. Return it slowly to the rope guide bolt after engine starts.
Release the brake control handle to stop the engine and blade.
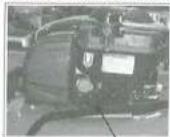
Fig.6A RM40SPB
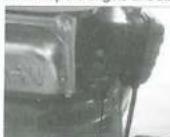
RM40C
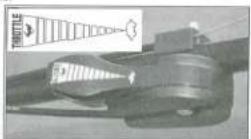
Fig.6B
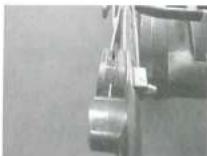
Fig.6C
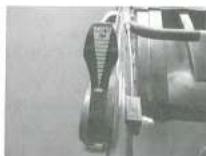
Fig.6D
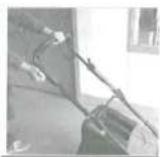
Fig.6E
6.2.2 Starting electrically RM40SPCE - key starting
- The unit is equipped with a rubber boot over the end of the spark plug, make certain the metal loop on the end of the spark plug wire (inside the rubber boot) is fastened securely over the metal tip on the spark plug.
- When starting a cool engine, turn the throttle choke lever to position. (Fig.6B)
- When starting warm engine and Operating, turn throttle choke lever to * - * position. (Fig.6C)
- Standing behind the mower grasp the brake control handle and hold it against the upper handle as shown in fig.6E. Turn the ignition key fully to the right in the ignition lock. (Fig.6F/Fig.6G/Fig.6H)
- As soon as the motor starts running, release the ignition key. (Fig.6G)
Release the brake control handle to stop the engine and blade
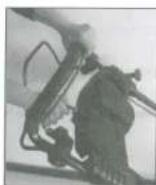
Fig.6F
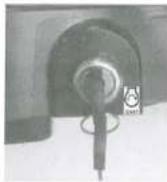
Fig. 6G
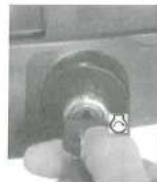
Fig. 6H
Please Note: The Battery requires charging periodically, use only the charger supplied.

Start the engine carefully according to the instructions, with your feet well away from the blade.

Do not tilt the lawn mower when starting the engine. Start the mower on a level surface, free of high grass obstacles.

Keep hands and feel away from the rotating parts. Do not start the engine when standing in front of the charge opening.
- WARNING:
- Intended use
- CE
- CONTENTS
- Maintenance and Storage
- NOTE:
- Transport
- BLADE MOUNTING TORQUE
- ENGINE
- STORAGE INSTRUCTIONS (OFF SEASON)
- ASSEMBLE THE GRASS CATCHER
- GRASS CATCHER
- IMPORTANT:
- DECK
- HEIGHT ADJUSTMENT INSTRUCTIONS
- TO STOP ENGINE
- CONNECTION FOR AUTO DRIVE - SELF PROPELLED (For RM40SPB RM40SPC RM40SPCE)
- FOR THE BEST RESULTS WHEN MOWING
- STARTER HANDLE
- HEIGHT OF CUT
- Rear Roller
- OPERATING INSTRUCTIONS
- BEFORE STARTING
- TO START THE ENGINE AND ENGAGE THE BLADE
- For RM40SPC RM40SPCE
- For All Models:
- Starting electrically RM40SPCE - key starting
Brand : COBRA
Model : RM40C
Category : Lawn mower