
FT1321 - Television FUNAI - Free user manual and instructions
Find the device manual for free FT1321 FUNAI in PDF.


| Product Type | Television |
| Brand | Funai |
| Model | FT1321 |
| Screen Size | 13 inches (32 cm) |
| Display Type | CRT (Cathode Ray Tube) |
| Dimensions (WxHxD) | Approx. 15.7 x 13.4 x 15.0 in (40 x 34 x 38 cm) |
| Weight | Approx. 22 lbs (10 kg) |
| Power Supply | AC 120V, 60Hz |
| Power Consumption | 60 W (typical) |
| Inputs | RF Antenna Input (VHF/UHF), Composite Video/Audio Input (RCA) |
| Speaker Output | 2 x 5 W |
| Remote Control | Included (model: RC-1321) |
| Sleep Timer | Yes (adjustable up to 120 minutes) |
| Channel Memory | Up to 181 channels (analog) |
| Manual Tuning | Yes, fine tuning available |
| Cleaning Instructions | Unplug TV. Wipe screen and cabinet with a soft dry cloth. Do not use abrasive cleaners or liquids. |
| Safety Instructions | Place on stable surface. Keep ventilation slots unobstructed. Avoid exposure to rain or moisture. Unplug during storms or if not used for extended periods. |
| Spare Parts Availability | Contact Funai customer service or authorized service centers for remote control, power cord, and internal components. |
Frequently Asked Questions - FT1321 FUNAI
User questions about FT1321 FUNAI
0 question about this device. Answer the ones you know or ask your own.
Ask a new question about this device
Download the instructions for your Television in PDF format for free! Find your manual FT1321 - FUNAI and take your electronic device back in hand. On this page are published all the documents necessary for the use of your device. FT1321 by FUNAI.
USER MANUAL FT1321 FUNAI
SUPPLIED ACCESSORIES....5
LOCATION....5
AVOID THE HAZARDS OF ELECTRICAL SHOCK AND FIRE....5
OPERATING CONTROLS AND FUNCTIONS.....6
ANTENNA CONNECTIONS....7
VHF/UHF COMBINED ANTENNA 7
UHF/VHF SEPARATE ANTENNAS....7
CABLE AND PAYTV 8
PICTURE ADJUSTMENTS....14
TROUBLESHOOTING GUIDE....16
SPECIFICATIONS....17
GENERAL SPECIFICATIONS....17
ELECTRICAL SPECIFICATIONS....17
OTHER SPECIFICATIONS 17
CABLE CHANNEL DESIGNATIONS .... 18
natural_image
Line drawing of a flat-screen monitor with control buttons and display screen (no text or symbols)WARNING:
TO REDUCE THE RISK OF FIRE OR ELECTRIC SHOCK, DO NOT EXPOSE THIS APPLIANCE TO RAIN OR MOISTURE.
CAUTION
RISK OF ELECTRIC SHOCK DO NOT OPEN

CAUTION: TO REDUCE THE RISK OF ELECTRIC SHOCK, DO NOT REMOVE COVER (OR BACK) NO USER SERVICEABLE PARTS INSIDE. REFER SERVICING TO QUALIFIED SERVICE PERSONNEL.
THIS SYMBOL INDICATES THAT DANGEROUS VOLTAGE CONSTITUTING A RISK OF ELECTRIC SHOCK IS PRESENT WITHIN THIS UNIT.

THIS SYMBOL INDICATES THAT THERE ARE IMPORTANT OPERATING AND MAINTENANCE INSTRUCTIONS IN THE LITERATURE ACCOMPANYING THE APPLIANCE.
"IMPORTANT SAFEGUARDS"
- Read instructions-All the safety and operating instructions should be read before the appliance is operated.
- Retain Instructions-The safety and operating instructions should be retained for future reference.
- Heed Warnings-All warnings on the appliance and in the operating instructions should be adhered to.
- Follow Instructions-All operating and use instructions should be followed.
- Cleaning-Unplug TV from the wall outlet before cleaning. Do not use liquid cleaners or aerosol cleaners. Use a damp cloth for cleaning.
EXCEPTION: A product that is meant for uninterrupted service and that for some specific reason, such as the possibility of the loss of an authorization code for a CATV converter, is not intended to be unplugged by the user for cleaning or any other purpose, may exclude the reference to unplugging the appliance in the cleaning description otherwise required in item 5. - Attachments-Do not use attachments not recommended by the TV manufacturer as they may cause hazards.
- Water and Moisture-Do not use this TV near water-for example, near a bath tub, wash bowl, kitchen sink, or laundry tub, in a wet basement, or near a swimming pool, and the like.
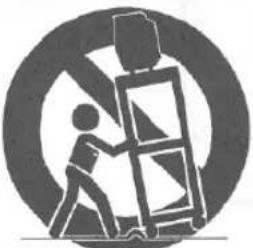
- Accessories-Do not place this TV on an unstable cart, stand, tripod, bracket, or table. The TV may fall, causing serious injury to someone, and serious damage to the appliance. Use only with a cart, stand, tripod, bracket, or table recommended by the manufacturer, or sold with the TV. Any mounting of the appli-
ance should follow the manufacturer's instructions and should use a mounting accessory recommended by the manufacturer. An appliance and cart combination should be moved with care. Quick stops, excessive force, and uneven surfaces may cause the appliance and cart combination to overturn.
PORTABLE CART WARNING
natural_image
Silhouette of a person climbing a ladder inside a circular frame with a hammer and sickle symbol (no text or symbols present)S3126A
-
Ventilation-Slots and openings in the cabinet and the back or bottom are provided for ventilation and to ensure reliable operation of the TV and to protect it from overheating, these openings must not be blocked or covered. The openings should never be blocked by placing the TV on a bed, sofa, rug, or other similar surface. This TV should never be placed near or over a radiator or heat register. This TV should not be placed in a built-in installation such as a bookcase or rack unless proper ventilation is provided or the manufacturer's instructions have been adhered to.
-
Power Sources-This TV should be operated only from the type of power source indicated on the marking label. If you are not sure of the type of power supply to your home, consult your appliance dealer or local power company. For TVs intended to operate from battery power, or other sources, refer to the operating instructions.
-
Grounding or Polarization-This TV is equipped with a polarized alternating-current line plug(a plug having one blade wider than the other). This plug will fit into the power outlet only one way. This is a safety feature. If you are unable to insert the plug fully into the outlet, try reversing the plug. If the plug should still fail to fit, contact you electrician to replace your obsolete outlet. Do not defeat the safety purpose of the polarized plug.
-
Power-Cord Protection-Power-supply cords should be routed so that they are not likely to be walked on or pinched by items placed upon or against them, paying particular attention to cords at plugs, convenience receptacles, and the point where they exit from the appliance.
-
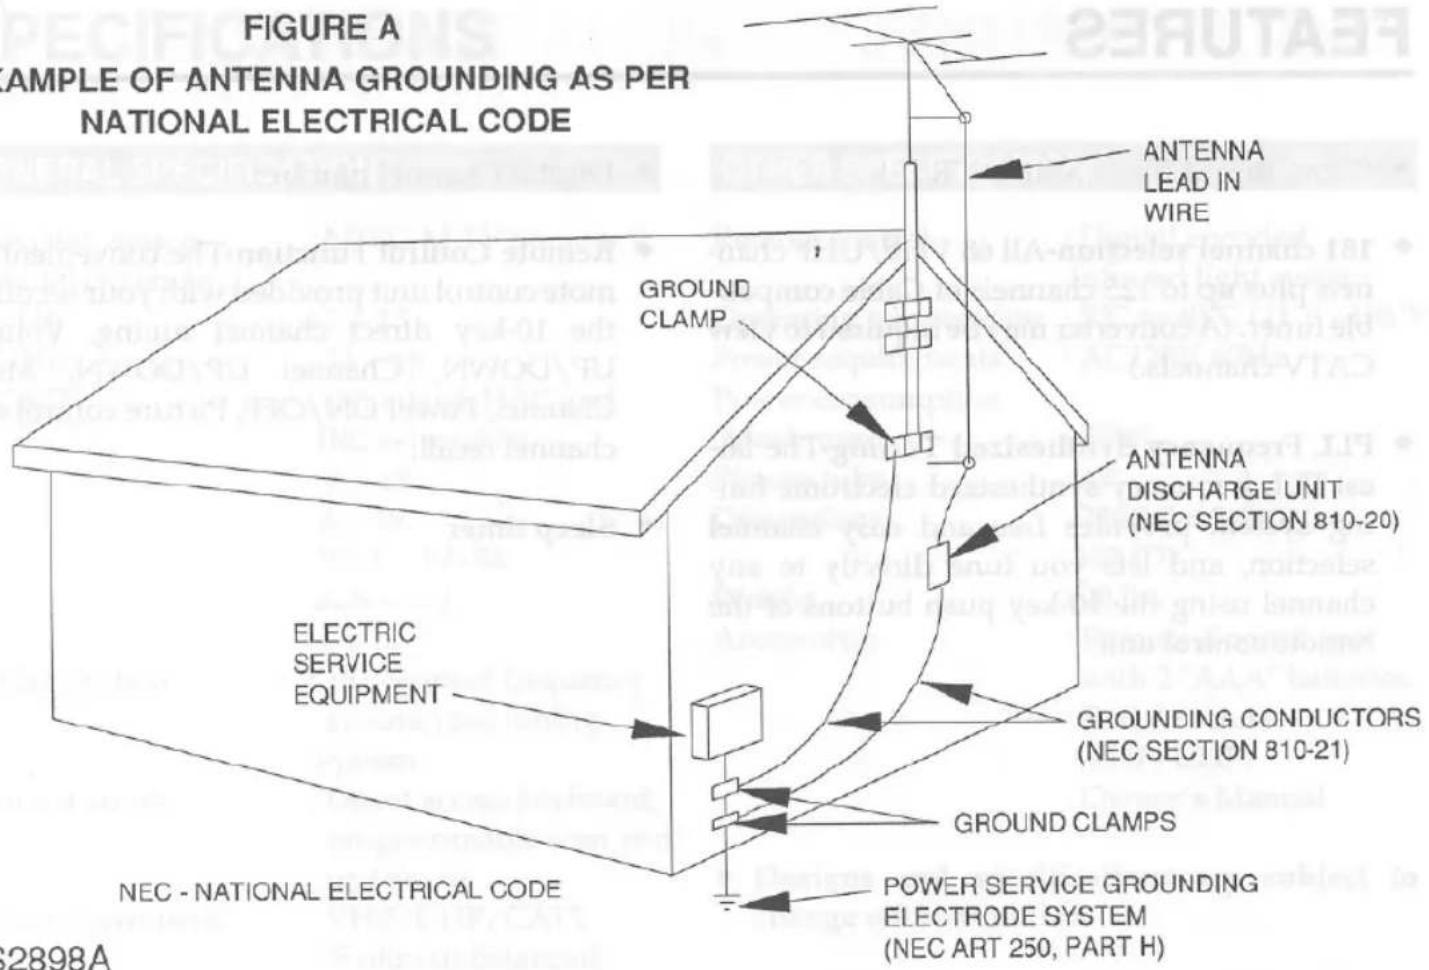
Outdoor Antenna grounding-If an outside antenna or cable system is connected to the TV, be sure the antenna or cable system is grounded so as to provide some protection against voltage surges and built-up static charges. Section 810 of the National Electrical Code provides information with respect to proper grounding of the mast and supporting structure, grounding of the lead-in wire to an antenna discharge unit, size of grounding conductors, location of antenna-discharge unit, connection to grounding electrodes, and requirements for the grounding electrode. (Fig. A)
- Lightning-For added protection for this TV receiver during a lightning storm, or when it is left unattended and unused for long periods of time, unplug it from the wall outlet and disconnect the antenna or cable system. This will prevent damage to the TV due to lightning and power-line surges.
- Power Lines-An outside antenna system should not be located in the vicinity of overhead power lines or other electric light of power circuits, or where it can fall into such power lines or circuits. When installing an outside antenna system, extreme care should be taken to keep from touching such power lines or circuits as contact with them might be fatal.
- Overloading-Do not overload wall outlets and extension cords as this can result in a risk of fire or electric shock.
- Object and Liquid Entry-Never push objects of any kind into this TV through opening as they may touch dangerous voltage points or shortcut parts that could result in a fire or electric shock. Never spill liquid of any kind on the TV.
- Servicing-Do not attempt to service this TV yourself as opening or removing covers may expose you to dangerous voltage or other hazards. Refer all servicing to qualified service personnel.
- Damage Requiring Service-Unplug this TV from the wall outlet and refer servicing to qualified service personnel under the following conditions:
a. When the powersupply cord or plug is damaged or trayed.
b. If liquid has been spilled, or objects have fallen into the TV.
c. If the TV has been exposed to rain or water.
d. If the TV does not operate normally by following the operating instructions. Adjust only those controls that are covered by the operating instructions as improper adjustment of other controls may result in damage and will often require extensive work by a qualified technician to restore the TV to its normal operation.
e. If the TV has been dropped or the cabinet has been damaged.
f. When the TV exhibits a distinct change in performance-this indicates a need for service.
20. Replacement Parts-When replacement parts are required, be sure the service technician had used replacement parts specified by the manufacturer that have the same characteristics as the original part. Unauthorized substitutions may result in fire, electric shock, injury to persons or other hazards.
21. Safety Check-Upon completion of any service or repairs to this TV, ask the service technician to perform routine safety checks to determine that the TV is in proper operating condition.
◆ Clear, Bright Black Matrix CRT
◆ 181 channel selection-All 68 VHF/UHF channels plus up to 125 channels of Cable compatible tuner. (A converter may be required to view CATV channels.)
◆ PLL Frequency Synthesized Tuning-The latest PLL frequency synthesized electronic tuning system provides free and easy channel selection, and lets you tune directly to any channel using the 10-key push buttons of the remote control unit.
♦ Digital Channel number
◆ Remote Control Function-The convenient remote control unit provided with your set offers the 10-key direct channel tuning, Volume UP/DOWN, Channel UP/DOWN, Mute, Channel, Power ON/OFF, Picture control and channel recall.
Sleep timer
The serial number of this product may be found on the back of the TV. No others have the same serial number as yours. You should record the number and other vital information here and retain this book as a permanent record of your purchase to aid identification in case of theft.
| Date of Purchase | |
| Dealer Purchases from | |
| Dealer Address | |
| Dealer Phone No. | |
| Model No. | FT1321 |
| Serial No. |
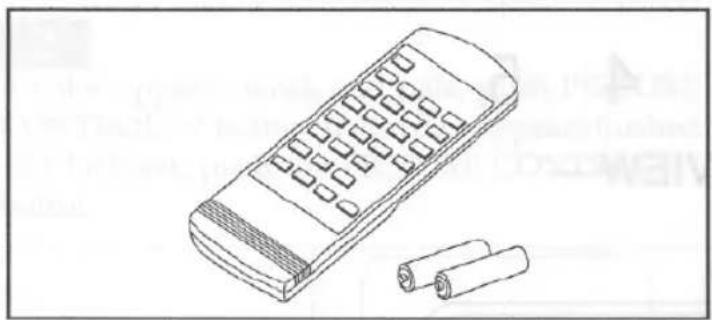
SUPPLIED ACCESSORIES
natural_image
Line drawing of a remote control with two cylindrical batteries beside it (no text or symbols)LOCATION
For safe operation and satisfactory performance of your television, keep the following in mind when selecting a place for its installation:
◆ Shield it from direct sunlight and keep it away from sources of intense heat.
◆ Avoid dusty or humid places.
Avoid places with insufficient ventilation for proper heat dissipation. Do not block the ventilation holes at the top and bottom of the television. Do not place the unit on a carpet because this will block the ventilation holes.
◆ Install unit in a horizontal position.
◆ Avoid locations subject to strong vibration.
Do not place the television near strong magnetic fields.
Do not move the unit from a cold to a hot place or vice versa.
AVOID THE HAZARDS OF ELECTRICAL SHOCK AND FIRE
Do not handle the power cord with wet hands.
Do not pull out the power cord when disconnecting it from AC wall outlet. Grasp it by the plug.
If, by accident, water is spilled on your television, unplug the power cord immediately and take the unit to an authorized service center for servicing.
Do not place anything directly on top of the television.
OPERATING CONTROLS AND FUNCTIONS
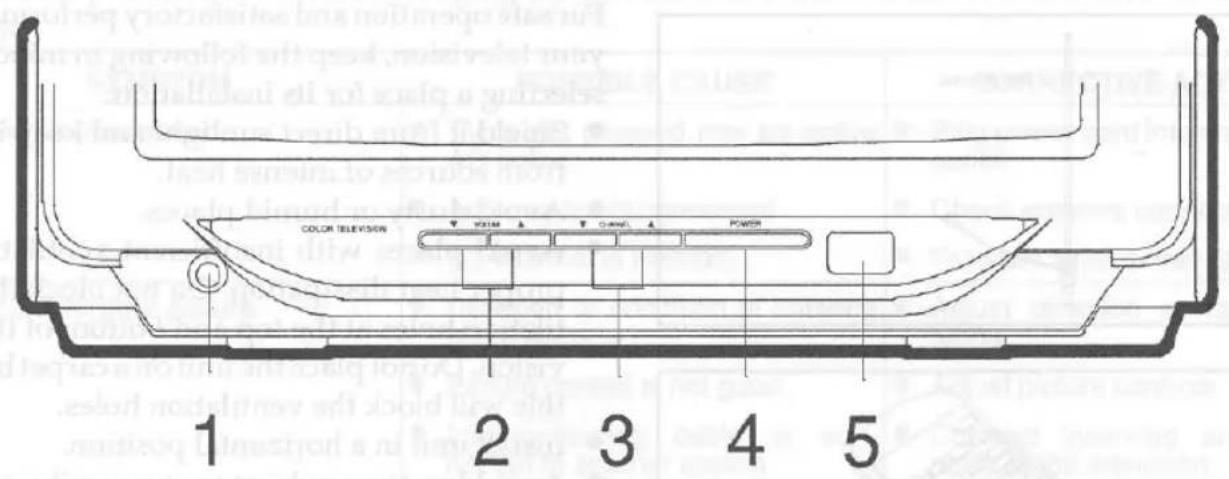
—FRONT VIEW—
—REAR VIEW—
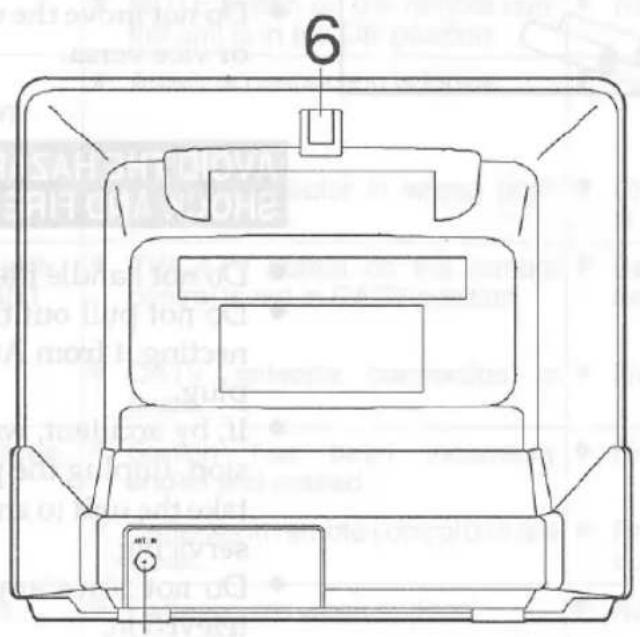
7
1 EARPHONE jack- To connect earphones (not supplied) for personal listening.
2 VOLUME UP/DOWN buttons-Press to control the volume.
3 CHANNEL UP/DOWN buttons-Press to select the channel.
4 POWER button-To turn Monitor power on and off.
5 INFRARED SENSOR WINDOW-Receives the infrared control signals from the remote control unit.
6 Antenna holder- Insert Rod Antenna.
7 VHF/UHF antenna terminal-Connect a VHF/UHF antenna (75 ohm) or CATV cable (75 ohm).
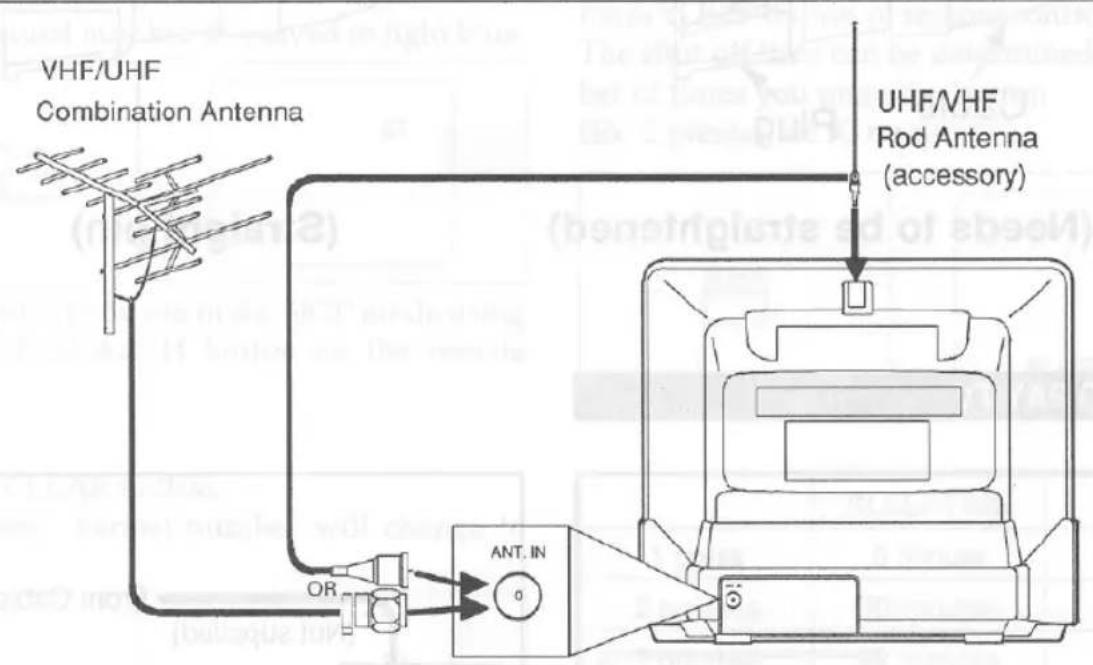
VHF/UHF COMBINED ANTENNA
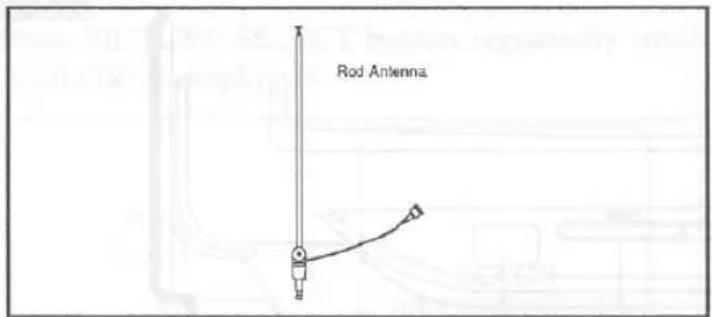
The UHF/VHF Rod Antenna(supplied) is detachable. Push the stem of the antenna into the hole which is located on the upper back cabinet of the unit.
Connect the Rod antenna to ANT.IN terminal of TV as shown in drawing.
For the best reception, extend the rod antenna and adjust its length and position. (Avoid handling the top section when making adjustments).
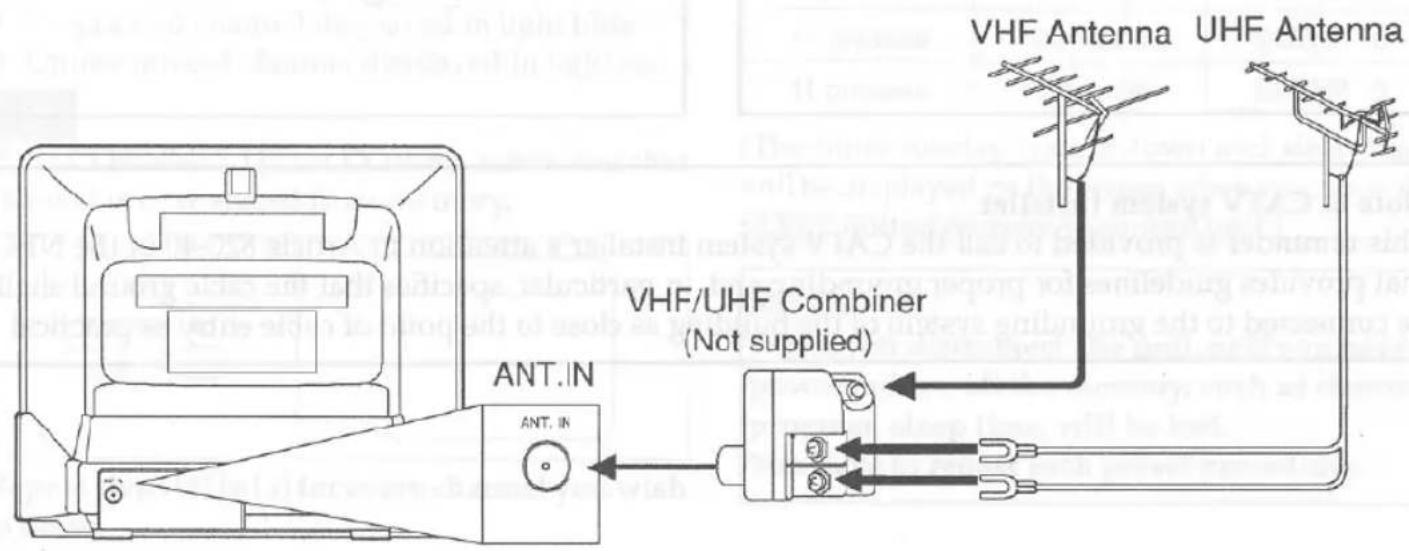
UHF/VHF SEPARATE ANTENNAS
In some areas it will be necessary to use an outdoor antenna.
Note:
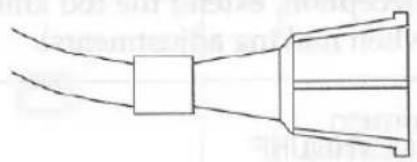
Before plugging the telescopic monopole antenna into antenna terminal, check that the pin is not bent. If it is bent, straighten the pin as illustrated, then plug the pin into antenna terminal.
Bent pin
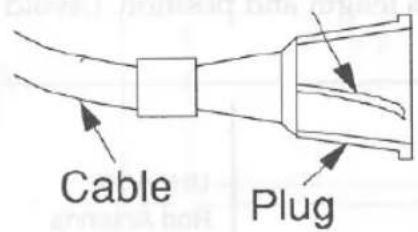
(Needs to be straightened)
natural_image
Pure diagram of a symmetrical mechanical or electrical component with no text, numbers, or symbols(Straight pin)
CABLE AND PAY TV
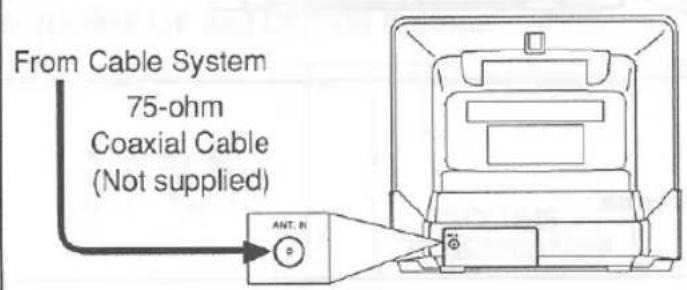
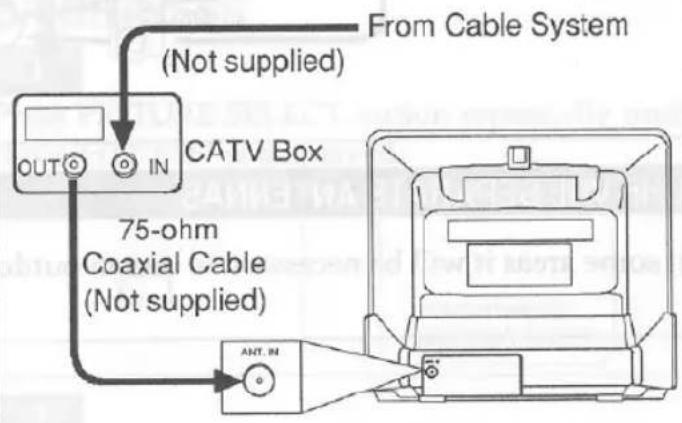
Note to CATV system installer
This reminder is provided to call the CATV system installer's attention to Article 820-40 of the NEC that provides guidelines for proper grounding and, in particular, specifies that the cable ground shall be connected to the grounding system of the building as close to the point of cable entry as practical.
You can operate all of your functions from the Remote Control (included).
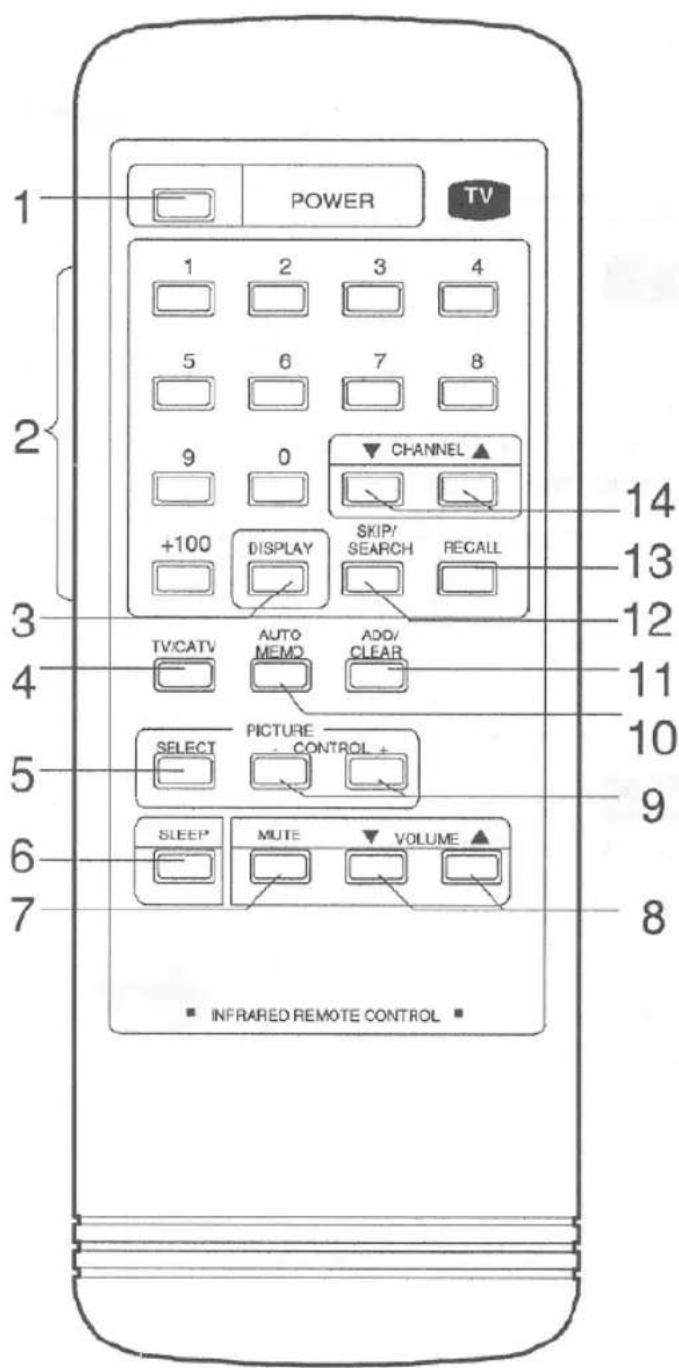
HOW TO USE THE REMOTE CONTROL
1 POWER button- To turn the unit on and off.
2 NUMBER buttons-Press two digits to directly access channel you choose. Remember to press a zero before a single-digit channel.
+100 button- To select channels which are equal or greater than number 100.
3 DISPLAY button-Press to display the channel number on the screen.
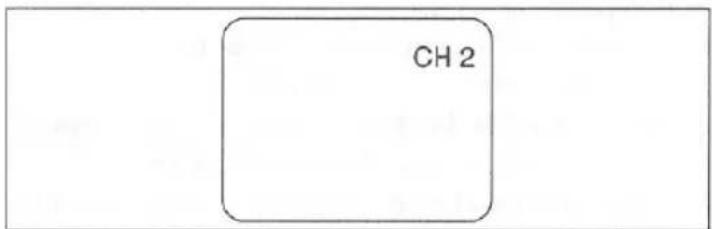
4 TV/CATV button- To select the TV or CATV.
5 PICTURE SELECT button- Press to select the picture adjustment function for contrast, brightness, color and tint.
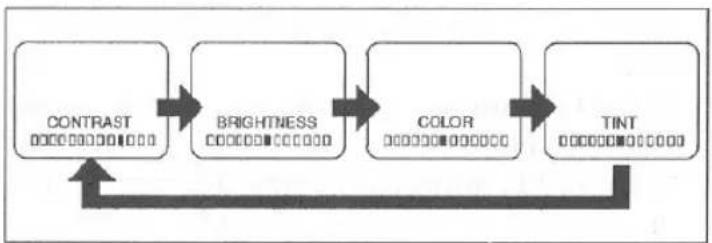
flowchart
graph LR
    A["CONTRAST\n0000000000"] --> B["BRIGHTNESS\n0000000000"]
    B --> C["COLOR\n0000000000"]
    C --> D["TINT\n0000000000"]
    D --> A
6 SLEEP button-Press to activate the sleep function.
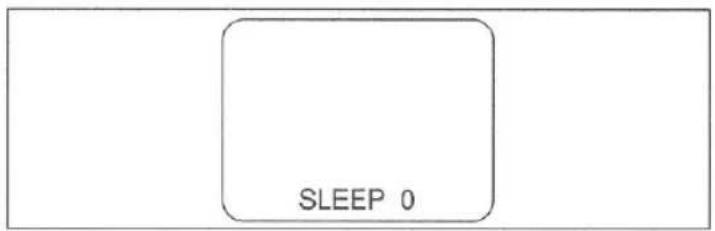
7 MUTE button- Press to mute sound. Press again to resume sound.
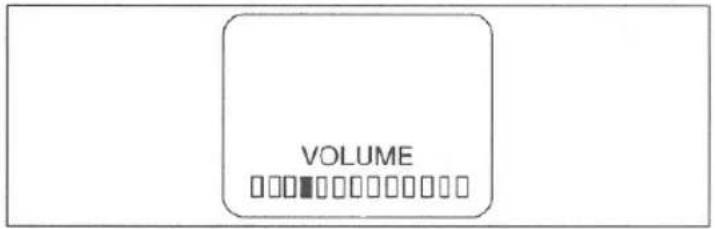
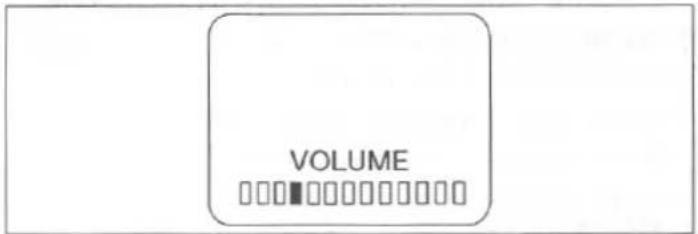
When pressing the MUTE button, VOLUME indicator will change from light blue to light red and stay displayed until pressing MUTE button again.
8 VOLUME buttons- Press to control the volume.
9 PICTURE CONTROL buttons-Adjust picture sharpness in TV mode.
10 AUTO MEMO button- Press to preset the tuner memories automatically.
11 ADD CLEAR button- Press to add desired channel, and to cancel memorized channel.
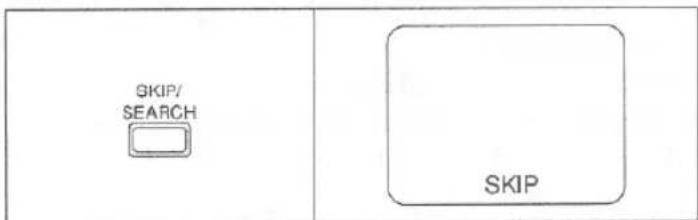
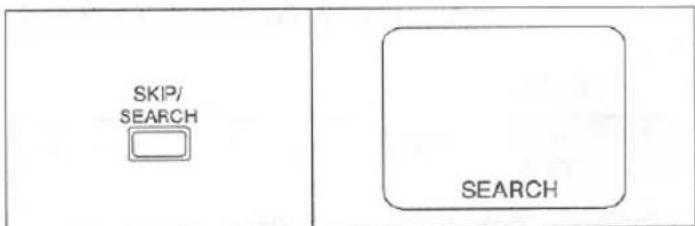
12 SKIP/SEARCH button- Press to select the skip or search mode during regular channel UP/DOWN scanning.
SKIP: Tuner stops at next programmed channel.
SEARCH: Tuner stops at next available channel in your area whether it is programmed or not.
13 RECALL button- Press to call previous received channel.
14 CHANNEL buttons- Press to search up (higher) or down (lower) channels.
INSTALLING THE BATTERIES
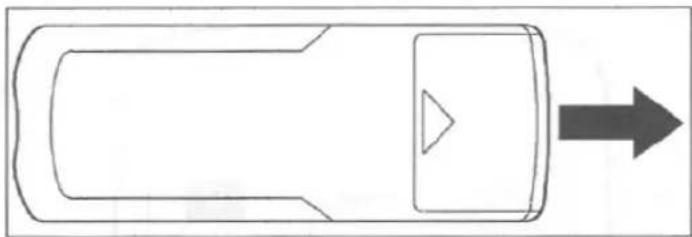
1
Slide the battery compartment cover on the remote unit in the direction of the arrow.
natural_image
Top-down line drawing of a car with a triangular head and arrow pointing right (no text or symbols)2
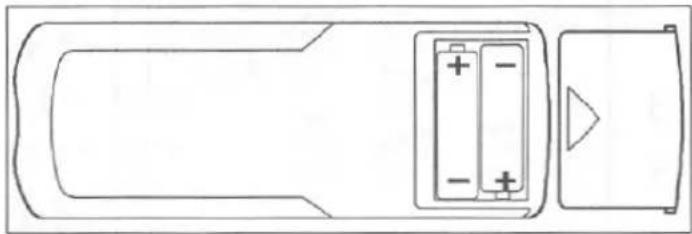
Insert 2 "AAA" penlight batteries into battery compartment in the direction as indicated by the polarity (+ / -) markings.
Batteries installed with incorrect polarity may damage the remote unit.
natural_image
Top-down line drawing of a car interior with battery and door (no text or symbols)3
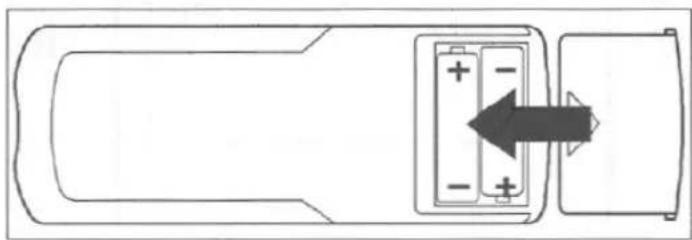
Replace the cover.
natural_image
Top-down schematic of a vehicle battery pack with an arrow indicating direction (no text or symbols)CHANNEL CHART
The two charts below describe the channels, CH1 to CH 125, you will receive in either band you select with the TV/CATV selector switch when you use the CHANNEL MEMORY PROGRAMMING.
TV MODE
| SELECTED CHANNEL INDICATION | 2~13 | 14~69 |
| CHANNEL BAND DESIGNATIONS | VHF | UHF |
| CHANNEL RECEIVED OFF THE AIR | 2~13 | 14~69 |
CATV MODE
| SELECTED CHANNEL INDICATION | CHANNEL BAND DESIGNATION | CATV CHANNEL RECEIVED FROM CABLE |
| 2 ~ 13 | BROADCAST VHF | 2 ~ 13 |
| 14 ~ 36 | CATV MID/SUPER BANDS | A ~ W |
| 37 ~ 65 | CATV HYPER BAND | W+1 ~ W+29 |
| 95 ~ 99 | CATV LOW BAND | A-5 ~ A-1 |
| 66 ~ 94 | ULTRA BAND | W+30 ~ W+58 |
| 1 | SPECIAL CATV CHANNEL | 5A(between 4 and 5) |
| 100~125 | ULTRA BAND | W+59~W+84 |
Notes:
♦ CATV channel designations are not standardized like broadcast channels, so Channel Band Designations at a selected channel may change according to the cable service.
- The current list in CHANNEL MEMORY may be lost if the TELEVISION is disconnected or power failure.
Consult your local cable TV company to find out which of these channels are receivable and which type of cable system is used in your area.
PRESETTING THE TUNER MEMORIES
To preset a channel or to change a preset channel, follow the procedure below.
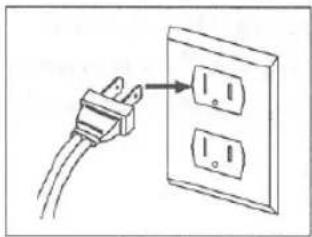
1
Connect the power cord to a standard AC outlet.
natural_image
Simple line drawing of a plug inserted into an electrical outlet (no text or symbols)2
Press POWER button to ON.
Channel "2" displays in light red.
| POWER | 2 |
3
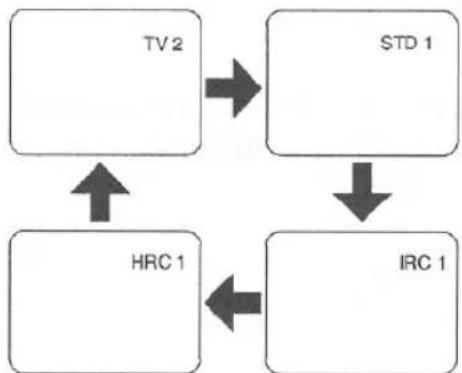
Press TV/CATV button on the remote Control repeatedly.
TV 2, STD 1, IRC 1 or HRC 1 are displayed on the screen in light red.
Select one of the available modes.
Call your cable company to find out what is your cable system, if you have cable in your home.
flowchart
graph TD
    A["TV 2"] --> B["STD 1"]
    B --> C["IRC 1"]
    C --> D["HRC 1"]
    D --> A
THE FOLLOWING STEPS CAN BE DONE WITH THE REMOTE CONTROL OR MANUALLY.
4
Press AUTO MEMO button for more than one second on the remote control unit.
The light red channel number on the screen will begin to advance from 2 (1 on CATV) forward. The tuner will then begin to search for all available stations in your area.
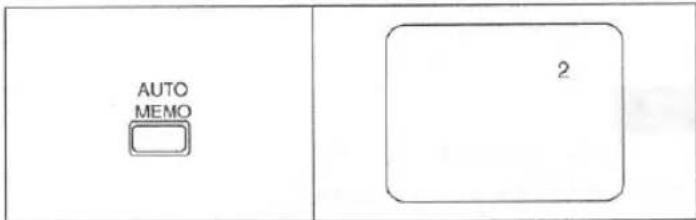
Now, all the channels you receive in your area are stored in memory. The channel number will be displayed in light blue.
Note: You may have channels that are still displayed in light red.
These channels (stations) are not available in your area.
To erase channels still in light red.
Stations not available in your area.
Proceed to steps 5 and 6 below.
5
Press SKIP/SEARCH button on the remote control until the word "SKIP" is displayed on the screen.
6
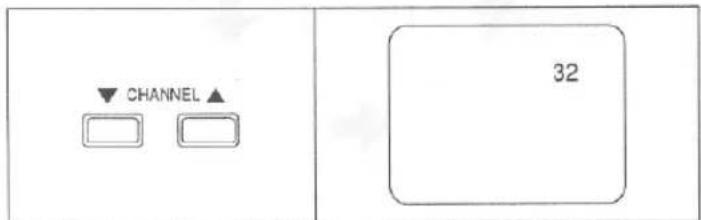
Press CHANNEL UP(or DOWN) Button. Now all channels in light red are erased.
MEMORIZING INDIVIDUAL CHANNEL
1
Press SKIP/SEARCH button until the word "SEARCH" is displayed on the screen.
2
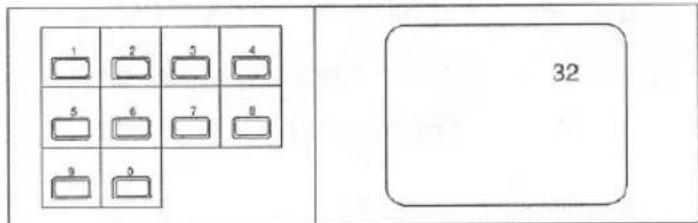
Using the number buttons on the remote control or manually select the channel you wish to put into memory. Selected channel is displayed in light red.
3
Press ADD/CLEAR button. Displayed channel number will change to light blue and is now in memory.
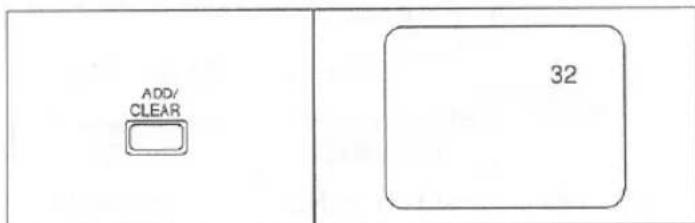
Repeat steps [2] and [3] for each channel you choose to memorize.
4
Press SKIP/SEARCH button until the word "SKIP" is displayed on the screen.
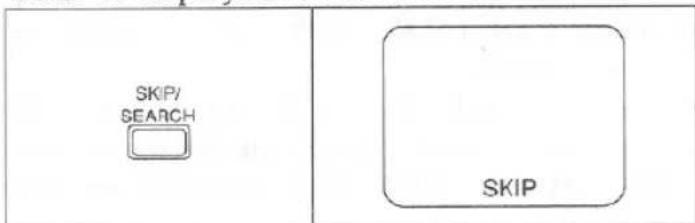
Tuner stops at the programmed channel.
TO ERASE A MEMORIZED CHANNEL
1
Select the channel that you wish to erase by pressing the CHANNEL UP (or DOWN) button until the desired channel number appears on the screen. Or you may use number keys of the remote control unit.
(Selected channel number displayed in light blue.
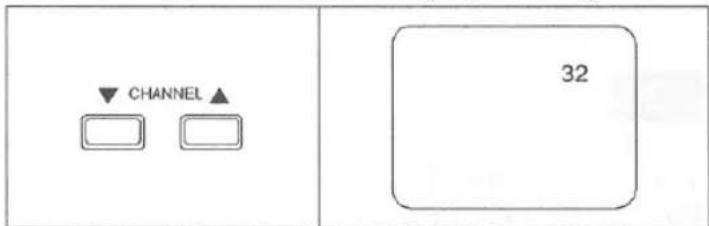
Make sure that you are in the SKIP mode using your SKIP/SEARCH button on the remote control.
2
Press ADD/CLEAR button.
(The displayed channel number will change to light red
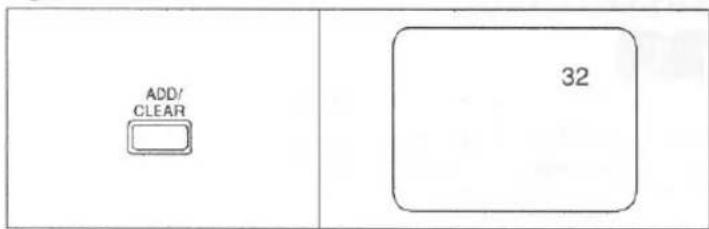
Note:
SKIP: Tuner stops at next programmed channel.
SEARCH: Tuner stops at next channel available in your area whether it is programmed or not.
◆ Programed channel displayed in light blue.
◆ Unmemorized channel displayed in light red.
3
Press CHANNEL UP (or DOWN) button and that channel is now erased from memory.
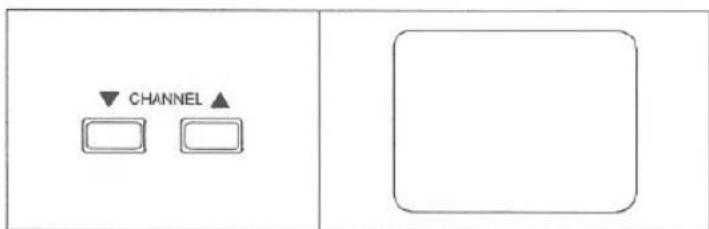
Repeat steps [1] to [3] for every channel you wish to erase.
SETTING THE SLEEP TIMER
The sleep timer function enables you to shut off the power without pressing POWER button after a desired period.
1
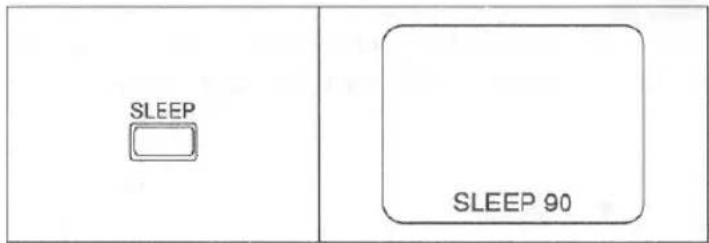
Press SLEEP button of remote control unit.
The shut off time can be determined by the number of times you press the button.
(Ex. 2 presses for 90 minutes)
| SLEEPTIME | DISPLAY | |
| 1 press | 0 minute | SLEEP 0 |
| 2 presses | 90 minutes | SLEEP 90 |
| 3 presses | 80 minutes | SLEEP 80 |
| 4 presses | 70 minutes | SLEEP 70 |
| 5 presses | 60 minutes | SLEEP 60 |
| 6 presses | 50 minutes | SLEEP 50 |
| 7 presses | 40 minutes | SLEEP 40 |
| 8 presses | 30 minutes | SLEEP 30 |
| 9 presses | 20 minutes | SLEEP 20 |
| 10 presses | 10 minutes | SLEEP 10 |
| 11 presses | 0 minute | SLEEP 0 |
(The timer display counts down and sleep timer will be displayed on the screen when you press the SLEEP button on remote control unit.)
NOTE:
When you disconnect the unit, or if you have a power failure, all the memory, such as channel program, sleep time, will be lost.
You have to repeat each preset procedures.
1
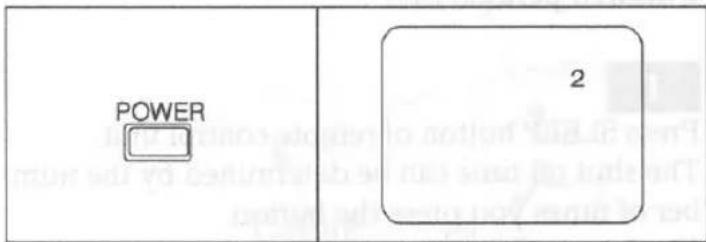
Press POWER button to "ON". Channel "2" displayed in light red
2
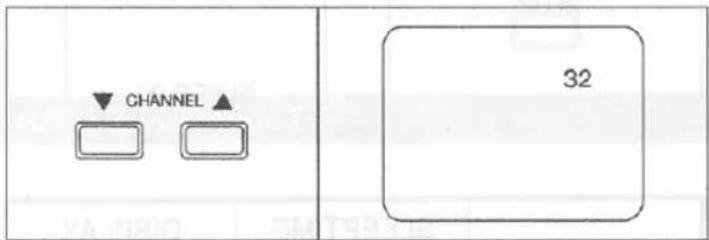
Select the desired channel with UP/DOWN buttons or 10-keys on the remote control unit.
3
Adjust the volume to desired listening level using VOLUME UP and DOWN buttons.
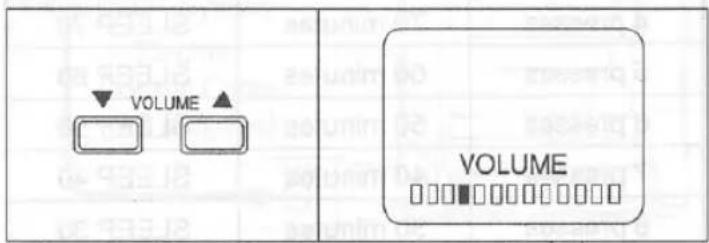
4
Adjust picture controls for a natural looking image. (See "PICTURE ADJUSTMENTS")
PICTURE ADJUSTMENTS
Satisfactory results will usually be obtained with the control set at the factory-preset levels. If any adjustments are necessary, adjust the required controls as follows.
These steps can be done manually with the Remote Control.
Note: For normal use, set to center position.
CONTRAST
1
Press PICTURE SELECT button repeatedly until "CONTRAST" is displayed.
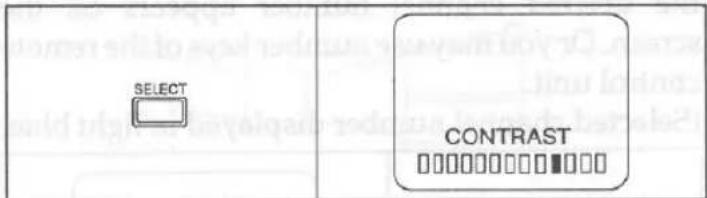
2
To increase the contrast, push the PICTURE CONTROL "+" button. To decrease contrast, push the PICTURE CONTROL "-" button.
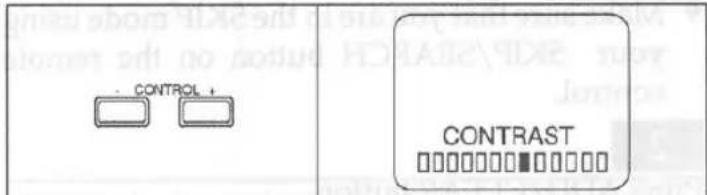
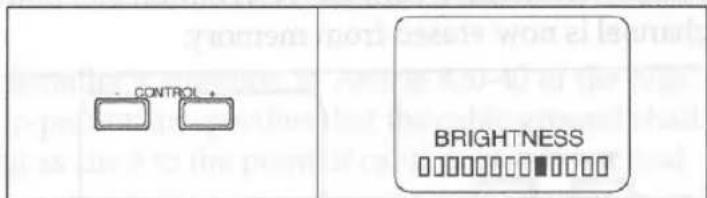
Press PICTURE SELECT button repeatedly until "BRIGHTNESS" is displayed.
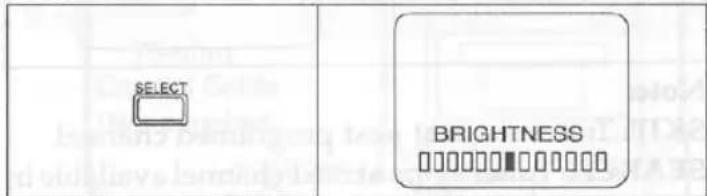
To increase brightness, push PICTURE CONTROL "+" button. To decrease brightness, push the PICTURE CONTROL "-" button.
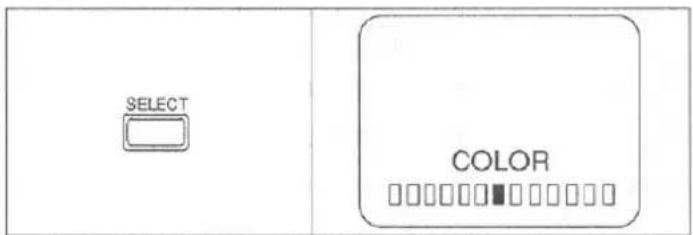
Press PICTURE SELECT button repeatedly until "COLOR" is displayed.
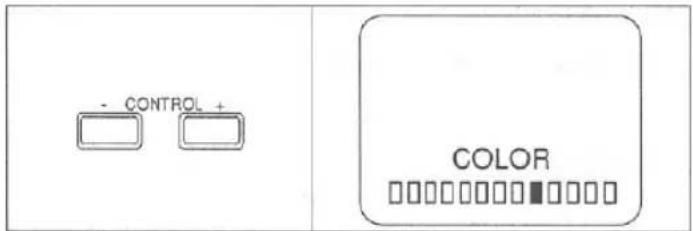
2
If color appears weak and pale, push PICTURE CONTROL "+" button. If the color appears flushed and brilliant, push the PICTURE CONTROL "-" button.
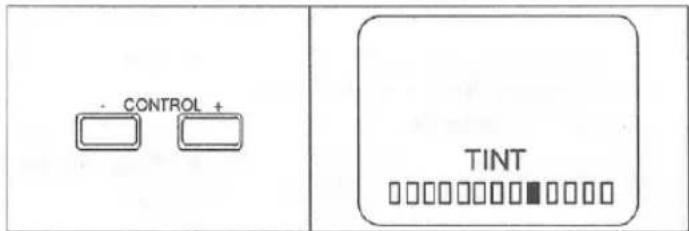
Press PICTURE SELECT button repeatedly until "TINT" is displayed.
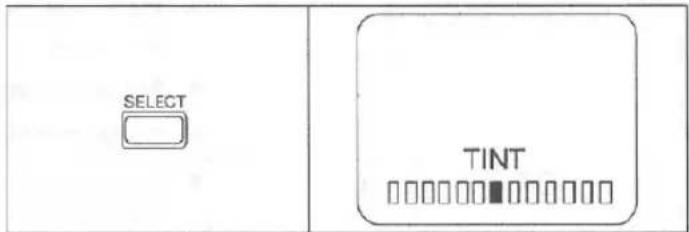
2
If facial tones are too green, push the PICTURE CONTROL "+" button.
If facial tones are too purple, push PICTURE CONTROL "-" button.
Sometimes a performance problem can be easily solved by checking seemingly apparent but often overlooked possibilities. Before arranging for service, check these items. It could save your time and money.
| SYMPTOM | POSSIBLE CAUSE | CORRECTIVE ACTION |
| No picture and sound. | TV is not plugged into an active AC outlet.Antenna is not connected.No channel in memory. | Plug power cord into an active AC outlet.Check antenna connection.Program tuner's memory. |
| Sound OK; poor picture. | Direction or condition of antenna is not good.Picture control is not good.Interconnecting cable is connected to another source. | Adjust direction or replace antenna.Adjust picture controls.Connect incoming antenna directly to the television. |
| Picture OK; poor or no sound. | Volume control on remote control unit or set is in minimum position.MUTE button on the remote control unit is in the ON position. | Adjust volume control on remote control unit or set.Release MUTE button. |
| TV channels don't work.Hissing noise from speaker and snow on TV screen. | Antenna connection is loose.Channel selector in wrong position. | Fix connection.Check that the channel selector is in the air position. |
| Cannot tune cable channels, with CATV connected to 75 ohm ANT terminal. | TV/CATV button on the remote control is not in CATV position.CATV antenna connection is loose. | Select the CATV position with remote control.Fix connection. |
| TV tuner and CATV skips stations. | Station has been incorrectly added and erased.Batteries in remote control unit are weak. | Reprogram the tuner memory.Replace batteries in remote control unit. |
| Remote control does not work. | Batteries are weak or dead.Not within effective operating range. | Replace the batteries.Move closer to the TV. |
GENERAL SPECIFICATIONS
| Television system | : NTSC-M TV Standard |
| Channel coverage | |
| VHF | : 2 ~ 13 |
| UHF | : 14 ~ 69 |
| CATV | : (Standard, HRC and IRC selectable) |
| 2 ~ 13, | |
| A ~ W, | |
| W+1 ~ W+84, | |
| A-5 ~ A-1, | |
| 5A | |
| Tuning System | : 181 channel frequency synthesized tuning system |
| Channel access | : Direct access keyboard, programmable scan and up/down |
| Antenna terminals | : VHF/UHF/CATV75 ohm unbalanced (F-type) |
ELECTRICAL SPECIFICATIONS
Sound output : 1W, 8 ohm
OTHER SPECIFICATIONS
| Remote control | : Digital encoded infrared light system |
| Operating temperature | : 5°C to 40°C (41°F ~104°F) |
| Power requirements | : AC120V, 60Hz |
| Power consumption | |
| (Maximum) | : 75W |
| Picture tube | : 13" |
| Dimensions | : 320(H) x 362 (W) x 357 (D) |
| Weight | : 20 lbs |
| Accessories | : Remote Control unit with 2 "AAA" batteries : Rod Antenna (VHF/UHF) : Owner's Manual |
◆ Designs and specifications are subject to change without notice.
CABLE CHANNEL DESIGNATIONS
This model is capable of receiving 181 cable channels. The channels are displayed as 1 thru 125.
Cable companies often designate the other channels with letters or letter-number combinations. Please check with your local cable company.
The following is a chart of common cable channel designations.
| CATV Channel | 5A | 2 | 3 | 4 | 5 | 6 | 7 | 8 | 9 | 10 | 11 | 12 | 13 | A | B |
| TV Display | 1 | 2 | 3 | 4 | 5 | 6 | 7 | 8 | 9 | 10 | 11 | 12 | 13 | 14 | 15 |
| CATV Channel | C | D | E | F | G | H | I | J | K | L | M | N | O | P | Q |
| TV Display | 16 | 17 | 18 | 19 | 20 | 21 | 22 | 23 | 24 | 25 | 26 | 27 | 28 | 29 | 30 |
| CATV Channel | R | S | T | U | V | W | W+1 | W+2 | W+3 | W+4 | W+5 | W+6 | W+7 | W+8 | W+9 |
| TV Display | 31 | 32 | 33 | 34 | 35 | 36 | 37 | 38 | 39 | 40 | 41 | 42 | 43 | 44 | 45 |
| CATV Channel | W+10 | W+11 | W+12 | W+13 | W+14 | W+15 | W+16 | W+17 | W+18 | W+19 | W+20 | W+21 | W+22 | W+23 | W+24 |
| TV Display | 46 | 47 | 48 | 49 | 50 | 51 | 52 | 53 | 54 | 55 | 56 | 57 | 58 | 59 | 60 |
| CATV Channel | W+25 | W+26 | W+27 | W+28 | W+29 | W+30 | W+31 | W+32 | W+33 | W+34 | W+35 | W+36 | W+37 | W+38 | W+39 |
| TV Display | 61 | 62 | 63 | 64 | 65 | 66 | 67 | 68 | 69 | 70 | 71 | 72 | 73 | 74 | 75 |
| CATV Channel | W+40 | W+41 | W+42 | W+43 | W+44 | W+45 | W+46 | W+47 | W+48 | W+49 | W+50 | W+51 | W+52 | W+53 | W+54 |
| TV Display | 76 | 77 | 78 | 79 | 80 | 81 | 82 | 83 | 84 | 85 | 86 | 87 | 88 | 89 | 90 |
| CATV Channel | W+55 | W+56 | W+57 | W+58 | A-5 | A-4 | A-3 | A-2 | A-1 | W+59 | W+60 | W+61 | W+62 | W+63 | W+64 |
| TV Display | 91 | 92 | 93 | 94 | 95 | 96 | 97 | 98 | 99 | 100 | 101 | 102 | 103 | 104 | 105 |
| CATV Channel | W+65 | W+66 | W+67 | W+68 | W+69 | W+70 | W+71 | W+72 | W+73 | W+74 | W+75 | W+76 | W+77 | W+78 | W+79 |
| TV Display | 106 | 107 | 108 | 109 | 110 | 111 | 112 | 113 | 114 | 115 | 116 | 117 | 118 | 119 | 120 |
| CATV Channel | W+80 | W+81 | W+82 | W+83 | W+84 | ||||||||||
| TV Display | 121 | 122 | 123 | 124 | 125 | ||||||||||
FUNAI CORPORATION
LIMITED WARRANTY
FUNAI CORP. will repair this product, free of charge in the USA in the event of defect in materials or workmanship as follows:
DURATION:
PARTS: FUNAI CORP. will provide parts to replace defective parts without charge for one (1) year from the date of original retail purchase. Two (2) years for Picture Tube. Certain parts are excluded from this warranty.
LABOR: FUNAI CORP. will provide the labor without charge for a period of ninety (90) days from the date of original retail purchase.
LIMITS AND EXCLUSIONS:
This warranty is extended only to the original retail purchaser. A purchase receipt or other proof of original retail purchase will be required together with the product to obtain service under this warranty.
This warranty shall not be extended to any other person or transferee.
This warranty is void and of no effect if any serial numbers on FUNAI/SYMPHONIC product are altered, replaced, defaced or missing. This FUNAI CORPORATION Limited warranty does not apply to any FUNAI/SYMPHONIC product not purchased and used in the United States.
This warranty only covers failures due to defects in material or workmanship which occurs during normal use. It does not cover damage which occurs in shipment, or failures which are caused by repairs, alterations or product not supplied by FUNAI CORP., or damage which results from accident, misuse, abuse, mishandling, misapplication, alteration, faulty installation, improper maintenance, commercial use such as hotel, rental or office use of this product or damage which results from fire, flood, lightning or other acts of God.
THIS WARRANTY DOES NOT COVER PACKING MATERIALS, ANY ACCESSORIES (EXCEPT REMOTE CONTROL), ANY COSMETIC PARTS, COMPLETE ASSEMBLY PARTS, DEMO OR FLOOR MODELS.
FUNAI CORP. AND ITS REPRESENTATIVES OR AGENTS SHALL IN NO EVENT BE LIABLE FOR ANY GENERAL, INDIRECT OR CONSEQUENTIAL DAMAGES ARISING OUT OF OR OCCASIONED BY THE USE OF OR THE INABILITY TO USE THIS PRODUCT. THIS WARRANTY IS MADE IN LIEU OF ALL OTHER WARRANTIES, EXPRESS OR IMPLIED, AND OF ALL OTHER LIABILITIES ON THE PART OF FUNAI, ALL OTHER WARRANTIES INCLUDING THE WARRANTY OF MERCHANTABILITY, AND FITNESS FOR A PARTICULAR PURPOSE, ARE HEREBY DISCLAIMED BY FUNAI AND ITS REPRESENTATIVES IN THE UNITED STATES. ALL WARRANTY INSPECTIONS AND REPAIRS MUST BE PERFORMED BY FUNAI AUTHORIZD SERVICE CENTER. THIS WARRANTY IS VALID WHEN THE UNIT IS CARRIED-IN TO FUNAI AUTHORIZED SERVICE FACILITY.
WHEN YOU ARE RETURNING THE PRODUCT FOR SERVICE TO FACTORY SERVICE CENTER, PLEASE CONTACT THE FUNAI SERVICE DEPARTMENT TO RECEIVE M.R.A. (MERCHANDISE RETURN AUTHORIZATION) NUMBER PRIOR TO SHIPPING. ANY POSTAGE, INSURANCE AND SHIPPING COST, INCURRED IN PRESENTING OR SENDING YOUR FUNAI/SYMPHONIC PRODUCT FOR SERVICE ARE SHIPPER'S RESPONSIBILITY.
CAREFULLY PACK WITH PROPER PACKING MATERIALS, PREFERABLY IN THE ORIGINAL CARTON.
ATTACH WRITTEN DOCUMENTATION DETAILING THE COMPLAINT, TO THE OUTSIDE OR INSIDE OF THE CARTON.
THE PRODUCT MUST BE ACCOMPANIED BY A COPY OF THE ORIGINAL RETAIL PURCHASE RECEIPT. IF NO PROOF OF PURCHASE IS ATTACHED, THE WARRANTY WILL NOT BE HONCRED AND REPAIRS COSTS WILL BE CHARGED.
IMPORTANT:
THIS LIMITED WARRANTY GIVES YOU SPECIFIC LEGAL RIGHTS, YOU MAY HAVE OTHER RIGHTS THAT VARY FROM STATE TO STATE, IF, AT ANY TIME DURING THE WARRANTY PERIOD, YOU ARE UNABLE TO OBTAIN SATISFACTION WITH THE REPAIR OF THIS PRODUCT, PLEASE CONTACT FUNAI CORP.
ATTENTION:
FUNAI CORP. RESERVES THE RIGHT TO MODIFY ANY DESIGN OF THIS PRODUCT WITHOUT PRIOR NOTICE.
For information of your nearest FUNAI Authorized Service Center or general service procedure, please call or write to the following:
FUNAI CORPORATION
Corporate Headquarters & Factory Service Center
Address:100 North Street Teterboro, NJ 07608
Tel:201-288-2666
(Eastern Time 9:00 AM - 4:30 PM)
- WARNING:
- CAUTION
- "IMPORTANT SAFEGUARDS"
- SUPPLIED ACCESSORIES
- LOCATION
- AVOID THE HAZARDS OF ELECTRICAL SHOCK AND FIRE
- OPERATING CONTROLS AND FUNCTIONS
- VHF/UHF COMBINED ANTENNA
- UHF/VHF SEPARATE ANTENNAS
- Note:
- Note to CATV system installer
- HOW TO USE THE REMOTE CONTROL
- INSTALLING THE BATTERIES
- 1
- 2
- 3
- CHANNEL CHART
- Notes:
- PRESETTING THE TUNER MEMORIES
- THE FOLLOWING STEPS CAN BE DONE WITH THE REMOTE CONTROL OR MANUALLY.
- 4
- To erase channels still in light red.
- 5
- 6
- MEMORIZING INDIVIDUAL CHANNEL
- TO ERASE A MEMORIZED CHANNEL
- SETTING THE SLEEP TIMER
- PICTURE ADJUSTMENTS
- CONTRAST
- CABLE CHANNEL DESIGNATIONS
- FUNAI CORPORATION
- LIMITED WARRANTY
- DURATION:
- LIMITS AND EXCLUSIONS:
- IMPORTANT:
- ATTENTION:
Brand : FUNAI
Model : FT1321
Category : Television