
AD1 Auto Capsule - Dash cam COWON - Free user manual and instructions
Find the device manual for free AD1 Auto Capsule COWON in PDF.


| Product Type | Dash cam (car camera) |
| Brand | Cowon |
| Model | AD1 Auto Capsule |
| Dimensions (approx) | 100 x 50 x 30 mm |
| Weight (approx) | 80 g |
| Power Supply | 5V DC via USB cable (car charger included) |
| Video Resolution | Full HD 1080p (1920x1080) at 30 fps |
| Lens Angle | 130° wide angle |
| Recording Modes | Continuous loop recording, event recording (G-sensor), manual recording |
| Storage | MicroSD card (up to 128 GB, Class 10 recommended) |
| G-sensor | Built-in 3-axis accelerometer for impact detection |
| Display | 2.0 inch LCD screen |
| Audio Recording | Built-in microphone (can be disabled) |
| Night Vision | Low-light enhancement with wide dynamic range |
| Mounting | Suction cup or adhesive mount (included) |
| Maintenance | Clean lens with a soft, dry cloth; avoid liquids |
| Safety | For vehicle use only; do not expose to extreme temperatures |
| Spare Parts | USB power cable, car charger, mounting bracket, adhesive pads |
| Repairability | Designed for professional repair; contact Cowon support |
| General Information | Compact dash cam with automatic recording on car start |
Frequently Asked Questions - AD1 Auto Capsule COWON
User questions about AD1 Auto Capsule COWON
0 question about this device. Answer the ones you know or ask your own.
Ask a new question about this device
Download the instructions for your Dash cam in PDF format for free! Find your manual AD1 Auto Capsule - COWON and take your electronic device back in hand. On this page are published all the documents necessary for the use of your device. AD1 Auto Capsule by COWON.
USER MANUAL AD1 Auto Capsule COWON
User's Guide ver. 1.1 EN
The information contained herein may be changed at anytime without prior notification.
This manual or any parts thereof may not be reproduced for any purpose whatsoever without the express written consent of COWON SYSTEMS, Inc, not transmitted in any form either electronically or mechanically, including photocopying and recording. All technical specifications, drawings etc are subject to copyright law.
© Copyright 2011, COWON SYSTEMS, Inc. All rights reserved
Thank you for purchasing a COWON product.
Copyright and Trademark
- Auto Capsule and COWON are the trademarks of COWON SYSTEMS Inc.
- All content in this manual are protected under copyright law.
- All the other product(s) and service(s) listed in this manual are registered trademark and service of the corresponding copyright owner(s).
- All rights to this program are reserved by COWON SYSTEMS Inc. and protected under copyright law.
- This manual is based on the specifications of the product available at the point of publishing it. Note that the sample sentences, charts, pictures given as an example, detailed functions of a product, specifications of H/W and S/W recorded in this manual are subject to change without notice.
Precautions
- Recording may fail depending on the given situation. The videos recorded with this product can only be used as a reference to examining the driving image.
- This manual is based on the product available at the point of publishing it. It thus may contain errors or omissions in its technical editing.
CONTENTS
Chapter 1. Before You Start!
Registration and Notes 8
Product Overview 9
Precautions 11
Package Components 16
Names of Parts and Functions 17
Installation 18
Connecting Rear-View Camera 20
Connecting Uninterruptible Power Equipment 21
Separating the Product 22
Chapter 2. Basic Use
Starting 24
Check MicroSD Card 24
Record 25
Real Time Recording 25
Manual Recording 28
Event Recording 31
Parking Mode Recording 34
CONTENTS
Chapter 3. More Functions
When MicroSD is removed while operating 39
When the power cable is unplugged while operating 39
When the impact event occurs during parking mode recording 40
Using MicroSD Card Formatting Function 41
Chapter 4. Other Information
MicroSD Card Management 43
Button Operation 44
LED Status Indicator 44
Voice Message and Sound Effects 45
Product Specifications 46
1
Before You Start!
8 Registration and Notes
9 Product Overview
11 Precautions
16 Package Components
17 Names of Parts and Functions
18 Installation
20 Separating the Product
21 Connecting Rear-View Camera
22 Connecting Uninterruptible Power Equipment
Before You Start!

Registration and Notes
Be sure to bring the product warranty when requesting for customer service. (Product warranty is issued when purchasing the product and cannot be re-issued. Please make sure to keep it in a safe place.)
- Before using the product, read the authorization code on the product warranty or on the side of the product and register it in the homepage first.
- Only the registered users are eligible for legitimate customer support and service. (Users who haven't registered the product must bring the product warranty with the date of purchase on.)
This product is a device for recording the driving image of a car.
Recording may fail depending on the given situation. The videos recorded with this product can only be used as a reference to examining the driving image.
- Always back-up any important video files.
- Company shall not be held accountable for any data loss, poor recording or recording error.
Before You Start!

Product Overview
HD-quality video recording
+ 2 mega-pixel CMOS image sensor is used to record a video in 720p HD (1280x720 pixels)/30 fps/ 16:9 wide.
Wider recording angle
+ Diagonal angles of up to 150° is available for wider viewability.
Built-in microphone for high-quality audio
+ Audio is recorded alongside the video.
Multiple recording menus
+ Real time recording, impact event recording, manual recording, motion sensitive recording (parking mode recording), and more recording modes are available.
Built-in 3-axis acceleration sensor
+ It detects the external impact via the 3-axis acceleration sensor for auto recording.
Built-in backup battery
+ Your last recording file is safely saved thanks to a built-in battery even for unexpected power outage.
Before You Start!
Built-in RTC
+Recording files are created by precise date and time through the built-in RTC.
Video-out
+ A video-out terminal for checking the video being recorded is included.
Multiple indicators for smooth operation
+ Convenient and accurate operation is up for grabs through LED indicators, sound effects, and voice message.
Options for diverse settings via PC viewer software
+ Set your preferences such as voice recording and outputs, dimensions for the angle of view, memory usage ratio, and time settings through PC viewer software.
2 channels supported (rear-view camera is optional)
+ A 2 channel video recording function is provided through a dedicated rear-view camera.
Uninterruptible power equipment is included
A dedicated uninterruptible power equipment is provided, enabling video recording functions to be provided during parked mode.
Before You Start!

Safety Precautions
This section regards precautions to prevent users from compromising safety or experiencing property damage. Please read the followings carefully before use. (Company has nothing whatever to do with any accident caused by a user who failed to conform to warning and precautions.)

The event that a user is likely to get killed or critically wounded when he/she does not conform to the instruction

In the event that a user is likely to get injured or experience financial loss when he/she does not conform to the instruction

Product
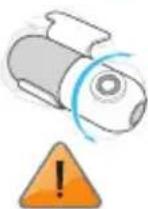
Changing the installation location of the product may result in a change in the camera angle. Adjust the camera angle after installing the product and test the recorded images.
- Normal recording cannot be guaranteed if the product is wrongly installed.

This product is a device that uses a camera to record video as you drive, therefore, the quality of the recorded videos may deteriorate when taken at the point of entering a tunnel, on a broad day when the shadow contrast and counterlight to the subject are severe, and in the middle of night with no light.
Video is not recorded during product booting.
*Please start driving after booting is complete.
Before You Start!
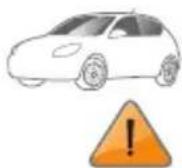
Avoid excessive car window tinting. It deteriorates the recording quality.
- The white balance of the video may vary depending on the degree of tinting.

Always keep the front window clean and free from dust before recording to guarantee the most optimal recording quality.

In the event a product is damaged or disconnected from power due to a critical and impactful accident, the product may not work and fail to record the accident.

Foreign matters (e.g. fingerprints) on the lens of the black box may adversely affect the recorded videos. Always keep the lens clean and free from dusts.

Do not disassemble or alter the product at your discretion.
- It may cause electric shock, product damage or loss of recorded data.
- For mechanical inspection, maintenance, and repair needs, contact the store you bought the product or the official customer center.
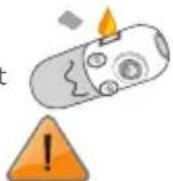
Avoid inserting or letting in metals or inflammables into the MicroSD card slot.
- It may cause a fire or electric shock.
Before You Start!

If water is spilled or foreign matters are seeped into the product, disconnect the power immediately and contact the customer center.
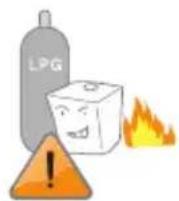
Do not use the product in a place where there is inflammable or explosive gas.
- Otherwise, ignition or explosion may ensue.

Refrain from operating the product while driving.
- It may cause a car accident.

Keep the product away from the reach of babies, children, or pets.
- They may swallow small parts in the product.
- Your pet may drool over the product, which may cause short circuit in the battery unit, resulting in an explosion.

Do not use voltage other than the rated voltage specified by the product.
- It may cause an explosion, fire or mechanical failure.
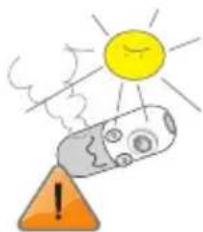
Avoid high temperatures such as inside the closed car under hot weather or a place with direct sunlight.
- It may adversely affect the exterior or internal parts of the product, causing a fire.
Before You Start!

Use caution not to apply too much strength to the lens and the exterior of the black box, or a mechanical failure may ensue.

Install the product in an area that doesn't disrupt a driver's visibility.
- Otherwise, it may cause an accident.

If you use the product for a long time, it heats up inside. So use caution not to get burned by accidentally touching it.
- Avoid touching the metal area when removing the MicroSD card after using the product for long hours.

Do not cover the black box with a cloth or other types of covers.
- It may contain the heat inside the product, resulting in an exterior deformation or a fire.

Do not spray water or wax directly to the product when cleaning the inside of a car.
- It may cause mechanical failure or electric shock.

Always use the genuine products and parts from COWON SYSTEMS Inc.
- COWON SYSTEMS Inc. shall not be held accountable whatsoever for failures or accidents caused by using the product and parts from other sources.

Do not wipe the product with chemical substances or detergent.
- Wipe the product gently with a soft cloth.
Before You Start!

Power Connection

If you don't intend to use the product for a long while, unplug the power cable of the product.
- Otherwise, it may cause electric discharge of a car battery or a fire.
- A user shall be held accountable for the product damage or car breakdown.

Do not use wet hands when plugging/unplugging the cigar jack cable.
- It may cause an electric shock.

Do not remove the MicroSD card when the product is in use.
- It may cause mechanical malfunction.
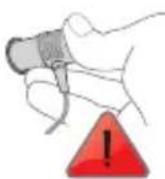
Plug in the power cord completely with no looseness.
- Otherwise, it may cause a fire.
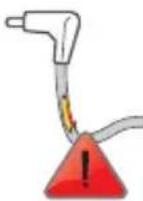
Do not use the damaged cigar jack cable.
- It may cause a fire or an electric shock.

To reset the product, shut down the power supply and reconnect it after a certain while, or remove the MicroSD card after turning off the product and insert it back again.
Before You Start!

Package Components
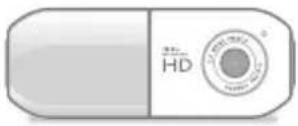
Main device

Product holder

Cigar jack

MicroSD card

MicroSD card reader

Video In-Out Cable
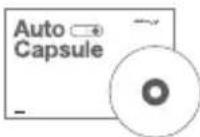
Manual & PC viewer CD, Quick Guide

Double-coated tape
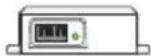
Uninterruptible
Power
Equipment

Cable organizer clips

Rear-view camera
(Optional)
- Note that the included items may vary according to the product specifications and may look different from the images provided in the manual.
Before You Start!

Name of Part and Functions
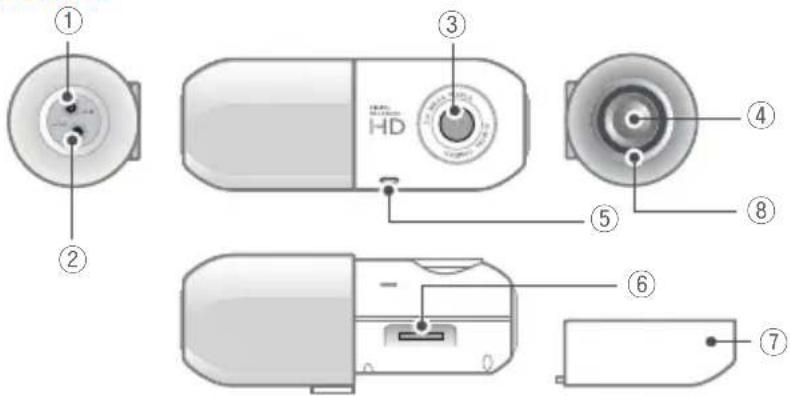
| No. | Name Description | |
| 1 | Cigar jack | It supplies the power to the main device. |
| 2 | Video In/Out | Terminal for outputting video being recorded or connecting rear-view camera. |
| 3 | Recording lens | It records the front direction of a vehicle. |
| 4 | Button | It is a button for manual recording. |
| No. | Name Description | |
| 5 | Microphone | It is a microphone for recording voice. |
| 6 | MicroSD card slot | It is a slot for inserting the MicroSD card. |
| 7 | MicroSD card Protective lid | Use it to insert or remove the MicroSD. |
| 8 | Indicator lamp | It displays the operation status of the product. |
Before You Start!

Installation
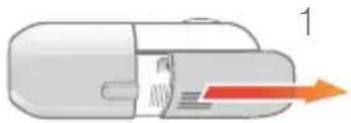

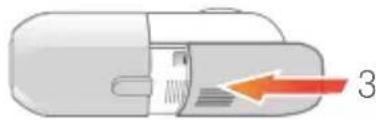
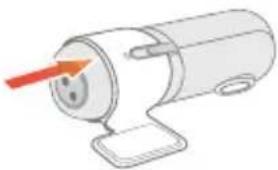
1 Press and push the protective lid to the side as shown in Fig. 1. Insert the MicroSD card as shown in Fig. 2.
Push and close the lid to the direction of the arrow as shown in Fig. 3.
- Make sure you insert the MicroSD card according to the designated direction.
If you forcibly insert the card in a wrong direction, it is likely to cause damage or failure. Note that you may need to receive paid repair service to fix this.
Before You Start!

② Place the product in the holder and install it in a vehicle.
- Choose the location to install the product. A space behind the rearview mirror is recommended.
- Wipe up the foreign matters or moisture completely from the location of installation.
- Remove the release paper in double-coated tape and attach it to the holder. Double-check the location of installation to fix the product.
Exercise caution when fixing the product as its adhesiveness deteriorates significantly if you detach it after it was installed.
Before You Start!


3 Connect the cigar jack.
When the product is connected to power, it sets off an alarm sound once to turn on a red LED indicator, and then, switch to a blue LED to start recording.
④ Camera angle adjustment and cable management
+ Adjust the camera angle of the main device according to a user's preferences. Arrange the cigar jack cable so that it won't interfere with driving.

Connecting Rear-View Camera (Optional)

- Connect video in-out cable to the VIDEO IN/OUT terminal of the product to use.
- The video in-out cable enables simultaneous connection of the rear-view camera and the vehicle monitor.
- Arrange cable to not interfere with driving before using.

In the case of using changed channels (channel 1 ←→ channel 2), please format memory.
If rear-view camera is connected (if using 2 channels), the front angle of view is fixed to be narrow. Angle of view can be adjusted only during 1 channel operation.

Uninterruptible Power Equipment

- When installing the uninterruptible power equipment, proceed with the installation only after you have thoroughly reviewed the included product manual.
- The power cable must be fixed at the designated position. (If the cable is not connected properly, reverse voltage may occur and severe problems may arise in the product and the connected black box.)
Yellow wire (BATT+)
To use, connect to permanent power fuse of the vehicle fuse box (emergency light, interior lights, taillights, etc.)
Red wire (ACC+)
To use, connect to fuse that is supplied with power when vehicle ignition is started and that is located in the vehicle fuse box (cigarette lighter, stereo, etc.)
Black wire (GND)
Fix to bolt on metal area of frame
- To install product, connect to fuse box in the vehicle to use.
- In a high-temperature environment, this product will automatically stop recording to protect product functions.
- When recording is automatically stopped, the Red/Blue LED will flicker repeatedly, and if the temperature decreases, operation will automatically resume.
Before You Start!

Separating the Product

Hold the indicator lamp of the product with your left hand and put your right-hand thumb on the connected area of the holder. Push the cigar jack port with your index finger to separate it more easily.
It is recommended that the MicroSD card is formatted on a regular basis for stable use of the product.
2
Basic Use
24 Starting
24 Check MicroSD Card
25 Real Time Recording
28 Manual Recording
31 Event Recording
34 Parking Mode Recording
Basic Use

Starting
When connected with power, the indicator LED turns red alongside the power ON sound. Recording begins alongside the voice message notifying the start of real time recording with the indicator LED turning blue.
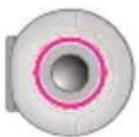
LED: RED On
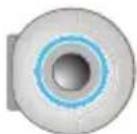
LED: BLUE On
Power connected ▶ "Start real time recording" with the power on sound ▶ Ready for recording

Check MicroSD Card


"No MicroSD card inserted"
When no MicroSD card is detected while preparing for recording, the product keeps prompting voice message "No MicroSD card inserted" with the indicator LED switching between red and blue.

Real Time Recording
Recording begins alongside the voice message notifying the start of real time recording. The indicator LED turns blue.

Voice message: "Start real time recording." ▶ Real time recording BLUE On

Real Time Recording File Management
A recording file is generated every minute and the recorded files are stored in the Real Time Recording folder in the MicroSD card. Up to 50 sub folders are created for file management. The file is named as "yymmdd_hhmm_I1.avi" according to the specific time it was recorded.
e.g.) File recorded on Oct 25, 2011 at 9:38:32 p.m. > 111025_213832_I1.avi

* If you store data beyond the designated capacity of the MicroSD card, it automatically deletes older files to save the new one.
Basic Use
Real Time Recording Files
About 47 MB(Image quality 'average') file in the 30 fps avi format in 720p resolution
| Video Audio | |
| Encoding Formats: H.264 (MPEG4 AVC) Encoding Formats: PCM | |
| Resolution: 1280 x 720 Sampling Rate: 22.05 KHz | |
| Frame Rate: 30 fps Channel: Mono | |
| Bit Rate: 6 Mbps Bit Rate: 353 Kbps | |
(Based on use of 1 channel)
Operation during Real Time Recording
+ When pressing the button briefly
When pressing the button briefly during real time recording, the manual recording begins alongside the sound effect with the indicator LED flickering in red. When the manual recording is complete, the indicator LED turns blue and the real time recording continues.

LED: RED


LED: BLUE On
Press the button briefly ▶ Sound effect ▶ Manual recording ▶ Manual recording complete ▶ Real time recording
Basic Use
+ When pressing and holding the button
Press and hold the button during real time recording. Parking mode recording will begin alongside the voice message notifying the start of parking mode recording with the indicator LED turning red.
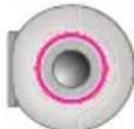
LED: RED On
Press and hold the button ▶ "Start parking mode recording" ▶ Parking mode recording
+ When impact is detected
When the acceleration sensor detects impact during real time recording, the event recording begins alongside the sound effect with the indicator LED flickering in red. When the event recording is complete, the indicator LED turns blue and the real time recording continues.
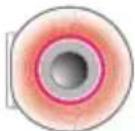
LED: RED

LED: BLUE On
Impact detected Sound effect ▶ Event recording ▶ Event recording complete ▶ Real time recording
+ When Button is Shortly Pressed Twice
If the button is shortly clicked on twice during constant recording, sound recording is stopped or restarted.
The voice prompt "stopping sound recording" or "starting sound recording" will be outputted depending on status.
Basic Use

Manual Recording

Starting Manual Recording
Press the button briefly during real time recording to begin the manual recording alongside the sound effect. The indicator LED flickers in red during manual recording.
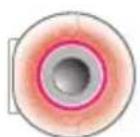

Completing Manual Recording
It records a total of 30 seconds including 15 seconds before and 15 seconds after from the point of pressing the button and completes the manual recording session. When the manual recording is complete, the indicator LED turns blue and the real time recording continues.

LED: RED

LED: BLUE On
Press the button briefly ▶ Sound effect ▶ Manual recording ▶ Manual recording complete ▶ Real time recording
Basic Use

Manual Recording File Management
Recording files are created in 30-second basis (previous 15 sec + next 15 sec). The files are saved in the Manual Recording folder in the MicroSD card. Up to 50 sub folders are created for file management. The file is named as "yymmdd_hhmm_N1.avi" according to the specific time it was recorded.
e.g.) File recorded on Oct 27, 2011 at 11:34:28 p.m. > 111027_233428_N1.avi

* If you store data beyond the designated capacity of the MicroSD card, it automatically deletes older files to save the new one.
Basic Use
○ Manual Recording Files
Same as those from real time recording with about 23 MB file in the 30 fps avi format in 720p resolution.
Operation during Manual Recording
No conversion to parking mode recording or event recording induced by impact is supported by pressing a button while the manual recording is underway.
Basic Use

Event Recording

Starting Event Recording
When the acceleration sensor detects impact during real time or parking mode recording, the event recording begins alongside the event sound effect. The indicator LED flickers in red during event recording.

LED: RED

Completing Event Recording
It records a total of 30 seconds including 15 seconds before and 15 seconds after from the point of pressing the button and completes the event recording session. After the recording is done, it returns to the previous mode before the event occurred.
If the previous mode was real time recording, the indicator LED turns blue to continue real time recording. If the previous mode was parking mode recording, the indicator LED turns red to return to the parking mode recording.
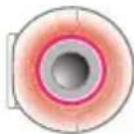
LED: RED
LED: BLUE On
Real time recording ▶ Impact detected ▶ Sound effect: Event ▶ Event recording ▶ Event recording complete ▶ Real time recording
Basic Use

LED: RED

LED: RED On
Parking mode recording ▶ Impact detected ▶ Sound effect: Event ▶ Event recording ▶ Event recording complete ▶ Parking mode recording
Event Recording File Management
Recording files are created in 30-second basis (previous 15 sec + next 15 sec). The files are saved in the Event Recording folder in the MicroSD card. Up to 50 sub folders are created for file management. The file is named as "yymmdd_hhmm_E1.avi" according to the specific time it was recorded.
e.g.) File recorded on Oct 25, 2011 at 9:38:46 p.m. > 111025_213846_E1.avi
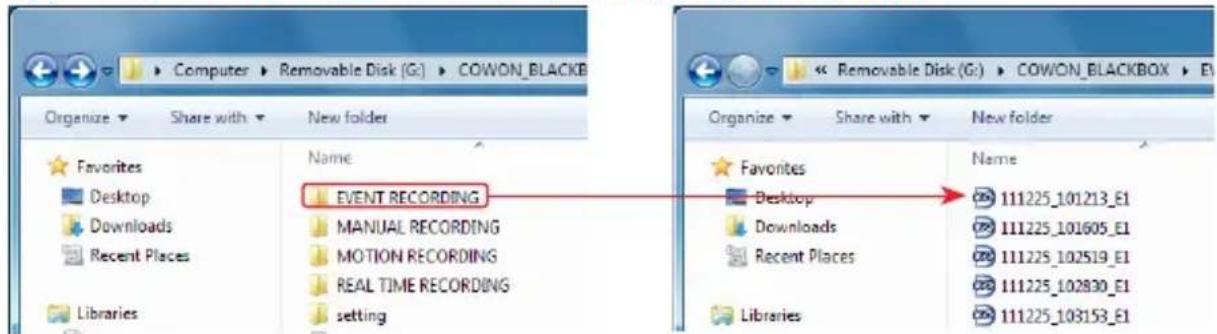
* If you store data beyond the designated capacity of the MicroSD card, it automatically deletes older files to save the new one.
Basic Use
Event Recording Files
Same as those from real time recording if the previous mode was real time recording with about 23 MB file in the 30 fps avi format in 720p resolution.
If the previous mode was parking mode recording, it is about 10 to 18 MB file in the 15 to 23 fps avi format in 720p resolution. (Based on use of 1 channel)
Operation during Event Recording
No conversion to parking mode/real time recording or event recording induced by impact is supported by pressing a button while the event recording is underway.
Basic Use

Parking Mode Recording

Terminology
Parking mode recording refers to the mode that switches to a standby mode to stop recording if no motion is detected within the angle of view. If motion is detected, it converts to the recording mode and starts recording for a certain while.

Starting Parking Mode Recording
Press and hold the button during real time recording. Parking mode recording will begin alongside the voice message notifying the start of parking mode recording with the indicator LED turning red.

LED: RED On
Real time recording ▶ Press and hold the button ▶ Voice message: "Start parking mode recording." ▶ Parking recording

Standby Parking Mode
If there is no motion, it stops recording and switches off to standby mode.
Basic Use
○ Parking Mode Recording
When it detects any motion, it records a total of 30 seconds including 15 seconds before and 15 seconds after from the point of detecting it. The indicator LED flickers in red during parking mode recording. After the recording is done, it returns to the standby parking mode.

LED: RED On
LED: RED

LED: RED On
Standby parking mode ▶ Motion detected ▶ Parking mode recording ▶ Recording complete ▶ Standby parking mode
○ Exiting Parking Mode Recording
Press and hold the button during parking mode recording. Real time recording will begin alongside the voice message notifying the start of real time recording with the indicator LED turning blue.

LED: BLUE On
Parking mode recording ▶ Press and hold the button ▶ Voice message: "Start real time recording." ▶ Real time recording
○ Automatic Parking Mode Transition
The default setting of the automatic parking mode transition function Auto Capsule is ON.
Start Parking Mode : If G sensor does not detect movement for 10 minutes, parking recording will automatically start.
End Parking Mode : If G sensor detects movement for a certain amount of time or an event occurs, product will automatically transition to constant recording.
Basic Use
Parking Mode Recording File Management
Recording files are created in 30-second basis (previous 15 sec + next 15 sec) from the point of detecting motions. The files are saved in the Motion Recording folder in the MicroSD card. If it continues detecting motion while recording, the recording time is extended up to 1 minute. Up to 50 sub folders are created for file management.
The file is named as "yymmdd_hhmm_M1.avi" according to the specific time it was recorded. e.g.) File recorded on Oct 26, 2011 at 5:31:41 p.m. > 111026_173141_M1.avi
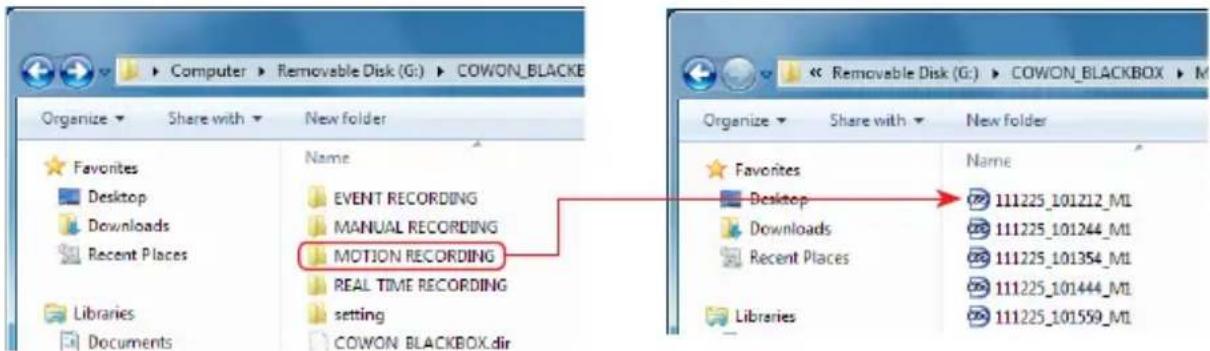
* If you store data beyond the designated capacity of the MicroSD card, it automatically deletes older files to save the new one.
Basic Use
Parking Mode Recording Files
About 10 to 37 MB file in the 15 to 23 fps avi format in 720p resolution.
Operation during Parking Mode Recording
Manual recording is not supported by a button operation while parking mode recording is underway.
+ When impact is detected
When the acceleration sensor detects impact during parking mode recording, the event recording begins alongside the sound effect with the indicator LED flickering in red. When the event recording is complete, the indicator LED turns red and the parking mode recording resumes.

LED: RED

LED: RED On
Impact detected Sound effect ▶ Event recording ▶ Event recording complete ▶ Real time recording
+ When pressing and holding the button
Press and hold the button during parking mode recording. It ends the parking mode recording and starts the real time recording alongside the voice message notifying the start of real time recording with the indicator LED turning blue.

LED: BLUE On
Press and hold the button ▶ "Start real time recording" ▶ Real time recording
3
More Functions
39 When MicroSD is removed while recording
39 When the power cable is unplugged while operating
40 When the impact event occurs during parking mode recording
41 If using microSD card format function
More Functions
When MicroSD is removed while operating
When the MicroSD card is removed while any recording mode is underway (e.g. real time recording, manual recording, event recording, parking mode recording), the product automatically reboots to returns to a standby recording mode and start checking the MicroSD card.
If the MicroSD card is removed without caution during recording, the file being recorded won't be saved.
In addition, it may cause critical damage to the card. Use extra caution when it comes to the MicroSD card.
When the power cable is unplugged while operating
When the power cable is unplugged during real time recording or parking mode recording, it ends the recording process and the product is automatically turned off with the Power OFF sound.

LED: RED

LED: OFF
Real time recording ▶ When the power cable is unplugged ▶ Sound effect: Power OFF
More Functions
When the power cable is unplugged during real time recording or parking mode recording, it ends the recording process and the product is automatically turned off with the Power OFF sound.

LED: RED

Event recording ▶ Unplug power cable ▶ Recording complete ▶ Sound effect: Power OFF ▶ Power OFF
If you remove the MicroSD card before the product shuts down completely with the power-off sound, the last file being recorded may not be stored.
When the impact event occurs during parking mode recording
It ends the parking mode recording. If there was event recording during parking mode recording and you're about to switch the mode to the real time recording, the voice message alerts a user beforehand that there was event recording during parking mode recording.

LED: BLUE On
Parking mode recording ▶ Press and hold the button ▶ Events while parked Voice message: "You have recorded events while parked" ▶ Real time recording
More Functions

If using microSD card format function
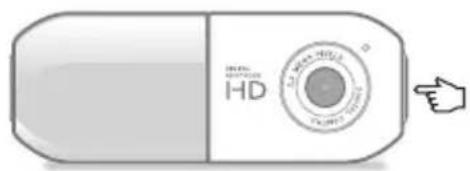
If the power plug is connected while the multifunction button is simultaneously pressed for a long time, the format function of the microSD card equipped within can be used.
When microSD card formatting starts, a sound notifying the start of microSD card formatting is alerted while the LED lights up, and a sound is alerted and the Red/Blue LED lights up while microSD card is being formatted.
When microSD card formatting is completed, a sound notifying completion of microSD card formatting is alerted and the LED lights up, and the system is automatically reset.
4
Other Information
43 MicroSD Card Management
44 Button Operation
44 LED Status Indicator
45 Voice Message and Sound Effects
46 Product Specifications

MicroSD Card Management
Memory Management
- Real Time Recording
Folder Name: Real Time Recording
Allocated Space: 60% of the entire space (approx.
4.47 GB for 8-GB card)
File Capacity: 72 files (a minute-basis 62-MB files)
- Event Recording
Folder Name: Event Recording
Allocated Space: 20% of the entire space (approx.
1.49 GB for 8-GB card)
File Capacity: 45 files (a 30 sec-basis 33-MB files)
- Manual Recording
Folder Name: Manual Recording
Allocated Space: 10% of the entire space (approx.
762 MB for 8-GB card)
File Capacity: 22 files (a 30 sec-basis 33-MB files)
- Parking Mode Recording
Folder Name: Motion Recording
Allocated Space: 10% of the entire space (approx. 762 MB for 8-GB card)
File Capacity: 11 files (a minute-basis 62-MB file)
- Margin area
Each area has a margin area corresponding to that of 1 file
* The above is for an 8GB memory space. The allocated space varies depending on the memory capacity of your MicroSD card.
* If formatting 8 GB of memory, actual available memory area is approximately 7.45 GB
* Based on the setting values of the largest recording video file size.
Other Information

Button Operation
See a table below for button operations according to recording modes.
| Mode Press the button briefly Press and hold the button | If button is shortly pressed twice | Remarks |
| Real time recording Starts manual recording Starts parking mode | Sound recording stopped/restarted | |
| Manual recording No action Starts parking mode No Action | ||
| Event recording No action Starts parking mode No Action | ||
| Parking mode recording No action Starts real time recording No Action |

LED Status Indicator
See a table below for LED indicator's status according to recording modes.
| Mode LED Status | Remarks | |
| Booting | RED On | |
| Real time recording | BLUE On | |
| Manual recording | Flickers in RED | |
| Event recording | Flickers in RED | |
| Standby parking mode | RED On | |
| Parking mode recording | Flickers in RED | |
| Alert for no MicroSD card | Flickers in RED/BLUE |
Other Information

Voice Message and Sound Effects
See a table below for voice messages and sound effects according to recording modes.
| Mode Voice message/Sound effect Remarks | ||
| Booting Booting Sound effect | ||
| Starting real time recording "Start real time recording" Voice message | ||
| Starting manual recording Event Sound effect | ||
| Starting event recording Event Sound effect | ||
| parking mode recording "Start parking mode recording" Voice message | ||
| Alert for events while parked | "You have recorded events while parked" | Voice message |
| Alert for no MicroSD card "No MicroSD card inserted" | Voice message | |
| Before turning off | Power OFF | Sound effect |
Product Specifications
| Category Specification Remarks | ||
| Model COWON AD1 | ||
| Number of Channel 2 channels 720P @ 30fps | ||
| Camera | Front: 2-mega pixels CMOS CameraRear: 0.3mega pixels CMOS CameraUsing 1 channel: 720P HD(1280x720) | 1/3.0 inches |
| Resolution | Using 2 channels :720P HD(Front, 1280x720),480P VGA(Rear-view, 640x480) | |
| Number of Frames of View | Using 1 channel: 30fpsUsing 2 channels: Front 20fps, Rear 10fps | For a narrow angle |
| Video Encoding H.264 (MPEG-4 | ||
| Audio Encoding PCM | ||
| Recording Angle D=150° / H=113.4°/ V=82° Based on lens | ||
| Storage Memory Compatible with a MicroSD card of up to 32 GB | ||
| Recording mode while driving | Real Time RecordingManual RecordingEvent Recording (Auto Impact Recording) | |
| Recording mode while parked | Parking Mode Recording (Motion detection recording)Event Recording (Auto Impact Recording) | Uninterruptible power equipment needed |
| Video-out CVBS (Composite) | ||
| Dimension 380 x 102 mm (main device) | ||
| Weight | 88 g (main device) | |
| Operating Temperature | -20°C ~ +50°C | |
| Rated Voltage | DC 12V to 24V | Uninterruptible power equipment |
DIGITAL PRIDE
©OWON
- COPYRIGHT AND TRADEMARK
- PRECAUTIONS
- CONTENTS
- CHAPTER 1. BEFORE YOU START
- CHAPTER 2. BASIC USE
- CHAPTER 3. MORE FUNCTIONS
- CHAPTER 4. OTHER INFORMATION
- 1
- BEFORE YOU START
- REGISTRATION AND NOTES
- PRODUCT OVERVIEW
- BUILT-IN RTC
- VIDEO-OUT
- MULTIPLE INDICATORS FOR SMOOTH OPERATION
- OPTIONS FOR DIVERSE SETTINGS VIA PC VIEWER SOFTWARE
- 2 CHANNELS SUPPORTED (REAR-VIEW CAMERA IS OPTIONAL)
- UNINTERRUPTIBLE POWER EQUIPMENT IS INCLUDED
- SAFETY PRECAUTIONS
- PRODUCT
- POWER CONNECTION
- PACKAGE COMPONENTS
- NAME OF PART AND FUNCTIONS
- INSTALLATION
- CONNECTING REAR-VIEW CAMERA (OPTIONAL)
- UNINTERRUPTIBLE POWER EQUIPMENT
- YELLOW WIRE (BATT+)
- RED WIRE (ACC+)
- BLACK WIRE (GND)
- SEPARATING THE PRODUCT
- 2
- BASIC USE
- STARTING
- CHECK MICROSD CARD
- REAL TIME RECORDING
- REAL TIME RECORDING FILES
- OPERATION DURING REAL TIME RECORDING
- WHEN PRESSING THE BUTTON BRIEFLY
- WHEN PRESSING AND HOLDING THE BUTTON
- WHEN IMPACT IS DETECTED
- WHEN BUTTON IS SHORTLY PRESSED TWICE
- MANUAL RECORDING
- MANUAL RECORDING FILE MANAGEMENT
- EVENT RECORDING
- EVENT RECORDING FILE MANAGEMENT
- EVENT RECORDING FILES
- OPERATION DURING EVENT RECORDING
- PARKING MODE RECORDING
- TERMINOLOGY
- STARTING PARKING MODE RECORDING
- STANDBY PARKING MODE
- ○ PARKING MODE RECORDING
- ○ EXITING PARKING MODE RECORDING
- ○ AUTOMATIC PARKING MODE TRANSITION
- PARKING MODE RECORDING FILE MANAGEMENT
- 3
- MORE FUNCTIONS
- 4
- OTHER INFORMATION
- MICROSD CARD MANAGEMENT
- MEMORY MANAGEMENT
- BUTTON OPERATION
- LED STATUS INDICATOR
- VOICE MESSAGE AND SOUND EFFECTS
- PRODUCT SPECIFICATIONS
Brand : COWON
Model : AD1 Auto Capsule
Category : Dash cam