
CDR 820E - Dash cam COBRA - Free user manual and instructions
Find the device manual for free CDR 820E COBRA in PDF.


| Product Type | Dash cam |
| Brand | Cobra |
| Model | CDR 820E |
| Dimensions | Approx. 90 x 50 x 30 mm |
| Weight | Approx. 70 g |
| Power Supply | 12V DC via cigarette lighter adapter |
| Video Resolution | Full HD 1080p at 30fps |
| Lens | Wide-angle lens (approx. 140°) |
| Night Vision | Infrared LEDs for low-light recording |
| G-Sensor | Built-in impact detection for emergency recording |
| Memory Card | MicroSD card (up to 32GB, Class 10) |
| Display | 2.7 inch LCD screen |
| GPS | Optional external GPS module |
| Loop Recording | Automatic overwriting of oldest files |
| Parking Mode | Motion detection while parked (requires hardwire kit) |
| Audio | Built-in microphone and speaker |
| Mount | Suction cup mount for windshield |
| Operating Temperature | -10°C to 60°C |
| Storage Temperature | -20°C to 70°C |
| Maintenance | Clean lens with soft cloth; avoid moisture |
| Safety | Do not use in high humidity or direct sunlight |
| Spare Parts | Replacement mount, power cable, and adhesive pads available |
| Warranty | 1 year limited warranty |
Frequently Asked Questions - CDR 820E COBRA
User questions about CDR 820E COBRA
0 question about this device. Answer the ones you know or ask your own.
Ask a new question about this device
Download the instructions for your Dash cam in PDF format for free! Find your manual CDR 820E - COBRA and take your electronic device back in hand. On this page are published all the documents necessary for the use of your device. CDR 820E by COBRA.
USER MANUAL CDR 820E COBRA
For Customer Service, visit:
www.cobra.com
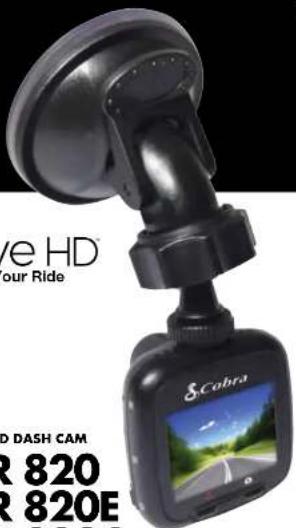
drive HD
English
Protect
Re-live
Share
[Unreadable]

Cobra
User Manual
drive HD
Record Your Ride

Important Information and Customer Assistance
Important Information
Safe Driving
Motorists, as well as operators of emergency or service vehicles, are expected to exercise all due caution while using this product, and to obey all applicable traffic laws. Security of Your Vehicle
Before leaving your vehicle, always remember to conceal this device in order to reduce the possibility of break-in and theft.
Privacy
This device may not be used to violate the privacy rights of others. In no way will Cobra Electronics or its subsidiaries be responsible for inappropriate use of this product. It is the sole responsibility of the buyer to consult legal counsel for the interpretation of any laws applicable to the area of intended use of this product.
Customer Assistance
www.cobra.com
2014 Cetra Electronics Corporation 650 West Portland Street Chicago, Texas 80707 USA www.cetra.com


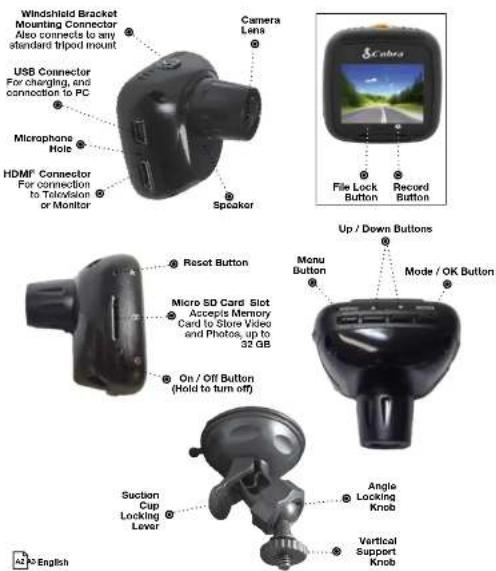
Controls Indicators and Connections
Controls, Indicators and Connections

Product Features
Congratulations! You've made a smart choice by purchasing a Drive HD Dash Cam from Cobra. This booklet describes the simple steps for mounting, setting up, and using your dash camera.
Camera Features
Records everything you see and hear in 1080P Full HD with high dynamic range that optimizes video during day or night.
Continuous Loop Recording overwrites old footage unless you want to save it. A time/date stamp is embedded on all recordings so you'll never miss an event while driving.
Ready to use out-of-the-box. Includes a heavy-duty suction cup to mount the camera to your windshield and an 8GB MicroSO card to Record your Ride.
Wide angle view gives you a full view of the road without any edge distortion.
3-axes G-Sensor senses sudden accelerations and collisions and automatically protects footage surrounding the incident.
Additional Features
Emergency Record Button
Motion Sensor
Built-In Microphone & Speaker
Auto-Record and Auto-Power Diff
Adjustable Movie Clip Time

Limited 1-Year Warranty
Limited 1-Year Warranty
Cabra Electronics Corporation warrants that this product and the component parts thereof, will be free of defects in workmanship and materials for a period of one year from the date of first consumer purchase. This warranty may be enforced by the first consumer purchaser. If the product is under warranty, it will be repaired or exchanged depending on the model as determined at Cobra's sole discretion. Such remedy shall be your sole and exclusive remedy for any breach of warranty. The procedure for obtaining service and support, and the applicability of this warranty, will vary depending on the country or jurisdiction in which you purchased and utilize the product. For the details on obtaining product service, support and warranty please visit www.cabra.com/support
Provided that the product is utilized within the U.S.A.- Cobra will, without charge, repair or replace, at its option, defective products, products or component parts upon delivery to the Cobra Factory Service department, accompanied by proof of the date of first consumer purchase, such as a duplicated copy of a sales receipt. You must pay any initial shipping charges required to ship the product for warranty service, but the return charges, to an address in the U.S.A., will be at Cobra's expense, if the product is repaired or replaced under warranty.
This warranty gives you specific legal rights, and you may also have other rights which may vary from state to state and country to country.
Exclusions: This limited warranty does not apply: 1) To any product damaged by accident; 2) In the event of misuse, ordinary wear, failure to follow directions, or improper maintenance of the product or as a result of unauthorized alterations or repairs; 3) If the serial number has been altered, defaced, or removed; 4) If the product was purchased or is utilized in a jurisdiction not covered by the limited warranty.
All implied warranties, including warranties of merchantability and fitness for a particular purpose are limited in duration to the length of this warranty. Cobra shall not be liable for any incidental, consequential or other damages; including, without limitation, damages resulting from loss of use or cost of installation.
Some states and countries do not allow limitations on how long an implied warranty lasts and/or do not allow the exclusion or limitation of incidental or consequential damages, so the above limitations may not apply to you. This warranty gives you specific legal rights, and you may also have other rights which vary from state to state and country to country.
22 English

Introduction
Important Information....A1
Customer Assistance.... A1
Controls, Indicators and Connections.... A2
Product Features A3

Your Device
What's in the Box.... 2
Installation.... 3
Device Operation 5-12
Powering the Device On and Off.... 4
Charging the device 4
Video Record, Still Photo and Playback Modes.... 5
Video Mode 6
Still Photo Mode 8
Video and Photo Playback Modes.... 9
Video Playback Screen 10
Video Protection Screen 12
Adjusting Camera Settings 13
Language Selection 13
Video Settings.... 14
Adjusting Video Settings....15
To Adjust General Settings 16
General Settings....17
Still Photo Mode Settings 18
Connecting to a Computer.... 19
Troubleshooting....20
Trademark Acknowledgements....20

Customer Information
Specifications 21
Product Service & Support 21
Limited 1-Year Warranty ....22

What's in the Box
Installation
What's in the box
Dash Cam (Model # CDR 820)
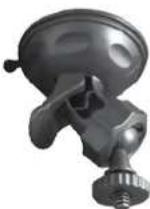
Heavy Duty Suction Cup Mount
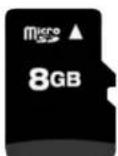
8GB Micro SD Card (installed)
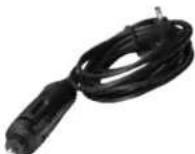
Cigarette Lighter Adapter
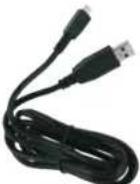
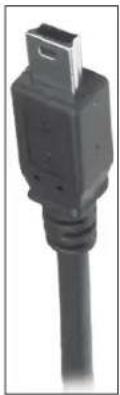
Mini USB to USB Cable

English
Installation
Where to Mount Your Unit
You will get optimum performance from your camera if you mount it on the front windshield, behind the rear-view mirror. This will minimize the impact on the driver's line of sight. You'll also want to keep the camera centered and angle the bracket to optimize the camera's view of the road ahead.
Windshield Mounting
| Peel the plastic film off of the suction cup. | |
| Position the mounting bracket above the camera as shown. Rotate the vertical support knob clockwise for 2-3 full rotations until it captures the camera firmly.To adjust the angle to the road, if necessary, loosen the angle locking knob above. Turn the camera so that it has a clear view of the road, ahead. Tighten the knob when done. | 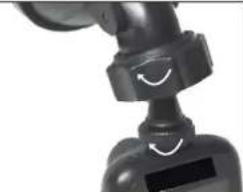 |
| Press the Suction Cup firmly onto the windshield.Push down on the lever to lock the suction cup in place. | 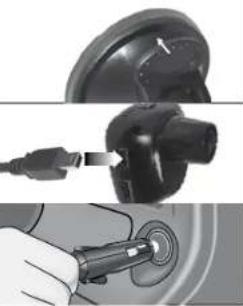 |
| Plug the USB power cord into the camera. | |
| Plug the cigarette lighter adapter on the power cord into your vehicle's cigarette lighter. | |


Device Operation
Your Dash Cam You
Powering the Device On and Off
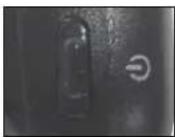
To turn the device on, press the POWER button.
To turn the device off, press and hold the POWER button for three seconds.
Charging the device
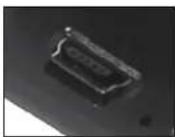
You can charge the device with the included car charger, or with a USB cable. The device will also run off of its own internal battery for a short time.

NOTE: When the Car charger is connected, the device will automatically power on and start recording video.
Battery: The battery in this unit is intended to operate the unit after power loss due to an accident or crash. Note that while recording may continue, the device was not intended for long-term recording on battery power.
natural_image
Close-up of a black USB cable connector (no text or symbols visible)
Device Operation
Video Record, Still Photo, and Playback Modes
The camera has four separate modes:

Video Mode

still Photo Mode

ideo Playback Mode

still Photo Playback Mode
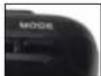
To toggle between the modes: Press the MODE Button:
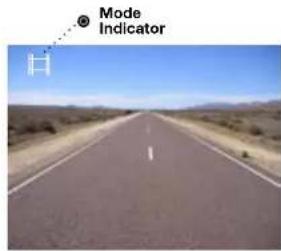
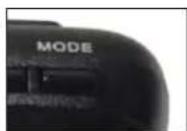

NOTE: You cannot switch modes or enter menus while the camera is recording video.

English

Your Dash Cam Device Operation
Video Mode

Video Mode is the primary function of this device and allows you to easily record HD video of the road ahead of you.
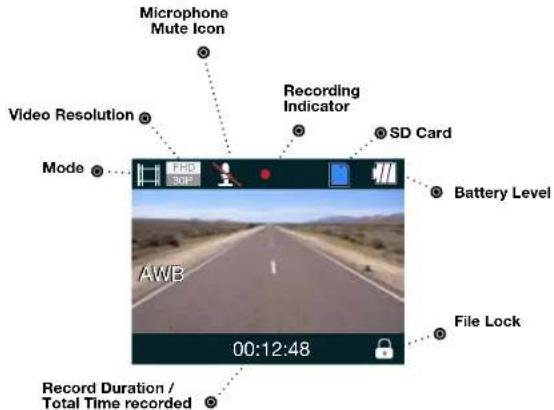
Continuous Cyclical Recording: Once the memory card is full, this camera will continuously overwrite the oldest footage recorded. To protect a clip so that it will not be overwritten, press the FILE LOCK Button. The 🔒 icon will show on the screen. Files can also be locked from the playback menu in Video Playback Mode.
G-Sensor: The G-Sensor is an accelerometer that can detect an impact caused by an accident. If the G-Sensor is triggered, the current video segment will automatically be locked so that it is not overwritten by cyclical recording. If the G-Sensor is triggered and video is not being recorded, it will start video recording automatically.
The sensitivity of the G-Sensor can be adjusted in settings.
Device Operation
To Start and Stop recording video, press the RECORD button
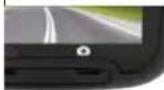
The Red Record Dot starts flashing or stops flashing, and the record duration changes to display total time recorded.

To Lock a video while it is being recorded, press the FILE LOCK button
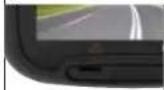
The Lock Current File message and the Lock icon will appear on the screen:

To Toggle the Microphone On / Off, press the UP button
The Microphone Mute icon will toggle on the screen:

To Toggle the Screen On / Off, press the DOWN button
The screen will toggle on and off.

English


Device Operation

Still Photo Mode
This device can be used to capture high-resolution still photos using its built-in camera. The images are stored on the removable SD Card memory.
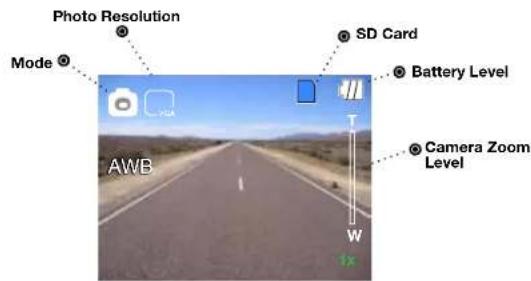
To take a picture
| Press the RECORD button. | The screen flashes black and the image briefly freezes to show that a picture was taken. |
To digitally zoom in or out
| Press and hold the UP or DOWN buttons. | The image zooms in or out, and indicates the zoom factor on the screen.(1x - 4x) |

Device Operation

Video and Photo Playback Modes
This device stores video and pictures on its removable SD Card Memory. Playback mode will allow you to review the saved video and photos, and play back the video with sound.
File Selection Screen
![Mode File Name 100_DSCMOV_0001.AVI SD Card Battery Level Page Files are shown in groups of six per page. 1/6 Red border indicates selected file Timestamp of selected file 01/01/2014 18:29:10 [00:30:12] File Duration](/content/2026/05/961450/images/295d48e7a29edec674727e3c6fa1166aebfac67848e534634a9020df15824ae1.jpg)
To move forward or backward in the list of saved files
| Press the UP or DOWN buttons while on the video selection screen. | The red box moves to select the next or previous file. If you are at the beginning or end of a page, this may cause you to flip to the previous or next page. |
To play a selected file:
| Press the RECORD button while on the file selection screen. | The video will begin playing. |

English


Device Operation
Video Playback Screen
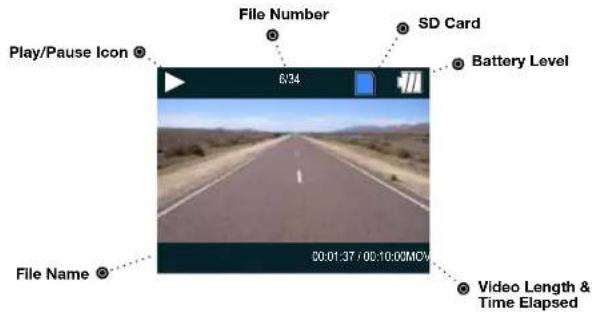
| To play or pause video playback | |
| Press the RECORD button. | The video will begin playing or pause playback, and the Play / Pause Icon will toggle. |
| To Fast forward or rewind the video | |
| Press the UP or DOWN buttons. | The video will begin playing faster or rewind, and the playback speed will show on the screen as 2X, 4X, etc. |
Your Dash Ca

Device Operation
To return to the list of saved files while in the middle of video playback
| Press the MODE button. You will be returned to the video selection screen. |
To adjust the playback audio volume
| Press MENU to bring up the Playback menu.Make sure VOLUME is highlighted, and press MODE. | |
| Press the arrow keys to select a volume level, 0-10. The selected volume level will have a red box around it. Press MODE again to confirm and close. Finally, press MENU to exit. |
To delete a file
| Press the MENU button to bring up the Playback menu. Press the down arrow to highlight DELETE, and press MODE to confirm. |
| To delete just one file, highlight the icon with just one item in the trash, and press MODE to confirm. You will then see the "select a file" dialog. Use the arrow keys to highlight the file you want to delete with the red box, then press RECORD to confirm. The "Delete Selected File" Dialog will appear. Make sure YES is selected, and then press RECORD to confirm. The file will be deleted and you will return to the video selection screen. |
Device Operation
Video Protection Screen
To Lock a video or image while in playback mode
Press the MENU button to bring up the Playback menu. Press the down arrow until PROTECT is highlighted, and press MODE to confirm.
To protect just one file, highlight the icon with the open book and the key, then press MODE to confirm.
You will then see the "select a file" dialog. Use the arrow keys to highlight the file you want to protect with the red box, then press RECORD to confirm.
You'll see the "Protect Selected File" dialog. Press the UP arrow to ensure that YES is selected, then press RECORD to confirm.
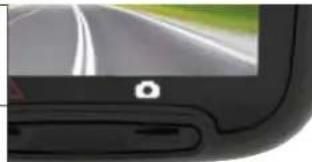
natural_image
Close-up of a car's rear camera showing a white road ahead and a black sensor grille (no text or symbols visible)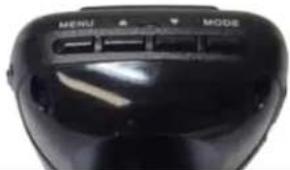
natural_image
Close-up of a black smartwatch with labeled buttons (MENU, MODE) and ports (no readable text beyond labels)The selected picture will now show a lock icon:

This means this file will not be overwritten by continuous loop recording in Dash Cam mode.

3 English
Adjusting Camera Settings
Language Selection
While in Video or Still Photo mode, press the MENU button, scroll to the language menu, and press MODE to enter the Language Selection menu.
Use the UP or DOWN arrows to select the desired language, and then press MODE to confirm.
The following languages are supported:
English, Dutch, French, German, Portuguese, Russian, Spanish and Chinese.

Your Dash
Adjusting Camera Settings
Video Settings

Note: If you are currently recording video (●) you'll need to stop recording with the RECORD button first.

While in VIDEO mode, press the MENU button once to enter the menu selection screen. Verify that Video Settings is selected, then press MODE to confirm.

Press the UP and DOWN arrows to select the setting you'd like to modify, then press the MODE button to confirm.


A window on the right edge of the screen will display the available options. Use the UP and DOWN arrows to make your selection, then press MODE to confirm.
A list of the settings and their meanings are shown on the next page.


English

Adjusting Camera Settings
Your Dash Cam
Adjusting Video Settings
Movie Mode Settings
| Video Settings | This sets the level of detail in the video. FHD will give you the best image, but will take up the most memory. |
| Movie Quality Select between Super High Quality (SHQ) and High Quality (HQ) | |
| Movie Clip Time | This selects the length of the video clips the system records. Options range from 1 minute to 10 minutes. |
| Auto Power Off | Once power is removed from the device, it automatically shuts down. This option lets you set how many seconds to continue recording video after power is removed. |
| Motion REC Time | When the Motion Event REC feature is turned on, the camera will analyze the Image and determine when the Image has changed substantially, and automatically start recording for you. Leave this feature on If you want to record video when you're moving, and stop recording video when stopped. |
| Microphone If you do not want this device to record audio with its internal microphone, turn this setting off. | |
| MIC sensitivity | Set the sensitivity of the microphone. |
| Scene | Select between Auto, Sport, Portrait, Landscape, Snow, Beach, and Fireworks. |
| Exposure | In very bright environments, use a positive EV. Dark environments use negative EV. Options between -2 and +2 are available. |
| White Balance You can adjust the white balance based on the ambient lighting. Options include: Auto, Daylight, Cloudy, Flourescent 1, Flourescent 2, and Flourescent 3. | |
| ISO Sensitivity | Increasing ISO will make the camera more sensitive to light. Try increasing ISO in low-light conditions, or leave it set to “Auto” |
| Color | Adjusts color saturation. Options include: natural, bright, and grey. |
| Effect | Photo effects include: Normal, retro, black and white, relief, negative, drawing, painting, and crayon. |


Adjusting Camera Settings
To Adjust General Settings

NOTE: If you are currently recording video (●) you'll need to stop recording with the Record button first.

While in VIDEO or STILL PHOTO mode, press the MENU button once to enter the menu selection screen. Press the down arrow until General Settings is highlighted, then press MODE to confirm.

Press the UP and DOWN arrows to select the setting you'd like to modify, then press the MODE button to confirm.


A window on the right edge of the screen will display the available options. Use the UP and DOWN arrows to make your selection, then press MODE to confirm.

A list of the settings and their meanings are shown on the next page.

7 English

Adjusting Camera Settings
General Settings
| Beep Sound | If you don't want the device to beep on every button press, turn this option OFF. |
| Idle Power Off Automatically turns the unit off if no buttons are pressed within 1 or 5 minutes if no video is being recorded. | |
| Date/Time | Use this to set the current time and date. |
| Date Format | Sets the date format. |
| HDMI ^ Output | Lets you choose between 720P and 1080P on the HDMI ^ Output. |
| Screen Flicker | This sets the screen refresh rate. Options include 50 Hz and 60 Hz. |
| USB Function If you want your camera to behave like a Mass Storage device (flash drive) when connected to a computer, select MSDC. If you want to use it as a webcam with your computer, select PCAM. | |
| Screen Rotate | Allows you to flip the screen vertically for upside-down operation. |
| Screen Saver Allows you to set a timeout for the screen to go black when not in use. Options include 1 minute and 3 minutes. | |
| G-Sensor Level | Sets the sensitivity of the G-Sensor, from 0 (off) to 4 (max) |
| Motion Detector | Sets the sensitivity of the Motion sensor, from 0 (off) to 3 (max) |
| Restore Defaults | Resets the system to its default settings. |
| Format SD-Card If you want to completely erase all the movies and files on the SD-card, select this option. Be careful; all your data will be lost. | |
| SD-Card INFO | See how much space remains on the SD Card. |
| FW Version | Get the firmware version information. |



Adjusting Camera Settings
Still Photo Mode Settings
While in Still Photo mode, press the MENU button to enter the menu selection screen. Verify that Still Settings is selected, then press MODE to confirm.

Press the UP and DOWN arrows to select the setting you'd like to modify, then press the MODE button to confirm.

A window on the right edge of the screen will display the available options. Use the UP and DOWN arrows to make your selection, then press MODE to confirm.
Still Photo Mode Settings
| Still Image Size | This sets the level of detail in the photo. Higher M indicates more megapixels, which will give you a sharper image, but take up more memory. Options between 1M and 14M are available. |
| Still Quality Select | between Super High Quality (SHQ) and High Quality (HQ) |
| Scene | Select between Auto, Sport, Portrait, Landscape, Snow, Beach, and Fireworks. |
| Exposure | In very bright environments, use a positive EV. Dark environments use negative EV. Options between -2 and +2 are available. |
| White Balance You can adjust the white balance based on the ambient lighting. Options Include: Auto, Daylight, Cloudy, Flourescent 1, Flourescent 2, and Flourescent 3. | |
| ISO Sensitivity Increasing ISO will make the camera more sensitive to light. Try increasing ISO in low-light conditions, or leave it set to "Auto" | |
| Color | Adjusts color saturation. Options Include: natural, bright, and grey. |
| Effect | Photo effects include: Normal, retro, black and white, relief, negative, drawing, painting, crayon. |


English


Connecting to a Computer
To connect your camera to a Computer
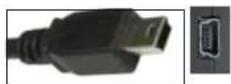
Connect the camera to your computer using the included USB to Mini-USB Cable.
By default, your device connects to your computer in Mass Storage mode, and acts like a flash drive. Videos can be viewed with any standard video player that supports .avi files.

NOTE: Quicktime, the native video player for Mac, only supports specific types of .avi files and cannot playback this camera's videos. For links to third party players that will work on Mac, visit www.cobra.com/support/software-downloads.
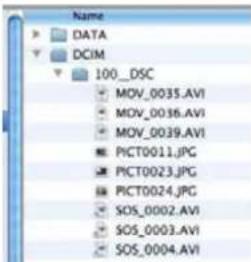
Movies that are locked begin with "SOS_" and movies that are not locked begin with "MOV_".
Note that if the Memory card gets too full, videos that are not locked will be overwritten to make room for new videos. If you want to save any videos that begin with "MOV_" you should copy them to your computer, or Lock the files.
To switch the camera's USB function
| If you prefer to connect your camera to your PC as a web or video camera, you can change this setting in the settings menu. |
| Disconnect the camera from your PC, enter General Settings, and change the USB Function to MSDC. |
| Then, when you reconnect your camera to your PC, it will use this function |


Troubleshooting & Trademark Acknowledgement
Your Dash Cam

Specifications and Product Service & Support
Troubleshooting
If your unit does not appear to be operating properly, please follow these troubleshooting steps:
■ Make sure the power cord is properly connected.
■ Make sure the socket of your vehicle's cigarette lighter is clean and free of corrosion.
■ Make sure the power cord's cigarette lighter adapter is firmly seated in your cigarette lighter, and the Status LED is on between the UP and DOWN buttons.
- Check the power cord fuse. (Unscrew the ribbed end cap of the cigarette lighter adapter and examine the fuse. If required, replace it with a 2-amp fuse only.)
For detailed and up-to-date FAQ's, please visit www.cobra.com/support/faqs.
Trademark Acknowledgement
Cobra, the snake design, Drive HDTM, the d design, and Record your rideTM are proprietary trademarks of Cobra Electronics Corporation, USA. Other trademarks and trade names are those of their respective owners.
Cobra Electronics Corporation™ is a trademark of Cobra Electronics Corporation, USA. HDMI, the HDMI logo, and High-Definition Multimedia Interface are trademarks or HDMI registered trademarks of HDMI licensing LLC in the United States and other countries.
NOTE: This device complies with part 15 of FCC rules: Operation is subject to the following two conditions: (1) This device may not cause harmful interference, and (2) This device must accept any interference received including interference that may cause undesired operation.
CAUTION: Modifications or parts not approved by Cobra Electronics Corporation may violate FCC Rules and void authority to operate this equipment.
This device complies with RSS-310 of Industry Canada. Operation is subject to the condition that this device does not cause harmful interference.
CAN ICES-3B/NMB-3B.
DISPOSAL OF ELECTRONICS EQUIPMENT: This product may contain hazardous substances that could impact health and the environment if not disposed of properly. The crossed out wheeled bin symbol indicates that the product should not be disposed of along with household waste. It should be handed over to an applicable collection point for the recycling of electrical equipment. By ensuring that this product is disposed of correctly you will help/prevent potential negative impact on the environment. If you need more information on the collection, reuse and recycling systems, please contact your local civic office or the shop where it was originally purchased. WARNING: This product contains chemicals know to the State of California to cause cancer and birth defects or other reproductive harm.



HDMI
Camera Specifications:
Visual Angle.... 118 degrees
Sensor 5 MP CMOS
Video resolution.... 1080P 1920x1080 30 fps
720P 1280x720 60 fps
720P 1280x720 30 fps
480P 640x480 30 fps
Video Format....avi
Picture Resolution 4032x3094 (Max. 14 MP)
Picture Format...... JPEG
White Balance.... Auto
Color Effect ...... Auto
Continuous Loop Recording.... Supported
Motion Detection .... Supported
Date and Time Stamp ...... Supported
Media Supported.... micro SD Card - 8GB Included (32GB Max)
Languages ..... English, Dutch, French, German, Portuguese, Russian, Spanish, Chinese
Sound Recording .... Synchronous video and sound record
USB Interface.... USB 2.0
USB Web Camera.... Supported
USB Mass Storage.... Supported
Display Screen.... 1.5" LCD
Battery.... Rechargeable Lithium-Ion
Camera Capacity:
1080P Recording time with 8GB card (included).... 120 minutes
1080P Recording time with 16GB card 240 minutes
1080P Recording time with 32GB card (max) 480 minutes
Product Service & Support
For any questions about operating or installing this new Cobra product, PLEASE CONTACT COBRA FIRST...do not return this product to the retail store. The contact information for Cobra will vary depending on the country in which you purchased and utilize the product. For the latest contact information, please go to www.cobra.com/support
For products purchased in the U.S.A. you may also call 1-800-262-7212 (1-800-COBRA-12). For Products Purchased in the U.S.A., if your product should require factory service, please go to www.cobra.com/support and follow the instructions for returning your product to the Cobra Factory Service Department for service.

1 English

- Important Information
- Controls Indicators and Connections
- Product Features
- Camera Features
- Additional Features
- Limited 1-Year Warranty
- Introduction
- Your Device
- Customer Information
- What's in the Box
- Installation
- Where to Mount Your Unit
- Device Operation
- Powering the Device On and Off
- Charging the device
- Video Record, Still Photo, and Playback Modes
- Your Dash Cam Device Operation
- Video Mode
- Still Photo Mode
- Video and Photo Playback Modes
- File Selection Screen
- Video Protection Screen
- Adjusting Camera Settings
- Language Selection
- Video Settings
- Adjusting Video Settings
- To Adjust General Settings
- Still Photo Mode Settings
- Connecting to a Computer
- To connect your camera to a Computer
- Troubleshooting & Trademark Acknowledgement
- Specifications and Product Service & Support
- Troubleshooting
- Trademark Acknowledgement
- Camera Specifications:
- Camera Capacity:
- Product Service & Support
Brand : COBRA
Model : CDR 820E
Category : Dash cam