
LR9502 - Kitchen sink LEISURE - Free user manual and instructions
Find the device manual for free LR9502 LEISURE in PDF.


| Product Type | Kitchen sink |
| Brand | Leisure |
| Model | LR9502 |
| Material | Stainless steel |
| Mounting Type | Topmount |
| Number of Bowls | Single bowl |
| Overall Dimensions (L x W) | 33 x 22 inches |
| Bowl Depth | 9 inches |
| Drain Opening | 3.5 inches |
| Finish | Brushed satin |
| Weight | 15 lbs |
| Included Accessories | Drain kit, mounting clips |
| Cleaning Instructions | Clean with mild soap and water; avoid abrasive cleaners |
| Warranty | Limited lifetime warranty |
| Compatibility | Standard 33-inch cabinet |
| Certifications | cUPC, ANSI |
Frequently Asked Questions - LR9502 LEISURE
User questions about LR9502 LEISURE
0 question about this device. Answer the ones you know or ask your own.
Ask a new question about this device
Download the instructions for your Kitchen sink in PDF format for free! Find your manual LR9502 - LEISURE and take your electronic device back in hand. On this page are published all the documents necessary for the use of your device. LR9502 by LEISURE.
USER MANUAL LR9502 LEISURE
Stainless Steel Inset Sinks with Fixed Position Clips
- It is recommended that the inset sink is fitted to the worktop before being permanently fixed to the cabinet.
- Place the sink upside down on worktop. Position the sink relative to the worktop as required, ensuring that the cabinet framework will be clear of all parts of the sink, or alternatively where provided use cut-out template found on sink wrapper.

- Remove the sink and draw another line 10mm inside the outline of the sink top.

This is the cutting line for the aperture.
-
Drill as large a hole as possible inside the cutting line. Using a pad saw, jig saw or similar, cut out the aperture to the cutting line.
-
Remove the paper backing from the quadrant section and apply to all 4 corners of the sink.

natural_image
Close-up of a metallic tool component with a circular feature, showing surface texture and edge details (no text or symbols visible)Remove the protective back from the main seal and stick to the underside of sink.

natural_image
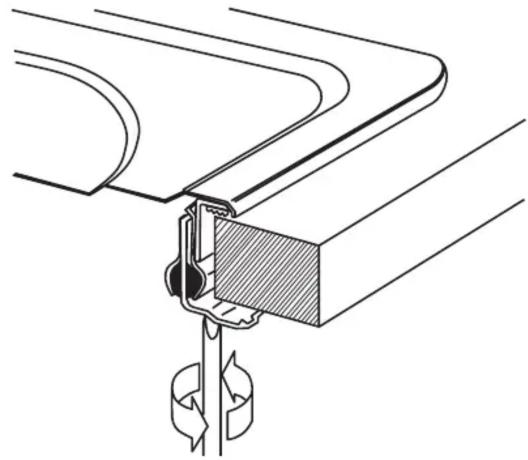
Close-up of a hand holding a damaged dark material with a white tip, alongside a close-up of a metallic object on a surface (no text or symbols visible)- Attach the fi xing clips to the sink rail ensuring that the two ‘prongs’ of the clip face inwards. Open the hinge on the clip.

- Turn the sink upside down and lay the worktop over the sink. Swing the clip into position. (This is the most effective method although if the worktop has been fixed to the cabinet, the sink can be placed in the aperture and the fixing effected from underneath).
- Loosely tighten the corner fi xing clips to centralise the sink in the cut-out.
- Tighten the fixing screws.
natural_image
Technical line drawing of a mechanical assembly with curved components and a central rectangular block (no text or symbols)Do not overtighten the fi xing clamps once the sink is fully bedded in the sealing tape. Do not tighten fully at the fi rst attempt.
- In certain circumstances it may not be possible to fit a clip to all the fixed positions; provided a good seal is achieved it is not detrimental to omit clips where diffi culty arises.
Recommended tightening sequence for sink fi xing clips

contour
| Group | Contour Description | Value Range | |-------|------------------------------------------|-----------| | 8 CLIPS | 860x435 or 950x508 | 860x435 or 950x508 | | 9 CLIPS | 860x435 or 950x508 | 860x435 or 950x508 | | 10 CLIPS | 860x435 or 950x508 | 860x435 or 950x508 | | 12 CLIPS | 1160x508 | 1160x508 |After Care Stainless Sinks
Day to Day Care
Routine cleaning of your stainless steel sink is easy if the following simple procedure is followed After use wipe the bowl and drainer with a soft damp soapy cloth, rinse with clean water. In hard-water areas, an application of Jif will avoid any build-up of dull fi lm of waterborne deposits. Although stainless steel is an extremely durable material and will withstand a great deal of hard use, it can be scratched by hard or sharp objects. If the surfaces are to be kept in a blemish free condition reasonable care should be taken when handling such items.
Discolouration and Heavy Staining
Staining of stainless steel in most cases is due to something being deposited on the steel rather than an attack on the material itself. The most common cause of staining is the build up of a thin fi lm of water borne deposits on the sink surface, often fi rst seen as a rainbow effect. The build up of such a fi lm can be avoided by drying the surface of the sink after use as described above. However, should such a fi lm appear, it can be readily removed with a soft damp cloth and Jif. To remove the fi lm, apply the Jif neat and rub vigorously with a damp cloth along the length of the sink surface. After cleaning rinse thoroughly with clean water and dry. Wire wool products and ferrous water supply pipes can leave minute ferrous particles adhered to the sink surface. Since stainless steel under normal conditions does not rust, these particles can cause the appearance of small brown rust stains. These stains can be removed using the procedure described above.
CAUTION :
Certain household products contain substances which will attack the stainless steel surface, they are :
1. Bleaches :
Most common domestic bleaches contain Chlorine in the form of a hypochlorite. Chlorine attacks the microscopic Chromium Oxide fi Im on the surface and can cause pitting of the surface. Bleaches should always be used in the prescribed strength specified by the manufacturers. Undiluted bleaches can cause pitting and staining of the surface and should be immediately rinsed off with plenty of clean water. All cleaning agents containing hypochlorites are unsuitable for use with stainless steel and, even highly diluted, can cause pitting under certain conditions. For this reason it is strongly recommended that the sink is not used for soaking clothes or cleaning clothes in hypochlorite solutions for long periods.
2. Silver Dip Cleaners :
These are particularly harmful since they contain strong acids which can cause discolouration and pitting. The first sign of this is an iridescent rainbow stain which turns an etched dull grey colour. Should any Silver Dip Cleaner come into contact with the surface of the sink it should be immediately rinsed off with plenty of clean water.
3. Corrosive Foodstuffs :
Fruit juices, damp salt, vinegar, readymade mustards, pickle and mayonnaise can cause pitting and corrosion if left in contact with the stainless steel surface for long periods.
4. Acids :
Sulphuric, Hydrochloric and other strong acids will cause pitting corrosion, as will photographic developing liquids. All should be immediately washed off with plenty of clean water if contact occurs.
Cleaning :
Always use a soft cloth. The use of coarse grit scouring powders or soap filled wire wool cleaning pads is not recommended, since both will mark the surface of the sink. Wire wool pads can leave tiny fragments of wire embedded in the surface and these can rust and leave small brown rust stains. Vigorous rubbing with a soft cloth, JIF, neat detergent, cleaning cream or liquid will remove these stains. Always remove wet cleaning aids (cloths, containers, etc.) from the sink surface after use in order to avoid the formation of water marks and rust stains.
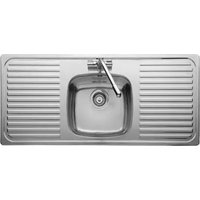

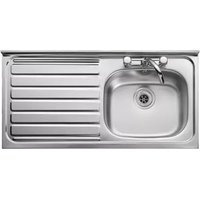


Brand : LEISURE
Model : LR9502
Category : Kitchen sink