
DVH-7781MK2 - DVD player DENVER - Free user manual and instructions
Find the device manual for free DVH-7781MK2 DENVER in PDF.


| Product Type | DVD Player |
| Brand | Denver |
| Model | DVH-7781MK2 |
| Dimensions (W x D x H) | Approx. 43 x 25 x 4 cm |
| Weight | Approx. 1.5 kg |
| Power Supply | AC 100-240V, 50/60Hz |
| Power Consumption | < 15 W |
| Disc Playback | DVD, CD, VCD, MP3, JPEG |
| Video Output | HDMI, Composite |
| Audio Output | Stereo RCA, Coaxial |
| USB Port | Yes, for multimedia playback |
| Card Slot | SD/MMC slot |
| Remote Control | Included |
| Region Code | 2 (EU) or configurable |
| Cleaning | Wipe with a soft, dry cloth |
| Safety | Keep away from liquids; ensure ventilation |
| Spare Parts | Remote control available from manufacturer |
| Reparability | Contact authorized service center |
| General Information | Standard home DVD player with multiple playback options |
Frequently Asked Questions - DVH-7781MK2 DENVER
User questions about DVH-7781MK2 DENVER
0 question about this device. Answer the ones you know or ask your own.
Ask a new question about this device
Download the instructions for your DVD player in PDF format for free! Find your manual DVH-7781MK2 - DENVER and take your electronic device back in hand. On this page are published all the documents necessary for the use of your device. DVH-7781MK2 by DENVER.
USER MANUAL DVH-7781MK2 DENVER
For your protection, please read these safety instructions completely before operating the appliance, and keep this manual for future reference.
Carefully observe all warnings, precautions and instructions on the appliance and in the operating instructions, and adhere to them.
INSTALLATION
Water and Moisture - Do not use powering operated appliances near water - for example, near a bathtub, washbowl, kitchen sink, or laundry tub, in a wet basement, or near a swimming pool, etc.
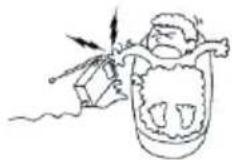
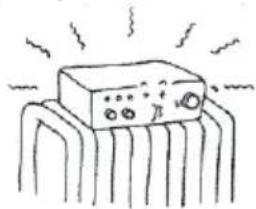
Heat - Do not place the appliance near or over a radiator or heat register, or where it is exposed to direct sunlight.
natural_image
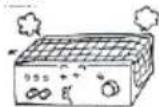
Simple line drawing of an electronic component with no text or symbolsVentilation - The slots and openings in the cabinet are provided for necessary ventilation. To ensure reliable operation of the appliance, and to protect it from overheating, these slots and openings must never be blocked or covered.
- Never cover the slots and openings with a cloth or other materials.
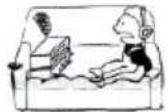
- Never block the slots and openings by placing the appliance on a bed, sofa, rug or other similar surface.
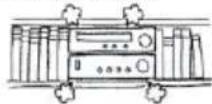
- Never place the appliance in a confined space, such as a bookcase, or built-in cabinet, unless proper ventilation is provided.
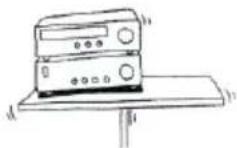
Accessories - Do not place the appliance on an unstable cart, stand, tripod, bracket, or table. The appliance may fall, causing serious injury to a child or an adult, and serious damage to the appliance, Use only a cart, stand, tripod, bracket, or table recommended.
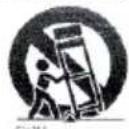
- An appliance and cart combination should be moved with care. Quick stops, excessive force, and uneven surfaces may cause the appliance and cart combination to overturn.
WALL or Ceiling Mounting - If your appliance can be mounted to a wall or ceiling, mount it only as recommended.
USE
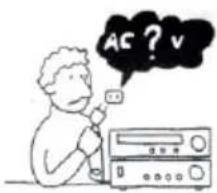
Power Source - This appliance should be operated only from the type of power source indicated on the marking label. If you are not sure of the type of electrical power supplied to your home, consult your dealer or local power company. For those appliances designed to operate from battery power, or other sources, refer to the operating instructions.
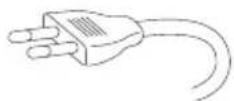
Grounding or Polarization - This appliance is equipped with a polarized AC power cord Plug(a plug having one blade wider than the other), or with two-wire grounding type plug) Plug having a second pin for grounding). A follow the instructions below:
- For the appliance with a polarized AC power Cord plug:
This plug will fit into the power outlet only one way. This is a safety feature. If you are unable to insert the plug fully into the outlet, try reversing The plug. If the plug should still fail to fit, contact your electrician to have a suitable outlet Installed. Do not defeat the safety purpose of the Polarized plug by forcing it in.
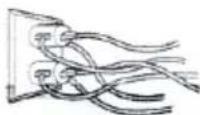
Overloading - Do not overload wall outlets, extension cords or convenience receptacles beyond their capacity, since this can result in fire or electric shock.
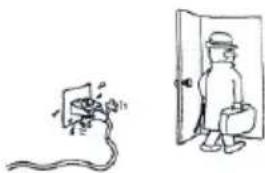
When not in use - Unplug the power cord of the appliance from the outlet when left unused for a long period of time.
To disconnect the cord, pull it out by grasping the plug. Never pull the plug out by the cord.
natural_image
Illustration of a person holding a bucket next to an electrical plug and cable, next to a door (no text or symbols)Power-Cord Protection - Route the power cord so that it is not likely to be walked on or pinched by items placed upon or against them, paying particular attention to the plugs, receptacles, and the point where the cord exits from the appliance.
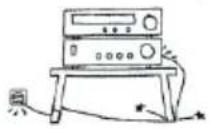
Lightning - For added protection for this appliance during a lightning storm, or when it is left unattended and unused for long periods of time, unplug it from the wall outlet and disconnect the antenna or cable system. This will prevent damage to the appliance due to lightning and powerline surges.
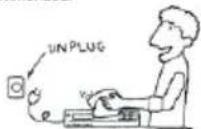
Cleaning - Unplug the appliance from the wall outlet before cleaning or polishing it. Do not use liquid cleaners or aerosol cleaners. Use a cloth lightly dampened with water for cleaning the exterior of the appliance. Clean the appliance only as recommended.
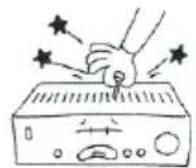
Object and Liquid Entry - Never push objects of any kind into the appliance through openings as they may touch dangerous voltage points or short out parts that could result in a fire or electric shock. Never spill liquid of any kind on the appliance.
ANTENNAS
Outdoor Antenna Grounding - If an outdoor antenna or cable system is installed, follow the precautions below.
An outdoor antenna system should not be located in the vicinity of overhead power lines or other electric light or power circuits, or where it can come in contact with such power lines or circuits. WHEN INSTALLING AN OUTDOOR ANTENNA SYSTEM, EXTREME CARE SHOULD BE TAKEN TO KEEP FROM CONTACTING SUCH POWER LINES OR CIRCUITS AS CONTACT WITH THEM IS ALMOST INVARIABLY FATAL.
Be sure the antenna system is grounded so as to provide some protection against voltage surges and built-up static charges. Section 810 of the National Electrical Code provides information with respect to proper grounding of the mast and supporting structure. Grounding of the lead-in wire to an antenna discharge unit, size of grounding conductors, location of antenna-discharge unit, connection to grounding electrodes, and requirements for the grounding electrode.
Antenna Grounding According to the National Electrical code
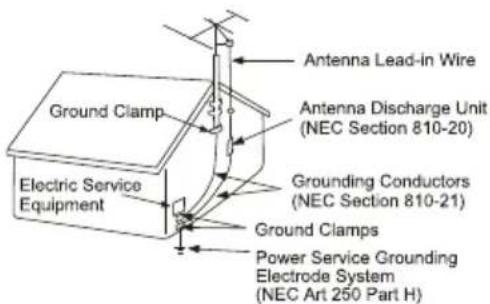
NEC-NATIONAL ELECTRICAL CODE
SERVICE
Damage Requiring Service- Unplug the appliance from the wall outlet and refer servicing to qualified service personnel under the following conditions:
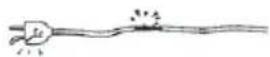
- When the power cord or plug is damaged or frayed.
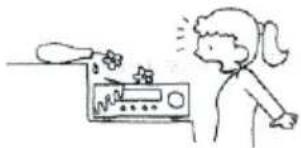
- If liquid has been spilled or objects have fallen into the appliance.
natural_image
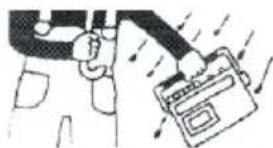
Simple line drawing of a person reacting to a device with a fan (no text or symbols)- If the appliance has been exposed to rain or water.
natural_image
Illustration of a person using a device with motion lines indicating movement (no text or symbols)- The appliance does not appear to operate normally or exhibits a marked change in performance. - This indicates a need for service.
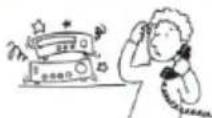
- If the appliance does not operate normally when following the operating instructions, adjust only those controls that are specified in the operating instructions. Improper adjustment of other controls may result in damage and will often require extensive work by a qualified technician to restore the appliance to normal operation.
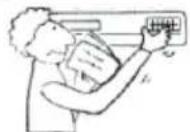
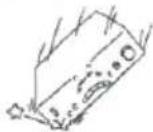
- If the appliance has been subject to excessive shock by being dropped, or the cabinet has been damaged.
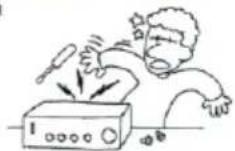
Servicing - Do not attempt to service the appliance yourself as opening or removing covers may expose you to dangerous voltage or other hazards. Refer all servicing to qualified service personnel
Replacement parts- When replacement parts are required, be sure the service technician has used replacement parts specified that have the same characteristics as the original parts. Unauthorized substitutions may result in fire, electric shock or other hazards.
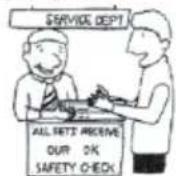
Safety Check - Upon completion of any service or repairs to the appliance, ask the service technician to perform routine safety checks) as specified ) to determine that the appliance si in safe operating condition.
-
Do not install this equipment in a confined or building-in space such as a book case or similar unit, and remain a well ventilation conditions. The ventilation should not be impeded by covering the ventilation openings with items such as newspaper, table-cloths, curtains etc. Minimum 10 cm distance around the apparatus for sufficient ventilation.
-
WARNING: To reduce the risk of fire or electric shock, do not expose this apparatus to rain or moisture. The apparatus shall not be exposed to dripping or splashing and that objects filled with liquids, such as vases, shall not be placed on apparatus.
-
WARNING: The batteries shall not be exposed to excessive heat such as sunshine, fire or the like.
-
WARNING: The mains plug is used as disconnect device, the disconnect device shall remain readily operable.
-
Invisible laser radiation when open and interlocks defeated. Avoid exposure to beam of laser.
-
Correct Disposal of this product. This marking indicates that this product should not be disposed with other household wastes throughout the EU. To prevent possible harm to the environment or human health from uncontrolled waste disposal, recycle it responsibly to promote the sustainable reuse of material resources. To return your used device, please use the return and collection systems or contact the retailer where the product was purchased. They can take this product for environmental safe recycling.
FRONT PANEL AND REAR PANEL ILLUSTRATION
FRONT PANEL
The front of the DVD player
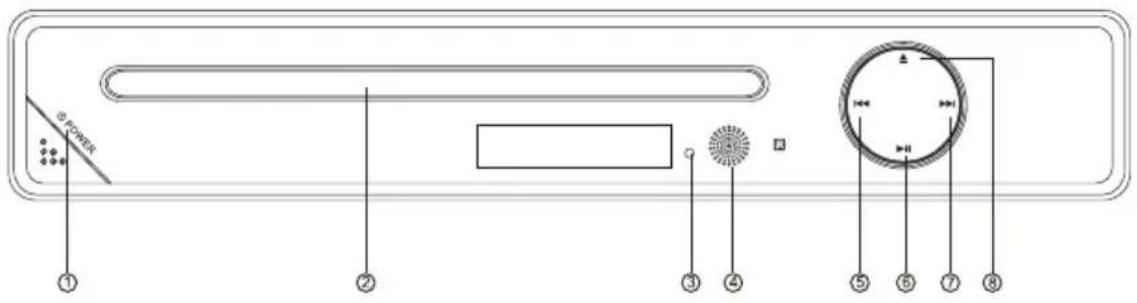
① POWER
③ power LED indicator
⑤ PREV
⑦ NEXT
② CD DOOR
④ REMOTE CONTROL SENSOR
⑥ PLAY/PAUSE
⑧ OPEN/CLOSE
The back of the DVD player
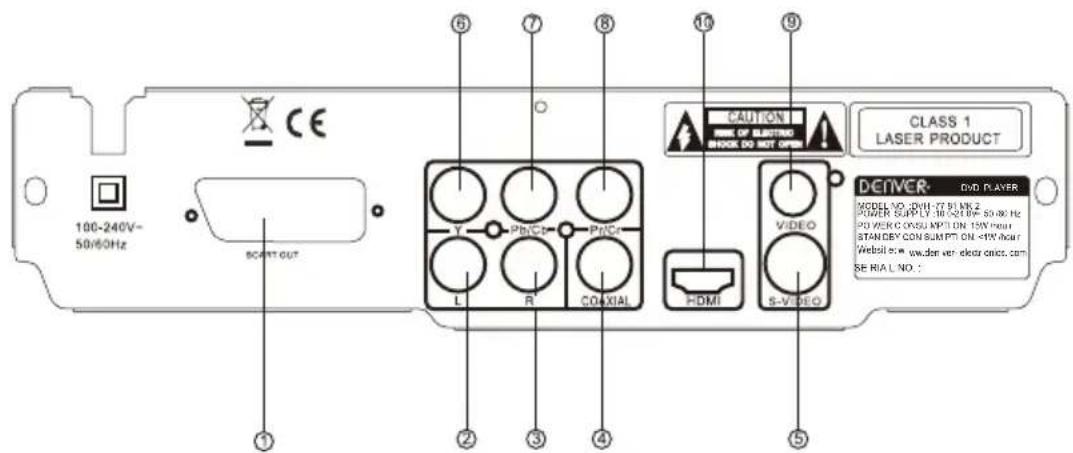
① Scart output jack
④ Digital signal COAXIAL output jack
⑦ Pb/Cb output jack
② LEFT output jack
⑤ S-Video output jack
⑧ Pr/Cr output jack
③ RIGHT output jack
⑥ Y output jack
⑨ VIDEO output jack
⑩ HDMI output jack
REMOTE CONTROL
- When use, direct the remote control to the infra-red sensor (within 45 degrees)
- Do not put remote control near to the place with high temperature or moisture
- Do not put water or any other object on remote control
- Do not use new and old batteries or different type batteries together
- Please replace batteries when find remote control is out of work or weak sensitivity.
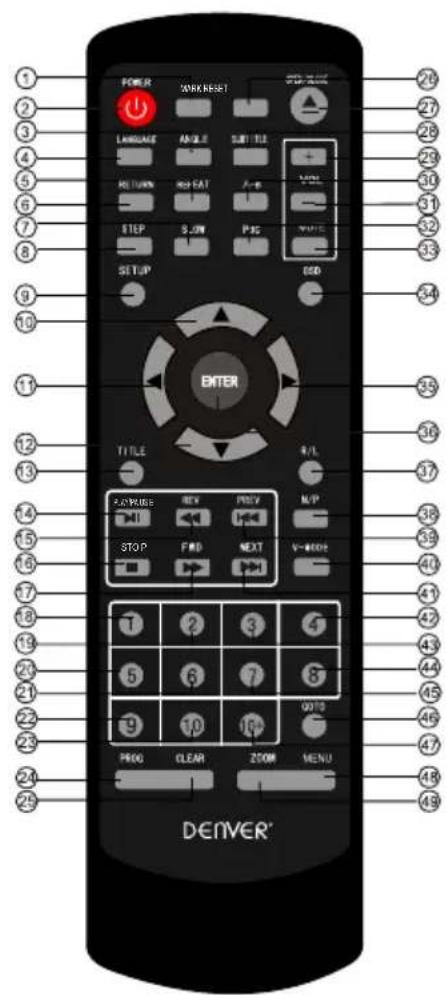
| 1 MARK | 21 6 | 41 NEXT |
| 2 POWER | 22 9 | 42 4 |
| 3 ANGLE | 23 10 | 43 3 |
| 4 LANGUAGE | 24 PROG | 44 8 |
| 5 REPEAT | 25 CLEAR | 45 7 |
| 6 RETURN | 26 RESET | 46 GO TO |
| 7 SLOW | 27 OPEN/CLOSE | 47 10+ |
| 8 STEP | 28 SUBTITLE | 48 MENU |
| 9 SETUP | 29 VOL + | 49 ZOOM |
| 10 UP | 30 A-B | |
| 11 LEFT | 31 VOL - | |
| 12 DOWN | 32 PBC | |
| 13 TITLE | 33 MUTE | |
| 14 PLAY/PAUSE | 34 OSD | |
| 15 REV | 35 RIGHT | |
| 16 STOP | 36 ENTER | |
| 17 FWD | 37 R/L | |
| 18 1 | 38 N/P | |
| 19 2 | 39 PREV | |
| 20 5 | 40 V-MODE |
OSD SETUP
This player allows you to customise the performance to your personal preferences.

flowchart
graph TD
    A["Setup Menu"] --> B["Language"]
    A --> C["Video"]
    A --> D["Audio"]
    A --> E["Rating"]
    A --> F["Misc"]
Displaying the setup menu screen
The setup preferences.
The selected category will provide you the setting details using the following screen.
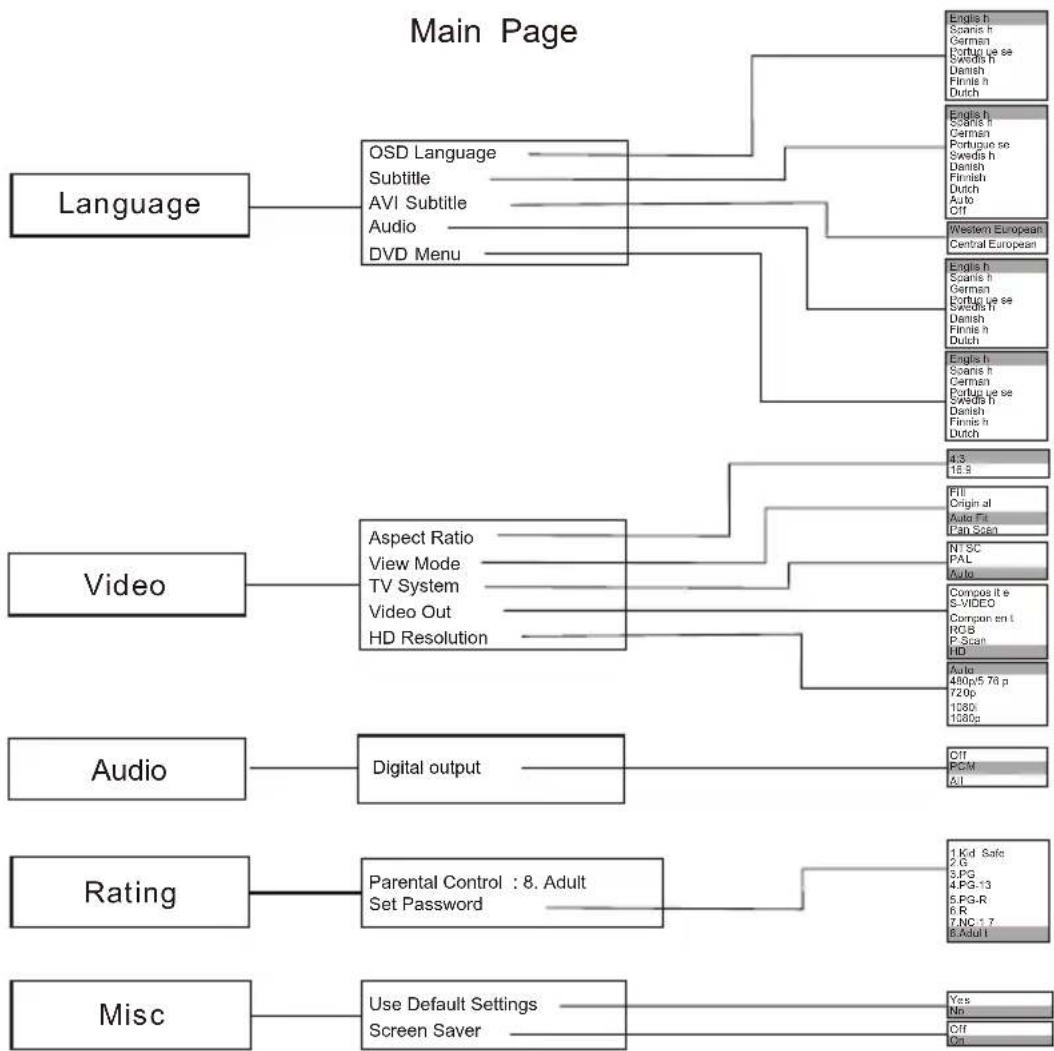
flowchart
graph TD
    A["Language"] --> B["OSD Language"]
    A --> C["Subtitle"]
    A --> D["AVI Subtitle"]
    A --> E["Audio"]
    A --> F["DVD Menu"]
    B --> G["English h: Spanish h: German: Portugal se: Sweden h: Danish: Finnish h: Dutch"]
    C --> H["English h: Spanish h: German: Portugal se: Sweden h: Danish: Finnish: Dutch: Auto Off"]
    D --> I["Western European Central European"]
    E --> J["English h: Spanish h: German: Portugal se: Sweden h: Danish: Finnish h: Dutch"]
    F --> K["English h: Spanish h: German: Portugal se: Sweden h: Danish: Finnish h: Dutch"]
    L["Video"] --> M["Aspect Ratio"]
    L --> N["View Mode"]
    L --> O["TV System"]
    L --> P["Video Out"]
    L --> Q["HD Resolution"]
    M --> R["4/3 18.5"]
    N --> S["FII Origin al Auto Fit Pan Scan"]
    O --> T["N1 SC PAL Auto"]
    P --> U["Composite e S-VIDEO Compon en t IRGB P Scan HD"]
    Q --> V["Auto 480p5 78 p 720p 1380 1380c"]
    W["Audio"] --> X["Digital output"]
    Y["Rating"] --> Z["Parental Control : 8. Adult Set Password"]
    AA["Misc"] --> AB["Use Default Settings Screen Saver"]
    AC["Off"] --> AD["Yes No Off On"]
Set on "PARENTAL CONTROL" under "Rating", Press "enter" and input code 8888 (The original factory code is 8888). After input and confirm the code, press "PARENTAL CONTROL" and choose the desired rating. Move below to "SET PASSWORD", press enter and input the code "8888", then input the new code, Under "SET PASSWORD", input again the code, and confirm. The function of "PARENTAL CONTROL" is effective.
- During playback, press POWER to stop the player and close the power.
To open the disc tray, press OPEN/CLOSE
To close the disc tray, press OrganClose
During DVD playback, press TITLE to display the DVD title menu or play the first title. Note: this function is subject to the disc.
During DVD playback, press MENU to display the disc menu of the current title. Note: This function is subject to the disc
Under the stop mode, Press this button to switch the video of ① CVBS ② YUV ③ P-scan ④ RGB ⑤ S-video ⑥ HD
During VCD/DVD playback, press OSD to display the current time counter position as follows.
VCD 2.0

Elapsed time Left time for the current track
DVD VIDEO

Elapsed time Left time for the current track

0-10 Keys

- During VCD/SVCD playback, Press PBC to select the mode of PBC On or PBC Off PBC is: playback control used to navigate VCD/SVCD.
• These keys are used to input the time, as well as title, chapter and track numbers
- When a CD,DVD or VCD is playing (with PBC off), press the 0-10 keys to select a track directly.
- When a numeric item is displayed on the screen, press the 0-10 keys to select the desired entry.
During AVI, DVD, VCD or SVCD playback, press SLOW for slow motion playback.
Once you press SLOW, the disc will play at 1/2, 1/4, 1/6 and 1/8 normal speed.
- Press PLAY to resume normal playback.
During AVI, DVD, CD or VCD playback, press PREV to play the previous chapter, title or track.
During AVI, DVD, CD or VCD playback, press NEXT to play the next chapter, title or track.
SLOW

PREV

NEXT

REPEAT

• Each press of the REPEAT button will change the repeat mode.
During VCD, CD playback, there are three modes: repeat Single, repeat All and Off. During AVI/DVD, playback, there are three modes: repeat character, repeat title and Off. Note: During VCD playback, the PBC mode must be set to Off
A-B

• During playback, press A-B to select point A
- Press it again to select point B. The player will repeat the section from A to B automatically.
- Press A-B a third time to cancel A-B repeat and clear points A and B.
Note: During AVI/CD/VCD/SVCD playback, points A and B must be within the same track. During AVI/DVD playback, points A and B can be selected from different chapters.
During AVI/DVD, CD or VCD playback, press REV To in reverse. the disc at 2, 4, 8 and 16 times speed
• Press PLAY to resume normal playback.
- During AVI/DVD, CD or VCD playback, press FWD to forward. The disc at 2, 4, 8 and 16 times speed.
- Press PLAY to resume normal playback.
- Press N/P when in STOP mode to select the mode from PAL / AUTO /NTSC .
REV

FWD

N/P

Press MUTE to turn off the audio.
Press MUTE again to resume normal sound.
R/L
During VCD/SVCD playback, press R/L repeatedly to select the channel of audio-output: Left / Right / Mix / Stereo.
CLEAR
Press CLEAR to delete the numbers you have entered.
PLAY/PAUSE
Press PAUSE during playback to pause playback.
Press again to step forward one frame
Press PLAY to resume normal palyback.
NOTE: the step function is not available during CD playback
STOP
Press STOP once during playback to stop and hold playback.
Press PLAY to resume playback from the point you have pressed STOP.
Press STOP twice to stop playback completely.
RETURN
When the PBC is on, press return ,and you can select once again from the menu displaying. This function is only valuable to VCD.
ZOOM
During VCD/SVCD/DVD/AVI playback, press ZOOM to magnify the image
as follows:
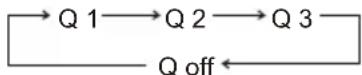
This function can zoom, can't lessen
STEP
When playing AVI/DVD, VCD, SVCD disc, press STEP once, the picture changes to next frame, Press PLAY to resume normal play.
SETUP
Press the SETUP button on you remote control to access the setup menu. The setup menu is a Multi-level Menu.
Use the ▼ or ▲ buttons to select the menu option that you need.
Use the ◀ and ▶ to go back to previous level menu or to enter the next level menu.
Press ENTER button to confirm selection.
Press SETUP button to exit setup.
RESET
Under the stop mode, Press this key to reset the DVD player to default mode, this will not recover your Password set up.
Press VOL + to increase the volume. Press VOL - to reduce the volume.
ANGLE
During DVD playback, Press ANGLE to view scenes from different camera angles. Press ANGLE repeatedly to change from one camera angle to another. Note: This function is disc specific.
SUBTITLE
During DVD playback, Press SUBTITLE repeatedly to select from up to 32 subtitle languages. Note: This function is disc specific (language will vary).
LANGUAGE
Press LANGUAGE repeatedly to select from up to 8 audio languages/formats during DVD playback. Press repeatedly to select from up to 4 audio languages/formats during SVCD playback. Note: This function is disc specific LANGUAGE
GOTO
During AVI/DVD, VCD playback, press GOTO, and the menu will display as follow:
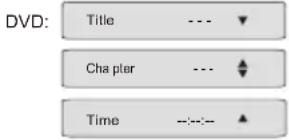
Use ↑ ↓ to select TITLE, CHAPTER, TIME. Use the number keys to input the desired time or track, then press ENTER to Confirm. During DVD playback, press SEARCH, and the menu will display as follow:
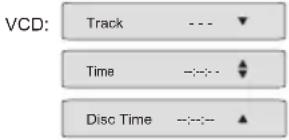
Use ↑ ↓ to select TRACK, TIME or DISC TIME. Use the number keys to input the desired time, title or chapter, then press ENTER to confirm.
Note: 1) TIME searches for an exact time in the track. 2) TRACK searches for a desired title or chapter. 3) For some DVD discs, the search function is unavailable.
MARK
When you're playing a disc, if you want to keep a special moment as a memory you can press "Mark" button, then in a later time when you want to re-play the disc from this special moment again, you just press 'Mark' button.
PROG
Press PROG to get program menu when reading DVD & VCD, then program your wanted songs. (DVD programme needs TITLE and MENU.)
When playing music, press "right", "up" or "down" and "enter" to choose edit mode, and then Press"left" and "enter" to choose the music you want.
After that, press "right" and "enter" to choose "add to program", and then "up" and "enter" to choose "program view", next press "up" to choose "edit mode" and then press "Left" and "enter" to choose the music, press "play" to play the music.
Cancel program:
After program, press "stop" twice, and press "right" to choose "edit mode", and then press "left" to choose the music you'd like to cancel and "enter" to confirm your operation.
Press "right" and "enter" to choose "clear program", then press "Right" to "browse view" and return to play in order.
Note :
If you are playing songs or viewing Jpeg pictures, the maximum supported files on each folder is 500.
In the case of having more than 500 pictures or songs, then you need to create a new folder and make sure each of them. Do not exceed more than 500 files. For example: if you have 1020 files, then you need to create
3 different folders where in 2 of them you will need to record 500, Files in each and the third folder with the remaining 20 files. This way the unit will be able to recognize the folders and thus play all the content.
HDMI Function:
- Connect HDMI cable to HDMI output of the rear panel of DVD player and TV.
- Set TV mode to 'HDMI' mode
- Press 'setup' button on remote control, in system setup/HD output, please choose the HDMI mode (480P, 576P, 720P, 1080i, 1080P) you want.
Note: This DVD Player is set up for HDMI Connection, with connection to the TV via an HDMI cable (not supplied) connecting the HDMI socket on your TV and on the DVD player.
However IF you connect to a TV using the SCART socket, please set the Video Output on the DVD Player to be "RGB" accordingly. To set the Video Output to RGB on the DVD Player, press "Setup" on the remote control then--> "Video" -->then "Video Output" -->then "RGB".
TROUBLE SHOOTING
REMOTE CONTROL IS INSENSITIVE OR DOES NOT WORK
Check the batteries of remote control and make sure that they are powerful and in good conductivity.
Direct the remote control to the IR sensor of the player.
Check whether there are some obstacles between the remote control and IR sensor.
ABNORMAL FUNCTION OPERATION
Turn off the power, and then turn on again.
The disc can not be taken out of the tray when the player is reading, so you have
to turn off the power and turn on again, and press OPEN/CLOSE key immediately to open the tray.
| Type of Disc | DVD/VCD/HDCD/CD/DVD ± R/RW,AVI/WMA,Kodak Picture CD | Frequency Response | CD: 4Hz 20KHz (EIAT) |
| DVD: 4Hz 22KHz (48K)4Hz 44KHz (96K) | |||
| Audio Format | MPEG 1, LAYER 1,LAYER 2 , LAYER 3 | S/N radio | >92 dB |
| THD | <0.04% | ||
| Signal Output | Color System: PAL/NTSC/MULTIAudio System: AC-3 Digital outputAudio DAC 16bit/48KHzVideo Output: 1 Vpp (at 75 ohm)Audio Output: 2 Vpp | Output Terminals | Video (composite) output X 1S-Video output X 12.0ch output X 1Digital coaxial output X1YPbPr output X1Scart output X1HDMI output X1 |
| Power input | AC100-240V~ 50/60Hz 15W | ||
| Dimensions | Body size : W225XD235XH50mmNet weight : 1.5KG |
Notes :
- There are many non-standardized AVI/DVD/WMA/CD-recording procedures and copyprotection procedures now in use, and many different kinds of DVD±R,DVD±RW ,CD-R and CD-RW blank disks. Therefore,in some cases read errors or read delays may be encountered. This is not a defect of the device.
- For CD-RW of CD-R, it may not be played according to the type of this disc.
Imported by:
Inter Sales A/S
Stavneagervej 22
DK-8250 Egaa
Denmark
ALL RIGHTS RESERVED
DENVER ELECTRONICS A/S
www.denver-electronics.com
Instructions on environment protection
Electric and electronic equipment and included batteries contains materials, components and substances that can be hazardous to your health and the environment, if the waste material (discarded electric and electronic equipment and batteries) is not handled correctly.
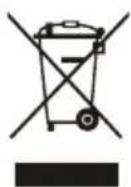
Electric and electronic equipment and batteries is marked with the crossed out trash can symbol, seen below. This symbol signifies that electric and electronic equipment and batteries should not be disposed of with other household waste, but should be disposed of separately.
As the end user it is important that you submit your used batteries to the appropriate and designated facility. In this manner you make sure that the batteries are recycled in accordance with legislature and will not harm the environment.
All cities have established collection points, where electric and electronic equipment and batteries can either be submitted free of charge at recycling stations and other collection sites, or be collected from the households.
Additional information is available at the technical department of your city.
- INSTALLATION
- USE
- ANTENNAS
- SERVICE
- FRONT PANEL AND REAR PANEL ILLUSTRATION
- FRONT PANEL
- REMOTE CONTROL
- OSD SETUP
- 0-10 Keys
- SLOW
- PREV
- NEXT
- REPEAT
- A-B
- REV
- FWD
- N/P
- R/L
- CLEAR
- PLAY/PAUSE
- STOP
- RETURN
- ZOOM
- STEP
- SETUP
- RESET
- ANGLE
- SUBTITLE
- LANGUAGE
- GOTO
- MARK
- PROG
- Cancel program:
- Note :
- HDMI Function:
- TROUBLE SHOOTING
- REMOTE CONTROL IS INSENSITIVE OR DOES NOT WORK
- ABNORMAL FUNCTION OPERATION
- Notes :
- Instructions on environment protection
Brand : DENVER
Model : DVH-7781MK2
Category : DVD player