
Storm S6 - Thermal camera RIX - Free user manual and instructions
Find the device manual for free Storm S6 RIX in PDF.


| Product Type | Smartphone |
| Dimensions | 150 x 70 x 8 mm |
| Weight | 180 g |
| Battery Capacity | 3000 mAh |
| Display Size | 5.5 inches |
| Operating System | Android |
| Processor | Quad-core 1.3 GHz |
| RAM | 2 GB |
| Internal Storage | 16 GB |
| Camera (Rear) | 8 MP |
| Camera (Front) | 5 MP |
| Connectivity | Wi-Fi, Bluetooth, GPS, 4G LTE |
| Sensors | Accelerometer, Proximity, Light |
| Power Input | 5V/2A via micro USB |
| Battery Type | Removable lithium-ion |
| Maintenance | Clean with soft dry cloth; avoid solvents |
| Safety | Do not expose to moisture or extreme temperatures |
| Spare Parts | Battery, screen, charger available online |
| Repairability | User-replaceable battery; other repairs by professional |
| General Information | Includes user manual (28 pages) |
Frequently Asked Questions - Storm S6 RIX
User questions about Storm S6 RIX
0 question about this device. Answer the ones you know or ask your own.
Ask a new question about this device
Download the instructions for your Thermal camera in PDF format for free! Find your manual Storm S6 - RIX and take your electronic device back in hand. On this page are published all the documents necessary for the use of your device. Storm S6 by RIX.
USER MANUAL Storm S6 RIX
THERMAL
IMAGING SCOPE
STORM
SERIES
User Manual V3.0

GET IT ON Google Play


Download on the App Store
Linktree*

We appreciate you choosing RIX.
Please read the instruction manual carefully before using this product.
Thank you and happy hunting!

TABLE OF CONTENTS
-
- Overview …01 …11Shortcut
-
- Features …01 …14Shortcut
-
- Description …02 Main Menu …15
-
- In the Box …04 …17Auto Ima
-
- Product Appearance …05 … 17Recoil Ad
-
- …06Device Installation …17Firmware
-
- …07Power Supply App Description …18
-
- …08Buttons and Maintenance …19
Knobs Operation
- …08Buttons and Maintenance …19
- Troubleshooting …19
…10Power On/Off - Legal and Regulatory …21
Status Bar …11 Information
01 PRODUCT OVERVIEW
Introducing the STORM series, featuring advanced thermal imaging technology and high-sensitivity infrared detectors for exceptional outdoor hunting and night vision capabilities. With the ability to perform in adverse weather conditions, such as rain, snow, fog, and haze, the STORM series is perfect for night hunting, observation, and geographic positioning. It offers a range of functions including photography, video recording, recoil activated video, digital zoom, PIP and multiple reticle options.
02 PRODUCT FEATURES
| Light weight, less than 1lb | Optical Zoom: 3.5x - 14x |
| High resolution 1024x768 display | PIP function |
| Replaceable 18650 battery, long battery life | Built-in Wi-Fi module, supporting app connection |
| High image quality | Weather mode |
| Built-in 32GB storage, photo and video recording available |
03 PRODUCT DESCRIPTION
| Model S1 S6 | S2 | S3 | ||
| Sensor Specifications | ||||
| Type | VOx Uncooled | |||
| Resolution, pixels | 192 × 144 256 × 192 | 384 × 288 | 640 × 480 | |
| Pixel pitch, μm | 12 | |||
| NETD, mK | < 25 | |||
| Frame rate, Hz | 50 | |||
| Optical Specifications | ||||
| Objective lens, mm | 19 F1.0 | 25 F1.0 | 35 F1.0 | 35 F1.0 |
| Optical zoom, x | 3.5 | 3.5 | 3.5 | 2 |
| Field of view, degrees / yd@100yd | 6.9 / 12.1 | 7.0 / 12.3 | 7.5 / 13.2 | 12.5 / 21.9 |
| Digital zoom, x | 1 to 2 1 to 4 | |||
| Eye relief, mm | 48 | |||
| Diopter adjustment, D | -5 to +5 | |||
| Detection range, m/yd | 1000 / 1093 1300 / 1422 | 1800 / 1969 | 1800 / 1969 | |
| Display Specifications | ||||
| Type | OLED | |||
| Resolution, pixels | 1024 × 768 | |||
| Wi-Fi | ||||
| Wireless protocol | Wi-Fi | |||
| Frequency, GHz | 2.4 | |||
| Video Recorder | ||||
| Video / Photo resolution, pixels | 1024 × 768 | |||
| Video / Photo format | .mp4 / .jpg | |||
| Built-in memory, GB | 32 | |||
| Model S1 S6S3S2 | |||
| Physical Specifications | |||
| Degree of protection, IP code | IP67 | ||
| Operating temperature range, °F | -4 to +122 | ||
| Weight, lb | 0.9 | 0.97 | |
| Dimensions, inch | 5.3 × 2.5 × 2.2 | ||
| Connections and Compatibilities | |||
| Battery type | 18650 | ||
| Capacity, mAh | 3200 | ||
| Operating time on battery pack (at t=72°F), h | 6 66 5 | ||
| External power supply, V | 5 (Type C USB) | ||
| Max. recoil power on rifled weapon (Eo), g/Joules | 1000 / 6000 | ||
| Compatible mounts | Picatinny mount | ||
04 IN THE BOX

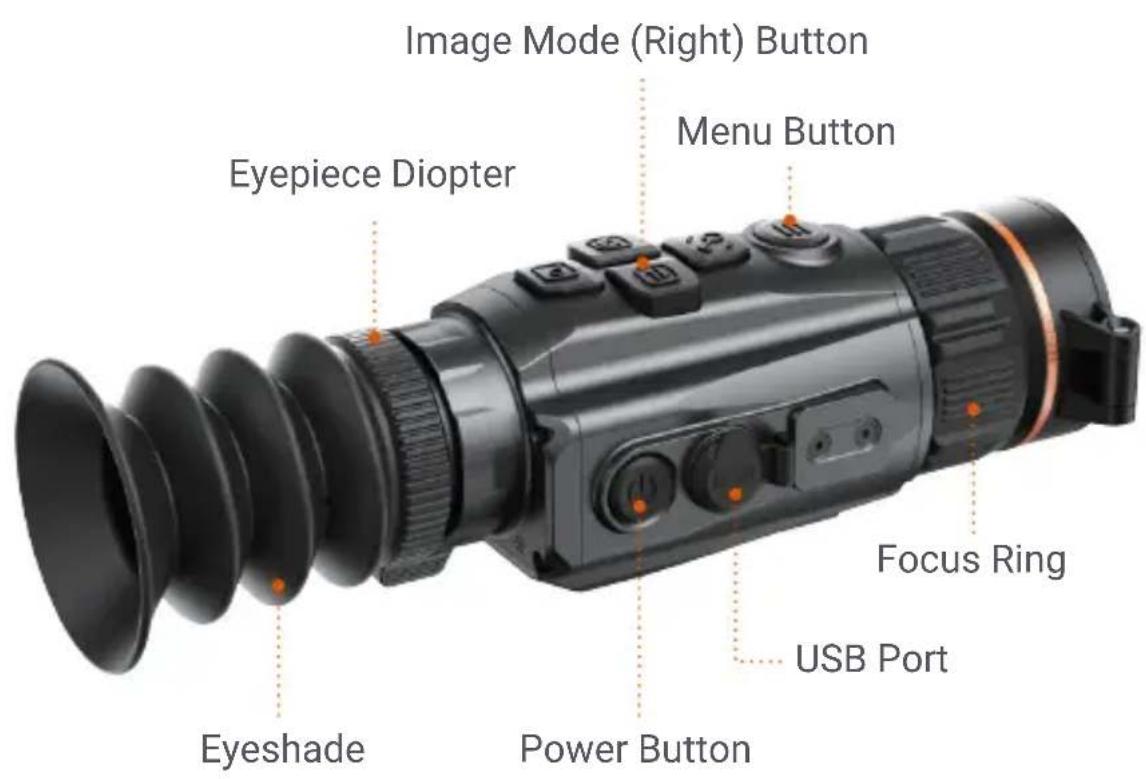
05 PRODUCT APPEARANCE

06 PRODUCT INSTALLATION
There is a Picatinny compatible scope mount installed on the Strom. Please follow the schematic below for proper installation.
Before attempting to install your Storm, please ensure that your firearm is unloaded and the muzzle is pointed in a safe direction.
▶ Unlock the mount. To do this, depress the lock button and swing the lever 180° to the open position.
▶ Install the assembly onto the rail and move the lever to the locked position.
▶ Check the tension to close. The correct amount of tension is the maximum amount you apply with one hand to move the lever to a closed position.
▶ To adjust the tension, move the lever to the open position and push the lever towards the base. This will make the adjustment nut protrude on the opposite side of the base. With the nut protruding, turn it to the left or right to make the necessary adjustment. This process may take a few tries to get it where you want it.

Lock Button
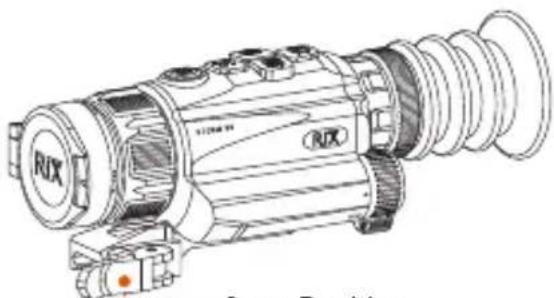
Open Position

Adjustment Nut
07 POWER SUPPLY
The STORM series is powered by a replaceable 18650 battery.
▶ Press and rotate the battery cap 90° clockwise and pull the battery cap outward.
▶ Install the 18650 battery into the battery compartment, positive pole (+) inward and negative pole (-) outward, as indicated by the symbols inside the battery compartment.
▶ After inserting the battery, press and rotate the cover to lock it.


Warning
▶ Remove the battery if the device is not in use for extended periods of time.
▶ Do not power the device with a modified or damaged battery.
▶ Please note, the decrease in battery capacity under sub-zero temperatures is normal and not a factory defect.
▶ Do not use the battery at a temperature above 122° F ( 50° C), as it may reduce the life of the battery.
08 BUTTONS AND KNOBS OPERATION
| Current State | Button Short Press | Press and hold | |
| Powered off | Power | - | Power on the device |
| Standby | Power | Wake up the device | Wake up the device |
| Power on | Power | Standby | Shut down |
| Home screen | Menu | Open the shortcut menu | Open the main menu |
| Up | Switch digital zoom / Switch PIP zoom | Turn on/off the PIP function | |
| Left | Image correction | Switch weather mode | |
| Right | Switch image patterns | Turn on/off RET mode | |
| Down | Start / Stop video recording | Take a photo | |
| Shortcut menu screen | Power | Return to the home screen with saved changes | - |
| Menu | Return to the home screen with saved changes | ||
| Up | Switch image contrast | - | |
| Left | Switch reticle color | - | |
| Right | Switch reticle type | - | |
| Down | Adjust screen brightness | - | |
| Main menu screen | Power | Return to the home screen with saved changes | - |
| Menu | - | Return to the home screen with saved changes | |
| Up | Turn on/off Wi-Fi | - | |
| Left | Enter bad pixel correction screen | - | |
| Right | Enter zeroing screen | - | |
| Down | Switch zeroing profiles | - | |
| Current State | Button Short Press Press and hold | ||
| Zeroing screen | Power | Choose whether to save and exit | — |
| Menu | Freeze / Resume | Return to the home screen with saved changes | |
| Up | Move reticle up slowly | Move reticle up quickly | |
| Left | Move reticle left slowly | Move reticle left quickly | |
| Right | Move reticle right slowly | Move reticle right quickly | |
| Down | Move reticle down slowly | Move reticle down quickly | |
| Bad pixel correction screen | Power | Choose whether to save and exit | — |
| Menu | Confirm/cancel bad pixel | Return to the home screen with saved changes | |
| Up | Move reticle up slowly | Move reticle up quickly | |
| Left | Move reticle left slowly | Move reticle left quickly | |
| Right | Move reticle right slowly | Move reticle right quickly | |
| Down | Move reticle down slowly | Move reticle down quickly | |
09
POWER
ON/OFF
Power On / Starting
- Open the objective lens cap.
- Press and hold the Power button for 3 seconds to turn on the rifle scope. The RIX logo will appear.
Powering Off / Stopping
- Press and hold the Power button. The power-off screen will open, showing a 3-second countdown.
- Continue holding the Power button until the 3-second countdown completes.


Warning
▶ If using an external power supply, do not disconnect the power supply when saving data, otherwise the data may not be saved.
10 STATUS BAR
The status bar is located at the bottom of the screen and displays the status of the riflescope, from left to right:

- Weather mode (sunny [default], rain)
- Zeroing profile (A to E)
- Current magnification (e.g., ×3.5)
- Wi-Fi connection (Wi-Fi off, Wi-Fi on)
- RET mode
- Clock
- Battery Level
11 SHORTCUT FUNCTION
Digital Zoom (Press Zoom button)
On the home screen, simply press the Zoom button to zoom in and out of the image. The status bar provides a real-time display of the corresponding magnification level as you adjust it.
PIP (Press and hold Zoom button)
On the home screen, press and hold the Zoom button to enable the PIP function. The digital zoom returns to 1×. When the PIP (picture in picture) function is enabled, the digital zoom of PIP will change by pressing Zoom button.
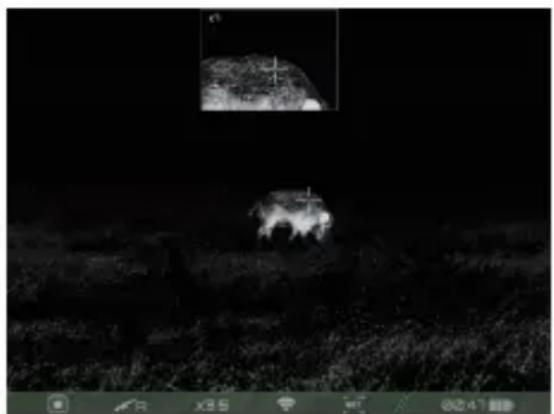
When the PIP function is activated, a frame line in the middle of the display highlights the selected area for enlargement. A small window appears on the upper part of the display, magnifying the selected area. This allows users to easily observe target details and aim more accurately.
Image Correction (Correction button)
If the image effect becomes worse, you can correct the image effect by pressing the Correction button.
Weather Mode Switching (Press and hold Correction button)
On the home screen, toggle the weather mode by pressing the Correction button. The available options include sun mode (default) and rain mode.
Image Mode Switching (Image mode button)
On the home screen, toggle the image mode by pressing the Image mode button. The available options include white hot (default), black hot, red hot, color.

White Hot (Default)
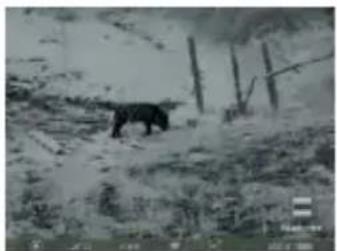
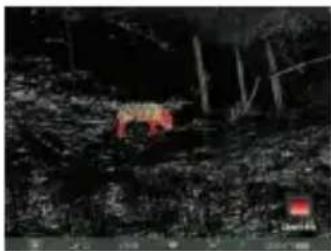

ColorBlack Hot Red H
RET Mode (Press and hold Image mode button)
On the home screen, enable/disable the RET (Resolution Enhancement Technology) mode by pressing and holding the Image Mode button. More image details will be displayed after the RET mode is on, but this will increase power consumption.
Photo / Video (Video Button)
▶ Photo Taking
On the home screen, press and hold the Video button to take a photo, and the screen will freeze, with a photo icon flashing in the upper left corner.
▶ Video Recording
On the home screen, press the Video button to start recording, and a prompt box showing the recording time appears in the upper right corner of the screen, with a time format of HH:MM:SS (hour: minute: second).

Press the Left button again to stop and save the video recording.
Note
The photos and videos taken will save on the built-in memory card in the format of IMG_yyyyMMddHHmmss.jpg (photos) and VID_yyyyMMddHHmmss.mp4 (videos). It is recommended to synchronize the device time and date through the app before using photo/video mode. You can find detailed instructions on the STORM Product App, which is available for download on our website, www.rixoptics.com.
The maximum duration of a single video is 10 minutes. When the duration of a recorded video exceeds 10 minutes, the device will automatically start recording a new video file for the remainder of time.
To download photos and videos, turn on the device, and connect it to a computer with the data cable. On your computer, Double-click MY COMPUTER on the Desktop Screen, find the device named "RIX", and double-click to open the device named "STORM_ Storage" to access the captured media.
▶You can easily free up storage space by either deleting or moving the media files to an external storage device.
▶ To avoid damaged or corrupted video footage, please turn off the device properly.
12 SHORTCUT MENU
On the home screen, press the Menu button to open the shortcut menu.
Contrast Settings
In the shortcut menu, press the Up (Zoom) button to switch image contrast, with a range of 1-5 and 3 as the default.

Screen Brightness Settings
Press the Down (Video) button to switch screen brightness, with a range of 1-5 and 3 as the default.

Reticle Color Settings
Press the Left (Correction) button to switch reticle color, and choose from white, black, red, and green.

Reticle Type Settings
Press the Right (Image Mode) button to switch reticle type, with a total of 8 reticle type options available.

13 MAIN MENU
On the home screen, press and hold the Menu button to open the main menu.
When the main menu is opend, the system information automatically displayed on the right side of the screen.
WiFi
In the main menu, press the Up (Zoom) button to enable or disable Wi-Fi function. The STORM series has a built-in Wi-Fi module. The device can connect to an external device (computer or mobile phone) via Wi-Fi.

Search for the Wi-Fi named "STORM_S3_XXXXXX" on the external device, where "XXXXXX" is the serial number of the device.
Select the Wi-Fi and enter the password to connect. The initial password is 12345678.
After a successful connection to Wi-Fi, the device can be controlled via the mobile app.
Note
The STORM series allows you to change the name and password of the Wi-Fi in the app.
In the app, find the My Device icon, and click it to enter the interface for Settings.
▶ In the text box, enter and submit the new Wi-Fi name (SSID) and password.
▶ After submitting the changes, reset the device to activate them.
▶ If the device is factory reset, the name and password of the Wi-Fi will also be restored to the default settings.
Switch Zeroing Profiles
In the main menu, press the Down (Video) button to switch zeroing profiles, range from A to E. The reset zeroing function will be based on the current selection.

Pixel Defect Correction
When using the scope, you may see pixel defects, such as visible light spots or dark spots with stable brightness. To address this problem, the Pixel Defect Correction function can be used to remove the pixel defects.
In the Main Menu, press the Left (Correction) button to enter pixel defection correction screen.
On the zeroing screen, press the direction (Up, Down, Left, Right) buttons to move the cross.
Press the Menu button to select or unselect the screen.
Press and hold the Menu button to select or reverse the pixel.
To exit without saving the zeroing data,
press the Power button and then press the Down (Video) button.


Reset Zeroing
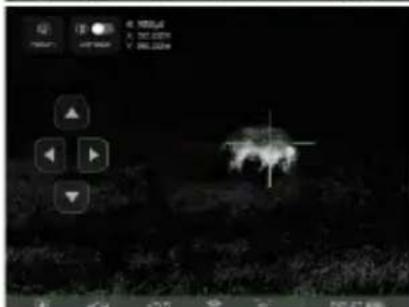
In the main menu, press the Right (Image Mode) button to enter zeroing screen.
On the zeroing screen, press the Menu button to freeze or unfreeze the screen.
Use the direction (Up, Down, Left, Right) buttons to move the reticle.
Press and hold the Menu button to save the zeroing data.

14 AUTO IMAGE CORRECTION
Calibration is an effective solution for enhancing degraded or uneven images. By balancing the background temperature of the detector, calibration can eliminate image defects and improve overall quality. The STORM series automatically detects image defects and corrects them promptly if the image quality deteriorates. And the STORM series will not correct when you aim and shoot, to avoid giving you a bad experience.
15 RECOIL ACTIVATED VIDEO
The Recoil Activated Video function is enabled by default. You can automatically capture and save remarkable moments of hunting and shooting.
Note
▶ To avoid damaged video footage, please turn off the device properly.
16 FIRMWARE UPDATE
Copy the firmware file to device.
Press and hold the Power button to turn off, it then detects the firmware file and upgrades.
Note
For additional information on the updating procedure, please visit RIX website: www.rixoptics.com.
17 APP DESCRIPTION
The STORM series comes with a dedicated app. By connecting the device to the app on a mobile phone, tablet, or laptop you can enjoy real-time image transmission, perform device operations, and receive program updates. Download instructions for using the app from the official website (www.rixoptics.com).
Users have the option to update the firmware of the STORM product by utilizing the app or downloading the latest version from www.rixoptics.com.
You can download and install the app from the official website (www.rixoptics.com) or by searching RIX+ in an app store.


18 PRODUCT MAINTENANCE
Prior to using the device, it is important to conduct a thorough technical inspection to ensure the following items are in proper working condition.
To remove dust and dirt from the metal and plastic parts, use a cotton cloth and gently wipe the surface clean.
Make sure that the 18650 battery being used is free from any bulges or deformities and that the plastic cover is undamaged.
19 PRODUCT TROUBLESHOOTING
Refer to the table below, which outlines potential issues that may arise during operation. For any product issues that cannot be remedied or are not listed below, please contact the RIX Optics customer support by visiting our website at www.rixoptics.com or call +1 (800) 580-5281.
| Fault | Possible Causes Solutions | |
| The scope cannot be started. | The battery is out of charge. | Charging |
| The device cannot be powered by an external power supply. | The USB cable is damaged. | Replace the USB cable. |
| The external power supply is insufficient. | If necessary, check the external power supply. | |
| The image is too dark. | The screen brightness is set too low. | Adjust the brightness |
| The image quality is poor or the detection range shortens. | These problems are likely to occur when you use the device in harsh weather such as snow, rain and fog. | |
| The device cannot connect to a mobile phone or computer. | The Wi-Fi password is incorrect. | Enter the correct password or reset the device back to factory setting. |
| There are too many Wi-Fi networks in the range of the device, which may cause interference. | For a stable network connection, it is recommended to relocate the device to an area with a lower number of Wi-Fi networks. | |
| Wi-Fi signals are lost or interrupted. | The device is beyond Wi-Fi coverage. There is blocking (such as concrete walls) between the device and the receiver. | Move the device to a place where you can receive Wi-Fi signals. |
| When the device is used at a low temperature, the imaging quality is poorer than that at a normal temperature. | At temperatures above 0°C, the temperature rise varies with the observed objects (environment and background) due to different heat conductivity coefficients. As a result, high-temperature contrast occurs and the image quality is better. At low temperatures, the observed targets (background) usually cool down to a similar temperature because of reduced temperature contrast. Therefore, the image quality (details in particular) is poor, which is a characteristic of thermal imaging devices. | |
Wireless Transmitter Module Frequency Range
WLAN: 2.412-2.472GHz
Wireless transmitter module power < 20dBm
FCC Statement
FCC-ID: 2A7ZZ-5A-03
Labeling Requirements
This device complies with part 15 of the FCC Rules. Operation is subject to the following two conditions: (1) This device may not cause harmful interference, and (2) this device must accept any interference received, including interference that may cause undesired operation.
Information To The User
Any Changes or modifications not expressly approved by the party responsible for compliance could void the user's authority to operate the equipment.
EMC Class A
Note: This equipment has been tested and found to comply with the limits for a Class A digital device, pursuant to part 15 of the FCC Rules. These limits are designed to provide reasonable protection against harmful interference when the equipment is operated in a commercial environment. This equipment generates, uses, and can radiate radio frequency energy and, if not installed and used in accordance with the instruction manual, may cause harmful interference to radio communications. Operation of this equipment in a residential area is likely to cause harmful interference in which case the user will be required to correct the interference at his own expense.
To comply with RF exposure requirements, a minimum separation distance of 0.00 cm must be maintained between the user's body and the handset, including the antenna.


YEAR WARRANTY
Thermal Devices

YEAR WARRANTY
Digital Devices

CUSTOMER SERVICE
+1 (800) 580-5281
support@rix-nv.com


- THERMAL
- IMAGING SCOPE
- STORM
- SERIES
- TABLE OF CONTENTS
- 01 PRODUCT OVERVIEW
- 02 PRODUCT FEATURES
- 03 PRODUCT DESCRIPTION
- 04 IN THE BOX
- 05 PRODUCT APPEARANCE
- 06 PRODUCT INSTALLATION
- 07 POWER SUPPLY
- WARNING
- 08 BUTTONS AND KNOBS OPERATION
- 09
- POWER
- ON/OFF
- POWER ON / STARTING
- POWERING OFF / STOPPING
- 10 STATUS BAR
- 11 SHORTCUT FUNCTION
- DIGITAL ZOOM (PRESS ZOOM BUTTON)
- PIP (PRESS AND HOLD ZOOM BUTTON)
- IMAGE CORRECTION (CORRECTION BUTTON)
- WEATHER MODE SWITCHING (PRESS AND HOLD CORRECTION BUTTON)
- IMAGE MODE SWITCHING (IMAGE MODE BUTTON)
- RET MODE (PRESS AND HOLD IMAGE MODE BUTTON)
- PHOTO / VIDEO (VIDEO BUTTON)
- PHOTO TAKING
- VIDEO RECORDING
- NOTE
- 12 SHORTCUT MENU
- CONTRAST SETTINGS
- SCREEN BRIGHTNESS SETTINGS
- RETICLE COLOR SETTINGS
- RETICLE TYPE SETTINGS
- 13 MAIN MENU
- WIFI
- SWITCH ZEROING PROFILES
- PIXEL DEFECT CORRECTION
- RESET ZEROING
- 14 AUTO IMAGE CORRECTION
- 15 RECOIL ACTIVATED VIDEO
- 16 FIRMWARE UPDATE
- 17 APP DESCRIPTION
- 18 PRODUCT MAINTENANCE
- 19 PRODUCT TROUBLESHOOTING
- WIRELESS TRANSMITTER MODULE FREQUENCY RANGE
- FCC STATEMENT
- LABELING REQUIREMENTS
- INFORMATION TO THE USER
- EMC CLASS A
Brand : RIX
Model : Storm S6
Category : Thermal camera