
Pocket K3 - Thermal camera RIX - Free user manual and instructions
Find the device manual for free Pocket K3 RIX in PDF.


| Brand | RIX |
| Model | Pocket K3 |
| Product Type | Portable Multimedia Player |
| Dimensions (approx.) | 10 x 5 x 1.5 cm |
| Weight (approx.) | 80 g |
| Power Source | Rechargeable lithium-ion battery (500 mAh) |
| Charging | USB Type-C (5V / 1A) |
| Playback Formats | MP3, WMA, WAV, FLAC |
| Radio | FM with auto-scan and preset memory |
| Storage | MicroSD card slot up to 64 GB (not included) |
| Connectivity | USB 2.0 for data transfer and charging |
| Audio Output | 3.5 mm earphone jack (earphones included) |
| Speaker | Built-in mono speaker, 1W |
| Display | 2.0 inch TFT color screen (320x240) |
| Additional Features | Voice recording, e-book reader, photo viewer |
| Battery Life | Up to 15 hours (music) / 10 hours (radio) |
| Cleaning | Wipe gently with a soft, dry cloth |
| Safety | Do not expose to moisture or extreme temperatures. Keep away from children. |
| Spare Parts & Repairability | Battery replaceable by qualified technician. Contact RIX support. |
| Package Contents | Pocket K3 player, USB cable, earphones, user manual |
Frequently Asked Questions - Pocket K3 RIX
User questions about Pocket K3 RIX
0 question about this device. Answer the ones you know or ask your own.
Ask a new question about this device
Download the instructions for your Thermal camera in PDF format for free! Find your manual Pocket K3 - RIX and take your electronic device back in hand. On this page are published all the documents necessary for the use of your device. Pocket K3 by RIX.
USER MANUAL Pocket K3 RIX
THERMAL
MONOCULAR
SERIES
User Manual V3.0

WARNING
PLEASE READ BEFORE USE
Please inspect your batteries for any external damage before charging.
Please make sure you fully charge your batteries before use.
Do not point at the sun and/or high heat sources.

We appreciate you choosing RIX.
Please read the instruction manual carefully before using this product.
Thank you and happy hunting!
Please visit the RIX official website or
the RIX mobile app to view the latest product manuals.


Download on the App Store


GET IT ON Google Play

Linktree*

POCKET SERIES RX
TABLE OF CONTENTS
01.
Overview …01
09.
Status Bar …08
02.
Features …01
10.
Shortcut Function …09
03.
Parameters …02
11.
Main Menu …11
04.
In the Box …04
12.
Electronic Image …13 Stabilization
05.
Appearance …05
13.
App Description …14
06.
Power Supply …06
14.
Product Maintenance …15
07.
Buttons Operation …07
15.
Troubleshooting …15
08.
Power On/Off …07
16.
Legal and …17 Regulatory Information
01 PRODUCT OVERVIEW
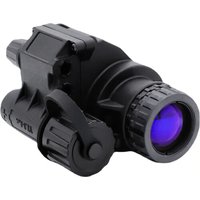
The POCKET series features advanced thermal imaging technology and high-sensitivity infrared detectors for exceptional outdoor night vision capabilities. With the ability to perform in all weather conditions, from sun to rain, the POCKET series is perfect for night hunting and observation. Plus, it offers a range of functions including photography, video recording, and more.
02 PRODUCT FEATURES
| Sensor resolution:K2: 256x192, K3: 384x288 | Sensor NETD:<25mK |
| Sensor frame rate:50Hz | Display screen: OLED 800x600 |
| 18650 replaceable battery | Light weight |
| Small, compact and can be placed in a pocket | Ergonomics design, comfortable to use |
03 PRODUCT PARAMETERS
| POCKET SERIES | K3 | K2 |
| Sensor | ||
| Type | VOx Uncooled | |
| Resolution, pixels | 384×288 | 256×192 |
| Pixel pitch, μm | 12 | |
| NETD, mK | <25 | |
| Frame Rate, Hz | 50 | |
| Optics | ||
| Objective Lens, mm | 15mm; F1.0 | 9mm; F1.0 |
| Optic Zoom, x | 2 | 1.7 |
| Field of View (H), degrees / yd @ 100 yd | 17.5°/33.6yd | 19.4°/37.3yd |
| Digital Zoom, x | 1×/2×/4× | |
| Eye Relief, mm | 13.5 | |
| Diopter Adjustment, D | -7 to +2 | |
| Range Performance | ||
| Detection Range, m/yd | 780m/853yd | 468m/512yd |
| Display | ||
| Type | OLED | |
| Resolution, pixels | 800×600 | |
| Video Recorder | ||
| Video / Photo Resolution, pixels | 800×600 | |
| Video / Photo Format | .mp4 / .jpg | |
| Built-in Memory, GB | 8 | |
| Wi-Fi | ||
| Wireless Protocol | Wi-Fi | |
| Frequency, GHz | 2.4GHz | |
| Environmental Characteristics | ||
| Degree of Protection, IP code | IP67 | |
| Operating Temperature Range, °F | -4 to +122 | |
| Battery Type | 18650 | |
| Capacity, mAh | 3200 | |
| Operating Time on Battery Pack (at t=72°F), h | About 6 | |
| External Power Supply | 5V (Type-C USB) | |
| Weight & Size | ||
| Dimensions, inch | 4.9×1.8×2.9 | |
| Weight, lb | about 0.47 (without battery) | about 0.44 (without battery) |
04 IN THE BOX

The Pocket Series Thermal Monocular

18650 Battery (in the device)
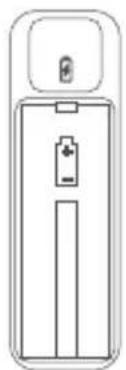
Battery Charger

Carrying Case

USB Type-C Cable
Lens Cloth

Lanyard
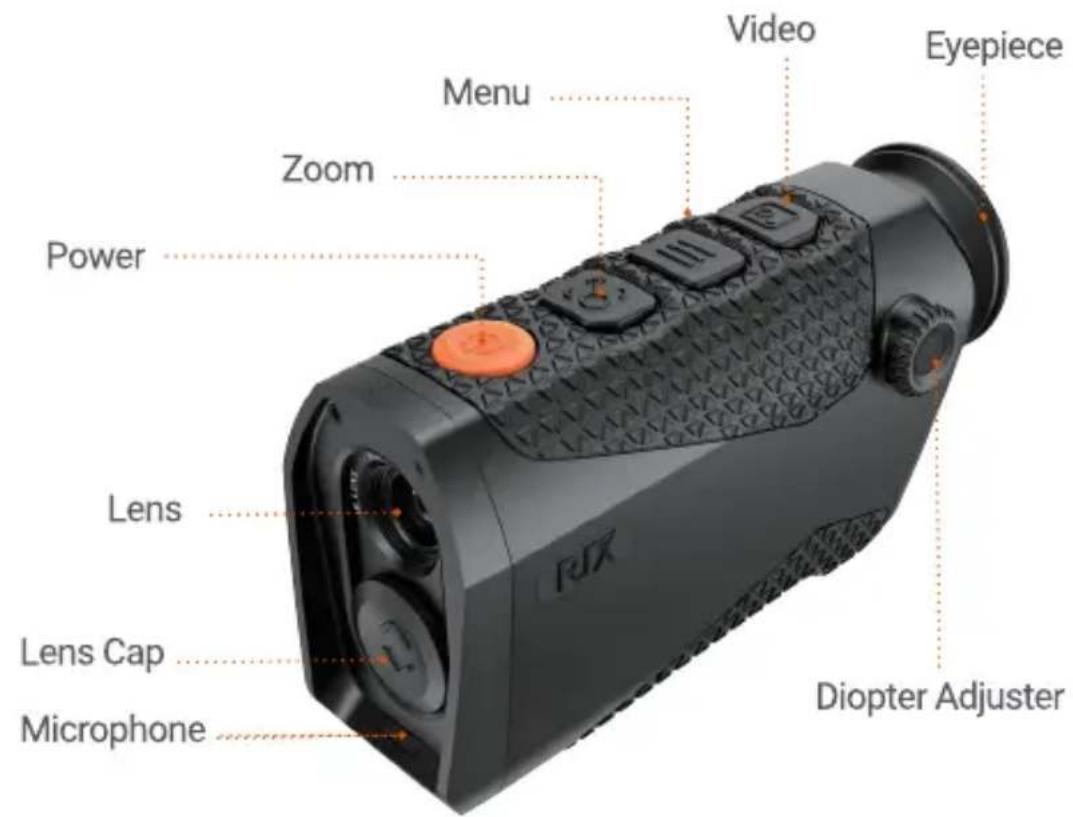
05 PRODUCT APPEARANCE

06 POWER SUPPLY
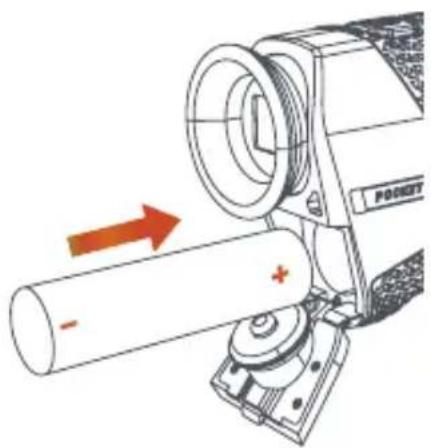
The POCKET series is only powered by a replaceable 18650 battery with a length of 65mm.
▶ To open the battery compartment lid, push down on the latch.
▶ Install the battery into the compartment, positive (+) pole inward and negative (-) pole
outward, as indicated by the symbols inside the battery compartment.
▶ After inserting the battery, press and push up on the latch to secure the battery cover.

Warning
▶ Please remove the battery if the device is not in use for a long time.
▶ Do NOT power the device with a modified or damaged battery.
▶ Please Note: The decrease in battery pack capacity under sub-zero temperatures is a normal occurrence and not a factory defect.
▶ Do not use the battery at a temperature above 50° C, as it may reduce the service life of the battery.
| Button | Current Status | Short Press | Long Press |
| Powered off | - | Power on the device | |
| Power | Stand by | Wake up the device | |
| Home screen | Standby | Power off the device | |
| Menu screen | Return to the home menu with saving changes | - | |
| Zoom | Home screen | Adjust the magnification | Manual Image Correction |
| Menu screen | Flip up | - | |
| Menu | Home screen | - | - |
| Menu screen | Adjust the parameters of a function | - | |
| Video | Home screen | Start / Stop video recording | Take a photo |
| Menu screen | Flip down | - | |
08 POWER ON/OFF
Power On / Starting
- Open the objective lens cap. Press and hold the lens cap and push it downward.
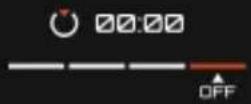
- Long press the Power button for 3 seconds to turn on the device. The RIX logo will appear.
Powering Off / Stopping
Long press the Power button for 3 seconds to turn off the device.
RJX
Note
Releasing the Power button at any time during this shutdown cycle will stop the shutdown process.
Warning
If using an external power supply, do not disconnect the power supply when saving data, otherwise the data may not be saved.
09 STATUS BAR
The status bar is located at the bottom of the screen and displays the operating status information of the device. From left to right:

- Image mode: White Hot (default), Black Hot, Red Hot, Color.
- Digital zoom: 1×(default), 2×, 4×.
- Weather mode: Sun, Rain.
- Auto image correction mode: On/Off.
- Wi-Fi connection: On/Off.
- Clock
- Battery Level
10 SHORTCUT FUNCTION
The shortcut functions can be directly used through buttons on the home screen.
Digital Zoom (Zoom Button)
On the home screen, simply press the Zoom button to zoom in and out on the subject.
The status bar provides a real-time display of the magnification level as you adjust it.
Manual Image Correction (Zoom Button)
This function is effective for enhancing degraded or uneven images. By balancing the background temperature of the detector, calibration can eliminate image defects and improve overall quality.
If you feel that the image is bad, you can press and hold the Zoom button until hearing a clicking sound.
Standby (Power Button)
If you are not currently using the device, but do not want to shut it down, you can use standby mode. This function can reduce device power consumption and extend battery life.
Briefly press the Power button to enter standby mode, then press the Power button again to exit standby mode.
Image Mode (Menu Button)

White Hot (default)

Black Hot
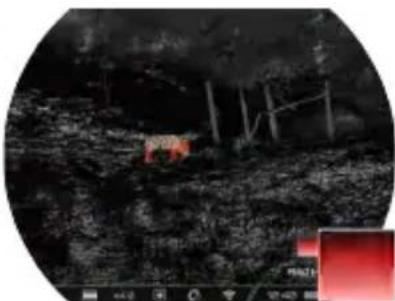
Red Hot

Color

Highlight
Briefly press the Menu button to switch the image mode including white hot (default), black hot, red hot, color, highlight (only for K3).
Note: When using highlight mode, the heat source target in the image is more prominent and brighter, and the background is darker, making it easier to quickly identify the target.
Photo/Video (Video Button)
▶ Video Recording
Short press the Video button to start recording. A prompt box showing the recording time will appear in the upper right corner of the screen with a time format of HH:MM:SS (hour:minute:second). Short press the Video button again to stop and save the video recording.
▶ Photo Taking
Long press the Video button to take a photo, and the screen will freeze with a photo icon flashing in the upper left corner.

Note
The photos and videos taken will be saved on the built-in memory card respectively in the format of PIC_HHmmss.jpg (photos) and VIDEO_HHmmss.mp4 (videos). It is recommended to synchronize the device time and date through the app before using the photo/video mode. You can find specific operation instructions in the RIX App which is available to download on our
website, www.rixoptics.com.
The maximum duration of a video recording file is 10 minutes. When the duration is more than 10 minutes, the video will be automatically recorded onto a new file.
▶ To download photos and videos, turn on the device to run, and connect it to a computer with the data cable. On your computer, Double-click MY COMPUTER on the Desktop Screen, find the device named "POCKET", and double-click to open the device named "POCKET_KX" to access the captured media.
▶ You can easily optimize the storage space by either deleting or moving the media files to a storage device.
To avoid damaged video footage, please turn off the device properly.
▼11 MAIN MENU
On the home screen, press and hold the Menu button to open the menu screen. Choose functions by the Zoom and Video button, setting by the Menu button.
Screen Brightness
Press the Menu button to set the screen brightness with a range of 1-5, with 3 being the default.
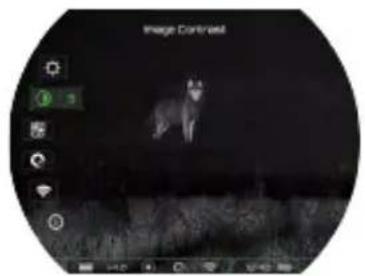
Image Contrast
Press the Menu button to set the image contrast with a range of
1-5, with 3 being the default.
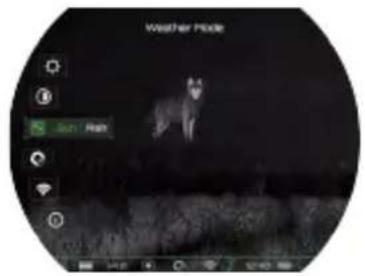
Weather mode
Press the menu button to set the weather mode, choosing sun or rain.
Auto Image Correction
Press the menu button to set the auto image correction on or off.
When the function is on, the device will automatically correct the image according to the software algorithm. When the function is off, on the home screen, you can press the Zoom button to correct it manually.
Note
No matter the function is on or off, the manual image correction function can be used on the home screen.


Wi-Fi
The device has a built-in Wi-Fi module and can connect to an external device (computer or smartphone) via Wi-Fi.
- Press the menu button to choose on/off.
- Search for the Wi-Fi named "POCKET_KX_XXXXXX" on a phone or computer.
- Select the Wi-Fi and enter the password to connect. The initial password is 12345678.
After a successful connection to Wi-Fi, the device can be controlled via the mobile app.
Note
▶ You could change the name and password of the Wi-Fi in the app.
▶ In the app, find the Device Parameter icon, and click it to enter the interface for settings.
▶ In the text box, enter and submit the new Wi-Fi name (SSID) and password.
▶ After submitting the changes, reset the device to activate them.


Info
Product information includes the product model, software version number, WiFi name, PN code, SN code, and FCC ID.
▼12
ELECTRONIC IMAGE STABILIZATION
During using, the electronic image stabilization is designed to minimize image blurring and shaking caused by hand or body shaking, and other factors that cause the device to shake. Reducing viewing discomfort caused by image shaking, providing users with a more stable and comfortable image.
Note
▶ The function does not show up on the device.
▶ The function does not work at 1x digital zoom and only automatically works at 2x and 4x digital zoom.
▶ The function is available on all POCKET series products.
13 APP DESCRIPTION
The device comes with a dedicated app. By connecting the device to the app on a cell phone, tablet, or laptop you can enjoy real-time image transmission, perform device operations, and receive program updates. Download instructions for using the app from the official website, www.rixoptics.com.


Linktree

RIX+

GET IT ON
Google Play

Download on the
App Store
RIX+ Android

RIX+ IOS
Users have the option to update the firmware of the device by utilizing the app or downloading the latest version from www.rixoptics.com.
▶About App
You can download and install the app on the official website (www.rixoptics.com) or by searching RIX+ in an app store.
14 PRODUCT MAINTENANCE
Prior to using the device, it is important to conduct a thorough technical inspection to ensure the following items are in proper working condition.
To remove dust and dirt from the metal and plastic parts, use a cotton cloth and gently wipe the surface clean.
Make sure that the 18650 battery being used is free from any bulges or deformations and that the plastic cover is not damaged.
15 PRODUCT TROUBLESHOOTING
Refer to the table below, which outlines potential issues that may arise during operation. For product issues that can not be remedied or are not listed below, please contact RIX Optics customer support by visiting www.rixoptics.com.
| Fault | Possible Causes | Solutions |
| The device cannot be started. | The battery is out of charge. | Charging |
| The device cannot be powered by an external power supply | The USB cable is damaged. | Replace the USB cable. |
| The external power supply is insufficient. | If necessary, check the external power supply. | |
| The image is too dark. | The screen is not bright enough. | Adjust the display brightness |
| The image quality is poor or the detection range shortens. | These problems are likely to occur when you use the device in harsh weather (such as sun, snow, rain, and fog). | |
| The device cannot connect to a mobile phone or computer. | The Wi-Fi password is incorrect. | Enter the correct pass-word or reset the device back to factory setting. |
| There are too many Wi-Fi networks in the range of the device, which may cause interference. | For a stable network connection, it is recommended to relocate the device to an area with a lower number of Wi-Fi networks. | |
| Wi-Fi signals are lost or interrupted. | The device is beyond Wi-Fi coverage. There is blocking (such as concrete walls) between the device and the receiver. | Move the device to a place where you can receiveWi-Fi signals. |
| When the device is used at a low temperature, the imaging quality is poorer than that at a normal temperature. | At temperatures above 0°C, the temperature rise varies with the observed objects (environment and background) due to different heat conductivity coefficients. As a result, high-temperature contrast occurs, and the image quality is better. At low temperatures, the observed targets (background) usually cool down to a similar temperature because of reduced temperature contrast. Therefore, the image quality (details in particular) is poor, which is a characteristic of thermal imaging devices. | |
16 Legal and Regulatory Information
Wireless Transmitter Module Frequency Range
WLAN: 2.412-2.472GHz
Wireless transmitter module power < 20dBm
FCC Statement
FCC-ID: 2A7ZZ-3A-03
Labeling Requirements
This device complies with part 15 of the FCC Rules. Operation is subject to the following two conditions: (1) This device may not cause harmful interference, and (2) this device must accept any interference received, including interference that may cause undesired operation.
Information To The User
Any Changes or modifications not expressly approved by the party responsible for compliance could void the user's authority to operate the equipment.
EMC Class A
Note: This equipment has been tested and found to comply with the limits for a Class A digital device, pursuant to part 15 of the FCC Rules. These limits are designed to provide reasonable protection against harmful interference when the equipment is operated in a commercial environment. This equipment generates, uses, and can radiate radio frequency energy and, if not installed and used in accordance with the instruction manual, may cause harmful interference to radio communications. Operation of this equipment in a residential area is likely to cause harmful interference in which case the user will be required to correct the interference at his own expense.
To comply with RF exposure requirements, a minimum separation distance of 0.00 cm must be maintained between the user's body and the handset, including the antenna.



- THERMAL
- MONOCULAR
- SERIES
- WARNING
- PLEASE READ BEFORE USE
- TABLE OF CONTENTS
- 01
- 09
- 02
- 10
- 03
- 11
- 04
- 12
- 05
- 13
- 06
- 14
- 07
- 15
- 08
- 16
- 01 PRODUCT OVERVIEW
- 02 PRODUCT FEATURES
- 03 PRODUCT PARAMETERS
- 04 IN THE BOX
- 05 PRODUCT APPEARANCE
- 06 POWER SUPPLY
- 08 POWER ON/OFF
- POWER ON / STARTING
- POWERING OFF / STOPPING
- RJX
- NOTE
- 09 STATUS BAR
- 10 SHORTCUT FUNCTION
- DIGITAL ZOOM (ZOOM BUTTON)
- MANUAL IMAGE CORRECTION (ZOOM BUTTON)
- STANDBY (POWER BUTTON)
- IMAGE MODE (MENU BUTTON)
- PHOTO/VIDEO (VIDEO BUTTON)
- VIDEO RECORDING
- PHOTO TAKING
- ▼11 MAIN MENU
- SCREEN BRIGHTNESS
- IMAGE CONTRAST
- WEATHER MODE
- AUTO IMAGE CORRECTION
- WI-FI
- INFO
- ▼12
- ELECTRONIC IMAGE STABILIZATION
- 13 APP DESCRIPTION
- ABOUT APP
- 14 PRODUCT MAINTENANCE
- 15 PRODUCT TROUBLESHOOTING
- 16 LEGAL AND REGULATORY INFORMATION
- WIRELESS TRANSMITTER MODULE FREQUENCY RANGE
- FCC STATEMENT
- LABELING REQUIREMENTS
- INFORMATION TO THE USER
- EMC CLASS A
Brand : RIX
Model : Pocket K3
Category : Thermal camera