
SR210-12 - Soundbar BUSH - Free user manual and instructions
Find the device manual for free SR210-12 BUSH in PDF.


| Product Type | Soundbar |
| Model | SR210-12 |
| Brand | Bush |
| Dimensions (W x H x D) | 620 x 70 x 63 mm |
| Power Output | 2 x 12W |
| Frequency Response | 20 Hz - 20 kHz ±4 dB |
| Input Sensitivity (Line In) | 800 mW |
| Input Sensitivity (Aux In) | 1000 mV |
| Power Supply | Input: 100-240 V ~ 50/60 Hz, Output: 14 V 1.2 A |
| Power Consumption | 38.69 W |
| Standby Power Consumption | ≤ 0.5 W |
| Bluetooth Version | V5.1 |
| Bluetooth Pairing Name | BUSH SR210-12 |
| Audio Formats Supported (USB) | MP3, WMA |
| Connectivity | Bluetooth, USB, Line In (3.5mm), Aux In (RCA), Optical, HDMI ARC |
| Remote Control Battery | 2 x AAA (included) |
| Wall Mountable | Yes (brackets included, screws and rawl plugs supplied) |
| Auto Standby | After ~15 minutes without audio signal |
| Care and Cleaning | Wipe with lint-free cloth, do not use liquids or solvents |
| Safety Features | Overheat protection, use only supplied power adapter, keep away from moisture and heat |
Frequently Asked Questions - SR210-12 BUSH
User questions about SR210-12 BUSH
0 question about this device. Answer the ones you know or ask your own.
Ask a new question about this device
Download the instructions for your Soundbar in PDF format for free! Find your manual SR210-12 - BUSH and take your electronic device back in hand. On this page are published all the documents necessary for the use of your device. SR210-12 by BUSH.
USER MANUAL SR210-12 BUSH
natural_image
Abstract geometric pattern with gray triangles and a black rectangular object, no text or symbols presentYou'll soon be enjoying your new Soundbar.
It all begins here, with your instructions. Don't worry, there's nothing too technical coming up. Just simple, step-by-step guidance to get you up and running quickly. Sound good? Then let's get started.
Help and Guidance
We're here to help you get the most from your Soundbar. Should you require any guidance, a simple solution can often be found online at:
www.bush-support.com
If you still require further assistance, call one of our experts on 0345 600 3021.
If you require any technical guidance or find that your product is not operating as intended, a simple solution can often be found in the Troubleshooting
Contents
1. Safety information
Power source 8
Moisture and water 8
Heat sources and flames 9
Ventilation 9
Care and cleaning 9
2. Getting to know your Soundbar
Accessories 12
Soundbar 13
Remote control 14
Inserting batteries 15
Positioning the Soundbar 15
Making the Soundbar connections 16
3. Using your Soundbar
Power on 20
Standby mode 20
Change the mode (Audio source) 20
Adjusting the volume 21
Bass or Treble enhancement 21
Pairing with a Bluetooth device 21
Controlling a paired device 22
USB mode 22
Line in mode 23
Aux in mode 23
Optical mode 24
section of these instructions, or online at www.bush-support.com. If you still require further assistance, call one of our experts on 0345 600 3021
Contents
HDMI ARC Mode 24
Wall mounting your Soundbar 25
4. Other information
Technical specification 30
5. Product support
Troubleshooting 34
Help and assistance 35
Disposal 36
If you require any technical guidance or find that your product is not operating as intended, a simple solution can often be found in the Troubleshooting
This page is left intentionally blank

This page is left intentionally blank
1 Safe


natural_image
Abstract geometric pattern composed of gray triangles and squares on a white background, with no text or symbols present.
Safety information
Important - Please read these instructions fully before installing or operating
Power source
- Only use the power supply that came with the product. Using an unauthorised power supply will invalidate your guarantee and may irrecoverably damage the product.
- Disconnect your soundbar from the mains power supply during thunderstorms.
• Always check that you have completely switched off your soundbar, before you change or disconnect the power supply. - When installed, the power socket must be within easy reach.
- Do not bend, stretch or pull the supply cable in order to avoid electric shock.
- Do not attempt to open the product. This product does not contain any user serviceable parts. Unauthorised handling of the product may damage it and will void your warranty.
- Switch the soundbar off at the mains power socket and unplug it if you are leaving it unattended for a long period of time (holidays etc).
- Remove the batteries from the remote control if it will not be used for an extended period of time.
- Only use recommended batteries or those of the same or equivalent type in the remote control.
- Batteries are to be inserted with the correct polarity.
- The supply terminals are not to be short-circuited.
- Never throw batteries in a fire or attempt to open the outer casing.
- Batteries are harmful if swallowed, so keep away from young children.
Moisture and water
- Do not use this product near water or moisture.
- Do not use this product near a bath or sink, near a swimming pool or anywhere else that water or moisture is present.
- Keep it dry. Avoid exposure to precipitation, humidity and liquids which could all affect the product circuitry.
If you require any technical guidance or find that your product is not operating as intended, a simple solution can often be found in the Troubleshooting

Safety information
Important - Please read these instructions fully before installing or operating
Heat sources and flames
- Do not leave this product in high temperatures as electronic devices and plastic parts may warp in heat.
- Keep it away from bright sunlight or heat sources, such as a radiator.
Ventilation
- Do not install this product in a confined space.
- Allow adequate ventilation to prevent heat build-up.
- Do not block or cover slots, holes or openings on the product by placing on soft furnishings such as carpets, rugs or beds as these are provided for functionality and/or ventilation to ensure safe operation of the product.
- For indoor use only.
Care and cleaning
- All care and cleaning operations should be carried out with the Soundbar unplugged from the mains power.
- Occasionally wipe the cabinet with a lint free cloth.
- Never clean the unit with liquids or solvents.
This page is left intentionally blank
Getting to know your Soundbar
2

natural_image
Abstract geometric pattern composed of gray triangles and squares on a white background, with no text or symbols present.Getting to know your Soundbar
You'll be up and running in no time
Ready? Let's begin...
Please read these instructions carefully. They contain important information which will help you get the best from your product and ensure safe and correct installation and operation.
If you require any further assistance, our technical experts are happy to help. For full details, refer to the product support section at the end of these instructions.
Accessories
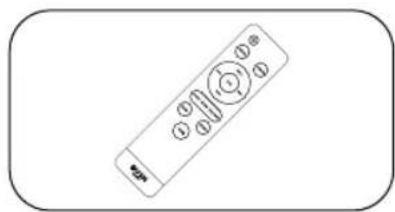
Remote control (requires 2 x AAA batteries included)
natural_image
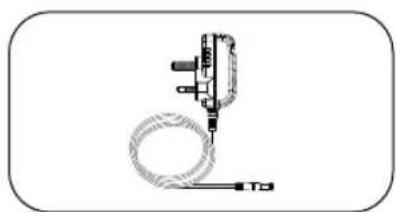
Line drawing of a remote control with four buttons and a battery (no text or symbols)Mains power adapter
natural_image
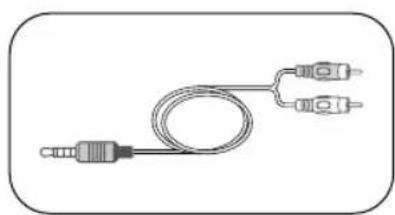
Technical line drawing of a mechanical or electrical component with coiled cable and terminal connectors (no text or symbols)3.5mm to RCA cable
natural_image
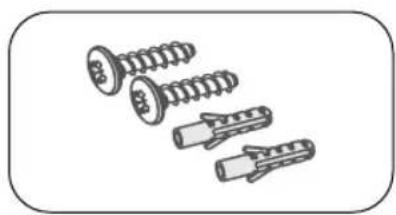
Illustration of a coiled cable with two connectors (no text or symbols)Rawl plugs and screws
natural_image
Illustration of four different types of screws (no text or symbols present)If you require any technical guidance or find that your product is not operating as intended, a simple solution can often be found in the Troubleshooting
Getting to know your Soundbar
You'll be up and running in no time
Soundbar
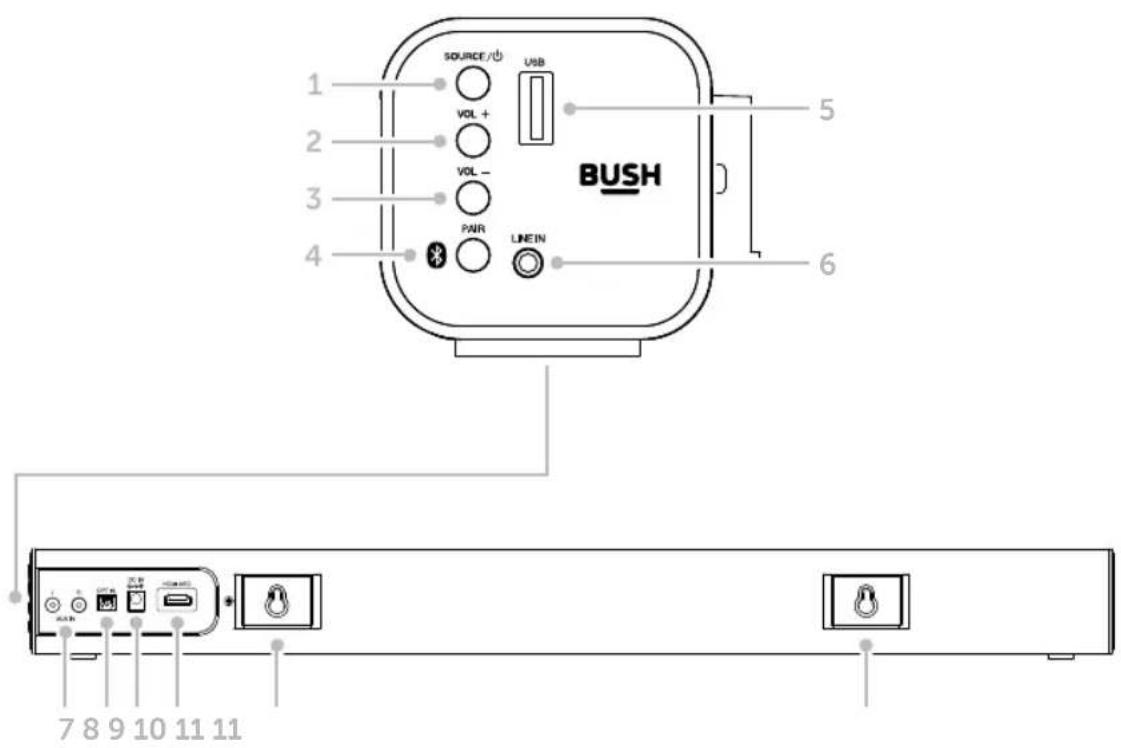
- Power on/Audio source (Bluetooth/USB/Line in/Aux-in/Optical/HDMI ARC))
- Volume +
- Volume -
- Bluetooth Pair/Disconnect
-
USB socket
-
LINE IN socket
- RCA inputs
- Optical input
- Power input socket (DC in)
- HDMI ARC connection
- Wall mounting brackets
section of these instructions, or online at www.bush-support.com. If you still require further assistance, call one of our experts on 0345 600 3021.
Getting to know your Soundbar
You'll be up and running in no time
Remote control
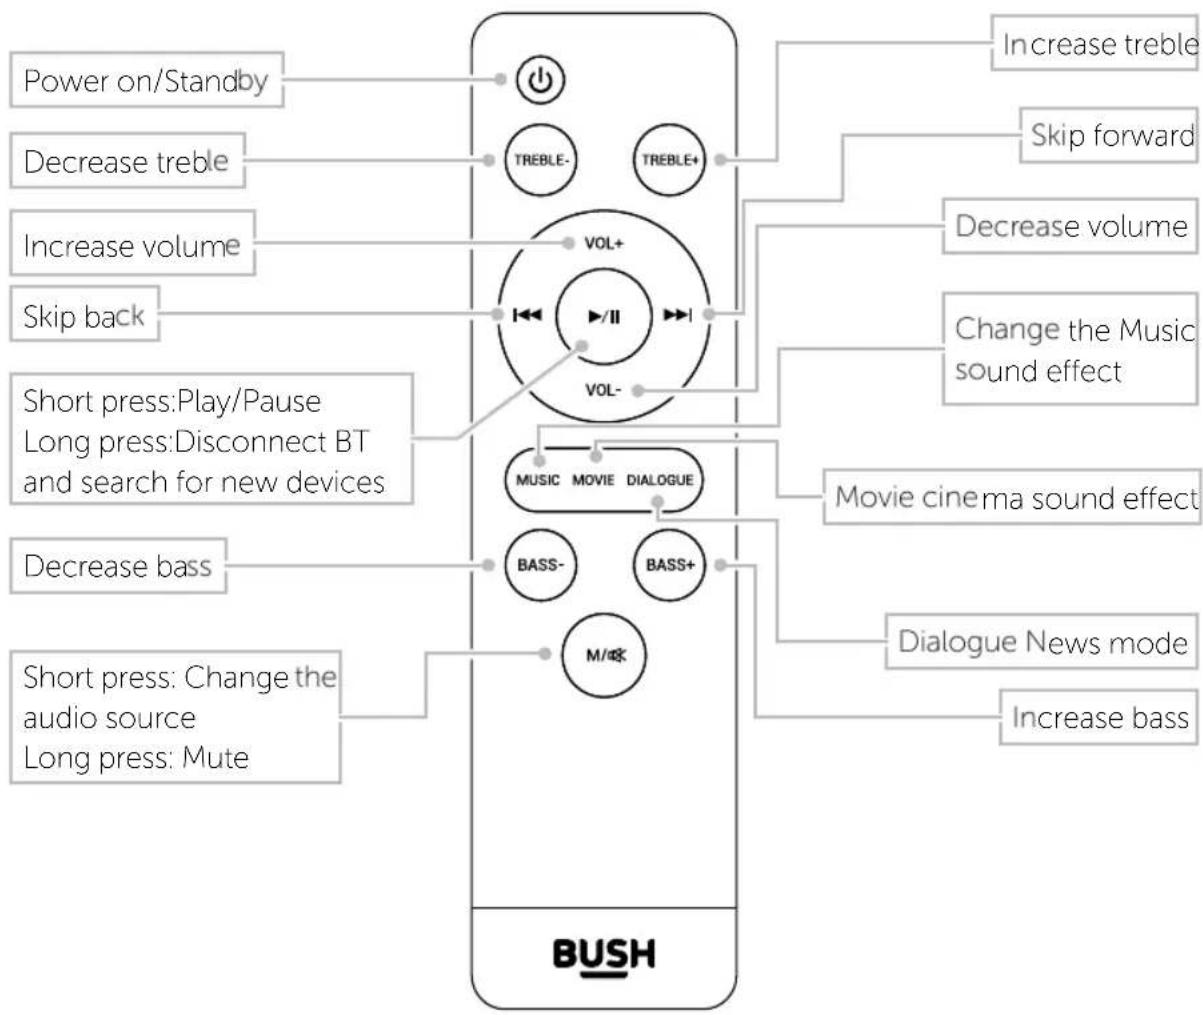
flowchart
graph TD
    A["Power on/Standby"] --> B["TREBLE-"]
    C["Decrease treble"] --> D["TREBLE+"]
    E["Increase volume"] --> F["VOL+"]
    G["Skip back"] --> H["<<--> VOL-"]
    I["Short press:Play/Pause<br>Long press:Disconnect BT<br>and search for new devices"] --> J["MUSIC MOVIE DIALOGUE"]
    K["Decrease bass"] --> L["BASS-"]
    M["Short press: Change the audio source<br>Long press: Mute"] --> N["M/4K"]
    O["Increase treble"] --> P["Decrease volume"]
    Q["Skip forward"] --> R["Decrease volume"]
    S["Change the Music sound effect"] --> T["Movie cinema sound effect"]
    U["Dialogue News mode"] --> V["Increase bass"]
If you require any technical guidance or find that your product is not operating as intended, a simple solution can often be found in the Troubleshooting
Getting to know your Soundbar
You'll be up and running in no time
Inserting batteries
- On the back of the remote control, press in the tab on the battery compartment cover to remove it.
- Insert the 2 x AAA batteries supplied, making sure to note the '+' and '-' markings and position the batteries the correct way around.
- Replace the battery cover, making sure that it 'clicks' shut.

natural_image
Line drawing of a mechanical device with a handle and lever mechanism (no text or symbols)Positioning the Soundbar
It's important that you consider carefully in advance where your Soundbar will be situated and make sure that it is:
• on a flat and stable surface or securely wall mounted
- within 1.4 metres of a power socket. Please ensure that the mains power lead is not a trip hazard.
- where it will be in range of the connected or 'paired' bluetooth device (e.g. TV/iPhone/iPad/Android/other phone/computer, which is about 10 metres or less (33 feet or less)) in line of sight.
- never place your Soundbar directly onto antique or polished surfaces.
section of these instructions, or online at www.bush-support.com. If you still require further assistance, call one of our experts on 0345 600 3021.
Getting to know your Soundbar
You'll be up and running in no time
Making the Soundbar connections
Note: Please do not switch on the mains power until ALL the required connections have been made.
- Decide which connections and cables you will use with your Soundbar.
- After the required connections have been made, plug the mains power lead into the socket on the back of the Soundbar and then plug the power adaptor into the mains power wall socket and switch on.
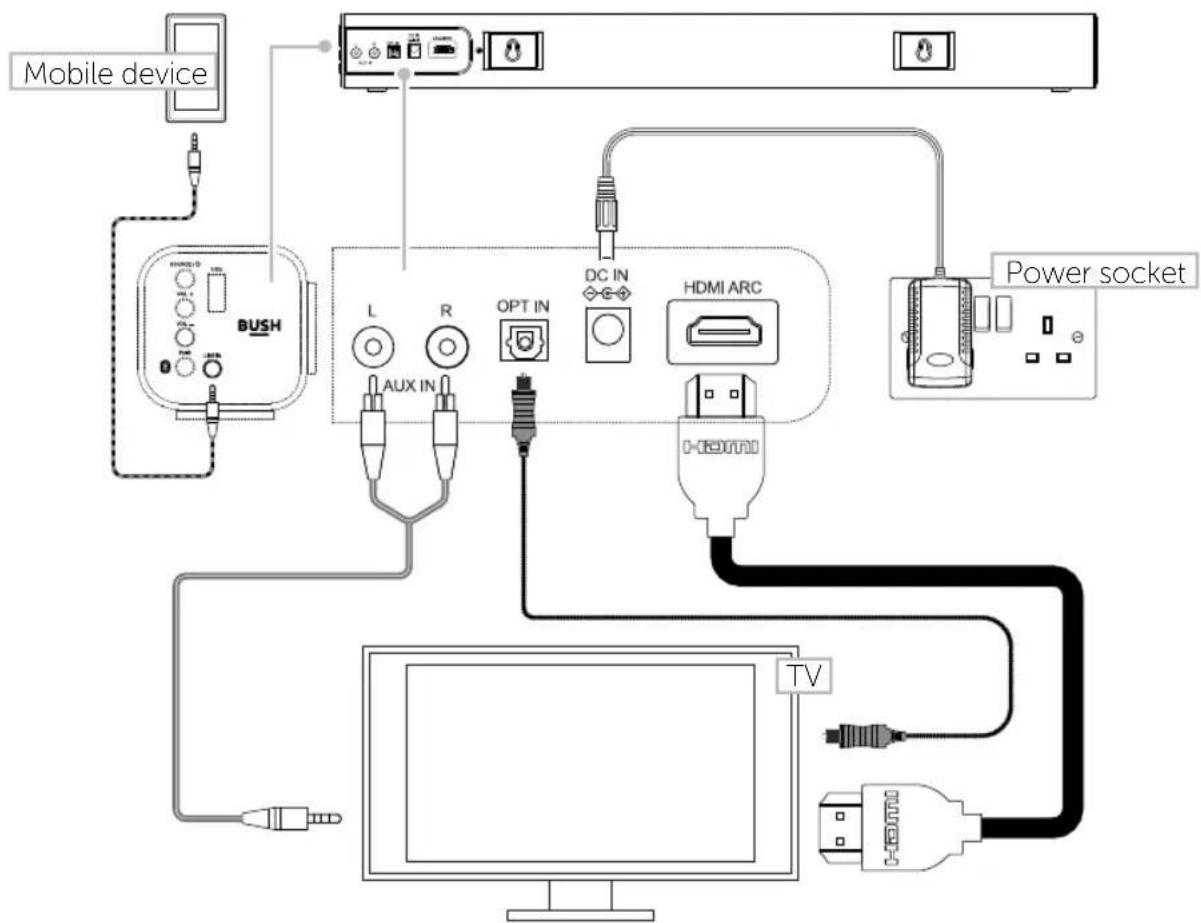
If you require any technical guidance or find that your product is not operating as intended, a simple solution can often be found in the Troubleshooting
This page is left intentionally blank
This page is left intentionally blank
Using your Soundbar
3

natural_image
Abstract geometric pattern composed of gray triangles and squares on a white background, with no text or symbols present.Using your Soundbar
Let's get started
Power on
Press and release the Power button on the end of the product or on the remote control. Your Soundbar will switch on in Bluetooth mode and will search for Bluetooth devices.
Note: This Soundbar has a 'last function used' memory. It will turn on in the last mode used before it was turned off if the product has not been unplugged.
Standby mode
Press and hold the Power button on the end of the product or press and release the Power button on the remote control. Your Soundbar will go to Standby mode.
Note: This product is designed to go to STANDBY mode automatically after 15 MINUTES (approximately), if it does not receive an audio signal. Press and release the Power button on the Soundbar or on the remote control to switch your product back on again.
Change the mode (Audio source)
Press and release the Power/Source button on the end of the Soundbar or the M/⌘ button on the remote control to change between Bluetooth/USB/Line in/Aux-in/Optical and HDMI ARC modes. Connect a USB stick in to the USB socket on the end of the Soundbar to switch directly to USB mode.
Check the display which will confirm the current mode
bt - Bluetooth
LINE - Line In
USB - USB Playback
ARC - HDMI ARC
OPT - Optical
AUH - L & R Aux In
If you require any technical guidance or find that your product is not operating as intended, a simple solution can often be found in the Troubleshooting
Using your Soundbar
Let's get started
Adjusting the volume
Vol- on the soundbar and the remote
- Press and release to decrease the volume in steps.
- Press and hold to progressively decrease the volume.
Vol+ on the soundbar and the remote
- Press and release to increase the volume in steps.
- Press and hold to progressively increase the volume.
Bass or Treble enhancement
The Bass and Treble settings each range from -3 to +3.
- Press and release the Bass or Treble + or - button on the remote control to adjust the Bass or Treble as appropriate.
Pairing with a Bluetooth device
Before you can use your Sound bar in Bluetooth mode with your TV or other Bluetooth capable device, you need to 'pair' it.
- When you first power on your Soundbar or when you change the mode to Bluetooth, the product will search for Bluetooth devices and you will see 'bt' flashing on the front of the Soundbar.
- On the device that you would like to connect to your Soundbar via Bluetooth (e.g. TV/iPhone/iPad/Android/other phone/Tablet/Computer), turn on Bluetooth connectivity and ensure that it is 'discoverable'.
Note: If necessary, refer to the instructions for your device to add or set up Bluetooth.
section of these instructions, or online at www.bush-support.com. If you still require further assistance, call one of our experts on 0345 600 3021.
Using your Soundbar
Let's get started
- When found, your Soundbar will be displayed as 'BUSH SR210-12'. Select the device name to begin pairing.
Note: If your device requests a password, please enter '0000' to complete the device pairing.
-
Check the Soundbar, 'bt' will stop flashing when pairing has been successful.
-
Now that you have paired your device with the Soundbar, it will connect to it when it is within range, which is about 10 metres or less (33 feet or less), line of sight.
-
Your device will remain paired with the Soundbar unless you decide to disconnect or 'unpair' it.
Note: You can press and hold the Bluetooth/Pair button on end of the Soundbar to unpair your current device and search for new devices.
Controlling a paired device
Once paired you can either use the controls on the connected audio device to play/pause, skip tracks etc., or you can use the control buttons on the Soundbar remote control.
▶/II Play/Pause
▶▶| Press and release to skip forward
Press and release to skip back
USB mode
Insert the USB stick which has the music files you wish to play, into the USB socket on the end of the Soundbar. Check that you line up the USB stick with the USB socket and that it is the right way around. When connected correctly, USb will be displayed.
Note: Your Soundbar will support both mp3 and wma audio formats.
If you require any technical guidance or find that your product is not operating as intended, a simple solution can often be found in the Troubleshooting
Using your Soundbar
Let's get started
You can use the remote control to play/pause and skip tracks on the USB.
▶/II Play/Pause
▶▶| Press and release to skip forward
Press and release to skip back
Note: Remember to unplug the USB stick after use to access the other modes on your Soundbar.
Line in mode
Check that your Soundbar is in Line in mode. If you are not already in Line in mode, press and release the Source button on the Soundbar or the M/OK button on the remote control to go to Line in mode. Line will be displayed on the front of the Soundbar.
- Connect one end of a 3.5mm audio cable (not supplied) to the headphone (or auxiliary out) socket of your secondary device.
- Connect the other end to the Line in socket on the end of your Soundbar.
- Press the Play button on your external device to start playback through the Soundbar.
To gain optimal volume levels, adjust the volume level on both the secondary device and on the Soundbar.
Note: It is recommended that you unplug the audio cable from the Line in socket on the end of the Soundbar, after you have finished listening to your external device.
Aux in mode
Check that your Soundbar is in Aux in mode. If you are not already in Aux in mode, press and release the Source button on the Soundbar or the M/OK on the remote control to go to Aux in mode. AUX will be displayed on the front of the Soundbar.
- Connect the Left (white) and Right (red) plugs supplied to the Left (white) and Red (right) sockets on the back of the Soundbar.
section of these instructions, or online at www.bush-support.com. If you still require further assistance, call one of our experts on 0345 600 3021.
Using your Soundbar
Let's get started
- Connect the other end of the cable to the Audio out socket on your TV.
The sound output from your TV, will now be via your Soundbar.
To gain optimal volume levels, adjust the volume level on both the TV and on the Soundbar.
Optical mode
Check that your Soundbar is connected to the TV or other audio device using an Optical cable (not supplied) and is in Optical mode.
If you are not already in Optical mode, press and release the Source button on the Soundbar or the M/OK on the remote control to go to Optical mode. OPt will be displayed on the front of the Soundbar.
HDMI ARC Mode
Check that your Soundbar is connected to the TV using an HDMI cable (not supplied) and that this is plugged into the HDMI ARC socket on the back of the Soundbar.
If you are not already in HDMI mode, press and release the Source button on the Soundbar or the M/10K ion on the remote control to go to HDMI mode. ARC will be displayed on the front of the Soundbar.
Note: Ensure that the HDMI ARC function is selected on your TV and the digital output is set to PCM.
If you require any technical guidance or find that your product is not operating as intended, a simple solution can often be found in the Troubleshooting
Using your Soundbar
Let's get started
Wall mounting your Soundbar
You can wall mount your Soundbar. You will need:
- 2 x rawl plugs of a type and size that are suitable for the wall that you will hang the Soundbar on. 2 rawl plugs have been supplied but please check that these are suitable for the wall surface that you will use.
- 2 x screws that are the correct size for the rawl plugs. 2 screws have been supplied which are the correct size for the rawl plugs provided, but you will need to check that they will be sufficient for the wall surface that you will use.
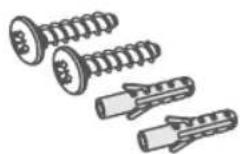
You will also need to check that the screw heads fit and hold well into the wall mount points on the back of the Soundbar.
Notes:
- Make sure that the screws and rawl plugs you use are suitable for supporting the Soundbar.
- To avoid damage to the Soundbar and personal injury, you should get a qualified person to drill the fixing surface and fit the appropriate wall fixings.
- When drilling into walls, always check that there are no hidden wires or pipes etc.
-
Before wall mounting your product, check the wall strength. If this is not clear, then consult relevant qualified personnel.
• Take care not to allow the Soundbar to fall whilst attempting to hook it onto the screws you have fitted to hang the product onto. -
Align the Soundbar in your chosen location and use a pencil to mark the drilling positions of 337 mm apart.
-
Drill the holes as marked in point 1 above.
section of these instructions, or online at www.bush-support.com. If you still require further assistance, call one of our experts on 0345 600 3021.
Using your Soundbar
Let's get started
- Push 2 rawl plugs into the holes. Insert 2 screws into the holes and tighten. Take care to leave enough space between the screw heads and the wall.
Note: You will need to ensure that the screws heads can fit into the wall mount points on the back of your Soundbar and that they are long enough to sufficiently grip into the rawl plugs and wall. You must also leave enough space between the screw head and the wall for the screw head to fit into the mounts.
- Hang the Soundbar onto the screws. For secure mounting ensure the screw heads slide firmly into the narrow part of the wall mount fixings on the back of the Soundbar.

If you require any technical guidance or find that your product is not operating as intended, a simple solution can often be found in the Troubleshooting
This page is left intentionally blank

This page is left intentionally blank
Other information
4

natural_image
Abstract geometric pattern composed of gray triangles and squares on a white background, with no text or symbols present.Other information
Helpful technical information
Technical specification
| Power output 2 x 12W | |
| Frequency response 20Hz - 20kHz +/- 4dB | |
| Input sensitivity Line in: 800mW, Aux in 1000mV | |
| Main unit | |
| Power supply | Input: 100-240V ~ 50-60HzOutput:14V 1.2A |
| Power adapter make and model | Dongguan Yingna Electronic Technology Co. Ltd. YN-24WA140120UK |
| Power consumption 38.69W | |
| Standby power consumption ≤ 0.5W | |
| Dimensions Soundbar: 620 x 70 x 63mm | |
| Mains cable length 1.5M | |
| Remote control | |
| Battery 2 x AAA | |
| Bluetooth | |
| Bluetooth compatibility | A2DP, AVCTP, AVDTP, AVRCP, HFP, SPP, SMP, ATT, GAP, GATT, RFCOMM, SDP, L2CAP |
| Bluetooth version V5.1 | |
| Pairing name BUSH SR210-12 | |
If you require any technical guidance or find that your product is not operating as intended, a simple solution can often be found in the Troubleshooting
Other information
Helpful technical information

This product is intended for use within the UK.
Declaration of Conformance
Hereby, Argos Ltd, declares that this SR210-12 Soundbar is in compliance with the essential requirements and other relevant provisions of the Radio Equipment Directive 2014/53/EU and UK Radio Equipment Regulations 2017. The complete declaration of conformity can be obtained by contacting http://www.bush-support.com/
This page is left intentionally blank
Product support
5
natural_image
Abstract geometric pattern composed of gray triangles and squares on a white background, with no text or symbols present.Product support
Help is always at hand
Troubleshooting
No power:
- Check the power plug connection at the back of the Soundbar and at the wall socket.
- Check that you are not in Standby mode. Press and release the Power button on the Soundbar or on the remote control.
Unable to pair with a Bluetooth device:
- Check that you are in Bluetooth mode.
- Ensure that you are within range of the Soundbar for Bluetooth functionality, 10 metres or less (33 feet or less).
- Check that the device you are attempting to pair with supports A2DP stereo audio transmission.
- Move any other unnecessary Bluetooth devices/electrical equipment away from the Soundbar and if possible, turn them off or disable their Bluetooth functionality.
No sound / Sound distortion:
- Adjust the volume
- Increase the volume on the secondary device and on your Soundbar.
- Check that you are in the correct mode for the music that you wish to listen to.
Remote control does not work:
- Reduce the distance between the remote control and the Soundbar.
- The remote control batteries may be exhausted. Replace the remote control batteries.
- The remote control needs clear line of sight, without obstacles, to function correctly. Direct sunlight or other bright light sources shining on the remote sensor may affect the performance.
Soundbar powers off:
- Your Soundbar has been designed to automatically go to Standby mode after approximately 15 minutes without an audio signal, to save power. Press the Power button on the Soundbar or on the Remote control to turn your Soundbar back on again.
If you require any technical guidance or find that your product is not operating as intended, a simple solution can often be found in the Troubleshooting
Product support
Help is always at hand
Help and assistance
If you require any technical guidance or find that your Soundbar is not operating as intended, a simple solution can often be found in the Troubleshooting section of these instructions or online at www.bush-support.com
If you still require further assistance, call one of our experts on 0345 600 3021*. To help give us give you a fast and efficient service please have the following information ready:
Model Ref.
Serial number
You can find these on the rating plate - a small information panel (usually a sticker or metal plate) on the rear or base of your product.
Date of purchase
This will be shown on your receipt
Local call rates applies*
Lines open 8am-7pm Monday to Saturday and 10am-4pm Sunday.
*Calls to Bush enquiry lines may attract a charge and set up fee from residential lines depending on your call plan/tariff. Mobile and other providers costs may vary, see www.bt.com/pricing for details.
For security and training purposes, telephone calls to and from customer service centres may be recorded and monitored. Calls from Republic of Ireland will attract international call charges.
section of these instructions, or online at www.bush-support.com if you still require further assistance, call one of our experts on 0345 600 3021.
Product support
Help is always at hand
Disposal

- This product should not be treated as normal household waste and it should be recycled. Please take it to your nearest collection facility or for further details contact your local council or visit www.recycle-more.co.uk
- Batteries contain substances that may be harmful to the environment and human health. Keep out of the reach of children and seek immediate medical help if swallowed.
- Batteries should not be disposed of in the normal household waste but taken to appropriate local recycling facilities, where and when these are available.
- Never throw batteries in a fire or attempt to open the outer casing
If you require any technical guidance or find that your product is not operating as intended, a simple solution can often be found in the Troubleshooting
Product support
Help is always at hand
BUSH
Call us now and activate your 12 month guarantee
Thank you for choosing Bush. Your new product is guaranteed against faults and breakdowns for 12 months. Don't forget to register it with us today so we can provide you with our best possible after-sales service and useful updates.
www.bushregistration.co.uk
FREEPHONE*
0800 597 8548
Lines are open 8am - 8pm, 365 days a year. *Calls may be recorded and monitored.
Your Bush Guarantee
This product is guaranteed for twelve months from the date of original purchase. Any defect that arises due to faulty materials or workmanship will be repaired free of charge (or if applicable the product will be replaced or the purchase price refunded) where possible during this period by the dealer from who your purchased the unit.
The guarantee is subject to the following provisions:
- The guarantee does not cover accidental damage, misuse, cabinet parts, knobs or consumable items.
- The product must be correctly installed and operated in accordance with the instructions contained in the manual.
- It must be used solely for domestic purposes. The guarantee will be rendered invalid if the product is
re-sold or has been damaged by inexpert repair.
- Specifications are subject to change without notice.
- Bush disclaim any liability for loss or damage arising from the breakdown of the product.
- This guarantee is in addition to and does not diminish your statutory or legal rights.
Important Data Protection Information
To find out how we and Domestic & General Insurance Plc use your data please refer to the guarantee registration material or visit www.bushregistrations.co.uk.
Guarantor: Argos Limited - 489 - 499 Avebury Blvd. - Milton Keynes - MK9 2NW
If you require any technical guidance or find that your product is not operating as intended, a simple solution can often be found in the Troubleshooting.
section of these instructions, or online at www.bush-support.com If you still require further assistance, call one of our experts on 0345 600 3021.
Product support


This page is left intentionally blank

This page is left intentionally blank
BUSH
Contact:
www.bush-support.com
Helpline: 0345 600 3021


- Help and Guidance
- Contents
- Safety information
- Getting to know your Soundbar
- Using your Soundbar
- Other information
- Product support
- Safe
- Safety information
- Power source
- Moisture and water
- Heat sources and flames
- Ventilation
- Care and cleaning
- Getting to know your Soundbar
- 2
- Ready? Let's begin...
- Accessories
- Inserting batteries
- Positioning the Soundbar
- Making the Soundbar connections
- Using your Soundbar
- 3
- Power on
- Standby mode
- Change the mode (Audio source)
- Adjusting the volume
- Bass or Treble enhancement
- Pairing with a Bluetooth device
- Controlling a paired device
- USB mode
- Line in mode
- Aux in mode
- Optical mode
- HDMI ARC Mode
- Wall mounting your Soundbar
- Notes:
- Other information
- 4
- Product support
- 5
- Troubleshooting
- No power:
- Unable to pair with a Bluetooth device:
- No sound / Sound distortion:
- Remote control does not work:
- Soundbar powers off:
- Help and assistance
- Disposal
- BUSH
- Call us now and activate your 12 month guarantee
- www.bushregistration.co.uk
- Your Bush Guarantee
- The guarantee is subject to the following provisions:
- Important Data Protection Information
Brand : BUSH
Model : SR210-12
Category : Soundbar