V33 Plus - Dash cam Rexing - Free user manual and instructions
Find the device manual for free V33 Plus Rexing in PDF.


| Brand | Rexing |
| Model | V33 Plus |
| Product Type | Dash Cam (Front & Rear) |
| Processor | NTK96670 |
| Lens | Fixed-focus with full-glass elements, f/1.8 aperture |
| Display | 2.7 inch, 16:9 LCD |
| Audio I/O | Internal high-sensitivity mic and speaker |
| Memory Support | Micro SD card (Class 10 or higher, up to 512 GB) |
| Video Resolution (Single) | UHD P30, QHD P30, FHD P30 |
| Video Resolution (Dual) | UHD P24 + FHD P24, QHD P30 + QHD P30, QHD P30 + FHD P30, FHD P30 + FHD P30 |
| Video Resolution (3 Channel) | 3 QHD P30 |
| Video Format | H.264 (.MOV) |
| Loop Recording | 1 / 2 / 3 min or Off |
| G-Sensor | Low, Medium, High, Off |
| GPS Logger | Built-in |
| Wi-Fi | Built-in (802.11 b/g/n) |
| Battery | Supercapacitor |
| Power Supply | 12V car charger (included) |
| Mounting | 3M adhesive mount and electrostatic sticker |
| Languages | English, Chinese, French, Spanish, Portuguese, German, Italian, Russian, Japanese |
| Dimensions | Not specified |
| Weight | Not specified |
| Included Accessories | Dash camera, rear camera, car power connector (12 ft), 3M adhesive mount, cable adhesive spacer, cable management tool, electrostatic sticker, warning sticker, 64 GB SD card, smart hardwire kit, user manual |
| Warranty | 12 months (extendable to 18 months with registration) |
Frequently Asked Questions - V33 Plus Rexing
User questions about V33 Plus Rexing
0 question about this device. Answer the ones you know or ask your own.
Ask a new question about this device
Download the instructions for your Dash cam in PDF format for free! Find your manual V33 Plus - Rexing and take your electronic device back in hand. On this page are published all the documents necessary for the use of your device. V33 Plus by Rexing.
USER MANUAL V33 Plus Rexing
The information in this manual is subject to change without notice.
www.rexingusa.com
Activate Your
18-Month Warranty & Choose Your FREE Gift!
Activate within 30 days of purchase to claim your free gift and extend your limited 12-month warranty to 18 months.
Scan The QR To Activate & Select Your Free Gift
SCAN ME!

https://www.rexingusa.com/productreg/
Overview
Thank you for choosing REXING!
We hope you love your new products as much as we do. If you need assistance, or have any suggestions to improve it, please contact us.
care@rexingusa.com
(877) 740-8004
Our support team will respond to you as soon as possible.
Always a surprise with Rexing
Check us out here.
- https://www.facebook.com/rexingusa/
- https://www.instagram.com/rexingdashcam/
- https://www.rexingusa.com/support/registration/
Facebook Instagram 513 Product Support
SIB Product Support
Table of Contents
About this Manual 2
Table of Contents 4
-
What's in the box 6
-
Camera Overview 8
Device Layout 8
Buttons 9
Status Icons 10
- Get Started 12
Installation 12
Mount the Dash Cam 12
Inserting the Memory Card 13
Formating a Memory Card 14
Mount the Rear Camera 16
Installing the Camera onto the windshield 17
Turning the Device On and Off 18
- Basic Operation 19
Automatic Recording 19
Playback 20
Camera Playback Mode 21
Computer Playback 22
GPS Playback 22
Wi-Fi Connect 25
Parking Monitor 28
- Device Settings 30
Video Settings 30
System Settings 36
Photo Settings 39
- Troubleshooting 42
Update Firmware 44
-
Product Specifications 44
-
Warranty & Support 46
1. What's in the box
1.2.



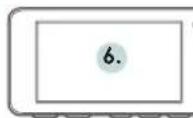

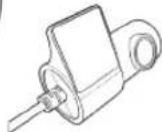
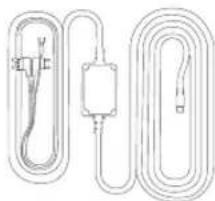
natural_image
Pure electrical circuit lines without any symbols
9.10.

11. 12.
- Users Manual
- Safety Guide
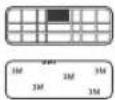
- 3M Adhesive Mount
- Cable Adhesive Spacer
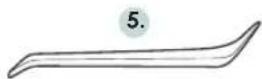
- Cable Management Tool
- Rexing V33 Dash Camera
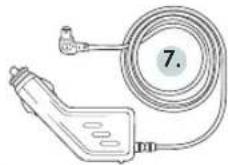
- Car Power Connector (12ft)
-
V33 Rear Camera with Extension
-
Electrostatic Sticker
- Warning Sticker
- 64 GB SD Card
- Smart Hardwire Kit
The items supplied with the device and any available accessories may vary depending on your region. Appearances and specifications are subject to change without prior notice. Availability of accessories is subject to change.
All supplied items are designed for use only with this device and may not be compatible with other devices. Malfunctions resulting from the use of unapproved accessories are not covered by the warranty service.
For more information about available accessories, refer to www.rexingusa.com.
2. Camera Overview
Device Layout
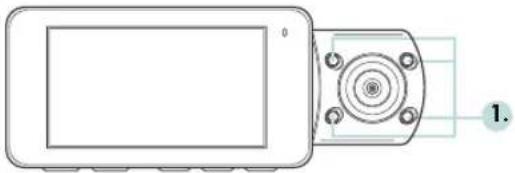
natural_image
Diagram of a device with a rectangular panel and a circular component, labeled with number 1 (no text or symbols on the diagram itself)2.4.5.3.6.
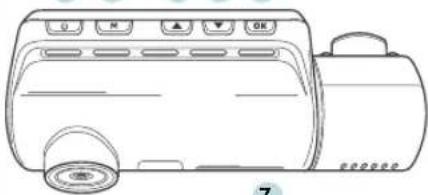
natural_image
Line drawing of a refrigerator with control buttons and a door handle (no text or symbols)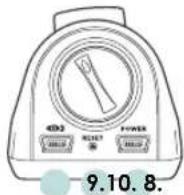
natural_image
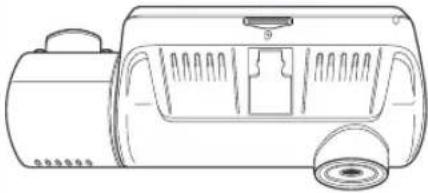
Line drawing of a portable electric stove or refrigerator with ventilation grilles and a side-mounted fan (no text or symbols)- 4 IR Lights
- Power Button/ Screen Toggle Button
- Menu Button/Playback Button
- Up Button/ Mode Button/ Wi-Fi Button
- Down Button/ Mic Button
- OK (Confirm) Button/ Video Lock Button/ Record Button
- Micro SD Card Slot
- Power/USB Charging Port
- Reset Pinhole
- Rear Camera Port
Buttons
| Button Function | |
| Press: Display on or offHold: Turn the device on or off manually | |
| OK | Menus: Confirm a selectionVideo Mode: Start/ Stop recording: Hold to lock current recordingPhoto Mode: Take photosPlayback Mode: Start/ Stop playback |
| M | Press: Enter menu, toggle through menus or exit current menuHold: Change modes |
| ▲ | Menus: Move selection upHold (Video or Photo Mode): Enable Wi-Fi featurePlayback Mode: Decrease or reverse playback speed/ Cycle left through recordingsPress (Video or Photo Mode): Change front/rear camera views |
| ▼ | Menus: Move selection downVideo Mode: Toggle audio recordingPlayback Mode: Increase playback speed/Cycle right through recordings |
| RESET | Press and hold for 4 seconds to reset the device in the event that it operates erratically, hangs up, or freezes |
| LED Indicator | Flashing Red: RecordingSolid red: Charging |
Status Icons
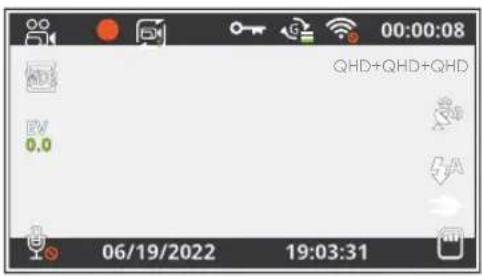
| Icon Indication | |
| QHD+QHD+QHD | Video Resolution |
| Currently Recording (Blinking) | |
| Wide Dynamic Range Enabled | |
| Connected to Power Source | |
| Audio Recording Enabled | |
| Audio Recording Disabled | |
| Video Recording Mode | |
| Playback Mode | |
| Photo Mode | |
| Loop Recording | |
| Memory Card (Inserted) | |
| EV0.0 | Exposure |
| GPS Signal Acquired | |
| GPS Searching for Signal | |
| Current Recording Locked | |
| IT Lights Auto | |
| G-Sensor Level |
3. Get Started
Installation
Video guide can be found at https://www.rexingusa.com/support/videos/
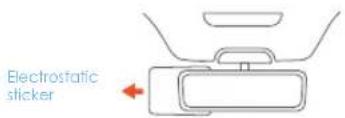
Step 1: Installing the Electrostatic Stickers
1.1 Prepare Your Windshield
Thoroughly cleanse your windshield with either water or alcohol. Follow this by wiping it dry using a clean, dry cloth to ensure a spotless surface.
1.2 Position the Sticker
Next, carefully peel off the protective film from the electrostatic sticker. Attach the sticker to the windshield, ideally behind the rear-view mirror. This position is recommended to avoid obstructing your view while you're on the road.
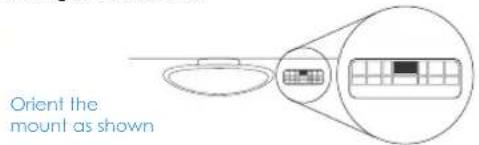
Step 2: Mount the Dash Camera
Make sure that you mount the front camera in a safe, appropriate location where is won't obstruct the driver's view. Clean your windshield before applying the mount. Wait at least 20 minutes after applying the mount to the windshield before attaching the camera.
Step 3: Inserting the Memory Card
The V33 accepts Micro SD Memory cards (class 10 or higher with a maximum capacity of 512GB).
Depending on the memory card manufacturer and type, some cards may not be compatible with your device. Using an incompatible card may damage the device or the memory card or corrupt the data stored on it.
Note: Before inserting or removing a memory card, first ensure you've powered down the device.
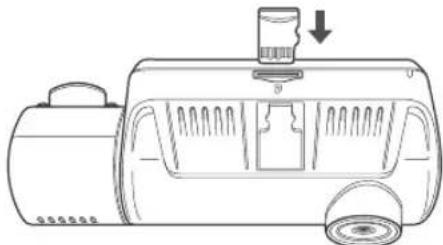
natural_image
Line drawing of a device with a handle and internal compartments, no text or symbols presentInserting a memory card
- If the device is powered on, press and hold the POWER button to power down.
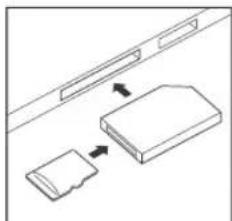
- Insert the card in the orientation shown.
- Push the card into the slot, listening for a click sound signaling the card is securely inserted.
Removing the Memory Card
Before removing a memory card from your V33, you must first dismount it for safe removal.
With the device powered down, press down the memory card until you hear a click. Gently remove your finger (or other pressing object to allow the spring release to push the memory card out of the slot).
Do not remove the memory card while the device is transferring or accessing information. Doing so can result in data loss or corruption or damage to the memory card or device. Rexing is not responsible for losses that result from the use of damaged memory cards, including the loss of data.
Connecting the charger improperly may cause serious damage to the device. Any damage caused by misuse is not covered by the warrant. Use only Rexing-approved chargers. Using unapproved chargers or cables can damage the device.
If the device receives an unstable power supply, the screen may not function properly. If the device is not operating properly using a Rexing-approved charger, please contact Customer Care (care@rexingusa.com).
Step 4: Format the Memory Card
Run the cable down from your camera to the 12V cigarette lighter port of your vehicle. Be sure to connect only Rexing-approved chargers designed and supplied specifically for use with your device. Using an incompatible charger can cause serious personal injury or damage to you device.
Before formatting your memory card, always remember to make backup copies of all important data stored on the device. The manufacturer's warranty does not cover loss of data resulting from user actions.
For best results, formate the memory card using the Format function on your camera.
It's recommended that you format your memory card after transferring files to your computer or at least once a month.
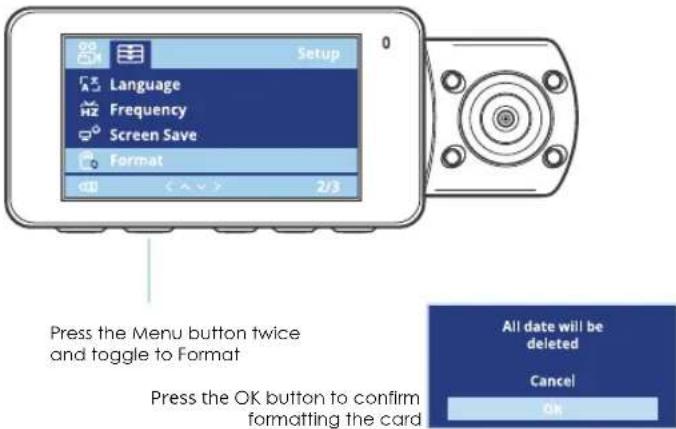
Using your camera to format a memory card:
- Upon turning on the camera, press the OK button to stop recording.
- Press the Menu button twice to enter the Setup Menu. Use the UP and Down navigation button to navigate to the "Format" option.
- Press OK to confirm your selection.
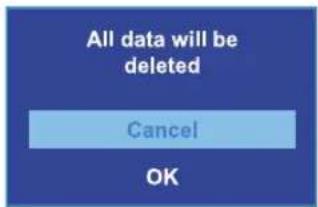
- You will be notified that all data will be deleted. Scroll down to "OK" and press the OK button to confirm.
- If you followed the instructions above, you should see a blue box asking you to please wait while the card is being formatted. Formatting should only take a moment, and you will be taken back to the Setup Menu once formatting in complete.
- At this point, disconnect from the power source. The camera will shut down automatically after 3 seconds. The next time the camera is connected to power, the camera should start up and begin recording automatically.
Step 5: Mount the Rear Camera Step 6: Installing the Camera onto the Windshield
Mount the rear camera as shown below. Use rear camera cable to connect the rear camera to the V33 camera.
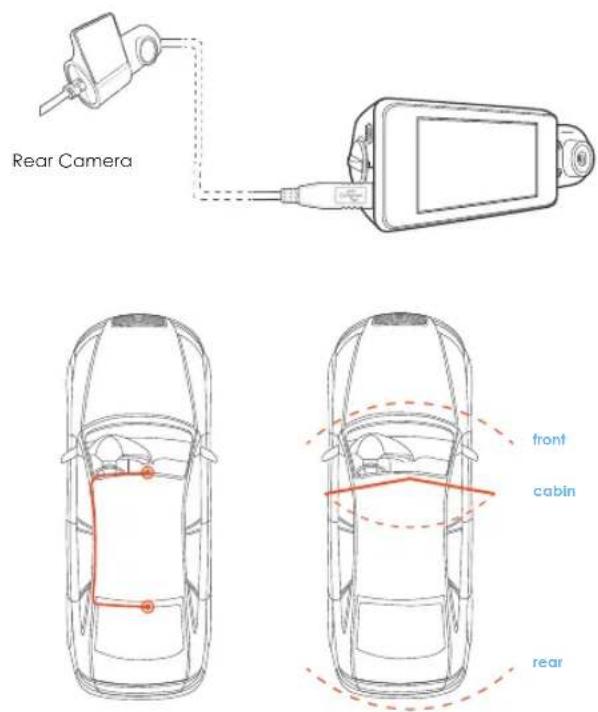
Place the camera on the mount and carefully route the power cable around the windscreen and tuck in under the trim. Plug the Car Charger Cable into a 12V DC power outlet for the car cigarette lighter. Connect car charger to the camera. The camera will auto-start recording once powered on.
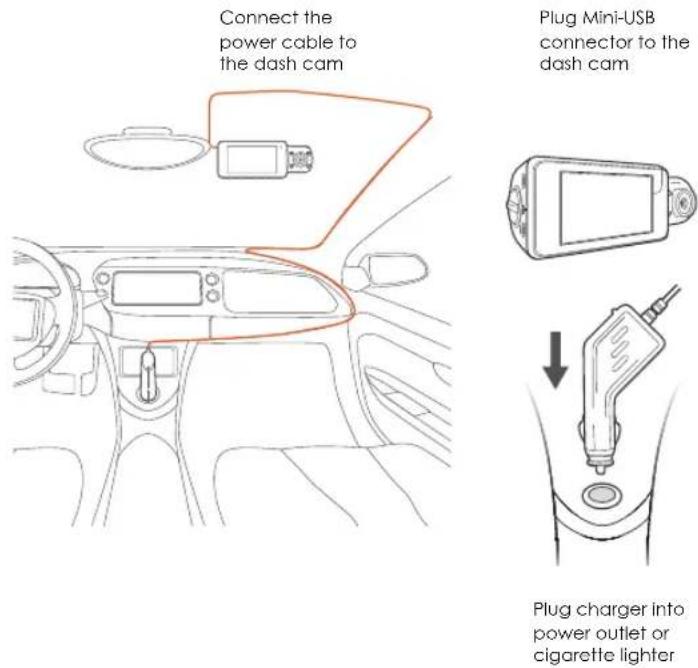
Step 7: Turning the Device On or Off
Press and hold the POWER button for a few seconds to turn on the device. A welcome message will be displayed on the screen. Doing the same to manually turn off the device and a goodbye message will be displayed.
The V33 will switch on or off automatically if you keep it connected using the car charger. The camera will automatically start recording when it is powered on. After power is disconnected, the device will shut down after 3 seconds.
Note: If your car cigarette lighter provides constant power, the unit may not turn on or off automatically with the car.
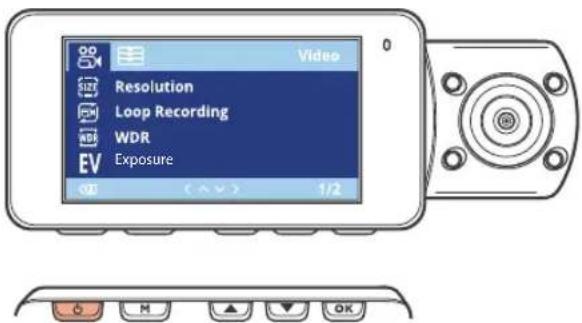
Press and hold the POWER button to turn the device on manually
4. Basic Operation
4.1 Automatic Recording
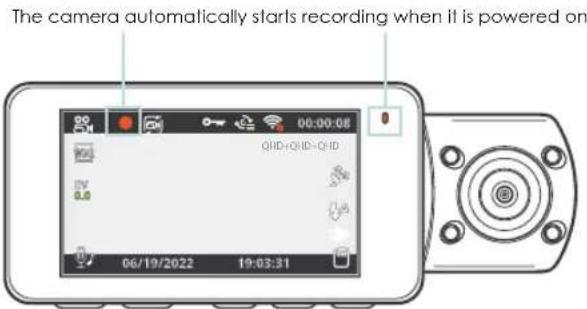
The device will automatically turn on and begin recording once it receives power, such as when you start your car. The indicator and the red dot icon on screen will flash while recording.
Display Control
To switch between camera views on the LCD display, hold the UP button. Press the POWER button will turn on or off the LCD screen, your display setting won't affect the way recordings are captured.
Locking Videos
While recording, you can hold the OK button to manually lock the current video clip. This will ensure that Loop Recording won't overwrite the clip when the memory card is full. You can also lock videos after recording by using the Protect function in the Playback Menu. Locked videos can be found on the memory card under "\CARDV\MOVIE\RO".
Automatic Shutdown
Once power is disconnected, the dash cam will shut down within 3 seconds.
Wi-Fi Feature
In Video Recording Mode, while recording is stopped, hold the UP button to enable Wi-Fi feature. For detailed instructions on how to use Wi-Fi feature, see page 25 (Wi-Fi Connect).
4.2 Playback
Video recordings from the front and back cameras will be stored in chronological order on the memory card for easy navigation and playback.
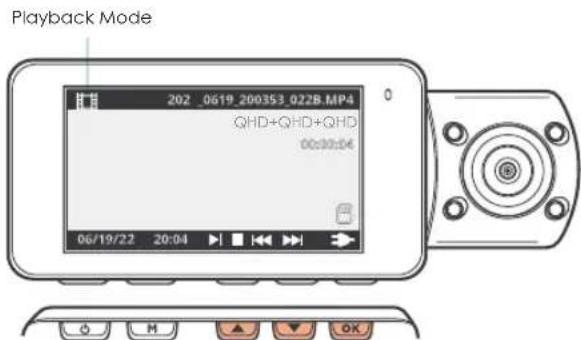
Control playback with OK, UP and DOWN navigation buttons
4.2.1 Camera Playback Mode
To play recordings on your device:
- Switch to Playback Mode by holding the MENU button.
- Use the UP and DOWN buttons to browse your videos.
- Press OK to play a selected recording.
- During playback, press OK to stop playback.
- FAST FORWARD: During playback, press the DOWN button one or more times to increase playback speed (2X/ 4X / 8X).
- FAST REWIND: During playback, press the UP button one or more times to decrease or reverse playback speed (-2X/ -4X / -8X).
To delete a selected recording:
- In Playback Mode, use the UP and DOWN buttons to browse your videos.
- Once you find the recording you want to delete, press MENU to view options.
- Press the DOWN button to scroll down to "Delete".
- Press OK once to view options to "Delete Current" recording or "Delete All" recordings.
- With "Delete Current" selected, press OK.
- When prompted with "Erase This?" press the DOWN button to scroll down to "OK" and press OK to delete the selected recording.
To delete all recordings:
- In Playback Mode, press MENU to view the Playback Menu.
- Press the DOWN button to scroll down to "Delete".
- Press OK once to view options to "Delete Current" recording or "Delete All" recordings.
- With "Delete All" selected, press OK.
- When prompted with "Erase All Recordings?" press the DOWN button to scroll down to "OK" and press OK to delete all recordings.
4.2.2 Computer Playback
Recommended Media Players: QuickTime Media Player / VLC / Windows Media Player
Insert your Micro SD card into an SD card adapter, then insert the SD card adapter into your computer or a card reader to access your card storage. Your videos will be stored under "\CARDV\MOVIE".
Locked videos can be found on the memory card under "\CARDV\MOVIE\RO".
natural_image
Diagram showing two components with arrows indicating direction, no text or symbols present4.2.3 GPS Playback
You can play back your recordings in a specialized application that allows you to view speed and location information alongside your footage.
System Requirements
Operating System: Windows 7, 8, or 10, MAC OS X Display Resolution: 1280 x 720
Installing the application:
- You can then access this information while playing back your recordings using the GPS Video player (For Windows and Mac, available at rexingusa.com).
- Download the zip folder containing the software installer.
- Unzip the folder to access the installer file contained within.
- Open the installer and follow the instructions to install the GPS Playback software to your computer.
- Once installed, you may launch the application.
Please go to rexingusa.com/support/videos/ for a tutorial video.
Opening a GPS video file:
- Once you've opened the application, navigate to the top menu bar and click "File > Open" to browse through your files.
- Navigate to the video file you want to add to the playback queue, select it and click "Open" to load it into the application. You may also select multiple videos at once.
- After a brief loading period, the (first) video should begin playing automatically, displaying speed and location information in real time along the right-side panels.
Playback
Beneath the video is a playback bar with a handle that you can drag to skip ahead to any time point in the video. Beneath that, there's a volume control slider, as well as previous, rewind, pause/play, fast forward, next, and stop buttons.
Additional Controls
Snip: Save the current frame of video as an image (PNG).
Full Screen: View the video in full screen (double-click the video to exit).
Settings
In the settings menu, you may change your language from English to Chinese, Japanese, or Vietnamese, etc. You may also change your unit of speed measurement from MPH to KM/H.
The dash cam will automatically search for the GPS signal once it's connected to the power source. Press the MENU button twice and go to System Settings. Toggle the GPS Speed Unit setting, and select your favorite speed unit.
After a GPS signal is found, the screen icon will turn from red to green. It will record the speed and location of your vehicle as you drive.
GPS Date-Time Troubleshooting
If your dash cam GPS date and time are incorrect please go to https://www.rexingusa.com/gps-date-time/ OR scan the QR code below.

4.3 Wi-Fi Connect
Step 1
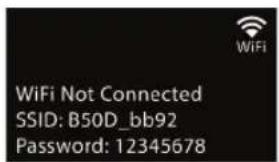
With your dash cam powered on, hold the UP navigation button to enable the Wi-Fi function. The Wi-Fi name (aka the SSID) and password for the dash cam should be displayed on-screen.
Step 2
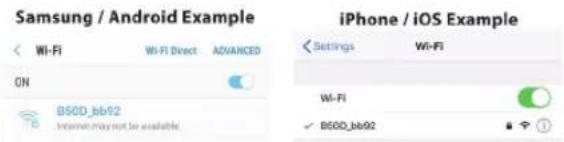
On your mobile device, navigate to your Wi-Fi settings. Connect to your dash cam's Wi-Fi by tapping its name when it appears. Enter your dash cam's Wi-Fi password if you are prompted to do so.
Note: On same mobile devices, you may have to try to connect more than once. To ensure you've successfully connected, your mobile device's screen should resemble the examples shown.
Step 3
Once you're connected to the dash cam, open the Rexing Connect app on your mobile device.
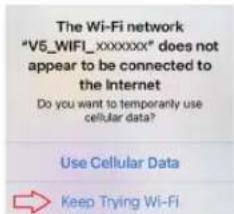
Please select "Keep Trying Wi-Fi" if you see the notification on the right.
Step 4
In the app, hit the "Connect" button to connect to your dash cam, allowing you to access live view and view/download your recordings.
Note: Hold to the UP button for 2 seconds to disconnect the Wi-Fi.
4.3.1 Rexing Connect App
Easily download the app by scanning the QR code below or search via the App Store or Google Play.

4.3.2 Wi-Fi Connect Troubleshooting
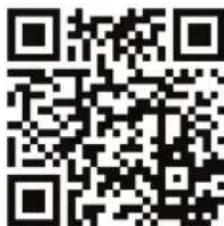
If you bring up the Rexing connect app and cannot connect your phone to the dash cam please go to
https://www.rexingusa.com/wifi-connect/
OR scan the QR code below.
4.4 Parking Monitor (Parking Surveillance Mode)
Parking monitor provides surveillance on your parked vehicle. When the engine is off, the hardwire kit is used to provide continuous power and protect your car battery from being discharged.
We kindly suggest taking a moment to watch our tutorial video. It's designed to help you have a smooth and successful installation experience. We believe you'll find it very helpful!
Please go to https://www.rexingusa.com/lhwkinstall or scan QR code
Option 1: Vibration Detection
To enable the Parking Monitor, you'll need to connect it with a Smart Hardwire Kit (Included).
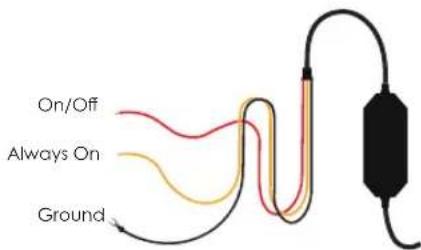
This feature will allow the dash cam to switch to parking mode automatically if the vehicle's engine turns off and switch back to the normal recording after the vehicle's engine turns on.
Gravity Sensing Record:
The Gravity Sensing detects significant or sudden movement (such as an impact or collision), it will trigger an event recording. We suggest setting the "Gravity Sensing" to High sensitivity for Parking Mode Recording.
Note:
If you do not use the parking mode function, please change the Gravity Sensing sensitivity to low. Otherwise, the video will easily be locked and the video cannot be deleted by the loop recording function. This will cause the memory card to be full of locked videos and cause the recorder to fail to work normally.
Please DO NOT ENABLE the Parking Monitor function in the settings of the dash cam WITHOUT connecting a smart hardwire kit. They may cause a malfunction.
Option 2: Motion Detection
To use this feature, you need to connect it with a Rexing Intelligent Hardwire Kit (sold separately).
Make sure that the Parking Mode is turned off on your dash cam, otherwise it may cause a malfunction.
Once the sensor has detected MOTIONS. The intelligent hardwire kit will power up the dash cam automatically and start recording until the MOTION is cleared.
5. Device Settings
5.1 Video Settings
Mode, press OK to stop recording, then press MENU once to open the Video Menu.
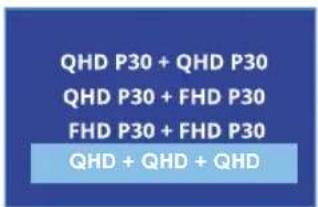
Resolution
Default setting:
$$ \mathrm{QHD} \quad \mathrm{P30} + \mathrm{QHD} \quad \mathrm{P30} + \mathrm{QHD} \quad \mathrm{P30} $$
Set the video recording resolution.
Approximate recording time (dual-channel)
| 14 hours128GB | 20 hours | |
| 256GB 28 hours | 40 hours |
Note: Choosing a single-channel resolution such as UHD, QHD, etc. will disable recording with the cabin and rear camera.
Loop Recording
Default setting: 1 Minute
Video will be continually recorded in segments. When the storage limit is reached on the memory card, new recordings will automatically
overwrite the oldest recordings. Locked video files on the memory card will remain protected and won't be overwritten by Loop Recording.
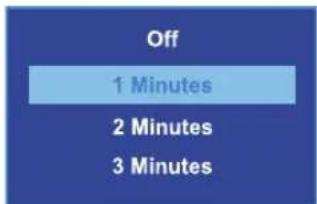
Note: Turning Loop Recording off will require you to manually clear recordings from your memory card whenever storage is full. We highly recommend keeping Loop Recording enabled.
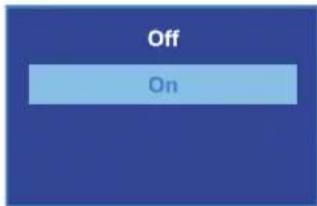
WDR (Wide Dynamic Range)
Default setting: On The camera automatically adjusts exposure settings to provide balanced lighting and clear video.
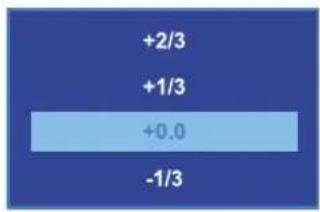
Exposure
Default setting: +0.0
Manually adjust the camera's exposure value to brighten or darken recordings. Positive values brighten recordings while negative values darken them.
Record Audio
Default setting: On
Allows you to enable or disable audio recording with your videos.
You may choose to record audio with video or turn off the microphone so all recorded videos will be muted.
Note: You can also use the MIC button to toggle auto recording.
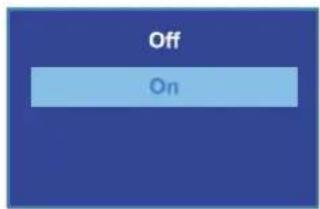
Date Stamp
Default setting: On
Stamp the date and time to the bottom of your videos. Note that the date and time stamp cannot be removed from videos if this feature was enabled at the time of recording.
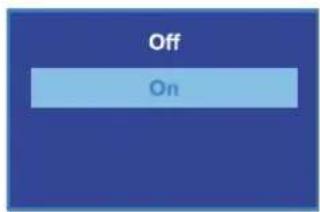
G Sensing
Default setting: Low
If a change in gravitational forces is detected, such as in the event of a vehicular accident, the G-sensor will signal to the camera, and an
automatic file lock will be placed on the current video, preserving your most crucial footage. Locked videos can be found on the memory card under "\CARDV\MOVIE\RO".
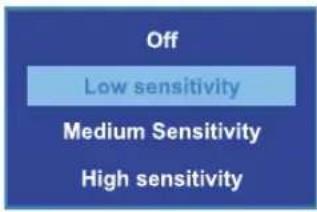
Note: Locked video files won't be erased by Loop Recording. They will remain on the memory card until they are manually deleted or when the card is formatted.
Plate Number
Default setting: Off
Enter your vehicle plate number. The plate number will be displayed at the bottom of your videos.
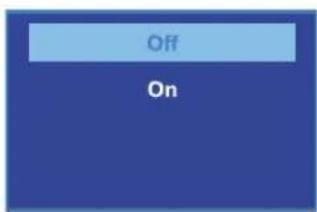
To enter your license plate number:
- UP / DOWN – Change current value
- OK - Move to next value
- MENU - Confirm setting
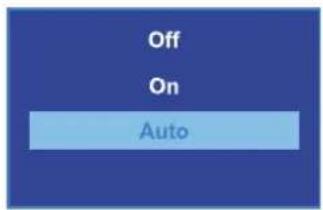
IR Light
Default setting: Auto
Auto handle low light conditions and ensures flawless video footage even when the passenger cabin is dark.
Daylight Savings
Default setting: Off
When enabled, time is advanced forward by 1 hour to match daylight savings time.
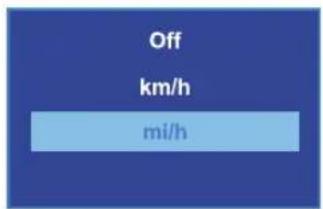
GPS
Default setting: mi/h
Display speed information at the bottom of your recordings.
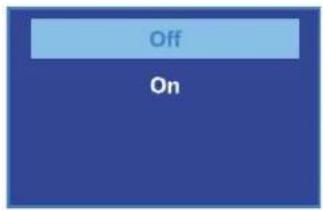
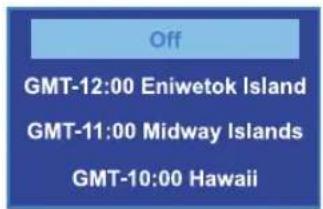
Set Time Zone
Default setting: Off
Updates the time automatically with your time zone.
Parking Monitor
Connect the dash cam to a smart hardwire kit or an intelligent hardwire kit (both sold separately) to activate the parking monitor function. (see page 28 for detailed operations)
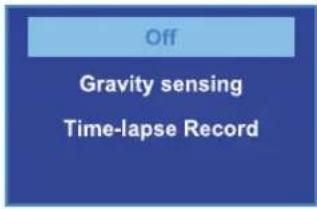
G-Sensor
When a collision is detected while the car is parking, the camera will turn on and record a 20-second video lip, which will be locked securely from being overwritten.
Pros: G-Sensor mode is more energy efficient.
Cons: It may miss recording some videos in the sleep mode.
Time Lapse
After the car is turned off, the dash cam will perform as usual, but the camera will capture videos and frames respecified intervals of time and condense them into a video time lapse, which means your footage appears to be faster upon playback.
Pros: Dash cam will record everything after the car engine is turned off.
Cons: It may drain your car battery; however, the hardwire kit has low voltage protection function. When the hardwire kit detected low car battery, the dash cam will automatically shut down to protect your car battery
5.2 System Settings
Press MENU twice to open the Setup Menu (in Video Recording mode, you must first stop recording which is done by pressing UP).
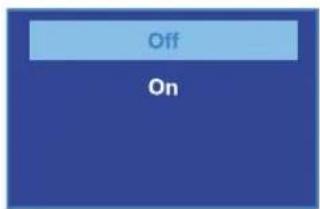
Wi-Fi
Default setting: Off
Turn this feature on to temporarily enable Wi-Fi feature (See Page 25).
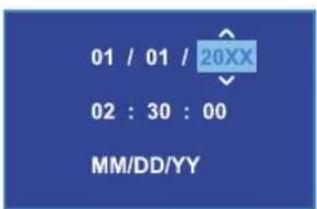
Date/Time
Set the time and date on your device.
To enter the date/time:
- UP/DOWN - Change current value
- OK - Move to next value
- MENU - Confirm setting
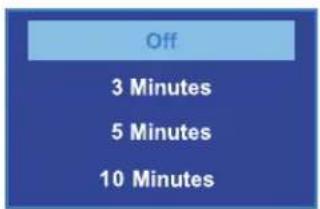
Auto Power Off
Default setting: Off
When enabled, this feature allows the device to shut down after a period of time in which the camera isn't recording.
Beep Sound
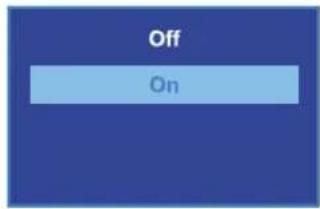
Default setting: On
Enable or disable the device's sound effects.
Language
Default setting: English
Set your preferred device language.
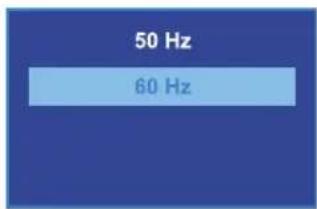
Frequency
Default setting: 60 Hz
Power supply specification used in your country or geographical region. The United States users should use 60 Hz (default).

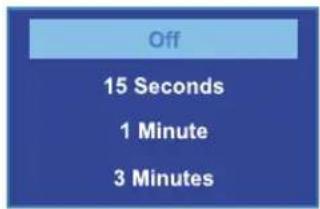
Screen Saver
Default setting: Off
Specifies the duration for which the display will stay on after the device is powered on. Having this setting disabled (default) will keep the display on constantly. You can press any button to wake the device from screen saver mode.
Format
Performing this operation will format the memory card, and clearing off all files.
Note: Locked videos will also be cleared, so ensure you have backed up your important footage before formatting the card.
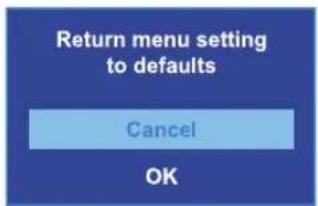
Default Setting
Performing this operation will reset all settings to their default values.
Version
Displays the current device firmware information.
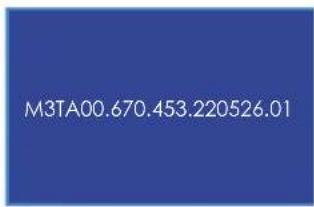
Photo Settings
These settings affect your still photo captures. Hold MENU button for 3 seconds to enter the Photo Mode. In Photo Mode, Press MENU once to open the Still Menu.
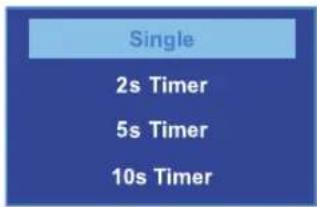
Capture Mode
Default setting: Single
Sets a timer that counts down before capturing images.
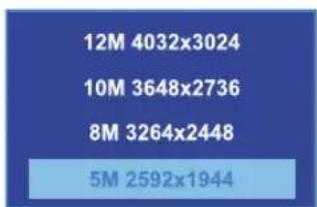
Resolution
Default setting: 5M
Set the pixel resolution for captured images. Higher resolution images are more detailed but take up more space on the memory card.
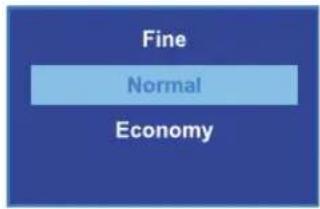
Quality
Default setting: Normal
Set the quality level of captured images. Lower quality images will take up less space on the memory card, but they are more visually compressed than higher quality images.
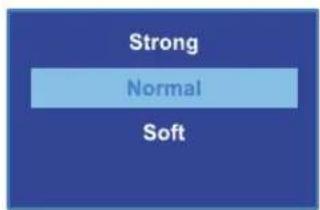
Sharpness
Default setting: Normal
Automatically enhance images for a clearer, more distinct picture.
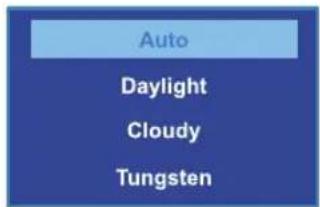
White Balance
Default setting: Auto
Adjust the white balance for different lighting environments. When set to Auto, the camera will automatically determine the appropriate white balance for each shot.
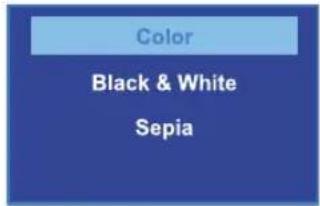
Color
Default setting: Color
Overlay a color effect for captured images. When set to Normal, no overlay is applied.
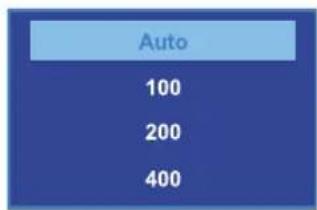
ISO
Default setting: Auto
Adjust the camera's sensitivity to light when taking photos. The higher the ISO, the better the camera operates in low light, although images are produced with more noise (grainy-looking).
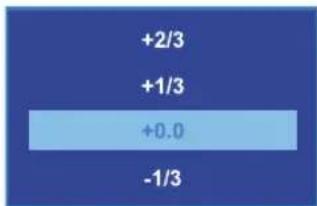
Exposure
Default setting: +0.0
Adjust the camera exposure value to manually brighten or darken your images.
Anti-Shaking
Default setting: On
When enabled, the camera will automatically reduce the amount of blurriness resulting from quick or "shaky" movement.
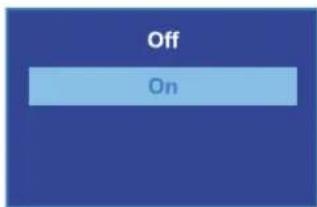
Quick Review
Default setting: Off
Upon capturing an image, the image will be previewed on the display for a few seconds before returning to Photo Mode.
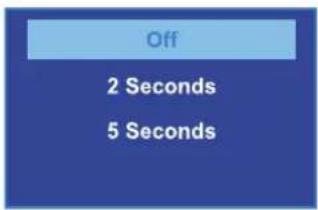
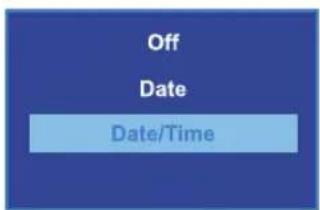
Date Stamp
Default setting: Date/Time
Apply a date and/or time stamp to captured images.
6. Troubleshooting
Updating Firmware
Please note that we only recommend updating your firmware if you experience issues with your camera.
Installing incorrect firmware can damage your device. Identify the correct firmware for your camera by following the prompts on the rexingusa.com firmware portal.
Watch out video tutorial on https://youtu.be/OhRcKoOBmko
To update your camera's firmware:
- Format the memory card using the Format function (See Page 14).
- Take note of your firmware version number (See Page 39 – Version).
- On a computer, visit the firmware section of www.rexingusa.com and follow the prompts to locate the correct firmware for your camera.
- Download the firmware zip file to your computer.
- Unzip the file.
- Move the resulting file (.bin) to the root of your memory card.
- Safely eject the card from computer, then insert into your unpowered camera.
- Turn the camera on by connecting to a power source.
- The camera will update automatically. The screen will stay on but the status light will stay on for up to 1 minute while the firmware updates.
- Important! Memory card needs to be formatted again after updating. Failure to do this will result in the camera attempting to update the firmware every time it's powered on.
- After formatting, hold the POWER button to reboot the camera. DO NOT disconnect the camera from the power source.
- Upon reboot, you may disconnect your camera from power.
Specifications
| Processor NTK96670 | |
| Lens | Fixed-focus with full-glass elements |
| Aperture | f1.8 |
| Display 2.7 inch, 16:9 LCD | |
| Audio I/O | Internal high-sensitivity mic and speaker |
| Memory Support | Class 10 or higher Micro SD card (up to 512GB) |
| Gravity Sensor Low / Medium / High / Off | |
| White Balance Auto | |
| Exposure Auto ISO | |
| Battery Type Supercapacitor | |
| Video Format h.264 (.MOV) | |
| Video Resolution – Single | UHD P30QHD P30FHD P30 |
| Video Resolution – Dual | UHD P24 + FHD P24QHD P30 + QHD P30QHD P30 + FHD P30FHD P30 + FHD P30 |
| Video Resolution – 3 Channel 3 QHD P30 | |
| Loop Recording | 1 min / 2 mins / 3 mins / Off |
| Screen Saver | 15 secs / 1 min / Off |
| Audio Recording | On / Off |
| GPS Logger | Built-In |
| WI-FI | Built-In |
| Language | English, Chinese, French, Spanish, Portuguese, German, Italian, Russian, Japanese |
8. Warranty & Support
Warranty
The Rexing V33 Dash Cam comes with a full 12-month warranty. If you register your product on our official site https://www.rexingu-sa.com/support/registration, you can extend the warranty to 18 months.
Support
If you have any questions regarding your product, please do not hesitate to contact us at care@rexingusa.com, or call us at (877)740-8004. Queries are typically answered within 12-24 hours.
Your opinion matters
Rexing is firmly committed to always improving our products, services, and user experience. If you have any thoughts on how we can do even better, we welcome your constructive feedback and suggestions.
Connect with us today at care@rexingusa.com
Thank you for choosing Rexing!
FCC ID: 2AW5W-V33
This device complies with part 15 of the FCC Rules. Operation is subject to the following two conditions: (1) This device may not cause harmful interference, and (2) this device must accept any interference received, including interference that may cause undesired operation.
Changes or modifications not expressly approved by the party responsible for compliance could void the user's authority to operate this equipment.
REXING®




MADE IN CHINA
- Activate Your
- 18-Month Warranty & Choose Your FREE Gift!
- Overview
- Thank you for choosing REXING!
- Table of Contents
- What's in the box
- Camera Overview
- Get Started
- Installation
- Step 1: Installing the Electrostatic Stickers
- Prepare Your Windshield
- Position the Sticker
- Step 2: Mount the Dash Camera
- Step 3: Inserting the Memory Card
- Inserting a memory card
- Removing the Memory Card
- Step 4: Format the Memory Card
- Step 5: Mount the Rear Camera Step 6: Installing the Camera onto the Windshield
- Step 7: Turning the Device On or Off
- Basic Operation
- Automatic Recording
- Display Control
- Locking Videos
- Automatic Shutdown
- Wi-Fi Feature
- Playback
- Camera Playback Mode
- To play recordings on your device:
- To delete a selected recording:
- To delete all recordings:
- Computer Playback
- GPS Playback
- System Requirements
- Installing the application:
- Opening a GPS video file:
- Playback
- Additional Controls
- Settings
- GPS Date-Time Troubleshooting
- Wi-Fi Connect
- Step 1
- Step 2
- Step 3
- Step 4
- Rexing Connect App
- Wi-Fi Connect Troubleshooting
- Parking Monitor (Parking Surveillance Mode)
- Option 1: Vibration Detection
- Gravity Sensing Record:
- Note:
- Option 2: Motion Detection
- Device Settings
- Video Settings
- Resolution
- Loop Recording
- WDR (Wide Dynamic Range)
- Exposure
- Record Audio
- Date Stamp
- G Sensing
- Plate Number
- IR Light
- Daylight Savings
- GPS
- Set Time Zone
- Parking Monitor
- G-Sensor
- Time Lapse
- System Settings
- Wi-Fi
- Date/Time
- Auto Power Off
- Beep Sound
- Language
- Frequency
- Screen Saver
- Format
- Default Setting
- Version
- Photo Settings
- Capture Mode
- Quality
- Sharpness
- White Balance
- Color
- ISO
- Anti-Shaking
- Quick Review
- Troubleshooting
- Updating Firmware
- To update your camera's firmware:
- Warranty & Support
- Warranty
- Support
- Your opinion matters
- FCC ID: 2AW5W-V33
Brand : Rexing
Model : V33 Plus
Category : Dash cam