
Winston 2.0 - Tripod 3 Legged Thing - Free user manual and instructions
Find the device manual for free Winston 2.0 3 Legged Thing in PDF.


| Product Type | Tripod |
| Brand | 3 Legged Thing |
| Model | Winston 2.0 |
| Maximum Height | Approximately 165 cm (65 inches) |
| Minimum Height | Approximately 30 cm (12 inches) |
| Folded Length | Approximately 45 cm (17.7 inches) |
| Weight | Approximately 1.8 kg (4.0 lbs) |
| Maximum Load Capacity | 10 kg (22 lbs) |
| Material | Carbon fiber legs |
| Leg Sections | 4 sections |
| Leg Lock Mechanism | Twist locks |
| Head Type | Not included (compatible with Arca-Swiss plates) |
| Bubble Level | Yes, integrated |
| Quick Release Plate | Compatible with standard Arca-Swiss plates |
| Spikes/Feet | Interchangeable rubber feet and stainless steel spikes |
| Center Column | Short center column with hook for weight |
| Carry Bag | Included padded carry bag |
| Warranty | 5 years limited warranty |
Frequently Asked Questions - Winston 2.0 3 Legged Thing
User questions about Winston 2.0 3 Legged Thing
0 question about this device. Answer the ones you know or ask your own.
Ask a new question about this device
Download the instructions for your Tripod in PDF format for free! Find your manual Winston 2.0 - 3 Legged Thing and take your electronic device back in hand. On this page are published all the documents necessary for the use of your device. Winston 2.0 by 3 Legged Thing.
USER MANUAL Winston 2.0 3 Legged Thing
Pro Range 2.0 Tripods
INSTRUCTIONS

3 Legged Thing®

Built to enable. Created to inspire
IMPORTANT
DO NOT USE YOUR TRIPOD UNTIL YOU HAVE READ THESE INSTRUCTIONS. NO WARRANTY CLAIM WILL BE ENTERED INTO FOR THE MISUSE OR INCORRECT USE OF THESE PRODUCTS.

ANATOMY OF A TRIPOD:
We offer three leg angles that we consider to be optimum for using a tripod. They are 23^ , 55^ & 80^ . Each angle has its own merits.

1 Tri-mount Plate Central C2umn
3 Twist Lock (Column) Loc4 Ring
5 Collar 6 Leg Latch
7 Hinge 8 Twist Lock (Leg)
9 Bootz/Footwear 10 D - Ring
AirHeds and Release Plates
There are two clamp types - Pro & Lever.
IMPORTANT
NEVER undo any of the knobs without holding your camera.

ANATOMY OF AN AIRHED PRO
1 QR-Octa Quick Release Plate
3 Camera Screw
5 Casing
7 Ball Control Knob
2 Plate Lock Knob
4 Pan Knob (Behind Head)
6 Pan Base
8 Bubble Level
ANATOMY OF AN AIRHED PRO LEVER
1 QR-Octa plate
3 Camera Screw
5 Casing
7 Ball Control Knob
2 Lever
4 Pan Knob
6 Pan Base
8 Bubble Level (Behind Clamp)

AirHed Pro Lever
The AirHed lever is operated by sliding the lever (a) towards you and opening the lever (b) by 180 degrees. To lock, pull the lever back to it's original position.
To change the orientation from right to left-handed and vice versa, remove the plate and move the lever (b) into a 90-degree position. Push in point (c), in doing this you will release the lever enabling you to rotate the lever by 180-degrees and change its orientation.
Prior to its first use, the lever clamp may need to go through an easy set up process. This is because we want our products to be as cross compatible as they can be, in this case, being suitable for whatever release plate you choose. Simply open the clamp (as previously shown) insert your plate of choice in, then close the clamp using the lever. Now with the provided Hex Key tighten or losen the clamp so your plate is secure, make sure you don't over-tighten as this may make opening or closing the lever difficult.
Additional Clamp Function
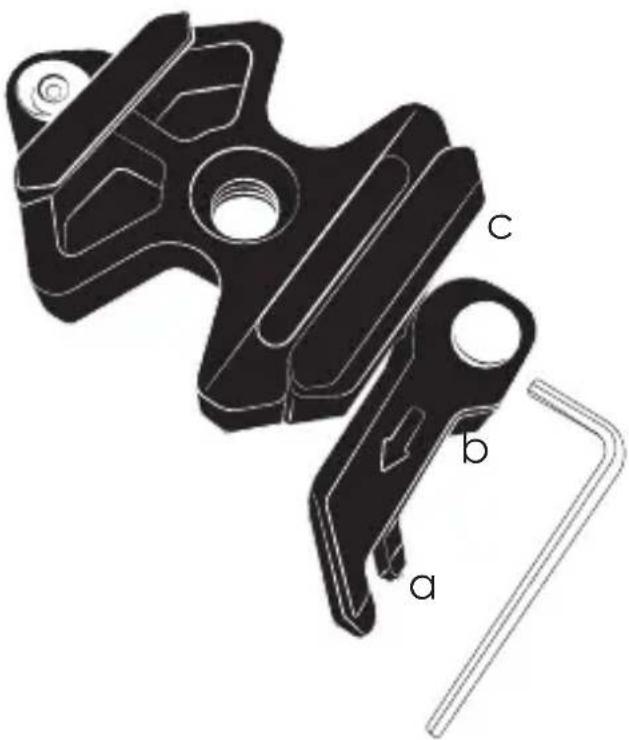
Both Pro-Lever and Pro-Clamps can be detached from the ball head and mounted directly to the tripod canopy. This is particularly useful as a quick release mechanism for the detachable legs.
In the centre of the clamp is a hex screw (a). Undo this with the tool provided. Once removed, the 3/8" female thread (b) will be visible. This can be screwed down onto any 3/8" threaded device.

natural_image
Line drawing of a handheld device with a circular component and a separate close-up view (no text or symbols)
natural_image
3D mechanical component diagram showing a bracket and housing (no text or symbols)Basic Functionality
The contoured Tri-mount plate comes with three hollow ends (a), for connecting your strap or carabiner, six 1/4" threaded holes (b) and one 3/8" threaded hole in the centre. The central bolt can be removed and has both 1/4" and 3/8" threads.
In the base of the centre column is a D-Ring (c), which is used to connect either your strap, for carrying, or the bag (e) for ballast, using the carabiner (d).
The carabiner clip can also be connected to the D-Ring via Toolz (f).


To remove the centre column, unscrew the D-Ring (a) and the collar (b). You can then pull out the Column (c), and completely remove the collar (b). Your Tri-Mount plate (d) should be unscrewed from the other end of the column and then carefully screwed directly to the canopy (e).
Line up the three ends of the Tri-mount plate to sit between the leg gaps and then screw up the Locking ring (f) to meet the Tri-Mount plate, locking it firmly in place.


Para-Locks
The Para-Locks (a) are designed to prevent accidental disassembly of the legs and column and add additional strength to the mechanism and tripod.
If the Para-Lock (a) seems locked, but the leg section is not firmly locked, then the Para-Lock is locked in the open position. Rotate the opposite way until locked and check.
To undo, grip the cap (b) and rotate it counter-clockwise (if looking down upon cap) until it disengages with the Para-Lock (a). Then, undo the Para-Lock until it comes free of the thread. You can then pull the leg or column section out for routine maintenance or cleaning.
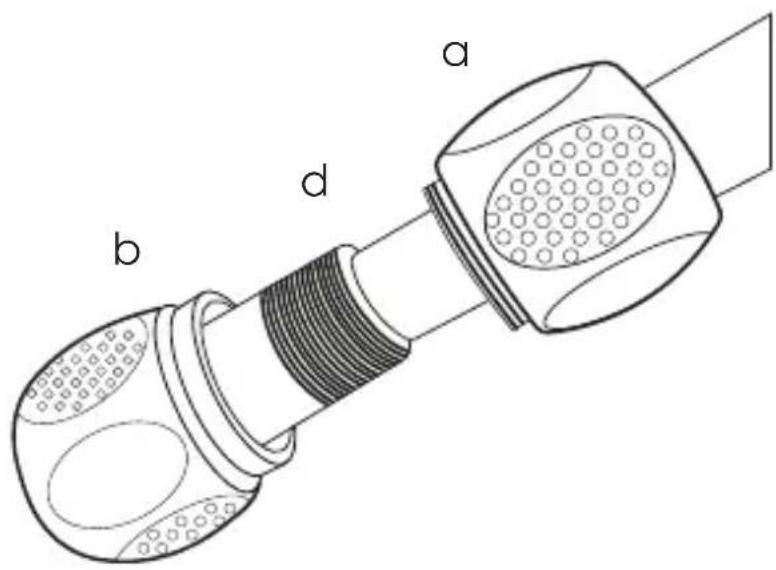
The internal Chicken Lips (shims) (c) easily clip on and off the tubing (d) and should be carefully lined up with the internal key line when reassembling leg sections.

natural_image
Technical line drawing of a mechanical component with no visible text or symbolsCleaning
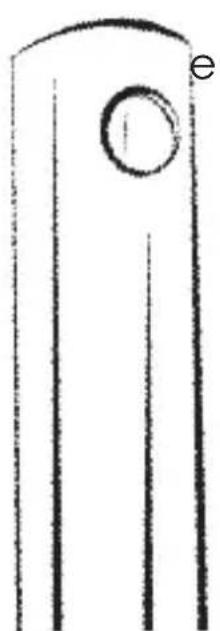
It is advised that you wash your tripod after using it in saltwater, sand, dirt, or mud and this can be done by undoing each leg. Take each individual leg lock and unscrew until completely undone, and and gently pull the tubing (d) out, allowing you to clean the threads of the legs. Be careful not to lose the Chicken Lips (shims) (c). Once cleaned, dry all the parts with a clean cloth. Do not leave them to air dry. Then ensure that the Chicken Lips (shims) are in place lining up with the hole (e) and then carefully insert the leg, lining up the internal key lines with the gaps in the Chicken Lips and tighten the leg lock in place.
Never use WD40 on your tripod as it can be a solvent. Always use silicone grease.
natural_image
Simple line drawing of a vertical cylindrical object with a circular hole and two parallel lines extending downward (no text or symbols)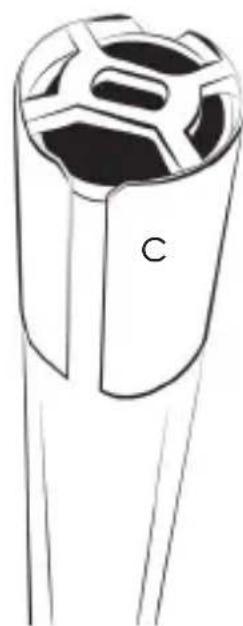
natural_image
Line drawing of a cylindrical object with a star-like top and labeled 'C' (no text or symbols beyond the label)Leg Catches and Locks
In order to change the leg angle or to stow away your tripod you will need to pull out the leg catch (a) to manoeuvre the leg into the desired position. Once you have your desired position push the leg catch back into place to ensure the catch is secure before use.
The Detachable Legs
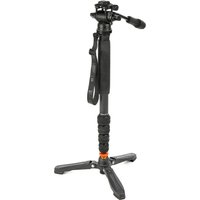
All three legs can be unscrewed directly from the leg hinge (b). You can screw one of the legs into the bottom of the detached centre column to make the monopod, without extra parts. Alternatively, you can screw your AirHed directly onto the detached leg for a shorter monopod.
Both Pro-Lever and Pro-Clamps can be detached from the ball head and mounted directly to the detached leg.

natural_image
Line drawing of a mechanical device with three legs and a central body, labeled 'b' (no text or symbols on the diagram itself)
The three detachable legs give you the option to convert to a table-top tripod. Unscrew all three legs directly from the hinge (b). Screw your choice of footwear into the thread where your legs were previously attached (b). Ensure your footwear is screwed in tightly at all times to prevent losing them.
Warranty Information
Your 3LT product comes with a 5 Year Global Warranty. On the box you will find a sticker with a unique barcode and a serial number. Use this serial number to register your products at www.3leggedthing.com/register.
Details of your warranty can be found at www.3leggedthing.com/FAQ. Your warranty covers 3 Legged Thing products only.
If you have a question or suspect you have a fault, contact us first by emailing support@3leggedthing.com.

natural_image
Abstract black and white circular logo with stylized eye and leaf-like shape (no text or symbols)3LT Social Media


3LeggedThing
/3LeggedThing
@3LeggedThing
A Legged Thing
Unit 9 Kinsbourne Farm
Bury End
Stagsden
Bedfordshire
MK43 8TS
United Kingdom of
Fadeless Splendour
Brand : 3 Legged Thing
Model : Winston 2.0
Category : Tripod