
STV-9824-PLUS - Screen Newline - Free user manual and instructions
Find the device manual for free STV-9824-PLUS Newline in PDF.


| Product Type | Interactive Intelligent Display |
| Screen Size (Diagonal) | 98 inches |
| Resolution | 4K UHD (3840 x 2160) |
| Display Colors | 1.07 billion (8 bit + FRC) |
| Brightness (Center Typ.) | 450 cd/m² |
| Contrast Ratio (Typ.) | 4000:1 |
| Response Time | 6.5 ms |
| Viewing Angle | 178° horizontal and vertical |
| Refresh Rate | 60 Hz |
| Backlight Type | Direct LED |
| Smart Platform | Android 14 |
| Processor | ARM Cortex A73 x4 |
| GPU | ARM Mali-G52 MC1 |
| RAM | 4 GB |
| Internal Storage | 16 GB |
| Wireless Connectivity | Wi-Fi 5, Bluetooth |
| Power Consumption (Max) | 450 W (Standard Mode) |
| Standby Power | < 0.5 W |
| Speaker Output | 15 W x 2 (bottom, 6 Ω) |
| Input Ports | HDMI 2.0 x 3, USB-A 2.0 x 1, USB-A 3.0 x 1, LAN (RJ45) x 1, RS232 (DB9) x 1, AV In x 1 |
| Output Ports | S/PDIF OUT x 1, Audio Out (3.5mm) x 1 |
| Dimensions (without mount) | 2182 x 1247 x 111 mm |
| Net Weight | 58.9 kg (±2 kg) |
| VESA Mount Pattern | 800 x 200 x 200 mm |
| Operating Temperature / Humidity | 0°C ~ 40°C / 20 ~ 80% RH (non-condensing) |
| Energy Star Certified | Yes |
Frequently Asked Questions - STV-9824-PLUS Newline
User questions about STV-9824-PLUS Newline
0 question about this device. Answer the ones you know or ask your own.
Ask a new question about this device
Download the instructions for your Screen in PDF format for free! Find your manual STV-9824-PLUS - Newline and take your electronic device back in hand. On this page are published all the documents necessary for the use of your device. STV-9824-PLUS by Newline.
USER MANUAL STV-9824-PLUS Newline
natural_image
Abstract grayscale gradient with diagonal division and dark background (no text or symbols)Symbol Conventions 03
Safety Instruction 04
1. Parts and Functions 07
1.1 Parts 07
1.2 Ports.... 10
1.3 Remote Control 12
2.Installation Guide 14
2.1 Safety Precautions 14
2.2 Installation Precautions 15
2.3 Installation 17
3.Turning On/Off 19
3.1 Power On 19
3.2 Power Off 19
4.Operating the Intelligent Display 20
4.1 Power Option 20
4.2 Standby Modes 21
4.2.1 True Power Off Mode 21
4.2.2 Fast Boot Mode 21
4.2.3 Sleep Mode 21
4.3 Boot-up Screen 22
4.4 Welcome Page 22
4.4.1 Newline Cast 23
4.4.2 Newline VCS 23
4.4.3 File Commander 24
4.4.4 Applications 27
4.4.5 Newline App Store 29
4.4.6 Newline Display Management+ 29
4.4.7 VLC 30
4.5 Menu Page(in source) 30
4.5.1 Source 31
4.5.2 Screen 31
4.5.3 Advanced Options 32
4.6 Menu Page 32
4.6.1 Picture 33
4.6.2 Sound 34
4.7 Settings 35
4.7.1 Network & Internet 35
4.7.2 Source & Inputs 36
4.7.3 Display & Sound 37
4.7.4 Apps 38
4.7.5 System 38
4.8 Remotes & Accessories 46
5.Serial Port Control 47
6. Formats Supported by Multi-media 53
7.FAQ & Troubleshooting 54
8.Maintenance Tips 55
9.Technical Parameters 56
10.More Information 58
Welcome to the world of Newline.
Thank you for choosing the Newline STV+ series Interactive Intelligent Display. Please use this document to get the most out of your screen.
This device complies with part 15 of the FCC Rules. Operation is subject to the following two conditions:(1) This device may not cause harmful interference, and (2) this device must accept any interference received, including interference that may cause undesired operation.
NOTE 1: This equipment has been tested and found to comply with the limits for a Class B digital device, pursuant to part 15 of the FCC Rules. These limits are designed to provide reasonable protection against harmful interference in a residential installation. This equipment generates, uses and can radiate radio frequency energy and, if not installed and used in accordance with the instructions, may cause harmful interference to radio communications. However, there is no guarantee that interference will not occur in a particular installation. If this equipment does cause harmful interference to radio or television reception, which can be determined by turning the equipment off and on, the user is encouraged to try to correct the interference by one or more of the following measures:
- Reorient or relocate the receiving antenna.
- Increase the separation between the equipment and receiver.
- Connect the equipment into an outlet on a circuit different from that to which the receiver is connected.
- Consult the dealer or an experienced radio/TV technician for help.
NOTE 2: Any changes or modifications to this unit not expressly approved by the party responsible for compliance could void the user's authority to operate the equipment.
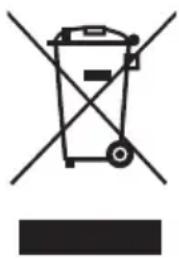
The symbol of the crossed out wheeled bin indicates this machine should not be placed in municipal waste. Instead, dispose of waste equipment by handing it over to a designated collection point for the recycling of electrical and electronic equipment.
natural_image
Symbol of a trash bin crossed with no visible text or labelsEnergy Star Compliance.

Signage Displays with Plug-in Module.
As an ENERGY STAR Partner, Newline Interactive Inc., has followed the EPA's enhanced Product qualification and certification process to ensure that the products marked with the ENERGY STAR logo are ENERGY STAR qualified per the applicable ENERGY STAR guidelines for energy efficiency. The logo appears on the pen tray near front connections on all ENERGY STAR qualified Signage Displays.
The ENERGY STAR program for Signage Displays was created by EPA to promote energy efficiency and reduce air pollution through more energy-efficient equipment in offices, classrooms and factories. One way that a product achieves this goal is by using a power management feature to reduce power consumption when the product is not in use.
In the event that brightness settings or power mode settings are changed by the user, energy consumption of the display may increase beyond the limits required for ENERGY STAR certification.
Additional information on the ENERGY STAR program and its environmental benefits are available on the EPA ENERGY STAR Power Management website at http://www.energystar.gov/powermanagement.
Additional information on the ENERGY STAR program and its environment benefits are available on the EPA ENERGY STAR website at http://www.energystar.gov
For production, above information will need to be available for the Energy Star V8 build from 27th January 2020.
STV-4324-PLUS/STV-5524-PLUS: Manufacturer-reported maximum luminance LMax Reported is 260 cd/m2. STV-6524-PLUS: Manufacturer-reported maximum luminance LMax Reported is 270 cd/m2. STV-7524-PLUS: Manufacturer-reported maximum luminance LMax Reported is 300 cd/m2. STV-8524-PLUS: Manufacturer-reported maximum luminance LMax Reported is 350 cd/m2. STV-9824-PLUS: Manufacturer-reported maximum luminance LMax Reported is 450 cd/m2.
Symbol Conventions
Symbols are used in this document to indicate operations that need particular attention. The symbols are defined as follows:
 NOTE NOTE | Provides additional information to supplement operation in the main text. |
 CAUTION CAUTION | Indicates a potentially hazardous situation that, if not avoided, could result in equipment damage, data loss, performance deterioration, or unanticipated results. |
 WARNING WARNING | Indicates a hazard with risk that, if not avoided, could result in death or injury. |
Safety Instruction
For your safety, please read the following instruction before you use the machine. Serious injury or property damage may be caused by improper operations. Do not try to repair the machine on your own.
| WARNING | |
 | Disconnect the machine from power supply immediately if major failures occur.Major failures include the following:Smoke, peculiar smell or abnormal sound is discharged from the machine.No image or sound is displayed, or the image error occurs.In the preceding scenarios, do not continue to use the machine. Disconnect power supply immediately and contact professional staff for troubleshooting. |
 | Do not drop liquid, metal or anything combustible into the machine.If any liquid or metal is dropped into the machine, power off the machine and disconnect power supply, then contact professional staff for solutions.Pay attention to children when they are close to the machine. |
| Put the machine on a stable surface.An unstable surface includes and does not limited to an inclined plane, a shaky stand, desk or platform, which might cause turnover and damage. | |
 | Do not open the cover or change the machine on your own.High voltage components are installed in the machine. When you open the cover, high voltage, electric shock, or other dangerous situations may occur.If inspection, adjustment, or maintenance is required, contact the local distributor for help. |
 | Use the specified power supply.To prevent the machine from being damaged, do not use any types of power cables other than the one provided with the machine.Use a three-wire socket and ensure that it is properly grounded.Pull out the power plug from the socket if the machine is not used for a long period. |
| Clean the dust and metal on the power plug regularly.Fire or electric shock may be caused if the machine is powered on, when you are cleaning.Pull out the power plug before cleaning it with a dried cloth. | |
  | Do not put items on the top of the machine.Do not put items, such as a container for liquid (a vase, flowerpot, cosmetics or liquid medicine) on the top of the machine.If any water or liquid is spilled on the machine, a short circuit may occur and cause fire or electric shock.Do not walk on or hang any items on the machine.Do not install the machine in an improper place.Do not install the machine in humid places, such as the bathroom, the shower room, near windows, or outdoor environments that experience rain, snow or other harsh weather. Avoid installation near hot spring vapor. The preceding environments may cause faults in the machine or electric shock under extreme conditions.Do not put exposed fire source, such as an ignited candle, on the machine. |
 | Pull out the power plug during thunderstorms.Do not touch the machine during a lighting storm to avoid electric shock.Install or place components that supply high enough voltage to cause personal injury out of the reach of children. |
 | Do not touch the power cable with wet hands. |
| CAUTION | |
 | Do not install the machine in high temperature environments.Do not install the machine near a heat source, such as a radiator, a heat reservoir, a stove or other heating machines.Do not expose the machine to direct sunlight, which may cause high temperatures and subsequent faults in the machine. |
 | For transport:Pack the machine for transport or maintenance by using the cartons and cushioning material provided with the machine.Vertically move the machine during transport. The screen or other components are easily broken if the machine is moved by an improper way.Before you move the machine, disconnect all external connections and separate all toppling preventing machines. Move the machine carefully to prevent it from being hit or squeezed, especially the screen, which may cause injury if broken. |
 | Do not cover or block up any vents on the machine.Any overheated components may cause fire, damage the machine, and shorten the service life.Do not lay the machine down where the venting surface will be covered.Do not install the machine on a carpet or cloth.Do not use a cloth such as table cloth to cover the machine.Keep away from the machine when you use a radio.The machine complies with the international EMI standard to pervent radio interference. However, interference may still exists and causes noise in the radio.If noise occurs in the radio, try the following solutions.Adjust the direction of the radio antenna to avoid the interference from the machine.Keep the radio away from the machine. |
| Use the battery correctly.Galvanic corrosion, electric leakage, and even fire may be caused by improper battery usage.It is recommended to use the designated type of battery and install the battery by correct electrodes (positive and negative).Do not install and use new battery with a used one.Take out the battery if the remote control is not used for a long period.Do not expose the battery to overheated environments such as sunlight and firing.Dispose of the used battery based on your local regulations. | |
| Do not damage the power cable.Do not damage, change, twist, bend, or forcibly drag the power cable.Do not put weights (such as the machine itself) on the power cable.Do not forcibly drag the cable when you pull out the power plug. If the power cable is damaged, please contact the local distributor to repair or replace it.The power cable in the accessory box is for this machine only. Do not use it on other machines. | |
| Additional advice:Use the machine in an environment with comfortable lighting. It is harmful to your eyes to watch in a too bright or too dark environment.Relax your eyes after a period of time for watching.Keep sufficient distance from the machine to protect your eyes and prevent eyestrain.Adjust the volume to an appropriate level, especially at night.Use amplifier equipment as the audio input source with caution. If you must use amplifier equipment, the input power should not exceed the maximum of speaker power. Otherwise, the speaker can become overpowered and damaged. | |
1
Parts and Functions
Parts
◆ Front View
• STV-4324-PLUS / STV-5524-PLUS / STV-6524-PLUS STV-7524-PLUS / STV-8524-PLUS / STV-9824-PLUS:

Rear View
• STV-4324-PLUS / STV-5524-PLUS:

• STV-6524-PLUS / STV-7524-PLUS:

• STV-8524-PLUS:
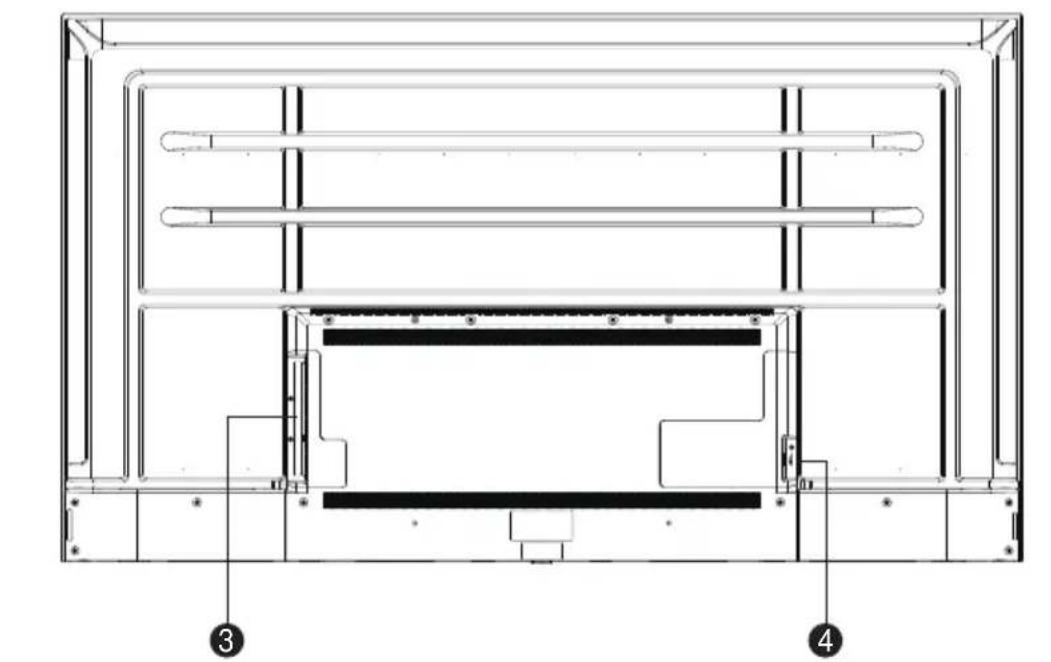
• STV-9824-PLUS:

natural_image
Architectural floor plan showing room layouts and structural elements (no text or labels)1 Indicator Light
2 Power Switch
3 Rear Ports
4 Power Supply Plug
Rear Ports

CAUTION
- While HDMI offers support for cables of varying lengths, the maximum cable length that Newline recommends for optimal performance is 3 meters (10 feet) for HDMI and 1.8 meters (around 6 feet) for Display Port. Using cable longer than recommended length may cause data loss and a negative impact to display quality.
- Right interface




Note
Please do not connect a 2.4G wireless mouse and USB 3.0 devices simultaneously, on the left back side of the display, in order to avoid the interference.

CAUTION
Carefully read the following instructions before using the remote control to avoid possible faults:
- Do not drop or damage the remote control.
- Do not spill water or other liquids on the remote control.
- Do not place the remote control on a wet object.
- Do not place the remote control under direct sunlight or near an overheating heat source.
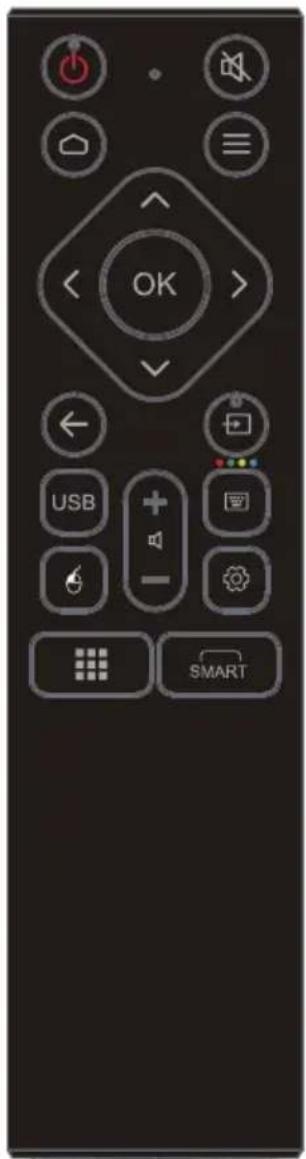
| Buttons Operations | |
| [3X44] | Power on/off/Sleep/Restart. |
 | Mute/Unmute Audio. |
 | Go back to Home page |
 | Open the system menu. |
 | Up/Down/Left/Right |
 | Confirm/OK. |
 | Return to Previous/Exit |
 | To select input source. |
| [C7Y] | To access File Commander. |
| [2XX6] | To control the volume. |
 | To access WiFi channel and wired network channel under settings. |
 | Open/turn off the wireless mouse mode. |
| [0347] | To display the Settings menu. |
| [02TX] | To access application list page. |
 | To start pairing Bluetooth accessories. |
Safety Precautions
◆ Installation Environment
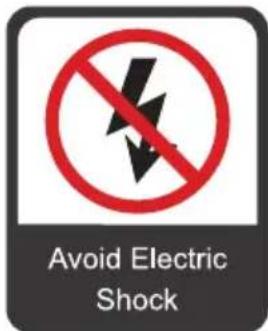


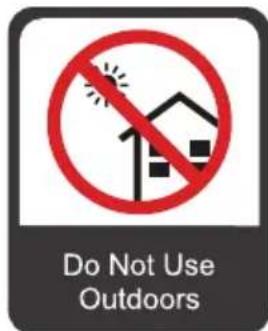

◆ Installation Direction
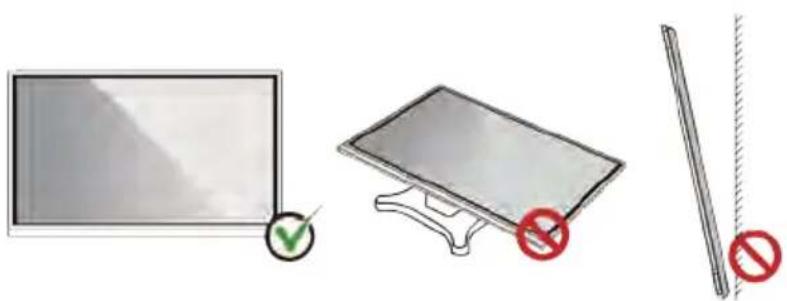
natural_image
Illustration of three electronic components: a flat-screen monitor, a flat-screen display stand with a red prohibition symbol, and a diagonal rod with a red prohibition sign (no text or labels present)Hang the Product Horizontally Do Not Lay Flat Do Not Install Tilted
Installation Precautions
- When using a mobile stand, ensure that the weight of the machine is less than the loading capacity of the mobile stand.
- When using the wall-mount bracket, ensure that the wall can support the weight of the machine. We recommend that the wall surface be reinforced and have a loading capacity 4 times of the weight of the machine. Consult a professional installer for wall-mount installation.
Note
- The company does not undertake relevant legal responsibility for any problems caused by improper operation, if the third party mobile stand, or wall-mount bracket is beyond the scope of the machine.
- Do not install the machine where it might be hit by a door.
◆ Vertical installation
When installing, try to keep the machine vertical. Excessive tilt angle may cause the screen glass to fall off or the machine to collapse.

Note
For any problem, please contact our support desk. Our company is not responsible for any damage or losses incurred by users if the users fails to follow the instructions.
◆ Ventilation
Ensure adequate ventilation and/or air conditioning environment. We recommend keeping certain distances from the side of the machine to the wall or panels. Ventilation requirements are shown in following figure.

Installation
The dimensions of the four bracket mounting holes on the back panel are VESA MIS-F compliant. Dimensions of the mounting holes on the back panel are shown on the following figure.
• STV-4324-PLUS / STV-5524-PLUS: 300 x 300 mm /11.81 x 11.81in;
• STV-6524-PLUS / STV-7524-PLUS: 400 x 300 mm /15.75 x 11.81in;
• STV-8524-PLUS: 500 x 400 mm/19.68 x 15.75 in;
• STV-9824-PLUS: 800 x 200 x 200 mm/31.50 x 7.87 x 7.87in.
Note
- Consult a professional installer to install the machine.
43"/55"

65"/75"

3
Turning On/Off
Power On
Step 1: Plug the power supply into the power outlet fully and plug the power connector into the side of the machine. Ensure the power is in the range of 100 V to 240 V with frequency at 50 Hz/60 Hz ± 5%.
Note
The power outlet should be installed near the machine and shall be easily accessible.
Step 2: Press the "Power" button on the bottom or on the remote control.
Power Off
Step 1: Press the "Power" button on the bottom or press ⏻ on the remote control, the power indicator will turn to red.
Step 2: If you are not going to use the display for an extended period of time, we recommend you to unplug the power cord.
Power Option
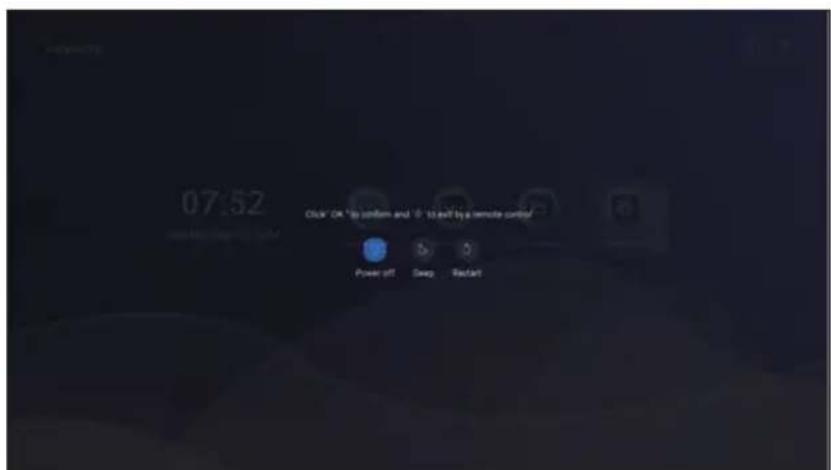
Press the physical power button once to enter the power option menu (Power off/ Sleep/Restart). Short press to switch options and long press to confirm. It will automatically exit this menu after 15 seconds of inactivity.

Press the ⏻ button on the remote control to enter the power option menu, including Power off (default)/Sleep/Restart. Press "OK" to confirm your option.
Standby Modes
Standby modes include True Power Off Mode, Fast Boot Mode and Sleep Mode.
True Power Off Mode
When the WoL and WoW options are turned off, selecting Power Off will cause the panel to enter True Power Off Mode. At this time, the panel is completely powered down with all components turned off. In this state, the panel can only be powered back on through certain predefined methods such as physical power button, RS232, Auto Power On or a remote control signal.
Fast Boot Mode
When the WoL and/or WoW option is turned on, selecting Power Off will cause the panel to enter Fast Boot Mode. This is a low-power state that allows the panel to quickly resume full operation while conserving energy. It can be powered on by various signals such as physical power button, Wake on LAN (WoL), Wake on Wireless LAN(WoW), RS232, Auto Power On or a remote control signal.
Sleep Mode
In Sleep Mode, the panel will turn off the backlight and the sound, and can be woken up through some predefined methods, such as physical power button, RS232, IP Control or remote control signal.
Boot-up Screen
When the display is turned on, the screen will show the boot-up page. As shown in the following figure.

Welcome page
The panel will display the Welcome page after boot-up. This screen displays the logo, time, date, Newline Cast, Newline VCS, File Commander, Applications and Wi-Fi status icon, as shown in the following figure.

◆ Newline Cast
Select Newline Cast on the Welcome page to enter the screen sharing application. On screen directions will appear for you to follow in order to wirelessly cast to the display, as shown in the following figure:

◆Newline VCS
Select Newline VCS to enter the digital signage application, as shown in the following figure. Account activation is required to use this application.

◆ File Commander
Select File Commander to view MultiMedia. In this interface you can preview all files in the internal storage and storage devices connected via USB ports.

Icons on the top of right corner
| Icons | Function |
 | Click to search the files by files name |
 | The system supports two view modes: list and grid. You can click on the top right corner to switch or view modes.Click to display files based on name, size, type and date. |
 | Click to create new file |
 | Click to create new folder |
File Management
Display supports connection to USB flash memory. Enter the File application, you can preview all files in the internal storage and storage devices connected via USB ports.

File Filtering
You can click the menu at the left side to display files by types, for example: Documents, Download, Movies, Music, Notifications and Pictures.

You can also click = at the top right corner to filter files by View mode, Sort by and show only.
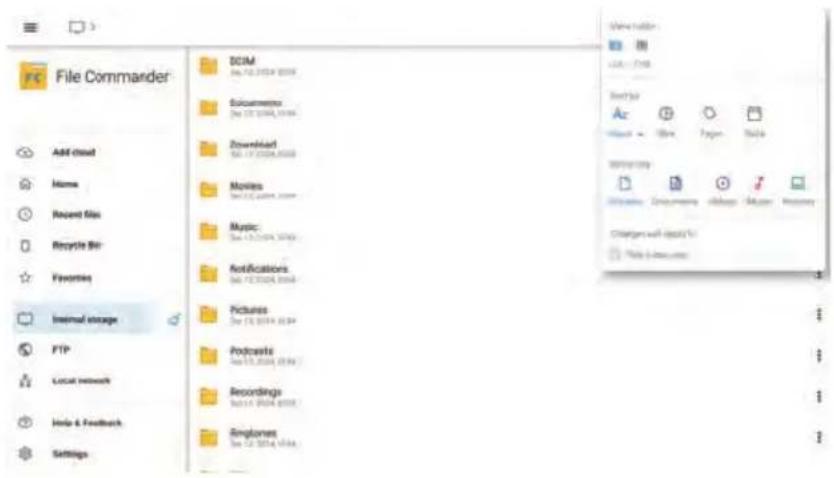
File Search
Enter the Files application, and click 🔒 in the dialog box that is displayed, enter keywords in the search box according to requirements. The system will display a list of files that match the keywords.
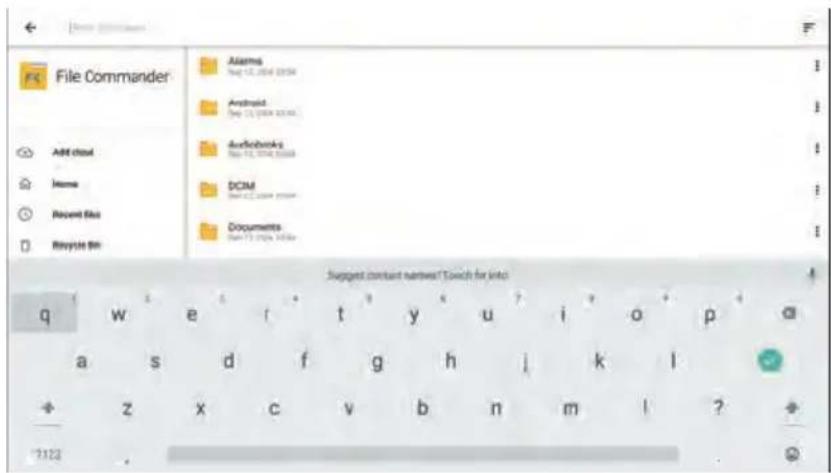
Note
- Use the keyboard on remote control to enter keywords.
- Use mouse function of remote control to click the soft keyboard on screen to enter keywords.
File Operation
Enter the Files application, You can create folders according to requirements, select files, and set Add to favorites/Copy/Cut/Delete/Move/Rename/Zip/Properties. For details on other operation, click : in the right side for more operation.

Note
After entering the files interface, select the file items using the mouse function of remote control.
Applications
Select Applications or press the button 🎯 on the remote control to enter the application list. Applications display all pre-installed applications. Select the icon of an application to run the application. Long press the OK button to remove/uninstall apps.

| Name | Icons | Functions |
| Chromium |  | Select this icon to enter the Chromium application. |
| File Commander |  | Select this icon to enter the File Commander application. |
| Newline App Store |  | Select this icon to enter the Newline App Store. |
| Newline Broadcast |  | Select this icon to enter the Newline Broadcast application. |
| Newline Cast |  | Select this icon to enter the Newline Cast application. |
| Newline Display Management+ |  | Select this icon to enter the Newline Display Management+ application. |
| Newline VCS |  | Select this icon to use the Newline VCS application for digital signage. |
| Officesuite |  | Click this icon to enter the Office suite application. In this application, you can view office files, including excel, word, power point, and PDF files. |
| Settings |  | Select this icon to enter the settings interface. |
| VLC |  | Select this icon to enter the VLC application. |
- Newline App Store
Select Newline App Store to enter Newline app store. You can view all the apps here, search the apps you want in this interface as shown in the following figure. Press ← button on remote control to return to the upper interface.
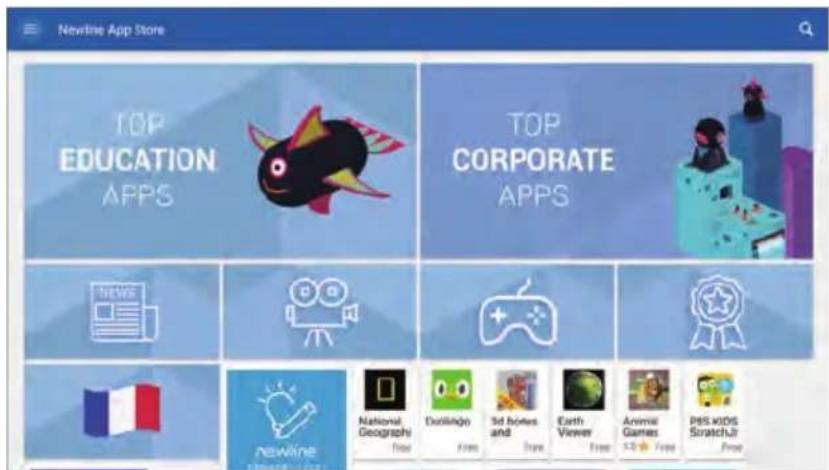
Notes: 1. STV+ series does not support Google Play Services.
2. Not all apps are supported for the STV+ series.
- Newline Display Management+
Newline Display Management+ is a remote display management solution that enables users to centrally manage the Newline displays from the comfort of their desk. Users can deploy and install apps, configure display settings, and push updates without being in front of the display.

• VLC
VLC is a free and open source cross-platform multimedia player and framework that can play most multimedia files and various streaming media protocols. You can choose Video, Audio, Playlists, Browsing and Other in this interface.

Menu Page (in source)
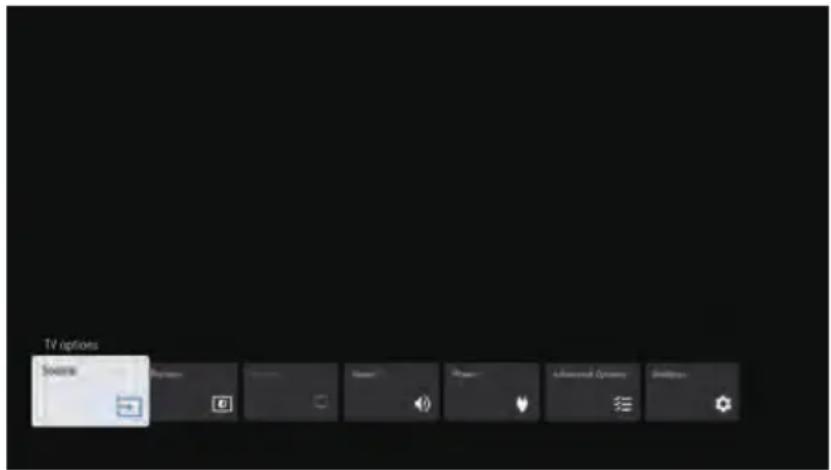
On the Input source page, press the menu button ≡ on the remote control to view TV options menu items include Source, Picture, Screen, Sound, Power, Advanced Options and Settings. Press </> on the remote control to select a menu item, press OK to complete the menu switching and option setting in the menu. If you don't want the menu page, press ← to exit the menu page.
Source
Select the Source item in the menu, in this interface including Home, AV, HDMI 1, HDMI 2 (eARC/ARC) and HDMI 3.

Screen
After connecting to the signal source, you can set the screen display ratio (Automatic > Super zoom > 4:3 > Movie expand 14:9 > Movie expand16:9 > Wide screen > Full > Unscaled). Press ← button on remote control to return to the upper interface.
natural_image
Dark image with a small white rectangular overlay on the right side (no visible text or symbols)◆ Advanced Options
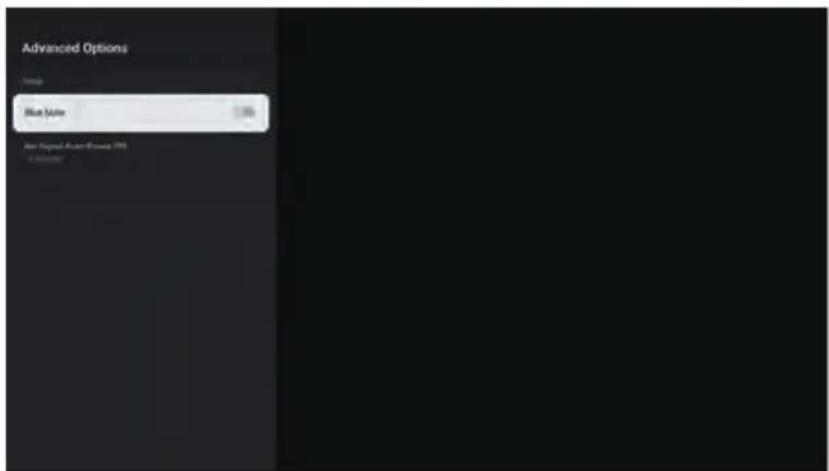
Select the Advanced Options item in the menu, in this interface including Blue Mute and No Signal Auto Power Off. Press OK button on the remote control to enable and disable the blue mute.
No Signal Auto Power Off: Select this item to set the auto power off time when there is no signal detected (Off > 5 Minutes > 10 Minutes > 15 Minutes > 30 Minutes > 60 Minutes). The default is 15 Minutes.
Menu Page
On the Home page, press the menu button ≡ on the remote control to view menu page. The menu items include Picture and Sound.
Press </>/^/√ on the remote control to select a menu item, press OK to complete the menu switching and option setting in the menu. If you don't want the menu page, press ← to exit the menu page.

Picture
Select the Picture item in the menu, in this interface including Picture Mode, Backlight, Brightness, Contrast, Saturation, HUE, Sharpness, Advanced Settings and Reset to Default.
- Picture Mode: Select Picture Mode to change the picture mode (User > Standard > Vivid > Sports > Movie > Game > Energy Saving ).
- Backlight: Press </> on the remote control to adjust the backlight.
- Brightness: Press < / > on the remote control to adjust the brightness.
- Contrast: Press < / > on the remote control to adjust the contrast.
- Saturation: Press < / > on the remote control to adjust the saturation.
- HUE: Press «/» on the remote control to adjust the hue.
- Sharpness: Press< /> on the remote control to adjust the sharpness.
- Reset to Default: Select Reset to Default to reset picture settings to default.

Advanced Settings
Select Advanced Settings to enter the following interface. Press ← to exit the setting.
- Color Temperature: Select this item to change the Color Temperature (User > Cool > Standard > Warm). Select Red Gain, Green Gain and Blue Gain then press < /> on the remote control to adjust the gains.
- DNR (Digital Noise Reduction): Digital noise reduction technology, uses digital processing to reduce impurities mixed in video signals (Off > Low > Medium > Strong). The default setting is Medium.
- MPEG NR (MPEG Format Noise Reduction): Eliminate noise generated in videos using the MPEG compression standard. The purpose is to reduce the impact of noise caused by MPEG compression and improve the viewing experience (Off > Low > Medium > Strong), the default setting is Medium.
- Gamma: Select this item to change the Gamma (Dark > Middle > Bright).
- HDMI RGB Range: Select this item to change the HDMI RGB range.

Sound
Select the Sound item in the menu to enter the following interface.
- Sound Style: Select Sound Style to change the sound mode (User > Standard > Vivid > Sports > Movie > Music > News). Press the button to mute or unmute audio.
• Balance: Press </> on the remote control to adjust the balance. - Bass: Press </> on the remote control to adjust the bass.
- Treble: Press </> on the remote control to adjust the treble.
- Surround Sound: Press OK button on the remote control to enable and disable the Surround Sound.
- Speakers: Press OK button on the remote control to enable and disable the speakers.
- eARC: Press </> on the remote control to adjust the eARC (Auto > Off).
- Auto Volume Control: Press OK button on the remote control to enable and disable the Auto Volume Control.
- Reset to Default: Select Reset to Default to reset sound settings to default.

Settings
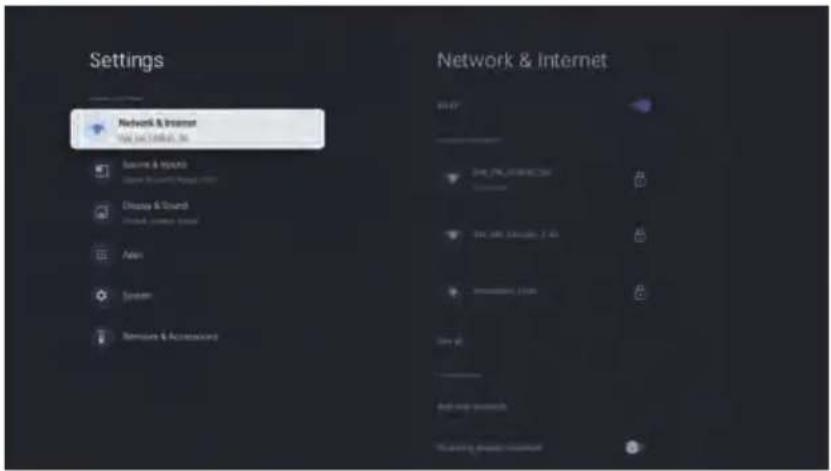
Press the button 📍 on the remote control to enter the settings interface. This interface displays Network & Internet, Source & Inputs, Display & Sound, Apps, System and Remotes & Accessories.
◆ Network & Internet
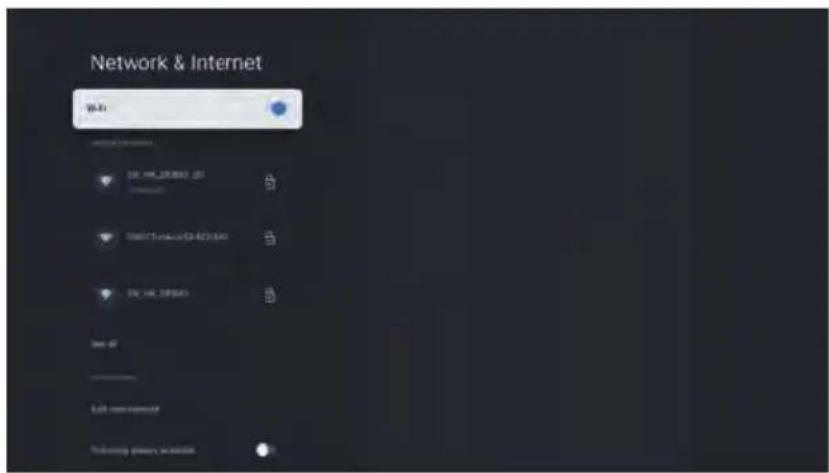
Select the Network & Internet or press the button ☐ on the remote control to enter the network setting interface. You can view network status information, set Wi-Fi, Add new network, Scanning always available, Hotspot & Tethering, Network Priority and Wake configs.
Press button on remote control to return to the upper interface.
- Wi-Fi: Press OK button on the remote control to enable the Wi-Fi function.
- Add new network: Select this item to add new network. If you need to connect to an enterprise-level network or add a WiFi certificate, you can also click this entry to jump to the menu for settings.
- Scanning always available: Press OK button on the remote control to enable the Scanning always available.
- Hotspot & Tethering: Select this item to set hotspot and tethering.
• Network Priority: Select this item to set Network Priority (Ethernet/Wifi).
- Wake configs: Wake on LAN (WoL) and Wake on Wireless LAN (WoW) are technologies that allow the panels to be powered on from Fast Boot Mode remotely via a network. WoL operates over a wired Ethernet connection, while WoW operates over a wireless network connection.
The WoL and WoW options will have an impact on entering different standby modes. If one or both of WoL and WoW are turned on, and the remote control selects power off, the panel will enter Fast Boot Mode. If WoL and WoW are both turned off, the panel will enter True Power Off Mode.
WoW: Wireless network wake-up, supports WoW in Fast Boot Mode, default is Off. WoL: Wired network wake-up, support WoW in Fast Boot Mode, default is Off. Note: WoW & WoW are also supported after power loss.

Source & Inputs
Select the Source & Inputs to enter the inputs setting interface. You can view standby inputs and not connected inputs here. This interface also includes HDMI Control, CEC Auto Power Off, CEC Auto Power On and CEC Device List.
Press ← button on remote control to return to the upper interface.
- HDMI Control: Select this item to allow the display to control HDMI devices.
- CEC Auto Power Off: Select this item to allow the display to turn off the power of the connected devices.
- CEC Auto Power On: Select this item to allow connected devices to turn on the power of the display.
• HDMI EDID Version: EDID1.4/EDID2.0/Auto. - CEC Device List: Select this item to check the CEC device list.

◆ Display & Sound
Select the Display & Sound to enter the display and sound setting interface. This interface includes Picture, Screen, Sound and Audio Output.
Press ← button on remote control to return to the upper interface.
- Screen: Select this item to enter the screen settings(only available when in a source).
• Audio Output: Select this item to enter the audio output settings.

- Apps
Select the Apps to enter the apps setting. This interface includes See all apps, App permissions, Special app access, Security & Restrictions.
Press ← button on remote control to return to the upper interface.
• See all apps: Select this item to see all apps. Select app to see details.
- App permissions: Select this item to check all app permissions.
- Special app access: Select this item to view all Special app access.
• Security & Restrictions: Select this item to check Security & Restrictions.

◆ System
Select the System to enter the system setting interface, including About, Power & Energy, Date & Time, Keyboard, Storage, System Sounds and Restart.
Press ← button on remote control to return to the upper interface.

About
Enter About to check Device name, Status, Legal information, Model, System Version and Firmware Version. Select Reset to restore factory settings. In order to confirm the factory reset, you need to enter the PIN code: 1111.

Power & Energy
Select Power & Energy to enter the Power & Energy interface. You can enable the Limit network connection in stand by to use less energy in standby mode. This interface also includes Power and Timer.

Power
Select Power to enter the power setting interface, including Sleep Timer, Picture off, Standby light, Auto start VCS, RS232, IP Control and Power Button Options. Press OK button on the remote control to enable and disable the Standby light, Auto start VCS, RS232 and IP Control.
Sleep Timer: The default is off. After selecting the time, the panel will power off after the countdown ends. There are options from 10 minutes to 120 minutes. For example, if you select 10 Minutes, the panel will power off after 10 minutes. There will be a pop-up prompt window when the countdown is left with 1 minute. Once powered down, the Sleep Timer setting will default back to Off
Power Button Options: There are Standby and Power On options, the default is standby. When Standby is selected, the panel will enter standby by default after it is powered off and powered on again.
When Power On is selected, the panel will power on automatically after it is powered off and powered on again.

Timer
Select Timer to set the Auto Power On & Off times.

Power On Time Type: Automatic power-on function(Off/On/Once), default Off.
- When selecting Off, the Auto Power On Time function is grayed out;
- When selecting On, you can set the Auto Power On Time and select the cycle and time;
- When selecting Once, you can set the Auto Power On Time without periodic selection.
The set effective time only takes effect once. After the effect is completed, the Auto Power On function automatically returns to Off.
Auto Power On Time: Follows the system's 12-hour/24-hour format. The user can select: hour, minute, (AM/PM), period and select "Set" to take effect.
After the scheduled power on time is set, there will be a note in the function menu (Ex. If you set the panel to automatically start at 22:00 on Monday and Tuesday, it will display: Mon Tue 22:00.)

(Power On Time Type defaults to Off. At this time, Auto Power On Time is grayed out and cannot be selected.)

(When Power On Time Type is turned On, this is the Auto Power On Time interface.)

(When Power On Time Type selects Once, this is the Auto Power On Time interface.)
Power Off Time Type: Automatic shutdown function(Off/On/Once), default Off.
- When Off is selected, the Power Off Time function is grayed out;
- When selecting On, you can set the Power Off Time and select the cycle. You can select multiple cycles;
- When selecting Once, you can set the Power Off Time without periodic selection. The set effective time only takes effect once. After the effect is completed, the Auto Power Off function automatically returns to Off.
Auto Power Off Time: Follow the system's 12-hour/24-hour format. The user can select: hour, minute, (AM/PM), period and select "Set" to take effect.

(Power Off Time Type defaults to Off. At this time, Auto Power Off Time is grayed out and cannot be selected.)

(When Power Off Time Type is On, this is the Auto Power Off Time interface.)

(When Power Off Time Type is Once, this is the Auto Power Off Time interface.)
Date & Time
Select Date & Time to enter the setting interface. You can set Automatic date & time to use network-provided time, and set date & time, time zone and Use 24-hour format in this interface.
Use 24-hour format: When the option is on, it is 24-hour format. When the option is off, it is 12-hour format. The system defaults to 24-hour format.

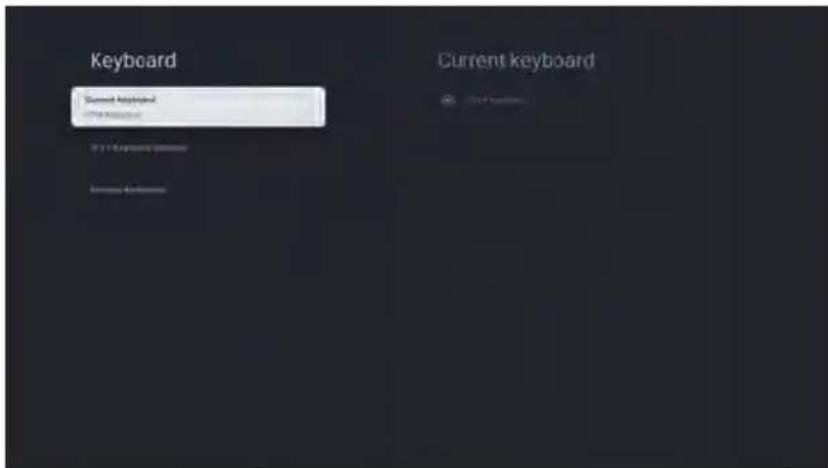
Keyboard
Select Keyboard to enter the keyboard interface. You can view Current keyboard in this interface, check STV+ Keyboard Settings and Manage keyboards.
Storage
Select Storage to enter the storage interface. You can view Internal shared storage and Free up storage in this interface.

System sounds
Press OK button on the remote control to enable the System sounds.

Restart
Select Restart to restart the panel.

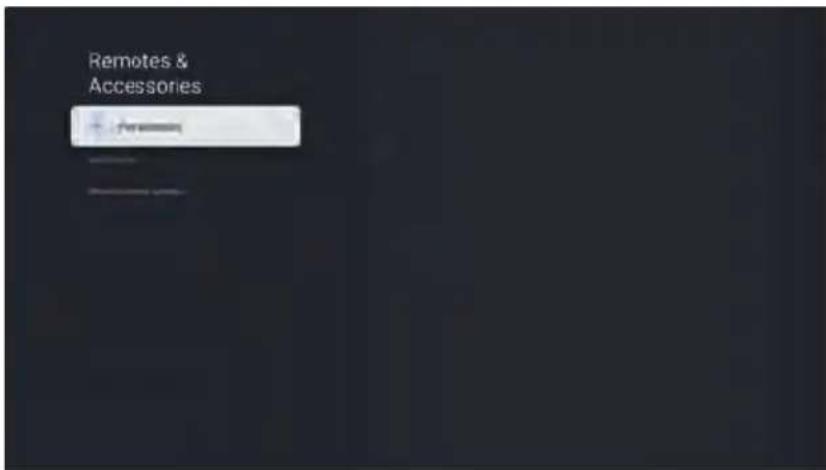
◆ Remotes & Accessories
Select Remotes & Accessories to Pair accessory and check Remote control settings.
Before using IP Control and/or RS-232 serial port control, you need to ensure that the setting is enabled. RS-232 is enabled by default.
Instructions to enable/disable RS-232 & IP Control:
-
Settings > System > Power & Energy > Power
-
If you need to use IP Control, turn on the IP Control option switch; if you need to use the RS232 serial port, turn on the RS232 option;
IP Control:
Use a network connection to control the device over an Internet Protocol (IP) network; IP Control supports the commands listed in the section below.
Note: Power On via IP Control is not supported.
- The following is an example test method. There is no standard usage instruction for this function:
-
Configuration: Connect the PC and the large screen to the same network, start the IP Control debugging tool, select TCP Client for the port number, fill in the corresponding IP address and port number, and click connect.
-
Send commands: After the connection is successful, enter the command in the command pane to test.
| Configuration information for using tools | |
| IP | Machine IP |
| Port: TCP/UDP | 6688 |
RS-232 operation instructions:
RS-232 is a standard protocol for serial communication. RS-232 over serial refers to the use of this standard to enable communication between devices using a serial port.
• How to use:
-
Configuration: The PC and the large screen are connected via a physical RS-232 (DB9) cable, and the serial port is configured to use the same communication settings, including baud rate, data bits, parity and stop bits.
-
Send commands: After the connection is successful, send commands to the large screen terminal through RS-232. The display receives the command, interprets the command, and performs the requested operation. The screen will respond by returning a return value to confirm command execution or provide status information.
| Configuration information for using tools | |||
| Port: COM1 (Set according to PC or controlling product's port number) | |||
| Baud rate | 19200 | Odd/even check | None |
| Data bits | 8 | Stop bit | 1 |
The following table lists button controlling codes. The buttons share same functions with corresponding buttons on the remote controller:
| Function Controlling Codes Return Codes | ||
| Power On | 7F 08 99 A2 B3 C4 02 FF 01 00 CF | 7F 09 99 A2 B3 C4 02 FF 01 00 01 CFNOTE: Support the panel power on from true power off mode and Fast Boot mode. Only supported by RS-232 commands and not by IP Control. |
| Power off | 7F 08 99 A2 B3 C4 02 FF 01 01 CF | 7F 09 99 A2 B3 C4 02 FF 01 01 01 CFNOTE: Support the panel power off(1) WOL/WOW on, enter Fast Boot Mode;(2) WOL/WOW off, enter true power off mode. |
| Sleep Mode On | 7F 08 99 A2 B3 C4 02 FF 01 04 CF | 7F 09 99 A2 B3 C4 02 FF 01 04 01 CFNOTE: The panel goes to sleep. |
| Sleep Mode Off | 7F 08 99 A2 B3 C4 02 FF 01 03 CF | 7F 09 99 A2 B3 C4 02 FF 01 03 01 CFNOTE: The panel wakes up from sleep mode. |
| Mute/Unmute | 7F 08 99 A2 B3 C4 02 FF 01 02 CF | 7F 09 99 A2 B3 C4 02 FF 01 02 01 CF |
| Signal source | 7F 08 99 A2 B3 C4 02 FF 01 06 CF | 7F 09 99 A2 B3 C4 02 FF 01 06 01 CF |
| Display status | 7F 08 99 A2 B3 C4 02 FF 01 09 CF | 7F 09 99 A2 B3 C4 02 FF 01 09 01 CF |
| HDMI 1 | 7F 08 99 A2 B3 C4 02 FF 01 0A CF | 7F 09 99 A2 B3 C4 02 FF 01 0A 01 CF |
| HDMI 2 | 7F 08 99 A2 B3 C4 02 FF 01 52 CF | 7F 09 99 A2 B3 C4 02 FF 01 52 01 CF |
| HDMI 3 | 7F 08 99 A2 B3 C4 02 FF 01 53 CF | 7F 09 99 A2 B3 C4 02 FF 01 53 01 CF |
| VOL - | 7F 08 99 A2 B3 C4 02 FF 01 17 CF | 7F 09 99 A2 B3 C4 02 FF 01 17 01 CF |
| VOL + | 7F 08 99 A2 B3 C4 02 FF 01 18 CF | 7F 09 99 A2 B3 C4 02 FF 01 18 01 CF |
| Menu 7F | 08 99 A2 B3 C4 02 FF 01 1B CF | 7F 09 99 A2 B3 C4 02 FF 01 1B 01 CF |
| Home page | 7F 08 99 A2 B3 C4 02 FF 01 1C CF | 7F 09 99 A2 B3 C4 02 FF 01 1C 01 CF |
| Return (exit) | 7F 08 99 A2 B3 C4 02 FF 01 1D CF | 7F 09 99 A2 B3 C4 02 FF 01 1D 01 CF |
| OK | 7F 08 99 A2 B3 C4 02 FF 01 2B CF | 7F 09 99 A2 B3 C4 02 FF 01 2B 01 CF |
| ← | 7F 08 99 A2 B3 C4 02 FF 01 2C CF | 7F 09 99 A2 B3 C4 02 FF 01 2C 01 CF |
| → | 7F 08 99 A2 B3 C4 02 FF 01 2D CF | 7F 09 99 A2 B3 C4 02 FF 01 2D 01 CF |
| ↑ | 7F 08 99 A2 B3 C4 02 FF 01 2E CF | 7F 09 99 A2 B3 C4 02 FF 01 2E 01 CF |
| ↓ | 7F 08 99 A2 B3 C4 02 FF 01 2F CF | 7F 09 99 A2 B3 C4 02 FF 01 2F 01 CF |
| Set volume | 7F 08 99 A2 B3 C4 02 FF 05 XX CF | 7F 09 99 A2 B3 C4 02 FF 05 XX 01 CFNOTE: XX indicates the value of volume (0-100), corresponding to the hexadecimal number system (00 - 64). |
| Set display mode | 7F 08 99 A2 B3 C4 02 FF 06 XX CF | 7F 09 99 A2 B3 C4 02 FF 06 XX 01 CFNOTE: XX indicates the mode.00-standard, 01-ECO mode,02-custom. |
| Increase backlight brightness | 7F 08 99 A2 B3 C4 02 FF 01 47 CF | 7F 09 99 A2 B3 C4 02 FF 01 47 01 CF |
| Decrease backlight brightness | 7F 08 99 A2 B3 C4 02 FF 01 48 CF | 7F 09 99 A2 B3 C4 02 FF 01 48 01 CF |
| Set the value of backlight brightness | 7F 08 99 A2 B3 C4 02 FF 09 XX CF | 7F 09 99 A2 B3 C4 02 FF 09 XX 01 CFNOTE: XX indicates the value of backlight brightness (1-100), corresponding to the hexadecimal number system (01-64). |
| Switch backlight | 7F 08 99 A2 B3 C4 02 FF 01 15 CF | 7F 09 99 A2 B3 C4 02 FF 01 15 XX CFNOTE: XX = 01 indicates the backlight is on.XX = 00 indicates the backlight is off. |
| Settings | 7F 08 99 A2 B3 C4 02 FF 01 20 CF | 7F 09 99 A2 B3 C4 02 FF 01 20 01 CF |
| Mute On | 7F 09 99 A2 B3 C4 02 FF 0F 00 CF | 7F 09 99 A2 B3 C4 02 FF 0F 00 01 CF |
| Mute Off | 7F 09 99 A2 B3 C4 02 FF 0F 01 CF | 7F 09 99 A2 B3 C4 02 FF 0F 01 01 CF |
| Switch Backlight On | 7F 09 99 A2 B3 C4 02 FF 0E 01 CF | 7F 09 99 A2 B3 C4 02 FF 0E 01 01 CF |
| Switch Backlight Off | 7F 09 99 A2 B3 C4 02 FF 0E 00 CF | 7F 09 99 A2 B3 C4 02 FF 0E 00 01 CF |
| Set Display message on the OSD | 7F 09 99 A2 B3 C4 02 FF 1A XX CFNOTE:• XX indicates the value of text content up to 50 charactersClosing/clearing command:7F 09 99 A2 B3 C4 02 FF 1A 20 CF | 7F 09 99 A2 B3 C4 02 FF 1A 00 XX CFNOTE:• XX = 01 indicates set OSD OK.• XX = 00 indicates set OSD failed. |
| Activate Newline cast | 7F 08 99 A2 B3 C4 02 FF 00 0D CF | 7F 09 99 A2 B3 C4 02 FF 00 0D 01 CF |
| Close Newline cast | 7F 08 99 A2 B3 C4 02 FF 01 0D CF | 7F 09 99 A2 B3 C4 02 FF 01 0D 01 CF |
| Activate Newline broadcast | 7F 08 99 A2 B3 C4 02 FF 00 0F CF | 7F 09 99 A2 B3 C4 02 FF 00 1F 01 CF |
| Close Newline broadcast | 7F 08 99 A2 B3 C4 02 FF 01 0F CF | 7F 09 99 A2 B3 C4 02 FF 01 1F 01 CF |
| Function Querying Codes Return Codes | ||
| Power supply | 7F 08 99 A2 B3 C4 02 FF 01 37 CF | 7F 09 99 A2 B3 C4 02 FF 01 37 XX CFNOTE:• XX indicates the power on/off state.• XX = 01: power on state• XX = 00: power off state |
| Speaker | 7F 08 99 A2 B3 C4 02 FF 01 82 CF | 7F 09 99 A2 B3 C4 02 FF 01 82 XX CFNOTE:• 01: mute• 00: non-mute |
| Current signal source | 7F 08 99 A2 B3 C4 02 FF 01 50 CF | 7F 09 99 A2 B3 C4 02 FF 01 50 XX CFNOTE:• HDMI 1= 19• HDMI 2= 1F• HDMI 3= 1E |
| Speaker volume | 7F 08 99 A2 B3 C4 02 FF 01 33 CF | 7F 09 99 A2 B3 C4 02 FF 01 33 XX CFNOTE: XX indicates current volume value (XX is a hexadecimal value, range: 00-64). For example, XX = 20 indicates current volume value is 32 (decimal value), XX = 00 indicates mute state. |
| D.Mode | 7F 08 99 A2 B3 C4 02 FF 01 35 CF | 7F 09 99 A2 B3 C4 02 FF 01 35 XX CFNOTE: XX indicates the mode. 00-standard, 01-ECO mode,02-custom |
| Backlight brightness | 7F 08 99 A2 B3 C4 02 FF 01 49 CF | 7F 09 99 A2 B3 C4 02 FF 01 49 XX CFNOTE: XX indicates the value of backlight brightness (1 - 100), corresponding to the hexadecimal number system (01 - 64). |
| Backlight status | 7F 08 99 A2 B3 C4 02 FF 01 81 CF | 7F 09 99 A2 B3 C4 02 FF 01 81 XX CFNOTE:• XX = 00 indicates the backlight is on.• XX = 01 indicates the backlight is off. |
| Sleep Mode Status | 7F 08 99 A2 B3 C4 02 FF 01 45 CF | 7F 09 99 A2 B3 C4 02 FF 01 45 XX CFNOTE:• XX indicates the sleep wake up/sleep state.• XX = 01: Sleep Mode Off state• XX = 00: Sleep Mode On state |
| Function Querying Codes | Return Codes | |
| Return to system state of the previous options | 7F 08 99 A2 B3 C4 02 FF 0A 00 CF | 7F 08 99 A2 B3 C4 02 FF 0A 00AB CD EF GH IJ OPQR ST UV CFNOTE:AB: Power supplyCD: SpeakerEF: Current signal sourceGH: Speaker volumeIJ: D.ModeOP: backlight brightnessQR: backlight stateWS: Sleep Mode StatusThe return value description of EF:01 HDMI102 HDMI203 HDMI304 File Manager05 Android Home Page |
| Media category | Formats |
| Photo | .bmp/.gif/.jpg/.png |
| Video | MPEG-4/VP8/VP9 |
| Audio | MIDI/ MPEG1\2 Layer2 / MPEG1\2\2.5 Layer3/VORBIS/ FLAC/PCM |
Before you contact the technical support staff, please identify a fault according to the following table. If the fault cannot be restored based on the solutions, contact your local distributor for help. For your safety, please do not repair the unit on your own.
| Failure | Solution |
| No image. | Check whether the power plug is inserted into the power outlet and whether the display is powered on.Check whether the video and audio input cables are connected correctly.Check to ensure the correct source is selected.Check the settings on image brightness and contrast. |
| Image is normal, but no sound. | Check the volume.Check whether the MUTE button on the remote controller is pressed. |
| The image is black and white. | Modify the color settings.Check the color settings. |
| Image or sound is interrupted. | Turn off other devices surrounding the screen to check again, if any surrounding devices are causing the interference, try moving them away from the screen.Do not share the same power outlet with other electric appliances that could interference. |
| The remote controller fails. | Change the batteries.Clean the signal emitter at the top of the remote controller. (Check whether it is blocked.)Check contacts of the batteries. |
The following symptoms are not faults:
- A very few of constantly bright or dark pixels, such as tiny red, blue, green or dark points, may exist on the screen. This symptom is not a fault and does not affect running functions of the machine.
- Slight sound may occur due to the backlight adjustment or ventilation. This is a normal symptom.
- The image and sound are normal. However, you can sense static electricity when you touch the screen and metal back cover. This is a normal symptom.
8
Maintenance Tips
- Do not install or place the machine near the heat source.
- Do not install or place the machine under directly sunlight, or dust /damp place.
- Do not install or place the machine in the places with mechanical vibration and vulnerable to impact.
- Please keep the machine stay away from grid, large metal objects, radar stations and other equipment.
- Do not use chemical reagents to wipe the machine body, solvent may cause deterioration or damage to the shell paint. If have dirt bilge, wipe it with drying warm cloth after cutting off power source. Display touch screen can be wiped gently with a clean soft cloth.
- Do not power on and off the machine frequently, so as not to affect the service life of the machine. After normal shutdown, please wait three minutes before starting up. If not in use for a long time, please turn off the power and unplug the machine.
- Do not set the display brightness and contrast to the maximum for a long time to extend the service life of the screen.
- Do not use hard objects to write on the touch screen, so as not to scratch the screen and affect the display effect.
| Model | STV-4324-PLUS | STV-5524-PLUS | STV-6524-PLUS | STV-7524-PLUS | STV-8524-PLUS | STV-9824-PLUS |
| Display | ||||||
| Active Screen Size | 55"43" 65" 75" 85" 98" | |||||
| Backlight LCD (Direct LED Backlight) | ||||||
| Display Area(Decimal point is rounded off) | 941 x 529 mm | 1210 x 680 mm | 1428 x 804mm | 1650 x 928mm | 1872 x 1053mm | 2159 x 1214mm |
| Display Ratio 16:9 16:9 16:9 16:9 | 16:9 | |||||
| Resolution | 4K (3840x2160) | 4K (3840x2160) | 4K (3840x2160) | 4K (3840x2160) | 4K (3840x2160) | 4K (3840x2160) |
| Display Colors | 1.07 Billion (8 bit + FRC) | 1.07 Billion (8 bit + FRC) | 1.07 Billion (8 bit + FRC) | 1.07 Billion (8 bit + FRC) | 1.07 Billion (8 bit + FRC) | 1.07 Billion (8 bit + FRC) |
| Brightness Center brightness | 260 typ 260 | typ 270 typ 300 | typ 350 typ 450 | typ | ||
| Contrast Ratio Typ. 4000:1 Typ. 4000:1 Typ. 4000:1 Typ. 5000:1 Typ. 4000:1 | ||||||
| LCD Response Time | Typ. 6.5 ms | Typ. 6.5 ms | Typ. 6.5 ms | Typ. 6.5 ms | Typ. 6.5 ms | Typ. 6.5 ms |
| LCD Viewing Angle | 178° | 178° | 178° | 178° | 178° | 178° |
| LCD Refresh Rate | 60Hz | 60Hz | 60Hz | 60Hz | 60Hz | 60Hz |
| Lifespan | 30000 hours | 30000 hours | 30000 hours | 30000 hours | 30000 hours | 30000 hours |
| Smart System | ||||||
| Chipset | Android 14 | |||||
| CPU | ARM Cortex A73 x 4 | |||||
| GPU | ARM Mali-G52 MC1 | |||||
| RAM | 4 GB | |||||
| ROM | 16 GB | |||||
| Android Version | 14 | |||||
| Wi-Fi / Bluetooth | Wi-Fi 5, Bluetooth | |||||
| Electrical | ||||||
| Working Voltage | 100-240 V~50/60 Hz | 100-240 V~50/60 Hz | 100-240 V~50/60 Hz | 100-240 V~50/60 Hz | 100-240 V~50/60 Hz | 100-240 V~50/60 Hz |
| Power Consumption(Standard Mode Max.) | 105W 150W | 170W 260W | 290W 450W | |||
| Power Consumption(Standby mode) | <0.5W <0.5W | <0.5W <0.5W | <0.5W | <0.5W | ||
| Speaker | ||||||
| Speaker Direction | Bottom | |||||
| Rated Impedance | 6Ω | |||||
| Max. Power Output | 10Wx2 15W x 2 | |||||
| Ports | ||||||
| Rear input port | HDMI In 2.0 x 3, USB-A 2.0 x 1, USB-A 3.0x 1, LAN In (RJ45) x 1, RS232 DB9 x 1, AV In x 1 | |||||
| Rear output port | S/PDIF OUT x 1, Audio Output (Jack 3.5 mm) x 1 | |||||
| Transportation/Storage/Installation | ||||||
| Outline Dimension(without wall mount bracket thickness) | 957 x 556 x 86 mm | 1226 x 709 x 88 mm | 1446 x 831 x 84 mm | 1668 x 956 x 88 mm | 1890 x 1078 x 91 mm | 2182 x 1247 x 111 mm |
| Packing Dimension | 1075 x 142 x 652 mm | 1350 x 144 x 837 mm | 1600 x 164 x 960 mm | 1840 x 190 x 1103 mm | 2030 x 192 x 1250 mm | 2390 x 280 x 1500 mm |
| Net Weight 6.4 | ±2kg 10.8±2kg | 16.3±2kg 22.7 | ±2kg 28.9±2kg | 58.9±2kg | ||
| Gross Weight 8.9 | ±2kg 14.8±2kg | 22.1±2kg 32.4 | ±2kg 41.4±2kg | 84.6±2kg | ||
| VESA Mount Installation Position(Transversal) | 300 x 300 mm | 300 x 300 mm | 400 x 300 mm | 400 x 300 mm | 500 x 400 mm | 800 x 200 x 200mm |
| Storage Temperature/Humidity | -20~60°C / 0~90%RH(non-condensing) | |||||
| Working Temperature/Humidity | 0°C ~ 40°C / 20 ~ 80%RH(non-condensing) | |||||
| Installation Method(Optional) | wall-mounted, mobile cart | |||||
For More Information
Please visit our website (www.newline-interactive.com) for detailed instruction manual.
Contact Us for Support
Please email us at support@newline-interactive.com.
Our company is devoted to machine innovation and technology enhancement. Therefore, we may change machine specs and information without notice, Machine pictures in the manual are for reference only, please refer to actual machines.

- Symbol Conventions 03
- Safety Instruction 04
- Parts and Functions 07
- 2.Installation Guide 14
- 3.Turning On/Off 19
- 4.Operating the Intelligent Display 20
- Signage Displays with Plug-in Module.
- Symbol Conventions
- Safety Instruction
- 1
- Parts and Functions
- Parts
- ◆ Front View
- Rear View
- Rear Ports
- CAUTION
- Note
- Safety Precautions
- Installation Precautions
- ◆ Vertical installation
- ◆ Ventilation
- Installation
- 3
- Turning On/Off
- Power On
- Power Off
- Power Option
- Standby Modes
- True Power Off Mode
- Fast Boot Mode
- Sleep Mode
- Boot-up Screen
- Welcome page
- ◆ Newline Cast
- ◆Newline VCS
- ◆ File Commander
- File Management
- File Filtering
- File Search
- File Operation
- Applications
- - Newline App Store
- - Newline Display Management+
- • VLC
- Menu Page (in source)
- Source
- Screen
- ◆ Advanced Options
- Menu Page
- Picture
- Advanced Settings
- Sound
- Settings
- ◆ Network & Internet
- Source & Inputs
- ◆ Display & Sound
- - Apps
- ◆ System
- About
- Power & Energy
- Power
- Timer
- Date & Time
- Keyboard
- Storage
- System sounds
- Restart
- ◆ Remotes & Accessories
- IP Control:
- RS-232 operation instructions:
- 8
- Maintenance Tips
- For More Information
- Contact Us for Support
Brand : Newline
Model : STV-9824-PLUS
Category : Screen