
NVS-HB01 - Car GPS Navigation ALPINE - Free user manual and instructions
Find the device manual for free NVS-HB01 ALPINE in PDF.


| Product Type | Map CD-ROM for Alpine Navigation Systems |
| Model | NVS-HB01 (SMART MAP PRO) |
| Compatibility | Alpine NVE-N055PS series navigation units |
| Disc Format | CD-ROM |
| Map Coverage | Detailed road maps with points of interest (POIs) |
| Navigation Functions | Automatic route calculation, voice guidance, turn-by-turn directions, intersection zoom |
| Route Preferences | Motorway or ordinary road priority, shortest/quickest/main road options |
| Waypoints | Up to 5 waypoints per route |
| Memory Points | Up to 99 memory points (including home) |
| Border Point Crossing | Automatic or manual border point selection for multi-map usage |
| Display Languages | English (mile/km), French, German, Italian |
| Map Display Modes | North-up, heading-up, wide heading-up; day/night/auto modes |
| Point of Interest Categories | Hotels, restaurants, fuel stations, parking, hospitals, airports, ferries, etc. |
| Search Methods | By address, category, name, latitude/longitude, memory point, or local points |
| Voice Guidance | Real-time voice prompts with interrupt option; normal or reduced frequency |
| Alternate Routes | 2 km or 5 km alternate route searching |
| Drive Simulation | Demo mode to preview route guidance |
| Maintenance | Keep disc clean; avoid scratches; store in case when not in use |
| Safety Precautions | Do not operate while driving; stop vehicle before menu operations; obey traffic laws |
| Spare Parts | Replacement disc available from Alpine dealers |
| Dimensions (Disc) | Standard CD: 120 mm diameter, 1.2 mm thickness |
Frequently Asked Questions - NVS-HB01 ALPINE
User questions about NVS-HB01 ALPINE
0 question about this device. Answer the ones you know or ask your own.
Ask a new question about this device
Download the instructions for your Car GPS Navigation in PDF format for free! Find your manual NVS-HB01 - ALPINE and take your electronic device back in hand. On this page are published all the documents necessary for the use of your device. NVS-HB01 by ALPINE.
USER MANUAL NVS-HB01 ALPINE
Suite 203, 7300 Warden Ave. Markham,
Ontario L3R 926, Canada
Tel.: 1-800 ALPINE-1 (1-800-257-4631)
1-BBB-NAV-HELP (1-BBB-628-4357)
ALPINE ELECTRONICS OF AUSTRALIA PTY. LTD.
6-8 Fiveways Boulevard Keysborough,
Victoria 3173, Australia
Tel.: (03) 9769-0000
ALPINE ELECTRONICS GmbH
Kreuzerkamp 7-11
40878 Ratingen. Germany
Tel.: 02102-45 50
13 Tanners Drive, Blakelands,
Milton Keynes MK14 5BU, U.K.
Tel.: 01908-61 15 56
ALPINE ELECTRONICS DE ESPAÑA, S.A.
Portal De Gamarra 36, Pabellón 32
01013 Vitoria (Alava)-Apdo. 133, Spain
Tel.: 34-45-283588
Designed by ALPINE Japan
Printed In Japan (Y
68P11645Y14-A
ALPINE
DIGITAL INFORMATION MAP/CARTE ROUTIERE SUR CD ROM
SMART MAP PRO
OWNER'S MANUAL
Please read before using this disc.
MODE D'EMPLOI
GB


F
D
B NL L
I A CH
Yamagata Printing
Co., Ltd.
2-6-34. Takashima.
Nishi-ku, Yokohama,
Kanagawa, Japan
PRECAUTIONS
IMPORTANT INFORMATION, PLEASE READ CAREFULLY BEFORE USING THIS PRODUCT.
This product is intended to safely provide turn by turn instruction to get you to a desired destination. Please read the following precautions to ensure that you use your navigation system correctly.
This product is not a substitute for your personal judgment. Any route suggestions made by the navigation system may never supersede any local traffic regulations or your personal judgment and/or knowledge of safe driving practices. Do not follow route suggestions if the navigation system instructs you to perform an unsafe or illegal maneuver, places you in an unsafe situation, or routes you into an area which you consider unsafe.
Glance at the monitor screen only when necessary and safe to do so. If prolonged viewing of the screen is necessary, pull over in a safe and legal manner and location.
Do not input destinations, change settings, or access any functions requiring a prolonged view of the monitor and/or remote control while you are driving. Pull over in a safe and legal manner and location before attempting to access the system.
Do not use the navigation system to route you to emergency services. Not all locations of emergency service providers such as police and fire stations, hospitals, and clinics are contained in the database. Please use your own judgment and your ability to ask for directions in these situations.
The map database contained within the media (CD ROM) in which it is stored is the most recent map data available at the time of production. Because of changes in streets and neighbourhoods, there may be situations where the navigation system may not be able to route you to your desired destination. In these cases, use your own personal judgment.
The map database is designed to provide you with route suggestions, it does not take account the relative safety of a suggested route, or of factors which may affect the time required to reach your destination. The database does not reflect road closures or construction, road characteristics (i.e. type of road surface, slope or grade, weight or height restrictions, etc.), traffic congestion, weather conditions, or any other factors which may affect the safety or timing of your driving experience. Use your personal judgment if the navigation system is unable to provide you with an alternate route.
There may be situations where the navigation system may display the vehicle's location erroneously. Use your own driving judgment in this situation, taking into account current driving conditions. Please be aware that in this situation, the navigation system should correct the vehicle's position automatically; however, there may be times where you may have to correct the position yourself. If this is the case, pull over in a safe and legal manner and location before attempting operation.
Make certain that the volume level of the monitor is set to a level which still allows you to hear outside traffic and emergency vehicles. Driving while unable to hear outside sounds could cause an accident.
* Please make certain that any other person who intends on using the navigation system reads these precautions and the following instructions carefully.
If there is anything in the manual which you do not understand, or are uncertain about the operation of the navigation system, please contact an authorized Alpine representative before using the navigation system.
Points to Observe for Safe Usage
- Read the manuals for this disc and the system components carefully before using your navigation system. They contain instructions on how to use the system in a safe and effective manner. Alpine cannot be responsible for problems resulting from failure to observe the instructions in these manuals.
- This manual uses various pictorial displays to show you how to use this product safely and to alert you to potential dangers resulting from improper connections and operation. Following are the meanings of these pictorial displays. It is important to fully understand the meanings of these pictorial displays in order to use this manual and the system properly.
●Meaning of displays
 Warning Warning | This label is intended to alert the user to the presence of important operating instructions.Failure to heed the instructions may result in severe injury or death. |
 Caution Caution | This label is intended to alert the user to the presence of important operating instructions.Failure to heed the instructions can result in injury or material damage. |
 | This indicates supplementary explanation of operation of the system. |

Warning
KEEP SMALL ARTICLES OUT OF THE REACH OF CHILDREN
Store small articles (batteries, screws, etc.) in places not accessible to children. If swallowed, consult a physician immediately.
HALT USE IMMEDIATELY IF A PROBLEM APPEARS
When problem occurs such as a lack of sound or video, foreign objects inside the unit, smoke coming out, or noxious odors, stop use immediately and contact the dealer where you bought the equipment.
DO NOT OPERATE THE SYSTEM OR LOOK AT THE MONITOR SCREEN WHILE DRIVING
Do not change settings and destination locations while driving the vehicle.
Minimize the amount of viewing the monitor screen and listen for the voice guidance while driving. Operating the system will distract the driver from looking ahead of the vehicle and cause accident. Always stop the vehicle in a safe location before operating the system.

Caution
COMPLY WITH THE CURRENT TRAFFIC CONDITIONS WHILE DRIVING
When using the navigation system, always comply with the local traffic regulations.
DO NOT USE THE SYSTEM OUTSIDE THE VEHICLE
Do not use the system for purposes other than listed for the vehicle. Failure to do so may result in electric shock or injury.
STOP THE VEHICLE BEFORE CARRYING OUT ANY OPERATIONS THAT COULD INTERFERE WITH YOUR DRIVING
If loading or unloading a disc or raising or lowering the monitor could interfere with your driving (for example gear lever shifting), stop the vehicle in a safe location first, then operate the system.
DO NOT ATTEMPT TO USE ANY MUSIC CD'S OR OLDER VERSION OF MAP CD ROM'S
Doing so may cause a malfunction.
User Agreement
In using this CD-ROM "SMART MAP PRO" (hereinafter referred to as "Disk"), as part of the Aisin AW CO., Ltd. ("Aisin AW") and Navigation Technologies Corporation ("NavTech") Database (hereinafter referred to as "Database"), you are bound by the terms and conditions set forth below. By breaking the seal on this package, and using your copy of the Database and Disk, you have demonstrated your agreement to the terms and conditions of this Agreement. You should therefore, make sure that you read and understand the following provisions.
- The Disk and Database may not be copied, duplicated, processed, or otherwise modified, in whole or in part, without the express written permission of Aisin AW, NavTech and Alpine Electronics, Inc. ("Alpine").
- Neither the Disk nor the Database may be transferred or sublicensed to any third party for profit, rent or loan, or licensed for reuse in any manners.
- The Disk and/or Database may not be decompiled, reverse engineered or otherwise disassembled, in whole or in part.
- The Disk and Database may not be used in a network or by any other manner of simultaneous use in multiple systems.
- The Disk and Database are intended solely for personal use (or internal use where the end-user business), or the consumer. The Disk and Database are not to be used for commercial purposes.
- Neither Aisin AW, Alpine nor NavTech guarantees to the customer that the functions included in the Disk and Database meet a specific objective of user.
- Neither Aisin AW, Alpine nor NavTech shall not be responsible for any damages caused by the use of the Disk and/or Database to the actual user and to any third party.
- The Warranty on the Disk and Database shall not extend to an exchange or refund due to misspelling, omission of letters, or any other cosmetic discrepancy in layout found in Disk and/or Database.
- The right to use the Disk and Database shall expire either when the user destroys this software, or when any of the terms for use is violated and Aisin AW, Alpine and/or NavTech exercises the option to revoke the license to use this software.
- The terms and conditions hereof apply to all subsequent users and owners as well as to the actual purchaser.
WARNINGS
- Operation of the system while driving is dangerous. Users should stop vehicle before operating the software.
- Road conditions and regulations take precedence over information contained on the map display: observe actual traffic restrictions and circumstances while driving.
- This software is designed for use exclusively in the NVE-N055PS series. It cannot and may not be used in conjunction with other hardware.
Table of Contents
Precautions
2 ...... Important Information
4....Points to Observe for Safe Usage
6 User Agreement
Preface
8 Navigation terminology
9 Features
Before Using The System
10...... Writing the system programme installed
11 ...... How to switch the map displays
12 Switching the display on/off
13....Setting language mode
14 Manual backup
Searching For Locations
15 ..... Searching for destination from category 26 ..... Searching for destination by latitude/longitude input
18 ..... Searching for destination from address (name of city/street) 27 ....Searching from home/departure point/waypoint/previous (Easy mode) destination
21 ..... Searching for point of interest 28 .... Searching from a memory point
from category (Expert mode) 29 .... Searching from local points
23 ..... Searching for point of interest 30 .... Auto searching for border point
from address to search for 33 .... Manual searching for border point
Storing Points Into Memory
35 ...... Registering your home
36 ...... Registering a location to be stored into memory
Point Editing
37 Memory point editing number/icon/name/telephone number/position/special usage
Deciding The Route
42 ...... Setting the destination 48 ...... Confirming the searched route
44 ...... Setting waypoints 49 ...... Route editing
45 ...... Displaying the whole route 50 ...... Changing sequence of
46 ..... Searching for an alternate route waypoints for today's plan
47 ...... Setting route options 52 ...... Drive simulation
Customizing (as you like it)
54 .... Setting display conditions 59 .... Adjustments
55 ...... Displaying point-marks 59 ...... Direction correction
56 ....Setting guidance conditions 60 ....Screen position adjustment
57....Setting clock 61....Distance coefficient
Useful Hints
62 Viewing GPS screens
63 Viewing the odometer
Reference
64 In case of difficulty 66 Buttons and functions of
65 ...... If this message appears remote control
- This manual explains operation assuming that Alpine NVE-N055PS and RUE-4113 are used. If other model(s) are used, some display screens may vary and locations of the buttons on the remote control are different (see "Buttons and functions of remote control" on page 66). For operation, refer to the manuals for the units you use in addition to this manual.
Navigation terminology
Navigation
The navigation system displays and tracks the vehicle's position and movement on a moving map display. When a destination is input, the navigation system quickly calculates a route and guides you along the route with pictorial displays and voice prompts.
Present vehicle position

The navigation system integrates the GPS signals received and the map information stored on the CD ROM to display the position and direction of the vehicle. The system also includes a gyroscope and a speed sensor that enable it to display the present position even in locations where the GPS signal may be blocked.

Present vehicle position
Map matching
Since GPS navigation has an error of 100 – 655 feet (30 m – 200 m), the position of your vehicle may be displayed off the road. Map matching automatically corrects this error so that the position of your vehicle is displayed on the road.
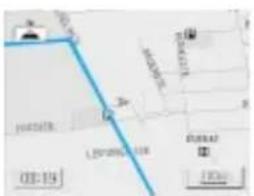
Uncorrected


Corrected
Destination G
The point on the map that is your destination is specified and displayed with the destination icon.
Route

When a destination is input, the navigation system automatically calculates a route and displays it in blue on the map.
Destination mark
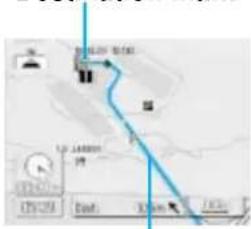
Route
Waypoints 1
You specify points you wish to pass by along the way to your destination and they are indicated with the waypoint icons in the display.

waypoint icon
Memory points 2
Locations you go to frequently can be stored into memory and marked on the map. The system can store up to 100 points, including your home.
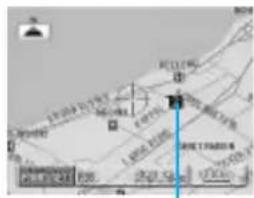
Memory point mark
Motorway-preference selection
When searching for routes with the navigation system, you can switch between searching for routes that give priority to motorways and those that give priority to ordinary roads. When you specify motorway preference, the navigation system automatically searches for a route that gives priority to motorways and guides you along that route.
Tracking

The tracks indicate the roads you have driven over with blue dots. There is a limit on the amount of memory available for storing your tracks (up to 31 miles/50 km). When you exceed this memory capacity, the tracks are erased starting from the earliest portion.

• Automatic Route Calculation
Just select the destination and your navigation system does the rest, automatically searching for the route you need. When searching for the route, you can select the route that gives priority to motorways or ordinary roads.
• Real Time Voice Guide
A voice guide informs you of the distance and direction until your course change, giving advice timed to match road conditions.
The VOICE button lets you call up the voice guide when needed by just pushing a button.
- Alternate Route Setting
Two types of route settings:
- Quick setting of alternate routes when traffic flow is obstructed.
- Distance for alternate roundabout route can be selected by driver (within 0.6 to 3 miles or 1 to 5 km).
- Automatic or Manual Border Point Setting
When you travel crossing the map border, you can select the border point on the road automatically or manually as a waypoint or a destination so as to make the route searching easier across the border.
• Facilities/Services Information Display
When you travel on motorways, the navigation system automatically displays facilities/services available in the vicinity of the vehicle such as fuel, food, parking, etc.
- Direct Input of Name of Place of Interest
Input only the name of a place of interest (without inputting the city name) to search for the route to the place of interest.
- Direct Input of Street Name
Just input the street name (no need to input the city name) to search for the route to the street.
- Sequence of Waypoints Can Be Changed (Today's Plan)
Your navigation system can automatically sort the sequence of the waypoints in order of distance starting with the nearest waypoint. Or you can manually change the sequence of the waypoints in any order as you like.
- Intersection Zoom
As you near intersections and cross points, the map display automatically zooms in to show a more detailed view that you will need. This means there is no need to press a Zoom button.
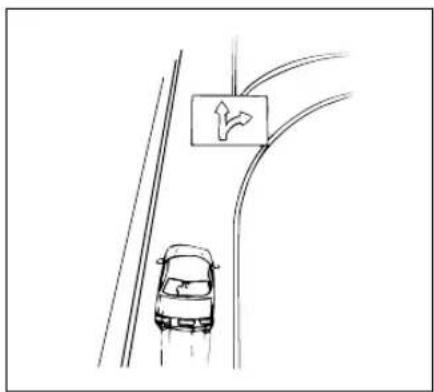
- Next Turn Guide
As you approach the place where you actually have to turn about 1000 feet (300 metres) prior to the crossroad or junction, the system informs you of which direction you have to turn with voice and picture guide.
• Built-in Gyroscope and Speed Sensors
The gyroscope for sensing direction and the speed pulse sensor for detecting distance provide data which allows vehicle position and direction to be displayed even in locations where the GPS signal cannot be received such as between buildings or in tunnels.
• Motorway Information Display
When you travel on motorways, the guidance display (with an arrow) automatically shows the distances to the next fuel station/restaurant/parking/junction (except exit).
Before Using The System
Writing the system programme installed
If a different version of the map disc has been used with your navigation system, the system programme installed will be rewritten automatically to read this SMART MAP PRO disc.
1 Remove the different version of the map disc from your navigation system. Insert this SMART MAP PRO disc. (For removing and inserting procedure, refer to the Owner's Manual of the system.)
The display shows "Set Original CD-ROM" while the disc is being loaded, then it shows "Program CD-ROM is being loaded." and the system rewrites the programme.
![graph TD A["專用ディスクを入れて下さい<br>Set Original CD-ROM"] --> B["Programn daten werden geladen.<br>Program CD-ROM is being loaded.<br>chargement du CD-ROM en cours.<br>Il programma CD-ROM à caricato.<br>Programma wordt van de CD geladen."] B --> C["Programnversion wird aktmlistert.<br>Program version will…](/content/2026/05/958442/images/7a6c4d95d53f2742edee390a56f192fbebbefeaa838a41211b71813e8b42c922.jpg)
2 The opening screen appears in the display.
For the procedure after this, see "Before Using The System" on page 12.
Note: If a different version of the map disc is inserted after the system programme has been rewritten, the selection menu appears in the display.
Select the desired menu item by tilting the joystick and pressing the ENTER button on the remote control. The opening screen appears on the display.

How to switch the map displays
Once the route setting has been performed and travelling started, the navigation system provides the driver all of the major route information with real time voice directions and guidance displays. You can manually select the desired guidance displays for your convenience.
The Basic Direction Display is automatically displayed when travelling starts. Pressing the □ button while the Basic Direction Display is being displayed switches to the Detailed Map. To return to the Basic Direction Display, press the □ button again.

During navigation, when your vehicle approaches an intersection, the Zoomed Intersection Map of that intersection is displayed. This enlarged Intersection Map gives you further information to the voice guidance. (Sometimes, the enlarged crossroad map is displayed even when you are going to go straight.)
Zoomed Intersection
Map display

• Ordinary Road: Name of next road ahead.
- Motorway: Name of next junction ahead.
• Street name you are on now
Arrival display
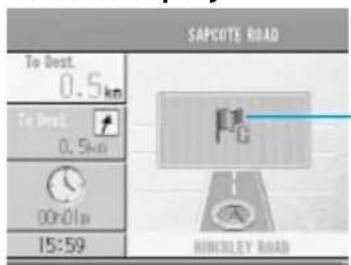
This icon appears when destination is near.
Switching the display on/off
With the Alpine navigation system, when the ignition key is turned to ACC or ON and the display monitor is set in the navigation display mode or external input display mode, the opening screen will be automatically displayed. For operation of remote control, see page 66 and the Owner's Manual for your system.
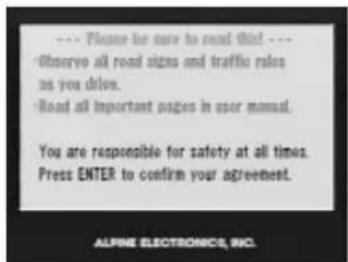
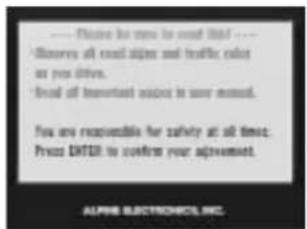
1-1 After the opening screen is displayed, important information saying "Please be sure to read this!" is displayed. Be sure to read it.
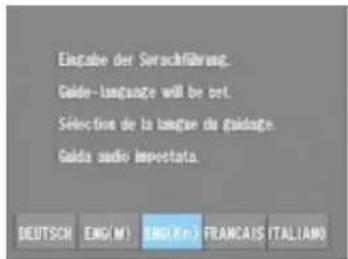
1-2 If the language has not been selected yet, the guide language selection menu is displayed. Select (highlight) the desired guide language by tilting the joystick. Then press the ENTER button. (For details, see the "Setting language mode" section.)


2 After you have read this important information, press the ENTER button.
The map screen is displayed.

3 With the map displayed, press the OFF button to turn off the display monitor.
If you press the ON button, the opening screen is displayed.


- If there is no disc in the navigation system, "Please insert map CD ROM" is displayed. For details on how to load the disc, refer to the "Inserting a disc" and "Removing a disc" sections on the manual for the navigation system.
- If the disc cannot be read, the "CD ROM unreadable. Please check CD ROM" message is displayed. Load the correct disc.
- If for an extended period of time the monitor is kept on with the engine off, the battery may discharge.
Setting language mode
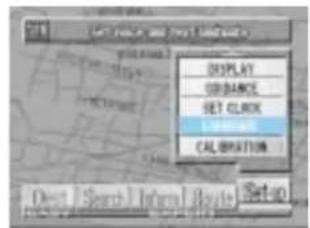
1 Press the MENU button to display the main menu. Select (highlight) "Set-up" from the main menu. The sub-menu is automatically displayed, select LANGUAGE from the sub-menu and press ENTER.
2 A sub-menu appears in the display. Select the desired menu item and press ENTER.
Note: For the English mode, you can select the distance indication in either M (Mile) or km (Kilometre). For other languages, only kilometer is used for the distance indications.
3 The important message saying "Please be sure to read this!" is displayed. After you have read this important message, press ENTER.
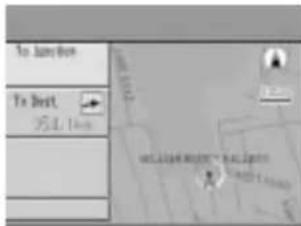
The map screen is displayed.



Manual backup
The navigation system will automatically back up (save) your new settings (for example, memory point settings etc.) when the ignition switch is turned off and turned on again. If the battery leads should be disconnected from the vehicle's battery, be sure to manually back up before disconnecting the battery leads as described below.
1 Press the MENU button to display the main menu. Select "Set-up" from the main menu, then select "BACKUP MEMORY" and press ENTER.
2 The "Backup now?" menu appears. If your answer is yes, select "Yes" and press ENTER.
3 The navigation system starts the backup process and the display becomes darker for a little while. The display shows the opening screen, then "Please be sure to read this!" screen.
4 After you have read this important information, press the ENTER button.
The map screen is displayed.


Searching For Locations
Searching for destination from category (Easy mode)
If you know the category of the desired destination, you can easily display that destination by just selecting the desired category from the displayed category list.
The display examples show when Holiday Inn (hotel) is searched.
1 Press the MENU button to display the main menu. Select "Dest." from the main menu, "Input destination by category" menu appears in the display automatically.

2 Select "CATEGORY" and press ENTER to display the category list.

3 The category list is displayed. Select the desired category (for example, HOTEL) and press ENTER.

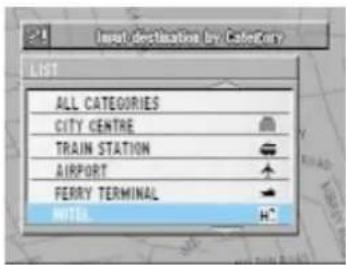
Note: If you know the name of the desired destination only, select "ALL CATEGORIES" and press ENTER. The character pallet is displayed, input the name of the destination in the same manner as for the city name (Steps 4 to 6). When inputtings have been completed, go to Step 7.
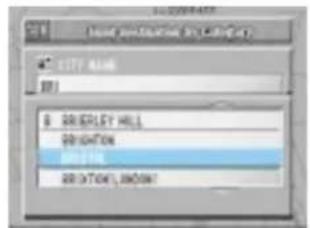
4 The city name selection menu is displayed. There are 4 choices you can select. Select the desired menu item and press ENTER.
- When "CITY NAME INPUT" is selected, proceed to Step 5.
- When "NEAR 5 CITIES" is selected, the names of 5 near cities appears in the display. Select the desired city name and press ENTER. Skip to Step 7.
- When a city name is directly selected from the list displayed, press the ENTER button and skip to Step 7.
- When "SEARCH ALL CITIES" is selected, the character pallet will be displayed. Skip to Step 7.
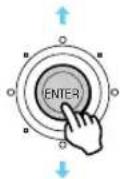
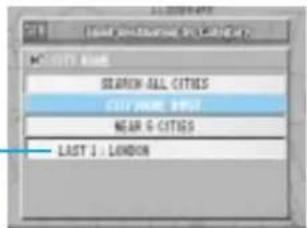
The city name of the last-X search stored in memory.
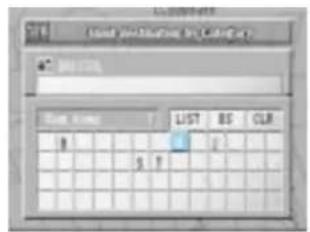
5 The character pallet is displayed. Tilt the joystick to select the desired character for the first position of the city name and press ENTER. The entered character appears at the first position of the text window.
The characters selected are displayed in the text window.
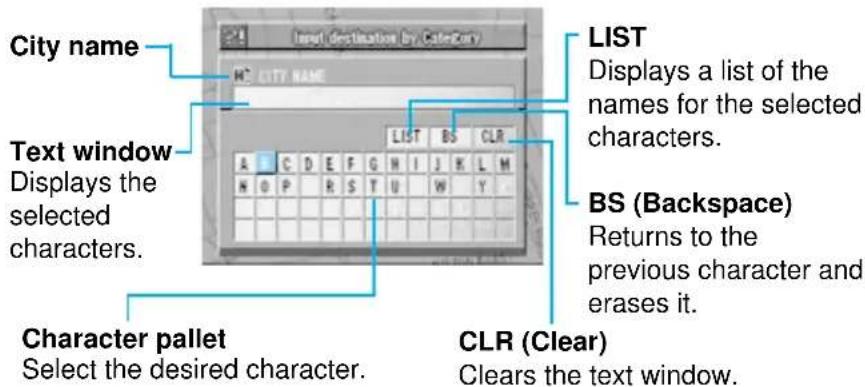


- When 1 character is input, the candidates for the next character are narrowed down (and the others disappear from the character pallet).
- You can also search for a location by inputting just the start of its name.
- If you want to display the list of candidate streets, select "LIST" and press ENTER. Skip to Step 7.
6 Repeat Step 5 above to complete the character inputtings.
7 Enter the name of the destination following Steps 5 and 6.
8 When the character inputtings have been completed, select "LIST" at the top of the character pallet and press ENTER.


If there is no location with the input spelling, locations with similar spelling are displayed.
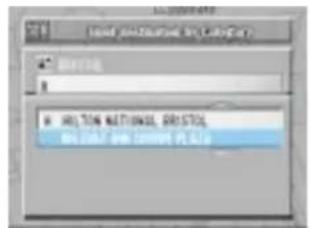
9 The list of the cadidate names is displayed. Select the desired name and press ENTER.
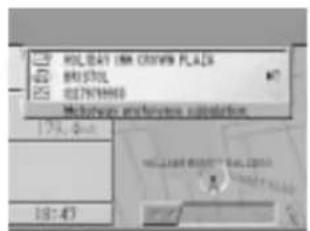
10 The system starts to calculate the route to the destination.
During the calculation process, the display shows the details of the destination and progress of calculation process.
When the calculation has been completed, the system automatically displays the map with the present vehicle position.

Searching for destination from address (name of city/ street) (Easy mode)
If you know the address for the destination, you can display its location on the map by inputting the address (name of the city/street).
This section describes how to search from the city/street name.
1 Press the MENU button to display the main menu and select "Dest." Press ENTER.
2 Select "ADDRESS" from the sub-menu and press ENTER.


3 The "Input destination by address" screen is displayed. There are 4 choices you can select.
Select "CITY NAME INPUT" from the menu and press ENTER to search for the destination from the city/street name.

- When "SEARCH ALL CITIES" is selected, proceed to Step 6.
- When "NEAR 5 CITIES" is selected, the names of 5 near cities appears in the display. Select the desired city name and press ENTER, then proceed to Step 6.
- When a city name is directly selected from the list displayed, press the ENTER button and skip to Step 6.

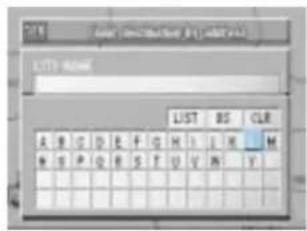
4 The character pallet is displayed. Tilt the joystick to select the desired character for the first position of the city name and press ENTER. The entered character appears at the first position of the text window.

The characters selected are displayed in the text window.
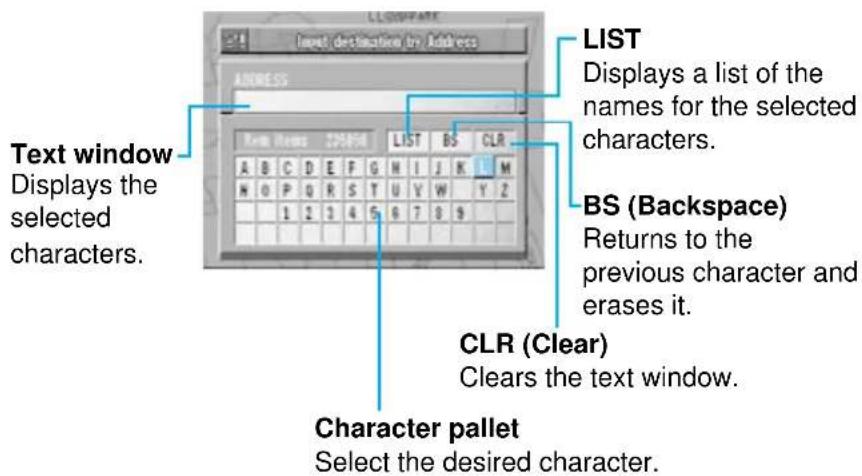

- When 1 character is input, the candidates for the next character are narrowed down (and the others disappear from the character pallet).
- You can also search for a location by inputting just the start of its name.
- If you want to display the list of candidate streets, select "LIST" and press ENTER.
5 Repeat Step 4 above to complete the character inputtings of the city name.
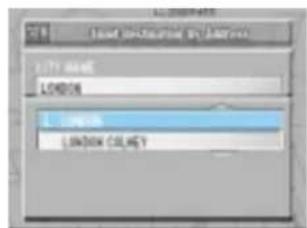
6 Enter the name of the street in the same manner as Steps 4 and 5.
Note: You may input only a portion of a long street name (for example, "Bridge" of "Parliament Bridge Street"), to display the list of the cadidate street names.
7 When the character inputtings of the street name have been completed, select "LIST" at the top of the character pallet and press ENTER.


If there is no location with the input spelling, locations with similar spelling are displayed.
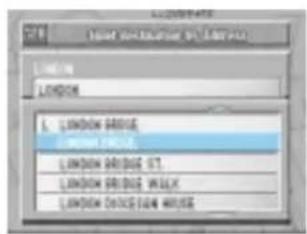
8 The list of street names will be displayed. Select the desired street name and press ENTER.
Note: If there are other streets with the same name in other cities when the desired street name is searched in the "SEARCH ALL CITIES" mode, the list of the cities will be displayed. Select the desired city name and press ENTER.

The Detailed Information screen appears. If the detailed information is correct, select "ROUTE SEARCH" and press ENTER.
When "Second street" is selected, the list of the second street names will be displayed. Select the desired street name and press ENTER.
9 The system starts to calculate the route. When the calculation has been completed, the system automatically displays the present vehicle position screen.


Searching for point of interest from category (Expert mode)
If you know the category of the desired point of interest (P.O.I.), you can easily display that point of interest on the map by just selecting the desired category from the displayed category list.
The display examples show when Holiday Inn (hotel) is searched.
1 Press the MENU button to display the main menu.
Select "Search." from the main menu, "Locate category on map" menu appears in the display automatically.

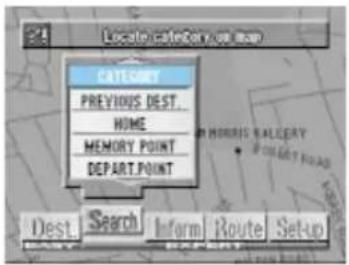
2 Select "CATEGORY" and press ENTER to display the category list.


3 To search for the desired point of interest, follow the Steps 3 to 9 of the "Searching for destination from category" section (pages 15 to 17).
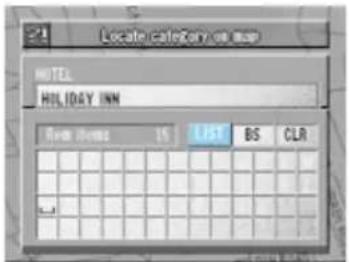
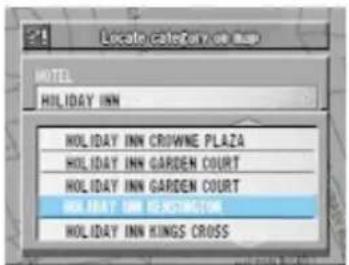
4 The details of the point of interest are displayed. If the details are correct, select "MAP DISPLAY" and press ENTER.

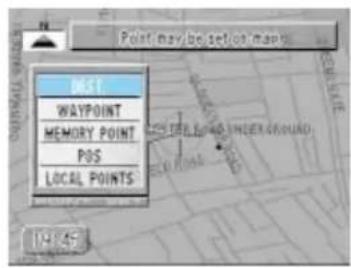
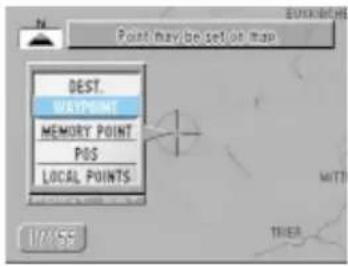
5 The "Point may be set on map" menu with the map showing the area of the point of interest appears. Select the desired menu to set the point as a destination, waypoint, etc.

Searching for point of interest from address
If you know the address of the desired point of interest (P.O.I.), you can easily display that point of interest on the map by just inputting the address. The display examples show when the London Bridge is searched.
1 Press the MENU button to display the main menu. Select "Search." from the main menu, "Locate address on map" menu appears in the display automatically.

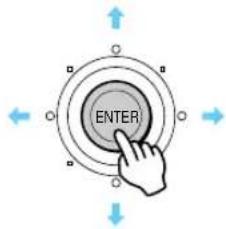
2 Select "ADDRESS" and press ENTER. The character pallet is displayed.

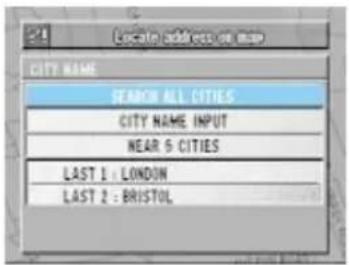
3 Enter the address of the point following Steps 3 to 8 of the "Searching for destination from address" section (pages 18 to 20).
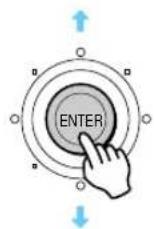


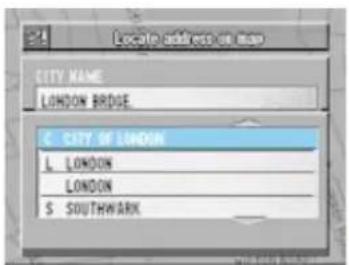
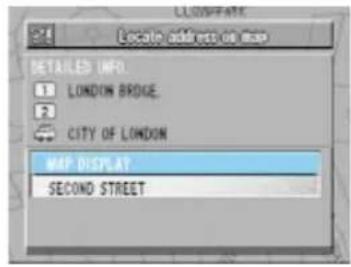
4 The details of the point of interest are displayed. If the details are correct, select "MAP DISPLAY" and press ENTER.
When "Second street" is selected, the list of the second street names will be displayed. Select the desired street name and press ENTER.
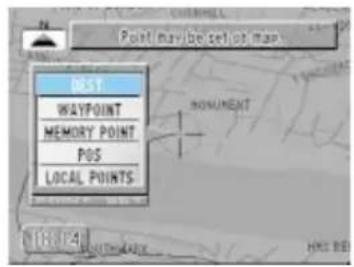
5 The "Point may be set on map" menu with the map showing the area of the point of interest appears. Select the desired menu to set the point as a destination, waypoint, etc.

Moving the map to search for locations
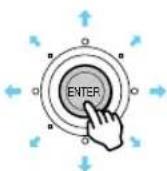
The map can be freely moved with the joystick in 8 directions. The best way to find a location is first to display the wide range map and specify the approx. location. You can find the desired location efficiently by specifying more and more detailed maps. When the point menu appears, you can search for your route with one touch. (See page 42.)
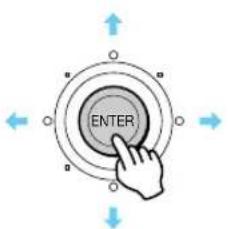
1 With the map screen displayed, tilt the remote control joystick in any of the eight directions.
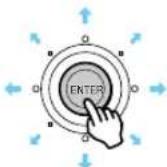
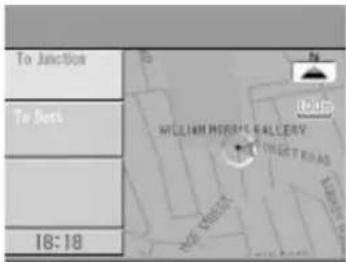
2 The map moves in the direction in which the joystick is tilted.
There are two movement speeds, depending on how long the joystick is tilted.
- To search for the route, move the map to bring the destination point on the map under the reticule icon, then press the ENTER button. (See page 42.)
- To return to the previous screen, press the RETURN button twice.
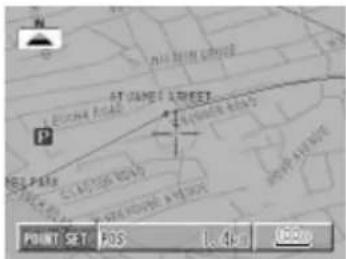
(Joystick tilted right)
3 To return to the present vehicle position, press the POS. button.

The map cannot be moved during menu screen display. In such a case, press the POS. button to display the map screen, then move the map.
Searching for destination by latitude/longitude input
If you know the latitude and longitude of the desired destination, you can display that location by just inputting those numbers.
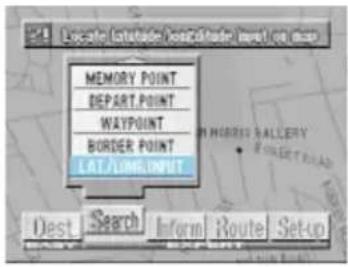
1 Press the MENU button to display the main menu. Select "Search" from the main menu, then select LAT/LONG. INPUT from the sub-menu and press ENTER.

2 The latitude/longitude pallet appears. Tilt the joystick to select number for the latitude and longitude and press EN-TER. Input all digits.
3 When you have completed inputtings, select END and press ENTER.
The position for the input latitude and longitude comes under the reticule icon and the point menu appears.
- For details on route searching, see page 42.
- To return to the previous screen, press the RETURN button twice. When this button is pressed only once, the point menu will not be displayed.
4 To return to the present vehicle position, press the POS. button.


Searching from home/departure point/waypoint/previous destination
If home/departure point/waypoint/previous destination have already been registered, you can call them out with a simple operation. For details on the registration method, see page 35. Departure point means the present vehicle position on the route.
1 Press the MENU button to display the main menu. Select "Search" from the main menu, then select the point you wish to see, HOME, DEPART. POINT, WAYPOINT or PREVIOUS DEST and press ENTER.
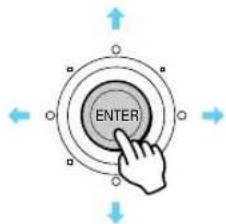

When Home is selected
2 The selected point is indicated by the reticule icon on the map. For home, the point menu appears.
- For details on route searching, see page 42.
- To return to the previous screen, press the RETURN button twice.
When this button is pressed only once, the point menu will not be displayed.
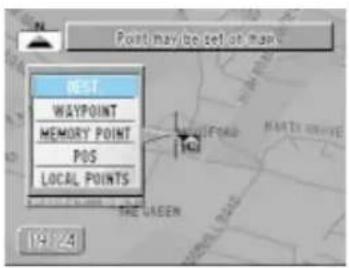
3 To return to the present vehicle position, press the POS. button.
Searching from a memory point
If a memory point has already been registered, you can call it out with a simple operation.
For details on the registration method, see page 35.
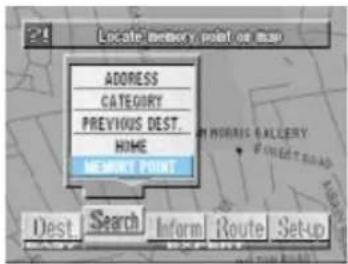
1 Press the MENU button to display the main menu. Select "Search" from the main menu, then select MEMORY POINT from the sub-menu and press ENTER.

2 The memory point list table is displayed. Select the memory point you wish to see and press ENTER.

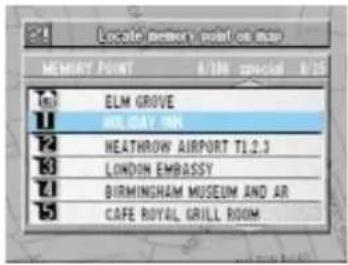
3 The reticule icon appears at the selected memory point, then the point menu appears.
- For details on route searching, see page 42.
- To return to the previous screen, press the RETURN button twice. When this button is pressed only once, the point menu will not be displayed.
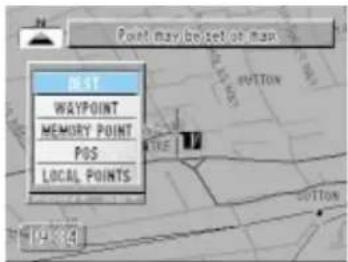
4 To return to the present vehicle position, press the POS. button.
Searching from local points
The system can display up to 6 points (max.) of interest in a range of 6 miles (10 km) around the reticule icon such as hospitals, parking lots, petrol stations, restaurants, train stations, airports, hotels, tourist information offices, and ferries.
You can search for the desired destination from these local points.
1 Display the POINT SET menu in a searching mode or pressing the LO.PT. button on the remote control (RUE-4113), and select "LOCAL POINTS" then press ENTER.
2 The list for the selected local points is displayed. Select the desired local point and press ENTER.

3 The reticule icon appears at the selected local point, then the point menu appears.
- For details on route searching, see page 42.
- To return to the previous screen, press the RETURN button twice. When this button is pressed only once, the point menu will not be displayed.
4 To return to the present vehicle position, press the POS. button.


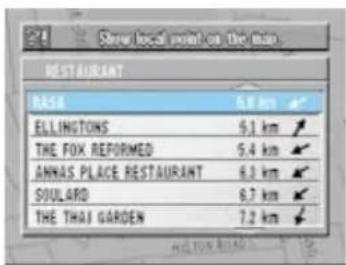
Displays the distance/direction of the points from the present vehicle's position on the map in order of distance.
Auto searching for border point
When you travel using two map CD ROMs, you can select automatically or manually a border point on the road as a waypoint or a destination so that the navigation system guides you to the border point. If your final destination is located in the covering area of the other CD ROM, you can select your destination via the border point as a waypoint. (For Manual Searching, see page 33.)
1 Press the MENU button to display the main menu. Select “Route” from the main menu, the sub-menu appears.

2 Select "ROUTE PREF." from the sub-menu and press ENTER. The "Select route preferences" menu appears.
3 Select "AUTO" from the "MUTI-CD" menu and press ENTER.
Notes: • To select the Auto Searching for a border point, the present vehicle position and destination should be included in 2 different map areas which are adjoining each other, and the CD ROM including the destination area should be loaded. Otherwise, use the manual searching. When "MANUAL" is selected, see the Manual searching for border point section on page 33.
- If you have only one map CD ROM or you use the map CD ROM for Great Britain or you travel on a direct ferry boat from the area of the current vehicle position to an adjacent area or vice versa, select "OFF."


4 When you search for a destination for the first time, replace the CD ROM with the one for the adjacent area in which the desired destination is located.
When the destination has already been memorized, it is not necessary to replace the CD ROM.
Search for the desired destination by selecting "Search" in the main menu. (The example shows when a hotel is selected as the desired destination.) The navigation system will check the present position of your vehicle and the map disc loaded in the system whether these match with the conditions shown in the note of Step 3. If they match, the system automatically displays the border point.

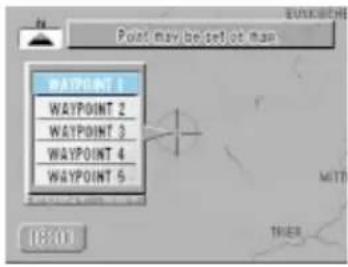
5 If the border point displayed is correct, select "WAYPOINT." The system calculates the route to the destination via the waypoint (border point).

Note: If you wish to select some other border point, select "BORDER POINT" and go to Step 3 of the manual border point searching procedure on page 33.


6 The WAYPOINT sub-menu appears automatically. Select the desired menu and press ENTER.
Note: Since the border point will be set as a waypoint, if all the waypoints have already been set, although the system can guide you to the border point, you need to replace the border point with one of the waypoints if you wish to set the border point as a waypoint.
7 Press the POS. button.
The route search screen is displayed.

8 When the destination is selected in Step 4 with the CD ROM for the other area loaded, replace the CD ROM at the starting point with the one that covers the area of the present vehicle position.
The navigation system will guide you from the starting point to the destination. (If the CD ROM covering the area of the present vehicle position is not loaded, the navigation system will not guide you from the starting point to the border point.) When the destination is selected in Step 4 with the CD ROM for the area of the present vehicle position loaded, replace the CD ROM at the border point to have the navigation system guide you to the destination.
9 Press the ROUTE button. The navigation system starts to search for the route.
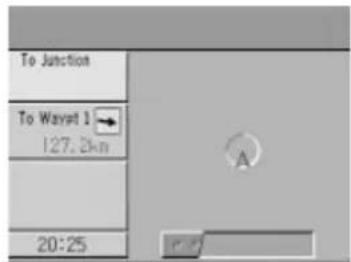
When the route search is completed, the current location is displayed. When you start driving, the guidance begins.



Manual searching for border point
You can search for a route to the border point within the area that includes the current vehicle position and crossing point to the desired area.
1 Press the MENU button to display the main menu. Select "Search" from the main menu, the sub-menu appears automatically.

2 Select "BORDER POINT" from the sub-menu and press ENTER.

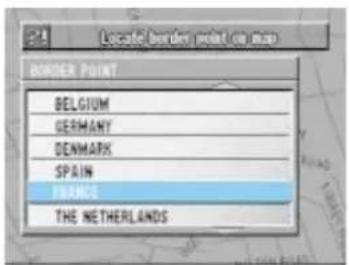
3 The area name menu appears. Select the name of the area beyond the border point and press ENTER. The list of road names appears.
4 Select the desired road name from the list and press ENTER. The system automatically check whether the present vehicle position is in the area of the loaded CD ROM or not.
If the present vehicle position is in the covering area of the loaded CD ROM:
5A The route up to the border point will be calculated as the destination and the system guides you to the border point.
If your final destination is located in the area of the other CD ROM, change the disc after crossing the border point and select the destination.



If the present vehicle position is out of the covering area of loaded CD ROM:
5B The sub-menu appears showing "WAYPOINT." Press ENTER and load the CD ROM covering the area of your final destination. Select the final destination, then set the border point. The system calculates the route to the final destination from the border point. Load the other map CD ROM covering the area you are in and select the border point to have the system guides you to the border point. When you crossed the border point, just change the map disc. The system will guide you to your final destination.
6 To return to the present vehicle position, press the POS. button.
Storing Points Into Memory
Registering your home
First, you register your home. When your home is registered, setting the destination for returning home is simple. In order to specify the position accurately, use as detailed a map as possible.
1 Bring the point on the map you wish to register as your home under the reticule icon or place your vehicle in front of your home, then press ENTER.

2 The point menu appears. Select "MEMORY POINT" and press ENTER.


3 The confirmation message is displayed to ask you whether this point will be registered as your home. If your home is not yet registered, select "YES" and press ENTER.

If you select NO or no input at all here, the position is registered to the memory point with the lowest number to which no position has yet been registered.

The home registration confirmation message appears if your home has not been registered.
4 The memory point editing list is displayed for 5 seconds as the registration completion message and the system switches to the map screen.
To return to the previous screen, press the RETURN button.
5 To return to the present vehicle position, press the POS. button.
Registering a location to be stored into memory
You can register up to 99 special points on the map, such as locations you go to frequently or scenic locations. In order to specify the position accurately, use as detailed a map as possible.
1 Bring the point on the map you wish to register under the reticule icon, then press ENTER.


2 The point menu appears. Select "MEMORY POINT" and press ENTER.


3 After displaying the confirmation message, the system returns to the map screen.
- The memory icon appears at the registered point.
- The point is registered to the memory point with the lowest number in which no location is registered.

4 The memory point editing list is displayed for 5 seconds as the registration completion message and the system switches to the map screen.
- To return to the previous screen, press the RETURN button.
5 To return to the present vehicle position, press the POS. button.
Point Editing
Memory point editing - number/ icon/ name/ telephone number/ position/ special usage
You can change the memory point numbers, or add icons and names.
1 Press the MENU button to display the main menu. Select "Set-up" from the main menu, then select "MEMORY PT. EDIT" and press ENTER.


2 The memory point list appears. Select the point you wish to change and press ENTER.


3 The memory editing list appears. Select the item you wish to change and press ENTER.

The selected point is displayed on the map.
The selection message for deletion is displayed. (see the bottom display.)
Number
You can change the memory number for the registered point.
→ Go to Page 38 Number Editing.
Icon
You can select an icon for the registered point from a number of icons.
→ Go to Page 38 Icon Editing.
Name
You can give a name to a registered point.
→ Go to Page 39 Name Editing.
Select Yes to delete.

Telephone number
Telephone number information can be added to a registered point.
→ See Page 40 Telephone Number Editing.
Position
The position of a memory point can be moved.
→ Go to Page 40 Memory Point Move.
Special usage
Such information as avoid points and beep points can be added to registered points.
→ Go to Page 41 Special Settings.

Number editing
4 Select "No." and press ENTER.

Icon Editing
4 Select "ICON" and press ENTER.
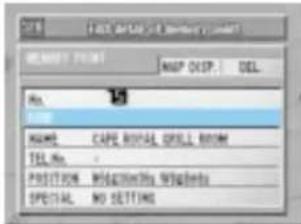
5 A list appears. Select the desired number and press ENTER.
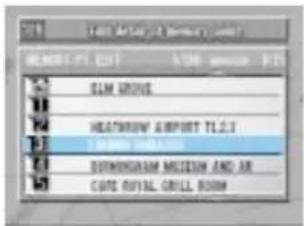
5 The icon list appears. Select the desired icon and press ENTER.

6 The memory editing list with the number changed is displayed.
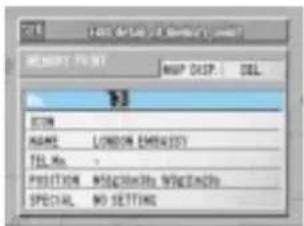
6 The memory editing list is displayed with the selected icon.


● The icons are also displayed on the map screen. During driving and during map movement, the icons on the map are not coloured.
● Five icons are provided for the Home and 10 icons for the position points.
Name Editing
4 Select "NAME" and press ENTER.


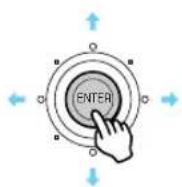
5 The character pallet is displayed. Select the desired characters one by one and press EN-TER each time you select a character.
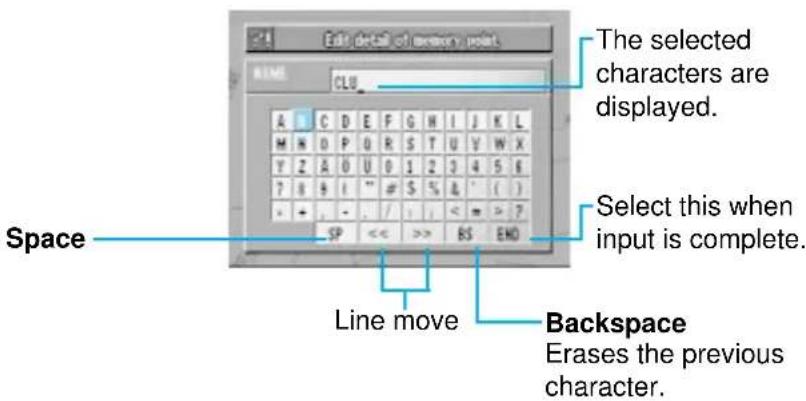
6 When character inputtings have been completed, select END and press ENTER.
7 The memory editing list is displayed with the name.

Telephone Number Editing
4 Select "TEL. No." and press ENTER.


5 The number pallet is displayed. Select the desired numeral and press ENTER. Repeat this procedure to complete the editing.
When 11 digits are input, the memory editing list appears automatically. For 9-digit numbers, you must select END and press ENTER when you have completed input.


6 The memory editing list is displayed with the telephone number.

Memory Point Move
4 Select "POSITION" and press ENTER.


5 The position to be corrected is indicated by the reticule icon. Use the joystick to move the map.

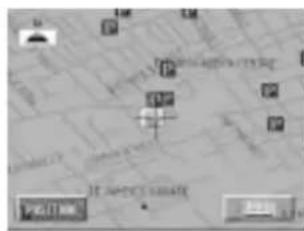
6 Press ENTER.

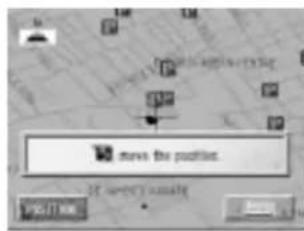
After the confirmation message is displayed, the memory editing list is displayed.
Special Settings
4 Select "SPECIAL" and press EN-TER.


6 The special use setting list is displayed. Press ENTER.

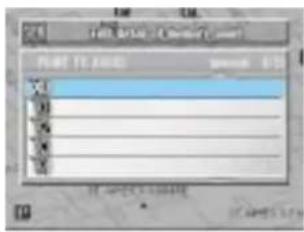
5 The special use list appears. Select the desired item and press ENTER.
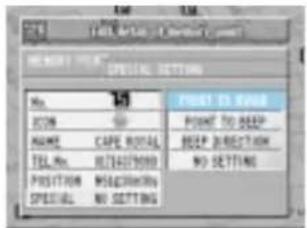
7 The memory editing list is displayed.
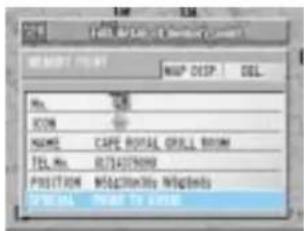
■ Setting the point to avoid (POINT TO AVOID)
- This is set when there is a point that you do not want to be covered by route searches. Routes are set to avoid roads between crossroads surrounding that point.
- Five locations can be set. (From X0 to X4 can be displayed on the memory point list.)
■ Setting the point to beep (POINT TO BEEP)
- You can set the system to beep when you are driving and approaching a point requiring particular care (such as a point where accidents occur frequently).
- Up to ten locations can be set including the beep direction points (from B0 to B9).
■ Setting the travel direction to beep (BEEP DIRECTION)
- For details on how to set the direction, see Page 59 Direction correction.
- A point for the system to beep at and the direction of travel can be registered together. For example, you can set the system to beep near Spandau only when travelling from Berlin toward Hannover.
- Up to ten locations can be set as directional beep points and beep points (from B0 to B9).
■ Not used (NO SETTING)
- Use to cancel selected avoid points/beep points/directional beep points.
Deciding The Route
Setting the destination
When you have found the location you want to go to, the route search is carried out.
1 Find the destination on the map, then press ENTER.
For details on how to find your destination, see pages 15 – 34.


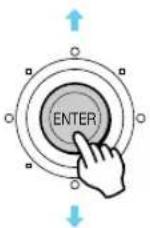
2 The point menu appears. Select DEST. and press ENTER.

3 When the route search is started, the message "motorway-preference (or ordinary-road-preference)" will be displayed.
To switch the preference mode (between motorway and ordinary road), press the route button while this message is being displayed.
4 The route search screen is displayed.

The route to your destination is searched for automatically in either motorway-preference or ordinary-road-preference mode. The search start message shows which mode the system is searching in, so if you want to change the mode, press the ROUTE button while the search screen is being displayed. Each time you press the ROUTE button, the mode toggles between motorway-preference and ordinary-road-preference.
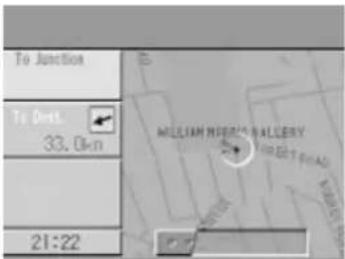
5 When the search is complete, the required time and distance to the destination are displayed.

The contents of the screen depend on how it has been customized with Guidance Condition Settings (page 56).
6 The searched for route is displayed. When you start driving this route, the guidance begins.

After arriving to the destination, always delete the destination (as explained on page 44). If the destination is left set, the guidance continues to be repeated. When the destination is deleted, the waypoints will be also deleted.

CAUTION
COMPLY WITH THE CURRENT TRAFFIC REGULATIONS WHILE DRIVING
When using the navigation system, always comply with the local traffic regulations on the road while driving.


Setting waypoints
You can set up to 5 waypoints from your current location to the destination. Set these points after the route searching from your current location to your destination has been completed.
1 Find the waypoint on the map, then press ENTER.

2 The point menu appears. Select "WAYPOINT" and press ENTER.

- Set multiple waypoints by repeating Steps 1 and 2.
- These points should be set as WAYPOINT 1, WAYPOINT 2, WAYPOINT 3 and so on in the order in which they are passed. Up to 5 points (max.) can be set.

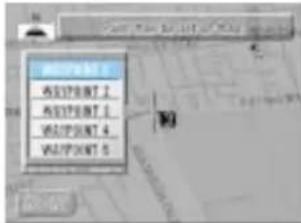
The route search screen is displayed.


4 When the route search is complete, the current location is displayed. When you start driving this route, the guidance begins.

● Waypoints are indicated with F1 , F2 ... and the destination is indicated with FG .
- When you delete the destination, the waypoints are also deleted.
- To cancel any waypoints, always delete them. If you leave in waypoints, the navigation system continues to guide you to them.
CAUTION
COMPLY WITH THE CURRENT TRAFFIC REGULATIONS WHILE DRIVING
When using the navigation system, always comply with the local traffic regulations on the road while driving.
The entire route is blue.
![graph TD A["Destination"] --> B["Waypoint3"] B --> C["Waypoint2"] C --> D["Waypoint1"] D --> E["Present car position"] style A fill:#f9f,stroke:#333 style B fill:#ccf,stroke:#333 style C fill:#cfc,stroke:#333 style D fill:#fcc,stroke:#333 style E fill:#ffc,stroke:#333](/content/2026/05/958442/images/9543b0c4d1c5fcaa7e82873398b522c5e63e4c7f645fabf24e4b4d7f1d477e6c.jpg)
Displaying the whole route
The system can display the whole route.
1 With the route displayed, press the ZOOM ^ button on the remote control to display the map with max. magnification ratio.

2 Press and hold the ZOOM ∧ button for at least 2 seconds. The whole route map is displayed.

3 Press the ∨ button. Each press makes the map magnification ratio one step smaller.


Searching for an alternate route
The system can search for 3 different types of routes: recommended routes, avoid routes, and distance priority routes. The searching operation should be started after setting the route.
1 Press the MENU button to display the main menu.
Select "Route" from the main menu, then select "ALTERN. ROUTE" and press ENTER.


2 A sub-menu appears in the display. Select the desired menu item and press ENTER.

- You can select either of the two types of route with the ROUTE button.
- In some cases not both routes can be found, for example when the distance is too short.
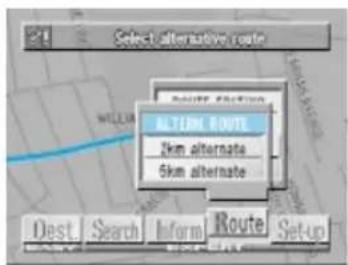

Immediately after a route search, you can search for an alternate route with the ROUTE button.
1 Immediately after a route search, press the ROUTE button.
The REROUTE menu appears.
If you select "A-SEARCH"
The system switches search around your vehicle's position → search to destination → preference selection mode.
When you select "ROUTE 1/ROUTE 2"
The routes already searched are displayed. 2 When not selecting anything, press the POS. button
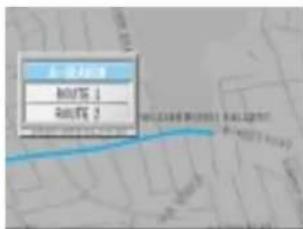

CAUTION
COMPLY WITH THE CURRENT TRAFFIC REGULATIONS WHILE DRIVING
When using the navigation system, always comply with the local traffic regulations on the road while driving.
1 Press the MENU button to display the main menu. Select "Route" from the main menu, then select "ROUTE PREF." and press ENTER.


2 The sub-menu appears in the display. Using the joystick, select the desired item and press ENTER.
MULTI CD
- AUTO: Automatic searching for border point.
- MANUAL: Manual searching for border point.
• OFF: Select this position when only one CD ROM is used or CD ROM for Great Britain is used.
Three route preference modes are available.
Select the desired route.
- SHORTEST: The shortest distance route.
- QUICKEST: The shortest time route.
- MAIN: Using main (arterial) roads.

Nine preference modes are available. Select the desired preference mode by tilting the joystick and pressing ENTER.
RE-ROUTE
To reroute automatically when deviated from the original route.
Select "HIGH" for the Motorway preference mode or "LOW" for the Regular Road preference mode.

Depending on the head control unit, this function does not work. Consult your Alpine dealer for details. Consult your Alpine dealer about the audio unit combined.
Confirming the searched route
We recommend that before you begin driving the route, you look at the entire route with the all-route display.
1 Press the MENU button to display the main menu. Select "Route" from the main menu, then select ALL ROUTE DISP. and press ENTER.
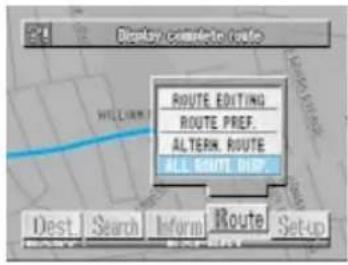
2 The entire route is displayed on a map with a large enough view that you can see the entire route.

Your current position, waypoints, and the destination icon are displayed.
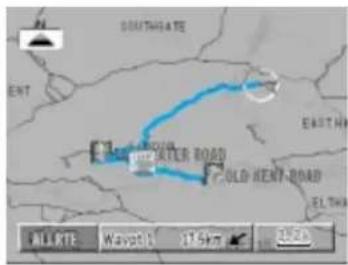
3 When you press the POS. button, the system returns to the map screen.


CAUTION
COMPLY WITH THE CURRENT TRAFFIC REGULATIONS WHILE DRIVING
When using the navigation system, always comply with the local traffic regulations on the road while driving.
This is for removing specific points from the guidance and changing the preference mode between points (motorway ↔ ordinary road), etc.
1 Press the MENU button to display the main menu. Select "Route" from the main menu, then select ROUTE EDITING and press ENTER.


2 The route editing screen is displayed.

Between points
3 Select the point to be edited (DEST./WAYPOINT 1/DEP.PT.) and press ENTER. The sub-menu appears as follows.
When destination is selected:

The map for the area around the destination is displayed. The destination and waypoints are deleted if you select "YES" in the confirmation screen.
When waypoint is selected:

The map for the area around the waypoint is displayed. The specified waypoint is deleted if you select "YES" in the confirmation screen. Guidance is provided for the route for the specified waypoint. Guidance is not provided for the route for the specified waypoint.
When point of departure is specified:

The map for the area around the point of departure is displayed.
3 Select the route between the points to be edited (0.0 km motorway) and press ENTER.
If the route is changed, rerouting is carried out automatically.
Motorways/ordinary roads are given priority.
The route is deleted.
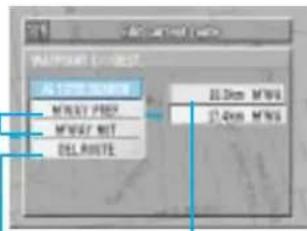
Shows the priority mode between points.
4 Your vehicle's position is displayed.
4 Select the desired item from the sub-menu. The selected item is displayed.
— Changing sequence of waypoints for Today's Plan
The sequence of the waypoints to go through can be automatically sorted in order of distance from the current vehicle position, or it can be manually changed in any order as you like.
1 Press the MENU button to display the main menu. Select "Route" from the main menu, then press ENTER.
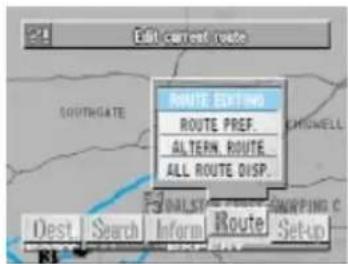
2 The "Edit current route" menu appears. Select "ROUTE EDITING" and press ENTER. The ROUTE EDITING MENU appears.

The system calculates the short route and displays the destination confirmation screen with the visiting sequence.
3 Select "SHORT" and press ENTER.
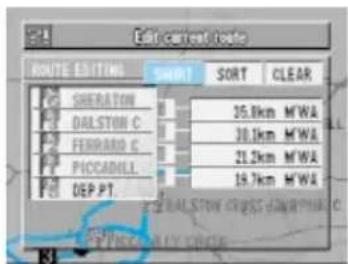
4 The "Do you include your destination?" menu appears. If your answer is yes, select "Yes" and press ENTER.


If your answer is no, select "No" and press ENTER. Then proceed to next step.
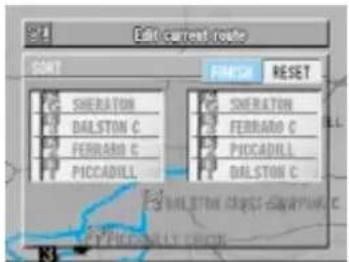
5 The Today's Plan list is displayed. If the route displayed is acceptable, select "FINISH" and press ENTER.
If you wish to change the route, select "SORT" and press ENTER. Select the destination you wish to go first and press ENTER.
6 The System calculates the new route and displays the confirmation screen. If the new route is acceptable, select "FINISH" and press ENTER. If you want to change again, repeat Steps 4 to 6 above.
The new map for today's plan is displayed.


Drive simulation
To check the searched route, you can carry out a drive simulation by selecting "Inform" from the main menu, then selecting AUTO DRIVE. The icon for the present vehicle position moves along the route indicating the contents of guidance that will be provided, such as crossroad guidance and voice guidance.
If waypoints have been set, the simulation goes to the waypoint but if only the destination has been set, the simulation goes to the destination.
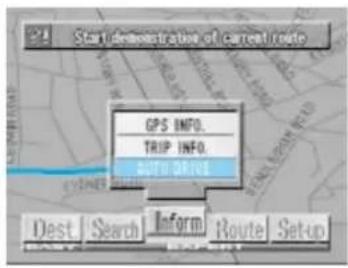
1 Press the MENU button to display the main menu. Select "Inform" from the main menu, then select AUTO DRIVE and press ENTER.


● The confirmation message only appears if a destination has already been set.
● During the drive simulation, the system accept operation of ☐, VOICE and POS. buttons in addition to OFF and RETURN buttons.
2 The drive simulation for the selected region starts.

3 To end the drive simulation, press the RETURN button.
After "Demo finished." message, the navigation system returns automatically to the map screen.



During the drive simulation, the system accept operation of ☐, VOICE and POS. buttons in addition to OFF and RETURN buttons.
* The drive simulation begins the voice guide from the currently selected language and continues on to other languages. The languages change in the following sequence.
→ German → English → French → Italian
Note: When the drive simulation has been finished, select the desired language again following the procedure on page 13.
Customizing (as you like it)
Setting display conditions
1 Press the MENU button to display the main menu. Select "Set-up" from the main menu, then select "DISPLAY" and press ENTER.
You can set what is displayed and what guidance is provided for, as you like.


2 Using the joystick, select items and press ENTER.
Map display
NOR. UP: The map is always displayed with north up. HEAD-UP: The map is always displayed with the direction in which you are going up. FR-WIDE: For heading up display, the direction in which you are heading is displayed wide.
Map colour
DAY: Bright tones for display emphasizing visibility
NIGHT: Dark tones for a display with minimal glare
AUTOM.SW: Automatically switches between day/night modes linked with your vehicle's dimmer
Tracks display
ON: Tracks are displayed in 100 meter intervals for up to 50 km. Beyond this distance, the tracks are erased starting from the earliest portion.
OFF: Tracks are not displayed.
DEL.: Deletes the displayed track.

Mark for a point of interest (for details, see next page)
Displaying point-marks
Five land-marks (for parkings, Parking/Restaurants, fuel stations, hotels, and restaurants in the vicinity of the present vehicle position) can be displayed on the map display.
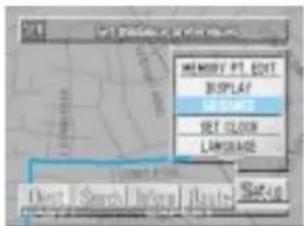
1 Press the MENU button to display the main menu. Select "Set-up" from the main menu, then select "DISPLAY" and press ENTER.

The Display mode preference screen is shown.
2 Select "SET CATEGORY" and press ENTER.

ON: Displays the land marks of the selected categories on the map screen.

OFF: Land marks are not displayed. SET CATEGORY: Displays the category selection menu.

3 The category selection menu appears. Select the desired category and press ENTER. You can select up to 5 categories (max.).
4 To return to the present vehicle position, press the POS. button.
Setting guidance conditions
1 Press the MENU button to display the main menu. Select "Set-up" from the main menu, then select "GUIDANCE" and press ENTER.
2 The sub-menu appears in the display. Using the joystick, select items and press ENTER.

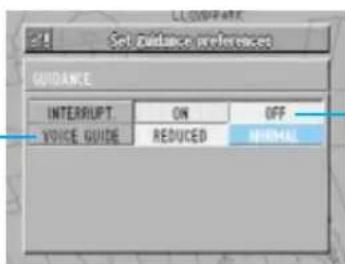
Voice interrupt
ON: You can listen to the route guidance (voice only) even while receiving radio broadcasts.
OFF: Voice interrupts are not carried out.
Number of voice guidances.
Frequency of voice guidances
NORMAL: Normal frequency of the voice guidances.
REDUCED: Decreased frequency of the voice guidances.

Depending on the head control unit, this function does not work. Consult your Alpine dealer for details.
Consult your Alpine dealer about the audio unit combined.
1 Press the MENU button to display the main menu. Select "Set-up" from the main menu, then select "SET CLOCK" and press ENTER.
![MEMORY FILED DISPLAY ENVANCE LAVELAGE Diet [ Search ] Info [ Quote : Set 10](/content/2026/05/958442/images/8dc1a0b6449263cf6a9c9003bc438949a15186fa16d5d00ca387d077330ee06c.jpg)

2 The "Set clock preferences" menu appears in the display. Select the desired menu item and press ENTER.

3 Select "M'WAY" (Motorway) or "NORM." (Normal Road) for average speed.

4 The graphic screen appears in the display for the selected menu. Tilt the joystick to the right or left to increase or decrease the average speed respectively. When setting has been finished, press ENTER to end the setting procedure.
Note: Do not select the speed exceeding the speed limit.


(Motorway)

(Normal road)
Direction correction
If the actual direction of your vehicle and the direction of the present vehicle position icon on the map differ, you can correct the direction of the present vehicle position icon with the following method.
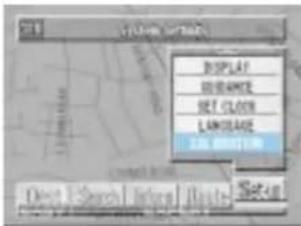
1 Press the MENU button to display the main menu. Select "Set-up" from the main menu, then select "CALIBRATION" and press ENTER.

2 A sub-menu is displayed. Select "DIR. CORR" and press ENTER.
3 The direction correction screen is displayed. Tilt the joystick toward left and right to correct the direction.

4 When the direction is corrected, press ENTER. The present vehicle position icon is displayed in the corrected direction.



Screen position adjustment
For some TV monitors that can be connected to the navigation system, the screen display will be out of place. Adjust the display position to match the TV monitor you connect to the system.
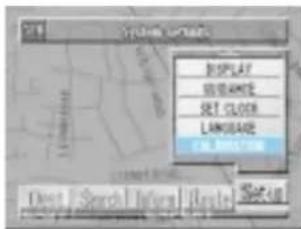
1 Press the MENU button to display the main menu. Select "Set-up" from the main menu, then select "CALIBRATION" and press ENTER.
2 A sub-menu is displayed. Select "SCREEN ADJ." and press ENTER.
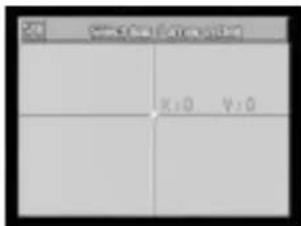
3 The screen position adjustment screen is displayed.
4 Adjust the display position with the joystick. The display screen moves the way you move the joystick.

5 Press ENTER. The screen is displayed at the adjusted position.



Distance coefficient
The navigation system measures the distance with the speedometer pulses. Since the speedometer pulses depend on the vehicle manufacturer and the tyre size, when you buy a new vehicle or replace your tyres, the speedometer pulses are compared with the distance measured with GPS waves and the distance coefficient is automatically recalibrated.
You can check on the screen whether or not speedometer pulses are being counted.
1 Press the MENU button to display the main menu. Select "Set-up" from the main menu, then select "CALIBRATION" and press ENTER.

2 A sub-menu is displayed. Select "COEFFICIENT" and press ENTER.
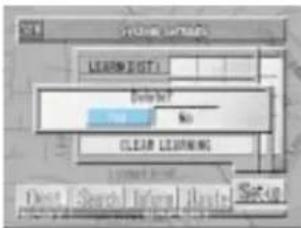
3 Select "CLEAR LEARNING" and press ENTER.

4 Confirmation screen asking you whether you wish to execute the clearance procedure or not. Select "Yes" if you wish to clear.
![DISPLAY VIEWANCE SET CLOCK LANGUAGE LINK STRONG Dest [ Search ] Interm / Route - Set-10](/content/2026/05/958442/images/b648c1cc3f5c0b17b18c2bf47c54347b6659317bccce20e27bdc76a671d0badb.jpg)
![DISPLAY DISPLAY DISPLAY ALL Dset [Search InForm] [Paste-Set-0]](/content/2026/05/958442/images/808e9cb203cd9958599badce6e43405c08dc2f7cc39f419f5080d3bf8f601046.jpg)
Useful Hints
Viewing GPS screens
GPS satellite information being received is displayed on the screen. If the error for the current vehicle's position is too large, check how many GPS satellites you are receiving. You can also see the current heading of your vehicle and its current speed.
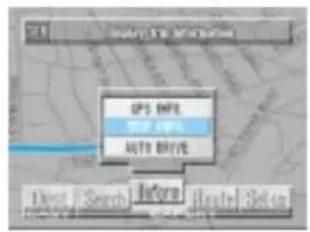
1 Press the MENU button to display the main menu. Select "Inform" from the main menu, then select "GPS INFO." and press ENTER.

2 The GPS information screen is displayed.

- Satellites from which you are receiving are displayed green and those from which you are not receiving are displayed red. Yellow indicates that your position is being calculated.
● The direction gives the heading of your vehicle.
● The speedometer display shows how fast your vehicle is travelling.
● SPEED PULSE blinks when the speedometer signal is coming in.
Vehicle direction

3 Press the POS. button.
The system returns to the map screen.

Viewing the odometer
The odometer displays the route distance/time travelled since the power was switched on.
1 Press the MENU button to display the main menu. Select "Inform" from the main menu, then select "TRIP INFO". and press ENTER.

2 A list displaying the distance/time travelled is displayed.

3 To reset the odometer, select "Yes" from the "Reset?" menu and press ENTER.

In case of difficulty
If you encounter a problem, please review the items in the following checklist. This guide will help you isolate the problem if the system is at fault. Otherwise, make sure the system is properly connected or consult your authorized Alpine dealer.
| Symptom | Cause | Solution |
| No operation | Blown fuse | Replace with a fuse of the prescribed rating. |
| Ambient temperature over 50°C | Lower the temperature in the vehicle below 50°C, for example by running for a while with the window open or by using the air conditioner. | |
| Moisture condensation | Allow enough time for the condensation to evaporate (about 1 hour). | |
| The present vehicle position cannot be measured correctly. | The vehicle position changed after the ignition was switched off.Movement on a ferry boatRotation of a parking lot turntableMovement by tow truck | Drive for a while with GPS signal reception. |
| The measurement error is too large. | Poor satellite configuration | Move to a location where GPS satellite reception is easy. |
| Measurement is 2 dimensional | ||
| Screen not displayed | The navigation screen is off. | Press the ON button on the remote control. |
| Cannot read disc is displayed for a certain operation. | The disc is dirty. | Clean the disc. |
| Unstable operation | The remote control batteries are wearing out. | Replace the remote control batteries. |
| No auto reroute | Auto reroute mode is not set. | Select "Set-up" from the main menu, then select Guidance Conditions. (See page 56.) |
If this message appears
Various messages are displayed on the monitor screen during operation. In addition to the messages telling you the current status or providing guidance for the next operation, there are also the following error messages. If one of these error messages is displayed, carefully follow the instructions in the solution column.
| Message | Cause | Solution |
| Please insert map CD ROM. | ·The disc has been removed.·There was no disc in the system when the power was switched on. | Insert the disc (sold separately). |
| CD ROM unreadable. Please check CD ROM. | ·A disc that the system cannot read has been loaded.·The disc is dirty or upside down.·The disc cannot be read because of condensation. | Insert the map disc (sold separately).Take out the disc, check if it was upside down, clean it if necessary, then re-insert it.Take out the disc, allow it to dry for a while, then re-insert it. |
| CD ROM being checked. | ·A disc was just inserted·Vibration or the like made it impossible to read the disc. | When the disc check is complete, the following screen is displayed automatically. |
| Do not operate while driving. Stop the vehicle, then use this operation. | ·The MENU button was pressed while the vehicle was running.·A menu selection operation was carried out while the vehicle was running. | Move the vehicle to a safe location, stop, and engage the parking brake, then carry out this operation. |
| Home is not registered. Register it before using this function. | ·An attempt was made to search the map from home with no home registered. | Register your home, then search the map. |
| Not registered. Register before using this function. | ·An attempt was made to search the map from a memory point with no memory point registered. | Register a memory point, then search the map. |
| Specify the destination before using this function. | ·An attempt was made to search the map from the Departure point with no destination registered.·All-route display, all-route search, or route deletion was attempted with no destination registered.·An attempt was made to indicate a waypoint with no destination registered. | Specify the destination, then carry out the search.Specify the destination, then carry out the operation.Specify the destination, then specify the waypoint. |
| Too many registrations. Erase some, then use this function. | ·An attempt was made to register more than 99 points in memory. | Erase unnecessary points, then register. |
| Roads cannot be found in that area. Specify near a major road. | ·When the destination or waypoint was specified, there was no road in the area, so no route could be found. | Focus on a nearby major road, then specify the destination or waypoint again. |
| No route could be found. Move to another location, then try this operation again. | ·No route could be found, for example due to traffic situations. | Move to another location, then press the ROUTE button to start the route search again. |
| No route could be found. The route from before the search is displayed. | ·When the ROUTE button was pressed during a route search to switch between motorway selection/ordinary road selection for route searching, for some reason, no route could be found. | Either drive in your original mode (motorway selection/ordinary road selection) or move to another location, then press the ROUTE button to resume the route search. |
| Use after setting the waypoint. | ·An attempt was made to erase a waypoint even though no waypoint is set. | This message simply announces that no waypoint is set. The message goes out soon. |
Buttons and functions of remote control
RUE-4113
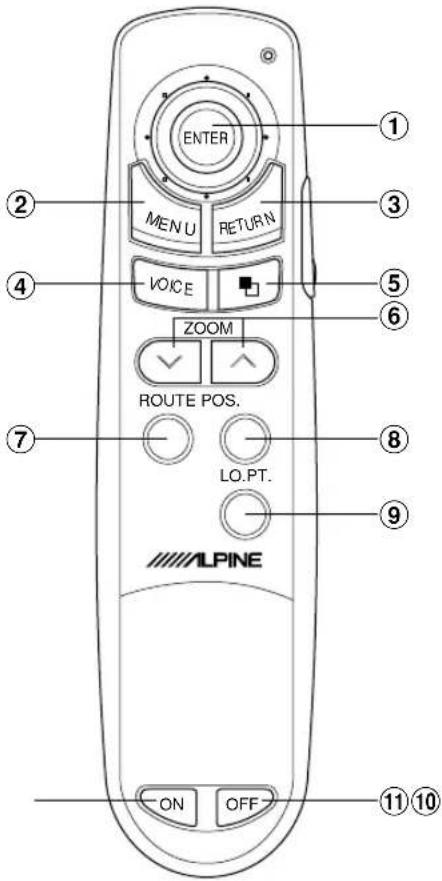
| Button No. | RUE-4113 | |
| 1 |  | Joystick/ENTER |
| 2 |  | MENU |
| 3 |  | RETURN |
| 4 |  | VOICE |
| 5 |  | NAV/TV |
| 6 |  | ZOOM UP/DOWN |
| 7 |  | ROUTE |
| 8 |  | POSITION |
| 9 |  | LOCAL POINT |
| 10 |  | SWITCH ON |
| 11 |  | SWITCH OFF |
- ALPINE
- SMART MAP PRO
- PRECAUTIONS
- IMPORTANT INFORMATION, PLEASE READ CAREFULLY BEFORE USING THIS PRODUCT
- POINTS TO OBSERVE FOR SAFE USAGE
- ●MEANING OF DISPLAYS
- WARNING
- KEEP SMALL ARTICLES OUT OF THE REACH OF CHILDREN
- HALT USE IMMEDIATELY IF A PROBLEM APPEARS
- DO NOT OPERATE THE SYSTEM OR LOOK AT THE MONITOR SCREEN WHILE DRIVING
- CAUTION
- COMPLY WITH THE CURRENT TRAFFIC CONDITIONS WHILE DRIVING
- DO NOT USE THE SYSTEM OUTSIDE THE VEHICLE
- STOP THE VEHICLE BEFORE CARRYING OUT ANY OPERATIONS THAT COULD INTERFERE WITH YOUR DRIVING
- DO NOT ATTEMPT TO USE ANY MUSIC CD'S OR OLDER VERSION OF MAP CD ROM'S
- USER AGREEMENT
- WARNINGS
- TABLE OF CONTENTS
- PREFACE
- BEFORE USING THE SYSTEM
- SEARCHING FOR LOCATIONS
- STORING POINTS INTO MEMORY
- POINT EDITING
- DECIDING THE ROUTE
- CUSTOMIZING (AS YOU LIKE IT)
- USEFUL HINTS
- REFERENCE
- NAVIGATION TERMINOLOGY
- NAVIGATION
- PRESENT VEHICLE POSITION
- MAP MATCHING
- DESTINATION G
- ROUTE
- WAYPOINTS 1
- MEMORY POINTS 2
- MOTORWAY-PREFERENCE SELECTION
- TRACKING
- AUTOMATIC ROUTE CALCULATION
- REAL TIME VOICE GUIDE
- ALTERNATE ROUTE SETTING
- AUTOMATIC OR MANUAL BORDER POINT SETTING
- FACILITIES/SERVICES INFORMATION DISPLAY
- DIRECT INPUT OF NAME OF PLACE OF INTEREST
- DIRECT INPUT OF STREET NAME
- SEQUENCE OF WAYPOINTS CAN BE CHANGED (TODAY'S PLAN)
- INTERSECTION ZOOM
- NEXT TURN GUIDE
- BUILT-IN GYROSCOPE AND SPEED SENSORS
- MOTORWAY INFORMATION DISPLAY
- WRITING THE SYSTEM PROGRAMME INSTALLED
- HOW TO SWITCH THE MAP DISPLAYS
- SWITCHING THE DISPLAY ON/OFF
- SETTING LANGUAGE MODE
- MANUAL BACKUP
- SEARCHING FOR DESTINATION FROM CATEGORY (EASY MODE)
- 4 THE CITY NAME SELECTION MENU IS DISPLAYED. THERE ARE 4 CHOICES YOU CAN SELECT. SELECT THE DESIRED MENU ITEM AND PRESS ENTER
- 5 THE CHARACTER PALLET IS DISPLAYED. TILT THE JOYSTICK TO SELECT THE DESIRED CHARACTER FOR THE FIRST POSITION OF THE CITY NAME AND PRESS ENTER. THE ENTERED CHARACTER APPEARS AT THE FIRST POSITION OF THE TEXT WINDOW
- SEARCHING FOR DESTINATION FROM ADDRESS (NAME OF CITY/ STREET) (EASY MODE)
- 6 ENTER THE NAME OF THE STREET IN THE SAME MANNER AS STEPS 4 AND 5
- 7 WHEN THE CHARACTER INPUTTINGS OF THE STREET NAME HAVE BEEN COMPLETED, SELECT "LIST" AT THE TOP OF THE CHARACTER PALLET AND PRESS ENTER
- 8 THE LIST OF STREET NAMES WILL BE DISPLAYED. SELECT THE DESIRED STREET NAME AND PRESS ENTER
- 9 THE SYSTEM STARTS TO CALCULATE THE ROUTE. WHEN THE CALCULATION HAS BEEN COMPLETED, THE SYSTEM AUTOMATICALLY DISPLAYS THE PRESENT VEHICLE POSITION SCREEN
- SEARCHING FOR POINT OF INTEREST FROM CATEGORY (EXPERT MODE)
- 1 PRESS THE MENU BUTTON TO DISPLAY THE MAIN MENU
- 2 SELECT "CATEGORY" AND PRESS ENTER TO DISPLAY THE CATEGORY LIST
- 3 TO SEARCH FOR THE DESIRED POINT OF INTEREST, FOLLOW THE STEPS 3 TO 9 OF THE "SEARCHING FOR DESTINATION FROM CATEGORY" SECTION (PAGES 15 TO 17)
- SEARCHING FOR POINT OF INTEREST FROM ADDRESS
- MOVING THE MAP TO SEARCH FOR LOCATIONS
- SEARCHING FOR DESTINATION BY LATITUDE/LONGITUDE INPUT
- SEARCHING FROM HOME/DEPARTURE POINT/WAYPOINT/PREVIOUS DESTINATION
- SEARCHING FROM A MEMORY POINT
- SEARCHING FROM LOCAL POINTS
- AUTO SEARCHING FOR BORDER POINT
- 6 THE WAYPOINT SUB-MENU APPEARS AUTOMATICALLY. SELECT THE DESIRED MENU AND PRESS ENTER
- 7 PRESS THE POS. BUTTON
- 8 WHEN THE DESTINATION IS SELECTED IN STEP 4 WITH THE CD ROM FOR THE OTHER AREA LOADED, REPLACE THE CD ROM AT THE STARTING POINT WITH THE ONE THAT COVERS THE AREA OF THE PRESENT VEHICLE POSITION
- 9 PRESS THE ROUTE BUTTON. THE NAVIGATION SYSTEM STARTS TO SEARCH FOR THE ROUTE
- MANUAL SEARCHING FOR BORDER POINT
- IF THE PRESENT VEHICLE POSITION IS OUT OF THE COVERING AREA OF LOADED CD ROM
- REGISTERING YOUR HOME
- REGISTERING A LOCATION TO BE STORED INTO MEMORY
- MEMORY POINT EDITING - NUMBER/ ICON/ NAME/ TELEPHONE NUMBER/ POSITION/ SPECIAL USAGE
- NUMBER
- ICON
- NAME
- TELEPHONE NUMBER
- POSITION
- SPECIAL USAGE
- NUMBER EDITING
- 4 SELECT "NO." AND PRESS ENTER
- ICON EDITING
- 4 SELECT "ICON" AND PRESS ENTER
- 5 A LIST APPEARS. SELECT THE DESIRED NUMBER AND PRESS ENTER
- 5 THE ICON LIST APPEARS. SELECT THE DESIRED ICON AND PRESS ENTER
- 6 THE MEMORY EDITING LIST WITH THE NUMBER CHANGED IS DISPLAYED
- 6 THE MEMORY EDITING LIST IS DISPLAYED WITH THE SELECTED ICON
- NAME EDITING
- 4 SELECT "NAME" AND PRESS ENTER
- 5 THE CHARACTER PALLET IS DISPLAYED. SELECT THE DESIRED CHARACTERS ONE BY ONE AND PRESS EN-TER EACH TIME YOU SELECT A CHARACTER
- 6 WHEN CHARACTER INPUTTINGS HAVE BEEN COMPLETED, SELECT END AND PRESS ENTER
- 7 THE MEMORY EDITING LIST IS DISPLAYED WITH THE NAME
- TELEPHONE NUMBER EDITING
- 4 SELECT "TEL. NO." AND PRESS ENTER
- 5 THE NUMBER PALLET IS DISPLAYED. SELECT THE DESIRED NUMERAL AND PRESS ENTER. REPEAT THIS PROCEDURE TO COMPLETE THE EDITING
- 6 THE MEMORY EDITING LIST IS DISPLAYED WITH THE TELEPHONE NUMBER
- MEMORY POINT MOVE
- 4 SELECT "POSITION" AND PRESS ENTER
- 5 THE POSITION TO BE CORRECTED IS INDICATED BY THE RETICULE ICON. USE THE JOYSTICK TO MOVE THE MAP
- 6 PRESS ENTER
- SPECIAL SETTINGS
- 4 SELECT "SPECIAL" AND PRESS EN-TER
- 6 THE SPECIAL USE SETTING LIST IS DISPLAYED. PRESS ENTER
- 5 THE SPECIAL USE LIST APPEARS. SELECT THE DESIRED ITEM AND PRESS ENTER
- 7 THE MEMORY EDITING LIST IS DISPLAYED
- SETTING THE POINT TO AVOID (POINT TO AVOID)
- SETTING THE POINT TO BEEP (POINT TO BEEP)
- SETTING THE TRAVEL DIRECTION TO BEEP (BEEP DIRECTION)
- NOT USED (NO SETTING)
- SETTING THE DESTINATION
- 1 FIND THE DESTINATION ON THE MAP, THEN PRESS ENTER
- 2 THE POINT MENU APPEARS. SELECT DEST. AND PRESS ENTER
- 3 WHEN THE ROUTE SEARCH IS STARTED, THE MESSAGE "MOTORWAY-PREFERENCE (OR ORDINARY-ROAD-PREFERENCE)" WILL BE DISPLAYED
- 4 THE ROUTE SEARCH SCREEN IS DISPLAYED
- 5 WHEN THE SEARCH IS COMPLETE, THE REQUIRED TIME AND DISTANCE TO THE DESTINATION ARE DISPLAYED
- 6 THE SEARCHED FOR ROUTE IS DISPLAYED. WHEN YOU START DRIVING THIS ROUTE, THE GUIDANCE BEGINS
- COMPLY WITH THE CURRENT TRAFFIC REGULATIONS WHILE DRIVING
- SETTING WAYPOINTS
- 1 FIND THE WAYPOINT ON THE MAP, THEN PRESS ENTER
- 2 THE POINT MENU APPEARS. SELECT "WAYPOINT" AND PRESS ENTER
- 4 WHEN THE ROUTE SEARCH IS COMPLETE, THE CURRENT LOCATION IS DISPLAYED. WHEN YOU START DRIVING THIS ROUTE, THE GUIDANCE BEGINS
- DISPLAYING THE WHOLE ROUTE
- SEARCHING FOR AN ALTERNATE ROUTE
- 2 A SUB-MENU APPEARS IN THE DISPLAY. SELECT THE DESIRED MENU ITEM AND PRESS ENTER
- MULTI CD
- RE-ROUTE
- CONFIRMING THE SEARCHED ROUTE
- CHANGING SEQUENCE OF WAYPOINTS FOR TODAY'S PLAN
- 5 THE TODAY'S PLAN LIST IS DISPLAYED. IF THE ROUTE DISPLAYED IS ACCEPTABLE, SELECT "FINISH" AND PRESS ENTER
- 6 THE SYSTEM CALCULATES THE NEW ROUTE AND DISPLAYS THE CONFIRMATION SCREEN. IF THE NEW ROUTE IS ACCEPTABLE, SELECT "FINISH" AND PRESS ENTER. IF YOU WANT TO CHANGE AGAIN, REPEAT STEPS 4 TO 6 ABOVE
- DRIVE SIMULATION
- 3 TO END THE DRIVE SIMULATION, PRESS THE RETURN BUTTON
- SETTING DISPLAY CONDITIONS
- 1 PRESS THE MENU BUTTON TO DISPLAY THE MAIN MENU. SELECT "SET-UP" FROM THE MAIN MENU, THEN SELECT "DISPLAY" AND PRESS ENTER
- 2 USING THE JOYSTICK, SELECT ITEMS AND PRESS ENTER
- MAP DISPLAY
- MAP COLOUR
- TRACKS DISPLAY
- DISPLAYING POINT-MARKS
- SETTING GUIDANCE CONDITIONS
- VOICE INTERRUPT
- FREQUENCY OF VOICE GUIDANCES
- DIRECTION CORRECTION
- SCREEN POSITION ADJUSTMENT
- DISTANCE COEFFICIENT
- VIEWING GPS SCREENS
- VIEWING THE ODOMETER
- IN CASE OF DIFFICULTY
- IF THIS MESSAGE APPEARS
- BUTTONS AND FUNCTIONS OF REMOTE CONTROL
Brand : ALPINE
Model : NVS-HB01
Category : Car GPS Navigation