
E20 - Drone Snaptain - Free user manual and instructions
Find the device manual for free E20 Snaptain in PDF.


| Product Type | Quadcopter drone |
| Model | E20 |
| Dimensions (Unfolded) | 27.3 x 30.3 x 5.6 cm (10.75 x 11.92 x 2.2 in) |
| Dimensions (Folded) | 14.1 x 8.9 x 5.6 cm (5.6 x 3.5 x 2.2 in) |
| Weight (with battery) | 181 g |
| Maximum Flight Time | 18 minutes |
| Battery (Drone) | 3.8V 2000mAh Lithium |
| Battery (Remote) | 3.7V 300mAh Lithium |
| Charging Time (Drone) | Approx. 4 hours (5V/2A) |
| Charging Time (Remote) | Approx. 90 minutes |
| Remote Control Range | 492 ft (150 m) |
| Camera FOV | Approx. 90° |
| Photo Resolution | 2976 x 1680 pixels |
| Video Resolution | 2976 x 1680 @ 25fps (Memory Card) |
| Memory Card Support | 32GB - 128GB SD card (FAT32, Class 10/U1+) |
| Flight Speeds | 3 m/s, 5 m/s, 8 m/s |
| Wind Resistance | 5 m/s (Level 2) |
| Operating Temperature | 32°F - 104°F (0°C - 40°C) |
| Key Functions | One-key takeoff/landing, circle fly, trajectory flight, 3D flip, emergency stop, find drone |
| Maintenance | Clean lens; replace propeller assemblies (A/B sets) |
| Safety Requirements | FAA registration required (if >249g with battery); avoid crowds, water, heat; follow local laws |
| Spare Parts Included | Propeller assemblies (A & B), 4 propeller guards, screws, screwdriver |
| Package includes | Drone, 2 batteries, remote, USB cable, carrying bag, user manual, quick guide, propeller guards |
Frequently Asked Questions - E20 Snaptain
User questions about E20 Snaptain
0 question about this device. Answer the ones you know or ask your own.
Ask a new question about this device
Download the instructions for your Drone in PDF format for free! Find your manual E20 - Snaptain and take your electronic device back in hand. On this page are published all the documents necessary for the use of your device. E20 by Snaptain.
USER MANUAL E20 Snaptain
natural_image
Line drawing of a multi-rotor drone with propellers and control panels (no text or symbols)USER MANUAL
Please read this manual carefully before flying and keep it for future use.
- For your safety, please follow the rules and safety guidelines whether you're a beginner or an expert at flying drones.
- According to the relevant laws and regulations in US, all drones must be registered, except those that weigh 0.55 pounds or less (less than 250 grams) and are flown exclusively under the Exception for Recreational Flyers. Please log in to the website of https://faadronezone-access.faa.gov/#/ to complete the registration. The maximum take-off weight will be more than 249g if the drone is used with the Intelligent Flight Battery. Make sure to observe local laws and regulations about the take-off weight. If the buyer does not register timely, SNAPTAIN will not be responsible for any losses, penalties and injuries caused by illegal flights.
• To meet the electromagnetic requirements of aviation on the radio station, it is forbidden to fly drones within 6.21 miles(10km) on both sides of the runway centerline, or within 12.43 miles(20km) of both ends of the runway. It is also prohibited to fly a drone on the route of an airline. In the area that is prohibited by the relevant authority or department of your country, stop using all flying models and unmanned quadrotors.
- Please download the B4UFLY App from Google Play or App Store, which provides real-time information about airspace restrictions and other flying requirements based on your GPS location.
• Beginning September 16, 2023, all drone pilots who are required to register their UAS must operate in accordance with the rule on Remote ID.
AIM HIGH FLY HIGH
Thank you for choosing our product and putting your trust in us. Contact us via email at
support@snaptain.com or call us (415)991-6646(Mon-Fri) if you have questions or concerns about the product.
We hope our products will make flying a whole new experience for you!
Please read the manual carefully for the best use of this product.
CONTENTS
IMPORTANT SAFETY PRECAUTIONS 01
FLY SAFELY 02
BATTERY SAFETY 04
WHAT'S INCLUDED 05
PRODUCT OVERVIEW 06
Drone 06
REMOTE 08
FIRST-TIME USE 11
Flight Preparation 11
Connect the SNAPTAIN FPV App with Your Drone 16
FUNCTION OVERVIEW 17
Flight Control 17
Functions 19
Camera 22
App Downloading and Installation 24
EXPLANATIONS OF DRONE'S LED INDICATORS 25
BEEPS EXPLANATION 25
SPECIFICATIONS 26
Drone 26
Camera 27
Remote 28
USB Charing Cable 28
Mobile System Supported 28
IMPORTANT SAFETY PRECAUTIONS
This drone can pose a danger when in use. When flying, make sure that you keep it away from other people. Incorrect installation, poor conditions, or unfamiliar users may damage the drone, cause injury, or lead to an unexpected accident. Make sure that you pay close attention to flying safety, and learn how to identify more dangerous conditions that may cause an accident due to your negligence.
1. Avoid crowds and structures
There may be uncertainty about the drone's flight state and speed while in flight, which can cause potential danger. When flying, keep your drone far away from crowds, buildings, trees, structures, high-voltage wires, etc. Flying should also be avoided in adverse weather conditions such as rain, storms, and high winds to ensure the safety of the user, spectators, and property around the site.
2. Avoid moist environments
Drones are made up of a variety of precision electronic and mechanical components. As a result, please make sure that moisture and water do not enter the drone. This can prevent mechanical or electronic parts from malfunctioning and thus causing an accident.
3. Only use the included parts for intended use
For any maintenance or repairs, please use the original parts made by SNAPTAIN. You should only use and operate the product in accordance with its permitted functions. The warranty will be voided if you apply unapproved parts. Use only within the scope of your local laws and regulations, and NOT for illegal purposes.
4. Avoid controlling the drone alone
It may be difficult for beginners to operate this drone at the beginning.
Please avoid flying the drone alone. When possible, operate this drone under the guidance of an experienced pilot.
5. Fly safely
Fly this drone in accordance with your state and flying skill. There is an increased probability of accidents if a person is fatigued, has a poor mental state, or operates incorrectly.
6. Stay away from the rotating parts
You should keep the drone away from you and any surrounding persons or objects when flying it at high speed.
7. Keep it away from heat sources
Drones are made of metal, fiber, plastic, electronics, etc. Avoid prolonged exposure to direct sunlight and keep it away from any heat source. Excessive heat exposure can cause distortion and damage.
FLY SAFELY
FPV transmission requirements:
*Make sure to fly the drone in an open area without any interference or obstacles.
*Do not fly against the wind.

EN


natural_image
Five grayscale icons representing different risk or safety symbols: warning triangle, human figures, airplane, airport, and tower (no text or labels)Avoid flying over or near obstacles, crowds, high-voltage power lines, trees, airports, or water areas.
DO NOT fly near strong electromagnetic sources such as power lines and base stations as they may affect the onboard compass.

Do not use the drone in adverse weather conditions such as rain, snow, and fog. It is advisable to operate it in a windless environment.
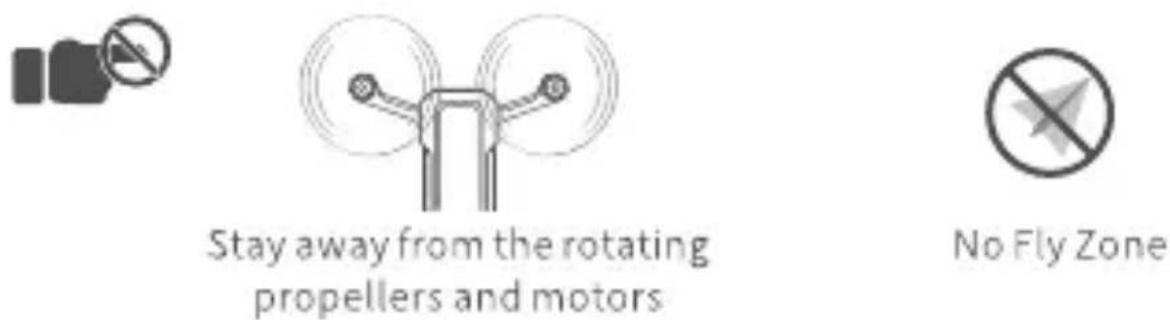

For your safety and that of those people around you, it's important to understand basic flight guidelines. Before flying, make sure you read the safety precautions.
BATTERY SAFETY

*RISK OF EXPLOSION BATTERY IS REPLACED BY AN INCORRECT TYPE
*DISPOSE OF USED BATTERIES ACCORDING TO THE INSTRUCTIONS
*BATTERY MUST BE RECYCLED OR DISPOSED OF PROPERLY
*Under no circumstances should the battery touch any liquids. Avoid using the battery in rainy or wet conditions, as it may catch fire or explode unexpectedly.
*It is not allowed to use batteries that are not provided by the manufacturer. Additionally, it is advisable to use the original charger for charging the batteries.
*Batteries that are swollen, leaking, or damaged are strictly forbidden.
*It is recommended to use the battery between 14°F(-10°C) and 104°F(40°C); overheating may lead to a fire or explosion. A battery's performance can be adversely affected by extremely low temperatures.
*Do not insert or puncture the battery with any sharp object.
*Battery liquid is highly corrosive, so stay away if it leaks. If skin or eyes are contacted, rinse immediately with plenty of water and seek medical attention.
*Please keep the battery out of children's reach. Immediately seek medical attention if a child swallows parts.
*After being dropped or impacted, the battery should not be used again.
*Place the battery away from heat sources, such as a car in direct sunlight or on a hot day, a fire or a stove.
*To prevent a battery from entering an over-discharged state, avoid storing it for extended periods of time once it has been fully discharged. If a battery is overcharged, the battery cell will be damaged and unable to be recharged.
EN
The product is an easily operated and simple-to-use drone for beginners. It is ready to fly out of the box. This drone features a downward vision positioning system and can fly both indoors and outdoors. It has a maximum flight time of 18 minutes, suitable for short-distance flights. To operate it, you will need a remote control or an app. Please refer to the user manual for more detailed instructions on flying the drone.
WHAT'S INCLUDED

natural_image
Line drawing of a quadcopter drone with four propellers (no text or symbols)Dronex1

Battery x2

Remotex1

Spare Propeller Assembly Ax2 Bx2

Screwdriver x1

Screws

natural_image
Simple line drawing of a rectangular cabinet or enclosure with two side handles (no text or symbols)Carrying Bag x1

natural_image
Blank white rectangular book or document with no visible text, symbols, or markingsUser Manual x1

natural_image
Blank white square with a thin gray border (no text or symbols)Quick Guide x1

USB Charging Cable x1

Propeller Guard x4
PRODUCT OVERVIEW
Drone

1 Power Button
2 Rear Arm
3 Front Arm
4 Propeller
5 Camera
6 Front LED Indicators
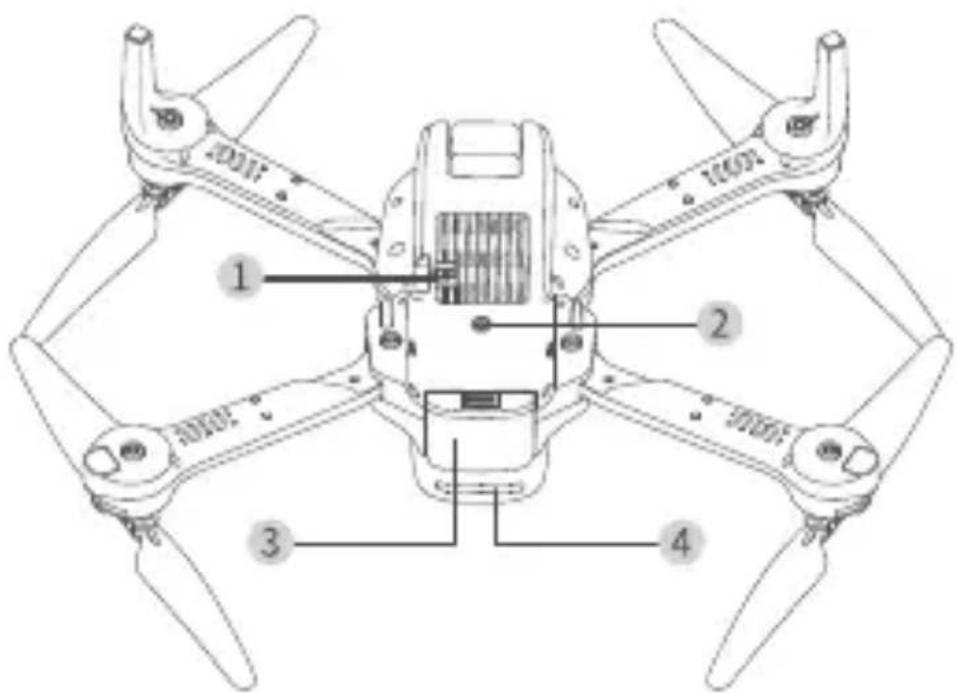
1 Memory Card Slot
2 Optical Flow Sensor
3 Battery
4 Rear LED Indicator
EN
\*How to Replace the Propeller Assembly(Optional)
The marks on the propellers (A/B) should match the marks on the drone arms when you replace the propellers.

natural_image
Line drawing of a quadcopter drone with four propellers labeled A, B, and C (no text or symbols on the diagram itself)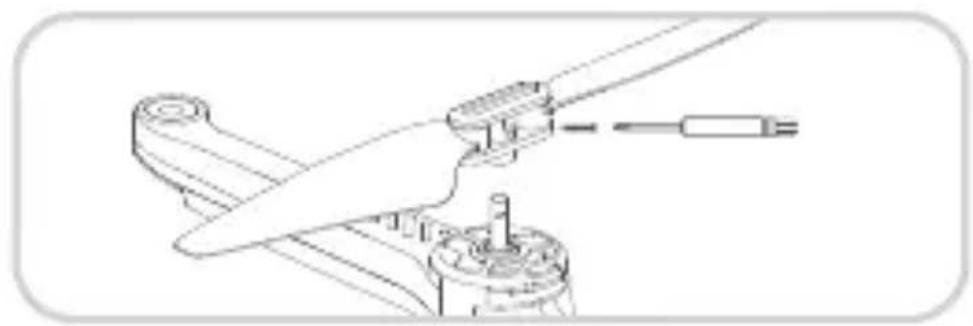
natural_image
Technical line drawing of a mechanical assembly with no visible text or symbols
natural_image
Two identical propeller-shaped diagrams labeled A and B, with no text or symbols on the shapes themselves.A propeller assembly: Starting with letter A, like A1, A2, etc.
B propeller assembly: Starting with letter B, like B1, B2, etc.
REMOTE
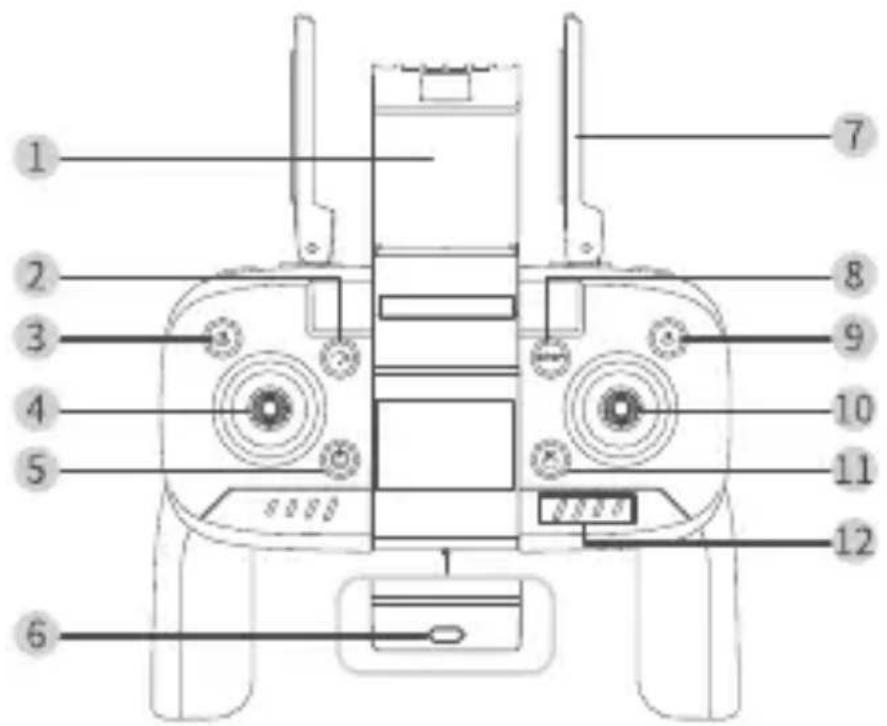
1 Phone Holder
2 Speed Switch
3 One Key Take-off and Landing
4 Left Control Stick
5 Power Button
5 Charging Port
7 Antenna
8 Emergency Stop
9 Circle Fly
10 Right Control Stick
11 3D Flip
12 Battery Power Indicators

1 Camera Tilt
2 Record Video
3 Zoom In/Out
4 Take Photo
EN
Speed Switch:
Press this button to toggle between different speed levels.
One Key Take-off and Landing:
Place the drone on a flat and level surface, then press and hold this button for 1 second to make it ascend and hover at a height of 3.9ft(1.2m). When the drone is hovering, press and hold this button for 1 second to make it descend and land until the propellers stop rotating.
Left Control Stick:
Push this stick to make the drone ascend, descend, rotate leftward and rotate rightward.
Power Button:
Press and hold it for 3 seconds to power on the drone; press and hold it for 3 seconds again to power off the drone.
Emergency Stop:
If an abnormal situation occurs when the drone is below 32.8ft(10m), you can press and hold this button for 3 seconds to make an emergency stop. (When this function is activated, the drone's motor and propellers will stop rotating, causing it to fall from the sky and potentially pose risks of damage. Use this function with caution.)
Note
This function is not available when the drone's height is over 32.8ft(10m).
Circle Fly:
Press this button to enable this function; press it again to disable this function.
Right Control Stick:
Push this stick to control the directions of the drone.
3D Flip:
Press this button to enable this function, then push the right control stick to flip the drone.
Battery Power Indicators:
Displays the remote's battery status. Each indicator represents 25% power.
Camera Tilt:
Push this gear leftward or rightward to tilt the camera.
Record Video:
Press this button to start recording a video; press it again to stop the recording and save the video to both your mobile phone & memory card.
Zoom In/Out:
Push this gear leftward or rightward to adjust the lens focus.
Take Photo:
Press this button to take a photo and save it to both your mobile phone & memory card.
FIRST-TIME USE
Flight Preparation
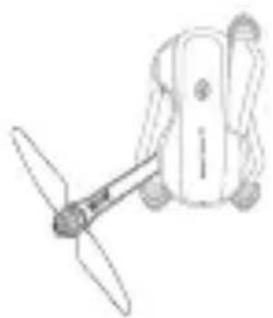
- The propellers and arms of the drone are folded for packaging purposes. Please unfold the front arms, then the rear arms.
natural_image
Line drawing of a drone with propeller and control panel (no text or symbols)
natural_image
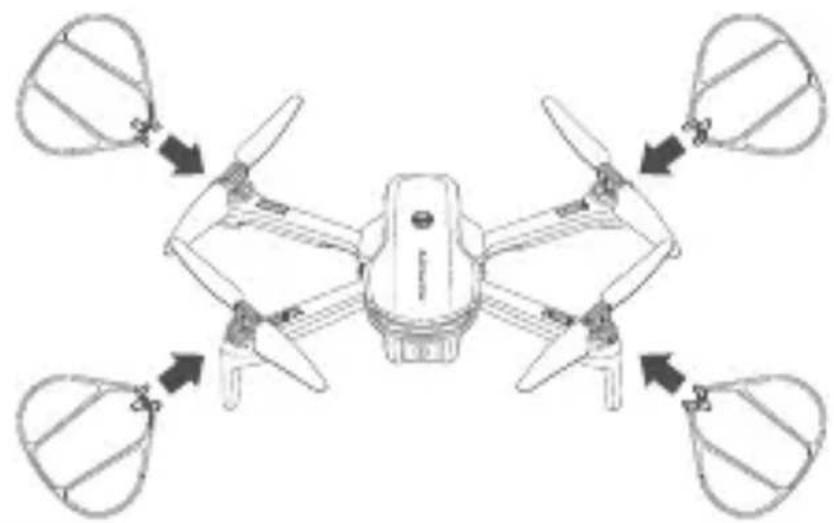
Line drawing of a quadcopter drone with four propellers (no text or symbols)- Attach the propeller guards to the drone.
natural_image
Diagram of a four-blade quadcopter drone with four propellers and directional arrows indicating propellers (no text or symbols)Note
For flight safety, it is recommended to install the propeller guards before you fly the drone.
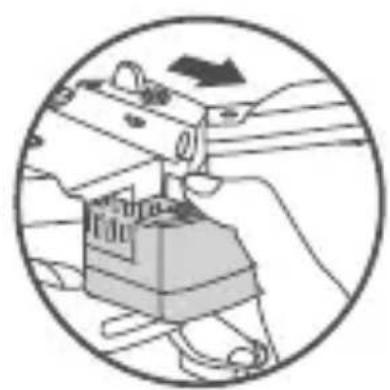
- Remove the battery from the drone, then charge it with the USB charging cable provided in the box. The cable can connect to a plug with a maximum output of 5V 3A.
natural_image
Illustration of a hand operating a mechanical device with wires and a directional arrow (no text or symbols)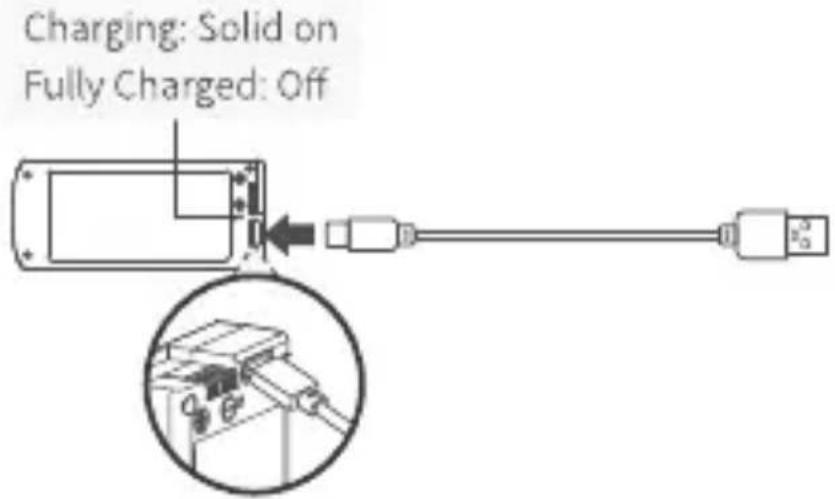
When the battery gets low, all the indicators on the drone will flash 3 times every 2s.
Notes
① It's not recommended to charge the battery using the USB port of a PC.
② Please note that when flying in low-temperature environments, the flight time of the drone may be reduced.
- Install the battery into the drone after it's fully charged.

natural_image
Top-down diagram of a four-bladed drone with a circular inset showing internal components (no text or symbols)EN
- Insert a memory card into the drone(Memory cards must be purchased separately. However, you can still use the drone's camera even if a memory card is not inserted, although the resulting videos and pictures may not be in high-definition quality.).

natural_image
Diagram of a drone with four propellers and a circular overlay showing an upward arrow (no text or symbols)* Support up to 128GB
* FAT32 format is required.
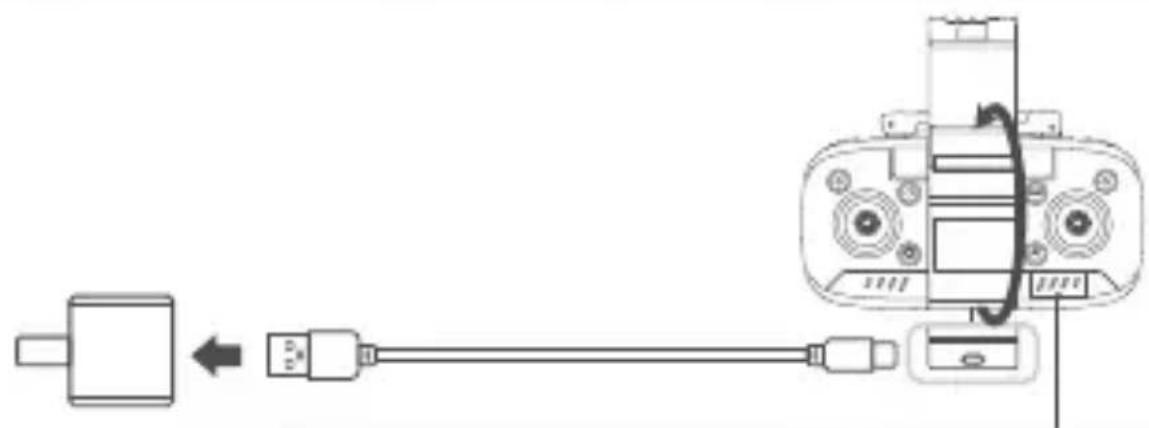
- Charge the remote with the USB charging cable provided in the box.
natural_image
Diagram showing a device connected via cable to a device with ports and cables (no text or symbols)Charging: Battery Power Indicators flash one by one Fully Charged: 4 indicators turn solid on Low Battery: The leftmost indicator flashes
The cable can connect to a plug with a maximum output of 5V 3A.
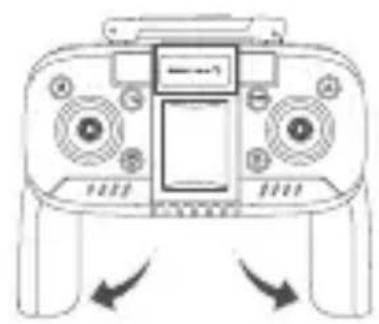
- Unfold the handle and antenna.
natural_image
Front view of a handheld electronic device with control knobs and buttons (no text or symbols visible)
natural_image
Front view of a handheld electronic device with visible ports and antenna (no text or symbols)- Unfold the phone holder to mount your mobile phone. Remove PHONE CASE before mounting to prevent your phone from dropping off!

natural_image
Top-down schematic of a mechanical device with four legs and two side ports (no text or symbols)
natural_image
Top-down schematic of a robot control panel with no visible text or symbolsNote
The phone holder can accommodate smartphones with a width ranging from 1.77 inches(45mm) to 3.38 inches(86mm).
EN
- Please remove the protective film on the lens before flying.

natural_image
Diagram of a drone with four propellers and a circular inset showing a camera module (no text or symbols)- Place the drone on a flat and level surface, then press and hold the power button for 3s on the drone to power it on.

natural_image
Diagram of a four-bladed drone with a hand cursor icon pointing to the button (no text or symbols)- Press and hold the power button for 3s on the remote to power it on. The drone will automatically pair with the remote. If the pairing is failed, please repeat the step 10 and step 11.

natural_image
Line drawing of a handheld device with a hand cursor pointing to the button (no text or symbols)* Pairing: All the indicators on the drone quickly flash 3 times.
* Successfully Paired: All the indicators on the drone turn solid on.
Connect the SNAPTAIN FPV App with Your Drone
Step 1:
Download and install SNAPTAIN FPV from Google Play™/App Store™ or scan the QR codes below.
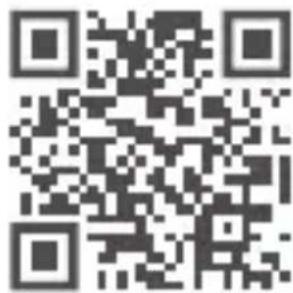
For Android 8.0 and later

For iOS 8.0 and later
Step 2:
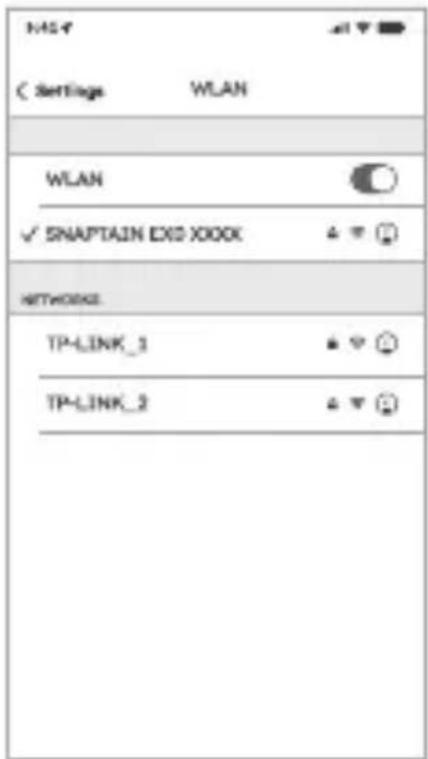
Simply navigate to the WiFi setting of your mobile phone and search for SNAPTAIN EX0 XXXX WiFi to connect.
EN
Step 3:
Launch the SNAPTAIN FPV app, then tap FUNCTION DISPLAY to enter the main page to see the live preview.
FUNCTION OVERVIEW
Flight Control
1. Unlock the drone
Option 1:
For your safety, the propellers of the drone are locked by default.
To unlock the drone, please simultaneously push the Left Control Stick to the lower left at 45° and the Right Control Stick to the lower right at 45° until the 4 propellers start rotating.

natural_image
Technical line drawing of a mechanical component with mounting holes and internal components (no text or symbols)Option 2:
For your safety, the propellers of the drone are locked by default.
To unlock the drone, please simultaneously push the Right Control Stick to the lower left at 45° and the Left Control Stick to the lower right at 45° until the 4 propellers start rotating.

natural_image
Technical line drawing of a mechanical device with no visible text or symbols2. Flight Directions
Left Control Stick
 |  | Push the Left Control Stick forward and the drone will ascend; pull it backward and the drone will descend. |
 | 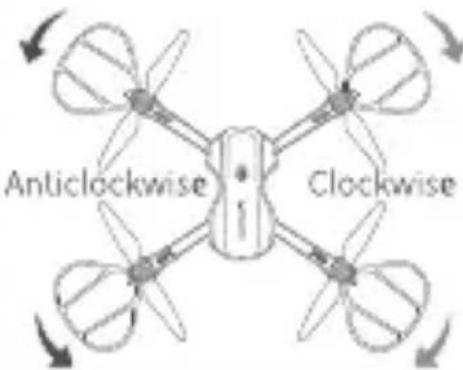 | Pull the Left Control Stick leftward and the drone will rotate to the left; pull it rightward and the drone will rotate to the right. |
Right Control Stick
natural_image
Technical line drawing of a mechanical device with no visible text or symbols
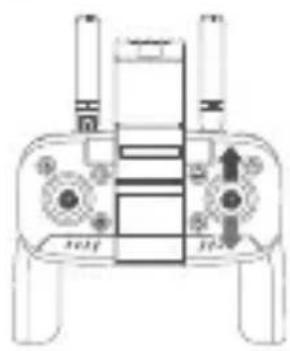
Push the Right Control Stick forward and the drone will fly forward; pull it backward and the drone will fly backward.

natural_image
Technical line drawing of a mechanical device with two ports and a central hub (no text or symbols)
Pull the Right Control Stick leftward and the drone will fly leftward; pull it rightward and the drone will fly rightward.
Functions
One Key Take-off and Landing
* Take-off: Place the drone on a flat and level surface without any obstacles, then press this button to make it ascend and hover at a height of 3.9ft (1.2m).


Icon on the App
* Land: When the drone hovers in the air without any obstacles, press this button to make it descend and land until the propellers stop rotating.

natural_image
Line drawing of a hand pressing a button on a robot's front panel (no text or symbols)
Icon on the App
Circle Fly
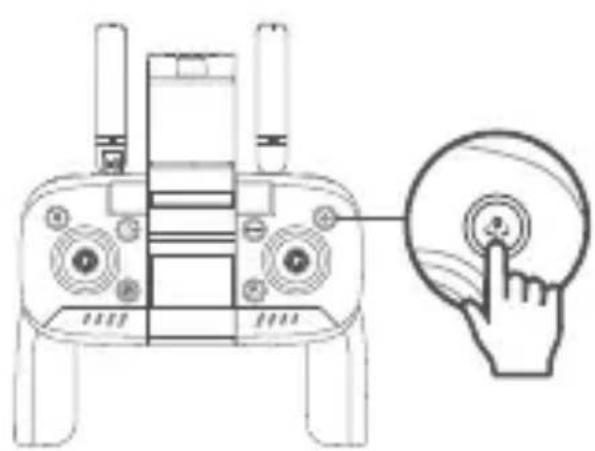
If there are no obstacles within a radius of 5 meters around the drone, press the Ⓞ button on the remote control to make the drone fly in a circular pattern.
natural_image
Line drawing of a Drones hover with a hand cursor pointing to the button (no text or symbols)
chemical
Molecular orbital diagram showing electron density distribution around a central atom with 4.9ft distance annotationPress the button Ⓤ again to disable this function. It's important to note that this function cannot be enabled when the drone's battery is low.
EN
Trajectory Flight
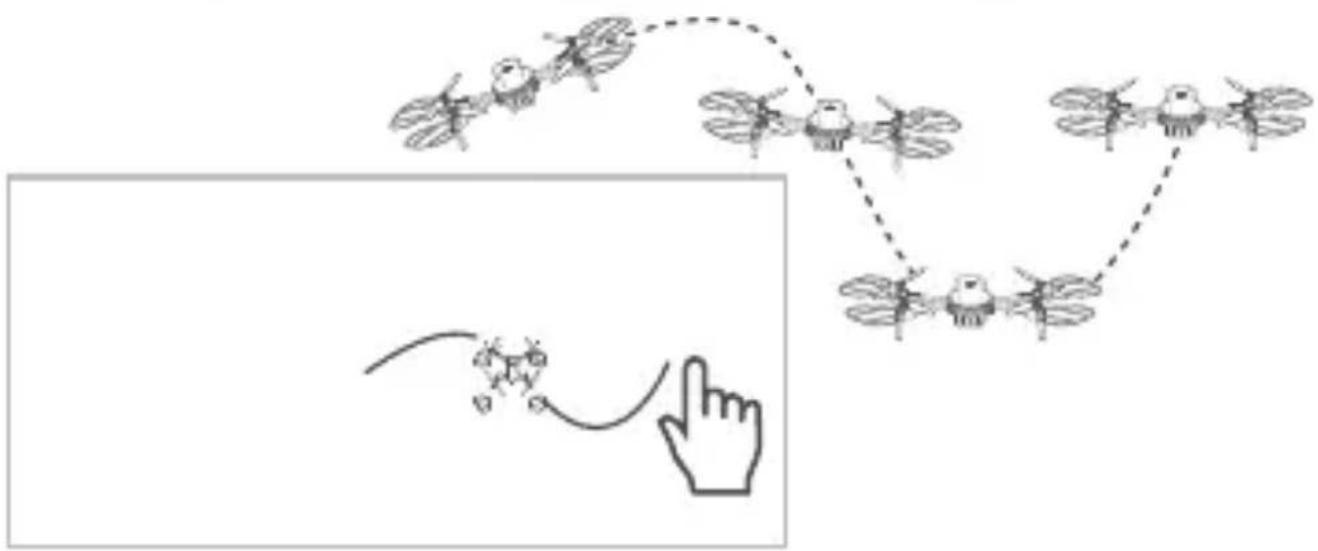
① Open the App and navigate to the main page.
② Tap on the "2" (Trajectory Flight) icon and adjust the scale by sliding the scale bar. The default scale is set to 1:1.
③ Use your finger to draw a desired flight path on the blank area of the screen.
④ The drone will follow the trajectory path without changing its flight height, but the length of the trajectory will vary based on the selected scale.
flowchart
graph TD
    A["Top: Drones"] --> B["Left: Insect"]
    B --> C["Right: Drones"]
    C --> D["Bottom: Drones"]
    D --> E["Hand: Arrow pointing to insect"]
    style A fill:#f9f,stroke:#333
    style E fill:#bbf,stroke:#333
3D Flip
After flying the drone to a height of at least 6.6ft(2m), press the ⚙ button to activate the 360° flip function. Once activated, use the Right Control Stick to perform flips. Push the stick forward, backward, leftward, or rightward to execute a 360° flip in the corresponding direction.

flowchart
graph TD
    A["Hand cursor clicking control button"] --> B["Flywheel-like drone with directional arrows"]
    B --> C["Final flywheel with directional arrows"]
Please note that this function cannot be enabled when the drone's battery is low.
Emergency Stop
If an abnormal situation occurs when the drone is below 32.8ft(10m), you can press and hold this button for 3 seconds to make an emergency stop. When this function is activated, the drone's motor and propellers will stop rotating, causing it to fall from the sky and potentially pose risks of damage. Use this function with caution.
Note
This function is not available when the drone's height is over 32.8ft(10m).

Please make an emergency stop when the drone's flight height is below 9.8ft(3m). If the drone's flight height is above 9.8ft(3m), carefully descend it to a height below 9.8ft(3m) before performing the emergency stop.
After an emergency stop, if you intend to fly the drone again, please restart both the drone and the remote control.
Find Your Drone
When the drone is accidentally lost during flight, press and hold the buttons an stop for 3 seconds to try to locate it. In response, the drone will emit a rapid beep and flash for one minute.
Note
To perform this function, the drone must be connected to the remote and have enough power.
Camera
① Press the button 📷 on the remote or tap 📍 on the App to take a photo. When taking a photo, the indicators on the drone will flash once and a shutter sound will be heard.
② Press the button ⚙️ on the remote or tap 📋 on the App to start recording a video. Press the same button or tap the same icon on the App again to stop recording. The video will be saved both on your mobile phone and the memory card. (Please note that the drone cannot capture photos while it is recording a video.)


Take Photo

Record Video
ICON ON APP
*How to check the videos and photos?
Option 1: Check the videos and photos within the App's album 📷. Option 2: Remove the memory card from the drone, then connect it to a computer using a card reader.

flowchart
graph LR
    A["Device with ports and memory"] --> B["File"]
    B --> C["USB"]
    C --> D["Laptop"]
* When the drone does not have a memory card installed, the photos and videos will be saved with a resolution of 720P within the app itself.
* Before inserting the memory card into the drone, ensure that it is formatted as FAT32 format.
EN
App Downloading and Installation
Step 1:
Download and install SNAPTAIN FPV from Google Play™/App Store™ or scan the QR codes below.

For Android 8.0 and later

For iOS 8.0 and later
Step 2:
Simply navigate to the WiFi setting of your mobile phone and search for SNAPTAIN EX0 XXXX WiFi to connect.

Step 3:
Launch the SNAPTAIN FPV app, then tap FUNCTION DISPLAY to enter the main page to see the live preview.
EXPLANATIONS OF DRONE'S LED INDICATORS
| Status | Front LED Indicators (Blue) | Rear Indicator(Green) |
| Powering on | Pulsing | Pulsing |
| Pairing | Quickly flash 3 times | Quickly flash 3 times |
| During Flight | Solid on | Solid on |
| Reset | Quickly flash 2 times | Quickly flash 2 times |
| Low Battery | Flash 3 times every 2s | Flash 3 times every 2s |
| Find Your Drone | Quickly flash for 1 minute | Quickly flash for 1 minute |
| Powered off | Off | Off |
BEEPS EXPLANATION
| Status | Beep(s) |
| Powering on the drone | 2 short beeps |
| Powering off the drone | 1 short beep, then 1 long beep |
| Command executed successfully | 1 short beep |
EN
| Status | Beep(s) |
| Low Battery | 2 short beeps every 2s |
| Find Your Drone | shortly beeps for 1 minute |
| Powering on the remote | 1 short beep |
| Powering off the remote | 2 short beeps |
| Emergency Stop | 6 short beeps |
SPECIFICATIONS
Drone
| Model | E10/E20 |
| Weight(with battery installed) | 181g |
| Max. Flight Time | 18 minutes |
| Operating Temperature | 32°F - 104°F (0°C - 40°C) |
| Dimensions | 10.75x 11.92x 2.2inches/27.3X30.3X5.6cm (unfolded),5.6x3.5x2.2inches/14.1X8.9X5.6cm (folded) |
| Flight Speed(at sea level, no wind) | 3m/s, 5m/s and 8m/s |
| Wind Speed Resistance | 5m/s(Level 2) |
| Battery Capacity | 3.8V 2000mAh Lithium Battery |
| Charging Time | ≈4 hours (depending on the power of the charger) |
Camera
| FOV | ≈90° |
| Photo Resolution | E10:1920 x 1080 pixelE20:2976 x 1680 pixel(App's Album and Memory Card) |
| Video Resolution | E10:1280 x 720@30fps (App's Album)1920 x 1080@30fps (Memory Card)E20:1280 x 720@25fps (App's Album)2976 x 1680@25fps (Memory Card) |
| Photo Format | JPG |
| Video Format | MP4 |
| Memory Card Type | 32G to 128G SD Card(Class 10/U1 and above).FAT 32 Format Supported |
| Operating Frequency | 5.15-5.25 GHz; 5.725-5.825 GHz |
| Protocol Supported | 802.11 a/b/g/n |
Remote
| Operating Frequency | 2.412-2.472 MHz |
| Max. Operating Distance | 492ft(150m) |
| Battery Capacity | 3.7v 300mAh Lithium Batteries |
| Charging Time | ≈90 minutes |
| Battery Life | ≈3 hours |
| Applicable Mobile Phone Size | 4.7-6.5inches |
| Operating Temperature | 32°F -104°F(0°C -40°C) |
USB Charging Cable
| Charging Temperature | 32°F -104°F(0°C-40°C) |
| Input Voltage | 5V/2A |
| Rated Power | ≤10W |
FCC Caution:
Any Changes or modifications not expressly approved by the party responsible for compliance could void the user's authority to operate the equipment.
This device complies with part 15 of the FCC Rules. Operation is subject to the following two conditions:
(1) This device may not cause harmful interference, and (2) this device must accept any interference received, including interference that may cause undesired operation.
Note: This equipment has been tested and found to comply with the limits for a Class B digital device, pursuant to part 15 of the FCC Rules. These limits are designed to provide reasonable protection against harmful interference in a residential installation. This equipment generates, uses and can radiate radio frequency energy and, if not installed and used in accordance with the instructions, may cause harmful interference to radio communications. However, there is no guarantee that interference will not occur in a particular installation. If this equipment does cause harmful interference to radio or television reception, which can be determined by turning the equipment off and on, the user is encouraged to try to correct the interference by one or more of the following measures:
— Reorient or relocate the receiving antenna.
— Increase the separation between the equipment and receiver.
— Connect the equipment into an outlet on a circuit different from that to which the receiver is connected.
— Consult the dealer or an experienced radio/TV technician for help.
For Remote
This equipment complies with FCC radiation exposure limits set forth for an uncontrolled environment.
For R/C QUADCOPTER:
This equipment complies with FCC radiation exposure limits set forth for an uncontrolled environment.
This equipment should be installed and operated with minimum distance 20cm between the radiator& your body.
This transmitter must not be co-located or operating in conjunction with any other antenna or transmitter.
ISEDC Warning:
This device complies with Industry Canada licence-exempt RSS standard(s). Operation is subject to the following two conditions:
(1) this device may not cause interference, and
(2) this device must accept any interference, including interference that may cause undesired operation of the device.
The device is compliance with RF exposure guidelines, users can obtain Canadian information on RF exposure and compliance. The minimum distance from body to use the device is 20cm.
Operation of this device in the band \150-\250 MHz is restricted to indoor use only.
The device is compliance with RF exposure guidelines, users can obtain Canadian information on RF exposure and compliance.
This transmitter must not be co-located or operating in conjunction with any other antenna or transmitter.
- USER MANUAL
- AIM HIGH FLY HIGH
- CONTENTS
- IMPORTANT SAFETY PRECAUTIONS
- Avoid crowds and structures
- Avoid moist environments
- Only use the included parts for intended use
- Avoid controlling the drone alone
- Fly safely
- Stay away from the rotating parts
- Keep it away from heat sources
- FLY SAFELY
- BATTERY SAFETY
- EN
- WHAT'S INCLUDED
- PRODUCT OVERVIEW
- \*How to Replace the Propeller Assembly(Optional)
- REMOTE
- Speed Switch:
- One Key Take-off and Landing:
- Left Control Stick:
- Power Button:
- Emergency Stop:
- Note
- Circle Fly:
- Right Control Stick:
- 3D Flip:
- Battery Power Indicators:
- Camera Tilt:
- Record Video:
- Zoom In/Out:
- Take Photo:
- FIRST-TIME USE
- Flight Preparation
- Notes
- Connect the SNAPTAIN FPV App with Your Drone
- Step 3:
- FUNCTION OVERVIEW
- Flight Control
- Unlock the drone
- Option 1:
- Option 2:
- Flight Directions
- Right Control Stick
- Functions
- One Key Take-off and Landing
- Circle Fly
- Trajectory Flight
- 3D Flip
- Emergency Stop
- Find Your Drone
- Camera
- App Downloading and Installation
- EXPLANATIONS OF DRONE'S LED INDICATORS
- SPECIFICATIONS
- FCC Caution:
- ISEDC Warning:
Brand : Snaptain
Model : E20
Category : Drone