208J - Uncategorized MBM - Free user manual and instructions
Find the device manual for free 208J MBM in PDF.


| Product Type | Manual Paper Folder |
| Model | 208J |
| Brand | MBM |
| Dimensions (in use) | W 40” × D 21.5” × H 20” |
| Dimensions (storage) | W 18” × D 21.5” × H 13” |
| Net Weight | 60 lb |
| Power Supply | 100-240 VAC, 50/60 Hz |
| Power Consumption | 50 W |
| Paper Size Range | 3.5” × 5” to 11” × 17” (single fold only minimum 3.5”×5”) |
| Paper Weight Range | 46.5 g/m² to 140 g/m²; up to 210 g/m² for single fold; up to 104.7 g/m² for cross-fold |
| Fold Types | Single, Letter, Zigzag, Double Parallel, Fold Out, Gate, Cross-Fold (Re-Fold) |
| Fold Dimensions (Table 1) | Max 13”, Min 2” |
| Fold Dimensions (Table 2) | Max 9.5”, Min 1.5” |
| Folding Speed | 2,400 – 14,400 sheets/hour (8.5”×11”, single fold) |
| Max Stacking Capacity | 500 sheets (20 lb bond) |
| Paper Feed System | Three-roller friction feed/separation |
| Key Functions | Fold skew adjustment, fold length adjustment, paper jam detection, 4-digit counter (add/subtract), test fold, auxiliary paper guide for cross-folding, jam map indication |
| Safety Features | Electrical grounding, safety cover interlock, moving parts warning, automatic stop on error |
| Maintenance | Clean rollers with rubber cleaner or damp cloth; replace separators when worn; clean photo sensor; do not use solvents |
| Accessories Included | Table 1 and Table 2, power cord, paper support guides (2), machine cover, operation manual |
Frequently Asked Questions - 208J MBM
User questions about 208J MBM
0 question about this device. Answer the ones you know or ask your own.
Ask a new question about this device
Download the instructions for your Uncategorized in PDF format for free! Find your manual 208J - MBM and take your electronic device back in hand. On this page are published all the documents necessary for the use of your device. 208J by MBM.
USER MANUAL 208J MBM
natural_image
3D rendering of a printer with open lid and internal components (no visible text or symbols)MBM
CORPORATION
1-800-223-2508
www.mbmcorp.com
Rev. 1.01
Safety Instructions
Definition of Symbols and Notes
The following names and signs stand for possible dangers:

Danger
This symbol stands for immediate danger. Disregarding these instructions may cause severe injury.

Caution
This symbol stands for a potentially dangerous situation. Disregarding these instructions may lead to injuries or damage to property.
| Danger | |
 | Make sure that the machine is electrically grounded to prevent electrical shock. |
| Use the machine at 100-240 VAC with a frequency of 50-60Hz. There is a risk of electrical shock or fire if a higher or lower voltage is used, or if an electric current is utilized with a frequency not within the range stated above. | |
| Do not place any object on top of this machine. There is a risk of electrical shock or fire if water or any foreign object enters the machine. | |
| Handle the power cord with care. There is a risk of electrical shock or fire if the cord is damaged, broken, or placed under a heavy object. | |
| Do not insert or remove the power plug when water is present. | |
| Do not remove the cover of this machine. There is a risk of an electrical shock. | |
| Do not reconfigure the electronics of this machine. There is a risk of an electrical shock or fire. | |
| Do not operate the machine if it is emitting smoke or a strange odor. Turn off the machine, unplug from the outlet and contact your dealer. | |
| Do not operate the machine if the power cord is generating heat or emits a strange smell. Turn off the machine, unplug from the outlet and contact your dealer. | |
| If a foreign object enters into the machine, turn off the power switch and remove the power plug, then consult your dealer. | |
| In the event of a thunderstorm, unplug the machine. | |
| Caution | |
 | Keep hair, clothing, and jewelry away from the machine while operating. Serious injury may result. |
| Do not put the machine on an unstable or slanted surface. Doing so may cause the machine to drop or fall, causing damage and possible injury. | |
| Store and operate the machine in a clean, dust-free environment with low humidity. Avoid areas with high moisture, extreme temperatures and excessive dust, as these conditions may cause machine failure or electrical shock. | |
| Be sure to grasp the power cord by the plug when removing from the electrical outlet. Not doing so may cause damage to the cord and possible electrical shock or fire. | |
| Be sure to pull the power plug out of the electric outlet before moving the machine. Not doing so may cause damage to the cord and possible electrical shock or fire. | |
| Remove the power plug from the electrical outlet when this machine is not in use. | |
Warning
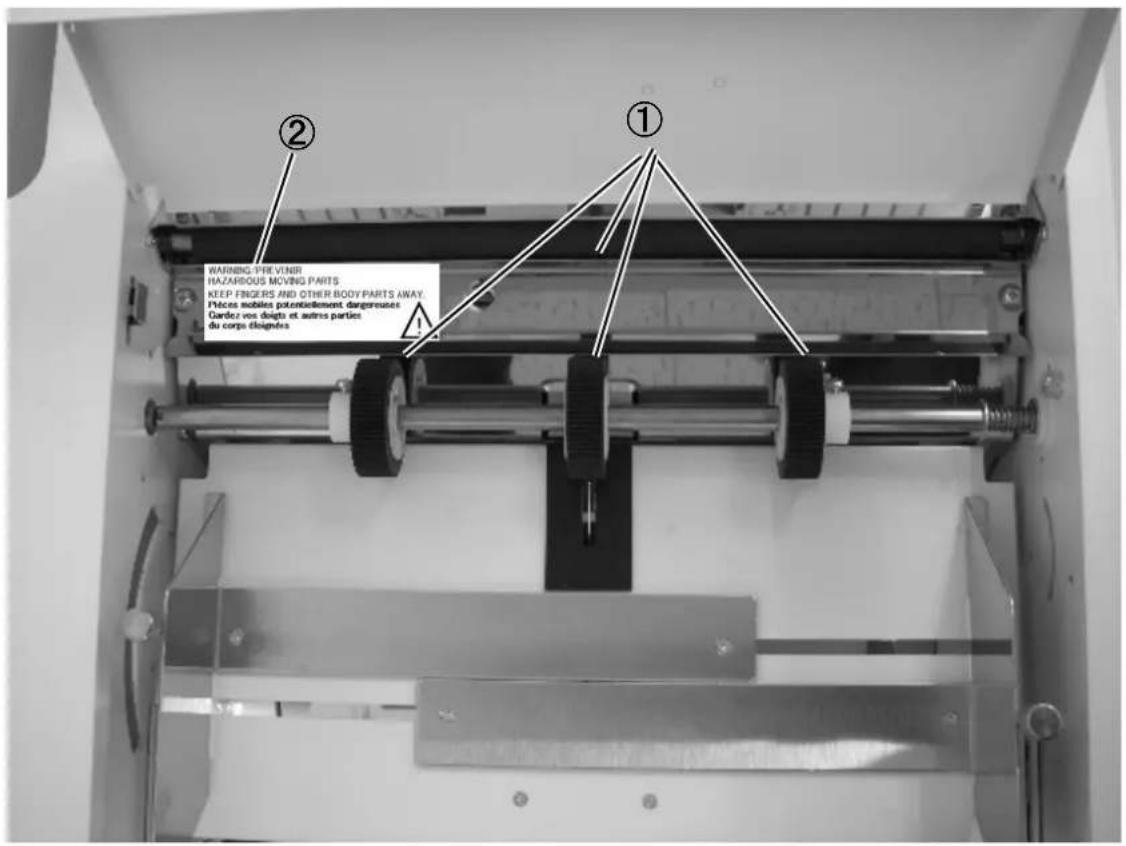
① Moving Parts
② Warning Label
WARNING/PREVENIR
HAZARDOUS MOVING PARTS
KEEP FINGERS AND OTHER BODY PARTS AWAY.
Thank you for purchasing the EZF-200 Manual Paper Folder. You should receive many years of reliable service from this machine. Compact and easy to use, the EZF-200 Paper Folder is sure to streamline your paper folding tasks, saving you valuable time. Please read the Operation Manual thoroughly before using this machine.
Contents
Introduction....3
Contents 3
- Accessories....4
- Description of Parts....5
- Designation and Functions of Operation Panel 6
- Preparations....7
- Operation Procedure 8
5.1 Switching the Power ON 8
5.2 Setting Fold Plate Position....8
5.3 Test Folding 8
5.4 Fold Feed Angle / Skew Adjustment 9
5.5 Continuous Folding 9
5.6 Subtraction Counting....9
5.7 Cross Folding....10
5.8 Fine Adjustments for Table 1....11
5.9 Fine Adjustments for Table 2....12
5.10 Speed adjustment.... 13
5.11 Functions that can be set 14
5.12 Interval function (batch processing) 15
5.13 Error indications, situations, and measures.... 16
- Maintenance (Cleaning and replacement of consumable items) 17
- Trouble shooting 18
- Specifications.... 19
1. Accessories
After un-boxing the EZF-200, make sure that the following accessories are present. Please contact your local dealer immediately if anything is missing.
| Accessories | Qty | |
| Table 1 1 | 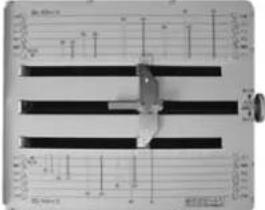 | |
| Table 2 1 | 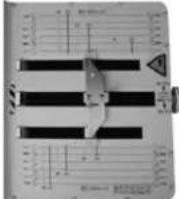 | |
| Power source cable 1 | 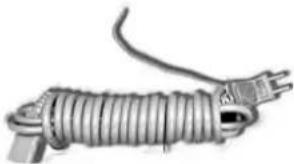 | |
| Paper support guides (right and left) | 2 | 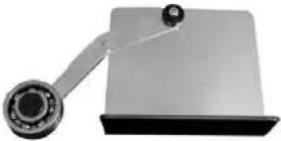 |
| Machine cover 1 | 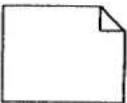 | |
| Operation Manual (this booklet) | 1 | 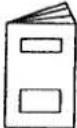 |
2. Description of Parts
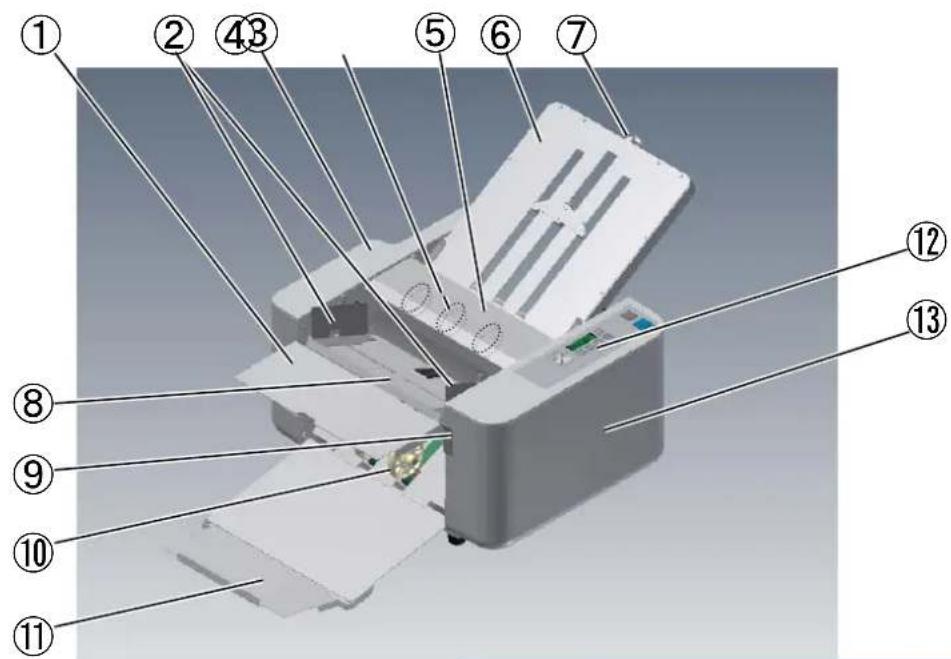
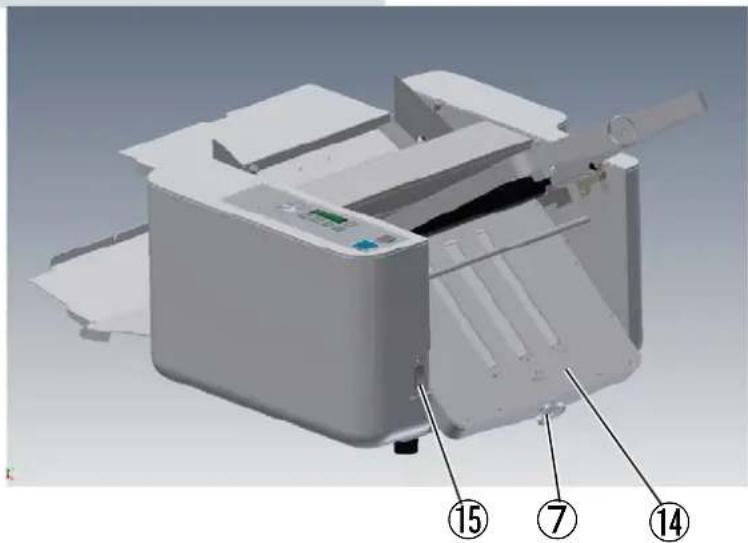
Stopper plate
| Number | Name | Number | Name |
| 1 | Auxiliary feed table | 9 | Paper feed table lever |
| 2 | Paper guide | 10 | Paper discharge roller |
| 3 | Left side cover | 11 | Paper stacking table |
| 4 | Paper feed roller | 12 | Control panel |
| 5 | Roller cover | 13 | Right side cover |
| 6 | Table 1 | 14 | Table 2 |
| 7 | Fold position adjustment knob | 15 | Power source switch |
| 8 | Paper feed table |
3. Designation and Functions of Operation Panel
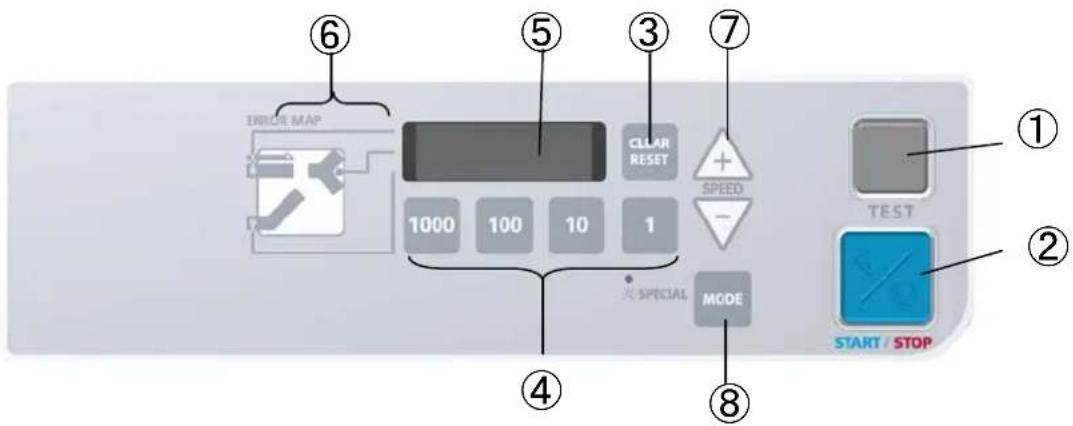
| No. | Designation/Indication | Function |
| 1 | TEST key Performs test folding of two sheets. | |
| 2 | START/STOP key Starts and stops machine. | |
| 3 | CLEAR/RESET key Clears the counter / resets after an error. | |
| 4 | Numerical key Used for Subtraction counting. | |
| 5 | Counter Indicates the number of sheets folded. | |
| 6 | Check lamp | Comes on when paper stock is depleted, or indicates the location of a miss-feed. |
| 7 | Speed key | Adjust the speed using the “+” and “-” keys. |
| 8 | Mode key | Enters SPECIAL mode. |
4. Preparation
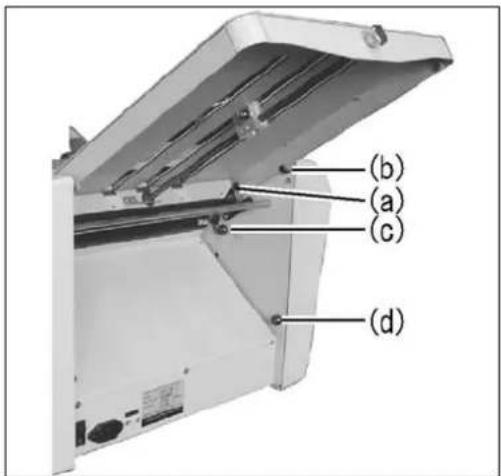
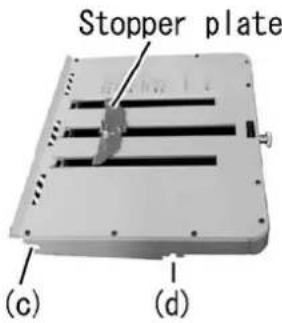
Install Table 1 and 2:
Insert Table 1 on the studs indicated by (a) and (b) as shown in picture.
Insert Table 2 on the studs indicated by (c) and (d) as shown in picture.
When setting Table 1, be sure to put its stopper plate at the center position.
Caution:
Be sure that both Table 1 and 2 fit correctly on the studs (a), (b), (c) and (d). If they are improperly set, it may cause an incorrect collation, or the tables may fall out of the machine.
Lift the auxiliary table and insert the paper.
Raise the paper feed table lever.
Set the paper guide for the appropriate paper size.
Neatly stack the paper on the feed table with the printed side facing up. (printed side down in case of fold-out)
Lower the paper feed table lever.
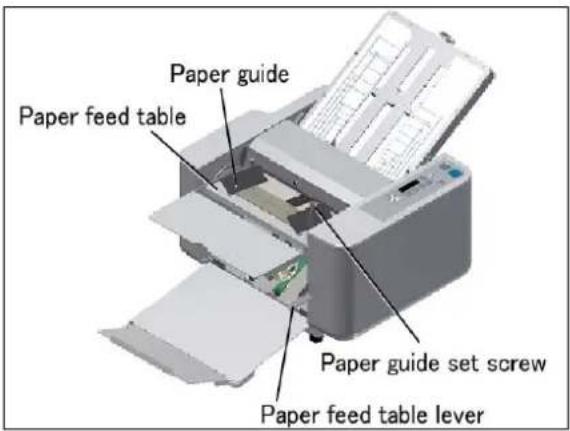
Note:
If the paper does not come in contact with the paper feed roller, remove and reinsert.
Curled or wrinkled paper may not feed correctly.
When using printed paper, insure that the ink is completely dry, otherwise marking may occur.
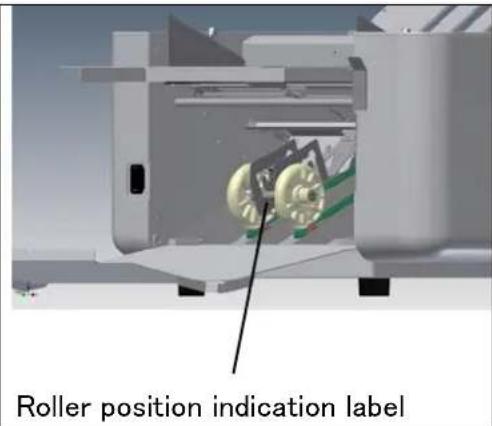
Setting the paper exit roller:
The exit roller should be moved to the proper position according to the paper size. Refer to the “Roller Position Indication” label. If ejection is not performed properly, try a different position.
Example:
Set the roller to position ONE when using A3 paper.
5. Operation Procedure
5.1 Switch the Power to ON
Insert power plug into a proper outlet. Set the POWER switch to the ON position.
Note:
Remove the power plug from the outlet after use.
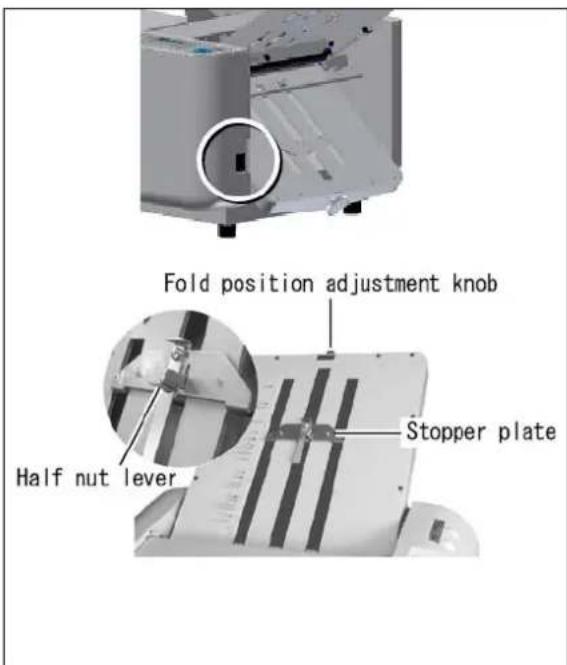
5.2 Setting Fold Plate Table Position
Pull the half-nut lever to move the stopper plate to the desired position on Table 1 and 2. Align the arrow on the stopper plate with the corresponding fold marks on the tables and release the half-nut. This locks the stopper plate into position.
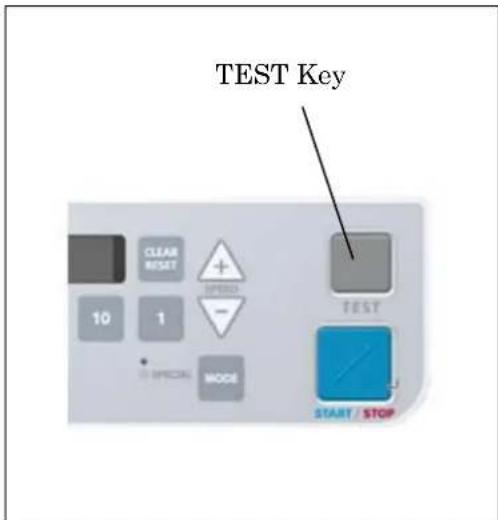
5.3 Test Folding
Press the TEST key to feed two sheets of paper.
Check to see if the paper has been folded correctly by inspecting the second sheet of the two folded.
If the fold position is not correct:
1) Fold Position Adjustment (Fold Length) Refer page 13 & 14 "Fine Adjustment for table 1 and 2".
2) Skew Adjustment (Slant or Paper is not square) Refer page 10 "Fold Feed Angle / Skew Adjustment".
5.4 Fold Feed Angle / Skew Adjustment
Watch the folded paper ejected from the machine as ejected and refer the chart below. Turn feed adjustment knob right or left to adjust skew.
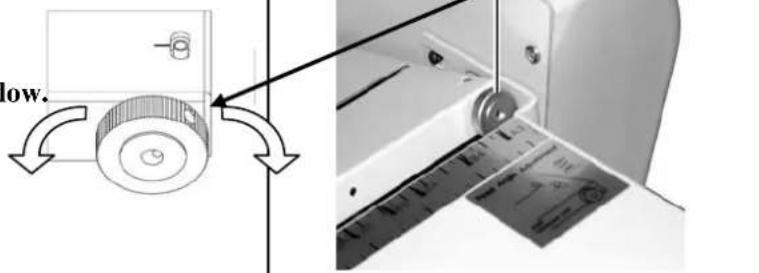
| Folding Pattern | Single Double Parallel Fold Out | |||||
| Arrow shows direction of sheet ejected to stacking tray | 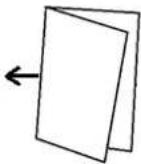 | 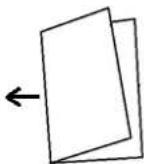 | 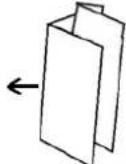 | 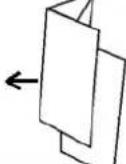 | 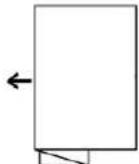 | ←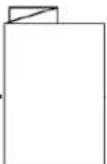 |
| Direction of Feed Adjustment Knob | Turn Left Turn Right Turn Left Turn Right Turn Left Turn Right | |||||
| Folding Pattern | Letter | ZigZag | Gate | |||
| Arrow shows direction of sheet ejected to stacking tray | 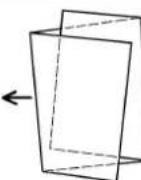 | 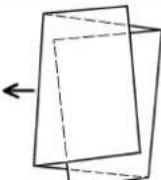 | 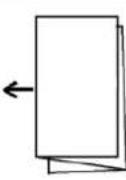 | 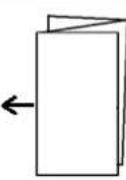 | 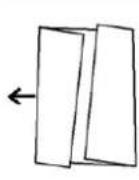 | 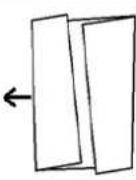 |
| Direction of Feed Adjustment Knob | Turn Left Turn Right Turn Left Turn Right Turn Left Turn Right | |||||
5.5 Continuous Folding:
Press the START/STOP key. The machine will fold the sheets continuously.
Press the START/STOP key again while the machine is in operation in order to stop feeding.
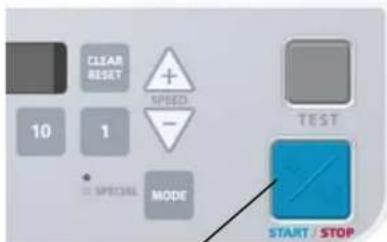
START/STOP Key
5.6 Subtraction Counting:
As each sheet is folded, the number indicated on the display decreases by one.
Press the appropriate numerical key to select the number of sheets to be folded.
Example:
Press the number "10" key twice to select 20.
Note:
The Subtraction counting number is cancelled when the POWER is set to OFF.
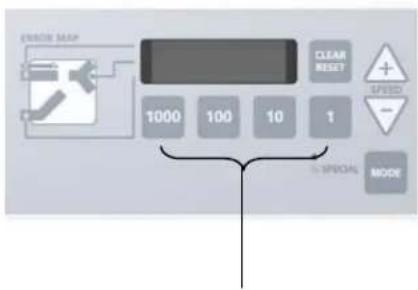
Numerical Key
5.7Cross Folding (Re-Folding):
Cross folding refers to performing the double parallel, letter, or other types of folds on single-folded sheets of paper.
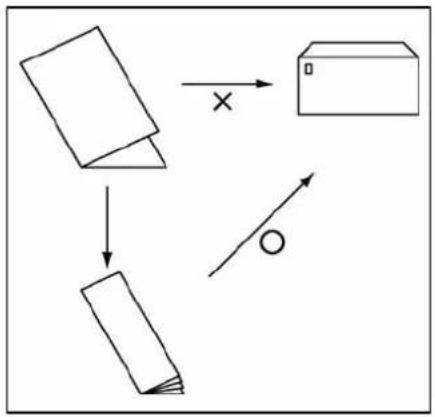
flowchart
graph TD
    A[" folding "] --> B[" packing "]
    B --> C[" x "]
    C --> D[" box "]
    D --> E[" o "]
    E --> F[" direction "]
Note:
The maximum weight of paper that can be used for cross folding is 104.7 g/m^3 .
However, the following variables may affect performance of the paper stock being folded: paper type, paper size, grain direction, printing quality, as well as the relative humidity and temperature of the operating environment.
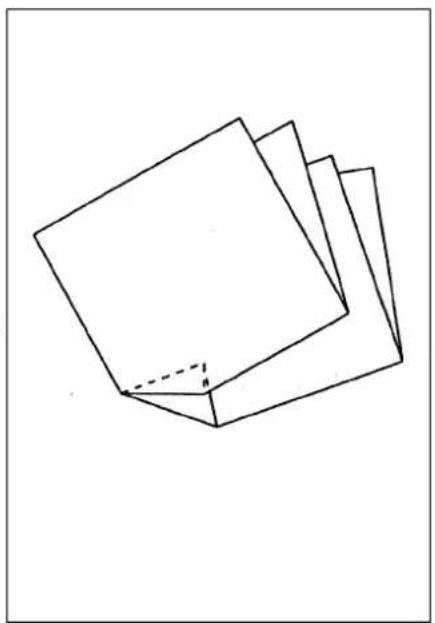
On occasion, fold displacement may occur, causing a corner of the folded paper to be folded inside as indicated in the figure at the right. In these cases, additional fine adjustment may need to be made to the fold tables to eliminate the problem.
natural_image
Simple line drawing of a folded paper or document with no text or symbolsTip:
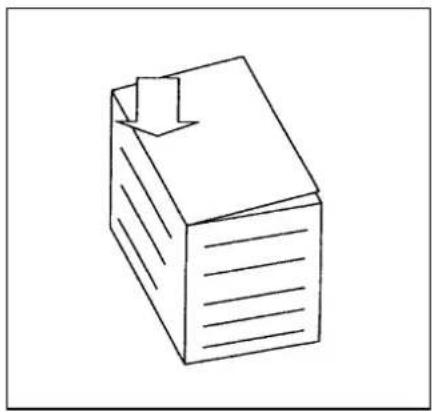
To aid in the cross-folding procedure, press the crease of the single-folded stock flat before attempting to cross fold.
natural_image
Simple line drawing of a stack of papers or documents (no text or symbols)5.8 Fine Adjustments for Table 1
| Fold type Plane (A) | Direction to turn the Table 1 fine adjustment knob | ||
| Single fold | Table 1 is not used | ||
| Gate fold | 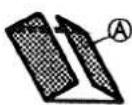 | Long |  |
| Short |  | ||
| Letter fold | 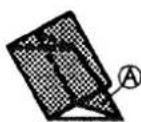 | Long |  |
| Short |  | ||
| Zigzag fold |  | Long |  |
| Short |  | ||
| Double parallel fold |  | Long |  |
| Short |  | ||
| Fold-out Fold | 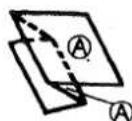 | Long |  |
| Short |  | ||
5.9 Fine Adjustments for Table 2
| Fold type Plane (B) | Direction to turn the Table 2 fine adjustment knob | ||
| Single fold | 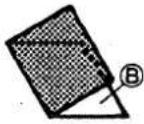 | Long |  |
| Short |  | ||
| Gate fold | 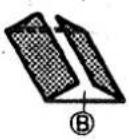 | Long |  |
| Short |  | ||
| Letter fold |  | Long |  |
| Short |  | ||
| Zigzag fold |  | Long |  |
| Short |  | ||
| Double parallel fold |  | Long |  |
| Short |  | ||
| Fold-out fold | 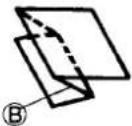 | Long |  |
| Short |  | ||
5.10 Speed adjustment
In the following cases, try to adjust the speed:
- If wrinkles appears or skews occur to sheets of soft paper such as groundwood paper, reduce the speed.
- To reduce the operating sound, reduce the speed.
- When sheets of thick paper jam, increase the speed.
Adjust the speed using the “+” and “-” keys.
The speed is displayed on the counter.
| Displayed mode | Speed | Description |
| LO Low speed Select low speed when folding soft sheets of paper or reducing the operating sound. | ||
| ME Medium speed Basic speed. | ||
| HI High speed Select high speed when folding sheets of thick paper. | ||
When the “MODE” key is pressed and the SPECIAL indicator lamp is lit, the machine enters SPECIAL mode.
Three speed levels can be selected as in the abovementioned case.
| S_LO | Silent sound mode | The machine operates in a silent manner. This mode is not suitable for sheets of thick paper. |
| S_ME | Thick paper mode | Dedicated mode for sheets of thick paper. |
| S_HI | Super high speed mode | The machine can perform folding work at high speed. Sheets of paper of A4 and smaller sizes can be folded only in two, inward three, and four. |
Note!
- After the speed was changed, it is necessary to make a fine adjustment of the folding position.
5.11 Functions that can be set
In this mode, the “interval function (patch processing),” “operation memory,” and “operating sound enabled/disabled” can be set.
Hold down the "MODE" key.
“rb” will be displayed on the seven-segment LED display.
The functions (settings) are enabled when each digit is lit, or they are disabled when each digit is flickering.
Each function can be enabled or disabled by pressing the corresponding key.
The settings will be determined by releasing the "MODE" key.
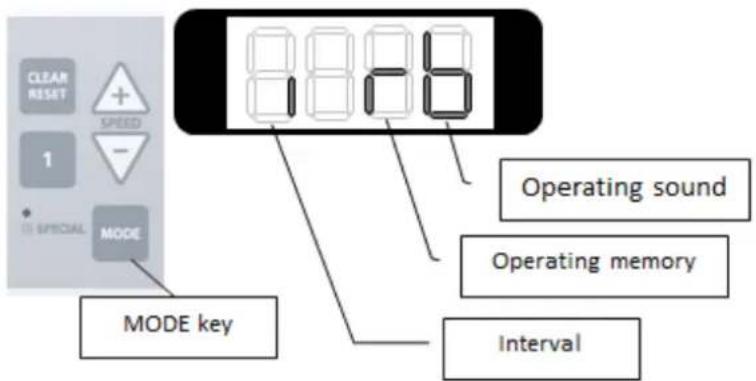
| Displayed character | Function/Setting | Corresponding key | Description |
| i Interval function 1000 See “5.9 Interval function.” | |||
| r | Operation memory setting | 100 Details | Is of the operation performed just before the power is turned off will be saved.The operation saved on the preceding day can be performed as soon as the power is turned on. |
| b | Operating sound enabled/disabled | 10 The | sound produced when a button is pressed and beeps, such as the operation end sound, can be muted. |
5.12 Interval function (batch processing)
The interval function sections the folding operation at each set time.
Select the interval function in the operation of "5.8 Functions that can be set."
Method of switching the screen
The screen switches by pressing the "1000" key.
(Setting check → Sheet count setting → Waiting time setting → Setting check · · ·)
[Sheet count setting]
Enter the number of sheets to be folded in succession (sheet count).
Up to 500 sheets of paper can be set.
[Waiting time setting]
Enter the waiting time (seconds) after successive folding.
Up to 20 seconds can be set.
[Setting Check]
Before starting the folding operation, check the sheet count and waiting time settings on this screen.
* To cancel the interval, flicker “i” by pressing the “MODE” and “1000” keys together.
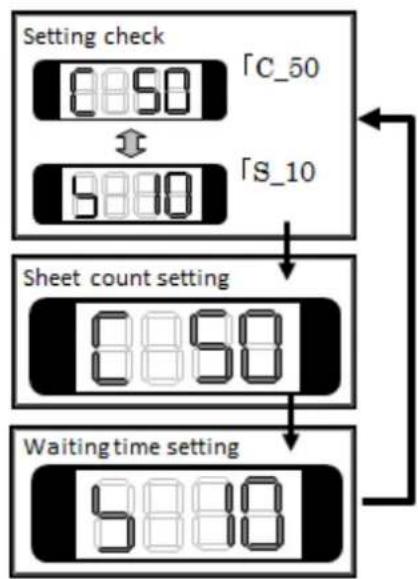
flowchart
graph TD
    A["Setting check"] --> B["8:50"]
    B --> C["9:00"]
    D["Sheet count setting"] --> E["8:50"]
    E --> F["9:00"]
    G["Waiting time setting"] --> H["9:00"]
    H --> I["9:10"]
    J["ΓC_50"] --> K["↑"]
    L["ΓS_10"] --> M["↓"]
    N["←"] --> O["←"]
5.13 Error indications, situations, and measures
The machine will automatically stop in the following cases
| Indication | Situation | Measure |
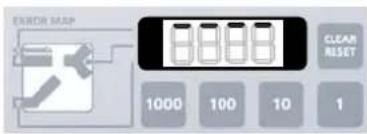 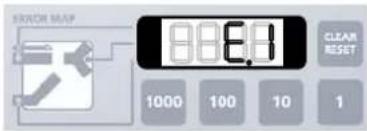 | 1The Start/Stop key was pressed without sheets of paper.2The Start/Stop key or the Test key was pressed with the paper feed table lever shifted up.3 Sheets of paper ran out in the middle of operation in countdown mode. | 1Set sheets of paper.2Shift down the paper feed table lever.3Add sheets of paper. |
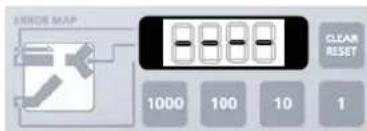 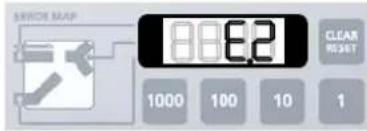 | 1A paper feed slip occurred.2A paper jam occurred in folding cassette 1 or 2 | 1Clean or replace the paper separator and the paper feed rubber rollers. See “6 maintenance” on page 152Detach folding cassette 1 or 2, and remove the jammed paper. |
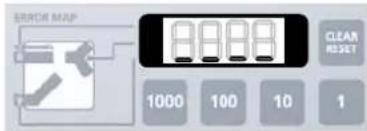 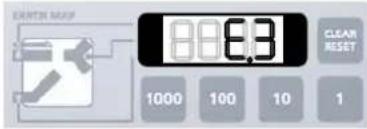 | 1The paper ejection table is full of sheets of paper.2A paper jam occurred in the paper ejection unit.3The paper ejection photosensor is contaminated. | 1Remove the sheets of paper in the paper ejection unit.2Remove the jammed paper.3Clean the paper ejection photosensor.See “6 maintenance” on page 15 |
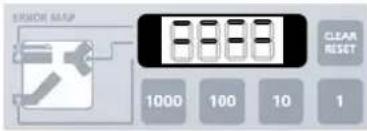 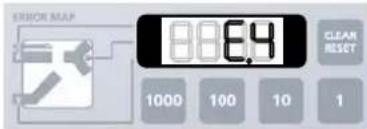 | 1The safety cover is open.2Folding cassette 1 is not properly set.3Folding cassette 2 is not properly set. | 1Close the safety cover.2Reset folding cassette 1.3Reset folding cassette 2. |
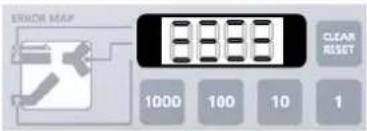 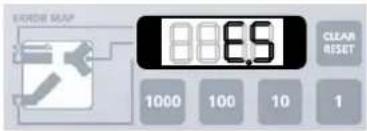 | 1 A paper jam occ cassette 1 or 2.2The speed is low.A paper jam occurred due to a low speed.? | 1Detach folding cassette 1 or 2, and remove the jammed paper.2Increase the speed. |
6. Maintenance (Cleaning and replacement of consumable items)
- Keep roller cover closed to prevent dust from accumulating on the rollers.
- Clean the rollers regularly using a cleaner suitable for rubber rollers or a cloth slightly dampened with water. Do not use solvents or aerosol sprays.
- If paper dust or ink accumulates on the paper rollers or separator, the paper feeding function will deteriorate and may cause a paper jam or slipping. If this happens, clean them using a cleaner suitable for rubber rollers or a cloth slightly dampened with water. Do not use solvents or aerosol sprays.
- Remove any dirt on the exterior parts using alcohol or appropriate cleaner. Do not use solvents.
Two rollers can be removed and installed without using tools. These two can be easily cleaned along with the paper ejection photo sensor.
As the other two rollers cannot be removed, they should be cleaned while slowly revolving them by hand. If only one sheet of paper is being fed, use a soft cotton swab to remove paper dust, etc. from the face of the paper ejection photo sensor shown by the arrow.
(1) Removing the rollers
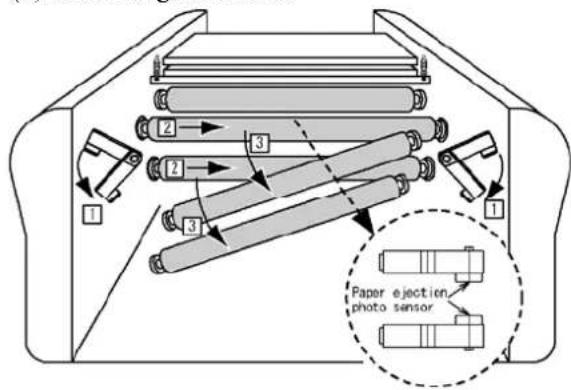
Remove the upper roller in the order of 1 to 3, and then remove the lower roller.
1 Move down the roller setting lever to the OFF position.
② Slide the roller to the right. (Its shaft will come off from the left-side hole.)
3 Remove the roller from the right-side hole.
(2) Setting of the rollers
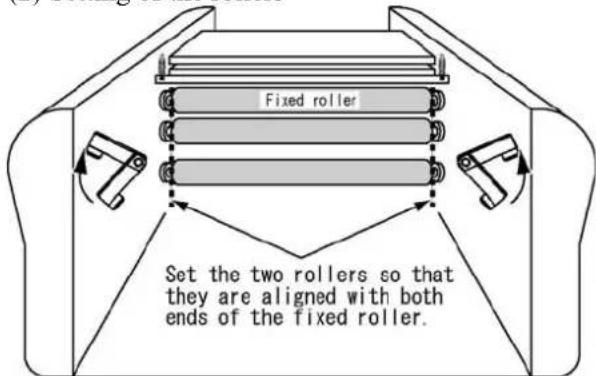
In the reverse order of removal, set the lower roller first.
[1] Insert the roller deep to the right. [2] Slide the roller to the left. * Be careful not to let the roller shaft on both sides get stuck on Part A.
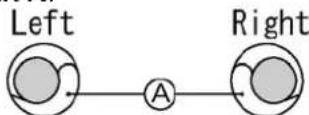
As shown above, the roller shaft should be placed on Part A.
[3] Move up the roller setting lever to the ON position.
Caution!
If the roller is not firmly fixed, it may cause operating problems. If it cannot be fixed, contact your dealer.
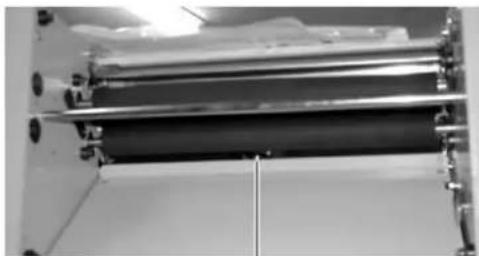
natural_image
Close-up of a mechanical assembly with cylindrical components and mounting brackets (no visible text or symbols)Paper ejection photo paper
7. Troubleshooting
| Trouble | Possible | Cause |
| The paper does not feed properly | Recently printed paper sticks together | Jog the paper sufficiently. Make sure that the ink is dry. |
| Stains on the paper separator | Clean the paper feed separator using appropriate cleaner. | |
| Stains on the paper feed rubber roller | Clean the dust or ink on the paper feed roller using appropriate cleaner. | |
| The paper separator is worn out Install a new paper separator. | ||
| The volume of the paper stacked on the paper feed table is not enough | Add more paper to the feed table – at least 20 sheets or more. | |
| The machine does not operate even after the START/STOP key is pressed | Paper jam inside the unit | Detach Table 1 and 2 and remove the jammed paper from the unit. |
| Wrinkles appear on the paper | Recently printed paper sticks together | Jog the paper sufficiently. Make sure that the ink is dry. |
| Stains on the paper separator | Clean the paper separator using an appropriate cleaner. | |
| Stains on the paper feed roller | Clean the dust or ink on the paper feed roller using an appropriate cleaner. | |
| Stains on paper fold rollers | Clean all four fold rollers using an appropriate cleaner. | |
| Tables 1 and 2 are not properly set Reset properly. | ||
| Paper jam in Table 1 and 2 | Detach Table 1 and 2 and remove the jammed paper. | |
| Improper fold position | The length of the paper is not standard size | Measure the length of the paper and adjust using the fine adjustment knob. |
| Printed paper (13 lbs bond or lighter) is not folded. | The surfaces of the fold rollers are covered with dust or ink, causing them to be slippery | Clean all four fold rollers using an appropriate cleaner. |
| Low room temperature | Operate the machine in a climate-controlled environment. Paper should be at room temperature before folding. Paper stored below 53F is not recommended. | |
Measures
8. Specifications
| Model 208j | Manual Folder |
| Paper size | 3.5” × 5” to 11” × 17”Smallest size for single fold only. |
| Paper quality | High- to medium-quality paper46.5g/㎡~140g/㎡Up to 210 g/㎡ bond for Single Fold only.Up to 104.7 g/㎡ for Cross-Fold(Re-Fold) |
| Fold type | •Single, Letter, Zigzag, Double Parallel, Fold Out, GateCross-Fold(Re-Fold). |
| Fold dimensions | MaximumTable 1: 13”Table 2: 9 ^1/_2 ” |
| MinimumTable 1: 2”Table 2: 1 ^1/_2 ” | |
| Paper feed system | Three-roller friction feed/separation system |
| Max. stacking capacity | 500 sheets of 20# Bond |
| Folding speed 2,400 – 144,00 sheets/h (8.5 x 11, single fold) | |
| Operation Manual | |
| Power Supply 100-240VAC, 50/60 Hz | |
| Available functions | Fold skew adjustment, fold length adjustment, paper jam detection,four digit counter(addition/subtraction), test fold, auxiliary paper guide forcross-folding(re-folding) and Jam map indication. |
| Power consumption | 50W |
| Dimensions | W 40” × D 21 ^1/_2 ” × H 20” (during use)W 18” × D 21 ^1/_2 ” × H 13” (during storage) |
| Net weight 60 lb | |
- Safety Instructions
- Danger
- Caution
- Warning
- Contents
- Accessories
- Description of Parts
- Designation and Functions of Operation Panel
- Preparation
- Install Table 1 and 2:
- Caution:
- Note:
- Setting the paper exit roller:
- Example:
- Operation Procedure
- Switch the Power to ON
- Setting Fold Plate Table Position
- Test Folding
- Fold Feed Angle / Skew Adjustment
- Continuous Folding:
- Subtraction Counting:
- 5.7Cross Folding (Re-Folding):
- Tip:
- Fine Adjustments for Table 1
- Fine Adjustments for Table 2
- Speed adjustment
- Note!
- Functions that can be set
- Interval function (batch processing)
- Error indications, situations, and measures
- Maintenance (Cleaning and replacement of consumable items)
- Caution!
- Troubleshooting
- Specifications
Brand : MBM
Model : 208J
Category : Uncategorized