
BIM26H34 - Sorbet maker Summit - Free user manual and instructions
Find the device manual for free BIM26H34 Summit in PDF.


| Product Type | Ice Maker |
| Model | BIM26H34 |
| Voltage / Frequency | AC 115V / 60Hz |
| Rated Ice Making Current | 1.9A |
| Rated Ice Harvest Current | 1.5A |
| Refrigerant | R600a, 1.58 oz |
| Indoor/Outdoor Use | Indoor / Limited Outdoor (under cover) |
| IP Rating | IPX4 |
| ADA Compliant | Yes |
| Installation Type | Free standing / Built-in |
| Working Temperature | 50°F - 100°F |
| Working Water Pressure | 20 - 80 Psi |
| Ice Storage Capacity | 22 lbs max |
| Ice Production (at 50°F) | 25 lbs/day |
| Ice Shape | Crescent |
| Ice Cube Dimensions (approx.) | 1/2" × 3/4" × 2-3/8" |
| Unit Dimensions (W × D × H) | 14-7/8" × 18-7/8" × 31-7/8" |
| Net Weight | 61 lbs |
| Material | Stainless steel door, black cabinet |
| Door Hinge | Reversible (left or right) |
| Water Connection | Quick fitting (7/16"-24 thread) |
| Included Accessories | Ice bucket, ice scoop, handle, filter, leveling feet |
| Warranty | 1 year limited, 5 years compressor |
| Defrost Frequency | Every 4-6 weeks |
Frequently Asked Questions - BIM26H34 Summit
User questions about BIM26H34 Summit
0 question about this device. Answer the ones you know or ask your own.
Ask a new question about this device
Download the instructions for your Sorbet maker in PDF format for free! Find your manual BIM26H34 - Summit and take your electronic device back in hand. On this page are published all the documents necessary for the use of your device. BIM26H34 by Summit.
USER MANUAL BIM26H34 Summit
natural_image
Line drawing of a simple rectangular refrigerator with lid and side panel (no text or symbols)Model: BIM26H32/BIM26H34/ BIM27OSADA/BIM271OS
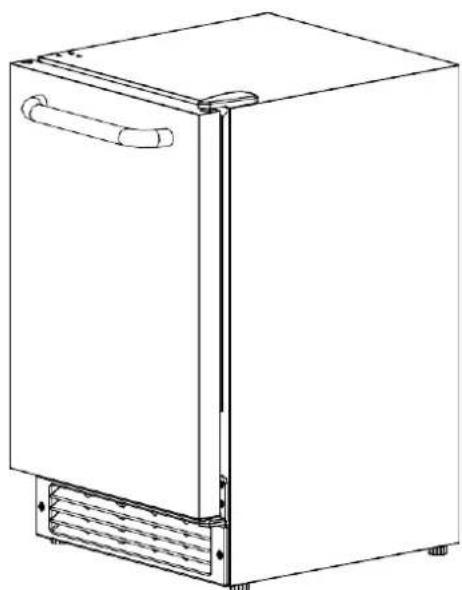
natural_image
Line drawing of a simple refrigerator with lid and side panel (no text or symbols)Model: BIM26
Free Standing / Built-in User's Manual
Felix Storch, Inc.
An ISO 9001:2008 registered company
770 Garrison Avenue
Bronx, NY 10474
www.summitappliance.com
IMPORTANT SAFETY INSTRUCTIONS

DANGER – Risk of fire or explosion. FLAMMABLE REFRIGERANT USED. Do not use mechanical devices to defrost the refrigerator. Do not puncture refrigerant tubing.
DANGER – Risk of fire or explosion. FLAMMABLE REFRIGERANT USED. To be repaired only by trained service personnel. Do not puncture refrigerant tubing.
CAUTION – Risk of fire or explosion. FLAMMABLE REFRIGERANT USED. Consult repair manual/owner's guide before attempting to service this product. All safety precautions must be followed.
CAUTION – Risk of Fire or Explosion. Dispose of properly in accordance with the applicable federal or local regulations. FLAMMABLE REFRIGERANT USED.
CAUTION - Risk of fire or explosion due to puncture of refrigerant tubing; follow handling instructions carefully. FLAMMABLE REFRIGERANT USED.
- WARNING: Keep ventilation openings, in the appliance enclosure or in the built-in structure, clear of obstruction.
- WARNING: Do not use mechanical devices or other means to accelerate the defrosting process, other than those recommended by the manufacturer.
- WARNING: Do not damage the refrigerant circuit.
- WARNING: Do not use electrical appliances inside the food storage compartments of the appliance, unless they are of the type recommended by the manufacturer.
POWER CORD PRECAUTIONS
- Do not use the appliance if the power cord is damaged. If the power cord is damaged, have a qualified electrician replace the power cord.
- Never lift, carry, or drag the appliance by the power cord.
- Do not connect or disconnect the electric plug when your hands are wet.
- Never unplug the appliance by pulling on the power cord. Always grip the plug firmly and pull straight out from the outlet.
MOVING PRECAUTIONS
- When moving the appliance, do not turn it upside-down and do not tilt it more than 45 degrees.
- Do not move the appliance without emptying it and securing the door in the closed position.
INSTALLING PRECAUTION
- Connect to potable water supply only.
OTHER PRECAUTIONS
- To ensure proper ventilation for the appliance, keep obstructions away from the front of the unit.
- Keep fingers out of the “pinch point” areas. Clearance between the door and cabinet are small. Be careful closing the door when children are in the area.
- Do not touch the evaporator with your hand when the appliance is operating.
- Do not attempt to repair or replace any part of your appliance unless this manual specifically recommends it. Have a qualified technician perform all other service on the unit.
-
Children 8 years of age and older and people with reduced physical, sensory, or mental capabilities or lack of experience and knowledge can use this appliance if they have been given supervision or instructions concerning the use of the appliance in a safe way and they understand the hazards involved.
-
Never allow children to operate, play with or crawl inside the appliance.
- Never allow children to clean and maintain the machine without supervision.
- Do not use the appliance other than for its intended purpose.
- Do not touch the condenser surfaces. They are sharp and can be easily damaged.
CLEANING AND MAINTENANCE PRECAUTIONS
- Never clean the appliance parts with flammable fluids. Do not store or use gasoline or other flammable vapors and liquids in the vicinity of this appliance or any other appliances. The fumes can create a fire hazard or explosion.
- Do not use solvent-based cleaning agents or abrasives on the interior. These cleaners may transmit taste to the ice cubes, or damage or discolor the interior.
- If the appliance has not been used for a long time, thoroughly clean it before the next use. Carefully follow any instructions provided for cleaning or the use of sanitizing solution. Do not leave any solution inside the appliance after cleaning.
DISPOSAL
The appliance cannot be treated as normal domestic trash but must be taken to a collection point for recycling electric and electronic appliances. Further information about the recycling of this product can be obtained from your local municipal authorities.
This appliance is intended to be used in household and similar applications such as
– staff kitchen areas in shops, offices, and other working environments
– farmhouses and by clients in hotels, motels, and other residential type environments
- bed and breakfast type environments
- catering and similar non-retail applications.
THE MANUFACTURER DISCLAIMS ANY RESPONSIBILITY IF THE ABOVE INSTRUCTIONS ARE NOT FOLLOWED.
TABLE OF CONTENTS
Product Overview and Specs 1 - 3
Installation
Before Using Your Ice Maker .... 4
Installing the Ice Maker 5
Installing the Handle 6
Reversing the Door Swing....7
Filter Installation Instructions....9
Built-in Installation....10
Raising the Height of the Unit....11
Electrical Connection 12
Extension Cord....12
Connecting the Water Supply 12
Operation
Initial Set-Up....13
Maintenance
Cleaning Your Ice Maker....13
Power Failure....14
Vacation Time/Storage....14
Moving Your Ice Maker 14
Energy-Saving Tips....14
Troubleshooting 15-16
Limited Warranty....17
Product Overview and Specs
| Model | BIM26H32 / BIM26H34 / BIM27OSADA / BIM271OS | BIM26 |
| Voltage/Frequency | AC 115V 60Hz | AC 115V 60Hz |
| Rated Ice making current | 1.9A | 1.2A |
| Rated Ice harvest current | 1.5A | 1.5A |
| Refrigerant | R600a, 1.58Oz. | R600a, 1.69Oz. |
| Indoor/Outdoor | Indoor/Outdoor* | Indoor |
| IP Rating | IPX4 | N/A |
| ADA | Yes | Yes |
| Installation Type | Free standing / Built-in | Free standing / Built-in |
| Working temperature | 50°F - 100°F | 50°F - 100°F |
| Working water pressure | 20 ~ 80 Psi | 20 ~ 80 Psi |
| Ice Storage Capacity | 22 lbs. maximum | 12 lbs. maximum |
| Ice-making Capability at 50°F | 25 lbs./day** | 15 lbs./day** |
| Ice Shape | Crescent | Crescent |
| Ice Cube Dimensions (Approximate) | 1/2 "×3/4 "×2-3/8 " | 7/8" × 7/8" × 2-3/8" |
| Unit Dimension (W×D×H) | 14-7/8 "× 18-7/8 "×31-7/8 " | 14-7/8"×18-7/8"×25" |
| Net Weight | 61 lbs. | 50 lbs. |
* When used in a limited outdoor environment: the unit must be under an awning or canopy and shall not be exposed directly to rain.
**The actual quantity of ice produced per day will vary with ambient room and water conditions.
NOTE: Technical data and performance information are provided for reference only and subject to change.
Models: BIM26H32/BIM26H34/BIM27OSADA/BIM271OS
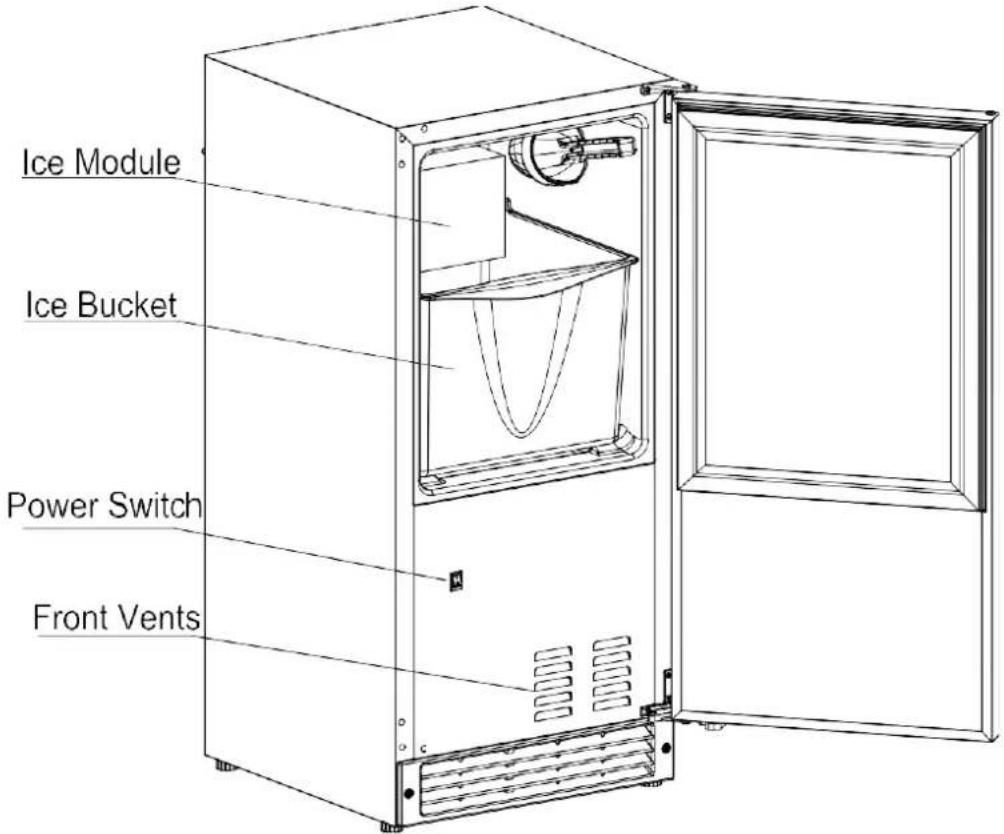

Model: BIM26

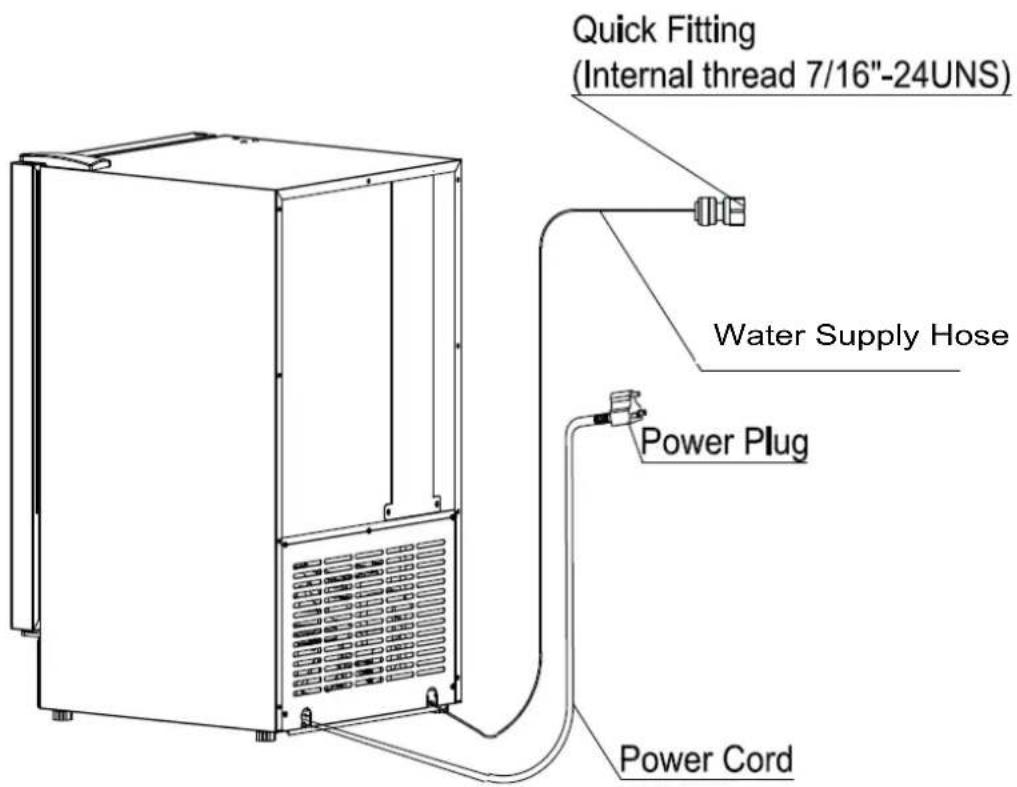
Accessories
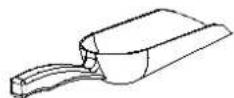
Ice Scoop
natural_image
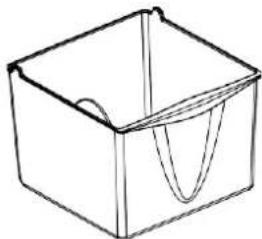
Simple line drawing of a rectangular box with internal curved lines (no text or symbols)Ice Bucket

Handle

Quick Fitting
[BIM26H32/BIM26H34/BIM27OSADA/BIM271OS ONLY]
natural_image
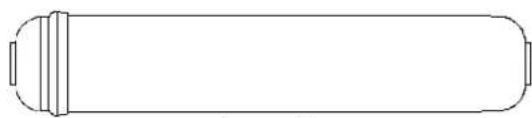
Simple line drawing of a cylindrical object with rounded ends and a central slot (no text or symbols)In Line Filter
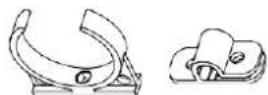
Clips
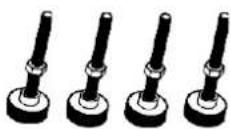
High Feet × 4
natural_image
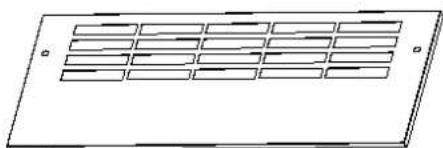
Pure technical diagram of a rectangular panel with internal grid lines, no text or symbols presentLower Grill
INSTALLATION
BEFORE USING YOUR ICE MAKER
- REMOVE THE EXTERIOR AND INTERIOR PACKAGING MATERIAL.
- CHECK TO BE SURE YOU HAVE ALL OF THE FOLLOWING PARTS:
• 1 DOOR HANDLE
- 1 ICE BUCKET
• 1 ICE SCOOP
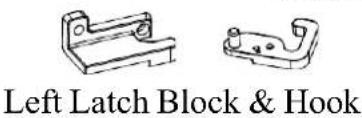
• 1 DOOR LATCH HOOK
• 1 DOOR LATCH BLOCK
• 1 QUICK FITTING [for connecting to the water supply]
- 1 IN LINE FILTER
- 1 FILTER CLIP
• 1 WATER LINE CLIP
• 1 ALTERNATIVE LOWER GRILL
• 4 ALTERNATIVE HEIGHT-ADJUSTABLE FEET
• 1 INSTRUCTION MANUAL
- Before connecting the ice maker to the power source, let it stand upright for approximately 4 hours. This will reduce the possibility of a malfunction in the cooling system from handling during transportation.
- Clean the interior surface with lukewarm water using a soft cloth.
INSTALLING THE ICE MAKER
CAUTIONS:
- The appliance shall not be exposed to rain even for the model with IPX4.
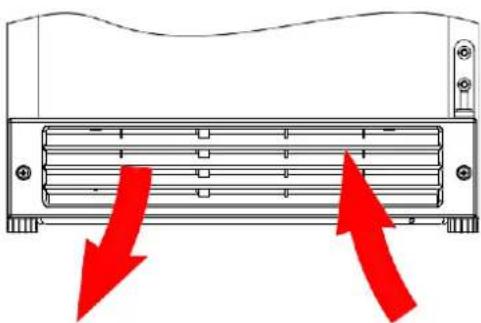
- This appliance is designed to expel hot air through the front vent. This allows for installation in a recessed or built-in application, if desired.
- Place your ice maker on a level surface that is strong enough to support the ice maker when it is fully loaded. The unit will be significantly heavier once it is operational and fully loaded. Level your ice maker by adjusting the legs at the front of the ice maker.
- Place the ice maker away from direct sunlight and sources of heat (stove, heater, radiator, etc.). Direct sunlight may affect the finish and heat sources may increase electrical consumption. Extreme cold ambient temperatures may also cause the ice maker to malfunction. This ice maker is designed for installation indoors in “room temperature” ambient conditions or outdoors in covered areas not exposed to direct sunlight or rain (outdoor model only).
- Position the unit to allow unrestricted airflow through the front grill, do not place the unit in the moist/humid areas. Too much moisture in the air can cause frost to form quickly on the evaporator which will require frequent defrosting.
- Plug the ice maker into a professionally installed grounded wall outlet. Do not under any circumstances cut or remove the third (ground) prong from the power cord. Any questions concerning power and/or grounding should be directed toward a certified electrician.

natural_image
Diagram of a server rack with red arrows indicating downward pressure or flow, no text or symbols presentINSTALLING THE HANDLE
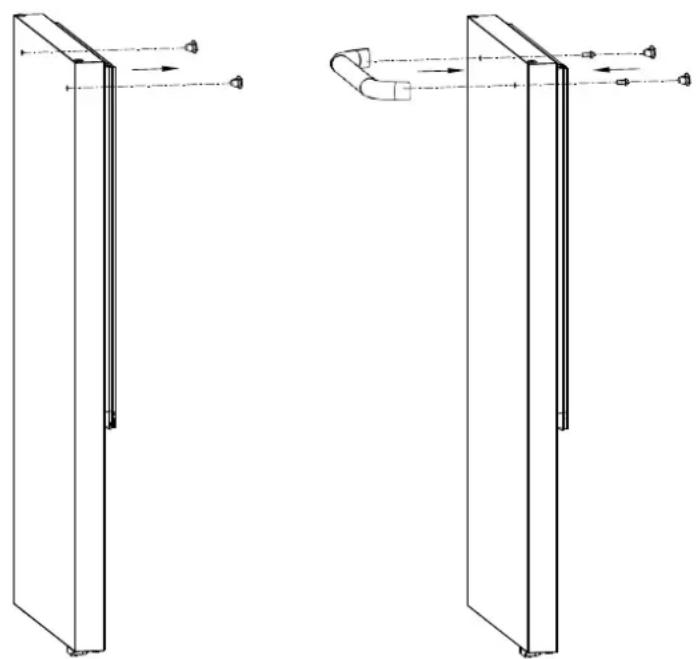
This appliance comes with a stainless steel handle. To install the handle please follow the below instructions:
Tools needed: Phillips screwdriver
natural_image
Technical line drawing of two door frame structures with directional arrows indicating movement (no text or symbols)-
Peel away the gasket from behind the door. There are two mounting holes covered by caps. Remove those caps and insert the screws into the hole.
-
On the other side of the door, align the handle with the screws from step 1. Tighten the screws using a Phillips head screwdriver until the handle is flush and secured tightly against the door. (DO NOT OVERTIGHTEN as this will cause the handle to become damaged.)
-
Reinstall the mounting caps, and the door gasket to its original position.
NOTE: If you choose not to use the handle supplied, simply follow step 1 to access the installation screws, remove them, and then place the two decorative plugs into the two holes separately. Continue to step 3 to replace the door gasket to its original position.
REVERSING THE DOOR SWING
This appliance can have the door open from either the left or right side. The unit is delivered with the door opening from the left side (hinged on the right).
Tools needed: flathead screwdriver, Phillips screwdriver
IMPORTANT: Before you begin, make sure the ice maker is unplugged.
For Models: BIM26H32/BIM26H34/BIM27OSADA/BIM271OS

natural_image
Technical line drawing of a refrigerator internal components with mounting brackets and internal wiring (no text or symbols)REMOVING THE DOOR
- Using a flathead screwdriver, separate the axis from the top right hinge and set it aside.
- Open the door 20^ around the axis of bottom right hinge, then lift the door off.
REPOSITIONING THE HINGES
- Unscrew the top and bottom hinges and the right latch block and cover the mounting holes with the caps that are in the in the opposite hinge.
- Install the bottom right hinge on the top left and leave the hinge axis open, then install the top right hinge on the bottom left with the left latch block.
REINSTALLING THE DOOR
- Unscrew to take away the right latch hook located at the bottom of the door and install the left latch hook on the opposite side.
- Install the door on the bottom hinge, and then install the top hinge axis. Tighten the screws firmly.
For Model BIM26

natural_image
Technical line drawing of a refrigerator internal compartments with mounting hardware (no text or symbols)- Open the screw cap and unscrew the three bolts to remove the top hinge, then lift out the door.
- Peel off the door gasket, locate the door handle mounting screw behind the gasket and unscrew it to remove the door handle. Use the spare plugs in the accessories bag to cover the mounting holes.
- Remove the 2 plugs at the front of the door and install the door handle on the opposite side, then reinstall the door gasket to complete the reversal of the door handle.
- Unscrew the bottom hinge to remove it. Then, remove the caps on the left side of the cabinet and install the bottom hinge on the left side of the unit.
- Install the door on the bottom hinge and then install the top hinge on the left side. Tighten the screws firmly to complete the installation.
Filter Installation Instructions
[BIM26H32/BIM26H34/BIM27OSADA/BIM271OS ONLY]
Tools needed: Phillips screwdriver

- Connecting the filter to the potable water supply
Remove the blue clip to remove the filter's plug, then connect the filter to potable water supply by inserting the water supply tube to the inlet end of the filter. Reinsert the clip to lock the tube.
- Purge
It is important you let the water run for 5 minutes to purge the system and to allow you to check for any leaks.
- Ice Maker Connection
Cut the water hose to an appropriate length (we recommend at least 21"). Remove the blue clips and insert the ice maker's water supply hose onto the outlet end of the filter. Reinsert the clip to lock the tube in place and then run the water to check for leaks.
- Fixing the filter
Using a screwdriver, install the filter clip onto the back of the unit, affix the filter clip onto the back of the unit, and affix the filter to the clip then, install the water line clip on the lower back of the unit to affix the water tube.
NOTE: The water filter must be replaced every 6-12 months depending on the water quality.
Built-in Installation
This product is designed to seamlessly integrate into a space that must follow the specifications in the table below which require precise measurement. The opening must be square and plumb front to back. Although not required, you can increase the overall width of the cutout to make the installation process easier.
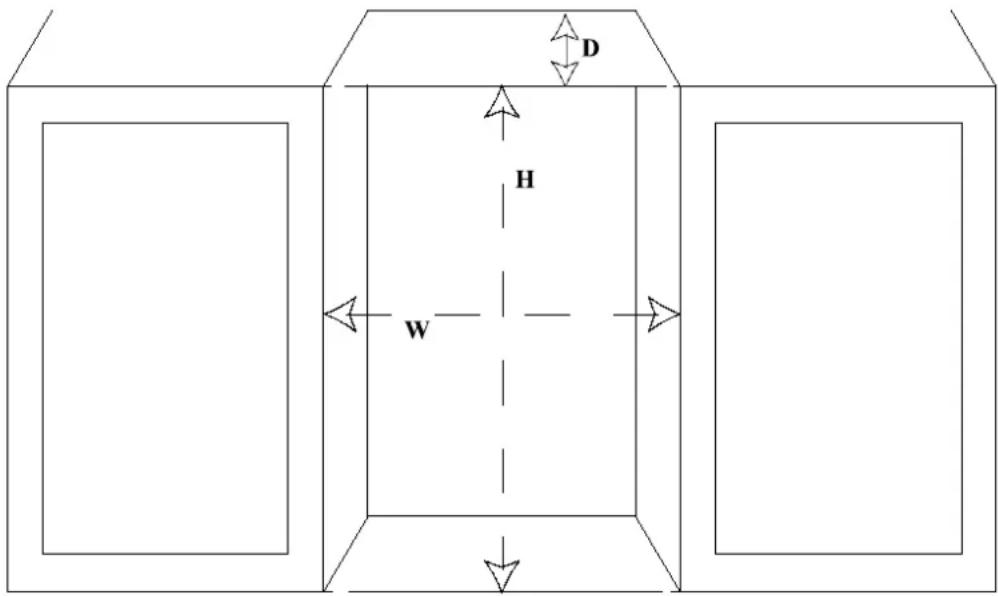
Model Specifications Table
| Specifications | Dimensions Cutout Dimensions | |||
| Model | BIM26H32/BIM26H34/BIM27OSADA/BIM271OS | BIM26 | BIM26H32/BIM26H34/BIM27OSADA/BIM271OS | BIM26 |
| Width | 1478" | 1478" | 1538" | 1538" |
| Depth | 1878" | 1878" | 2278" | 2078" |
| Height | 3178" | 25" | 3238" | 2514" |
NOTE: For models BIM26H32/BIM26H34/BIM27OSADA/BIM271OS, to be able to fully access the ice bucket, the door will need to open to at least 130^ , aligned to the cabinet when installing the unit.

Raising the Height of the Unit [BIM26H32/BIM26H34/BIM27OSADA/BIM271OS ONLY]
This ice maker is ADA compliant, but by switching to the alternate feet provided, the default height can be adjusted to 33 ½" and up to 34 ½".
Tools needed: Phillips screwdriver
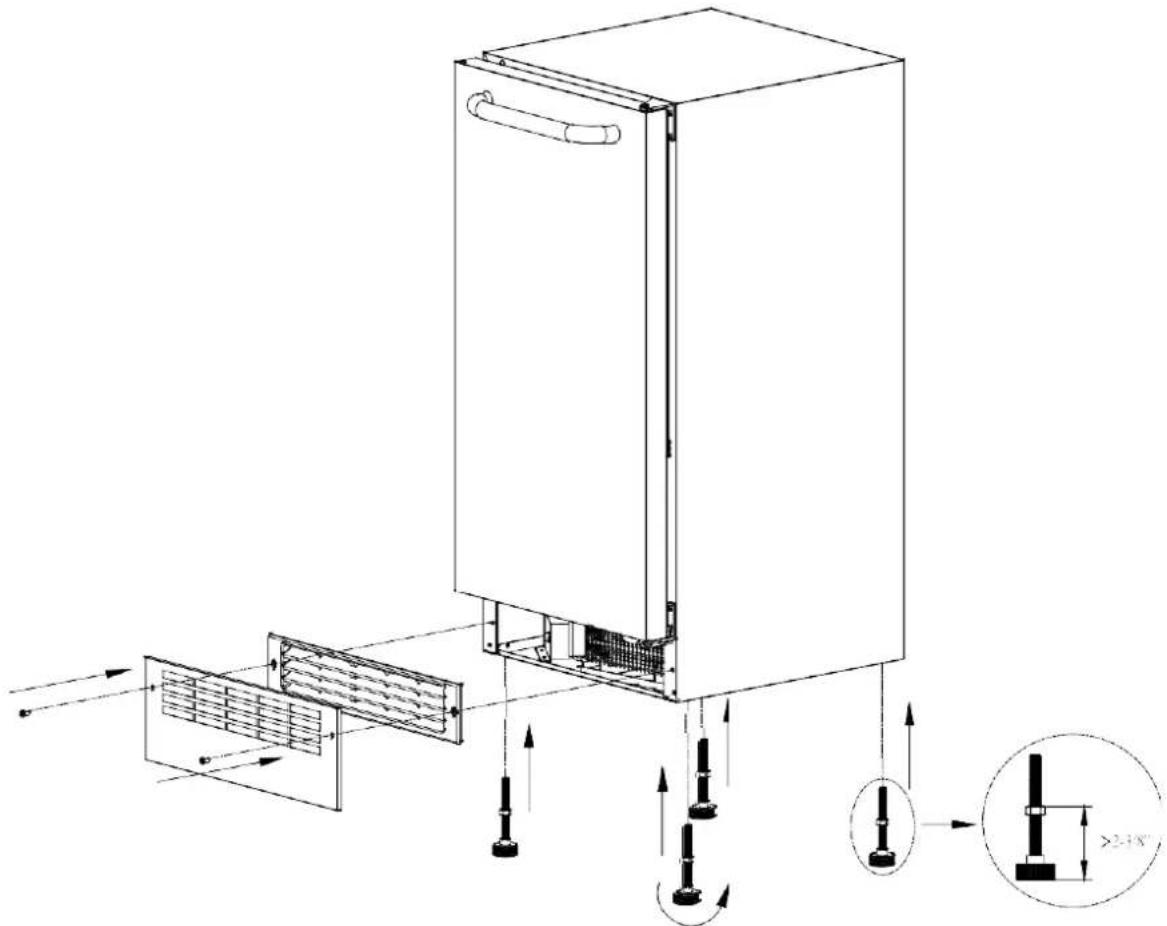
Changing the Feet
Using two or more people, lean the ice maker onto its back and unscrew the pre-installed leveling feet and replace it with the high feet.
NOTE: If the nut on the feet are lower than the factory default height (2 38 "'), the steel grill will not fit.
Lower Grill Change
Unscrew the two bolts that fixing the lower grill, stacking the stainless grill on the plastic grill, install them together.
Note: If the location nut on the feet are lower than the default height (2 18 " ), the alternative lower grill will not be fit.

natural_image
Line drawing of a single refrigerator with side-mounted door and ventilation slots (no text or symbols)ELECTRICAL CONNECTION
- This ice maker should be properly grounded for safety. The power cord of this ice maker is equipped with a three-prong plug which fits into standard three prong wall outlets to minimize the possibility of electrical shock
- Do not under any circumstances cut or remove the third ground prong from the power cord supplied.
- Do not use an extension cord to connect power to the unit.
- Do not use a two-prong grounding adapter.
- If you only have a two-prong wall outlet, contact a qualified electrician to have it replaced with a 3-prong outlet in accordance with applicable electrical codes.
• This ice maker requires a standard 115 volts AC. 60Hz electrical outlet with three-prong ground.
• The cord should be secured behind the ice maker and not left exposed or loose.
EXTENSION CORD
Because of potential safety hazards, this appliance is not recommended for use with an extension cord. However, if you must use an extension cord, use only a UI/cul-listed, 3-wire grounding type appliance extension cord with a grounding type plug and outlet. The electrical rating of the cord must be 115 volts and at least 10 amps.
CONNECTING THE WATER SUPPLY
WARNING: Connect to potable water supply only.
All the necessary hardware is not provided (as the plumbing fixtures at the installation point may differ) for installation so you must hire a professional licensed plumber to complete the installation.
- Connect the water supply tube to the nearest cold water source. Connect sufficient tubing to the unit to allow the appliance to be moved freely for cleaning and service. Also make sure that the tubing is not pinched or damaged during transportation/installation.
- Wipe the inside of unit and ice bucket with a damp cloth.
- Plug the appliance into a 115/120v polarized and grounded wall electrical outlet.
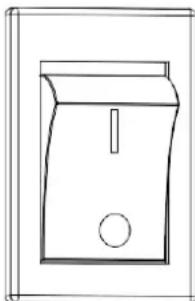
- Place the on-off switch in the "I" position.
- Make sure the water supply is on. As soon as the inner mechanism reaches the proper temperature, the icemaker mechanism will fill the mold with water.
- The first cubes may be small because of air in the water line. Later cubes will be of standard crescent type size.
- Approximate time for the first cycle is between 30-40 minutes.
- Each cycle approximately will take 5 oz of water so you should have a full tray after 11 hours.
IMPORTANT: THROW AWAY ALL ICE CUBES MADE DURING THE FIRST 3 HOURS OF OPERATION.
- When the ice bucket is full, the ice making mechanism will automatically shut off. If the ice cubes melt, the ice making mechanism will start again.
- Ice delivery may be paused by raising the metal arm into an upright position
- If the icemaker is not used regularly, it is recommended that the ice bucket be emptied periodically to ensure fresh ice.
- Sometimes the cubes may appear cloudy. This is due to the rapid freezing of the ice cube. This is trapped air in the water and does not affect the taste and quality of the ice.
- The front grille should be kept free of dust and lint to allow free airflow.
Do not store explosive substances such as aerosol cans with a flammable propellant in this appliance.
IMPORTANT: This unit should be defrosted approximately every 4-6 weeks or when frost on the ice maker walls is excessive or more than 14'' thick. If the ambient temperature is above 100^ (38°C), defrosting should be done more often, or the ice production will be affected. To defrost, turn the unit off, remove cubes and keep door open at least two inches.
MAINTENANCE
CLEANING YOUR ICE MAKER
- Turn the switch control to "off", unplug the ice maker and remove the bucket.
- Wash the inside with a warm water and baking soda solution. The solution should be about 2 tablespoons of baking soda to a quart of water.
- Wash the bucket with a mild detergent solution.
- The outside of the ice maker should be cleaned with mild detergent and warm water.
- The stainless steel components of the door should be cleaned with stainless steel cleaner
- The condenser coils should be vacuumed when they are dusty or dirty
natural_image
Simple line drawing of a door with a handle and circular button (no text or symbols)CAUTION
Failure to unplug the ice maker when cleaning, moving, or servicing it could result in electrical shock or personal injury.
POWER FAILURE
Most power failures are corrected within a few hours and should not affect the temperature of your ice maker if you minimize the number of times the door is opened. If the power is going to be off for a longer period of time, you should take the proper steps to disconnect your appliance.
- Shut off the water supply at the main water valve.
- Disconnect the water supply line from the valve.
- Pour away the water and ice that in the ice bucket.
- Allow the unit to run for an hour or two until all remaining ice cubes have been ejected and all water has cycled through the system and has been made into ice cubes.
- Disconnect the unit from the main power source.
- Dry out excess water from the ice maker assembly
- Leave the door open at least two inches.
MOVING YOUR ICE MAKER
- Securely tape down all loose items inside your ice maker.
- Screw the leveling screws up to the base (the shortest length possible) to avoid damage.
- Tape the door shut.
- Make sure the ice maker stays in the upright position during transportation.
ENERGY SAVING TIPS
- The ice maker should be located in the coolest area of the room, away from heat sources, and out of the direct sunlight.
TROUBLESHOOTING GUIDE
Before Calling for Service:
If the unit is malfunctioning, read through the troubleshooting guide below. Some of the problems mentioned in the Troubleshooting Guide can be solved easily without a service call.
| Problem | Possible Cause | Possible Solution |
| The ice maker does not operate. | The ice maker is unplugged. | Plug in the ice maker. |
| The circuit breaker is tripped. | Check the breaker. If the problem occurs again, call for service to check for a short circuit in the unit. | |
| The ice maker's power button is set to OFF. | Switch the ice maker's power button to ON. | |
| If the ambient temperature is over 110°F, the ice maker may overheat and initiate a failsafe to prevent damage. | If the failsafe occurs, do not restart the unit until the ambient temperature is lower than 86°F. | |
| The ice storage bin is full of ice, or the wire shut-off arm is locked in the up position. | Remove some of the ice. Be sure the wire shut-off arm is lowered. | |
| The water does not feed in after the ice maker starts. | The water supply tap is turned off. | Turn on the water supply tap. |
| Water inlet valve malfunction | Call Service. | |
| The water supply pipe is not properly connected. | Reconnect the water supply pipe. | |
| Water is leaking out of the unit. | The water supply connection is leaking. | Tighten the fitting. |
| A small amount of water in the ice bin | First initial cycle may add extra water and cause the ice module to overflow. | This is normal, wipe up excess water and check next cycle. |
| No ice is produced. | The wire shut-off arm is locked in the upright position. | Lower the wire shut-off arm. |
| Refrigerant leak. | Call Service. | |
| Ice Module malfunction. | Call Service. | |
| No water is being supplied to the unit. | Turn on the water or contact a plumber. | |
| The machine makes ice, but at a very slow rate. | The condenser is dirty. | Clean the condenser. |
| The air flow to the ice maker is obstructed. | Check the unit to ensure the air flow to the ice maker is not blocked. | |
| The ambient temperature is high, or the unit is near a heat source. | Check the area the unit is in to ensure the ambient temperature is in the proper range. | |
| The ice cubes are partially formed. | There is not enough water in the water trough. | Check if the water supply pressure is below 20 psig. The water supply or filter may be restricted. |
| The thermostat may have been adjusted to the warmest temperature setting. | Adjust thermostat towards the COLDEST. | |
| Abnormal Ice, melting or formed together | The ambient temperature is high, or the unit is near a heat source. | Adjust thermostat towards the COLDEST. |
| The door gasket does not seal properly. | Check the door is properly closed. | |
| The power is off. | Check power supply. | |
| There is a refrigerant leak. | Call Service. | |
| The unit accumulates frost and must be defrosted often. | Door is not properly closed door left open for too long when retrieving ice. | Defrost the ice maker as needed. Keep the door closed as much as possible. |
| High humidity environment | Increase the defrost frequency | |
| There is noise during operation. | The unit may not be leveled and secure. | Level and secure the unit. |
If your appliance shows other symptoms than those described above, or if you have checked all items listed as the cause and the problem still exists, then call Summit Appliance Customer Service at 1-800-932-4267 between 9 AM and 5 PM ET or visit our website at any time at https://www.summitappliance.com/support/ and we will do our best to answer your questions.
ONE-YEAR LIMITED WARRANTY
Within the 48 contiguous United States, for one year from the date of purchase, when this appliance is operated and maintained according to instructions attached to or furnished with the product, warrantor will pay for factory- specified parts and repair labor to correct defects in materials or workmanship. Service must be provided by a designated service company. Outside the 48 states, all parts are warranted for one year from manufacturing defects. Plastic parts, shelves and cabinets are warranted to be manufactured to commercially acceptable standards, and are not covered from damage during handling or breakage.
5-YEARS COMPRESSOR WARRANTY
- The compressor is covered for 5 years.
2 Replacement does not include labor.
ITEMS WARRANTOR WILL NOT PAY FOR:
- Service calls to correct the installation of your appliance, to instruct you how to use your appliance, to replace or repair fuses or to correct wiring or plumbing.
2 Service calls to repair or replace appliance light bulbs or broken shelves. Consumable parts (such as filters) are excluded from warranty coverage. - Damage resulting from accident, alteration, misuse, abuse, fire, flood, acts of God, improper installation, installation not in accordance with electrical or plumbing codes, or use of products not approved by warrantor.
- Replacement parts or repair labor costs for units operated outside the United States.
- Repairs to parts or systems resulting from unauthorized modifications made to the appliance.
- The removal and reinstallation of your appliance if it is installed in an inaccessible location or is not installed in accordance with published installation instructions.
DISCLAIMER OF IMPLIED WARRANTIES; LIMITATION OF REMEDIES
CUSTOMER'S SOLE AND EXCLUSIVE REMEDY UNDER THIS LIMITED WARRANTY SHALL BE PRODUCT REPAIR AS PROVIDED HEREIN. IMPLIED WARRANTIES, INCLUDING WARRANTIES OF MERCHANTABILITY OR FITNESS FOR A PARTICULAR PURPOSE, ARE LIMITED TO ONE YEAR. WARRANTOR SHALL NOT BE LIABLE FOR INCIDENTAL OR CONSEQUENTIAL DAMAGES. SOME STATES DO NOT ALLOW THE EXCLUSION OR LIMITATION OF INCIDENTAL OR CONSEQUENTIAL DAMAGES, OR LIMITATIONS ON THE DURATION OF IMPLIED WARRANTIES OF MERCHANTABILITY OR FITNESS, SO THESE EXCLUSIONS OR LIMITATIONS MAY NOT APPLY TO YOU. THIS WARRANTY GIVES YOU SPECIFIC LEGAL RIGHTS AND YOU MAY ALSO HAVE OTHER RIGHTS, WHICH VARY FROM STATE TO STATE.

WARNING: This product can expose you to chemicals including Nickel (Metallic) which is known to the State of California to cause cancer. For more information go to www.P65Warnings.ca.gov
Note: Nickel is a component in all stainless steel and some other metal components.
Felix Storch, Inc.
An ISO 9001:2015 registered company
770 Garrison Ave
Bronx, New York 10474
www.summitappliance.com

For parts and accessory ordering, troubleshooting and helpful hints, visit: www.summitappliance.com/support
- Free Standing / Built-in User's Manual
- IMPORTANT SAFETY INSTRUCTIONS
- POWER CORD PRECAUTIONS
- MOVING PRECAUTIONS
- INSTALLING PRECAUTION
- OTHER PRECAUTIONS
- CLEANING AND MAINTENANCE PRECAUTIONS
- DISPOSAL
- THE MANUFACTURER DISCLAIMS ANY RESPONSIBILITY IF THE ABOVE INSTRUCTIONS ARE NOT FOLLOWED.
- TABLE OF CONTENTS
- Product Overview and Specs 1 - 3
- Installation
- Operation
- Maintenance
- Accessories
- BEFORE USING YOUR ICE MAKER
- INSTALLING THE ICE MAKER
- CAUTIONS:
- INSTALLING THE HANDLE
- REVERSING THE DOOR SWING
- REMOVING THE DOOR
- REPOSITIONING THE HINGES
- REINSTALLING THE DOOR
- Filter Installation Instructions
- Built-in Installation
- Changing the Feet
- Lower Grill Change
- ELECTRICAL CONNECTION
- EXTENSION CORD
- CONNECTING THE WATER SUPPLY
- CLEANING YOUR ICE MAKER
- CAUTION
- POWER FAILURE
- MOVING YOUR ICE MAKER
- ENERGY SAVING TIPS
- TROUBLESHOOTING GUIDE
- ONE-YEAR LIMITED WARRANTY
- 5-YEARS COMPRESSOR WARRANTY
- ITEMS WARRANTOR WILL NOT PAY FOR:
- DISCLAIMER OF IMPLIED WARRANTIES; LIMITATION OF REMEDIES
Brand : Summit
Model : BIM26H34
Category : Sorbet maker