COS-C51EIX - Oven Cosmo - Free user manual and instructions
Find the device manual for free COS-C51EIX Cosmo in PDF.


| Product Type | Electric Built-in Single Oven |
| Brand | Cosmo |
| Model | COS-C51EIX |
| Overall Dimensions (W x D x H) | 23 1/6" x 22 5/8" x 23 1/6" (59.5 x 57.5 x 59.5 cm) |
| Recessed Dimensions (W x D x H) | 22" x 21 7/8" x 22 15/16" (55.8 x 55.5 x 58.3 cm) |
| Cutout Dimensions (W x D x H) | 22 1/16" x 22 7/16" x 22 13/16" (56.0 x 57.0 x 58.0 cm) |
| Oven Weight | 80 lbs (36 kg) approx. |
| Electrical Supply | 240V / 60Hz (also 208V / 60Hz compatible) |
| Power Rating | 3250 W at 240V, 2450 W at 208V |
| Recommended Circuit Protection | 20 A at 240V, 15 A at 208V |
| Oven Functions | Bake, Roast, Conv Roast, Broil Low, Broil High, Conv Broil, Defrost |
| Temperature Range | 150°F – 450°F (65°C – 232°C) |
| Control Type | Knobs and buttons with digital display |
| Display | 12-hour digital LED clock |
| Oven Light | Yes, 25-40W halogen, replaceable |
| Convection Fan | Yes, for convection functions |
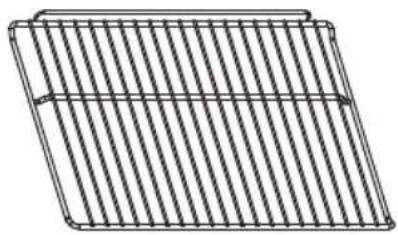
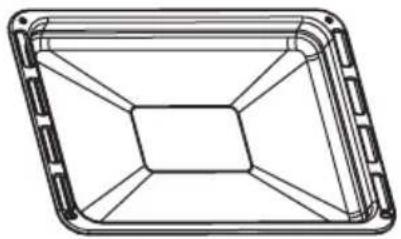
| Accessories Included | 2 oven racks, 1 broiler tray, mounting screws |
| Safety Features | Auto shut-off after 10 hours idle, standby mode, child lock not specified |
| Cleaning Method | Manual cleaning with mild soap and water; do not use self-clean |
| Warranty | Limited warranty; product registration required |
| Customer Support | 1-888-784-3108, www.cosmoappliances.com |
Frequently Asked Questions - COS-C51EIX Cosmo
User questions about COS-C51EIX Cosmo
0 question about this device. Answer the ones you know or ask your own.
Ask a new question about this device
Download the instructions for your Oven in PDF format for free! Find your manual COS-C51EIX - Cosmo and take your electronic device back in hand. On this page are published all the documents necessary for the use of your device. COS-C51EIX by Cosmo.
USER MANUAL COS-C51EIX Cosmo
natural_image
Line drawing of a COSMO oven with control panel and door (no text or symbols on main body)IMPORTANT: READ AND SAVE THESE INSTRUCTIONS.
FOR RESIDENTIAL USE ONLY.
INSTALLER: PLEASE LEAVE THESE INSTRUCTIONS WITH THIS UNIT FOR THE OWNER.
OWNER: PLEASE RETAIN THESE INSTRUCTIONS FOR FUTURE REFERENCE.
THANK YOU FOR YOUR PURCHASE
Thank you for your purchase. We know that you have many brands and products to choose from and we are honored to know that you have decided to take one of our products into your home and hope that you enjoy it.
COSMO Appliances are designed according to the strictest safety and performance standard for the North American market. We follow the most advanced manufacturing philosophy. Each appliance leaves the factory after thorough quality inspection and testing. Our distributors and our service partners are ready to answer any questions you may have regarding how to install, use and care for your products. We hope that this manual will help you learn to use the product in the safest and most effective manner.
Before using this product, please read through this manual carefully. Keep this user manual in a safe place for future reference. Please ensure that other persons using this product are familiar with these instructions as well.
If you have any questions or concerns, please contact the dealer from whom you purchased the product, or contact our Customer Support at:
1-888-784-3108
Reach us online at:
www.cosmoappliances.com
TABLE OF CONTENTS
OVEN SAFETY 5
Important Safety Instructions....7
OVERVIEW....10
Accessories 10
Oven Overview....11
Control Panel 12
FEATURES 13
Clock 13
Time Functions....14
Timer....15
Cook Time....16
Delay Start....19
Oven Light 21
USING THE OVEN 22
Before Using the Oven 22
Before Using the Oven for the First Time....23
Oven Vent....23
Oven Door 23
Using Oven Racks....24
Preheating 25
Oven Cooking Functions....26
MAINTENANCE AND CARE 29
Cleaning....29
Replacing the Oven Light 30
INSTALLATION REQUIREMENTS 32
Tools and Parts 32
Location Requirements ....34
Product Dimensions 35
Cutout Dimensions....36
Electrical Requirements.... 37
INSTALLATION INSTRUCTIONS.... 39
Unpack Oven 40
Remove Oven Door....41
Electrical Connection 42
3-Wire Power Supply Connection 44
4-Wire Power Supply Connection 45
Install Oven 46
Install Oven Door 47
Complete Installation....48
TROUBLESHOOTING....50
LIMITED WARRANTY 53
OVEN SAFETY
READ ALL INSTRUCTIONS BEFORE USING THE APPLIANCE
Your safety and the safety of others are very important.
We have provided many important safety messages in this manual and on your appliance. Always read and obey all safety messages.

This is the safety alert symbol.
This symbol alerts you to potential hazards that can kill or hurt you and others.
All safety messages will follow the safety alert symbol and either the word "WARNING" or "CAUTION." These words mean:

WARNING
You can be killed or seriously injured if you don't follow instructions.

CAUTION
A potentially hazardous situation which, if not avoided, could result in minor or moderate injury.
All safety messages will tell you what the potential hazard is, tell you how to reduce the chance of injury, and tell you what can happen if the instructions are not followed.
California Proposition 65 Warning

WARNING:
Cancer and Reproductive Harm - www.P65Warnings.ca.gov.
! WARNING
- This appliance is intended for normal residential use. It is not approved for commercial use, outdoor installation, or any other application no t specifically allowed by this manual.
- This appliance requires connection to a 3-prong or 4-prong, 240VAC single-phase (split-phase), 60Hz grounded electrical source dedicated to the appliance. When installed, appliance must be electrically grounded in accordance with local codes or, in the absence of local codes, with the National Electrical Code, NFPA 70 or the Canada n Electric Code, CSA C22.1-02.
- Proper installation is the responsibility of the installer. Any adjustment and service should be performed only by qualified oven installers or service technicians. The manufacturer is not responsible for any injury or damage that may result from incorrect or defective installation by unauthorized personnel.
- Product failure due to improper installation is not covered under r warranty.
- Do not use a steam cleaner to clean the appliance.
- This appliance is not intended to be operated with separate remot e control system.
IMPORTANT SAFETY INSTRUCTIONS
WARNING: To reduce the risk of fire, electrical shock, injury to persons, or damage when using the appliance, follow basic precautions, including the following:
- Proper Installation – The appliance, when installed, must be electrically grounded in accordance with local codes, or in the absence of local codes, with the National Electrical Code, ANSI/NFPA 70 or the Canadian Electrical Code, CSA C22.1-02. In Canada, the appliance must be electrically grounded in accordance with Canadian Electrical Code. Be sure your appliance is properly installed and grounded by a qualified technician.
- Read all of the installation manual before installing the oven.
- Disconnect power before servicing.
- Remove all packing material before connecting the electrical supply.
- WARNING: Never cover any slots, holes or passages in the oven bottom or cover an entire rack with materials such as aluminum foil. Doing so blocks airflow through the oven and may cause carbon monoxide poisoning. Aluminum foil linings may also trap heat, causing a fire hazard.
- Injuries may result from misuse of appliance doors such as stepping, leaning, or sitting on the doors.
- Maintenance – Keep appliance area clear and free from combustible materials, gasoline, and other flammable vapors and liquids.
- User Servicing – Do not repair or replace any part of the appliance unless specifically recommended in the manual. All other servicing should be referred to a qualified technician.
- Do not use replacement parts that have not been recommended by the manufacturer (e.g. parts made at home using a 3D printer).
- Proper Disposal of Your Appliance – Dispose of or recycle your appliance in accordance with Federal and Local Regulations. Contact your local authorities for the environmentally safe disposal or recycling of your appliance.
READ AND SAVE THESE INSTRUCTIONS
IMPORTANT SAFETY INSTRUCTIONS
- WARNING: Never use this appliance for warming or heating the room.
- CAUTION: Do not store items of interest to children in cabinets above an oven – children climbing on the oven to reach items could be seriously injured.
- Do Not Leave Children Alone – Children should not be left alone or unattended in area where appliance is in use. They should never be allowed to sit or stand on any part of the appliance.
- Wear Proper Apparel – Loose-fitting or hanging garments should never be worn while using the appliance.
- Do not store or use flammable materials in or near an oven, including paper, plastic, pot holders, linens, wall coverings, curtains, drapes and gasoline or other flammable vapors and liquids.
- Use this appliance only for its intended purpose as described in this manual. This appliance is not intended for storage.
- Use Only Dry Potholders – Moist or damp potholders on hot surfaces may result in burns from steam. Do not let potholder touch hot heating elements. Do not use a towel or other bulky cloth.
- Do Not Use Water on Grease Fires – Smother fire or flame or use dry chemical or foam-type extinguisher.
- Use Care When Opening Door – Let hot air or steam escape before removing or replacing food.
- DO NOT TOUCH HEATING ELEMENTS OR INTERIOR SURFACES OF OVEN – Heating elements may be hot even though they are dark in color. Interior surfaces of an oven become hot enough to cause burns. During and after use, do not touch, or let clothing or other flammable materials contact heating elements or interior surfaces of oven until they have had sufficient time to cool. Other surfaces of the appliance may become hot enough to cause burns – among these surfaces are oven vent openings, surfaces near these openings, oven doors, windows of oven doors, and crevices around the oven doors.
- Care must be taken to prevent aluminum foil and meat probes from contacting heating elements.
- Do Not Heat Unopened Food Containers – Build-up of pressure may cause container to burst and result in injury.
READ AND SAVE THESE INSTRUCTIONS
IMPORTANT SAFETY INSTRUCTIONS
- Keep Oven Vent Ducts Unobstructed.
- Never broil with door open. Open-door broiling is not permitted due to overheating of control panel.
- Avoid scratching or impacting glass doors or control panels. Doing so may lead to glass breakage. Do not cook on a product with broken glass. Shock, fire or cuts may occur.
- Placement of Oven Racks – Always place oven racks in desired location while oven is cool. If rack must be moved while oven is hot, do not let potholder contact hot heating element in oven.
- Clean Only Parts Listed in Manual.
- Do Not Clean Door Gasket – The door gasket is essential for a good seal. Care should be taken not to rub, damage, or move the gasket.
- Do Not Soak Removable Heating Elements – Heating elements should never be immersed in water.
- Do not let cooking grease or other flammable materials accumulate in or near the oven. Grease in the oven or near the oven may ignite.
For self-cleaning ovens:
- CAUTION: Do not leave food or cooking utensils, etc., in oven during the operation of self-cleaning.
- Wait for the oven to cool before removing contents and cleaning the oven.
- Before Self-Cleaning the Oven – Remove broiler pan and other utensils. Wipe off all excessive spillage before initiating the cleaning cycle.
- Do not use a protective coating to line the oven and do not use commercial oven cleaner unless certified for use in a self-cleaning oven.
- In the event of ignition inside the oven during self-clean, turn off the oven and wait for the fire to extinguish. DO NOT FORCE THE DOOR OPEN. Introduction of fresh air at Self Clean temperatures may lead to a burst of flame from the oven.
- If the self-cleaning mode malfunctions, keep door closed, turn off the appliance, disconnect the circuit at the circuit breaker box, and contact a qualified service provider for repairs.
- Some birds are extremely sensitive to the fumes produced during a self-clean cycle. Move birds to another well-ventilated room.
READ AND SAVE THESE INSTRUCTIONS
OVERVIEW
ACCESSORIES
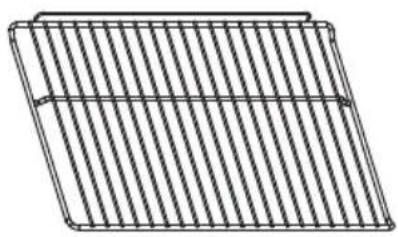
natural_image
Pure geometric diagram of a rectangular plate with vertical lines, no text or symbols present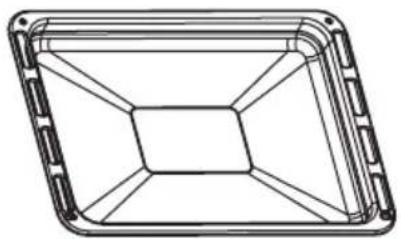
natural_image
Technical line drawing of a rectangular frame with internal grid pattern (no text or symbols)Oven Racks (2) Broiler Tray
NOTE:
- To purchase these replacement parts or any other accessories, please visit www.cosmoappliances.com or reference the contact information at the end of this manual.
OVEN OVERVIEW
MODEL: COS-C51EIX
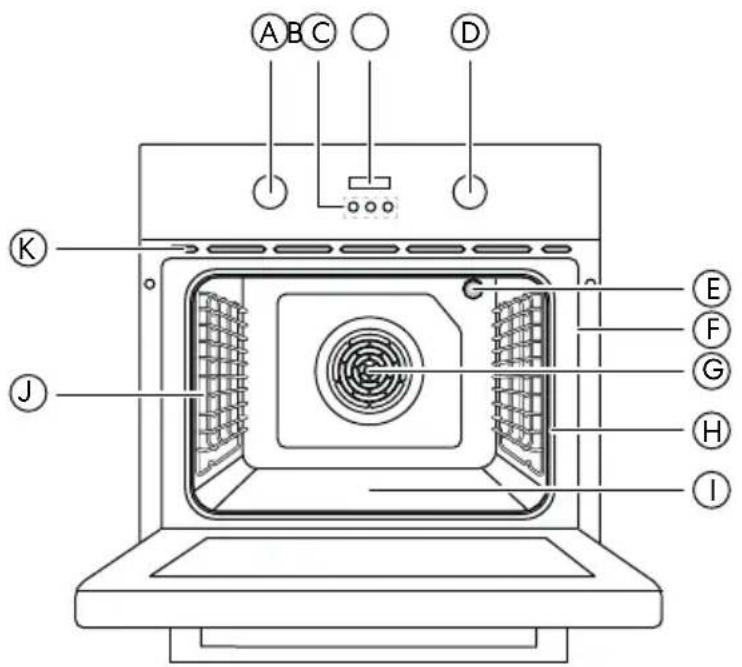
A. Function knob
B. Control buttons
C. Display
D. Temperature knob
E. Oven light
F. Model and serial # plate
G. Convection fan and element
H. Door gasket
I. Bake element (hidden)
J. Oven rack support
K. Oven vent
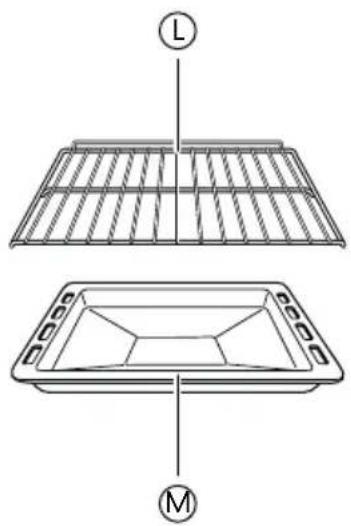
L. Oven rack
M. Broiler tray
CONTROL PANEL
Read the instructions carefully before using the oven. Control button shapes are representative; your oven may have alternate button shapes.
MODEL: COS-C51EIX
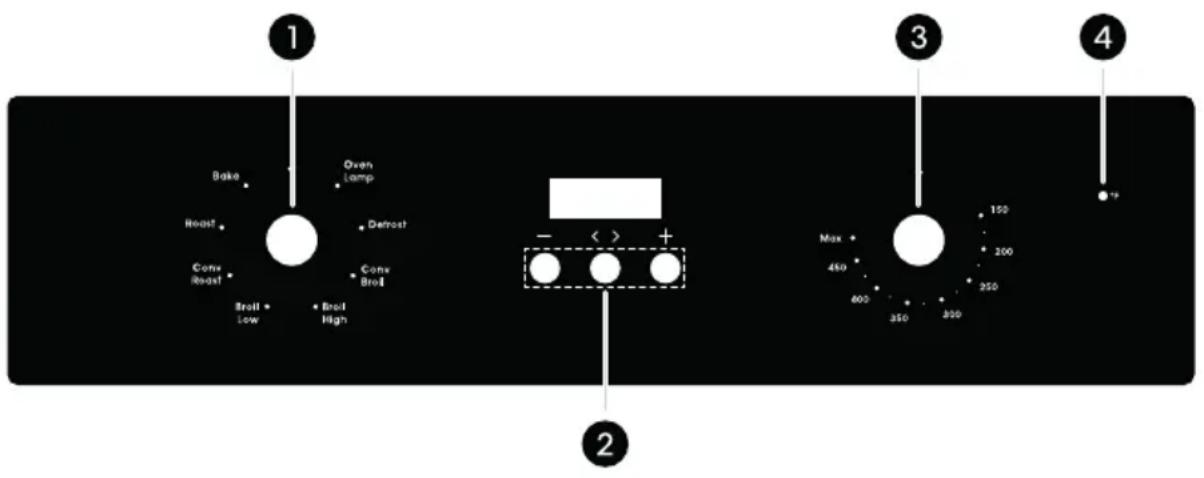
| # | Name Description | |
| 1 | Function Knob | To select various oven functions. |
| 2 | Control Buttons | To turn the oven On (Normal Mode) or Off (Standby Mode).To set the clock and the time functions. |
| 3 | Temperature Knob | To select the cooking temperatures. |
| 4 | Indicator Light | To indicate the oven is operating on one of the oven functions. |
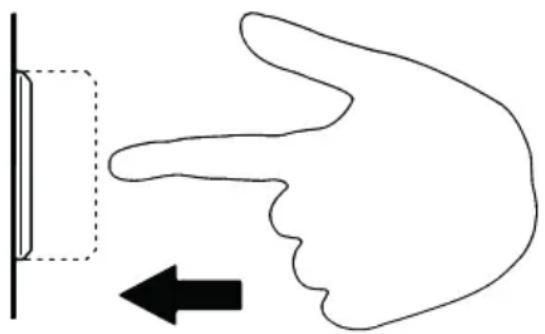
Releasing and Recessing the Control Knobs
- Press the knob inward to release it, and press it again to recess it.
natural_image
Simple line drawing of a hand gesture with an arrow indicating left motion (no text or symbols)FEATURES
CLOCK
The oven is equipped with a 12-hour clock. Set the correct time of day before using the oven.
NOTE:
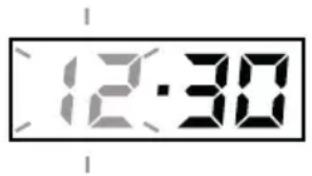
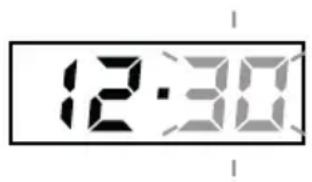
- When the oven is first connected to the electrical supply or reconnected from a power failure, the oven will be in Standby Mode and "12." clock hour will flash in the display. Set the correct time of day before using the oven.
- The clock cannot be adjusted when a Cook Time or a Delay Start is scheduled.
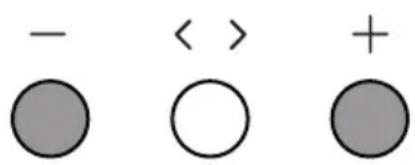
Setting the Clock
- If the clock hour in the display is not flashing, press and hold + and - at the same time for 3 seconds.
- Press/Hold + or - to adjust the clock hour.
- Press <> to confirm.
- Press/Hold + or - to adjust the clock minute.
- Press <> to confirm and start the clock.
TIME FUNCTIONS
To access the time functions, press and hold < > for 3 seconds or until the symbol lights up in the display to turn on and set the oven to Normal Mode from Standby Mode.
When the oven is in Normal Mode, press <> repeatedly to toggle and select different time functions.
If the oven is not in use, press and hold <> and + at the same time for 3 seconds to turn off and return the oven to Standby Mode.
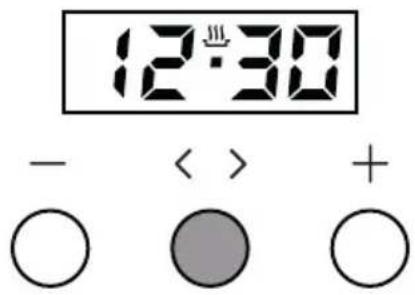
| Press <> | Time Function | Description | Display Symbol |
| - | Normal Mode | Enable time functions to be set and oven functions to be turned on and off manually. | |
| 1 time Timer | Set a timer that will ring a tone when the selected time has run out. | ||
| 2 times | Cook Time | Set the oven to cook for the selected length of time and turn off the oven automatically. | dur |
| 3 times | End Time | Set the oven to turn off automatically at the selected time of day. | End |
NOTE:
- In Standby Mode, oven light, time functions, and oven functions (heating elements) are disabled. Any operating time functions or oven functions will be cancelled when the oven returns to Standby Mode.
- Timer cannot be used with Cook Time or End Time at the same time.
- To cancel setting a time function, press and hold <> for 3 seconds to return to Normal Mode.
- The oven will return to Normal Mode if there is no operation for 5 minutes while setting a time function.
- When the time function cycle finishes and the end tone plays, press any button to stop the tone.
TIMER
The timer serves as an extra timer in the kitchen that will ring a tone when the selected time has run out. It does not start or stop cooking.
NOTE:
- Timer cannot be used with Cook Time or End Time at the same time. Setting the timer will reset any selected time in Cook Time and End Time.
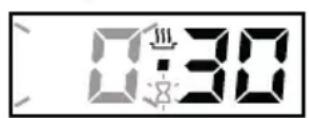
Setting the Timer (Up to 12 Hours 59 Minutes)
- If the oven is in Standby Mode, press and hold <> for 3 seconds or until the symbol lights up in the display to turn on and set the oven in Normal Mode.
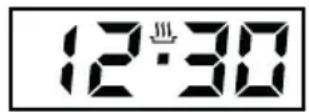
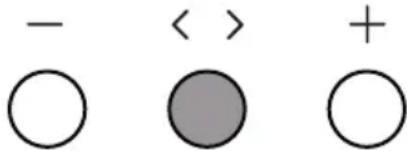
- Press <> once or until the ☒ timer symbol flashes in the display.
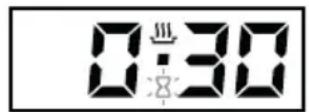
- Press + or - once, then press/hold + or - to adjust the timer hour.
-
Press <> to confirm.
-
Press/Hold + or - to adjust the timer minute.
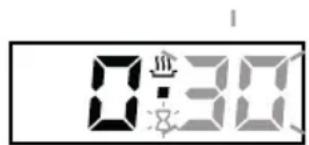
- Press <> to confirm and start the timer. The timer symbol turns solid.
-
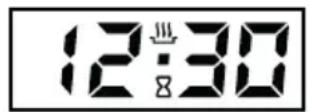
When the set time has run out, the timer end tone rings and the 8 timer symbol flashes in the display. Press any button to stop the tone.
-
Press and hold <> and + at the same time for 3 seconds to turn off and return the oven to Standby Mode if the oven is not in use.
Canceling the Timer
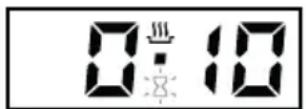
- Press <> once or until the ☒ timer symbol flashes in the display. The remaining time is shown.
- Press and hold <> for 3 seconds to cancel the current timer and return to Normal Mode.
- Press and hold <> and + at the same time for 3 seconds to turn off and return the oven to Standby Mode if the oven is not in use.
NOTE:
- Any operating time functions and oven functions will be cancelled when the oven returns to Standby Mode.
COOK TIME
Cook Time turns on the oven immediately to cook for a selected length of time. At the end of the cooking time, the oven turns off automatically.
NOTE:
- Select oven function (e.g. Bake) and temperature before setting a cook time.
- Cook Time can be set for any amount of time between 1 minute and 10 hours.
- To change the cook time during cooking, cancel the current cook time and set a new cook time.
- Cook Time cannot be used with Timer at the same time. Setting Cook Time will reset the timer.
Setting Immediate Cook and Automatic Shutoff (Example to set bake at 400°F for 25 minutes.)
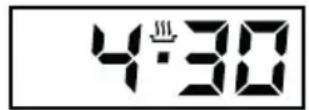
- If the oven is in Standby Mode, press and hold <> for 3 seconds or until the symbol lights up in the display to turn on and set the oven in Normal Mode.
- Press and release the function knob and the temperature knob, then turn the knobs to select Bake and 400°F. The oven starts preheating.
- Wait 15 – 25 minutes for the oven to preheat and the oven temperature to stabilize, then place the food in the oven.
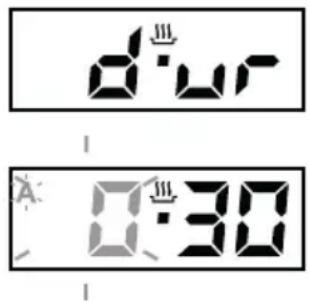
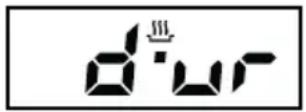
- Press <> repeatedly until the dur cook time symbol appears in the display.
- Press + or - once to adjust the cook time hour to 0.
- Press <> to confirm.
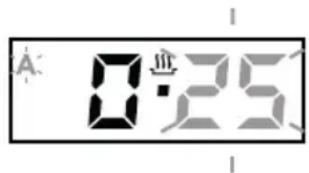
- Press/Hold + or - to adjust the cook time minute to 25.
- Press <> to confirm and start the cook time.
The clock (time of day) returns in the display. The A symbol lights up, indicating an automatic shutoff is set. The oven continues to cook for the set amount of time.
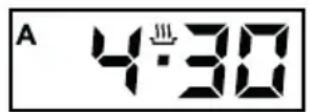
- When the cooking cycle finishes, the oven turns off automatically and returns to Standby Mode, and the cook time end tone plays.
Turn the knobs to select • or OFF at 12 o'clock position, and press any button to stop the tone. Remove the food from the oven.
Canceling the Cook Time
-
Press <> repeatedly until the remaining cook time appears in the display.
-
Press and hold <> for 3 seconds to cancel the current cook time and return to Normal Mode. The oven continues to operate with the selected oven function and temperature.
-
When cooking is finished, turn the knobs to select • or OFF at 12 o'clock position, then press and hold <> and + at the same time for 3 seconds to turn off and return the oven to Standby Mode. Remove the food from the oven.
DELAYED START
With both Cook Time and End Time set, the oven calculates the start time and automatically turns on the oven for a selected length of time and off at the time selected.
NOTE:
- The clock must be set to the correct time of day for End Time to work properly.
- Select oven function (e.g. Bake) and temperature before setting a cook time and an end time.
- End Time can be set up to 11 hours and 59 minutes from the current clock.
- Once Cook Time and End Time are set, the oven turns off and returns to Standby Mode until the start time is reached.
- Cook Time or End Time cannot be used with Timer at the same time. Setting Cook Time or End Time will reset the timer, and vice versa.
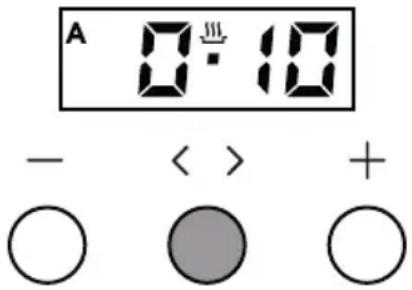
Setting the Oven for Delayed Start
(Example to set bake at 400^ F for 25 minutes ending at 05:30 PM.)
Arrange interior oven rack(s) as needed.
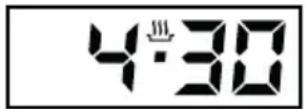
- If the oven is in Standby Mode, press and hold <> for 3 seconds or until the symbol lights up in the display to turn on and set the oven in Normal Mode.
- Press and release the function knob and the temperature knob, then turn the knobs to select Bake and 400°F. The oven starts preheating.
- Press <> repeatedly until the dur cook time symbol appears in the display.
- Press + or - once to adjust the cook time hour to 0, and press <> to confirm.
- Press/Hold + or - to adjust the cook time minute to 25, and press <> to confirm the cook time.
- Press <> repeatedly until the End end time symbol appears in the display.
- Press + or - once, then press/hold + or - to adjust the end time hour to 5, and press <> to confirm.
- Press/Hold + or - to adjust the end time minute to 30, and press <> to confirm the end time.
The oven returns to Standby Mode temporarily until the start time is reached, and the clock (time of day) returns in the display. The A symbol lights up, indicating an automatic shutoff is set. Place the food in the oven.
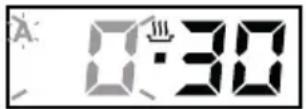
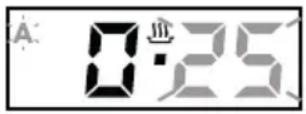
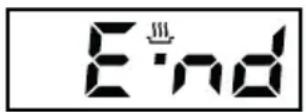
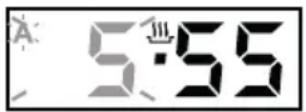
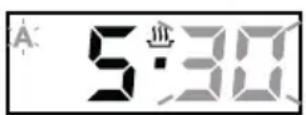
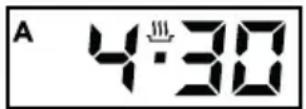
- When the start time 05:05 PM is reached, the oven turns on automatically. When the cooking cycle finishes, the oven turns off automatically and returns to Standby Mode, and the cook time end tone plays.
Turn the knobs to select ● or OFF at 12 o'clock position, and press any button to stop the tone. Remove the food from the oven.
Canceling the Delayed Start (Before the Start Time is Reached)
- Turn the knobs to select • or OFF at 12 o'clock position, then press and hold < > and + at the same time for 3 seconds to turn off and return the oven to Standby Mode. Remove any food from the oven.
Canceling the Delayed Start (After the Start Time is Reached)
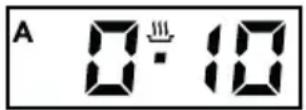
- Press <> repeatedly until the remaining cook time or the end time appears in the display.
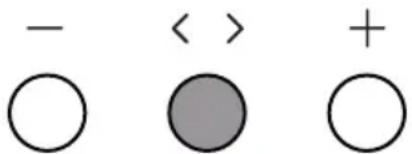
- Press and hold <> for 3 seconds to cancel the current cook time and end time and return to Normal Mode. The oven continues to operate with the selected oven function and temperature.
- When cooking is finished, turn the knobs to select • or OFF at 12 o'clock position, then press and hold <> and + at the same time for 3 seconds to turn off and return the oven to Standby Mode. Remove the food from the oven.
OVEN LIGHT
The oven light automatically turns on when an oven function is selected under Normal Mode.
NOTE:
- The oven light is disabled when the oven is in Standby Mode.
Turning On the Oven Light Manually
- If the oven is in Standby Mode, press and hold <> for 3 seconds or until the symbol lights up in the display to turn on and set the oven in Normal Mode.
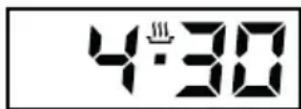
- Press and release the function knob, then turn the knob to select Oven Lamp to turn on the oven light.
Turning Off the Oven Light Manually
-
To turn off the oven light, turn the function knob to select • or OFF at 12 o'clock position.
-
Press and hold <> and + at the same time for 3 seconds to turn off and return the oven to Standby Mode if the oven is not going to be used.
USING THE OVEN
Read the instructions for each feature and cooking mode in this manual carefully before using the oven.
! CAUTION
- Do not use any type of foil or oven liner to cover the oven bottom. These items can trap heat or melt, resulting in damage to the product and risk of shock, smoke or fire. Damage from improper use of these items is not covered by the product warranty.
- Foil may be used to catch spills by placing a sheet on a lower rack, several inches below the food. Do not use more foil than necessary and never entirely cover an oven rack with aluminum foil. Keep foil at least 1-1/2" (3.8 cm) from oven walls to prevent poor heat circulation.
- Do not use plastic wrap or wax paper in the oven.
- Do not place food, water, ice, or any dish or tray directly on the oven floor, as this will irreversibly damage the enamel surface.
- Do not block, touch or place items around the oven vent during cooking. Your oven is vented through ducts right above the oven door(s). Do not block the oven vent when cooking to allow for proper air flow.
- The oven and broiler cannot be used during a power outage. If the oven is in use when a power failure occurs, the oven heating element shuts off and cannot be used until power is restored. Once power is restored, you will need to reset the oven to start any functions.
- As the oven heats up, the heated air in the oven may cause condensation to appear on the oven door glass. These water drops are harmless and will evaporate as the oven continues to heat up.
NOTE:
- Because the oven temperature cycles, an oven thermometer placed in the oven cavity may not show the same set temperature on the oven.
! WARNING
FOOD POISONING HAZARD
- Do not let food sit in oven more than one hour before or after cooking. Doing so can result in food poisoning or sickness.
- Foods that can easily spoil such as milk, eggs, fish, meat or poultry, should be chilled in the refrigerator first. Even when chilled, they should not stand in the oven for more than 1 hour before cooking begins, and should be removed promptly when finished cooking.
BEFORE USING THE OVEN FOR THE FIRST TIME
Empty and start the oven in Bake mode at the highest available temperature setting. Allow oven to run for 1 hour to burn off and remove any manufacturing protection oil, dust or impurities. There will be a distinctive odor or some smoke - this is normal. Ensure your kitchen is well ventilated during this conditioning period.
OVEN VENT
Areas near the vent above the oven door may become hot during operation and may cause burns. Avoid placing plastics near the vent as heat may distort or melt the plastic.
Do not block the vents (air openings) of the oven. They provide the air inlet and outlet that are necessary for the oven to keep cool and operate properly. It is normal for steam to be visible when cooking foods with high moisture content.
OVEN DOOR
To avoid oven door glass breakage:
- Do not close the oven door if the racks are not fully inserted into the oven cavity or if bakeware extends past the front edge of an oven rack.
- Do not set objects on the glass surface of the oven door.
- Do not hit glass surfaces with bakeware or other objects.
- Do not wipe down glass surfaces until the oven has completely cooled.
USING OVEN RACKS
The racks must be level in the correct orientation and properly inserted between the rails of the rack support on both sides to ensure safe removal of hot food items. The racks have a turned-up back edge that prevents them from being pulled out of the oven cavity.
! CAUTION
- Replace oven racks before turning the oven on to prevent burns.
- Do not cover the racks with aluminum foil, or any other material, or place anything on the bottom of the oven. Doing so will result in poor baking and may damage the oven bottom.
- Only arrange oven racks when the oven is cool.
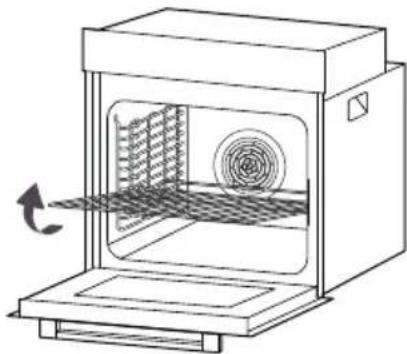
Removing Racks
- Pull the rack straight out until it stops.
- Lift up the front of the rack and pull it out.
Replacing Racks
-
Place the end of the rack on the support.
-
Tilt the front end up and push the rack in.
natural_image
Line drawing of a laboratory oven with a circular vent and airflow arrow (no text or symbols)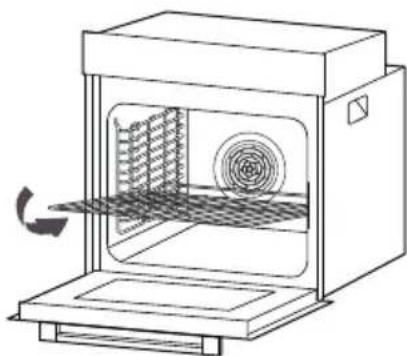
natural_image
Line drawing of a laboratory oven with a circular vent and cooling fan (no text or symbols)Rack Positions
For best cooking results, adjust rack so food is placed at the center of the oven. For most foods this will be rack position #3 or #4. For larger foods like roasts and turkey, move the rack position down to #1 or #2 to keep the food centered in the oven.
When using multiple racks simultaneously, try to space the food out around the oven center (rack positions #1 and #5 or #2 and #6 for two racks).
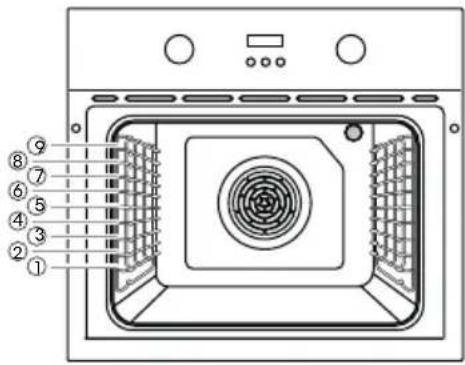
Broiling performs best with the food close to the broil heating element - typically rack position #7, #8, or #9.
PREHEATING
Preheating is generally desirable, although not absolutely necessary in all circumstances.
- Preheating is necessary for good results when baking cakes, cookies, pastry and breads.
• Preheating will help to sear roasts and seal in meat juices. - Place oven racks in their proper position before preheating.
- Selecting a higher temperature does not shorten the preheat time.
OVEN COOKING FUNCTIONS
IMPORTANT: The oven must be turned on in Normal Mode to enable the oven cooking functions (heating elements), oven light, and time functions.
To Turn On and Set the Oven in Normal Mode:
- Press and hold <> for 3 seconds or until the symbol lights up in the display.
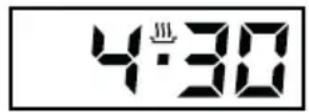
To Turn Off and Set the Oven in Standby Mode:
- Press and hold <> and + at the same
____ symboltime for 3 seconds or until the
disappears in the display.
NOTE:
- When the oven is turned off in Standby Mode, oven cooking functions (heating elements), oven light, and time functions are disabled.
- Any operating oven functions or time functions will be cancelled when the oven returns to Standby Mode.
- Oven cooking time will vary with the temperature of ingredients and the size, shape and finish of the bakeware.
- The clock in the display will flash after idling in Normal Mode for 5 hours. Press any button to continue using the oven, or press and hold < > and + at the same time for 3 seconds to turn off and return the oven in Standby Mode.
- After idling in Normal Mode for a total of 10 hours, the oven will automatically turn off and return to Standby Mode to avoid accidentally keeping the oven on.
| Cooking Functions | Description |
| Bake | The Bake mode uses heat from lower element to cook food. No fan is used to circulate the heat.This mode works best with food placed on a single rack. When using this mode to prepare baked goods such as cakes, cookies and pastries, always preheat the oven first and place food centrally near the middle racks. |
| Roast | The Roast mode uses heat from upper and lower elements to cook food conventionally.Ideal for roasting meats and poultry on a single rack. Always preheat the oven first and place food centrally near the middle racks. |
| Conv Roast | The Convection Roast mode uses heat from upper and lower elements and hot air movement from the convection fan to enhance cooking efficiency and evenness across multiple racks.Ideal for roasting meats and poultry. Heated air circulates around the food from all sides, sealing in juices and flavors. Roasting times may be slightly longer for multiple racks than what would be expected for a single rack. |
| Broil Low | The Broil Low mode uses heat from the inner upper element to sear foods.Ideal for toasting, melting cheese, browning and searing surface. Thicker cuts and unevenly shaped pieces of meat, fish and poultry may cook better at lower broiling temperatures. Food should be placed near the upper racks, and should not be cooked for too long on each side of the food. It is not necessary to preheat when using this mode. |
| Broil High | The Broil High mode uses intense heat from the inner and outer upper elements to sear foods in larger quantities.Ideal for toasting, melting cheese, browning and searing surface. Food should be placed near the upper racks, and should not be cooked for too long on each side of the food. It is not necessary to preheat when using this mode. |
| Conv Broil | The Convection Broil mode uses intense heat from the inner and outer upper elements and air movement from the fan to enhance cooking efficiency and evenness across multiple racks. Ideal for grilling large amount of meats, vegetables, and poultry. Cooking times may be slightly longer for multiple racks than what would be expected for a single rack. |
| Defrost | The Defrost mode uses air movement from the fan without the use of heat to circulate air and enhance defrost efficiency at room temperature.A gentle but quick way to speed up defrosting time and thawing of ready-made dishes, cream-filled dishes, produce, etc. Place food centrally near the middle racks. |
Using the Oven Cooking Functions:
- If the oven is in Standby Mode, press and hold <> for 3 seconds or until the symbol lights up in the display to turn on and set the oven in Normal Mode.
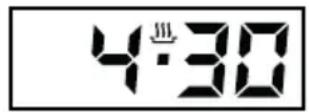
- Press and release the function knob and the temperature knob, then turn the knobs to select the desired oven cooking function and temperature. The oven starts preheating.
- Wait 15 – 25 minutes for the oven to preheat and the oven temperature to stabilize if necessary, then place the food in the oven.
- When cooking is finished, turn the knobs to select • or OFF at 12 o'clock position, then press and hold <> and + at the same time for 3 seconds to turn off and return the oven to Standby Mode. Remove the food from the oven.
MAINTENANCE AND CARE
CLEANING
IMPORTANT: Before cleaning, make sure all controls are off and the oven is cool. Always follow label instructions on cleaning products. Soap, water and a soft cloth or sponge are suggested first unless otherwise noted. Do not use abrasive cleaning products.
NOTE:
- Do not clean the oven door gasket. The material of the gasket cannot withstand abrasion. It is essential for the gasket to remain intact. If you notice it becoming worn or frayed, replace it.
The entire oven can be safely cleaned with a soapy sponge, rinsed and dried. If stubborn soil remains, follow the recommended cleaning methods below.
• Always use the mildest cleaner that will do the job.
- Use clean, soft cloths, sponges or paper towels.
- Rub metal finishes in the direction of the grain.
- Never leave acidic substances on stainless steel parts, such as lemon juice, vinegar, etc.
- Rinse thoroughly with a minimum of water so it does not drip into door slots.
- Do not use sharp metal scrapers.
- Do not immerse the oven door in water.
- Do not use a high pressure cleaning for cleaning the unit.
- Use hot water with non-abrasive cleaning product in case of heavy soiling.
- Dry to avoid water marks.
REPLACING THE OVEN LIGHT
! WARNING
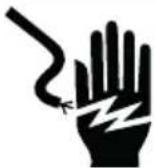
ELECTRICAL SHOCK HAZARD
- Before replacing oven light bulb, disconnect the electrical power to the oven at the main fuse or circuit breaker panel.
- Failure to do so can result in severe personal injury, death, or electrical shock.
! CAUTION
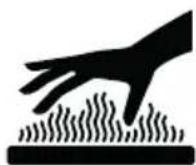
BURN HAZARD
• Make sure oven is cool.
- The light cover and bulb should be removed when cool. Touching hot glass with bare hands or a damp cloth can cause burns.
- Wear gloves while changing the oven light. Glass fragments from broken bulbs can cause risk of injury.
- Failure to do so could result in cuts or burns.
The oven light is a standard 25 – 40W, 220 – 240V, 570°F halogen appliance bulb.
Replacing Oven Light
IMPORTANT: Make sure oven and bulb are cool.
-
Disconnect power at the main fuse or circuit breaker panel.
-
Remove oven racks.
-
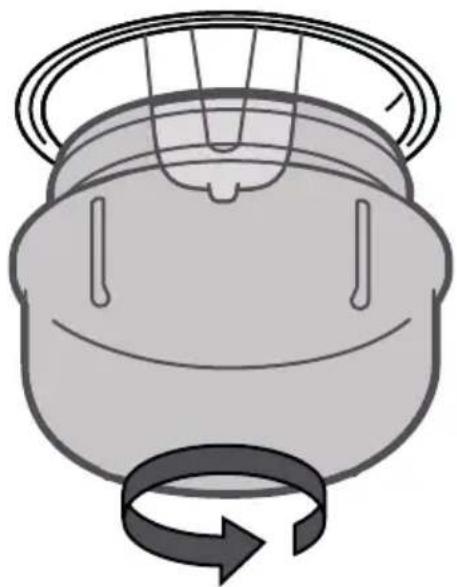
Remove the glass light cover on rear wall by turning it counter-clockwise.
natural_image
Illustration of a mechanical component with a rotating arrow and mesh top (no text or symbols)-
Remove bulb from socket.
-
Replace bulb, and replace light cover.
-
Plug in oven or reconnect power.
INSTALLATION REQUIREMENTS
TOOLS AND PARTS
Gather the required tools and parts before starting installation. Read and follow the instructions provided with any tools listed here.
Tools Needed
- Tape measure
• Phillips screwdriver - Level
-
Marker or pencil
-
Drill and drill bit (for wall cabinet installations)
- Safety glasses
- Gloves
Parts Needed
natural_image
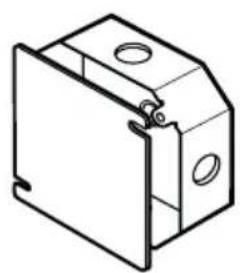
Isometric line drawing of a mechanical housing or bracket (no text or symbols)Junction Box
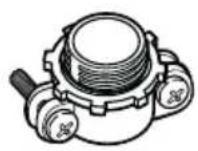
3/4" Conduit Connector (UL Listed or CSA Approved)
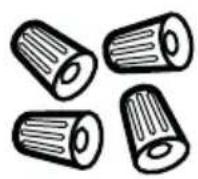
Wire Connectors
(UL Listed or CSA Approved)
natural_image
Simple curved line drawing with no text or symbols36" (91 cm) of String
Parts Supplied
natural_image
Pure geometric diagram of a rectangular grid with diagonal lines, no text or symbols presentOven Racks (2) Broiler Tray
natural_image
Technical line drawing of a rectangular frame with internal hexagonal grid pattern (no text or symbols)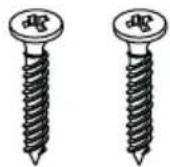
Mounting Screws (2)
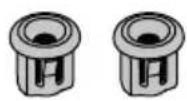
Screw Sleeves (2)
NOTE:
- To purchase these replacement parts or any other accessories, please visit www.cosmoappliances.com or reference the contact information at the end of this manual.
LOCATION REQUIREMENTS
IMPORTANT: Observe all governing codes and ordinances.
- Cabinet opening dimensions that are shown must be used. Given dimensions provide minimum clearance with oven.
- Recessed installation area must provide complete enclosure around the recessed portion of the oven.
- Oven support surface must be solid, level and flush with bottom of cabinet cutout.
- Floor must be able to support a single oven weight of 80 lbs (36 kg) plus food load of 30 lbs (14 kg).
- Be sure the oven is securely installed in a cabinet that is firmly attached to the house structure. Weight on the oven door could cause the oven to tip and result in injury. Never allow anyone to climb, sit, stand or hang on the oven door.
- Grounded electrical supply is required. See "Electrical Requirements" section.
- For undercounter installation, it is recommended that the junction box be located in the adjacent right or left cabinet.
IMPORTANT: To avoid damage to your cabinets, check with your builder or cabinet supplier to make sure that the materials used will not discolor, delaminate, or sustain other damage. Ensure that the glue of cabinets made of veneered wood can withstand temperatures of at least 250^ F ( 121^ C). Plastic or glues that cannot withstand such temperatures will melt and deform the cabinet housing.
PRODUCT DIMENSIONS
MODEL: COS-C51EIX
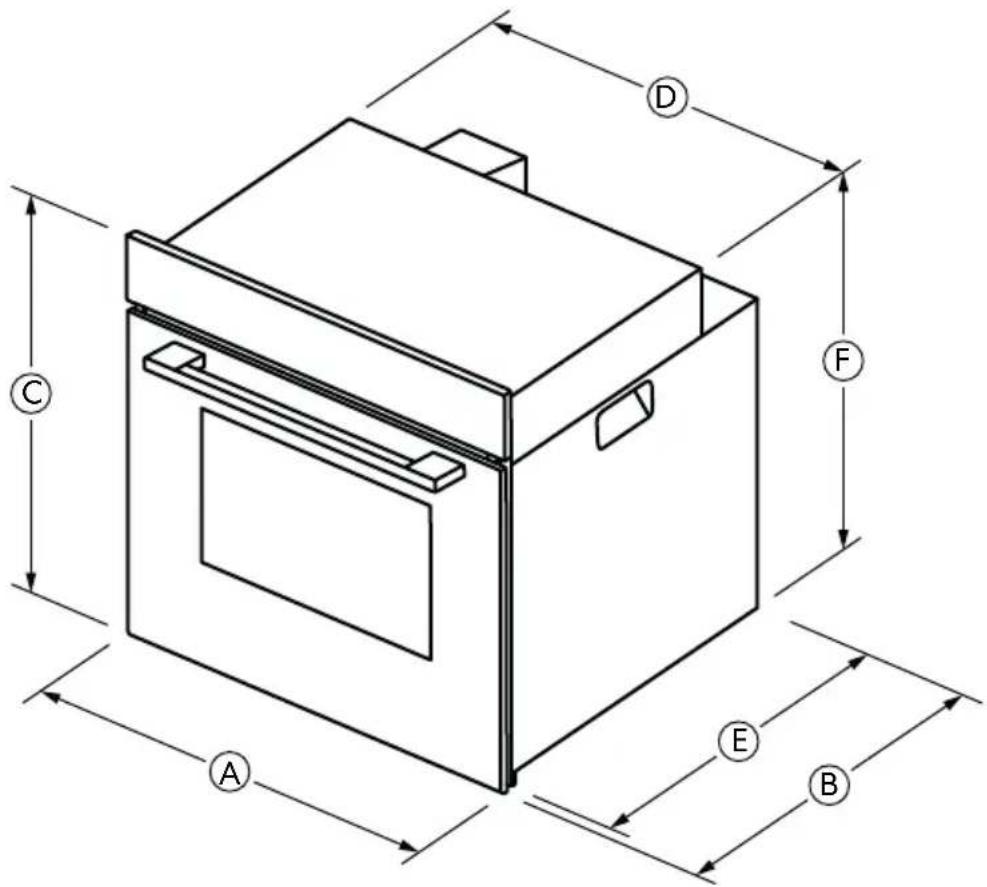
| Dimensions Letter Measurements | |
| A Width (Overall) 23 16 " (59.5 cm) | |
| B Depth (Overall) 22 58 " (57.5 cm) | |
| C Height (Overall) 23 16 " (59.5 cm) | |
| D Width (Recessed) 22" (55.8 cm) | |
| E Depth (Recessed) 21 78 " (55.5 cm) | |
| F Height (Recessed) 22 1516 " (58.3 cm) | |
CUTOUT DIMENSIONS
IMPORTANT: Some cabinet and building materials are not designed to withstand the heat produced by the oven for baking and self-cleaning. Check with your builder or cabinet supplier to make sure that the materials used will not discolor, delaminate or sustain other damage.
GIVEN DIMENSIONS ARE MINIMUM CLEARANCES.
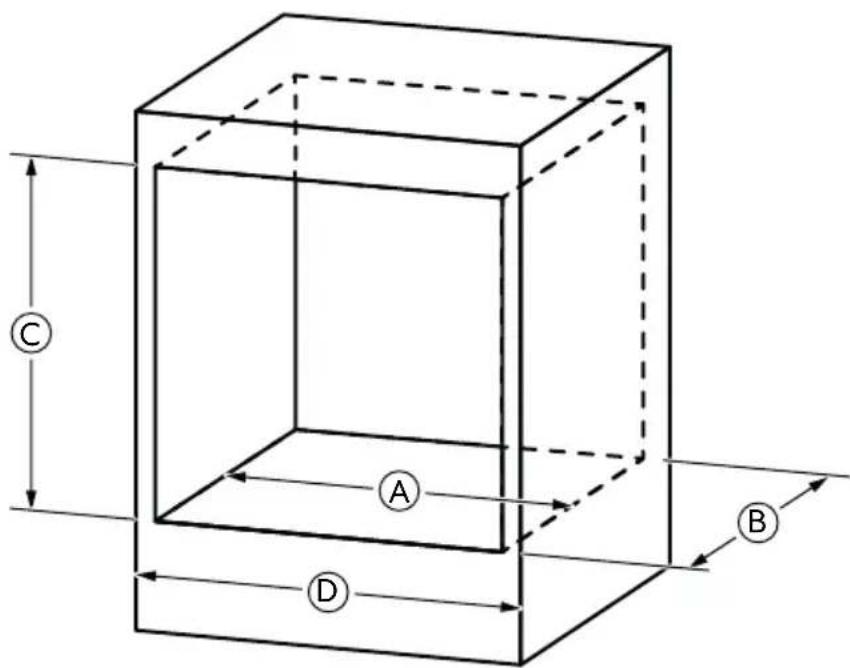
| Dimensions Letter Measurements | |
| A Width (Cutout) 22 1/16" (56.0 cm) | |
| B Depth (Cutout) 22 7/16" (57.0 cm) | |
| C Height (Cutout) 22 13/16" (58.0 cm) | |
| D Cabinet Width 23 7/8" (60.6 cm) | |
NOTE:
- If the cabinet does not have a front frame and the sides are less than 3/4" (1.9 cm) thick, shim both sides equally to establish the cutout width.
- These ovens are not approved for installations that stack one single wall oven above another single wall oven.
ELECTRICAL REQUIREMENTS
! WARNING
ELECTRICAL SHOCK HAZARD
- Do not use an extension cord with this appliance.
- Remove house fuse or open circuit breaker before beginning installation.
- Improper connection of aluminum house wiring to copper leads can result in an electrical hazard or fire. Use only connectors designed for joining copper to aluminum and follow the manufacturer's recommended procedure closely.
ELECTRICAL GROUNDING INSTRUCTIONS
• This appliance must be properly grounded.
- Do not ground to a gas pipe.
- Check with a qualified electrician if you are in doubt as to whether the appliance is properly grounded.
U.S.A. ONLY
Be sure that the electrical connection and wire size are adequate and in conformance with the National Electrical Code, ANSI/NFPA No. 70 - latest edition and all local codes and ordinances.
A copy of the above code standards can be obtained from:
National Fire Protection Association
1 Batterymarch Park
Quincy, MA 02169
CANADA ONLY
Be sure that the electrical connection and wire size are adequate and in conformance with the CSA Standard C22.1, Canadian Electrical Code, Part 1 - latest edition and all local codes and ordinances.
A copy of the above code standards can be obtained from:
Canadian Standards Association
178 Rexdale Blvd.
Toronto, ON M9W 1R3 CANADA
ELECTRICAL CONNECTION
If codes permit and a separate ground wire is used, it is recommended that a qualified electrical installer determine that the ground path and wire gauge are in accordance with local codes.
WARNING: Improper connection of the equipment-grounding conductor can result in a risk of electric shock. Check with a qualified electrician or service technician if you are in doubt as to whether the appliance is properly grounded.
To properly install your appliance, you must determine the type of electrical connection you will be using and follow the instructions provided for it here.
- This appliance must be supplied with the proper voltage and frequency, and connected to an individual (dedicated to the appliance), properly grounded branch circuit, protected by a circuit breaker or fuse. See the rating plate located on the oven frame to determine the product rating.
- Use the table below to determine the minimum recommended dedicated circuit protection.
| MODEL | Voltage, Frequency | Power Rating | Recommended Circuit |
| COS-C51EIX | 240 V, 60 Hz | 3,250 W | 20 Amp |
| 208 V, 60 Hz | 2,450 W | 15 Amp |
- A single-phase (split-phase), 3-wire or 4-wire, 120/208 VAC or 120/240 VAC, 60 hertz electrical system must be used. It is the personal responsibility of the oven owner to provide the correct electrical service for this oven.
- This appliance is manufactured with the ground (green or bare) wire connected to the oven chassis.
- Effective January 1, 1996, the National Electrical Code requires that new construction (not existing) utilize a 4-conductor connection to an electric oven. When installing an electric oven in new construction, mobile home, recreational vehicle, or an area where local codes prohibit grounding through the neutral conductor, refer to the section on 4-wire connections
- An appropriately sized, UL conduit connector must be used to correctly attach the conduit to the junction box.
- DO NOT shorten the flexible conduit. A UL listed or CSA approved conduit connector must be securely attached to the junction box and the flexible conduit must be securely attached to the connector clamp. If the flexible conduit will not fit within the clamp, do not install the oven until a clamp of the proper size is obtained.
INSTALLATION INSTRUCTIONS
IMPORTANT: This appliance shall be installed only by authorized persons and in accordance with the manufacturer's installation instructions, municipal building codes, and electrical wiring regulations.
! CAUTION
LACERATION, FOREIGN OBJECT, CRUSH HAZARD
- When installing, moving, or servicing any appliance, wear proper protective equipment, including cut resistant gloves, steel-toed shoes, and safety glasses.
! WARNING
EXCESSIVE WEIGHT HAZARD
- Use two or more people to move and install oven. Failure to do so can result in back or other injury.
- Remove all tape and packaging materials from around the oven.
- Open the oven door and remove packaging materials, manual, oven racks, and broiler tray inside the oven.
- Check for film on stainless steel parts, padding/spacers on and around door and face of oven, cardboard and plastic on and around racks, etc. Failure to remove packaging materials could result in damage to the appliance. Do not dispose of anything until the installation is complete.
NOTE:
- Do not remove any warning-type labels, the model and serial number label, or the Tech Sheet that is located on the back of the oven.
- Do not use sharp instruments, rubbing alcohol, flammable fluids, or abrasive cleaners to remove tape or glue. These products can damage the surface of your oven.
- Do not lift the oven using the oven door handle. Doing so can cause damage and improper operation of the oven.
- Do not move the oven by grabbing the open oven door. Doing so can result in serious damage to the oven.
REMOVE OVEN DOOR
IMPORTANT: The oven door is heavy. To avoid oven door glass breakage, use both hands, and grasp only the sides of the oven door to remove. Do not lift oven door by door handle.
-
Fully open the oven door.
-
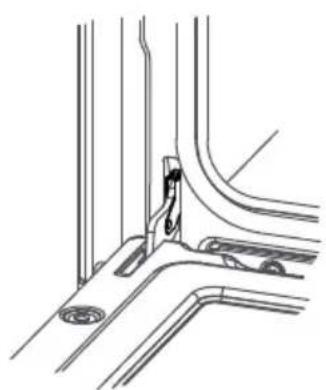
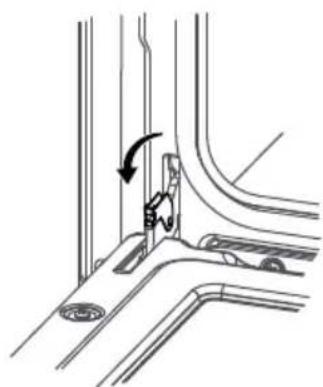
Unlock the hinge locks on both sides, rotating them as far toward the open door frame as they will go.
natural_image
Technical line drawing of a mechanical assembly with no visible text or symbolsLocked Unlocked
natural_image
Technical line drawing of a mechanical assembly with a directional arrow indicating motion (no text or symbols)-
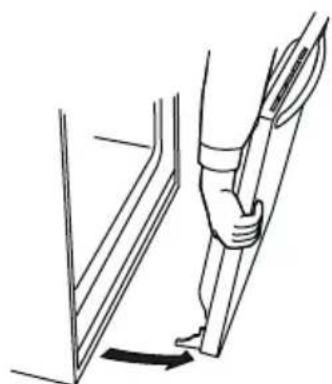
Firmly grasp both sides of the door.
-
Close the door to the removal position, which is approximately five degrees or 2-3 inches from being fully closed. If the position is correct, the hinge arms will move freely.
-
Lift door up and out until the hinge arms are clear of the slots. Set the oven door(s) aside on a covered work surface. Do not lay the oven door on its handle. Doing so may cause dents or scratches.
natural_image
Line drawing of a person using a tool to lift or stand (no text or symbols)ELECTRICAL CONNECTION
! WARNING
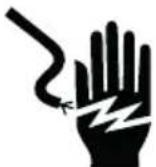
ELECTRICAL SHOCK HAZARD
- Turn off the circuit breaker or remove house fuse to the oven branch circuit before servicing.
• This appliance must be properly grounded. - Do not use an adapter or an extension cord.
- Failure to do so can result in death, fire, or electrical shock.
! WARNING
EXCESSIVE WEIGHT HAZARD
- Use two or more people to move and install oven. Failure to do so can result in back or other injury.
IMPORTANT:
• Installation work and repairs should only be performed by a qualified technician in accordance with all applicable codes and standards.
Repairs and service by unqualified persons could be dangerous and the manufacturer will not be held responsible.
- Before connecting the appliance to the power supply, make sure that the voltage and frequency listed on the rating label correspond with the household electrical supply. This data must correspond to prevent appliance damage. Consult an electrician if in doubt.
- The oven must connect to a single-phase (split-phase), 3-wire or 4-wire, 120/208 VAC or 120/240 VAC, 60 hertz electrical system. This appliance must be supplied with the proper voltage and frequency, and connected to an individual (dedicated to the appliance), properly grounded branch circuit protected by a circuit breaker or time-delay fuse. It is the personal responsibility of the oven owner to provide the correct electrical service for this oven.
IMPORTANT:
- Local codes and ordinances take precedence over these instructions. Complete electrical connections according to local codes and ordinances.
-
Turn off the circuit breaker or remove fuses to the oven branch circuit.
-
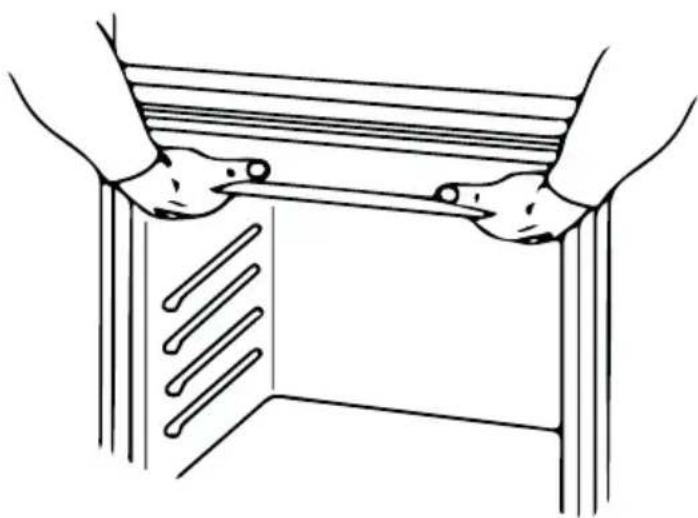
Using two or more people, grasp the ceiling of the oven cavity, lift oven on table or platform directly in front of and even with the cutout opening.
- The platform and the cutout floor must both support 110 lbs (50 kg).
natural_image
Line drawing of two hands holding a wooden table with three rows of ribbons (no text or symbols)- Complete installation following instructions for your type of electrical connection:
• 4-wire (recommended)
• 3-wire (if 4-wire is not available)
3-WIRE POWER SUPPLY CONNECTION
IMPORTANT: Use the 3-wire cable from power supply where local codes permit connecting the oven ground conductor to the neutral (white) junction box supply wire.
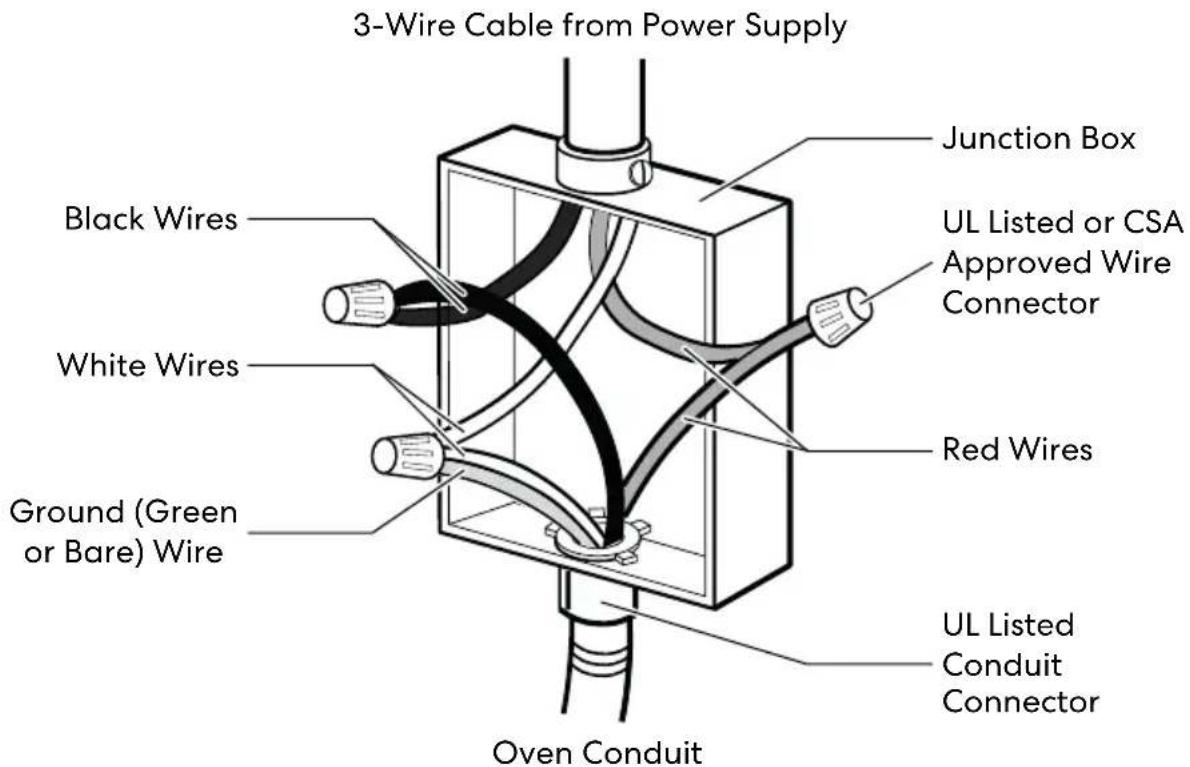
- Remove junction box cover, if present.
- Connect the flexible cable conduit from the oven to the junction box using a UL listed or CSA approved conduit connector.
- Tighten screws on conduit connector if present.
- Using the UL listed wire connectors:
- Connect the two black wires together.
- Connect the two red wires together.
- Connect the oven ground (green or bare) wire and oven neutral (white) wire to the neutral (white) wire in the junction box.
- Install junction box cover.
4-WIRE POWER SUPPLY CONNECTION
IMPORTANT: Use the 4-wire cable from power supply where local codes do not permit connecting the oven ground conductor to the neutral (white) junction box supply wire.
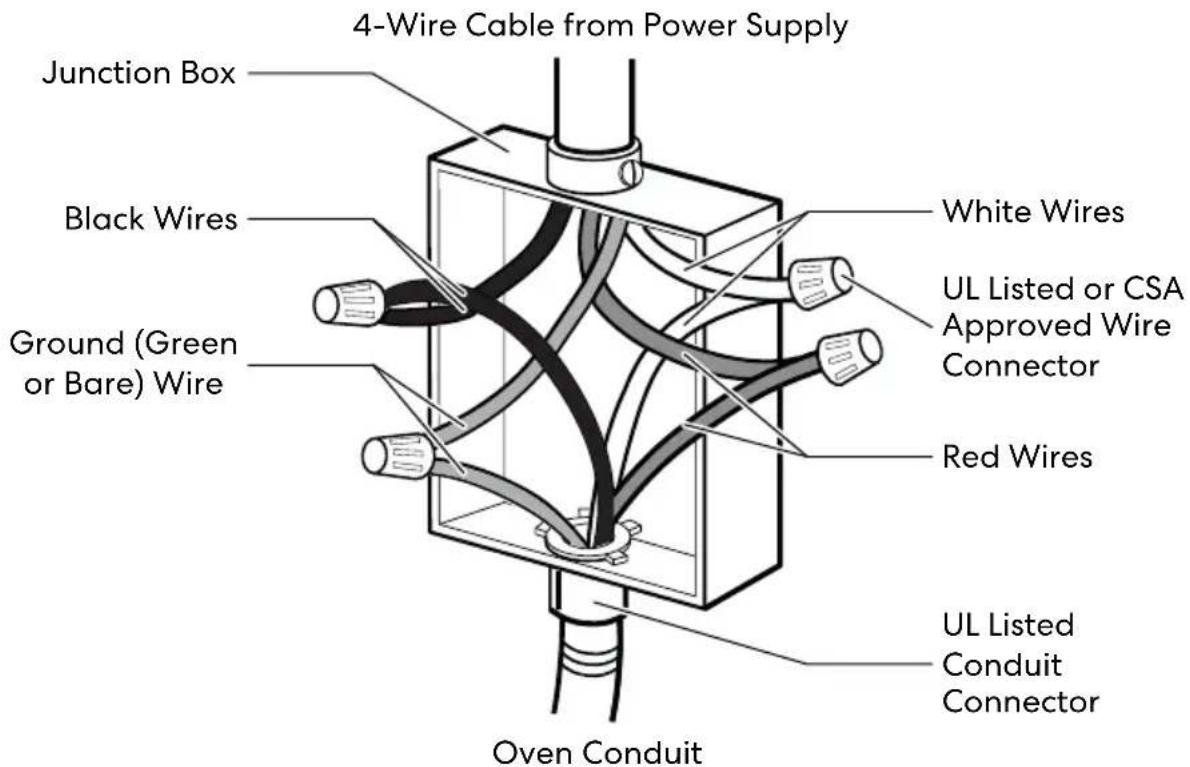
- Remove junction box cover, if present.
- Connect the flexible cable conduit from the oven to the junction box using a UL listed or CSA approved conduit connector.
- Tighten screws on conduit connector if present.
- Using the UL listed wire connectors:
- Connect the two black wires together.
- Connect the two red wires together.
- Connect the two neutral (white) wires together.
- Connect the oven ground (green or bare) wire to the ground (green or bare) wire in the junction box.
- Install junction box cover.
! WARNING
EXCESSIVE WEIGHT HAZARD
- Use two or more people to move and install oven. Failure to do so can result in back or other injury.
- Loop (do not tie) a 36" (91 cm) string around the conduit before the oven is slid into place. This will keep the conduit from falling behind the oven.
- Lift oven into cabinet cutout using the oven opening as a grip. Carefully push against the oven front frame. Do not push against outside edges.
NOTE:
- Ensure that no damage is done to oven gasket which lines the edge of oven cavity.
- While sliding the oven back, pull the string so that the conduit lies on the top of the oven in a natural loop.
- When you are sure the conduit is out of the way, carefully slide the oven 3/4" way back into the opening. Remove the string by pulling on one end of the loop.
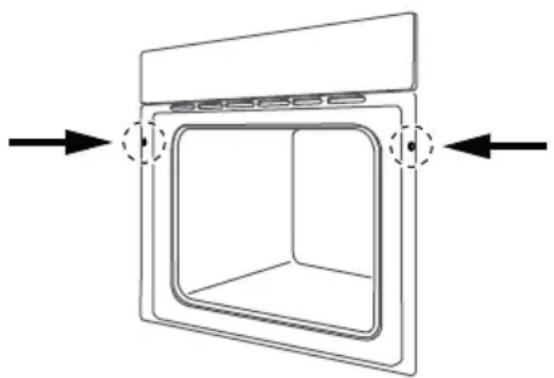
- Using the mounting holes on the oven side trim as a guide, drill pilot holes for mounting screws provided.
natural_image
Diagram of a 3D box-like structure with arrows indicating direction (no text or symbols)NOTE:
- Mounting screws must be used. Failure to do so can result in the oven falling out of the cabinet causing serious injury.
- Secure the oven to the cabinet with mounting screws provided.
NOTE:
- If the cabinet is particle board, you must use 3/4" particle board screws. These may be purchased at any hardware store.
INSTALL OVEN DOOR
IMPORTANT: The oven door is heavy. To avoid oven door glass breakage, use both hands, and grasp only the sides of the oven door to remove. Do not lift oven door by door handle.
Assembling Door
- Verify that the hinge arms are extending forward.
- Firmly grasp both sides of the door.
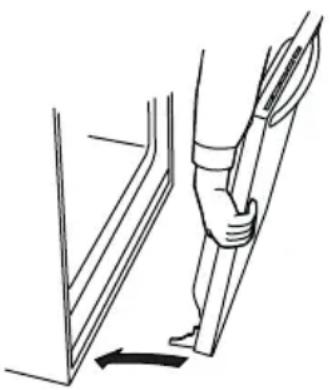
- With the door at the same angle as the removal position, which is approximately five degrees or 2-3 inches from being fully closed, seat the indentation of the hinge arms into the bottom edge of the hinge slots. The notch in the hinge arms must be fully seated into the bottom edge of the slots.
natural_image
Line drawing of a person using a tool to lift or stand a wall, with an arrow indicating motion (no text or symbols)-
Open the door fully. If the door will not open fully, the indentation is not seated correctly in the bottom edge of the slots.
-
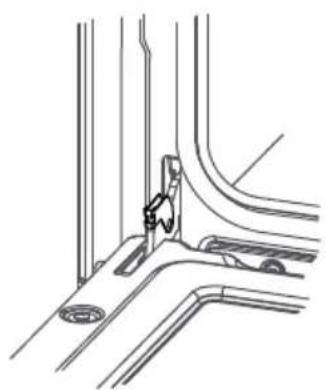
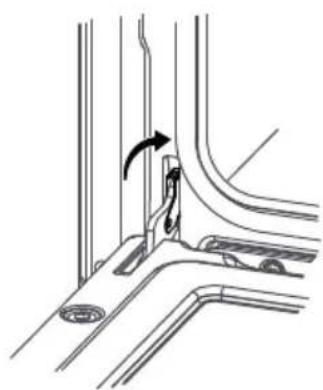
Lock the hinge locks, rotating them back toward the slots in the oven frame until they lock.
natural_image
Technical line drawing of a mechanical assembly with no visible text or symbolsUnlocked Locked
natural_image
Technical line drawing of a mechanical assembly with no visible text or symbols- Close the oven door. Check that the door is free to open and close and is level while closed.
COMPLETE INSTALLATION
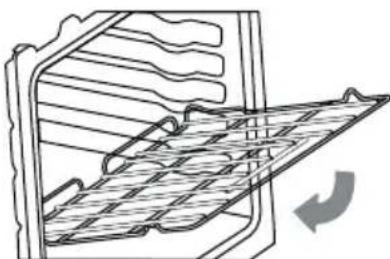
INSERT OVEN RACKS
The appearance of the racks may vary from what is shown in the manual.
-
Place the end of the rack in between the support rails.
-
Tilt the front end up and push the rack in.
natural_image
Technical line drawing of a mechanical component with internal hatching and an arrow indicating rotation (no text or symbols)INSERT BRIOLER TRAY
- Place the end of the tray in between the support rails and push the tray in.
IMPORTANT: Check that all packing material and tape have been removed. Failure to remove these materials could result in damage to the appliance once the appliance has been turned on and surfaces have heated.
-
Check to make sure the circuit breaker is closed (RESET) or the circuit fuses are replaced. Be sure power is in service.
-
At first use, set up the clock. For more information, refer to "Clock" in the "Features" section.
NOTE:
- If oven does not operate, check the following:
- Household fuse is intact and tight, or circuit breaker has not tripped.
- Electrical supply is connected.
- If the oven is in Standby Mode, press and hold <> for 3 seconds or until the symbol lights up in the display to turn on and set the oven in Normal Mode.
-
Press and release the function knob and the temperature knob, then turn the knobs to select Bake and 400^ F. The oven starts preheating.
-
When oven has been on for 5 minutes, feel for heat.
If you do not feel heat, turn off the oven and contact a qualified technician.
-
(Optional) Allow oven to run for at least 30 minutes to burn off and remove any manufacturing protection oil, dust or impurities.
-
Turn the knobs to select • or OFF at 12 o'clock position, then press and hold <> and + at the same time for 3 seconds to turn off and return the oven to Standby Mode.
TROUBLESHOOTING
First try the solutions suggested here to possibly avoid the cost of a service call.
COOKING PROBLEMS
With any oven cooking modes poor results can occur for many reasons other than a malfunction of the oven. Check the chart below for causes of the most common problems. Since the size, shape and material of baking utensils directly affect the baking results, the best solution may be to replace old baking utensils that have darkened and warped with age and use.
| PROBLEM CAUSE | |
| Food browns unevenly | Oven not preheatedAluminum foil on oven rack or oven bottomBaking utensil too large for recipePans touching each other or oven walls |
| Food too brown on bottom | Oven not preheatedUsing glass, dull or darkened metal pansIncorrect rack positionPans touching each other or oven walls |
| Food is dry or has shrunk excessively | Oven temperature too highBaking time too longOven door opened frequentlyPan size too large |
| Food is baking or roasting too slowly | Oven temperature too lowOven not preheatedOven door opened frequentlyTightly sealed with aluminum foilPan size too small |
| Pie crusts do not brown on bottom or crust is soggy | Baking time not long enoughUsing shiny steel pansIncorrect rack positionOven temperature is too low |
| Cakes pale, flat and may not be done inside | Oven temperature too lowIncorrect baking timeCake tested too soonOven door opened too oftenPan size may be too large |
| Cakes high in middle with crack on top | Oven temperature too highBaking time too longPans touching each other or oven wallsIncorrect rack positionPan size too small |
| Pie crust edges too brown | Oven temperature too highEdges of crust too thin |
OPERATION PROBLEMS
| PROBLEM | POSSIBLE CAUSE | SOLUTION |
| Oven is not heating | No power to the oven. | Check the circuit breaker or fuse box to your house. Make sure there is proper electrical power to the oven. |
| Oven is turned off in Standby Mode. | All oven functions are disabled in Standby Mode. Press and hold <> for 3 seconds or until the symbol lights up in the display to turn on and set the oven in Normal Mode. | |
| Oven mode or temperature not started or selected | Make sure the oven mode and temperature have been selected, and Start button has been pressed. | |
| Oven display stays Off | Power interruption. | Turn off power at the main power supply (fuse or breaker box). Turn breaker back on. If condition persists, call for service. |
| Cooling fan continues to run after oven is turned off | The electronic components have not yet cooled sufficiently. | The fan will turn off automatically when the electronic components have cooled sufficiently. |
| Oven light is not working properly | Oven is turned off in Standby Mode. | Oven light is disabled in Standby Mode. Press and hold <> for 3 seconds or until the symbol lights up in the display to turn on and set the oven in Normal Mode. |
| Light bulb is loose or burned-out. | Reinsert or replace the light bulb. Touching the bulb with fingers may cause the bulb to burn out. | |
| Oven light stays on | Oven is operating. | The oven light automatically turns on and stays on when an oven function is selected under Normal Mode. |
| Cannot remove light cover | Soil build-up around the light cover. | Wipe light cover area with a clean, dry towel prior to attempting to remove the light cover. |
| Clock and timer are not working properly | No power to the oven. | Check the circuit breaker or fuse box to your house. Make sure there is proper electrical power to the oven. |
| Clock or Timer not set correctly. | See the Clock and Timer sections. | |
| Excessive Moisture | Oven was not properly preheated. | When using bake mode, preheat the oven first. Convection Bake and Convection Roast will eliminate any moisture in the oven. |
| Porcelain Chips | Oven racks were removed and replaced incorrectly. | When removing and replacing oven racks, always tilt racks upward and do not force them to avoid chipping the porcelain. |
LIMITED WARRANTY
WARRANTY AND SERVICE
TO RECEIVE WARRANTY SERVICE, YOUR PRODUCT MUST BE REGISTERED.
TO REGISTER AND REVIEW FULL WARRANTY DETAILS, VISIT:
WWW.COSMOAPPLIANCES.COM/WARRANTY
SCAN TO REGISTER

CUSTOMER SUPPORT
TO CHAT WITH US LIVE FOR ASSISTANCE, VISIT:
WWW.COSMOAPPLIANCES.COM/CHAT
SCAN TO CHAT

IMPORTANT
Do Not Return This Product To The Store
If you have a problem with this product, please contact COSMO Customer Support at
+1 (888) 784-3108
DATED PROOF OF PURCHASE, MODEL #, AND SERIAL # REQUIRED FOR WARRANTY SERVICE.
IMPORTANT
natural_image
Simple line drawing of a trash bin with two crossed lines and a solid black rectangle below (no text or symbols)Correct disposal of this product:
This marking indicates that this appliance should not be disposed with other household wastes. To prevent possible harm to the environment or human health from uncontrolled waste disposal, recycle it responsibly to promote the sustainable reuse of material resources.
MEMO

APPLIANCES
Cosmo is constantly making efforts to improve the quality and performance of our products, so we may make changes to our appliances without updating this manual.
- THANK YOU FOR YOUR PURCHASE
- TABLE OF CONTENTS
- OVEN SAFETY 5
- OVERVIEW....10
- FEATURES 13
- USING THE OVEN 22
- MAINTENANCE AND CARE 29
- INSTALLATION REQUIREMENTS 32
- INSTALLATION INSTRUCTIONS.... 39
- TROUBLESHOOTING....50
- LIMITED WARRANTY 53
- OVEN SAFETY
- READ ALL INSTRUCTIONS BEFORE USING THE APPLIANCE
- Your safety and the safety of others are very important.
- WARNING
- CAUTION
- California Proposition 65 Warning
- WARNING:
- ! WARNING
- IMPORTANT SAFETY INSTRUCTIONS
- READ AND SAVE THESE INSTRUCTIONS
- For self-cleaning ovens:
- OVERVIEW
- ACCESSORIES
- NOTE:
- OVEN OVERVIEW
- MODEL: COS-C51EIX
- CONTROL PANEL
- Releasing and Recessing the Control Knobs
- FEATURES
- CLOCK
- Setting the Clock
- TIME FUNCTIONS
- TIMER
- Setting the Timer (Up to 12 Hours 59 Minutes)
- Canceling the Timer
- COOK TIME
- Setting Immediate Cook and Automatic Shutoff (Example to set bake at 400°F for 25 minutes.)
- Canceling the Cook Time
- DELAYED START
- Setting the Oven for Delayed Start
- (Example to set bake at 400° F for 25 minutes ending at 05:30 PM.)
- Canceling the Delayed Start (Before the Start Time is Reached)
- Canceling the Delayed Start (After the Start Time is Reached)
- OVEN LIGHT
- Turning On the Oven Light Manually
- Turning Off the Oven Light Manually
- USING THE OVEN
- ! CAUTION
- FOOD POISONING HAZARD
- BEFORE USING THE OVEN FOR THE FIRST TIME
- OVEN VENT
- OVEN DOOR
- USING OVEN RACKS
- Removing Racks
- Replacing Racks
- Rack Positions
- PREHEATING
- OVEN COOKING FUNCTIONS
- To Turn On and Set the Oven in Normal Mode:
- To Turn Off and Set the Oven in Standby Mode:
- Using the Oven Cooking Functions:
- MAINTENANCE AND CARE
- CLEANING
- REPLACING THE OVEN LIGHT
- ELECTRICAL SHOCK HAZARD
- BURN HAZARD
- Replacing Oven Light
- INSTALLATION REQUIREMENTS
- TOOLS AND PARTS
- Tools Needed
- Parts Needed
- Parts Supplied
- LOCATION REQUIREMENTS
- PRODUCT DIMENSIONS
- CUTOUT DIMENSIONS
- GIVEN DIMENSIONS ARE MINIMUM CLEARANCES.
- ELECTRICAL REQUIREMENTS
- ELECTRICAL GROUNDING INSTRUCTIONS
- U.S.A. ONLY
- CANADA ONLY
- ELECTRICAL CONNECTION
- INSTALLATION INSTRUCTIONS
- LACERATION, FOREIGN OBJECT, CRUSH HAZARD
- EXCESSIVE WEIGHT HAZARD
- REMOVE OVEN DOOR
- IMPORTANT:
- 3-WIRE POWER SUPPLY CONNECTION
- 4-WIRE POWER SUPPLY CONNECTION
- INSTALL OVEN DOOR
- Assembling Door
- COMPLETE INSTALLATION
- INSERT OVEN RACKS
- INSERT BRIOLER TRAY
- TROUBLESHOOTING
- COOKING PROBLEMS
- LIMITED WARRANTY
- WARRANTY AND SERVICE
- CUSTOMER SUPPORT
- IMPORTANT
- Correct disposal of this product:
- MEMO
- APPLIANCES
Brand : Cosmo
Model : COS-C51EIX
Category : Oven