
Assure Lever - Lock Yale - Free user manual and instructions
Find the device manual for free Assure Lever Yale in PDF.


| Product Type | Smart Lock (Touchscreen Lever) |
| Brand | Yale |
| Model Numbers | YRL226 (with key cylinder), YRL256 (key-free) |
| Power Source | 4 AA alkaline batteries |
| Backup Power | 9V battery jumper (contacts below keypad) |
| Door Thickness Compatibility | 1-3/8" to 1-3/4" |
| Backset | Adjustable: 2-3/8" to 2-3/4" (via latch adjustment) |
| Face Bore Diameter | Minimum 2-1/8" |
| Key Override | Yes (YRL226) / No (YRL256) |
| Max Number of Entry Codes | 25 (without Smart Module), 250 (with Smart Module) |
| Smart Home Compatibility | Optional Yale Smart Module (sold separately) |
| Audio Prompts | English, Spanish, French (selectable) |
| Auto Re-lock | Programmable: 30 sec, 60 sec, 2 min, 3 min |
| One-Touch Locking | Enabled by default |
| All Code Lockout | Yes (disables all except Master Code) |
| Wrong Code Entry Limit | 5 attempts before 60-second shutdown |
| Shutdown Time | 60 seconds |
| Low Battery Warning | Audible alert and indicator |
| Indoor Indicator Light | Programmable (on/off) |
| Spare Parts Available | Adjustable drive-in latch (AYRL-DRIVE), mounting hardware, cylinder replacement kit |
| Reset to Factory Defaults | Yes (via reset button inside lock) |
Frequently Asked Questions - Assure Lever Yale
User questions about Assure Lever Yale
0 question about this device. Answer the ones you know or ask your own.
Ask a new question about this device
Download the instructions for your Lock in PDF format for free! Find your manual Assure Lever - Yale and take your electronic device back in hand. On this page are published all the documents necessary for the use of your device. Assure Lever by Yale.
USER MANUAL Assure Lever Yale
This manual will walk you through all the required steps to add your new Yale Assure Lever to your door.
- Remove existing door knob or lever
• Double check door measurements
• Install your Assure Lever
• Program your Assure Lever - Add your Assure Lever to your smart home system or Yale Access app if purchased with Yale Smart Module or Yale Access Upgrade Kit
Tools Needed

Standard Phillips Head Screwdriver
Tools Needed For New Doors
Or Adjusting Existing Door

Before you begin
DOWNLOAD THE BILT APP
BILT。
Apple App Store
Google Play
Using the app on your smart phone, scan this QR for step-by-step installation instructions & to register your lock


WARNING
This product can expose you to lead which is known to the state of California to cause cancer and birth defects or other reproductive harm. For more information go to www.P65warnings.ca.gov.
Failure to follow these instructions could result in damage to the product, voiding the factory warranty and could lead to failure of the product to provide access.

What's In The Box


Touchscreen Keypad


Cylinder (YRL226)
Key-Free
Cylinder
(YRL256)

natural_image
Line drawing of two interlocked mechanical linkages (no text or symbols)Levers

natural_image
Technical line drawing of a remote control device showing internal components and battery pack (no text or labels)Inside Lock
natural_image
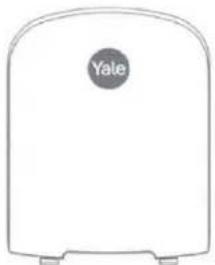
Simple line drawing of a white rectangular container with a circular label containing the word 'Yale' (no additional text or symbols)Battery Cover
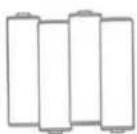
AA Alkaline Batteries
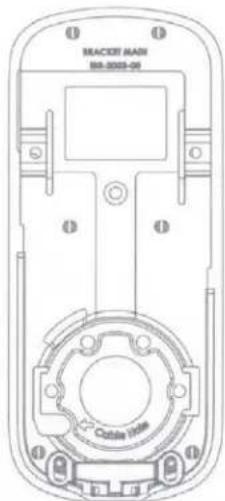
Mounting Plate
Battery Cover Key
Mounting Hardware

Strike Plate

(CAYRL-DRIVE
Adjustable Drive-In Latch available for purchase)

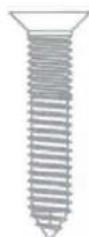

7 wood & #8-32
Machine x 20mm
Combination Screws


8-32×5/16"
Machine Screws

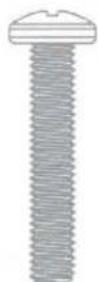

M4×22mm
Pan Head Machine
Screws
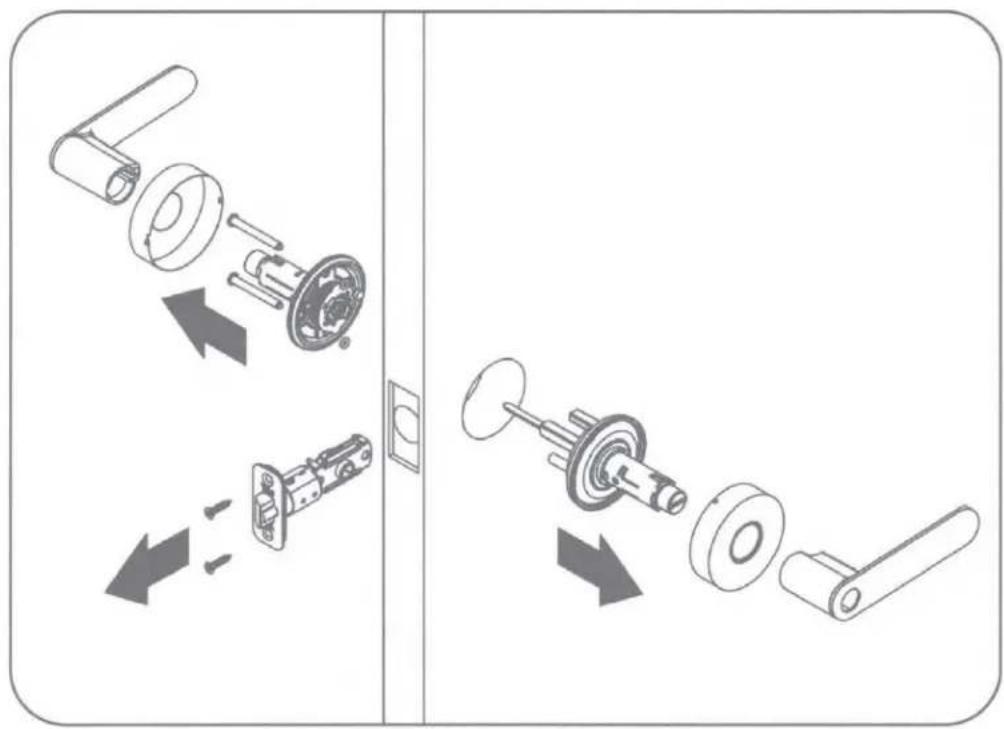
Removing Existing Door Knob or Lever

Do not discard old lock hardware until Assure Lever has been successfully installed.
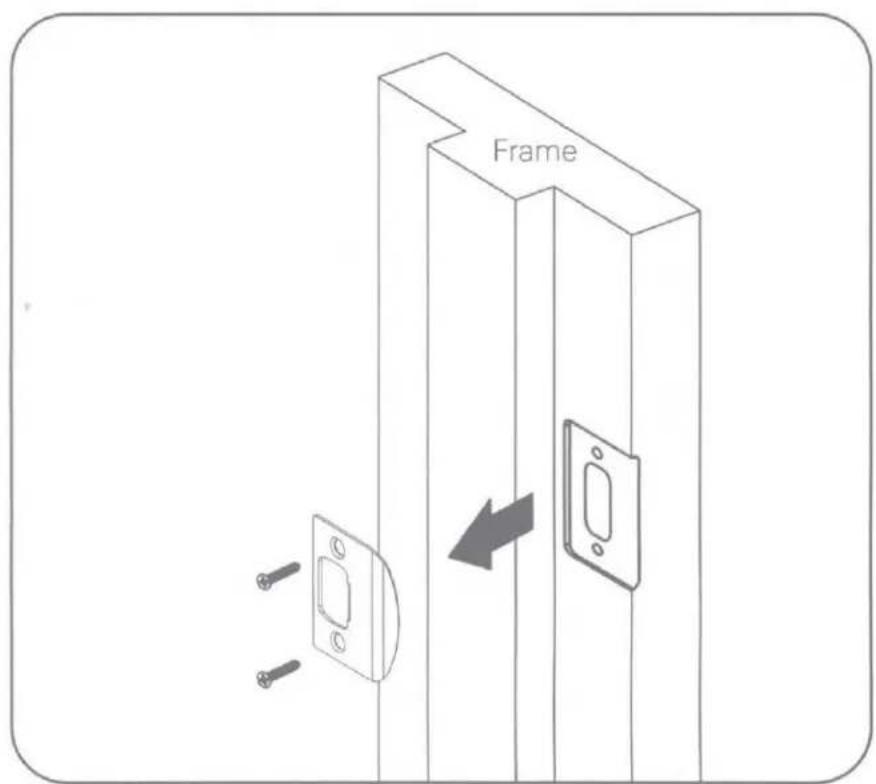
Check Door Measurements and Make Adjustments If Needed
Door Checker
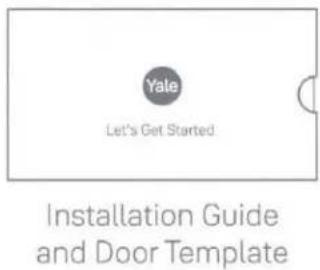
Use door checker from installation guide envelope to verify your door measurements and make any needed adjustments.

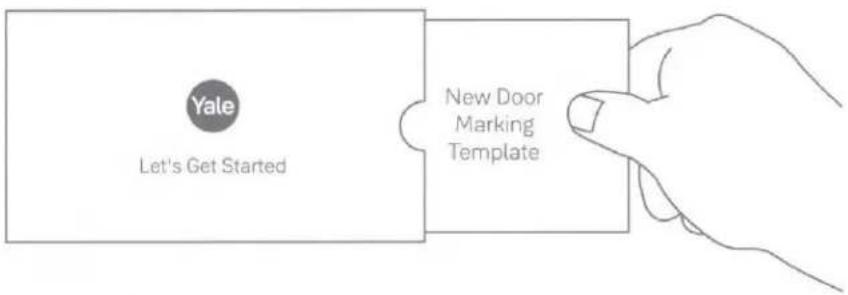
New Door Marking Template
With the door checker, use the template from installation guide envelope to prep a new door that has not been predrilled for hardware.

Install Latch and Strike Plate
Right Hand Installation Shown
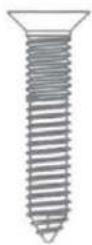
x2
For Lever
Actual Size

x2
For Strike Plate
Actual Size

natural_image
Line drawing of a hand pressing a button on a mechanical component (no text or symbols)
AYRL-DRIVE
Adjustable Drive-In Latch
available for purchase

O 2-3/4" through bolt posts, optional Note: Adjustment is based on backset



Install Touchscreen Right Hand Installation Shown
 Door face hole must be at least 2-1/8".If hole is too small, a door lock installation kit or jig should be used to increase hole size. Door face hole must be at least 2-1/8".If hole is too small, a door lock installation kit or jig should be used to increase hole size. | Rig |
| Inside of Right Hand Door | 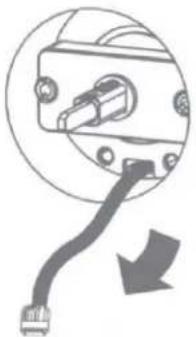 |
Install Mounting Plate
Right Hand Installation Shown
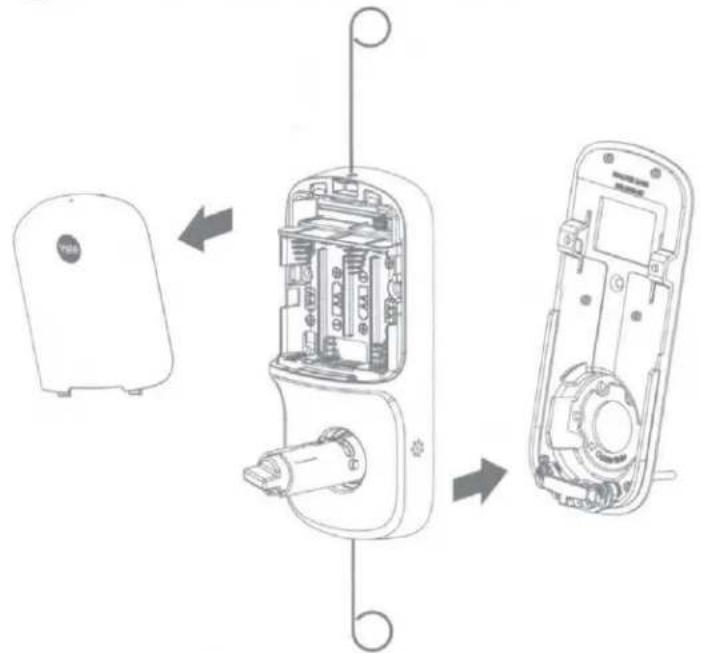
natural_image
Exploded view diagram of a mobile phone showing internal components and wiring (no text or labels)
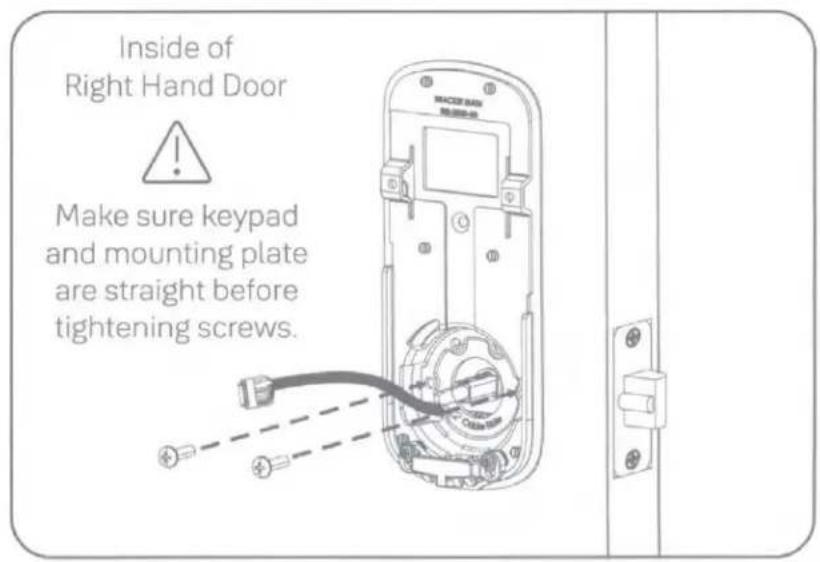

Attach Cable Right Hand Installation Shown
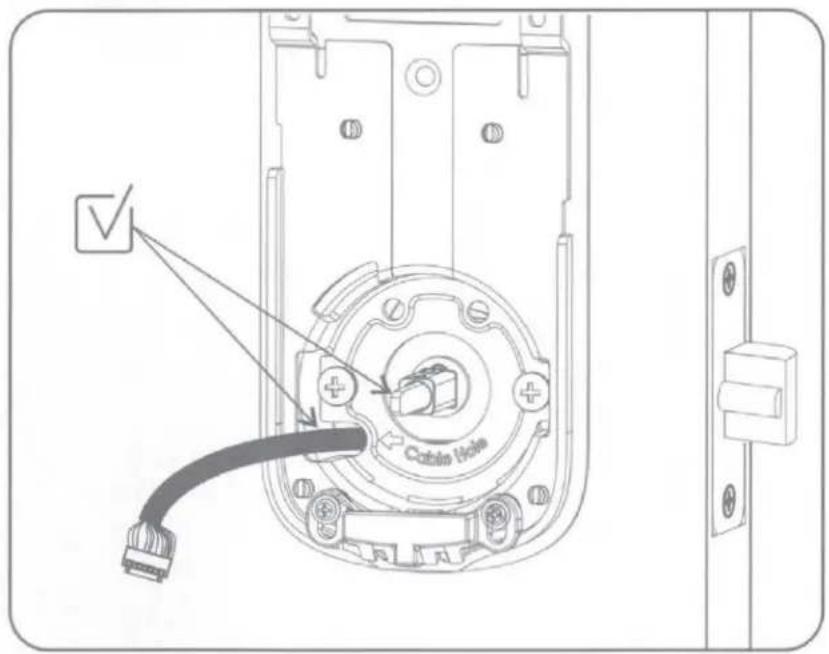

Install Inside Lock Right Hand Installation Shown

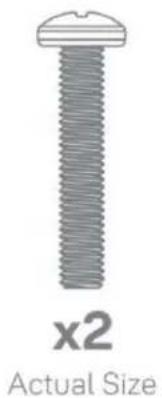
x2 Actual Size

natural_image
Technical line drawing of a device with internal components and a checkmark indicating selection (no text or symbols present)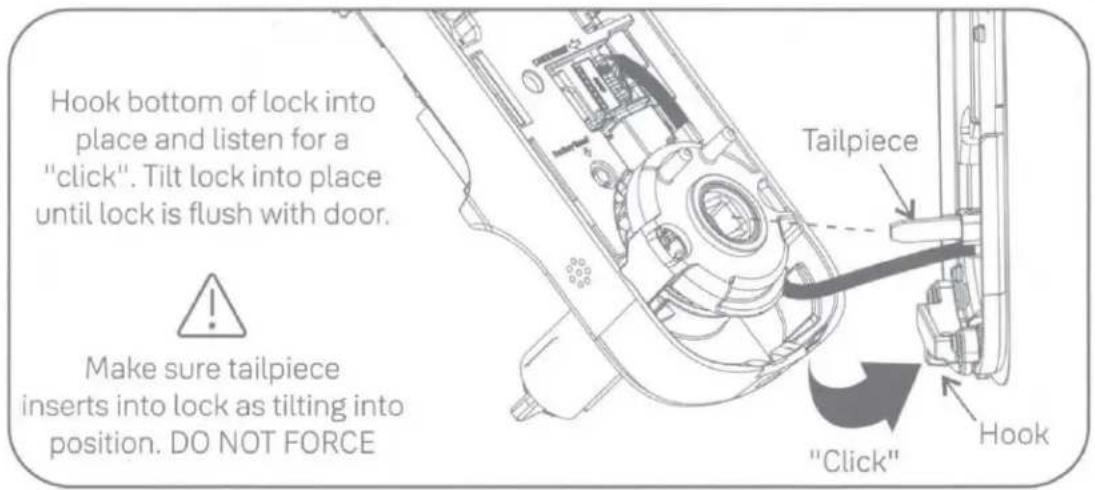
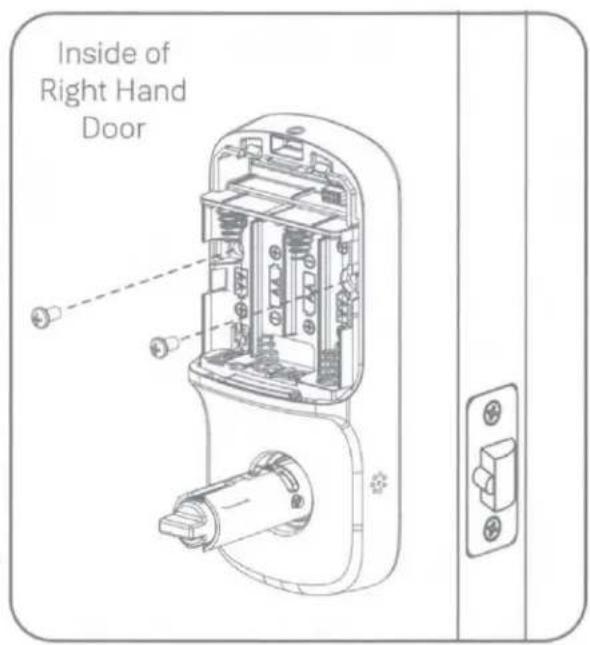
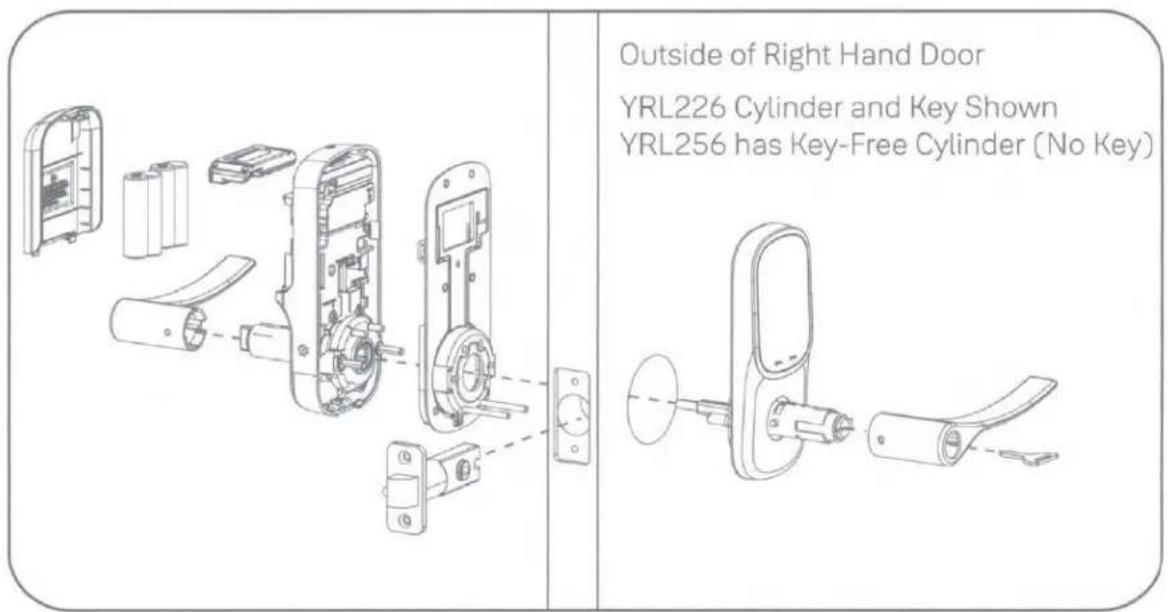
Install Cylinder (YRL226) or Key-Free Cylinder (YRL256)

OR


Install Outside Lever


Install Inside Lever


Test Thumbturn Operation with Door Open

natural_image
Technical line drawing of a door handle and keyhole (no text or symbols)
natural_image
Line drawing of a door handle and keyhole (no text or symbols)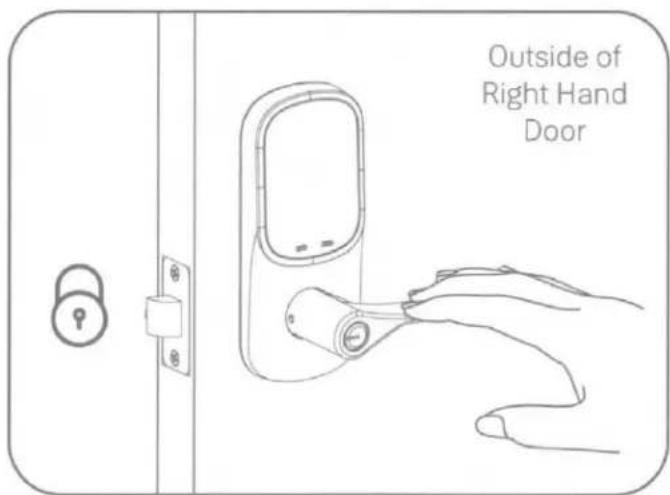


Test thumbturn and both levers in locked and unlocked positions. If operation fails, check installation beginning with Step 4 and refer to Hardware Troubleshooting.

Test Key Operation (YRL226) with Door Open
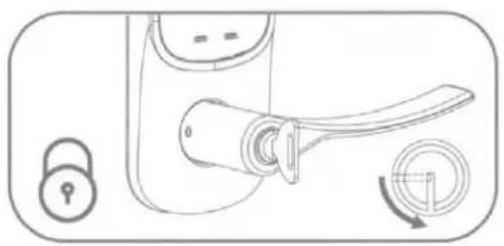
natural_image
Line drawing of a door handle with lock and scroll (no text or symbols)
natural_image
Line drawing of a door handle with lock and rotary dial (no text or symbols)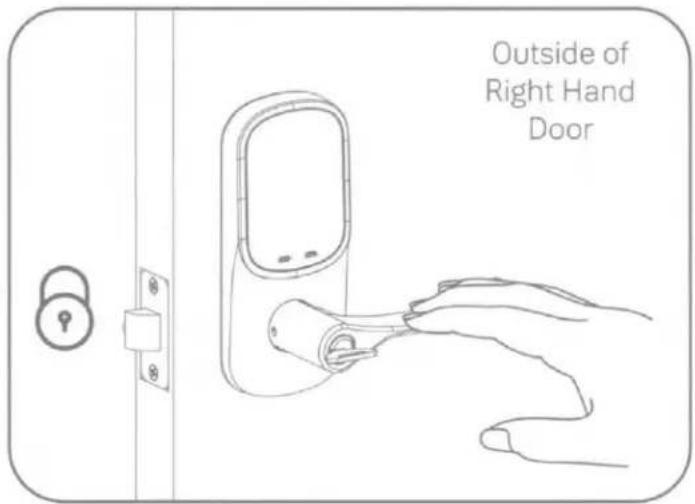


If key operation test fails, check installation beginning with Step 8.
Almost done!
Turn sheet over to finish installation and customize your lock.
11
Install Yale Smart Module Not included with NR models

NOTE: If a Smart module was included with your lock, it is in a separate box with additional module installation instructions.

For more information about Yale Smart modules and smart home features visit: US.YaleHome.com/Smart
12
Install Batteries & Cover

Congratulations, you've installed the Yale Assure Lever® Touchscreen (YRL226) or Key-Free Touchscreen (YRL256)! Using Your Lock instructions will help you customize your lock.

Testing Touchscreen Operation with Door Open
A Master Entry Code must be created upon installation or after resetting the lock to factory default. Programming and use of lock is not possible until this step has been successfully completed. See Using Your Lock instructions.
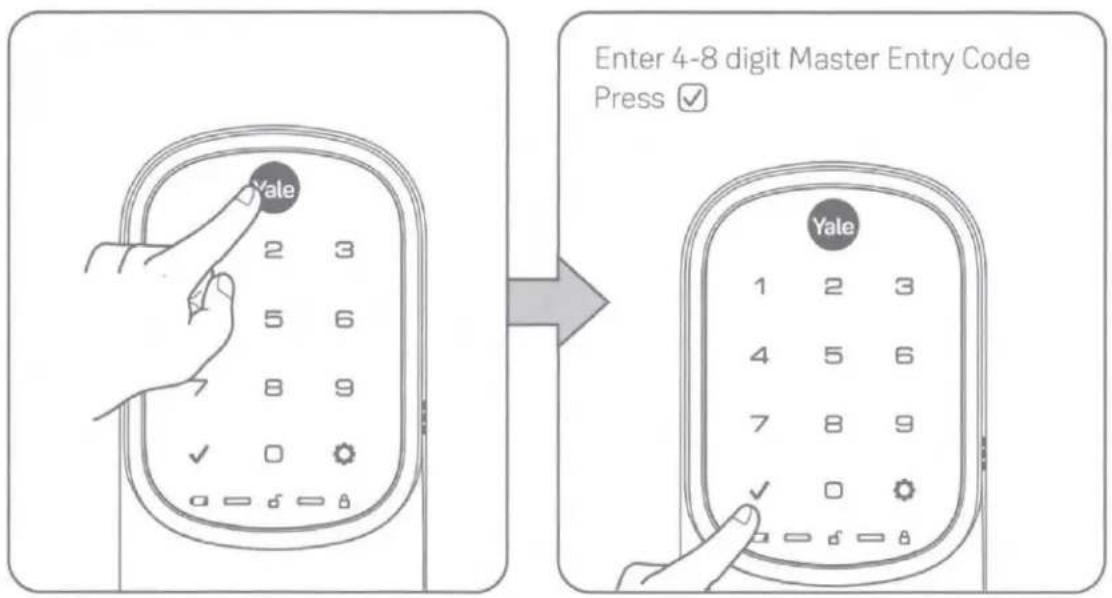


If touchscreen operation test fails, check installation beginning with Step 3

Resetting Lock to Factory Default

When resetting the lock, all Entry Codes, including the Master Entry Code*, are deleted. All programming features are reset to original default settings. See "Setting Definitions".
- Remove the battery cover and batteries.
- Remove the inside lock to access the reset button.
- The reset button (see image above) is marked.
- Re-insert 3 batteries and hold the reset button for 3 seconds.
- While still holding the reset button, insert the 4th battery, and hold the reset button for an additional 3 seconds.
- Release the reset button.
- Re-install the inside lock onto the door.
*Upon reset, Master Entry Code creation is the only option available and must be performed prior to any other programming of the lock.

Hardware Troubleshooting
Cycle lock in both the locked and unlocked positions. If problems are found:
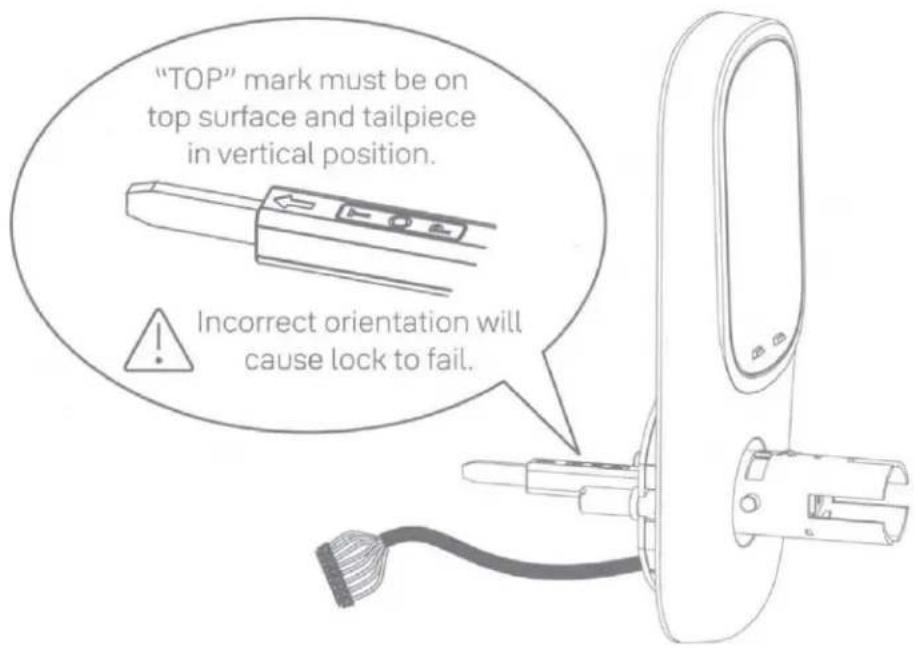
| Tailpiece and spindle will not mate and fit into the inside locka. Make sure that your door is between 1-3/8" and 1-3/4" thickb. Make sure that the square shaped spindle has "Top" writing and arrow facing upwardsc. Place the tailpiece in the vertical positiond. Verify that the thumbturn is in the horizontal (unlocked) position |
| Thumbturn does not rotate electronically or physicallya. Verify that inside of the lock is properly seated on the mounting bracketb. Ensure that the square shaped spindle has "Top" writing and arrow facing upwardsc. Place the tailpiece in the vertical positiond. Verify that the thumbturn is in the horizontal (unlocked) position |
| I'm getting an alert when I try to lock or unlock the door electronicallya. Do not turn or depress the lever during operation, this could cause a jam alarmb. Check that thumbturn does not have anything preventing it from physically rotatingc. Verify that you can rotate thumbturn freely |
| My lock is not making any sound when I touch numbers or icons on the keypada. Use the programming tree in the manual to verify that Audio is enabledb. If Audio is enabled, make sure that the white cable that connects the keypad to the inside lock is not pinched or broken |
| When rotating the thumbturn I hear noisea. A little bit of noise is normal when operating the thumbturnb. If cranking, grinding or clicking occurs please verify your installation |
| The locking pins will not retract when I try to install the leversa. If the thumbturn is in vertical (locked) position, rotate the thumbturn to the horizontal (unlocked) position and it will retract |

Replacing Cylinder (YRL226)
-
To Remove Cylinder: See installation Steps 7 and 8. Reverse appropriate actions to remove the outside lever handle and cylinder.
-
To Install New Cylinder:
A. Follow appropriate actions of installation Steps 7 and 8 to replace the cylinder and outside lever handle.
B. Test operation of new cylinder and key by following "Testing Operation".
| Settings | Default Setting | Definition |
| Master Entry Code | Creation required* | The Master Entry Code is used for programming and for feature settings. It must be created prior to programming the lock. The Master Code will also operate (unlock/lock) the lock. |
| All Code Lockout | Disabled | This feature is enabled by the Master Entry Code. When enabled, it restricts all Entry Code access except Master. When attempting to enter a code while the lock is in All Code Lockout mode, the RED locked padlock will appear on the screen. |
| Auto Re-lock | Disabled | After a successful code entry or manual unlock with the key (YRL226), the lock will automatically re-lock after each unlock in an effort to keep your home secure. This feature is optional, and can be turned off. In the ON mode, the lock will automatically re-lock after thirty (30) seconds. |
| Inside Indicator Light | Disabled (Off) | Located on the interior lock. Shows active status (Locked) of lock and can be enabled or disabled in the Advanced Lock Settings (Main Menu selection #3). |
| Language | English | Choosing English (1), Spanish (2) or French (3) becomes the (default) setting for the lock voice prompts. |
| One Touch Locking | Enabled | When the latch is retracted, activating the touchscreen will extend the latch (during Auto Re-lock duration or when Auto Re-lock is disabled). When One-Touch Re-lock is not in use (disabled), any valid Entry Code will re-lock the lock. |
| Shutdown Time | 60 Seconds | The lock will shutdown (flashing RED) for sixty (60) seconds and not allow operation after the Wrong Code Entry limit (5 attempts) has been met. |
| Volume | Enabled (Low) | The volume setting for Entry Code verification is set to Low (2) by default; otherwise it can be set to High (1) or Silent (3) for quiet areas. |
| Wrong Code Entry Limit | 5 Times | After five (5) unsuccessful attempts at entering a valid Entry Code, the lock will shut down and not allow operation for sixty (60) seconds. |
*The Master Entry Code must be created prior to any other programming of the lock.

Using Your Lock

Touchscreen Keypad

Inside Lock
\*NOTE TO INSTALLER AND CONSUMER
While Yale® has included several features to prevent lockout (9-Volt battery jumper, low battery warnings), it is still possible for a lockout situation to occur. Because the YRL256 does not have a key, Yale® recommends using YRL236 in an environment where there are additional entry points into dwelling.

Creating Master Entry Code
The Master Entry Code is used to change the lock settings. A security best practice is to set your Master Entry Code with 6 or more digits and create a separate code that is used daily to lock and unlock the door.
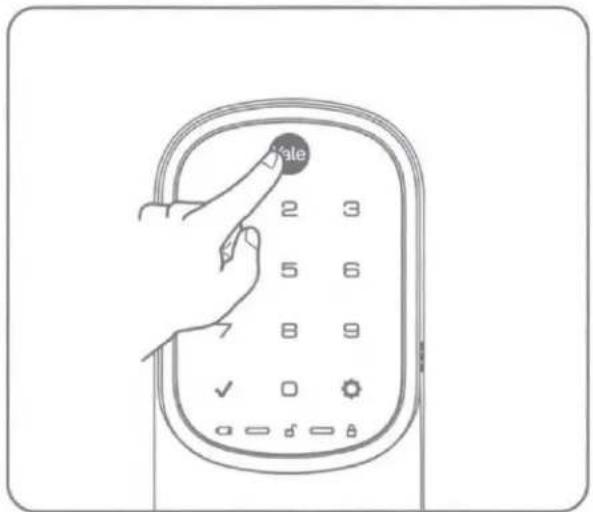

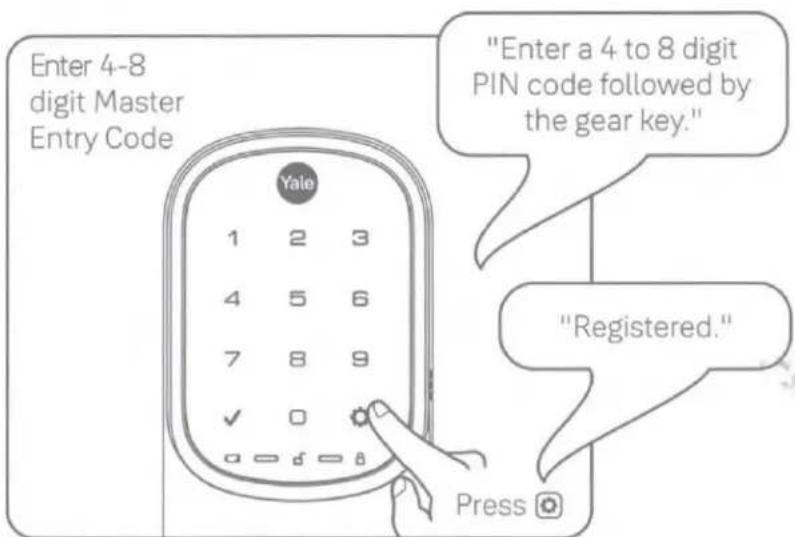

Creating Entry Codes
Master Entry Code must be created first.
*Max Entry Codes = 250 with Smart Module; 25 without.

flowchart
graph TD
    A["Enter Master Entry Code Press"] --> B["Enter 4-8 digit Entry Code Press (code flashes)"]
    B --> C["Press 1 Press"]
    C --> D["Press 2 Press"]
    D --> E["Press 3 Press"]
    E --> F["Press 4-8 digital Entry Code Press"]


Deleting Entry Codes
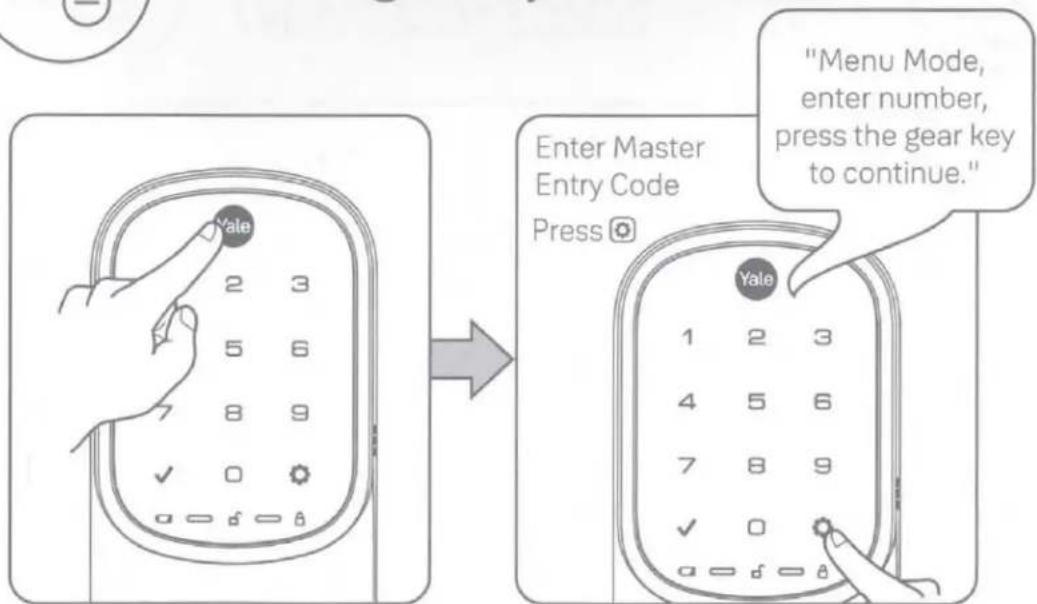

Deleting one Entry Code: To delete one Entry Code, you must enter the Entry Code you wish to delete.
To delete all Entry Codes (Does not delete Master Entry Code):


Unlocking Door with Entry Codes
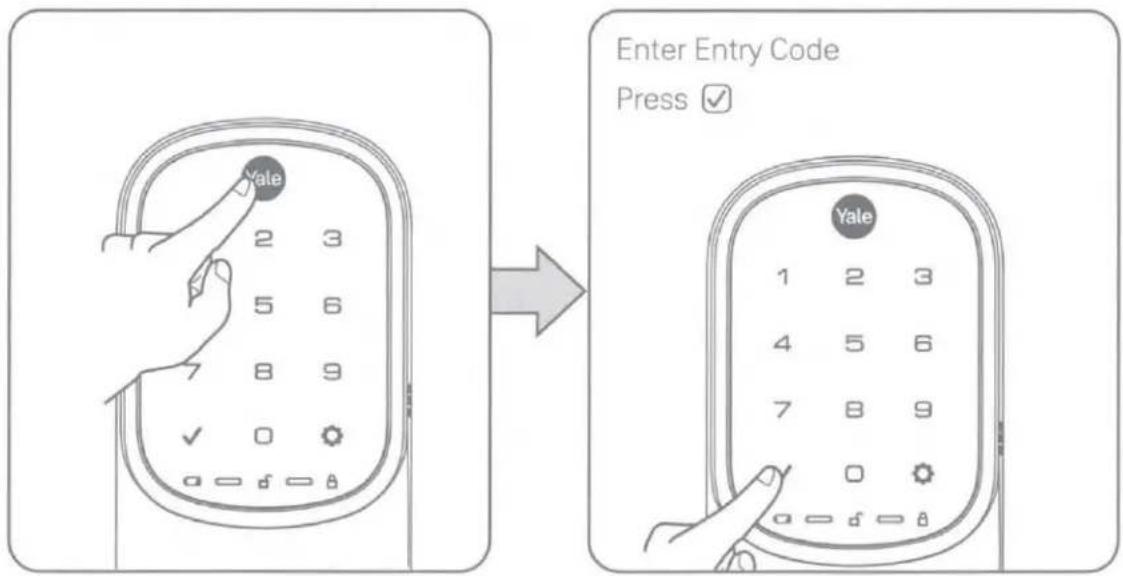
Code Chart
Duplicate if necessary
| Entry Code Management | Entry Code |
| Master: Homeowner | |
| User Name: Babysitter | |

Customizing Lock Using Settings Menu
- Press Yale logo to wake up lock
- Enter Master Entry Code* followed by 📄 icon.
Lock Response: "Welcome to the Settings Menu. Press each number to hear available settings and then press the settings icon to enter." - Enter digit corresponding to the function to be performed followed by the ⏻ icon. Follow the voice commands.

flowchart
graph TD
    A["Advanced Lock Settings"] --> B["1 Auto Re-lock"]
    B --> C["2 30 sec"]
    B --> D["3 60 sec"]
    B --> E["4 2 min"]
    B --> F["5 3 min"]
    B --> G["2 Inside Indicator Light"]
    G --> H["1 Enable"]
    G --> I["3 Disable"]
    G --> J["3 One Touch Locking"]
    J --> K["1 Enable"]
    J --> L["3 Disable"]
    M["Remain in Settings Menu or Exit Settings Menu"] --> N["4 Volume Setting"]
    N --> O["1 High"]
    O --> P["2 Low"]
    P --> Q["3 Silent"]
    R["Default settings in bold."] --> S["5 Language Setting"]
    S --> T["1 English"]
    T --> U["2 Spanish"]
    U --> V["3 French"]
    W["7 **Network Module Setting"] --> X["1 Join the Network"]
    X --> Y["3 Exit the Network"]
Here is an example of how to set Auto Lock to 30 seconds:
Master Entry Code Ⓧ, 3 Ⓧ, 1 Ⓧ, 2 Ⓧ, √
*The Master Entry Code must be created prior to any other programming of the lock.
**Network Module Setting function appears only with Yale Smart module installed.

Troubleshooting
| Symptom | Suggested Action |
| Lock does not respond - door is open and accessible. | Keypad becomes active when Yale logo is pressed.Verify contact with the logo.If keypad numbers are visible, check they respond when pressed.Check batteries are installed and oriented correctly (polarity) in battery case.Replace batteries* if batteries are dead.Check keypad cable is fully connected and not pinched. |
| Lock does not respond - door is locked and inaccessible. | Batteries may not have enough power. Replace batteries*.Apply a 9V battery to terminals below the keypad for backup power option. |
| Lock is on for a while then shows no reaction. Lights dim. | Batteries do not have enough power. Replace batteries*. |
| Lock chimes indicating code acceptance, but door will not open. | Check for any foreign objects between door and frame.Check that cable is firmly connected to inside lock. |
| Lock operates to allow access, but will not automatically re-lock. | Check to see if Auto Re-lock is enabled.Disable Auto Re-lock to lock the door (manually). |
| Entry Codes will not register. | If low battery indicator is lit, change batteries*.Entry Codes must consist of 4 to 8 digits.The same Entry Code cannot be used for multiple users.Entry Codes are set by the Master Entry Code, which is set first. Contact the Master user.Entry Codes must be entered within 5 seconds (while keypad is active) or process will have to be restarted.Checkor gearcannot be part of the Entry Code. |
| Upon entering an Entry Code and pressingkey, the lock displays "invalid code" error or lock times out without responding. | Verify entered code is a valid, previously programmed, 4 to 8 digit code.All Code Lockout is enabled. Only the Master Entry Code can change All Code Lockout. Contact the Master user. |
| Upon entering an Entry Code and pressingkey, red padlock icon appears and there are different tones. | Check that All Code Lockout is disabled (see Feature #6).Only the Master Entry Code can change All Code Lockout. Contact the Master user. |
| Lock operates, but makes no sound. | Check that Volume is enabled (see Feature #4).Only the Master Entry Code can change Volume. Contact the Master user. |
| Lock responds "Low Battery" | This is the alert to replace the batteries. Replace all four (4) batteries* with new AA Alkaline batteries. |
| Upon entering Entry Code and pressing thekey, lock responds "Wrong number of digits". | The digits entered were incorrect or incomplete. Re-enter the correct code followed by thekey. |
| Lock shows an X on keypad after entering a code. | Bolt failed to fully retract.Refer to Hardware Troubleshooting.Entry Code has not been scheduled for use at time of day it is tried. Try Entry Code again during scheduled time. |
| Deadbolt does not extend when locking the door with keypad. | Lock was not handed properly.Rehand lock through Settings Menu. |
* When batteries are replaced, Smart Module locks have a real time clock that will be set via the User Interface. It is recommended to verify correct date and time; particularly those locks operating under Daylight Savings Time.
FCC:
Class B Equipment
This equipment has been tested and found to comply with the limits for a Class B digital device, pursuant to Part 15 of the FCC Rules. These limits are designed to provide reasonable protection against harmful interference in a residential installation. This equipment generates, uses, and can radiate radio frequency energy and, if not installed and used in accordance with the instructions, may cause harmful interference to radio communications. However, there is no guarantee that interference will not occur in a particular installation. If this equipment does cause harmful interference to radio or television reception, which can be determined by turning the equipment off and on, the user is encouraged to try to correct the interference by one or more of the following measures:
• Reorient or relocate the receiving antenna.
• Increase the separation between the equipment and receiver.
- Connect the equipment into an outlet on a circuit different from that to which the receiver is connected.
• Consult the dealer or an experienced radio/TV technician for help.
Warning: Changes or modifications to this device, not expressly approved by Yale Home could void the user's authority to operate the equipment.
Industry Canada:
This Class A digital apparatus meets all requirements of the Canadian Interference Causing Equipment Regulations.
Yale® and Assure Lever® are registered trademarks of Yale Home. Other products' brand names may be trademarks or registered trademarks of their respective owners and are mentioned for reference purposes only. © Copyright 2021. All rights reserved. Reproduction in whole or in part without the express written permission of Yale Home is prohibited.
![New Door Marking Template For 1-3/4" [44.5mm] Thick Door 2-3/4" [70mm] Backset FOLD OVER DOOR EDGE 1" [25mm] Dia. 1" [25mm] Dia. 2-1/8" [54mm] Dia Thru Hole 2-3/8" [60mm] Backset For 1-3/8" [35mm] Thick Door 2-1/8" [54mm] Dia Thru Hole CAUTION: If Printed from Electronic File set print scale to 1:1 Measure ruke to check scale](/content/2026/05/957958/images/f85c8a923ec24ff54319d464869c720599159cd1c1a038fea9fea6fc81b20dfa.jpg)
Preparing Door & Frame
Necessary for new doors or adjusting existing prep.


ISL-1286-08
YRL-MNL-0007
Check Your Door Guide
For doors with existing hardware
CAUTION:
If Printed from Electronic File
set print scale to 1:1
Measure ruke to check scale

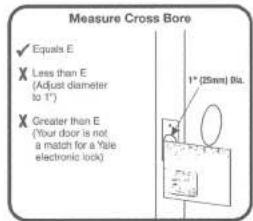
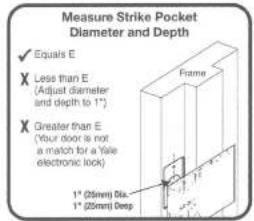
A. 1-3/8" - 1-3/4" Door Thickness
B. Backset, Use Out of Box latch setting.
C. Backset, Adjust latch setting.
D. Face Bore Diameter.
E. Edge Bore Diameter and Depth. Cross Bore Diameter.



We're Here to Help, 24/7!
Our trained and dedicated support team is available via phone or email, 24 hours a day, seven days a week.
Call us at 1-855-213-5841
or Email Support@YaleLock.com
ISL-2066-00-000 Ver.2
Part of ASSA ABLOY


Refer a Friend
Give your friends a discount, and you'll earn credit to your next purchase, too!*
Visit:
ShopYaleHome.com/Refer
*Some exclusions may apply. Subject to change.



- WARNING
- What's In The Box
- wood & #8-32
- 8-32×5/16"
- Removing Existing Door Knob or Lever
- Check Door Measurements and Make Adjustments If Needed
- Door Checker
- New Door Marking Template
- Install Touchscreen Right Hand Installation Shown
- Attach Cable Right Hand Installation Shown
- Install Inside Lock Right Hand Installation Shown
- Install Cylinder (YRL226) or Key-Free Cylinder (YRL256)
- Install Outside Lever
- Install Inside Lever
- Test Thumbturn Operation with Door Open
- Test Key Operation (YRL226) with Door Open
- 11
- Install Yale Smart Module Not included with NR models
- 12
- Install Batteries & Cover
- Testing Touchscreen Operation with Door Open
- Resetting Lock to Factory Default
- Hardware Troubleshooting
- Replacing Cylinder (YRL226)
- Using Your Lock
- \*NOTE TO INSTALLER AND CONSUMER
- Creating Master Entry Code
- Creating Entry Codes
- Unlocking Door with Entry Codes
- Code Chart
- Customizing Lock Using Settings Menu
- Troubleshooting
- FCC:
- Class B Equipment
- Industry Canada:
- Preparing Door & Frame
- Check Your Door Guide
- For doors with existing hardware
- CAUTION:
- We're Here to Help, 24/7!
- Refer a Friend
Brand : Yale
Model : Assure Lever
Category : Lock