T24037 - Microwave Tower - Free user manual and instructions
Find the device manual for free T24037 Tower in PDF.


| Product Type | Digital Microwave Oven |
| Model | T24037 (Applicable to all colour variants) |
| Capacity | 20 Litres |
| Rated Voltage | 230-240 V ~ 50 Hz |
| Input Power | 1200-1270 W |
| Output Power (Microwave) | 800 W |
| Microwave Frequency | 2450 MHz |
| Power Levels | 6 (100%, 80%, 50%, 30%, 10%, plus Quick Start at 100%) |
| Control Type | Digital with Rotary Dial and Buttons |
| Display | Digital Clock and Timer |
| Key Functions | Child Lock, Clock/Pre-set, Defrost by Weight/Time, Multi-Stage Cooking, Auto Cook Menu (8 menus), Enquiry Function |
| Turntable | Glass Turntable with Roller Ring (removable for cleaning) |
| Interior Light | Yes (oven lamp) |
| Safety Features | Safety Interlocks, Automatic Shut-off on Door Open, Child Lock, Earthing Required |
| Cleaning | Wipe exterior and interior with damp cloth; wash turntable and ring with mild soapy water; do not immerse |
| Spare Parts & Repairability | Spare parts available at www.towerhousewares.co.uk; repairs by qualified service technician only |
| Warranty | 1 year standard, extendable to 3 years upon registration at towerhousewares.co.uk |
| Dimensions (Approx.) | Not specified in manual; minimum installation height 85 cm, clearance required: back 10 cm, sides 20 cm, top 30 cm |
| Weight | Not specified |
Frequently Asked Questions - T24037 Tower
User questions about T24037 Tower
0 question about this device. Answer the ones you know or ask your own.
Ask a new question about this device
Download the instructions for your Microwave in PDF format for free! Find your manual T24037 - Tower and take your electronic device back in hand. On this page are published all the documents necessary for the use of your device. T24037 by Tower.
USER MANUAL T24037 Tower
over 100 YEARS of quality
T24037 Applicable to all colour variants
800W 20L DIGITAL MICROWAVE
natural_image
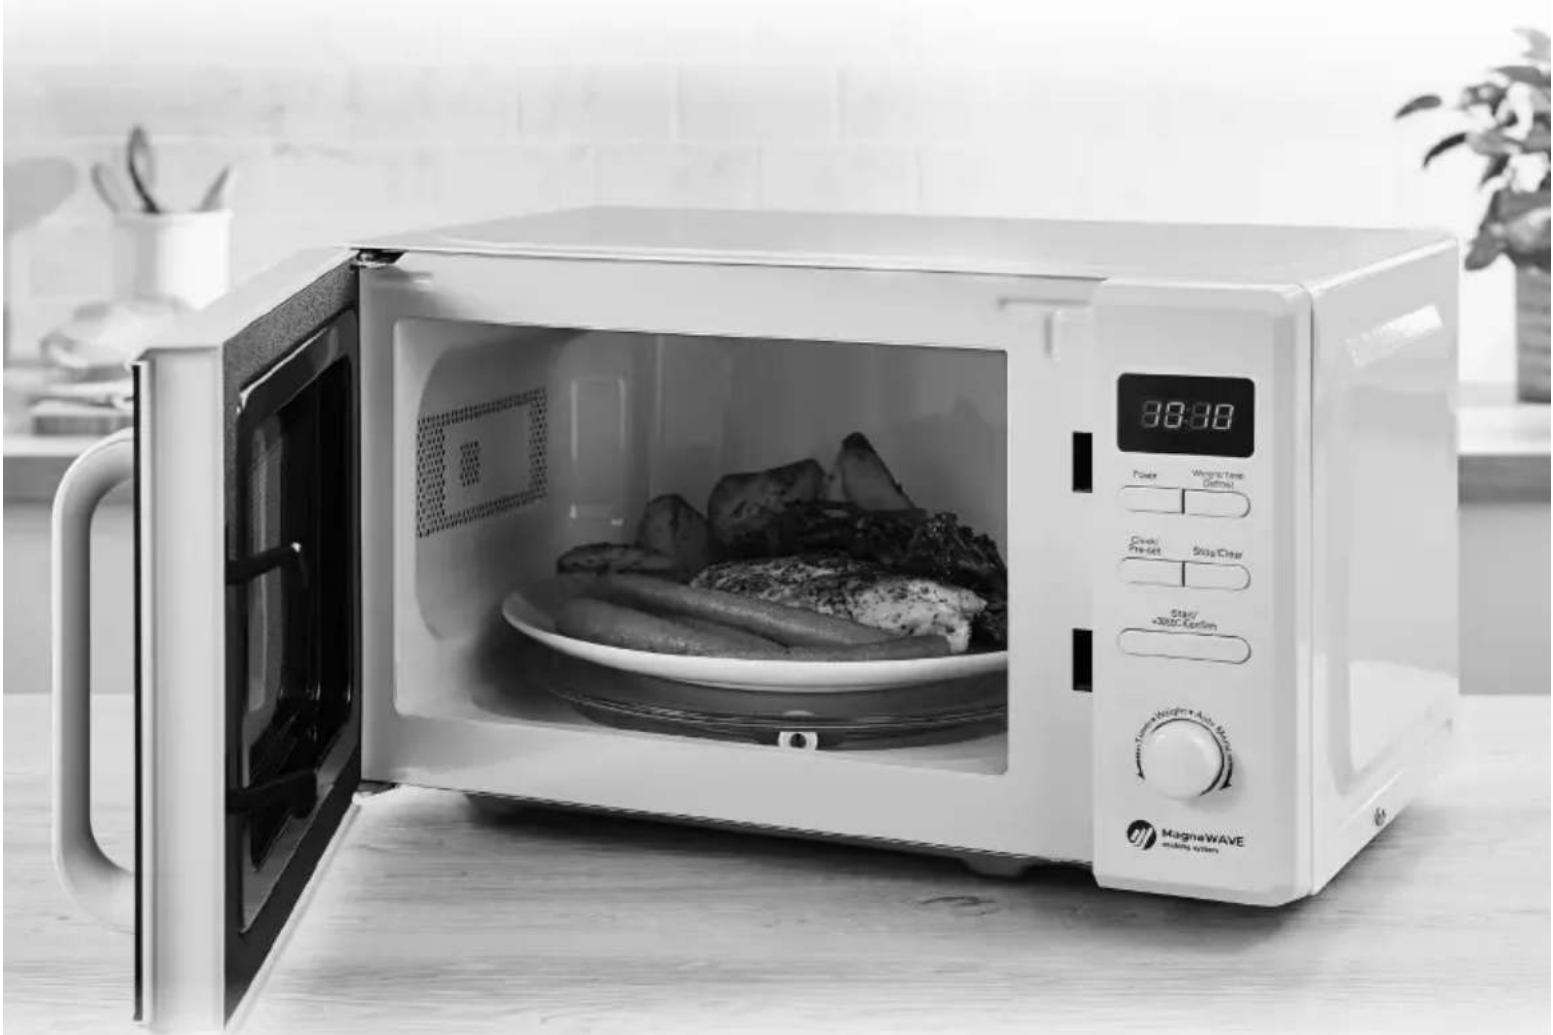
White magnifying oven with open door, closed lid showing food inside, and digital display (no visible text or symbols on main subject)Call us first, we can help.
With advice, spares and returns.
Visit our website:
towerhousewares.co.uk
Call:+44 (0)333 220 6066
(8.30am to 6.00pm Monday-Friday)
SAFETY AND INSTRUCTION MANUAL
PLEASE READ CAREFULLY
*Subject to registering your Extended Guarantee online at www.towerhousewares.co.uk.
Specifications:
This box contains:
Instruction Manual
Microwave Oven
Roller Ring
Glass Turntable
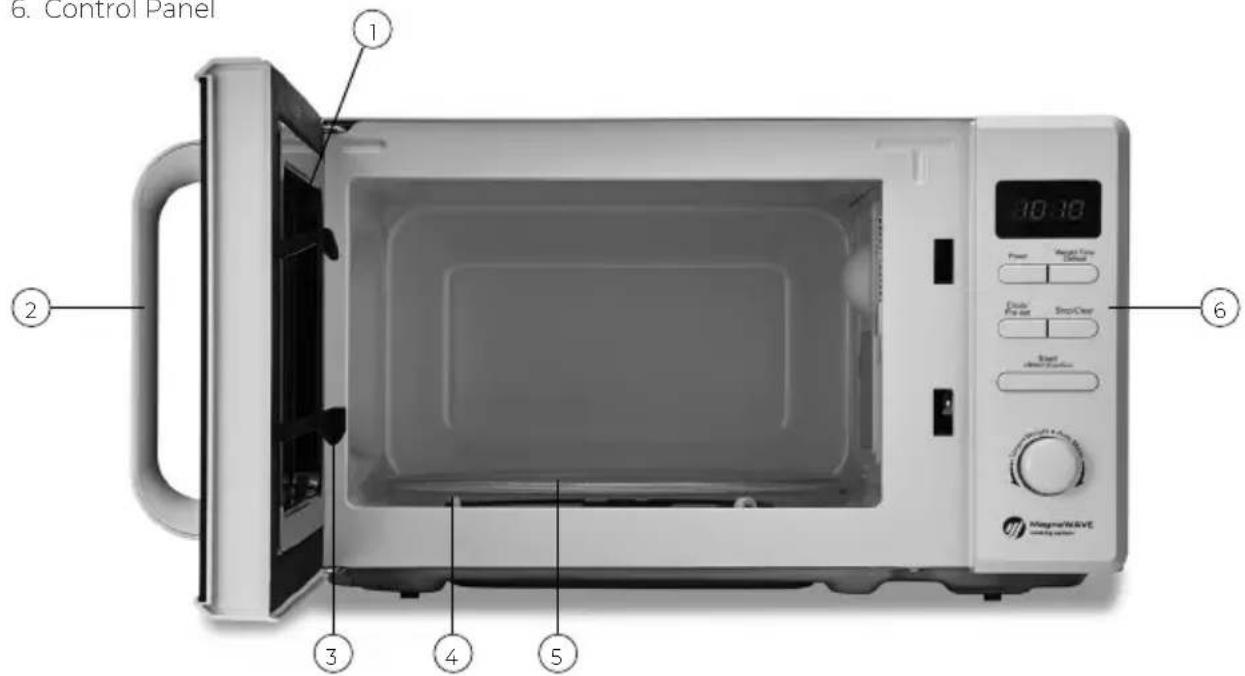
- Oven Window
- Door Handle
- Door lock
- Roller Ring
- Glass Turntable
- Control Panel
Technical Data:
Description: Digital Microwave Oven
Model: T24037 Applicable to all colour variants
Rated Voltage: 230-240V \~
Frequency: 50 Hz
Input Power: 1200-1270W
Output Power: 800W
Microwave Frequency: 2450Mhz
Documentation
We declare that this product conforms to the following product legislation in accordance with the following directive(s):
2014/30/EU Electromagnetic Compatibility (EMC)
2014/35/EU Low Voltage Directive (LVD)
1935/2004/EC Materials & Articles in Contact With Food (LFGB section 30 & 31)
2015/863/EU Restriction of Hazardous Substances Directive.
(including amendment (EU) 2015/863).
2009/125/EC Eco-design of Energy related Products (ErP)
RK Wholesale LTD Quality Assurance, United Kingdom.
Wiring Safety for UK Use Only
IMPORTANT
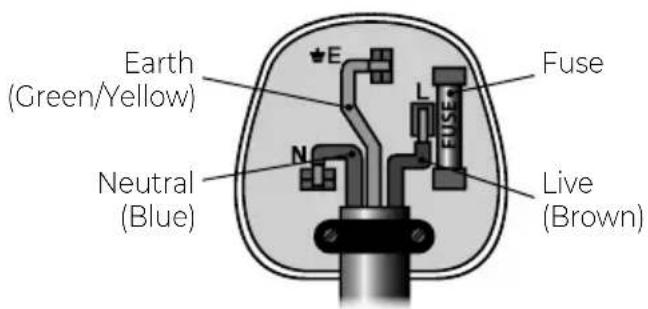
As the colours in the mains lead of this appliance may not correspond with the coloured markings identifying the terminals in your plug, please proceed as follows:
The wires in the mains lead are labelled in accordance with the following code:
Blue neutral [N] Brown live [L] Green/Yellow [EARTH]
Plug Fitting Details (Where Applicable).
The wire labelled blue is the neutral and must be connected to the terminal marked [N].
The wire labelled brown is the live wire and must be connected to the terminal marked [L].
The wire labelled green/yellow must be connected to the terminal marked with the letter [E].
On no account must either the brown or the blue wire be connected to the [EARTH] terminal.
Always ensure that the cord grip is fastened correctly.
The plug must be fitted with a fuse of the same rating already fitted and conforming to BS 1362 and be ASTA approved.
If in doubt consult a qualified electrician who will be pleased to do this for you.
Non-Rewireable Mains Plug.
If your appliance is supplied with a non-rewireable plug fitted to the mains lead and should the fuse need replacing, you must use an ASTA approved one (conforming to BS 1362 of the same rating).
If in doubt, consult a qualified electrician who will be pleased to do this for you.
If you need to remove the plug - disconnect it from the mains - then cut it off of the mains lead and immediately dispose of it in a safe manner. Never attempt to reuse the plug or insert it into a socket outlet as there is a danger of an electric shock.
WARNING: This appliance MUST be earthed!
DISPOSAL OF THE UNIT
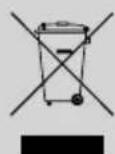
Appliances bearing the symbol shown here may not be disposed of in domestic rubbish. You are required to dispose of old electrical and electronic appliances like this separately.
Please visit www.recycle-more.co.uk or www.recyclenow.co.uk for access to information about the recycling of electrical items.
Please visit www.weeeireland.ie for access to information about the recycling of electrical items purchased in Ireland.
The WEEE directive, introduced in August 2006, states that all electrical items must be recycled, rather than taken to landfill.
Please arrange to take this appliance to your local Civic Amenity site for recycling, once it has reached the end of its life.
Important Safety Information:
Please read these notes carefully BEFORE using your Tower appliance
-
Check that the voltage of the main circuit corresponds with the rating of the appliance before operating.
• If the supply cord or appliance is damaged, stop using the appliance immediately and seek advice from the manufacturer, its service agent or a similarly qualified person.
• DO NOT let the cord hang over the edge of a table or counter, or let it come into contact with any hot surfaces.
• DO NOT carry the appliance by the power cord.
• DO NOT use any extension cord with this appliance.
• DO NOT pull the plug out by the cord as this may damage the plug and/or the cable. -
Switch off at the wall socket then remove the plug from the socket when not in use or before cleaning.
- Close supervision is necessary when any appliance is used by or near children.
• Children should not play with the appliance. - This appliance can be used by children aged from 8 years and above and persons with reduced physical, sensory or mental capabilities or lack of experience and knowledge if they have been given supervision or instruction concerning use of the appliance in a safe way and understand the hazards involved.
• Cleaning and user maintenance should not be undertaken by children without supervision.
• Take care when any appliance is used near pets.
• DO NOT use this product for anything other than its intended use.
• This appliance is for household use only.
CAUTIONS
• DO NOT operate the microwave with the door open, due to the safety interlocks built into the door mechanism. It is important not to tamper with the safety interlocks (safety interlocks automatically switch off any cooking activity when the door is opened). This could result in harmful exposure to excessive microwave energy.
• DO NOT place any object (such as kitchen towels, napkins, etc.) between the microwave front face and the door,
or allow food or cleaner residue to accumulate on sealing surfaces.
• DO NOT operate the microwave if it is damaged. It is particularly important that the microwave door closes properly and that there is no damage to its door hinges, latches, door seals and sealing surfaces.
- Please ensure cooking times are correctly set. Small amounts of food require shorter cooking or heating time. Over cooking may result in the food catching on fire and subsequent damage to the microwave. When heating liquids, e.g. soups, sauces and beverages in your microwave, avoid using straight sided containers with narrow necks. Stir the liquid before placing the container in the microwave and again
halfway through the heating time. After heating, let it stand, stir or shake it again carefully and check the temperature of it before consuming to avoid burns (especially, contents of feeding bottles and baby food jars).
- An exhaust outlet is located on the top, bottom or side of the microwave. Don't block the outlet. It could result in damage to your microwave and poor cooking results.
• DO NOT operate the microwave when empty. It is best to leave a glass of water in the microwave when not in use. The water will safely absorb all microwave energy if the microwave is accidentally started. - Improper use could result in damage to the microwave.
• DO NOT use wooden containers and ceramic containers that have metallic (e.g. gold or silver) inlays. Always
remove metal twist ties. Check that the utensils are suitable for use in the microwave before use. They may heat up and char. Metal objects in particular may arc in the microwave, which can cause serious damage.
• DO NOT rinse the glass turntable by placing it in water just after cooking. This may cause breakage or damage.
- Before cooking pierce the skin of potatoes, apples or any such fruit or vegetables. They could burst.
• DO NOT cook eggs in their shell. Eggs in their shell and whole hard-boiled eggs should not be heated in the microwave since they may explode, even after microwave heating has ended. Pressure will build up inside the egg which will burst.
• DO NOT attempt deep fat frying in your microwave. This could result in a sudden boil over of hot liquid.
- If smoke is observed, switch off or disconnect the microwave from the power supply and keep the microwave door closed in order to stifle any flames. It can cause serious damage, such as fire or electric shock.
- When food is heated or cooked in disposable containers made of plastic, paper or other combustible materials, keep an eye on the microwave and check it frequently.
• The microwave should be cleaned regularly and any food deposits should be removed. Failure to maintain the microwave in a clean condition could lead to deterioration of the surface. This could adversely affect the life of the appliance and possibly result in a hazardous situation.
- Follow exact directions given by each manufacturer for their popcorn product. DO NOT leave the oven unattended while corn is being popped. If corn fails to pop after the suggested times, discontinue cooking. Never use a brown paper bag for popping corn. Never attempt to pop leftover kernels. Overcooking could result in the corn catching fire.
• DO NOT use harsh abrasives cleaners or sharp metal scrapers to clean the microwave door glass. They can scratch the surface, which may result in the glass shattering.
• After cooking, the container is very hot. Use gloves to take out the food and avoid steam burns by directing steam away from the face and hands.
• This appliance is intended to be used in household and similar applications such as:
- staff kitchen areas in shops. Offices and other working environments.
- farm houses.
- by clients in hotels, motels and other residential environments, bed & breakfast type environments.
• The microwave oven is intended for heating food and beverages. Drying of food or clothing and heating of warming pads, slippers, sponges, damp cloth and similar may lead to risk of injury, ignition or fire.
• The door or outer surface may get hot when the appliance is operating
• In the unlikely event the appliance develops a fault, stop using it immediately and seek advice from the Customer Support Team:
+44 (0) 333 220 6066
Before First Use:
Read all instructions and safety information carefully before first use. Please retain this information for future reference.
- Remove all packing material and accessories. Examine the oven and cord for any damage. DO NOT install if the oven is damaged and contact your place of purchase.
- Remove any protective film found on the microwave oven cabinet surface. DO NOT remove the light brown Mica cover that is attached to the oven cavity to protect the magnetron.
- Microwave ovens must be placed under dry and non-corrosive environments and kept away from heat and humidity, such as a gas burner or water tank.
- Select a level surface that provides enough open space for the intake/outlet vents.
- To ensure sufficient ventilation, the following distances should be observed: At least 10cm from the back of the microwave to the wall, at least 20cm from the microwave to the side of the wall, and at least 30cm above the microwave. The minimum installation height for the microwave should be 85cm.
- The oven should be positioned away from TVs, radios or antennae, as the microwaves may cause disturbances to their picture or sound.
- The appliance must be positioned so that the plug is accessible.
- The microwave oven must be operated with the door closed.
- The microwave oven must not be placed in a cabinet. The microwave oven is intended to be used free-standing. DO NOT remove the legs from the bottom of the oven.
- Your appliance is now ready for normal use.
- Dispose of the packaging in a responsible manner.
Using Your Appliance:
Door lock: The microwave's oven door must be properly closed in order for it to operate.
Oven window: Allows users to see the contents at any time.
Roller ring: The glass turntable sits on its wheels; it supports the glass turntable and helps it to balance when rotating. Do not use the microwave without the roller ring.
Rotating axis: The glass turntable sits on the axis; the motor underneath it drives the glass turntable to rotate.
Glass turntable: Rotates during operation to help food cook evenly.
Control panel: Lets you choose between different functions when operating your microwave.
Setting the digital clock:
NOTE: There will be a single sound prompt when the control dial is turned and also with a press of a control panel button.
NOTE: When the cooking/defrosting time finishes a sound prompt will be heard 5 times.
To set the clock:
- Plug in the appliance and switch on at the socket. The display will show 0:00 and there will be a sound prompt.
- Press the CLOCK/PRE-SET button. The hour will flash.
- Turn the control dial to adjust the hour figure.
- Press the CLOCK/PRE-SET button. The minutes figure will flash.
- Turn the control dial to adjust the minutes figure.
- Press the CLOCK/PRE-SET button to set the time.
NOTE: If the clock is not set the microwave will not operate.
NOTE: During clock setting, if no operation is performed within 1 minute the appliance will revert back to its previous status.
Child Lock:
Locking: Whilst the microwave is not operating press the "STOP/CLEAR" button for 3 seconds. There will be a long sound prompt, confirming the activation of the safety lock function.
The screen will display Unlocking: Press the "STOP/CLEAR" button for 3 seconds. There will be a long sound prompt, confirming the de- activation of the safety lock function.
Microwave Cooking - Power:
Press the Power button multiple times to reach the required power setting.
There are six power settings, as follows:
| Setting Power Press the power button | ||
| 1st | 100% microwave power. Applicable for quick and thorough cooking | Once |
| 2nd | 80% microwave power. Applicable for medium express cooking | Twice |
| 3rd | 50% microwave power. Applicable for steaming food | Three Times |
| 4th | 30% microwave power. Applicable for defrosting food | Four Times |
| 5th | 10% microwave power. Applicable for keeping warm | Five Times |
Note: Alternatively press power and then rotate the dial to the required power setting.
Note: The cooking/defrosting times can be adjusted in increments:
| Cooking/defrosting Time Required between: | Turn the control to increase/decrease the time in increments of: |
| 0-1 min: 5 seconds | |
| 1-5 min: 10 seconds | |
| 5-10 min: 30 seconds | |
| 10-30 min: 1 minute | |
| 30-95 min: 5 minutes |
CAUTION:
- Never operate the oven when empty.
- If you turn the food during cooking, pressing the start button once will resume the current preset cooking program.
- If you intend to remove the food before the preset time, you must press the STOP/CANCEL button once to clear the preset program and prevent the oven from resuming the current preset program when next used.
Quick Start:
- When the appliance is not operating press the "START/+30SEC/CONFIRM" button to cook with 100% power for 30 seconds.
Note: With each press of the button the time can be increased by 30 seconds, with a maximum cooking time of 95 minutes.
- During microwave operation (cooking and defrosting) press the "START/+30SEC/CONFIRM" button to increase the operating time.
- When the appliance is not operating turn the control dial anti-clockwise to select a cooking time. Then press the "START/+30SEC/CONFIRM" button to start cooking. The microwave will operate at 100% power.
Note: When using AUTO Menu and Weight Defrost functions, the operating time cannot be increased by pressing the "START/+30SEC/CONFIRM" button.
Defrost By Weight:
- Press the "WEIGHT/TIME DEFROST" button once. The screen will display "dEFI".
- Turn the control dial to select the food weight. The range is 100-2000g.
- Press the "START/+30SEC/CONFIRM" button to start defrosting.
Defrost By Time:
- Press the "WEIGHT/TIME DEFROST" button twice. The screen will display "dEF2".
- Turn the control dial to select the defrosting time.
- Press the "START/+30SEC/CONFIRM" button to start defrosting.
Note: The defrost power is equal to P30 and is not changeable.
Note: If the microwave door is opened during defrosting, press the "START/+30SEC/CONFIRM" button once the door is closed to continue defrosting.
Multi –Stage Cooking:
A maximum of two stages can be set. If one stage is defrosting, it should be input first. There will be a single sound prompt after each stage. The next stage will start automatically.
Note: AUTO Menu cannot be set as one of the stages.
Example: Defrosting for 5 minutes and then cooking at 80% power for 7 minutes.
a. Press the "WEIGHT/TIME DEFROST" button twice. The screen will display "dEF2".
b. Turn the control dial to select 5 minutes defrosting time.
c. Press the "POWER" button once.
d. Turn the control dial to select P80 (80% power).
e. Press the "START/+30SEC/CONFIRM" button to confirm.
f. Turn the control dial to adjust the cooking time to 7 minutes.
g. Press the "START/+30SEC/CONFIRM" button to start the process.
Pre-set Function:
- Ensure that the clock is set as per the "Setting the digital clock" section.
- Input the cooking program required.
Note: A two stage cooking programme can be set.
Note: Defrosting should not be set as a pre-set function.
Example: Cooking with 80% power for 7 minutes.
a. Press the "POWER" button once.
b. Turn the control dial to select P80 (80% power).
c. Press the "START/+30SEC./CONFIRM" button to confirm.
d. Turn the control dial to adjust the cooking time to 7 minutes.
Note: DO NOT press the "START/+30SEC./CONFIRM" button at this stage.
- Set the time the microwave is to start operating.
a. Press the "CLOCK/PRE-SET" button. The hour figure will flash.
b. Turn the control dial to adjust the hour figure (0-23 hours).
c. Press the "CLOCK/PRE-SET" button. The minutes figure will flash.
d. Turn the control dial to adjust the minutes figure (0-59 minutes).
e. Press the "START/+30SEC./CONFIRM" button to complete the setting.
Note: Two audio prompts will sound when the time arrives and then cooking will start automatically.
Note: Once the cooking programme has been set, if the "START/+30SEC/CONFIRM" button is not pressed within 1 minute the setting will be cancelled. The display will revert to the current time.
Auto Cook Menu:
- Turn the control dial clockwise to choose from the menu "A-1" to "A-8".
- Press the "START/+30SEC./CONFIRM" button to confirm your selection from the menu.
- Turn the control dial to select the food weight.
- Press the "START/+30SEC./CONFIRM" button to start cooking.
- There will be 5 sound prompts when cooking has finished.
| Menu Weight Display Power | |||
| A-1 AUTO REHEAT | 200g 200 | 100%400g 400 | |
| 600g 600 | |||
| A-2 VEGETABLE | 200g 200 | 100%300g 300 | |
| 400g 400 | |||
| A-3 FISH | 250g 250 | 80%350g 350 | |
| 450g 450 | |||
| A-4 MEAT | 250g 250 | 100% | |
| 350g 350 | |||
| 450g 450 | |||
| A-5 PASTA | 50g (with cold water 450g) | 50 | 80% |
| 100g (with cold water 800g) | 100 | ||
| A-6 POTATO | 200g 200 | 100%400g 400 | |
| 600g 600 | |||
| A-7 PIZZA | 200g 200 | 100% | |
| 400g 400 | |||
| A-8 SOUP | 200ml | 200 | 80% |
| 400ml | 400 | ||
Enquiry Function:
- Whilst the appliance is in operation, press the "POWER" button and the current power will be displayed for 3 seconds.
- In pre-set mode, press the "CLOCK/PRE-SET" button to view the delayed start time. The pre-set time will flash for 3 seconds.
- Whilst the appliance is in operation, press the "CLOCK/PRE-SET" button to check the current time. The time will display for 3 seconds.
Assessing if the Food is Fully Cooked:
The colour and firmness of food help to determine whether it is done.
The following signs show that the food is ready:
- Steam coming out from all parts of food, not just the edge
• Joints of poultry can be moved easily - Pork or poultry show no signs of blood
- Fish is opaque and can be sliced easily with a fork
Utensils guideline:
It is strongly recommended to only use containers which are suitable and safe for microwave cooking. Generally speaking, containers made of heat-resistant ceramic, glass or plastic are suitable for microwave cooking. Never use metal containers for microwave cooking and combination cooking as sparks are likely to occur and there is a risk of fire or injury. When cooking microwave meals, always check the packaging to see which parts are microwave safe. Use the below table as reference:
| Material | Microwave Safe | Notes |
| Heat-resistant ceramic | Yes | Never use ceramics that are decorated with a metal rim or glazed. |
| Heat-resistant plastic | Yes | Cannot be used for extended periods of time when microwave cooking. |
| Heat-resistant glass | Yes Never use glass | that has a decorated metal rim. |
| Plastic film Yes | Not to be used when cooking meat or chops, as, the high temperature may damage the film. | |
| Grill rack No Never use metal grill racks | as this will cause arching. | |
| Metal container No | Never to be used in the microwave. Microwaves cannot penetrate through metal. Microwaving with a metal container can result in fire. | |
| Lacquer No | Poor heat resistance. Cannot be used for high temperature cooking. | |
| Bamboo wood and paper | No | Poor heat resistance. Cannot be used for high temperature cooking. |
| Cling film Yes | Cling film can be used as long as it is pierced to let steam escape, and is not touching the food. | |
CAUTION:
There are a number of accessories available on the market. Before you buy, make sure they are suitable for microwave use. When you put food into the microwave, ensure that the food supports and/or covering do not come in direct contact with any of the internal walls or the ceiling of the cavity since discolouration may take place.
Some plastics are heat-proof only up to certain temperatures. Check carefully!
Always remove the lids of jars and containers, including takeaway food containers, before putting them in the microwave. If the lids are not removed, steam and pressure can build up inside and cause an explosion even after microwave cooking has stopped.
Do not use straight sided containers with narrow necks when heating liquid. Use extreme care when inserting a spoon or other utensils into the container.
Cooking tips:
The following factors may affect the cooking result:
Food arrangement: Place thicker areas towards the outside of the dish with the thinner parts towards the centre. Spread it evenly and avoid overlap if possible.
Cooking time length: Begin cooking on a shorter time setting and evaluate the food after it times out. Extend the time as necessary. Over cooking may result in burnt food and smoke.
Piercing: Food such as potatoes, fish, chicken and sausages all need to be pierced in several places before cooking, so that steam does not build up and cause the food to explode.
Cooking food evenly: Food such as chicken, burgers or steak should be turned once during cooking. Depending on the type of food, if applicable, stir from the outside to the centre of the dish once or twice during cooking.
Allow standing time: Once the cooking time has finished, allow food to stand in the microwave for a few minutes. This allows the food to complete its cooking cycle and to cool down naturally.
Browning dish: When using a browning dish or self-heating container, always place a heat-resistant insulator, such as a porcelain plate, under it, to prevent damage to the turntable and rotating ring.
Microwave safe plastic wrap: When cooking food with high fat content, do not allow the plastic wrap to come into contact with food as it may melt.
Microwave safe plastic cookware: Some microwave safe plastic cookware might not be suitable for cooking foods with high fat and sugar content. The preheating time specified in the dish instruction manual must not be exceeded.
Troubleshooting:
| Questions Answers | |
| Is it normal for the glass turntable to turn in either direction? | Yes. The glass turntable can rotate clockwise or anti-clockwise, depending on the rotation of the motor when the cooking cycle starts. |
| Can I operate my microwave whilst it is empty? | No, never run it empty or with a very small load for a long period of time as this will damage the microwave. |
| Can I open the door whilst the microwave is running? | You can open the door at any point during cooking.The microwave energy will automatically switch off when the door is opened, and the time setting will pause until the door is closed. |
| Why is my microwave sparking? | If you see sparks in your microwave, turn it off immediately. Sparks can be caused by:Metal or aluminium foil that touches the interior of the microwave, metal from a closing strip or tableware with metallic edges, recycled paper that contains small metal particles and aluminium foil that is not correctly covering the food.Remove anything from the microwave that may contain metal.Refer to the Utensils Guideline in this manual for reference of what containers are microwave safe. |
| I am trying to cook eggs and they are popping. What do I do? | When you bake or poach eggs, the yolk can pop due to a build-up of steam inside the yolk membrane. Pierce the yolk with a toothpick before cooking. Never cook eggs without first piercing their shells. |
| My microwave is taking longer to cook food than the cooking guide says. | Variations in the size, shape and weight of your food can affect cooking times.Cooking guide times and heat settings should be used as suggestions to help prevent over-cooking. If you find the cooking time or temperature is not suited to your ingredients, adjust accordingly. |
| Can I operate my microwave without the glass turntable? | No. If you remove the glass turntable you will get poor cooking results. Ensure that all dishes used in the microwave fit correctly on to the glass turntable. |
| What does standing time mean and why is it recommended? | Standing time means that food should be removed from the microwave and allowed to 'stand' for an additional time to let it finish cooking.This is important because with microwave cooking, the heat is held in the food, not in the oven. Many foods build up enough internal heat to allow the cooking process to continue, even after the food is removed from the oven. Standing time for joints of meat, large vegetables and cakes is to allow the inside to cook completely, without overcooking the outside.Most directions on microwavable food will note how much standing time is required. |
Servicing safeguards - Microwave radiation:
It is hazardous for anyone, other than a qualified service technician, to carry out any service for repairing operation which involves removal of any cover which gives protection against exposure to microwave energy.
The temperature of accessible surfaces may be high when the appliance is operating.
Cleaning & Care:
• The microwave should be cleaned regularly and any food deposits removed.
- Remove the power cord from the wall outlet before cleaning. Don't immerse the appliance in water or other fluids when cleaning.
- Failure to maintain the microwave in a clean condition could lead to deterioration of the surface. This could adversely affect the life of the appliance and possibly result in a hazardous situation.
- Never use hard detergent, gasoline, abrasive powder or metal brush to clean any part of the appliance.
- Do not remove the waveguide cover.
• After lengthy use, it is possible for odours to emit from the microwave.
The following 2 points are some methods to remove odours or unpleasant smells:
- Place several lemon slices in a cup, then heat on High power for 2-3 minutes.
- Put some orange peel into the microwave, and then heat them on High power for 1 minute.
NEVER IMMERSE THE MICROWAVE, CORD, OR PLUG IN WATER OR ANY OTHER LIQUID.
Tips for cleaning:
If the seal of the microwave is dirty, it may stop the door from closing properly. Keep the seal clean. Spicy sauces such as ketchup and mustard, or salty dishes such as salted meat, contain ingredients that can erode the surface. After use, you should always clean the oven interior.
Food residue from spillovers or splatters will attract microwave energy, causing it to burn onto the surface. This could reduce the efficiency of the microwave and may cause bad odours.
Details for cleaning door seals, cavity and adjacent parts:
- Exterior: Wipe the appliance with a damp soft cloth.
- Door: Using a damp soft cloth, wipe clean the door and window. Wipe the door seals and adjacent parts to remove any spills. Wipe the control panel with a slightly dampened soft cloth.
- Interior walls: Wipe clean the interior with a damp soft cloth. Wipe clean the waveguide cover to remove any food remnants.
- Glass turntable / Rotation ring / Rotation axis: Wash with mild soap water. Rinse with clean water and allow it to dry thoroughly.
Note: Do not remove the waveguide cover during cleaning. Make sure the waveguide cover is installed correctly and has not been damaged during cooking.
TOWER
over 100 YEARS of quality
thank you!
We hope you enjoy your appliance for many years.
This product is guaranteed for 12 months from the date of original purchase. If any defect arises due to faulty materials of workmanship, the faulty products must be returned to the place of purchase. Refund or replacement is at the discretion of the retailer.
The Following Conditions Apply: The product must be returned to the retailer with proof of purchase or a receipt. The product must be installed and used in accordance with the instructions contained in this instruction guide. It must be used only for domestic purposes. It does not cover wear and tear, damage, misuse or consumable parts. Tower has limited liability for incidental or consequential loss or damage. This guarantee is valid in the UK and Eire only.
The standard one year guarantee is only extended to the maximum available for each particular product upon registration of the product within 28 days of purchase. If you do not register the product with us within the 28 day period, your product is guaranteed for 1 year only.
To validate your extended warranty, please visit www.towerhousewares.co.uk and register with us online.
Please note that length of extended warranty offered is dependent on product type and that each qualifying product needs to be registered individually in order to extend its warranty past the standard 1 year. Extended warranty is only valid with proof of purchase or receipt. Your warranty becomes void should you decide to use non Tower spare parts. Spare parts can be purchased from www.towerhousewares.co.uk
Should you have a problem with your appliance, or need any spare parts, please call our Customer Support Team on:
+44 (0) 333 220 6066
- 800W 20L DIGITAL MICROWAVE
- Specifications:
- This box contains:
- Technical Data:
- Wiring Safety for UK Use Only
- IMPORTANT
- Plug Fitting Details (Where Applicable).
- Non-Rewireable Mains Plug.
- WARNING: This appliance MUST be earthed!
- DISPOSAL OF THE UNIT
- Important Safety Information:
- Please read these notes carefully BEFORE using your Tower appliance
- CAUTIONS
- Before First Use:
- Using Your Appliance:
- Setting the digital clock:
- To set the clock:
- Child Lock:
- Microwave Cooking - Power:
- CAUTION:
- Quick Start:
- Defrost By Weight:
- Defrost By Time:
- Multi –Stage Cooking:
- Pre-set Function:
- Auto Cook Menu:
- Enquiry Function:
- Assessing if the Food is Fully Cooked:
- Utensils guideline:
- Cooking tips:
- Servicing safeguards - Microwave radiation:
- Cleaning & Care:
- The following 2 points are some methods to remove odours or unpleasant smells:
- Tips for cleaning:
- TOWER
- thank you!
Brand : Tower
Model : T24037
Category : Microwave