
Voice Tracer VTR5101 - Dictaphone PHILIPS - Free user manual and instructions
Find the device manual for free Voice Tracer VTR5101 PHILIPS in PDF.


| Product Type | Digital Voice Recorder (Dictaphone) |
| Brand & Model | Philips Voice Tracer VTR5101 |
| Dimensions (W x H x D) | 23 x 104.5 x 9.4 mm |
| Weight (incl. battery) | 42 g |
| Power Supply | Built-in lithium battery, rechargeable via USB or dedicated charger |
| Charging Time | Approximately 3 hours |
| Battery Life | Varies by usage; low battery indicator prompts recharge |
| Recording Formats | PCM (WAV 1536kbps), N.R. (WAV 384kbps), Stereo MP3 128kbps, Standard MP3 32kbps, L.P. MP3 8kbps |
| Maximum Recording Time (8GB) | Up to 2328 hours (LP), 583 hours (Standard), 145 hours (HQ), 48 hours (N.R.), 12 hours (PCM) |
| Memory | 8GB internal NAND Flash + microSD card slot (expandable) |
| Connectivity | High-speed USB 2.0 mass storage |
| Display | LCD with backlight (adjustable brightness and timeout) |
| Recording Modes | Voice-activated, Timer recording, Section break, A-B replay, Variable speed playback, Playback following |
| Audio Features | Digital noise reduction, Speech shadowing, Equalizer (7 modes), Loop modes, FM radio with recording |
| Key Lock | Slide POWER button to lock position; only Record key remains active |
| System Requirements | Windows 7/8/10/Vista/XP/2000, Mac OS X, Linux; USB port |
| Operating Conditions | Temperature: 5°C to 45°C; Humidity: 10%–90% non-condensing |
| Safety & Maintenance | Do not expose to rain/moisture; avoid high temperatures; use hearing protection; clean with soft dry cloth; no user-serviceable parts inside |
| Spare Parts & Repairability | Built-in battery not user-replaceable; contact Philips support for service; microSD card accessible |
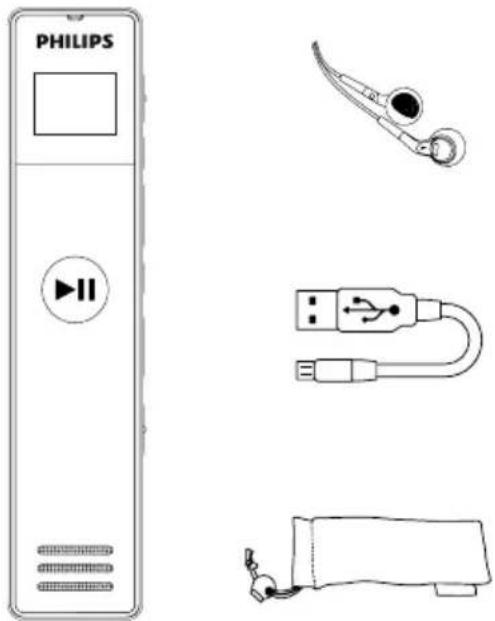
| What's in the Box | Voice recorder, USB cable, earphones, quick start guide, warranty card |
| Warranty | 1 year (see warranty card for details) |
Frequently Asked Questions - Voice Tracer VTR5101 PHILIPS
User questions about Voice Tracer VTR5101 PHILIPS
0 question about this device. Answer the ones you know or ask your own.
Ask a new question about this device
Download the instructions for your Dictaphone in PDF format for free! Find your manual Voice Tracer VTR5101 - PHILIPS and take your electronic device back in hand. On this page are published all the documents necessary for the use of your device. Voice Tracer VTR5101 by PHILIPS.
USER MANUAL Voice Tracer VTR5101 PHILIPS
natural_image
Simple white line icon of a USB flash drive on black background (no text or symbols)4.4按键锁定
录音界面说明:

①当前文件夹
②当前文件夹总数
③当前文件序号
④播放状态
⑤循环模式
⑥当前文件名
⑦当前播放时间
⑧当前文件总时间
⑨电池信息
(1) 在停止状态下, 长按 “音量键” 切换选择文件夹, 选择语音文件夹, A B C D M U S I C A ·s
(2) 按☒或☒键,选择要播放的文件。
图1

图2
6.8 循环模式
4.2 Battery charging 36
4.4 Keypad lock 37
5 Recording 38
6 Voice Mode 40
6.1 Recording type 41
6.2 Voice-activated mode 41
6.3 Monitoring settings 41
6.4 Record timer 42
6.5 Section break 43
6.6 Delete 43
6.7 A-B replay 43
6.8 Loop mode 44
6.9 Variable speed play 44
6.10 Volume adjustment 44
6.11 Playback following 45
7 Music Mode 46
7.1 A-B replay 47
7.2 Loop mode 47
7.3 Playback following 47
7.4 Delete files 48
7.5 Equalizer mode 48
7.6 Variable speed play 48
7.7 Volume adjustment 48
8 FM Mode 49
8.1 Auto search 49
8.2 Bookmark radio 50
8.3 Volume 50
8.4 FM record 50
8.5 Delete files 50
8.6 Exit 51
9 Setting Mode 52
9.1 Backlight time 52
9.2 Contrast 52
9.3 Auto power-off 53
9.4 Record light 53
9.5 Language 53
9.6 Key tone 54
9.7 Memory choice 54
9.8 Disk information 54
9.9 Card information 54
9.10 Formatting 55
9.11 Firmware version 55
9.12 System time 55
9.13 Default setting 56
10 Frequently Asked Questions (FAQ) 57
10.1 Recording cannot be started 57
10.2 Device cannot record 57
10.3 Playback cannot be started 57
10.4 Unable to listen to recording via speaker 57
10.5 Cannot turn on the device 57
II Technical Specification 58
II.1 Memory 58
11.2 Dimensions 58
11.3 System requirements 58
11.4 Operating conditions 58
I Welcome
Welcome to the world of Philips! We are honored by your choice and purchase of Philips' products. You can have Philips' comprehensive technical supports from our website, e.g. user's manuals, software downloading and warranty information etc.
www.philips.com
Product features
- Digital noise reduction: Background noise can be effectively filtered out and voices be recorded clearly. It is recommended to apply the PCM noise reduction recording in noisy background.
- Speech shadowing: Suited for studying, the equipment can do speech shadowing while playing recordings and music files.
- Replay: Suited for study, the equipment can replay while playing recordings or music files.
• Record in common MP3/WAV format. - Quick access to recordings and data by using high speed USB 2.0.
• Voice-activated recording.
• USB mass storage, ensuring maximum compatibility.
2 Important Reminders
Safety
- To avoid a short circuit, do not expose the product to rain or moisture.
- Do not store the device near places with high temperature or direct sunlight.
- Special Note: Before using the device please read this User Manual carefully. Philips shall not be liable for any data loss due to erroneous operation or force majeure events. Special attention should be given to careful operations and please backup your files.

Warning
- Special Announcement: Before using the product, please read the Manual carefully. Our Company shall not be held liable for any data loss due to incorrect manual operation or force majeure. We specially recommend that users make additional copies of the files in the device.
- Images are for reference only. Philips reserves the right to change the color / appearance / design / parameters/product functions. Hardware, software and APP are subject to update without prior notice.
Hearing protection
Observe the following guidelines when using your headphones:
- Adjust to suitable volume; do not use the earphones for a long time.
- Please do not turn the volume up beyond your tolerance.
- Do not turn up the volume so high that you cannot hear what's around you.
- When in dangerous conditions, please carefully use the earphones or stop using.
- Do not use the earphones when driving, cycling and skateboarding to avoid traffic accident and violating laws and regulations.
3 Your Digital Voice Recorder
What's in the gift box:
Overview:
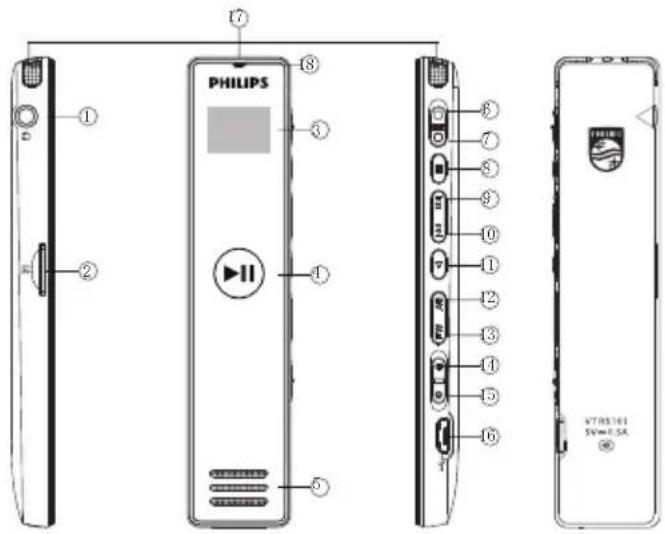
I Earphone
② SD card slot
③ Display screen
④ Play / Pause button
⑤ Speaker
⑥ Record button
⑦ Pause button
⑧ Menu button
⑨ Previous track / Volume up / Fast rewind
⑩ Next track / Volume down / Fast forward
⑪ Volume
⑫ A-B replay
⑬ FW button
⑭ Lock button
⑮ Power on, Power off
⑯ USB jack
⑰ Mircrophone net 18 Indicator light
4 Start to Use
4.1 Power On/Off

Note
- Please recharge the device for three hours before using it for the first time!
(1)When the machine is switched on, slid to '1 position for 3 seconds, the device will turn off automatically.
(2)When the machine is turned off, slid to '1 position for 3 seconds, the device will start automatically and then displays 'PHILIPS', as shown below.

When it enters the audio mode, press MENU to enter voice mode settings and long press MENU to enter app selection setting.

Reminder
• The device has a built-in lithium battery.
- If the device cannot work normally, please check if the device is out of power.
- When the device is recording, please do not cut off the power, otherwise damaged file or malfunction may be resulted.
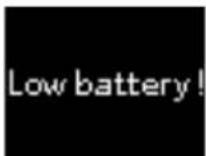
- When the battery indicator displays ' Please recharge the device promptly; when the battery is low, the indicator displays as below:
4.2 Battery charging
(I) Connect the device to PC through USB cable.
(2) Use dedicated charger to recharge.
When using the above methods to recharge, the device enters the charging status. The battery indicator shows a battery icon turning from empty to full repeatedly,
indicating that the device is recharging, with the color of the indicator light being orange. Under normal circumstance, the device can be fully recharged in around 3 hours. The orange charging indicator will turn off and the battery icon displays full power, the device is fully recharged.
4.3 Connection to computer
The device can be used as a USB mass storage to conveniently store, back up and move files. Link the device to a computer with a USB cable, the voice recorder can automatically be recognized as VTR5101 without installing any software.

Reminder
- While moving files into or out of the device, please do not disconnect the device from the computer.
- Connect the device to the computer via the USB slots at the back to backup files.
USB Connection and Charging Interface:

natural_image
Simple white line icon of a USB flash drive on black background (no text or symbols)4.4 Keypad lock
(I)Slide up the POWER button to the lock position to lock all the buttons except the 'Record' key. Then the 'Lock Icon' will be displayed on the screen, as shown below.
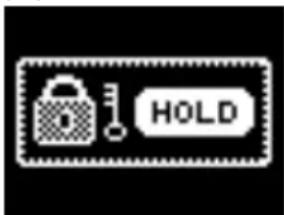
(2) Slide the POWER button down to the middle position for canceling locking.
5 Recording
Before using the device, please read carefully the following instructions.
(1)In the stop state of voice mode, short press VOL button (To select the folder to save your files. You can select folder A, B, C, D.
(2)Slide Record button (☐) to position to start recording; the red indicator light is on and the screen displays 'Record'; please point the top of the device towards the source of sound when recording.
(3)Press PLAY button () to pause recording, the red indicator light flickers, and the screen displays 'Pause'.
(4)Press PLAY button () again to resume recording.
(5)Slide Record button (☐) to position to save recording; red indicator light is turned off, and the device returns to the Stop interface of current recorded file.
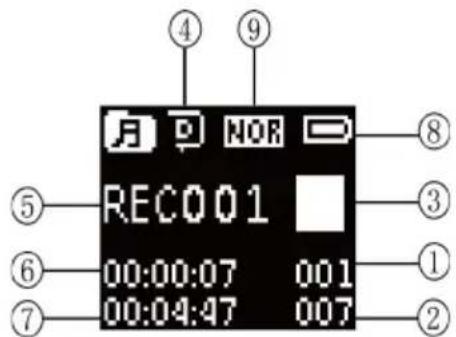
The recording interface is shown below:

Illustration of recording interface:
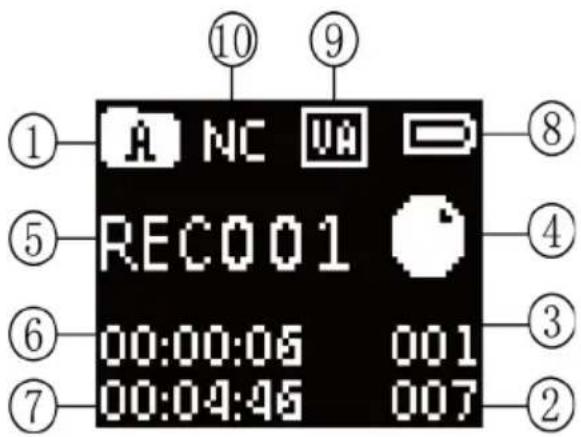
① Current folder
② Total number of recordings in the folder
③ Current file number
④ Recording state
⑤ Current recording file name
⑥ Recording duration
⑦ Remaining recording time
⑧ Battery status
⑨ Voice-activated mode
⑩ Record type

Note
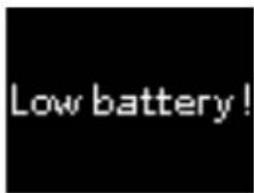
- When the screen displays empty battery icon, it means that the battery is nearly empty. When the low battery icon occurs, the system will automatically shut down. If the device is recording, the system will automatically save the recorded file then shut down. If the device is running out of battery, please recharge promptly. When the device is to shut down due to low battery, the screen will display as following:

Reminder
- Before recording, please set your intended recording type (refer to 'Recording Types' under Voice Mode in Chapter VI) and the folder to save your file (long press VOL to enter 'Folder Selection').
- Check if the memory has enough space for the next recording. (Refer to 'Disk Info' or 'Card Info' under System Setting in Chapter IX)
- Test the recording first to ensure that the recorder is set up correctly.
• A, B, C and D folder can store 99 files at most, totaling 396 files (99 x 4).
- When the recording duration exceeds the limit of the left space of the device or the number of files reaches the limit of 396, the recording will stop. Please delete part of the recording or move it to a computer.
- Please charge to full capacity in advance if you need to record for a long time.
6 Voice Mode
Voice Mode Interface Information:
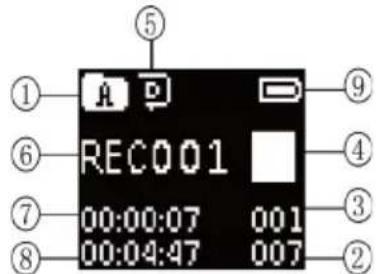
① Current folder
② Total number of recordings in the folder
③ Current file number
④ Current play state
⑤ Loop mode
⑥ Current file name
⑦ Current play time
⑧ Duration of current file
⑨ Battery status
(I)When in the state of 'Stop', long press VOL to switch to folder selection and select voice folders by A→B→C→D→MUSIC→A...
(2)Press or button to select the file you want to play.
(3) When playing, press VOL (V) to the interface to turn up or down the volume.
(4)When playing, press 'AB Replay' (A B to the mode of A-B replay.
(5) When playing, press MENU to enter Loop Mode Setting, including Directory Play, Catalog Loop, Single Loop and Random Play.
(6)Long press PLAY button (▷) for 2\~3 seconds to stop playing.
(7) When playing, press PLAY button( ▷□□) to pause playing, and repress PLAY button to resume playing.
(8))When playing, press 'FW'(Playback Following button)enter the playback following recording interface. For details, please refer to the section '6.11 Playback Following'.

Reminder
- When the earphone is inserted into the jack, the speaker of the device will stop working.
- Green indicator light is on during playing; It flashes when pausing and it will be off when the playing stops.
6.1 Recording type
When stopping, press 'MENU' to menu lists to select recording type. Screen displays as below:

Press or to select record type, press MENU to confirm. PCM recording: WAV format, high quality, with bit rate of 1536kbps.
N.R. recording: WAV format, high quality, with bit rate of 384kbps.
Stereo recording: MP3 format, stereo, with bit rate of 128kbps.
Standard recording: MP3 format, standard, with bit rate of 32kbps.
L.P. recording: MP3 format, long time, with bit rate of 8kbps.
6.2 Voice-activated mode
When the voice control recording function is activated, the
device will start recording automatically when it detects voice in the course of recording. If no voice is detected, the device will automatically pause recording; if voice is detected again, the device resumes recording.
When stopping, press MENU to menu lists to select voice-activated mode which is shown below.
English
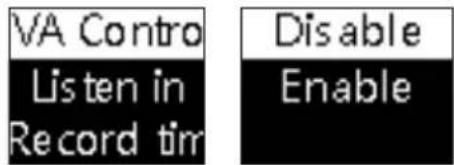
Press ☑ or ☒ to select 'Disable' or 'Enable', press MENU to confirm.
6.3 Monitoring settings
When stopping, press MENU to menu lists to select monitoring settings which is shown below.
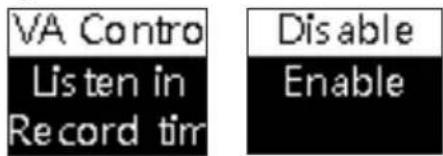
Press or to select 'Disable' or 'Enable', press MENU to confirm.
6.4 Record timer
When stopping, press MENU to menu lists to select Record Timer.
Record Timer setting: first pre-set a length of time, as system time turns to the pre-set time, the system automatically starts recording.
6.4.1 Record timer setting
In the menu list of Record Timer, press or to select record timer setting and press MENU to enter record timer setting which is shown below.

In the current state, press 'AB' or 'FW' to switch between year, month, day, hour and minute. In the setting process, the number indicator will flash and then press or to change the figure. Press MENU to save current time settings.
6.4.2 Recording source
It is applied to set microphone recording or FM recording. In the menu list of Record Timer, press 📄 or 📋 to select recording source and press MENU to set the recording source.
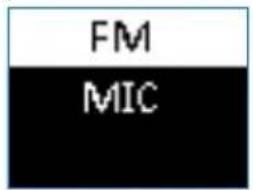
Press ☑ or ☑ to 'FM Recording' 'MIC Recording' and confirm it by pressing MENU.
6.4.3 Recording duration
It is used to set duration of auto record. The device will automatically save the recording when reaching the preset duration. In the menu list of Record Timer, press or to select the Recording Duration and press MENU to set the duration of the recording, which is shown below:
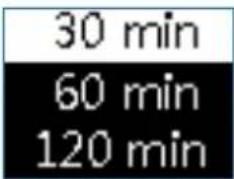
Press for to set the duration of the recording, and press MENU to confirm.
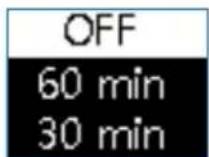
6.5 Section break
When the auto section break recording function is turned on, in the course of recording, the auto section break recording enables recordings to be saved automatically into a new file at preset auto break time and the next recording will be started.
When stopping, press MENU to select the sections which is shown below:
6.6 Delete
When stopping, press MENU to select 'Delete' or 'Delete All' which is shown below:
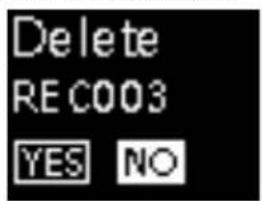

Press or to select 'YES' or 'NO', press MENU to confirm.
6.7 A-B replay
When playing, press 'AB Replay' (A) and confirm the starting point A. At this time, the interface would show A → B and B would flash, which is shown as Figure 1;
Press 'or 'to confirm the ending point B. At the time, the interface would show A → B and replay mode begins, which is shown as Figure 2. Re-press) to cancel the replay mode, and then A → B would disappear on the interface and the device returns to normal play (If VOL is not pressed to cancel the replay, it would exit from the replay mode after five-time replay.)

Figure I

Figure 2
6.8 Loop mode
The device provides four loop play modes, namely Directory Play, Repeat All, Repeat One and Shuffle Play. It is able to switch among those four play modes by pressing MENU button when playing.
☐:Directory play, it means to play in order from the current file to the last one, and then it automatically stops playing.
:Repeat all, it means to play all files in the current folder repeatedly.
☐: Repeat one, it means to repeatedly play the current file only.
:Shuffle play, it means to play the current folder in random order.
6.9 Variable speed play
6.9 Variable Speed Play or to select variable speed play and press MENU to confirm. At this time, the interface of variable speed play would appear as follows, where you need to press or to select the value of variable speed play and then press MENU to confirm.
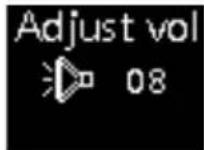
6.10 Volume adjustment
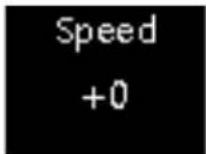
When playing, press VOL to the interface of volume adjustment shown as follows: and then press for to turn up or down the volume and the value of volume on the interface would change accordingly.
6.11 Playback following
When playing, press 'FW' to the interface of playback following which is shown as Figure 1: Record the playback to follow on the same interface. After the recording press 'Play' which would automatically replay the recorded playback. The interface is shown as below. The playing stops when the recording ends and returns to the play interface to resume playing the current file, the interface of which is shown as Figure 2.
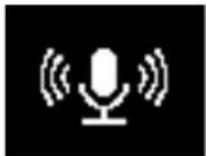


The length for the playback recording is 30 seconds, and simply press 'Play' to exit in advance from the recording and enter playback following mode.
7 Music Mode
When the voice mode is stopped, long press MENU to enter App List interface. Press ☐ or ☑ to music mode and press MENU to confirm.

When the voice mode is stopped, long press 'VOL' to select between the folders (A, B, C, D, music).

Reminder
• Music files can only be played in the 'MUSIC' folder.
Voice Mode Interface Information:
① Current file number
② Total number of recordings in the folder
③ Current play state
④ Loop Mode
⑤ Current file name
⑥ Current play time
⑦ Total time of current file
⑧ Battery Status
⑨ Equalizer Mode
(I)Press or to select the file you need to play.
(2) When stopping, press MENU to delete one file or delete all files.
(3)When playing, press 'AB Replay' (AB or A-B replay mode
(refer to AB Replay under Voice Mode)
(4) When playing, press MENU Button to set play mode, including Directory Play, Catalog Loop, Single Loop and Random Play.
(5)When playing, press MENU to set sound modes, including normal, rock, popular, classic, soft, jazz and DBB.
(6) Short press VOL button for 2\~3 seconds to enter volume adjustment interface, then press or button to adjust the volume.
(7)Press PLAY (▷) button for 2\~3 seconds to stop playing.
(8)When playing, press PLAY ( ) to pause playing, and press PLAY button again to resume playing.
(9) When playing, keep pressing ☑ or ☑ button to fast rewind or forward, and release the button to automatically resume normal playing.
(10)In the state of stop, long press MENU button to enter the main menu. Press VOL (button to return to Voice Mode.

Note
- When the earphone is inserted into the jack, the speaker of the device will stop working.
- Green indicator light is on during playing; it flashes when the device pauses and it will be turned off when the device stops playing.
7.1 A-B replay
The operation methods are the same as 'AB Replay' of 'Voice Mode'.
7.2 Loop mode
The operation methods are the same as 'Loop Mode' of 'Voice Mode'.
7.3 Playback following
Refer to 'Playback following' under 'Volume adjustment'.
7.4 Delete files
When stopping, press MENU to menu lists to select 'Delete' or 'Delete All', which is shown below:

If you need to delete a single file or all the files in the folder, please refer to the deletion method instructed in 'VoiceMode'.
7.5 Equalizer mode
The device supports seven sound effect modes, including normal, rock, popular, classic, soft, and jazz and DBB. When playing, press MENU to select sound effect mode. Switch among the modes via Pre button and Next button and press MENU to confirm.
| Icon Sound Effect | |
| NOR | Normal |
| ROCK | Rock |
| POP | Popular |
| CLAS | Classic |
| SOFT | Soft | |
| JAZZ | Jazz | |
| DBB | DBB |
7.6 Variable speed play
Refer to "Variable Speed Play" under 'Voice Mode'.
7.7 Volume adjustment
The operation methods are the same as 'Volume Adjustment' of 'Voice Mode'.
8 FM Mode
When music mode / voice mode is stopped, please long press MENU to enter the main interface. Press ☐ or ☑ switch to Radio Mode, which is shown below.

Press MENU to confirm on the interface of FM Mode, which is shown below:


Reminder
- Insert your earphones to receive FM. Sound can only be heard in the earphones.
In FM Mode, press or to select frequency point; press MENU to the submenu list, including Auto Search, Bookmark Radio, FM Recording, Delete Radio, Delete All and exit.
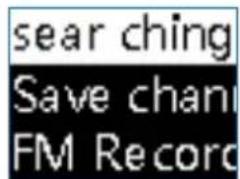
8.1 Auto search
When in FM Mode, press MENU to auto search and when a radio is detected the system would automatically save in the list. The completion of the auto search is shown below:

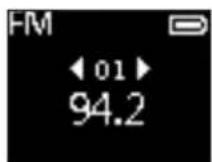

8.1.2 Switch radio
To switch between saved radio stations, first short press 'FW' button to display 'CH' on the right corner of the radio interface, then press ☑ to switch between saved stations
8.2 Bookmark radio
When in FM Mode, press MENU and select from the list the item to manually save the radio, which is shown below:
Press for ,select the radio to be saved, and press MENU to confirm.
8.3 Volume
Press 'VOL button to enter volume adjustment interface, and press for to adjust the volume.
8.4 FM record
Select FM Recording in the menu list, and the system would enable FM recording function. The default FM recording type is stereo recording. The interface of FM recording is shown below:

8.5 Delete files
Select 'Delete Radio' in the menu list to delete any radio station that has been bookmarked, or select 'Delete All Radios' to delete all the radio stations that have been bookmarked, which is shown below.

(1) Press ☑ or ☑ to delete the radio and press MENU to confirm.
(2) Press ☑ or ☑ to select YES or NO, and press MENU to confirm.
8.6 Exit
In the FM listening interface, short press MENU to pop up the list selection, press the up and down button to switch the menu, press the MENU to confirm. Select 'Exit' in the list interface, return to the FM listening interface, long press MENU on the FM listening interface to return to the main interface.
9 Setting Mode
When Music Mode / Voice Mode is stopped, please long press MENU to enter the main interface which is shown below.
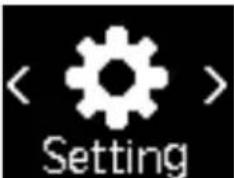
Press MENU to the list of system setting which covers Backlight Time, Contrast, Auto Power-off, Record Light, Language Selection, Key Tone, Memory Choice, Disk Info, Card Info, Formatting, Firmware Version, System Time and Default Setting.

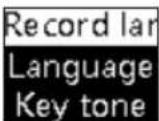
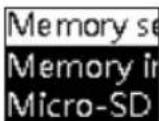


Note
- Note: as there are many items in the menu under the system setting, you can return to Voice Mode by pressing VOL (on any menu interface.
9.1 Backlight time
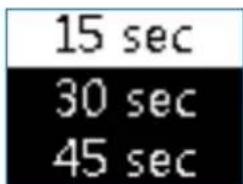
Five types of backlight time are available: be always on, 15s, 30s, 45s and 60s. If there's no operation on the device after the set time, the backlight will turn off automatically. If you select 'Always', the backlight would be always on. Select backlight time and press MENU to confirm to enter the interface of setting backlight time which is shown below:
9.2 Contrast
It is used for setting the contrast of the display screen, ranging 1-5. The larger the contrast value is, the lighter the
background will be; the smaller the contrast value is, the darker the background will be.
Select contrast and press MENU to confirm to enter the interface of setting contrast which is shown below:
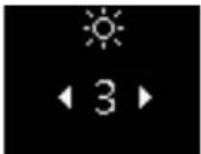
Press ☑ or ☑ to change the value of contrast and then press MENU to confirm.
9.3 Auto power-off
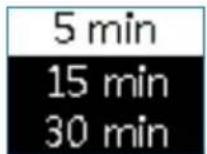
The system will automatically turn off if no operation is performed to the device in specified time. There are five auto power-off options: 5 min, 15 min, 30 min, 60 min or off. Select auto off and press MENU to confirm to enter the interface of auto off which is shown below:
9.4 Record light
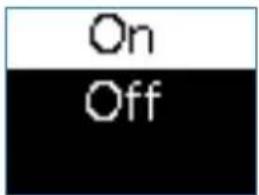
Select record light and press MENU to confirm to enter the interface of Record Light which is shown below:
9.5 Language
Select language selection in the menu list and press MENU to confirm, which is shown below:
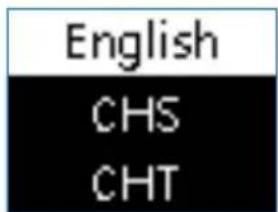
Press or to select 'Simplified Chinese' (S-C), 'Traditional Chinese' (T-C) or 'English' (EN), press MENU to confirm.
9.6 Key tone
Select key tone and press MENU to confirm to enter the interface of key tone which is shown below:

Press ☑ to ☑ to select 'On' or 'Off', press MENU to confirm.
9.7 Memory choice
Select memory choice and press MENU to confirm to enter the interface of memory choice which is shown below:

The default setting of memory is FLASH.
9.8 Disk information
Select memory choice and press MENU to confirm to enter the interface of memory choice which is shown below:
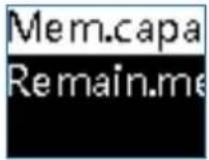
Press for to choose the 'Total Capacity' or 'Left Capacity' of SD Card, select 'Total Capacity' and press MENU to confirm.
9.9 Card information
Select card info and press MENU to confirm to enter the interface of card info which is shown below:

Press or to choose the 'Total Capacity' or 'Left Capacity' of SD Card, select "Total Capacity" and press MENU to confirm.
9.10 Formatting
The function is applied to format the device.

Reminder
- Prior to formatting, please backup important data or files in advance.
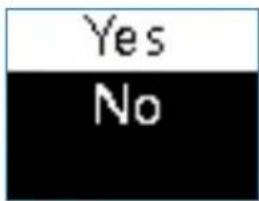
Select formatting, and press MENU to enter the interface of formatting which is shown below:

Press or to select 'Yes' or 'No', press MENU to confirm the formatting when you selecting 'YES'; if press MENU with 'No', it will cancel the formatting and return to the previous menu.
9.11 Firmware version
It is used for checking the version of the firmware and the date.
Select firmware version and press MENU to the interface of firmware version.
Press VOL button to return to the previous menu.
9.12 System time
Select system time, press MENU to confirm, select time format setting, and press MENU again to enter the interface of time format which is shown below:
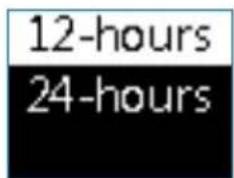
Press or to select '12H' or '24H' format, press MENU to confirm.
Select system time in the menu list. Press MENU to select time format, press MENU again to enter the interface of time setting which is shown below:
2017-11-23
08:00:00
In the current state, press 'AB' or 'FW' to switch between year, month, day, hour, minute and second. In the setting process, the number indicator will flash and then press for to change the figure. Press MENU to save the current time settings.
9.13 Default setting
Select default setting, press MENU to confirm to enter the interface of default setting which is shown below:
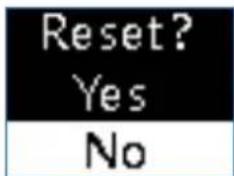
Press ☑ or ☑ to select 'Yes' or 'No', press MENU to confirm the default setting when you selecting 'YES'; if press MENU with 'No', it will cancel the default setting and return to the previous menu.
10 Frequently Asked Questions (FAQ)
Answers to the frequently asked questions are listed here to solve simple problems that may occur. If the problem cannot be solved, please contact the dealer or visit our official website: www.philips.com/support
10.1 Recording cannot be started
The battery is empty, please recharge promptly.
10.2 Device cannot record
The device exceeded the maximum file number or the device's storage is full, Please delete some recordings or move them to other storage devices.
10.3 Playback cannot be started
Please recharge the battery as it has run out power.
10.4 Unable to listen to recording via speaker
(I) Please unplug the headset.
(2) Adjust the volume of speaker as the volume may have been set at the minimum value.
10.5 Cannot turn on the device
Long press AB button for 8 seconds to reset the device.
II Technical Specification
11.1 Memory
Reference recording time (8GB): About 48 hours for Digital Noise Reduction recording mode, 145 hours for high quality recording mode, 12 hours for PCM recording mode, 583 hours for Standard recording mode and 2328 hours for long time recording mode.
Type of internal memory: NAND Flash (flash memory)
Mobile storage device (PC): Yes
11.2 Dimensions
Width × Height × Thickness: 23×104.5×9.4(mm)
Weight (Inclusive of battery): 42g
11.3 System requirements
Operating System: Windows 7,8,10/Vista/XP/2000, Mac OS X, Linux
Port: USB
11.4 Operating conditions
Temperature: 5°C\~45°C
Air humidity: 10% – 90%, non-condensing
Warranty card
质保书

year warranty
一年质保
Type: VTR5101
Serial nr:
Date of purchase
购买日期
Dealer's name, address and signature
销售商名称、地址及签字
www.philips.com/welcome
This document is printed on chlorine free produced paper Data subject to change without notice
This product was brought to the market by Speech Processing Solutions GmbH or one of its affiliates, further referred to in this document as SPS, which is the manufacturer of the product. SPS is the warrantor in relation to the product with which this booklet was packaged.
For China only
只限中国地区
Printed in China


© 2019 Speech Processing Solutions GmbH.
Register your product and get support at
www.philips.com/welcome


- 4.4按键锁定
- 循环模式
- Frequently Asked Questions (FAQ) 57
- II Technical Specification 58
- I Welcome
- Product features
- Important Reminders
- Safety
- Warning
- Hearing protection
- Your Digital Voice Recorder
- Start to Use
- Power On/Off
- Note
- Reminder
- Battery charging
- Connection to computer
- Keypad lock
- Recording
- Voice Mode
- Recording type
- Voice-activated mode
- Monitoring settings
- Record timer
- Record timer setting
- Recording source
- Recording duration
- Section break
- Delete
- A-B replay
- Loop mode
- Variable speed play
- Volume adjustment
- Playback following
- Music Mode
- A-B replay
- Loop mode
- Playback following
- Delete files
- Equalizer mode
- Variable speed play
- Volume adjustment
- FM Mode
- Auto search
- Switch radio
- Bookmark radio
- Volume
- FM record
- Delete files
- Exit
- Setting Mode
- Backlight time
- Contrast
- Auto power-off
- Record light
- Language
- Key tone
- Memory choice
- Disk information
- Card information
- Formatting
- Firmware version
- System time
- Default setting
- Frequently Asked Questions (FAQ)
- Recording cannot be started
- Device cannot record
- Playback cannot be started
- Unable to listen to recording via speaker
- Cannot turn on the device
- II Technical Specification
- Memory
- Dimensions
- System requirements
- Operating conditions
- Warranty card
- 质保书
Brand : PHILIPS
Model : Voice Tracer VTR5101
Category : Dictaphone