
RSB-1056 - Home Appliance Salton - Free user manual and instructions
Find the device manual for free RSB-1056 Salton in PDF.


| Product Type | Home Appliance |
| Brand | Salton |
| Model | RSB-1056 |
| Dimensions (W x D x H) | 25 x 20 x 15 cm |
| Weight | 1.2 kg |
| Power Supply | 120 V ~ 60 Hz, 1000 W |
| Cord Length | 1.0 m |
| Material | Plastic and Stainless Steel |
| Safety Features | Automatic shut-off, Overheat protection |
| Cleaning Instructions | Wipe with a damp cloth; do not immerse in water |
| Spare Parts Availability | Contact Salton service center |
| Repairability | Repairs should be carried out by qualified personnel |
| Main Functions | On/Off switch, Variable temperature control |
| Warranty | 1 year limited warranty |
| Certifications | CE, RoHS |
Frequently Asked Questions - RSB-1056 Salton
User questions about RSB-1056 Salton
0 question about this device. Answer the ones you know or ask your own.
Ask a new question about this device
Download the instructions for your Home Appliance in PDF format for free! Find your manual RSB-1056 - Salton and take your electronic device back in hand. On this page are published all the documents necessary for the use of your device. RSB-1056 by Salton.
USER MANUAL RSB-1056 Salton
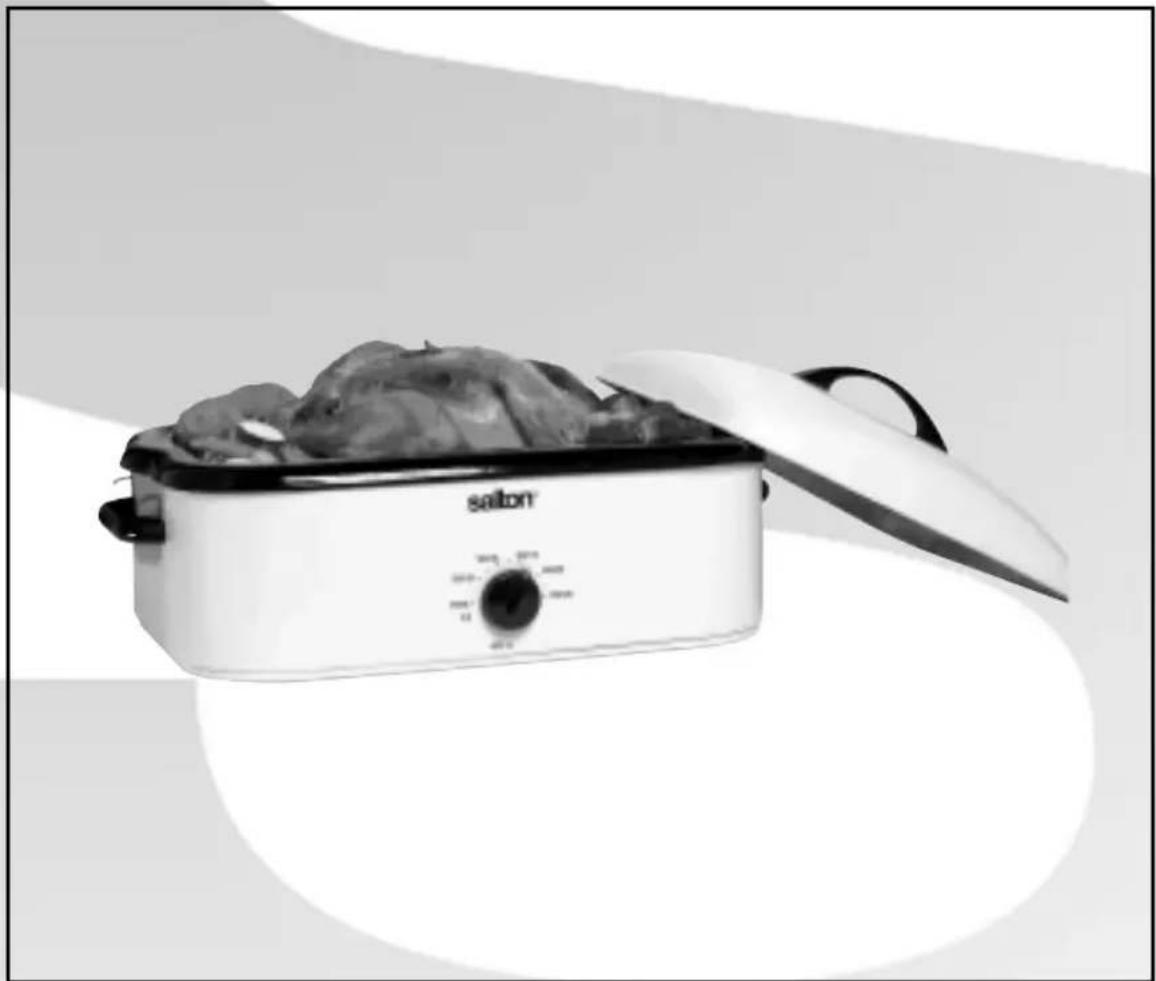
Roaster Oven with Buffet Server
natural_image
Black-and-white photo of a salon cooking pot with visible lid and control knob (no text or symbols on the pot itself)Instruction Booklet
Model: RSB-1056
IMPORTANT SAFEGUARDS
When using electrical appliances, basic safety precautions should always be followed including the following:
- Read all instructions.
- Place the roaster oven on a flat heat resistant surface and use in a well-ventilated area.
- DO NOT touch hot surfaces. Use pot holders or oven mitts when holding handles. DO NOT move the heated roaster oven.
- When lifting or removing lid, avoid the vent holes on the lid and tilt the lid away to divert the escaping steam.
- To protect against fire, electric shock and injury to persons, DO NOT immerse cord, plugs, or the appliance in water or other liquid.
- Close supervision is necessary when any appliance is used by or near children.
- Unplug from outlet when not in use and before cleaning. Allow to cool before putting on or taking off parts, and before cleaning the appliance.
- DO NOT operate any appliance with a damaged cord or plug or after the appliance malfunctions, or has been damaged in any manner. Return appliance to Salton for examination, repair or adjustment. See 'Warranty' section.
- The use of accessories or attachments not recommended by Salton may cause hazards.
- DO NOT use outdoors.
- DO NOT let cord hang over edge of table or counter, or touch hot surfaces.
- DO NOT place on or near a hot gas or electric burner, or in a heated oven.
- Prior to connecting or disconnecting plug from wall outlet, turn any control to 'Off'.
- This appliance is for Household Use Only. Do not use appliance for other than its intended use.
- DO NOT leave unit unattended while in use.
SAVE THESE INSTRUCTIONS
HOUSEHOLD USE ONLY
POLARIZED PLUG
This appliance has a polarized plug (one blade is wider than the other). To reduce the risk of electric shock, this plug will fit in a polarized outlet only one way. If the plug does not fit fully in the outlet, reverse the plug. If it still does not fit, contact a qualified electrician. Do not modify the plug in any way.
INTRODUCTION
The Salton 'Roaster Oven' efficiently roasts ham, turkey and chicken to perfection; bakes pies, cakes and other delicious desserts; stews, steams and slow cooks. It is an ideal size for large family meals or entertaining.
DESCRIPTION OF PARTS
- Cover
- Cover Handle
- Rack
- Removable Cooking Pan
- Base/Heating Well
- Buffet Servers
- Cover Rest
- Temperature Control Knob

BEFORE FIRST USE
Your Salton Roaster Oven should be conditioned before using for the first time. Follow the directions below:
- Assemble the Handle on the Cover.
- Place the Roaster Oven on a flat, heat resistant surface in a well ventilated area or in a covered outside area.
- Remove the Cover and lift out the Removable Cooking Pan.
-
Turn the Temperature Control Knob to the 'Off' position, then plug the unit into a 120V outlet.
-
Set the Oven temperature to 425^-450^ (218 – 230°C) and heat the empty Oven for 30 minutes until any odour or smoke disappears. NOTE: This odour or smoke is normal when conditioning the Oven for the first time and will not reoccur once the Oven is properly conditioned.
- After use, turn the Temperature Control Knob to 'Off', unplug unit from the outlet and allow the Roaster Oven to cool.
- Wash the Cover, Rack, Buffet Servers and Removable Cooking Pan in warm soapy water. DO NOT place in the dishwasher.
- Wipe the interior and exterior of the Roaster Oven base with a damp cloth. DO NOT IMMERSE THE ROASTER OVEN BASE IN WATER OR ANY OTHER LIQUID.
IMPORTANT: The Roaster Oven should be conditioned only before the first use. During normal use do not preheat the Roaster Oven for extended periods of time.
- Place the Roaster Oven on a flat, heat resistant surface and use in a well ventilated area.
- Turn the Temperature Control Knob to the 'Off' position. Plug into a 120V outlet.
- Follow the directions below to either roast, stew, bake, steam or slow cook.
- Use wood or plastic utensils to handle the food in the Cooking Pan.
How To Use the Rack
The Folding Rack can be used when roasting meat or poultry or for steaming or baking. The small legs raise food so that there is air space underneath when roasting or baking and raise food above the water for steaming.
Unfold the side arms to the outside. Place food on the rack. Pick up the rack by the arms and place in the Cooking Pan. The arms of the rack will be held up by resting against the sides of the Cooking Pan. When food has finished cooking simply lift the rack by the arms to remove the food.
How to Use the Cover Rest
Place the edge of the Cover between the Handle and the Cover Rest Supports to keep the Cover and condensation inside the Cover off the counter or table.
How to Stew
- Place Removable Cooking Pan in the Base/Heating Well.
- Cut food into uniform size pieces and place in the Removable Cooking Pan. Add liquids according to the recipe.
- Cover.
- Turn the Temperature Control Knob to the desired temperature.
- Add liquids during cooking, if needed.
NOTE: If cooking frozen meat add 15 to 20 minutes to the recipe time.
How to Roast
- Place the Removable Cooking Pan in the Base/Heating Well.
- Place food on the Rack and lift into the Removable Cooking Pan.
- Cover.
- Turn the Temperature Control Knob to the desired temperature.
- See the time chart below for the correct cooking time.
NOTE: If you prefer to sear the meat before roasting, place the Removable Cooking Pan in the Base/Heating Well and preheat the Roaster Oven to 425°F (220°C). Add 1 tablespoon (15 ml) of cooking oil to the Removable Cooking Pan, add meat. Sear meat on all sides. Follow steps #2 to 5 above.
ROASTING TEMPERATURE AND TIME CHART
| MEAT OR POULTRY | TEMPERATURE°F (°C) | INTERNAL TEMPERATURE°F (°C) | MINUTES PER LB. (PER KG) |
| Beef – Standing Rib (10 lbs./4.5 kgs.) | 325° (160°) | 140° (60°) rare160° (70°) medium170° (75°) well done | 18–20 (40–44)22–25 (48–55)27–30 (59–66) |
| Beef – Rolled Roast (10 lbs. /4.5 kgs.) | 325° (160°) | 140° (60°) rare160° (70°) medium170° (75°) well done | 30–32 (66–70)35–38 (77–83)40–45 (88–99) |
| Pork – freshBoneless, rolledBone-in(10 lbs./4.5 kgs) | 350° (175°)350° (175°) | 185° (85°) well done185° (85°) well done | 35–40 (77–88)30–35 (66–77) |
| Pork – smokedHam, whole(12 lbs./5.5 kgs) | 325° (160°) 170° (75°) | well done 25–28 (55–61) | |
| Lamb – leg(10 lbs. /4.5 kgs.) | 325° (160°)325° (160°) | 150° (65°) medium160° (70°) well done | 26–28 (57–61)29–31 (63–68) |
| VealBonelessBone-in(10 lbs./4.5 kgs.) | 325° (160°)325° (160°) | 175° (80°)175° (80°) | 45–50 (99–110)35-40 (77-88) |
| Turkey, stuffed(20 lbs./9 kgs.) | 325° (160°) 195° (90°) | 19–21 (41–46) |
NOTE:
- Large roasts require slightly less cooking time per pound than small roasts. Check internal temperature of roast during cooking for perfect results.
- To cook an unstuffed turkey, reduce total cooking time by approximately 1 hour. Check internal temperature before serving.
- Check internal temperature of poultry on the inside of the thigh.
How to Bake
- Place the Removable Cooking Pan including the Rack in the Base/Heating Well.
- Place food in a pan, oven proof glass dish or foil and place on the Rack.
- Cover.
- Turn the Temperature Control Knob to the desired temperature.
NOTE:
- To bake cobblers in casserole dishes, wrap foil around the edge of the crust for the first half of cooking time to prevent over-browning.
- Follow package directions for cooking frozen foods such as entrees and pizza. For best heat circulation, place food on Rack.
How to Steam
- Place the Removable Cooking Pan including the Rack in the Base/Heating Well.
- Add 1/2" (12 mm) of liquid in the bottom of the Removable Cooking Pan.
- Place food on the Rack or in a steaming basket.
- Cover.
- Turn the Temperature Control Knob to 350^ F ( 175^ ?C).
How to Slow Cook
- Place the Removable Cooking Pan in the Base/Heating Well.
- Add ingredients.
- Stir and cover.
- Turn the Temperature Control Knob to 250^-275^ ( 125^-135^ ).
- Follow recipe directions for cooking time.
NOTE:
- During the slow cooking process, heat builds up very gradually producing a slow simmer. Stirring is not necessary during the slow cooking process. There is a minimum amount of escaping moisture so the amount of liquid in the recipe should be sufficient for the complete cooking time. However, if needed, replenish liquids sparingly.
- To slow cook a standard recipe, multiply the standard time by 3 and cook at 250^-275^ ( 125^-135^ ).
How to Use the Buffet Servers
- Lift out the Removable Cooking Pan.
- Fill the Base/Heating Well with 8 litres/quarts of water (approximately 1/2 - 2/3 full.
- Place all 3 Buffet Servers on top of the Base/Heating Well. NOTE: The Buffet Servers with the round corners fit on either side. The Buffet Server with straight edges fits in the middle. Cover the Roaster Oven.
- Plug the unit into the wall outlet. Turn the Temperature Dial to 350^ F ( 175^ C) and heat for 30 minutes or until water is very hot.
- Uncover and carefully add hot, cooked food into the Buffet Dishes.
- Cover and turn control to 250^ F ( 125^ C) to keep foods warm. If necessary, adjust the temperature.
- Stir occasionally and keep food covered to maintain temperature.
- Periodically check the water level and add hot water, if necessary.
- When finished, remove the buffet Dishes.
- Turn control to OFF and allow water to cool. Use a plastic jug to empty most of the water. Empty remaining water towards either back corner of the unit. NOTE: DO NOT empty towards the front over the Temperature Control Dial.
IMPORTANT NOTES
- Temperature of foods should be kept at 150^ (65°C) or above.
- All 3 Buffet Servers need to be in place.
- Use only to keep cooked foods warm.
- DO NOT use on a stove top or microwave oven.
- If food is dry, add broth or juice to help keep warm.
- Use oven mitts or pot holders when handling hot Buffet Server dishes.
HELPFUL HINTS
-
To serve directly from the Roaster Oven set the temperature at 225^-250^ ( 110^-125^ ) to keep food hot during serving.
-
The Roaster Oven is ideal for cooking large quantities of stew, soup, baked beans etc.
CARE AND CLEANING
- After use, turn the Temperature Control Knob to 'Off', unplug unit from the outlet and allow the Roaster Oven to cool.
- Wash the Cover, Rack, Buffet Server and Removable Cooking Pan in warm soapy water. DO NOT place in the dishwasher. Remove any stuck on food with a non-abrasive cleaning pad. DO NOT USE ABRASIVE CLEANSERS OR STEEL WOOL PADS.
- Wipe the interior and exterior of the Roaster Oven base with a damp cloth. DO NOT IMMERSE THE ROASTER OVEN BASE IN WATER OR ANY OTHER LIQUID.
RECIPES
Baked Beans
200 fl. oz. (5.5L) Beans in tomato sauce
1 cup (250 ml) Brown sugar
4 cups (1L) Ketchup
1/2 cup (125 ml) Dry onion flakes
Combine all ingredients in Removable Cooking Pan. Bake at 350^ ( 180^ C) for approximately 2 hours or until bubbling. Stir halfway through cooking time. Serves 50.
Chili Meatball Supper
6 cups (1.5 L) Onions, chopped
6 large Green peppers, chopped
6 cans Kidney beans, drained 15 oz./ 454 ml. each
6 cans Tomatoes, diced, 16 oz. / 480 ml. each
4 cans Whole kernel corn, 12 oz. / 360 ml. each
2 cans Tomato sauce, 15 oz. / 454 ml. each
1/4 cup (60 ml) Chili powder
6 Bay leaves
2 tbsp. Salt
144 Meatballs (see recipe below)
Combine onion, green pepper, kidney beans, tomatoes, corn (undrained), tomato sauce, chili powder, bay leaves and salt. Bring to boiling. Stir in meatballs. Cover and simmer until meatballs are heated through, approximately 45 minutes. Stir occasionally during cooking.
Oven-Baked Meatballs
6 Eggs, beaten
1/2 cup (125 ml) Milk
6 cups (1500 ml) Bread crumbs
1 cup (250 ml) Onion, finely chopped
4 tsp. (20 ml) Salt
6 lbs. (2.7 kgs.) Ground beef
Combine eggs and milk in a large bowl. Stir in crumbs, onion and salt. Add meat; mix well. Chill. Shape meat into 1" (2.5 cm) balls. Makes about 144. Heat roaster to 375°F (190°C). Bake meatballs in a single layer in the Cooking Pan, until cooked through. Cool. Package in freezer bags and place in the freezer.
Beef Stew
10 lbs. (4.5 kgs.) Stewing beef
Cooking oil for browning
3 tbsp. (45 ml) Salt
2 tsp. (10 ml) Pepper
Water
4 lbs. (3.6 kgs) Frozen sliced carrots
3 Spanish onions, cut in chunks
2 lbs. (1.8 kgs) Frozen peas
Place cooking oil in bottom of pan. Add 1/2 of stewing beef. Cover and cook at 425^ F ( 220^ C) until browned. Set aside and brown second half of stewing beef and onions. Return browned beef to roaster and add water up to the top of the beef. Add salt and pepper. Cover and bring to a boil at ( 450^ F / 230^ C).
Simmer at 350^ F ( 175^ C) for 1-1/2 hours or until meat is tender. Add more water if necessary. Cook carrots and peas according to package directions then add to the roaster. Stir to distribute evenly. Serve immediately or leave on warm until ready to serve.
Roast Chicken
2 Roasting chickens, 5 lbs. (2.2 kgs.) each
1 tsp. (5 ml) Dried thyme
1 tsp. (5 ml) Salt
2 tsps. (10 ml) Butter or margarine
2 Onions, diced
2 Celery stalks, diced
1/3 cup (85 ml) Honey
1/4 cup (60 ml) Spicy brown mustard
Sprinkle the inside of cavities with thyme and salt. Mix margarine with onions and celery and place inside cavity of chickens. Mix honey and mustard together in a small bowl. Brush the mixture on the outside of the chicken. Place chicken on rack and roast at 425^ F ( 220^ C) for 20 minutes. Decrease temperature to 375^ F ( 190^ C) and brush occasionally with remaining honey and mustard mixture. Roast until internal temperature is 195^ F ( 90^ C).
Corned Beef and Cabbage
1 Corned beef brisket, 6 lbs. (2.7 kgs.)
12 Potatoes, medium size, halved
3/4 tsp. (4 ml) Black pepper
3/4 tsp. (4 ml) Rosemary
2 Bay leaves
3 Cloves, whole
9 Carrots, large, peeled and cut in chunks
6 Onions, small, peeled
3 Cabbages, small, cut into quarters
Hot water
Combine pepper and rosemary and rub onto outside of brisket. Place brisket in Cooking Pan. Add enough water so the brisket is half covered. Add bay leaves and cloves. Cover and cook at 400^ F ( 205^ C) until boiling. Reduce temperature to 250^ F ( 125^ C). Add carrots, onions and cabbage. Cover and cook for 3 to 4 hours or until meat is tender.
Corn on the Cob
12 Ears of corn, shucked
Water
Add approximately 1/2" (12 mm) water into the Cooking Pan. Cover and heat at 400°F (205°C) until boiling. Set corn on rack. Hold rack by the handles and carefully add to the roaster. Steam for 25 to 30 minutes or until tender.
Apple Spice Cake
1-3/4 cups (430 ml) All-purpose flour
2-1/2 tsp. (13 ml) Baking Powder
1/2 tsp. (3 ml) Salt
1 tsp. (5 ml) Cinnamon
1/2 tsp. (3 ml_ Nutmeg
1/2 cup (125 ml) Shortening
1-1/4 cups (310 ml) Brown sugar, lightly packed
2 Eggs
1/2 cup (125 ml) Applesauce
2/3 cup (170 ml) Milk
Preheat oven to 350^ F ( 175^ C). Grease an 8" square pan. Sift together flour, baking powder, salt, cinnamon and nutmeg. Cream shortening, then beat in brown sugar. Blend in eggs until mixture is light and fluffy. Add sifted dry ingredients to creamed mixture alternately with a mixture of applesauce and milk making 3 dry and 2 liquid additions. Combine lightly after each addition. Turn into prepared pan.
Bake in preheated oven for approximately 50 minutes or until cake springs back when lightly touched. Remove from oven and let cool for 5 – 10 minutes before removing from pan.
A short supply cord is provided to reduce the hazards of becoming entangled in or tripping over a long cord. Extension cords may be used if care is exercised in their use. If an extension cord is used, the marked electrical rating of the detachable power-supply cord or extension cord should be at least as great as the electrical rating of the appliance. If the appliance is of the grounded type, the extension cord should be a grounded 3-wire cord. The extension cord should be arranged so that it will not drape over the counter top or table top, where it can be pulled on by children or tripped over.
LIMITED WARRANTY
Salton Canada warrants that this appliance shall be free from defects in material and workmanship for a period of one year from the date of purchase. During this 'in-warranty' period, defective products will be repaired or replaced at the discretion of the retailer and/or Salton Canada. This warranty covers normal domestic usage and does not cover damage which occurs in shipment or failure which results from alteration, accident, misuse, abuse, glass breakage, neglect, commercial use or improper maintenance.
A defective product should be returned to the original place of purchase within the retailer's stipulated return/exchange period*. If you are unable to have a defective product replaced under warranty by the retailer, please check our website at "www.salton.com" for the service centre nearest you. You may also contact us for assistance by mail, e-mail, fax or telephone as listed below.
To ensure prompt 'in-warranty' service securely package and return the product to us prepaid. Be sure to include the original proof of purchase and a description of the defect along with your address and postal code.
For repairs not covered by the warranty, please contact us for assistance.
salton®
SALTON CANADA
Customer Service Department
81A Brunswick
Dollard-des-Ormeaux
Quebec, Canada H9B 2J5
Website: www.salton.com
E-mail: service@salton.com
Fax: 514-685-8300
Tel: 514-685-3660
- Roaster Oven with Buffet Server
- IMPORTANT SAFEGUARDS
- SAVE THESE INSTRUCTIONS
- HOUSEHOLD USE ONLY
- POLARIZED PLUG
- INTRODUCTION
- DESCRIPTION OF PARTS
- BEFORE FIRST USE
- How To Use the Rack
- How to Use the Cover Rest
- How to Stew
- How to Roast
- NOTE:
- How to Bake
- How to Steam
- How to Slow Cook
- How to Use the Buffet Servers
- IMPORTANT NOTES
- HELPFUL HINTS
- CARE AND CLEANING
- RECIPES
- Baked Beans
- Chili Meatball Supper
- Oven-Baked Meatballs
- Beef Stew
- Roast Chicken
- Corned Beef and Cabbage
- Hot water
- Corn on the Cob
- Water
- Apple Spice Cake
- LIMITED WARRANTY
- salton®
- SALTON CANADA
Brand : Salton
Model : RSB-1056
Category : Home Appliance