
DSY5010R - Monitor Astar - Free user manual and instructions
Find the device manual for free DSY5010R Astar in PDF.


| Product Type | Digital Signage Kiosk Monitor |
| Brand | Astar |
| Model | DSY5010R |
| Display Size | Approximately 50 inches (diagonal) |
| Resolution | 1920 x 1080 (Full HD, typical) |
| Dimensions (W x H x D) | Approx. 1120 x 650 x 80 mm (without stand) |
| Weight | Approx. 15 kg |
| Power Supply | AC 100–240V, 50/60Hz |
| Power Consumption | ≤ 150 W (typical) |
| Input Sources | USB, SD card, HDMI |
| Media Playback | Supports images, videos, and music from USB/SD |
| Remote Control | Infrared remote included (Power, Menu, Volume, etc.) |
| OSD Language | English (others selectable) |
| Repeat Mode | Repeat All, Repeat One, Shuffle |
| Photo Slide Mode | Random, Sequential |
| Cleaning | Wipe with a soft, dry cloth. Avoid liquids or abrasive cleaners. |
| Safety Precautions | Ensure proper ventilation; do not block vents. Use only provided power cable. |
| Spare Parts Available | Remote control, power cable, stand, screws |
| Repairability | Modular design; contact Astar service for repairs |
| General Information | Designed for commercial kiosk use; powered by NubiA technology |
Frequently Asked Questions - DSY5010R Astar
User questions about DSY5010R Astar
0 question about this device. Answer the ones you know or ask your own.
Ask a new question about this device
Download the instructions for your Monitor in PDF format for free! Find your manual DSY5010R - Astar and take your electronic device back in hand. On this page are published all the documents necessary for the use of your device. DSY5010R by Astar.
USER MANUAL DSY5010R Astar
Simple start up of DSY5010R
Step 1. Power on the kiosk:
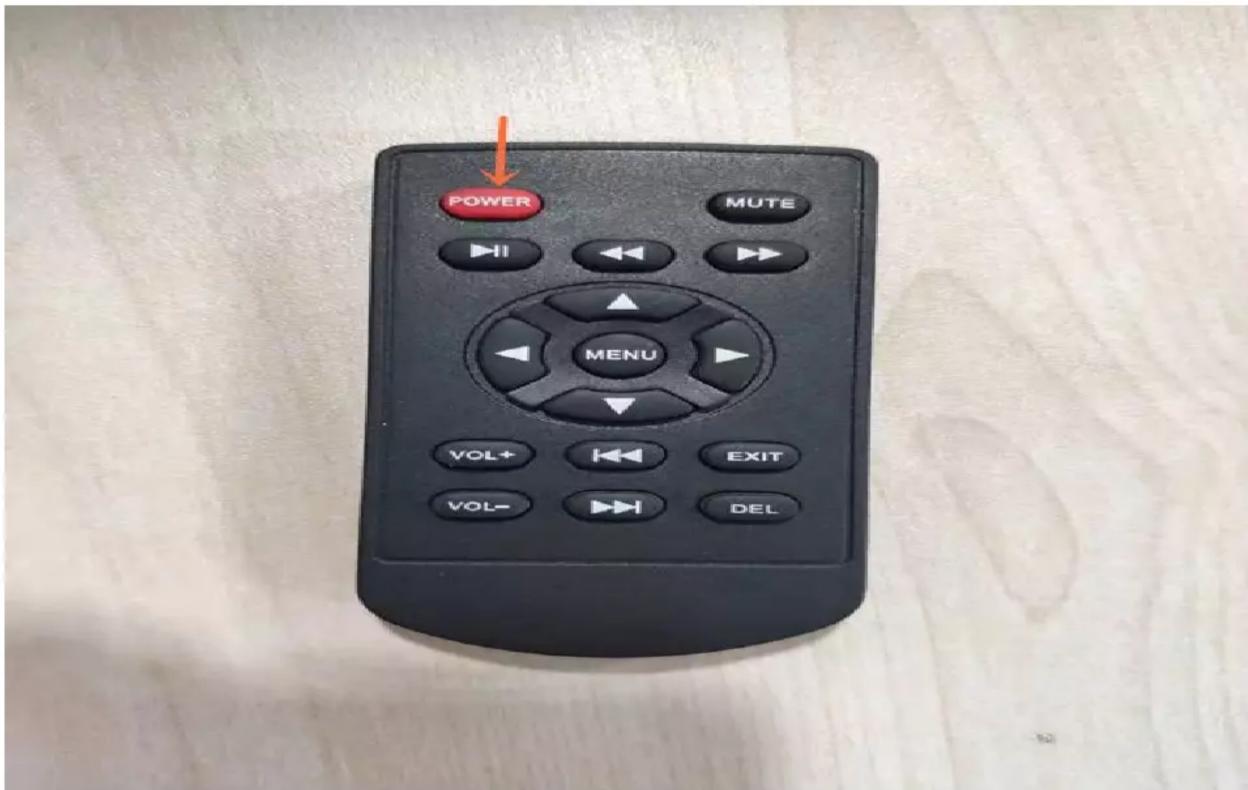
Open the rear door of the kiosk with the key which post on the back of the kiosk. And power it on( See Picture One). Then pick up the remote control, and press buon “ Power” to turn on the kiosk(See Picture Two)
Picture One:

Picture Two:
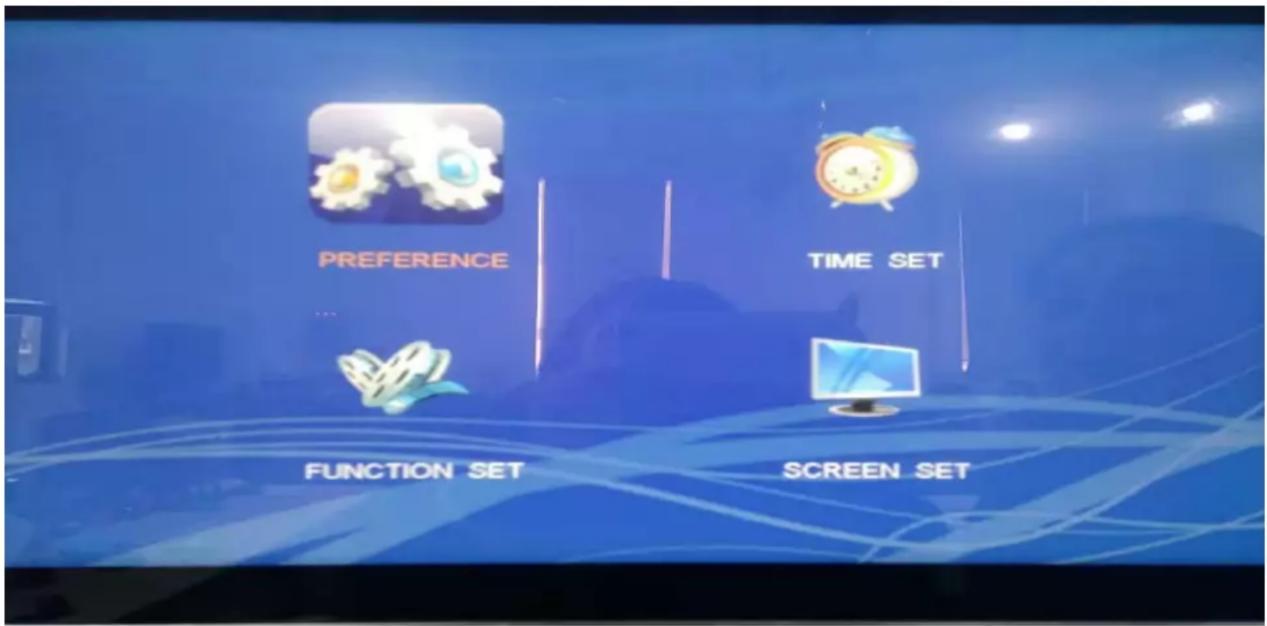
Step 2. Once you turn on the kiosk, the screen will show leer “ No signal” ( See picture Three). PIs press buon “Menu” immediately on the remote control. And enter into “Preference”(See picture four), and then press buon “ Menu”.
Picture Three:

Picture Four:
Step 3. You will see below info., and choose column of "Input Source" (See picture ve), and then press right buon(See picture six) on the remote control and then choose "USB" (See picture seven), and then press buon of "Menu". If you choose "HDMI" at menu of "Input Source", you need install a media player or mini PC to make it work.
Picture Five:

Picture Six:

Picture Seven:

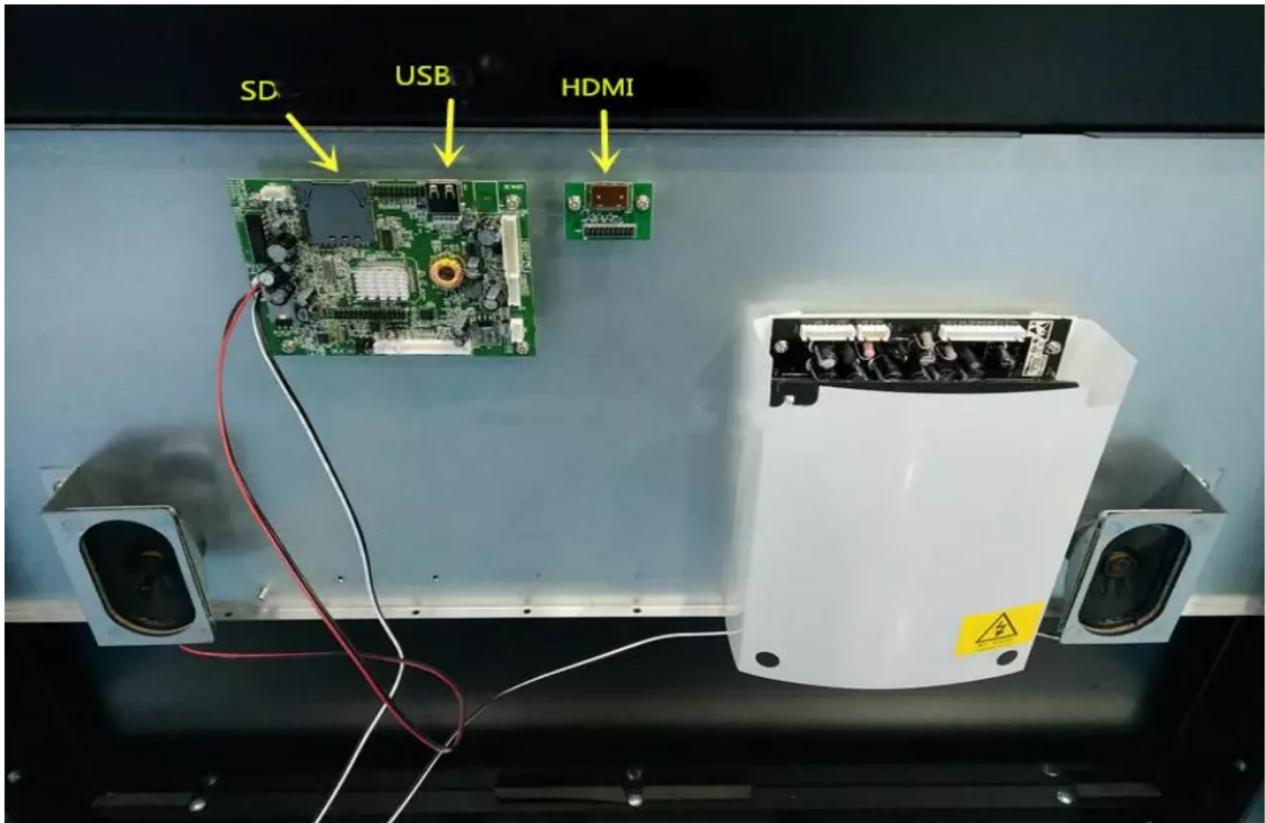
Step 4. Open the rear door of kiosk and Insert SD or USB( See picture Eight). And play the le copied in your SD or USB.
Picture Eight:
Brand : Astar
Model : DSY5010R
Category : Monitor