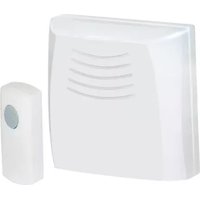
RCWL110A - Doorbell HONEYWELL - Free user manual and instructions
Find the device manual for free RCWL110A HONEYWELL in PDF.


| Product Type | Wireless Door Chime |
| Brand | Honeywell |
| Model | RCWL110A |
| Bell Push Power | 1 x 23A 12V Alkaline Battery (included) |
| Chime Power | 4 x LR14 (C) Alkaline Batteries (not included) |
| Transmission Range | Up to 80 meters in open field (reduced by walls and metal structures) |
| Operating Frequency | 345 MHz |
| Channel Settings | 16 selectable channels (1-16) on both bell push and chime |
| Tune Selection | Selectable tunes via switch on bell push |
| Mounting | Wall mount with bracket (included) or free-standing |
| Warranty | 1 year from date of purchase |
| Regulatory Compliance | FCC Part 15, Industry Canada |
| Installation Requirements | Small flat blade and Phillips screwdrivers |
| Included Accessories | Bell push, chime, 4 screws, wall anchors, adhesive pad, wall mount bracket, 23A battery |
Frequently Asked Questions - RCWL110A HONEYWELL
User questions about RCWL110A HONEYWELL
0 question about this device. Answer the ones you know or ask your own.
Ask a new question about this device
Download the instructions for your Doorbell in PDF format for free! Find your manual RCWL110A - HONEYWELL and take your electronic device back in hand. On this page are published all the documents necessary for the use of your device. RCWL110A by HONEYWELL.
USER MANUAL RCWL110A HONEYWELL
- The application of a program is to ensure that the program will be required to achieve the success of the program's implementation and completion of the program's execution. The program will also be required to achieve the success of the program's execution and completion of the program's execution and completion of the program's execution and completion of the program's execution and completion of the program's execution and completion of the program's execution and completion of the program's execution and completion of the program's execution and completion of the program's execution and completion of the program's execution and completion of the program's execution and completion of the program's execution and completion of the program's execution and completion of the program's execution and completion of the program's execution and completion of
Please retain these instructions for future reference.
Pack Contents
• Bell Push
• 100 ft. door chime
- 4 screws, wall anchors, adhesive pad, wall mount bracket
- 23A 12V Alkaline battery for the push
You Will Require
• Small flat blade screwdriver
- Small cross head screwdriver
• 4 LR14(C) Alkaline batteries for the chime (not included)
Safety..
Always follow the manufacturer's advice when using power tools and wear suitable protective equipment (e.g. safety goggles) when drilling holes.
Set Up The Bell Push..
- Open the bell push unit.
Carefully insert a small flathead screwdriver into slot A and twist gently. Lift away the front of the bell push to reveal the inside.
- Set the bell push channel.
It is possible that your chime may be set off by a nearby wireless device. This could be
a nearby wireless device. This could be a neighbor's bell push, for example. To prevent
Neighbor's bell push, for example. To prevent this interference, you may need to change to
another "channel". Using a flat blade screw-
driver, set rotary switch B to another position,
1 to 16. Make a note of the channel setting.
Your chime will need to have its switch set to the same position – see Chime Set Up.
the same position – see Online Set Up.
3. Select a tune
6. Select & tune: Switch C, in the bell push, selects the chime tune:
1=Westminster
2=Ding Dong (manufacturer's setting)
3=Ding
Mounting The Bell Push...
Mount the bell push using the adhesive pad or by using the two screws, as follows:
- Hold the bell push up against the door frame
wall where you want to mount it. (Ensure the push button is at the top)
push button is at the top).
-
Make a mark on the wall where the two screw holes will be
-
Take away the bell push base and drill two holes
large enough to accommodate the wall plugs if
necessary
-
Screw the bell push to the wall through the mounting points D.
-
Insert the 12V 23A battery (included).
-
Refit the cover, locating the top catch first.
Set Up The Chime..
- Set the chime channel. Set rotary switch E on the chime to position 1 to 16, as with the ball push. The
chime to position 1 to 16, as with the bell push. The channel set on the chime must match the channel.
channel set on the crime must match the already set on the bell push in Push Set I
- Install the chime batteries. Remove the
cover on the rear of the chime and insert
the alkaline batteries, LR14(C), in the
direction shown in the molding in the back of the battery compartment. Note
back of the battery compartment. Note that this door chime does not work with
rechargeable Ni-Cd batteries.
Test Your Door Chime.
Test your wirefree door chime at the desired location before you mount the chime on the wall.
1. Press the bell push. The chime should sound.
Check the Troubleshooting section if the chime does not sound.
[Non-Text]
nivwellyt celles aixustes aux項數 de product que producidas que com o forma a la parte 15 des vaglas de la FCC à los nurnes industrie Canada, la montamiento de Bagas de la FCC à los nurnes industrie Canada, la montamiento en échéant de que, y compras cieiras quan el amo a los montementes entreces que, y compras cieiras quan el amo a los montementes la parte responsable de la contrícola de expertar la rages de viagem miso que, l'ans modérations qui est sa citese expressament par l'entre pas de la parte responsable de la contrícola de expertar la rages de viagem la parte responsable de la contrícola de expertar la rages de viagem miso que, l'ans modérations qui est sa citese expressament par l'entre pas de la parte responsable de la contrícola de expertar la rages de viagem miso que, l'ans modérations qui est sa citese expressament par l'entre pas de la parte responsable de la contrícola de expertar la rages de viagem miso que, l'ans modérations qui est sa citese expressament par l'entre pas de la parte responsable de la contrícola de expertar la rages de viatem
Declaration
dianente de Honeywell en comptant le 1-800-468-1502.
The chime is designed so it can be or free standing or wall mounted,
using the wall mount bracket and screws (included).
1. Place the wall mount bracket on the wall and mark the screw holes (F).
2. Drill the holes and use wall anchors (included) if you are mounting to a masonry wall.
3. Screw the wall mount bracket to the wall. Make sure the hook is facing up.
4. Tilt the chime and hook the slot into the hook of the wall mount bracket as shown below. Make sure the hook is fully inserted into the slot.

Troubleshooting..
Chime doesn't sound when the bell push is pushed
- Check that the batteries have enough charge and are installed the right way. Note the + and - symbols molded into the back of the battery compartment.
- If the chime sound becomes faint or distorted, you should replace the batteries. Use LR14(C) alkaline batteries only.
- Check that the push battery has enough charge and is installed the right way. Note the + and - symbols molded into the back of the battery compartment.
- Check that the bell push channel switch and the chime channel switch are in the same position. See Set Up
- Check that the distance between the bell push or the chime is not too great* (see front of pack).
Chime sounds without being pushed
- Check that there is not water in the bell push or the chime. This can damage the electronics.
- Check that a neighbor is not using the same channel for their chime or a similar wireless system. See Set Up.
*The stated transmission range if this product is measured in open field conditions. Walls, ceilings and metal structures (i.e. reinforced uPVC) will reduce the maximum range.
Disposal and Recycling...
Batteries and waste electrical products should not be disposed of with household waste. Please recycle where these facilities exist. Check with your local authority or retailer for recycling advice.
Guarantee.
Honeywell guarantees this product for 1 year from the date of purchase. Proof of purchase is required; this does not affect your statutory rights. If you require further information about your product, call the Honeywell helpline at 1-800-468-1502.
Declaration.
Honeywell hereby declares that this product complies with Part 15 of the FCC rules and Industrial Canada standards. This device operation is subject to the following two conditions: (1) This device may not cause harmful interference, and (2) This device must accept any interference received, including interference that may cause undesired operation. Caution: Changes or modifications not expressly approved by the party responsible for regulatory compliance could void the users authority to operate the equipment.
Design reg. UK3015090,3015344; EU 180823,176672; China ZL200430006524.9, ZL200430050301.2
FC Federal Communications Commission
Operating frequency: 345 MHz;
FCC and IC certified
©2007 Honeywell International Inc. All Rights Reserved
All Rights Reserved Golden Valley, MN
Engineered by Honeywell - Made in China
Material requirements
Brand : HONEYWELL
Model : RCWL110A
Category : Doorbell