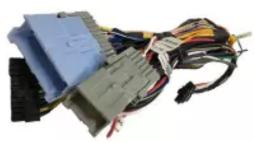
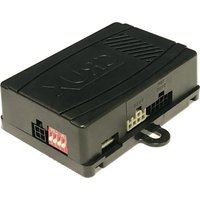
CRUX ONST-11C - Car audio interface

ONST-11C - Car audio interface CRUX - Free user manual and instructions

Find the device manual for free ONST-11C CRUX in PDF.

📄 4 pages English EN Download 💬 AI Question 11 questions ⚙️ Specs
Notice CRUX ONST-11C - page 1
Pick your language and provide your email: we'll send you a specifically translated version.
Product Type Vehicle Integration Module
Brand CRUX
Model ONST-11C
Compatible Vehicles 2005-2006 Chevy Cobalt, 2004-2007 Malibu, 2005-2009 Pontiac G6 (except 2009 G6 with center volume knob)
Key Features Retains factory features, steering wheel controls (SWC), OnStar, chime functions, VSS, parking brake, reverse outputs
Audio System Support Non-Bose and Bose amplified systems with built-in audio level adapter
Included Parts CS-GM11C module, CS-GM11C harness, SWC cables
Wiring EIA color-coded for easy installation
Chime Volume Adjustment Yes, via potentiometer on module (clockwise increase)
DIP Switch Settings Yes, 4 DIP switches for various radio brands (see manual)
SWC Cable Options Option A (Alpine, Clarion, JVC, Kenwood) uses blue/yellow wire; Option B (others) uses 3.5mm plug
Power Requirement 12V DC vehicle electrical system
LED Indicators Solid blue (LAN recognized), flashing blue (not recognized), solid red (12V ACC on), red off (ACC off)
Installation Professional installation recommended; disconnect battery before starting
Care Instructions Keep dry; avoid moisture and extreme temperatures
Safety Precautions Disconnect battery; follow wiring diagram; insulate unused wires
Spare Parts Availability Contact CRUX or authorized dealers for replacement harnesses or cables
Manual Download Available in PDF at notice-facile.com

Frequently Asked Questions - ONST-11C CRUX

Which vehicles are compatible with the ONST-11C?
The ONST-11C is compatible with select GM LAN 11 Bit vehicles: 2005-2006 Chevy Cobalt, 2004-2007 Malibu, and 2005-2009 Pontiac G6. Note: for 2009 G6 with a single center volume knob, use part ONST-11B.
How do I set the DIP switches for my aftermarket radio?
Refer to the DIP switch table in the manual. For example, set DIP 1-4 to OFF OFF ON ON for Atoto, Dual, Pioneer, etc., or OFF ON OFF OFF for Alpine, Clarion, JVC, Kenwood. Always check your radio's manual for SWC programming if needed.
How do I adjust the chime volume?
Use a small screwdriver to turn the Chime Volume Adjustment potentiometer on the CS-GM11C module. Turn clockwise to increase, counterclockwise to decrease. Default is halfway.
Which SWC cable should I use?
Use Option A (blue/yellow wire) for Alpine, Clarion, JVC, Kenwood radios. Use Option B (3.5mm plug) for Blaupunkt, Boss, Dual, Farenheit, Jensen, Power Acoustik, Pioneer, Sony, Soundstream, and most off-brand radios. Cap or insulate unused cable.
How do I select the audio system type (Bose vs Non-Bose)?
Plug the male 8-pin connector into the GRAY female 8-pin on the module for Bose (amplified) systems, and into the BLACK female 8-pin for Non-Bose (non-amplified) systems. The module is labeled accordingly.
What do the LED lights on the module mean?
Solid blue: LAN bus recognized. Flashing blue: LAN bus not recognized (check connections). Solid red: Module providing 12V ACC. Red off: 12V ACC off.
Does the ONST-11C retain OnStar functionality?
Yes, it retains factory OnStar features when used with an aftermarket radio. The module is pre-programmed for seamless integration.
Can I install the ONST-11C myself?
Installation is possible but requires knowledge of vehicle electronics. Follow the installation diagram carefully, use EIA color-coded wiring, and disconnect the battery before starting. Professional installation is recommended.
What is the warranty on the ONST-11C?
Warranty information is not provided in the manual. Contact CRUX or your point of purchase for details on coverage and duration.
Where can I download the full user manual?
The manual is available for free download in PDF format at notice-facile.com. You can also request a translated version by email.

User questions about ONST-11C CRUX

1 question about this device. Answer the ones you know or ask your own.

Ask a new question about this device

The email remains private: it is only used to notify you if someone responds to your question.

What does a continuous blue light on the ONST-11C module mean?
Frequently Asked Questions - 14 d
Response Notice-Facile

The continuous blue light (solid) indicates that your CRUX ONST-11C module is functioning correctly and has established an active connection with the vehicle's LAN bus.

Meaning of the lights:

  • Solid blue (continuous) - Normal operation, connection to the LAN bus established
  • Flashing blue - Connection issue with the vehicle's system (requires diagnosis)
  • Solid red - 12V power active
  • Red off - No 12V power

If your module shows a solid blue light, this is the expected behavior and your installation is functioning normally.

Respond (be the first)

Download the instructions for your Car audio interface in PDF format for free! Find your manual ONST-11C - CRUX and take your electronic device back in hand. On this page are published all the documents necessary for the use of your device. ONST-11C by CRUX.

USER MANUAL ONST-11C CRUX

  • Retains factory features in select GM LAN 11 Bit vehicles while functioning with an aftermarket radio.
  • Pre-programmed to retain factory Steering Wheel Controls.
  • Supports Non-Bose and Bose amplified systems.
  • Provides Vehicle Speed Sensor (VSS), Parking Brake and Reverse Outputs.
  • Retains factory OnStar®
  • Retains chime functions.
  • EIA color coded wiring for easy installation.

PARTS INCLUDED:
CRUX ONST-11C - 1
CS-GM11C MODULE

CRUX ONST-11C - 2
CS-GM11C HARNESS

CRUX ONST-11C - 3
SWC CABLES

INSTALLATION DIAGRAM:
CRUX ONST-11C - 4

flowchart
graph TD
    A["TO FACTORY HARNESS"] --> B["24-Pin Connector Harness"]
    B --> C["24-Pin Connector"]
    C --> D["10-Pin Connector"]
    D --> E["SWC DIP"]
    E --> F["BOSE NON BOSE"]
    F --> G["8-Pin Connector"]
    G --> H["Chime Volume Adjustment"]
    H --> I["4-Pin Connector"]
    I --> J["JVC/Kenwood (Blue / Yellow)"]
    J --> K["3.5MM SWC Cable Plug in the 3.5MM SWC cable to the 4-pin port on the module. See "DIP SWITCH SETTINGS" section."]
    style A fill:#f9f,stroke:#333
    style B fill:#ccf,stroke:#333
    style C fill:#cfc,stroke:#333
    style D fill:#fcc,stroke:#333
    style E fill:#cff,stroke:#333
    style F fill:#ffc,stroke:#333
    style G fill:#fcc,stroke:#333
    style H fill:#ffc,stroke:#333
    style I fill:#fcc,stroke:#333
    style J fill:#ffc,stroke:#333

DIP SWITCH SETTINGS:

AFTERMARKET RADIO DIP SWITCH SETTINGS:

NOTE: For Atoto, Blaupunkt, Dual, Farenheit, Power Acoustik, Soundstream, and most off-brand radios, check the aftermarket radio's manual to see if the SWC buttons need to be programmed.

4-PIN SWC CABLE

Use the proper 3.5MM to 4-Pin SWC cable for the aftermarket radio you are using.

OPTION A is used for ALPINE, CLARION, JVC, and KENWOOD units (Blue/Yellow wire is attached) OPTION B is used for BLAUPUNKT, BOSS, DUAL, FARENHEIT, JENSEN, POWER ACOUSTIK, PIONEER, SONY, SOUNDSTREAM and Most Off-Brand Radios.

NOTE: Cap or insulate the 3.5mm plug or Blue/Yellow wire if not being used.

Plug the SWC cable to the ONST-11C module and the 3.5mm plug to the aftermarket radio SWC port or use the Blue/Yellow wire for JVC and Kenwood radios.

SELECTING THE AUDIO SYSTEM:

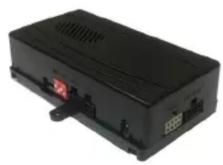
If the vehicle is equipped with an amplified audio system, the ONST-11C has a built-in audio level adaptor that outputs the proper audio level from the aftermarket radio to the factory amplifier. To use this feature, plug in the male 8-pin connector on the ONST-11C harness to the GRAY female 8-pin connector on the ONST-11C module. The module is also labeled "Bose" and "Non Bose" to avoid confusion. (see picture below)

If the vehicle is NOT equipped with a factory amplified system, plug in the male 8-pin connector to the BLACK female 8-pin on the ONST-11C module.

CRUX ONST-11C - SELECTING THE AUDIO SYSTEM: - 1

natural_image Close-up of a black electronic device rear panel with connectors and red arrows pointing to the ports (no visible text or symbols)

NON BOSE (Non-Amplified) Connection
BOSE (Amplified) Connection

CHIME VOLUME ADJUSTMENT:

The CS-GM11C has a potentiometer to adjust the chime volume. It is set at half way by default. To adjust the volume, simply use a suitable screw driver and turn the potentiometer clockwise to increase the volume and counter-clockwise to decrease the volume.

Chime Volume Adjustment

VEHICLE APPLICATIONS:

CHEVROLET

2005-2006

Cobalt

2004-2007

Malibu

PONTIAC

2005-2009

G6*

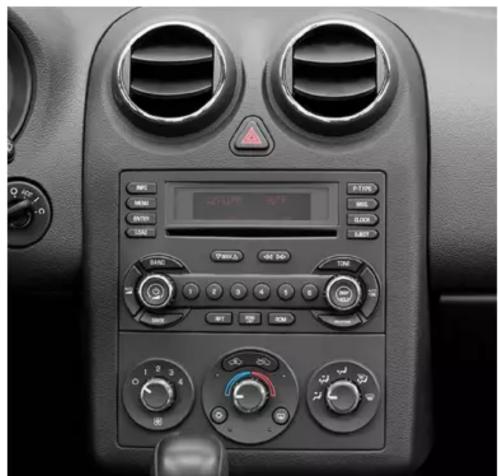
*NOTE: If the 2009 G6 radio has one volume knob in the center of the radio, please use part# ONST-11B instead.

Compatible Radio
CRUX ONST-11C - Compatible Radio - 1

natural_image Interior view of a car dashboard with air conditioners, dials, and a digital display (no readable text or symbols)

2006 Pontiac G6 2005 Chevrolet Malibu

CRUX ONST-11C - Compatible Radio - 2

natural_image Interior view of a car dashboard with digital displays and control knobs (no readable text or symbols)

DIP switch settings for Pioneer receivers:

303 50

Location of the switch may vary on the interface (Corner or Middle).

Please note that interfaces with DIP at the end of the LOT# are installed with the switch.

  • Set DIP switch to "3V3" position for support of NEW generation Pioneer steering wheel button control.
  • Set DIP switch to "5V" position for support of OLD generation Pioneer steering wheel button control.
Manual assistant
Powered by Anthropic
Waiting for your message
Product information

Brand : CRUX

Model : ONST-11C

Category : Car audio interface