DR4160 - Audio recorder MARANTZ - Free user manual and instructions
Find the device manual for free DR4160 MARANTZ in PDF.


| Product Type | Compact Disc Recorder/Player |
| Model | DR4160 |
| Brand | Marantz |
| Disc Compatibility | CD, CD-R (Digital Audio), CD-RW (Digital Audio) |
| Number of Discs (Changer) | 3 |
| Recording Speed | Normal (1x) and High Speed (2x) |
| Playback Frequency Response | 20 Hz - 20 kHz |
| Playback S/N Ratio (CD/CDR) | 105 / 98 dB |
| Playback Dynamic Range (CD/CDR) | 96 / 96 dB |
| Playback Total Harmonic Distortion | 0.003% |
| Recording S/N Ratio | 88 dB |
| Recording Dynamic Range | 90 dB |
| Recording Total Harmonic Distortion | 0.005% |
| Digital Coaxial Output | 0.5 V (p-p)/75 Ω |
| Line Output Voltage | 2 V RMS |
| Headphone Output | 0 - 5 Vrms / 8 - 2000 Ω |
| Digital Input Sample Rate | 32 - 48 kHz (automatic conversion) |
| Analog Input Sensitivity/Impedance | 600 mVrms / 50 kΩ |
| Power Requirement | AC 120 V 60 Hz |
| Power Consumption | 16 W |
| Operating Temperature | 41 - 95 °F (5 - 35 °C) |
| Dimensions (W x H x D) | 17-3/8 x 5-1/2 x 14-3/16 inches (440 x 140 x 360 mm) |
| Weight | 13.2 lbs (6.0 kg) |
| Recording Functions | Direct Line Recording, Auto Level Control, High-Speed Recording, Program Recording, Synchronized Start, Microphone Mixing |
| Special Features | CD Text, Text Edit, Track Edit, Shuffle, Repeat, Program Play |
| Supplied Accessories | Remote control, 2x AA batteries, 2 analog audio cords, 1 digital coaxial cord, power cord, instructions |
Frequently Asked Questions - DR4160 MARANTZ
User questions about DR4160 MARANTZ
0 question about this device. Answer the ones you know or ask your own.
Ask a new question about this device
Download the instructions for your Audio recorder in PDF format for free! Find your manual DR4160 - MARANTZ and take your electronic device back in hand. On this page are published all the documents necessary for the use of your device. DR4160 by MARANTZ.
USER MANUAL DR4160 MARANTZ
Compact Disc Recorder

CAUTION
RISK OF ELECTRIC SHOCK DO NOT OPEN
CAUTION: TO REDUCE THE RISK OF ELECTRIC SHOCK,
DO NOT REMOVE COVER (OR BACK).
NO USER-SERVICEABLE PARTS INSIDE.
REFER SERVICING TO QUALIFIED SERVICE PERSONNEL.

The lightning flash with arrowhead symbol, within an equilateral triangle, is intended to alert the user to the presence of uninsulated "dangerous voltage" within the product's enclosure that may be of sufficient magnitude to constitute a risk of electric shock to persons.

The exclamation point within an equilateral triangle is intended to alert the user to the presence of important operating and maintenance (servicing) instructions in the literature accompanying the product.
WARNING
TO REDUCE THE RISK OF FIRE OR ELECTRIC SHOCK, DO NOT EXPOSE THIS APPLIANCE TO RAIN OR MOISTURE.
CAUTION: TO PREVENT ELECTRIC SHOCK, MATCH WIDE BLADE OF PLUG TO WIDE SLOT, FULLY INSERT.
ATTENTION: POUR ÉVITER LES CHOCS ÉLECTRIQUES, INTRODUIRE LA LAME LA PLUS LARGE DE LA FICHE DANS LA BORNE CORRESPON DANTE DE LA PRISE ET POUSSER JUSQU'AU FOND.
NOTE:
This equipment has been tested and found to comply with the limits for a Class B digital device, pursuant to Part 15 of the FCC Rules. These limits are designed to provide reasonable protection against harmful interference in a residential installation. This equipment generates, uses and can radiate radio frequency energy and, if not installed and used in accordance with the instructions, may cause harmful interference to radio communication. The equipment will not occur in particular installation. If this equipment does cause harmful interference to radio or television reception, which can be determined by turning the equipment off and on, the user is encouraged to try to correct the interference by one or more of the following measures:
- Reorient or relocate the receiving antenna.
- Increase the separation between the equipment and receiver.
- Connect the equipment into an outlet on a circuit different from that to which the receiver is connected.
- Consult the dealer or an experienced radio/TV technician for help.
NOTE: Changes or modifications may cause this unit to fail to comply with Part 15 of the FCC Rules and may void the user's authority to operate the equipment.
LASER SAFETY
This unit employs a LASER. Only a qualified service person should remove the cover or attempt to service this device, due to possible eye injury.
CAUTION-USE OF CONTROLS OR ADJUSTMENTS OR PERFORMANCE OF PROCEDURE OTHER THAN THOSE SPECIFIED HEREIN MAY RESULT IN HAZARDOUS RADIATION EXPOSURE.
This Class B digital apparatus meets all requirements of the Canadian Interference-Causing Equipment Regulations.
IMPORTANT SAFETY INSTRUCTIONS
READ BEFORE OPERATING EQUIPMENT
This product was designed and manufactured to meet strict quality and safety standards. There are, however, some installation and operation precautions which you should be particularly aware of.
- Read Instructions — All the safety and operating instructions should be read before the appliance is operated.
- Retain Instructions — The safety and operating instructions should be retained for future reference.
- Heed Warnings — All warnings on the appliance and in the operating instructions should be adhered to.
- Follow Instructions — All operating and use instructions should be followed.
- Water and Moisture — The appliance should not be used near water — for example, near a bathtub, wash-bowl, kitchen sink, laundry tub, in a wet basement, or near a swimming pool, etc.
- Carts and Stands — The appliance should be used only with a cart or stand that is recommended by the manufacturer.
- An appliance and cart combination should be moved with care. Quick stops, excessive force, and uneven surfaces may cause the appliance and cart combination to overturn.

- Wall or Ceiling Mounting — The appliance should be mounted to a wall or ceiling only as recommended by the manufacturer.
- Ventilation — The appliance should be situated so that its location or position does not interfere with its proper ventilation. For example, the appliance should not be situated on a bed, sofa, rug, or similar surface that may block the ventilation openings; or, placed in a built-in installation, such as a bookcase or cabinet that may impede the flow of air through the ventilation openings.
- Heat — The appliance should be situated away from heat sources such as radiators, heat registers, stoves, or other appliances (including amplifiers) that produce heat.
-
Power Sources — The appliance should be connected to a power supply only of the type described in the operating instructions or as marked on the appliance.
-
Grounding or Polarization — The precautions that should be taken so that the grounding or polarization means of an appliance is not defeated.
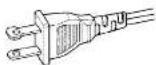
AC POLARIZED PLUG
- Power-Cord Protection — Power-supply cords should be routed so that they are not likely to be walked on or pinched by items placed upon or against them, paying particular attention to cords at plugs, convenience receptacles, and the point where they exit from the appliance.
- Cleaning — The appliance should be cleaned only as recommended by the manufacturer.
- Nonuse Periods — The power cord of the appliance should be unplugged from the outlet when left unused for a long period of time.
- Object and Liquid Entry — Care should be taken so that objects do not fall and liquids are not spilled into the enclosure through openings.
- Damage Requiring Service — The appliance should be serviced by qualified service personnel when:
A. The power-supply cord or the plug has been damaged; or
B. Objects have fallen, or liquid has spilled into the appliance, or
C. The appliance has been exposed to rain; or
D. The appliance does not appear to operate normally or exhibits a marked change in performance; or
E. The appliance has been dropped, or the enclosure damaged. - Servicing — The user should not attempt to service the appliance beyond that described in the operating instructions. All other servicing should be referred to qualified service personnel.
TABLE OF CONTENTS
Table of contents
IMPORTANT SAFETY INSTRUCTIONS
| GENERAL INFORMATION | 5 |
| Unpacking | 6 |
| Setup | 6 |
| Compact discs | 7 |
| Maintenance | 7 |
| About this manual | 8 |
| CONTROLS AND CONNECTIONS | |
| Controls on the front | 9 |
| Connections at the back | 10 |
| DISPLAY | |
| DISPLAY indications | 11 |
| DISPLAY messages | 12 |
| INSTALLATION | |
| Connects general | 14 |
| Analog connections | 14 |
| Digital coaxial connections | 15 |
| Digital optical connections | 15 |
| Power supply/MAINS | 16 |
| Setup recommendations | 16 |
| Inserting batteries in the remote control | 16 |
| REMOTE CONTROL | |
| Remote control commands | 17 |
| LOADING DISCS | |
| CD recorder | 17 |
| CD charger | 18 |
| PLAYING | |
| Playing.... | 18 |
| CD text.... | 19 |
| Selecting a disc.... | 19 |
| Selecting a track.... | 19 |
| Starch.... | 20 |
| Shuffle (random order) play.... | 20 |
| Repeat CO(s), track or program.... | 20 |
| PROGRAM | |
| Programming track numbers | 21 |
| Erasing a track from the program | 21 |
| Cleaning the program the program | 21 |
| Making a program for recording | 21 |
| RECORDING GENERAL | |
| Basic information | 22 |
| Direct Line Recording (DLR) | 22 |
| Auto Level Control (ALC) | 22 |
| BALANCE key | 22 |
| REC LEVEL key | 23 |
| Remarks on recording | 23 |
| INTERNAL RECORDING | |
| Recording modes | 23 |
| High speed recording and automatic finalizing | 24 |
| High speed recording | 25 |
| Normal speed recording and listening | 25 |
| Microphone recording | 26 |
| EXTERNAL RECORDING | |
| Analog or digital recording | 27 |
| Recording modes | 27 |
| Automatic track increment | 27 |
| Recording with automatic synchronized start | 28 |
| Manual recording | 29 |
| (UN)FINALIZING, ERASING | |
| Finalising CDR & CDRW discs | 30 |
| Unfinalising CDRW discs | 31 |
| Erasing from a CDRW disc | 31 |
| SPECIAL FEATURES | |
| Text Edit (on CD recorder only) | 32 |
| Track editing (on CD changer only) | 34 |
| TROUBLESHOOTING | 35 |
GENERAL INFORMATION
Congratulations on the acquisition of your CD-Recorder. This CD-Recorder now enables you to record, play and erase your own audio Compact Discs. Naturally the recorder can also be used to play all pre-recorded CDs.
With the exception of legal restrictions pertaining to copying, you can now create your own high-quality audio recordings on CD. The discs used to record must bear the logos shown below. Copyright fees have been paid on these discs in some countries. Recording on other types of discs (e.g. CD-R for professional recordings) is not possible.
There are two types of recordable AUDIO discs: CD-R(W) discs have a compatibility to play/record on the CD-Recorders based on the ORENGE BOOK Part III. But the discs might not be able to be played/recorded properly depending on the combinations of the discs and CD-Recorders.
CD Recordable Audio (record once):
Fully recorded and subsequently finalized audio CD-R discs can be played on all CD players and recorders that are suitable for CD-R discs. A CD-R disc can be recognized by the following logo:


2 CD ReWritable Audio (multiple recording):
Recorded and finalized audio CD-RW discs can be played on all CD players and recorders that are suitable for CD-RW discs. An increasing number of players and recorders will be suitable for these discs in the future. A CD-RW disc can be recognized by the following logo:


The CD-R(W)disc for 'DIGITAL AUDIO' can be both recording and playing on this CD-Recorder. In addition, this CD-Recorder can play the CD-R(W) disc for 'PROFESSIONAL RECORDING', but cannot record it.
Once you start using the recorder, you will discover how easy it is to 'make' your own CDs. Nevertheless, we recommend that you use an erasable (CD-RW) digital audio disc on your first attempt, while following the instructions given here.
Attention!
Recordings may only be made for personal use.
It is forbidden to copy material protected by copyright, including computer programs, films, television and audio recordings. This appliance may not be used for applications of this type.
Note: Some CD players can not play the finalized CD-R(W) discs because of the low reflectivity of such discs.
Because of laser power differences, some DVD players cannot play the finalized CD-R(W) discs.
Read the text carefully and keep the instructions close at hand so that you can refer to them if necessary.
GENERAL INFORMATION AND DISCS
Unpacking
First check the contents of the packaging. It should contain the following:
- CD-Recorder DR4160
- Remote control with batteries packaged separately
- Audio cables (2 - with red and white plugs)
• Digital coaxial cable (1 - with black plugs)
- POWER COIL
- Instructions - Guaranton
If one of these components is missing, please inform your supplier immediately. Save the packaging material it may come in handy if you move the appliance.
Setup
- Place the recorder on a strong, vibration-free surface.
• Do not use the recorder under extremely damp conditions.
- If the recorder is placed in a cabinet, make sure that a 2.5 cm space remains free on all sides of the recorder for proper ventilation.
Attention:
If the appliance is not used or operated in accordance with the instructions, this may result in exposure to dangerous radiation or other risks.
Only authorized technicians are allowed to open the appliance casing or to perform repairs or maintenance.
Compact discs
The glossy side shining like a rainbow is the front side of the disc, and the side on which the label is printed is the back.
Unlike conventional turntables for playing analog discs, the DR4050 reads the information recorded on the disc from underneath without contacting it using a beam of laser light. Therefore, the performance of a compact disc will not degrade like conventional analog records.
Handle discs carefully so as not to damage or scratch the front side.
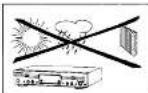
To protect the disc, avoid placing it in the following locations: In direct sunlight or near a source of heat like a heater. In a place which is damp or dirty.
- In a place which could be exposed to rain, such as near a window.
Always keep the disc surface clean.
Up to six billion data units are recorded on the front side of the disc. When cleaning the disc surface, always be sure to use a special compact disc cleaner and wipe as shown below.
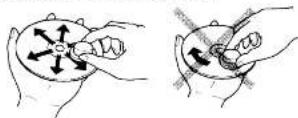
- Do not use conventional record cleaner for analog records, as this will adversely affect the disc surface.
Store discs properly by placing them in their disc cases.
- Do not attach a piece of paper or sticker on the label side of disc. When a disc has a piece of plastic tape or rental CD label with paste protruded from the edge or when a disc has a trace of such a sticky object, do not attempt to play the disc. If such a disc is played on the CD player, impossibility of taking out the disc or other malfunction may result.
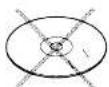
- Write only on the printed side of a CD-R or CD-RW, and only with a soft felt-tipped pen.
• Do not use a dec with a special shape
Do not attempt to play a disc with a special shape such as a heart-shaped disc or octagonal disc. Otherwise the equipment malfunction may result.


Maintenance
Clean the CD-Recorder with a soft, slightly dampened lint-free cloth. Do not use any cleaning agents as they may have a corrosive effect.

Do not expose the CD-Recorder, batteries or CDs to humidity, rain, sand or excessive heat (caused by heating equipment or direct sunlight).
If the CD-Recorder cannot read CDs correctly use a commonly available cleaning CD to clean the lens before taking the CD player to be repaired. Other cleaning methods may destroy the lens. Always keep the tray closed to avoid dust on the lens.
The lenses may cloud over when the CD-Recorder is suddenly moved from cold to warm surroundings. It is not possible to play a CD then. Leave the CD-Recorder in a warm environment until the moisture evaporates.
GENERAL INFORMATION
CONTROLS AND CONNECTIONS
About this manual
This manual gives instructions for operating this CD recorder where:
- the figures (1) throughout the text indicate a sequence of actions necessary to perform a certain operation.
- the arrows (→) indicate the reaction from the recorder;
- the dots (•) indicate remarks, advice or special options within a sequence of actions. The dot-marked instructions are not necessary for the required operation
All instructions in this manual are based on control via the keys on the set. If there are corresponding keys available on the remote control they can be used as well.
Supplied accessories
- 2 Analog audio cords (with red and white plugs)
- 1 Digital coaxial cord (with black plugs)
- Power cord
- 2 batteries for the remote control, size AA
- Remote control
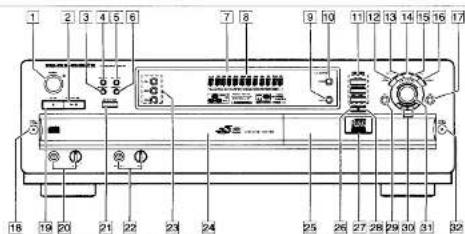
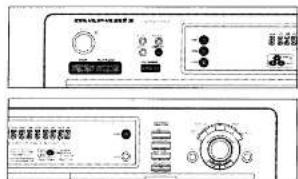
Controls on the front
General
1 ON/OFF.....turns the CD recorder/changer ON and OFF
STANDBY indicator... lights up when the set is STANDBY on
2 PLAY/PAUSE ▶...starts play/interrupts play
3 SHUFFLE....plays discs in charger, program or CD(RW) in recorder in random order
4 REPEAT.....repeat play (All, program or track)
5 CD TEXT ____ makes CD text scroll over display once
6 DISPLAY______selects display information/text
7 IR sensor ____ receives signals from the remote control
8 Display information screen
9 AUX selects external input
10 CDR selects CDR display/keys
17 YES ____ - selects settings in Text Edit and Track Edit mode
stores Text settings
- plays selected tracks
programs track numbers
19 STOP ■......stops playback or recording
20 MICROphone|.....microphone jack
Level microphone volume control
22 PHONES jack for headphones
Level headphones volume control
23 CD 1, 2, 3 ....select CD 1, 2 or 3/CD changer display and keys
29 NO de etes tracks from a program
- deetes complete program
- deletes text in Text Edit mode
30 ←→ searches backward
... reviews the tracks in a program
- controls the cursor in different menus (Text Edit and Track Edit)
searches forward
- reviews the tracks in a program
--------- controls the cursor in different menus
(Text Edit and Track Edit)
31 - JOG CONTROL + previous/next disc/track (play and
program mode
- recording evel control (recording)
balance control (recording)
selects settings (menu on)
CD changer
15 PROG(ram)....opens/closes program (review) memory
v6 TR(ack) EDIT ...... operts Track Edit mode to create your
own tracks
18 OPEN/CLOSE ▲ opens/closes disc tray
21 CD CHANGE . . . . . . . . . . . . . . . . . . . . . . . . . . . . . . . . . . . . . . . . . . . . . . . . . . . . . . . . . . . . . . .
24 Disc tray
CD recorder
11 Recording keys
CD → CD......selects high speed/auto finalise
recording mode
COMPILE CD......selects high speed recording
mode/opens program memory
RECIARD TYPE
[12] REC(arding) LEVEL....enables the EASY JCG key to set the recording level control
13 BALANCE......enables the EASY JOG key to set the balance
14 TEXT....opens Text Edit mode and and stores entered text
25 Disc tray
25 ERASE erases recordings
[27] Recording Led - Flue in Stop and Play mode
- Red during recording
Red blinking during star no
FINALIZE Enzyme 1: finalizes class
20 FINALIZE .... in closes/uninishes disc. 32 OPEN/CLOSE ▲.... opens/closes disc tray
Note: Unless stated otherwise, all controls are on the front of the CD recorder/changer. When provided on the remote control, you can also use the corresponding buttons, after selecting the CD recorder or CD Changor by pressing CD-R or CD-1, CD-2, or CD-3.
CONTROLS AND CONNECTIONS
DISPLAY

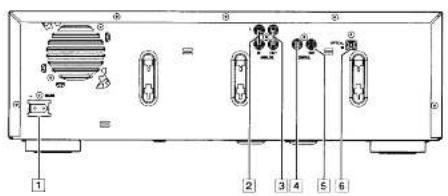
Connections at the back
[1] Connection to power
2 ANALOG IN.....connects to the line output of a tape deck, amplifier or other analogue source
3 ANALOG OUT CDR & CD
connects to the line input of an amplifier. (left and right)
4 DIGITAL IN ..... connects to the digital coastal output of an external CD player
5 DIGITAL OUT CDR & CD
connects to the digital coaxial input
or e.g. amplifier or recording device
6 OPTICAL IN.....connects to the digital optical output of an external CD player
DISPLAY indications
CD changer se

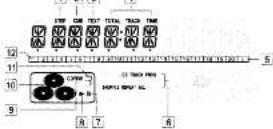
1 STEP indicates the number of tracks in a program
2 Oil ____ remote control active
3 TEXT ____ CD TEXT active
4 TRACK TIME....track time (CDC)
TOTAL TIME.....total time (CDC)
TRACK track number
5 +.....disc or program contains more than 20
tracks
6 PROG flashes during programming' lights in program mode
SHUFFLE plays tracks in random order
REPEAT TRACK lights up when a track is repeated
All lights up when all tracks on the discs in
the changes are repeated/when a
program is repeated
CD lights up when a complete disc in the
change or recorder is repeated
- II pause function active
8 lights during play
19 CD CD selected (a pre-recorded CD or
Finalised CD-R or CD-RW disc
CD R urfinalised CD R disc selected
CD RW urfinalised CD RW disc selected
10 CD changer selected and CD/sI inserted in compartment 1, 2 and/or 3 (a prerecorded
CD or finalised CD-R or CD-RW disc
11 3....disc in play or selected
12 Track bar......indicates
____ number of tracks on a disc or in a
program
number of track in play
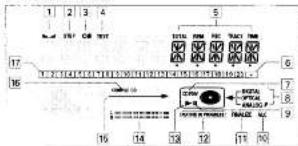
CD recorder section
flowchart
graph TD
    A["1"] --> B["2"]
    B --> C["3"]
    C --> D["4"]
    D --> E["5"]
    E --> F["6"]
    F --> G["7"]
    G --> H["8"]
    H --> I["9"]
    I --> J["10"]
    J --> K["11"]
    K --> L["12"]
    L --> M["13"]
    M --> N["14"]
    N --> O["15"]
    O --> P["16"]
    P --> Q["17"]
    Q --> R["18"]
    R --> S["19"]
    S --> T["20"]
    T --> U["21"]
    U --> V["22"]
    V --> W["23"]
    W --> X["24"]
    X --> Y["25"]
    Y --> Z["26"]
    Z --> AA["27"]
    AA --> AB["28"]
    AB --> AC["29"]
    AC --> AD["30"]
    AD --> AE["31"]
    AE --> AF["32"]
    AF --> AG["33"]
    AG --> AH["34"]
    AH --> AI["35"]
    AI --> AJ["36"]
    AJ --> AK["37"]
    AK --> AL["38"]
    AL --> AM["39"]
    AM --> AN["40"]
balance
2 STEP ____ indicates the number of tracks in a
program
3.00 remote control active
4 TEXT.....CD TEXT active
5 TRACK TIME ....track time (CDR)
TOTAL TIME...total time (CDR)
REM REC TIME remaining recording time
REM TRACK TIME remaining track time
TOTAL REM (TRACK) TIME
......total remaining (track) time (in dubbing mode)
6 +..... disc or program contains more than 20 tracks
7 CD CD inserted (in pre-recorded CD or finalised CD-R or CD-RW disc)
CD R unfinalised CD R disc inserted
CD RW....unfinalised CD RW disc inserted
a DIGITAL.....digital input selected for external recording
OPTICAL....optical input selected for external recording
ANALOG analog input selected for external
recording
microphone input active
9 II pause function active
10 ALC Auto Level Control active
11 FINALIZE ____ lights up during finalizing a recording
12 RECORD IN PROGRESS
Lights during recording
13 lights during play
14 L/R II II......indicates the audio signal level
15 internal recording activated
[16] COMPILE CD.....lights up when Compile CD mode is selected
17 Track bar...... indicates
number of tracks on a disc or in a
program
number of track in play
DISPLAY
INSTALLATION
DISPLAY indications
Messages, as listed and explained here, may appear on the display for your guidance.
General
MARRANTZ CD RECORDER
when set is switched on
PERDING....reading disc information
OPEN LLC - CBR during tray opening of
changer/reco
PROGRAM FULL ...prog
INSERT INSERT insert disc or insert disc in correct way/when recording is activated while no CD is inserted
WRDN5 DTSF...inserted disc is no audio CD
NOT FINALIZED ..... lights up when unfinalized CDR(W)
disc is inserted in CD changer
- flashes when CDR disc tray is opened with unfinalised CDR(W) disc inserted
MEMOR 1 - P/O ..... lights up when 87 % of memory is used
...... gives the amount of memory used, when tray is opened
Recording
WRT: when STOP ■ is pressed during
recording the first 4 seconds of a track
UPRATE ...... updating disc contents
DISE "BLC.....no more recording possible Dy#10CTUS.....digital general input." select
AD=25114C......digital optical input selected BUY OPTICR......digital optical input selected
Digital optical input selected
COPY PROTECT ....no digital recording can be made of the external source
UNFEENFLIETD.... when opening the tray with an unfinalized disc inserted
[3] FIRST P....high speed recording of a complete
disc from the CD Changer
TRPC: FPST ?.....high speed recording of a single track from the CD Changer
CD LISTEN?.....normal speed recording of a complete CD from the CD Changer
TRPC# LISTEN 7 normal speed synchronized recording of a single a track
RECORD CP = ?...recording of the entire disc selected
COMPILE CD 7.....High Speed recording of compilation (program) selected
RU: [J] 7....Synchronised Start of recording of a
complete disc from external source
RUI TRACK ? ...... Synchronised Start of recording of a single track from external source
AUX MANUAL 7.....Manual Start of recording from
external source selected
HUA MEI MIC P....Manual Start of mixed recording of
microphone and external source input
REC TR X ?.....select a track for recording
HCC ONLY?......Manuel Start of microphone recording
CLEAR A-3 7.....when clearing a passage
9-3 FHS 7.....highspeed recording of a particular
passage
RJ LISTON?.....normal speed recording of a particular passage
PEC LE - 12 record level is being adjusted
NOT REITING.....time left on CDR(W) disc is not enough
for proposed recording
ANALOG SEC.....copy prohibited track found during internal recording. Track will be copied analog (Copy Protection Regulations).
EPRISE 2. recorder asks for confirmation when erasing
EMRSE x - ?.....recorder asks for confirmation when erasing more than one track
ERASE DISC ?.....recorder asks for confirmation when erasing a disc
FINALIZE P.....recorder asks for confirmation when finalising a disc
FINALIZED.....when trying to finalise an already finalised disc
FENRULZEB C B .....when trying to record on an already finalized disc
UNFENRL 8x time countdown during unf-nalizing
CHECK INPUT ...... when RECORD is pressed while no
digital source is detected
ERRSE are the time countdown when erasing a track or a disc
FINAL FOR IT......time countdown when finalising a disc
AMD SOURCE .....when a professional source is
connected
A - B-CD......when point A of a passage to be repeated is stored
Play
PROGRAM.....program mode selected
PLAY PROGRAM .... playback of program
CLEAR PROG ?...when clearing a program
CD : BLL......complete CD X selected for
programming
Others
RUTO FINAL......when activating/disactivating the auto
Finalize function
NO PUBLIC TF .....when the recorder enters a data track during recording
FINALIZE ☐.....laser power calibration performed 95 times. please finalize disc
INITI-IRLIZING.....during laser power calibration for
unfinalized discs
DESC RECOVER ____ during disc recovering after power failure
OPC ERPOR ......failure during OPC procedure (OPC = Optimum Power Calibration)
RECORD ERROR
DESC ERROR....when trying to record on or finalize a recovered disc
MEMORY FULL: ....when no more text can be stored for a
FINALIZE CD...... certain disc. Another disc has to be finalized to obtain memory space
NO TRACKS .... when text input is given for an empty disc
TEXT EDIT ......when entering Text Edit mode
BL2UM ARTIST ....when editing or erasing an artist name
RIL RUN TITLE ..... when editing or erasing a title
TR N RP 25 ^1 ......when editing or erasing an artist name per track
TRN TITLE ____ when editing or erasing a title per track
E: ERASE ..... when erasing text
ALL TEXT ...... when erasing all text selected
ERRSE ...... when confirmation for erasing has to be given with YES key
ERPSE ALL .... when confirmation for erasing has to be given with YES key
ERPSE MEMORY .... when waiting for confirmation when erasing a text
TEXT MEMOR3.....when selecting text review per unfinalised disc in memory
MEMORY ENPT3 ... when TEXT MEMORY is selected
while no text is in memory
RUTO TRACK.....when selecting auto track increment ON or OFF
RL 301 TITLE .... will be followed by album title
SPRCH TITLE......will be followed by track title
RL201 RATIST ....will be followed by artist name
TRACK: RATIST .... will be followed by track artist name
NO TEXT.....no text stored for disc/track
INSTALLATION
INSTALLATION

Connections general
For payback on the CD recorder from the CD changer deck the following outputs are present:
- Digital coaxial output (CD & CD-R)
Analog output (CD & CD-R)
We advise you to connect these to the TAPE or CD-R input on your amplifier.
For external recording the following inputs are present:
- Digital optical input
- Digital coaxial input
- Analog input (stereo)
The connections you make will depend upon the possibilities your audio equipment offers. Please refer to the user manuals for your other audio equipment first.
Digital recordings (optical or coaxial) give the best
performance in audio and usability (e.g. auto-track). (The digital optical connection is less sensitive to external disturbances)
If your equipment does not offer digital connections, the high quality Analog-Digital-Converter of your set will ensure very good audio performance when recordings are made from the analog input.
Playback via the digital coaxial output of the CD recorder gives the best audio performance.
If your equipment does not offer digital connections, the high quality Digital-Analog-Converter of the set ensures a very good sound quality via the analog output.
We advise you to always establish both digital and analog connections. In this way you can always make analog recordings when digital recording is not possible.
We have described the most common ways of connecting the CD recorder. If you still have difficulties with the connections you can always contact the Marantz Consumer Service desk in your country.
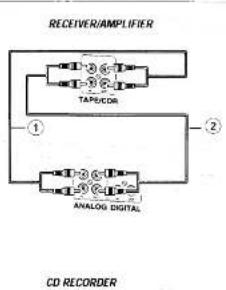
Analog connections
This connection must be made for playback on the CD recorder deck as well as the CD changer deck (cord 2). Cord 1 is only required if you want to make recordings from an external analog source.
flowchart
graph TD
    A["RECEIVER/AMPLIFIER"] --> B["Tape/cor"]
    B --> C["①"]
    B --> D["②"]
    C --> E["ANALOG DIGITAL"]
    D --> E
    E --> F["CD RECORDER"]
Use the audio cords supplied. Connect the red plugs to the R jacks, and the white plugs to the L jacks.
1 For external recording, connect cord (1) between the ANALOG IN-jacks on the set and the CDR LINE- or TAPE OUT-jacks of an amplifier.
Note: For recording directly from a CD player or tape deck, the analog input of the set should be connected to the analog output of the CD player or tape deck.
2 For playback, connect cord ② between the ANA. OG OUT-jacks on the set and the input jacks of an amplifier e.g. TAPE IN, CD-R or AUX.
Note: Never use the PHCND input.
Digital coaxial connections
This connection is required if you want to make recordings from an external CD player with a digital coaxial output.
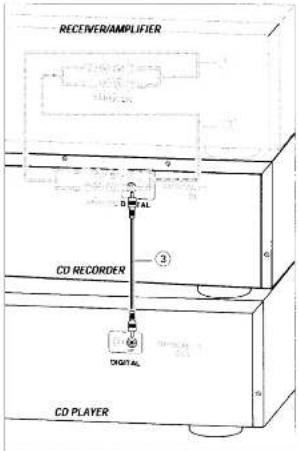
1 For external recording, connect the cord ③ between the DIGITAL IN-jack on the set and the DIGITAL OUT-jack of an external CD player
Note: Your set is equipped with a digital coaxial output (common output for CD recorder & CD changer deck). This output can be used for digital playback.
Digital optical connections
This connection is required if you want to make recordings from an external CD player with a digital optical output.
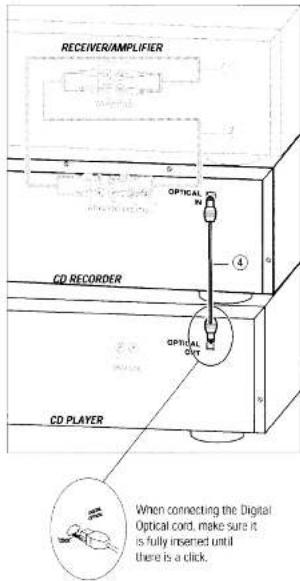
1 Remove the dust caps from the digital optical connection. (We recommend you save the cap.)
2 For external recording, connect a fibre-optic cord ④ between the digital optical input of the set and the digital optical output of an external CD player.
Note: For playback, the digital coaxial outputs or analog outputs of the CD Changer and CD recorder should be connected to an amplifier.

INSTALLATION
Power supply/Mains
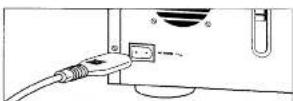
The type plate is located on the rear of the set.
1 Check whether the power voltage as shown on the type plate corresponds to your local power voltage. If it does not consult your dealer or service organisation.
2 Make sure all connections have been made before switching on the AC power supply.
3 Connect the power cord supplied to AC POWER - and to the wall outlet. This switches on the AC power supply
4 Press ON/OFF to switch on the set.
→ MARPANTZ CD RECORDER will be displayed
- Press ON/OFF again to switch off the set.
- Press ☐ on the remote control to switch the set to Standby mode.
When the set is switched to standby, it is still consuming some power. To disconnect the set from the power completely remove the power plug from the wall outlet
Setup recommendations
Place the set on a solid, vibration free surface.
- Make sure there is sufficient space around the set to
prevent overheating
- Do not place the set near a source of heat or in direct sunlight.
- Do not use the set under extremely damp conditions.
- If the set is placed in a cabinet, make sure that a 2.5 cm space remains free on all sides of the CD recorder for proper ventilation.
- Active mobile phones near to the set may cause malfunctions.
Inserting batteries in the remote control
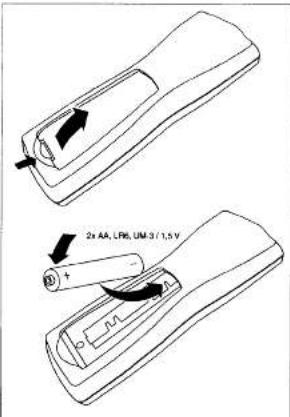
1 Open the battery compartment cover.
2 Insert 2 batteries (AA, LR6 or UM-3, as supplied) as shown.
3 Replace the cover.
Note: We recommend you use 2 batteries of the same type and condition.
Batteries contain chemical substances, so they should be disposed of properly.
REMOTE CONTROL
LOADING DISCS
Remote control commands
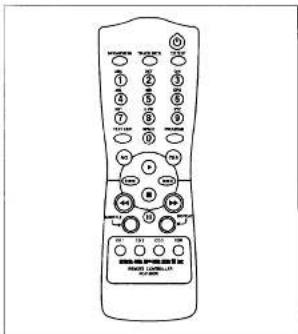
STANDBY ⏻ switches to Standby
BRIGHTNESS....sets the brightness of the display
TRACK INCR(ement) ...... selects automatic or manual increase
of track numbers during recording
CD TEXT ......activates CD text mode
Number/alphabet keys 0 - 9
- selects a track by number
- selects character for text input
TEXT EDIT ......opens Text Edit mode and stores
entered text
SPACE....inserts space during text input
PROGRAM....opens/closes program memory
NO ...... deletes trades from a program
deletes complete program
- deletes text in text edit mode
YRS
YES....- Selects Settings in Test Edit and Track Fair mode.
14.6.11.1028
stores text settings
- plays selected tracks
- programs track numbers
starts CD(RW) play
previous track (Play and Program
mode)
next track (Play and Program mode)
■ stops CD(RM)
← searches backward
- cursor control in Prog. review mode
searches forward
- cursor control in Prog. review mode
■ interrupts CD(RW) play
SHUFFLE...plays CDs, CDIRM or program in
random order
REPEAT.....repeat play
CD 1.2.3. selects discs in (D) change
CDR......selects CD recorder
CD recorder
natural_image
Illustration of a hand operating a CD or DVD disc on a washing machine (no text or symbols visible)Note
Only Audio CDs will be accepted in the CD recorder deck if a non-audio disc is inserted. The display shows WRDHS JESC.
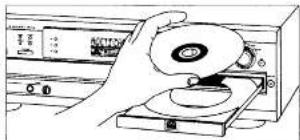
1 Press OPEN/CLOSE to open the disc tray.
→ OPEN [3]F lights up
2 Insert a CD, CDR or CDRW in the appropriate recess in the tray label side up.
3 Press OPEN/CLOSE to close the tray (see also "Playing").
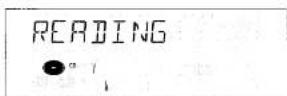
→ REROUND lights up and the display will show the type of disc inserted.
READING

- If a CDR(W) is finalised it will show co on the display.
- If you insert a blank or partly-recorded CDR or unfinalised CDRW, the CD recorder will calibrate the disc for optimum recording. During this process the display will first show REIDING: INITIALIZING and then the number of audio tracks. Calibration can take up to 25 seconds.
INITIALIZING

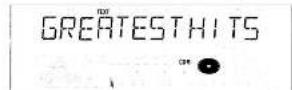
- If CD-text is available the TITLE/ARTIST will scroll by.
IMPORTANT!
For recording it is important that the blank disc is completely free from dust particles or scratches (see CD(RW) handling).
LOADING DISCS
PLAYING
PLAYING

CD changer
Note:
Only Audio CDs will be accepted in the CD changer deck if a non-audio disc is inserted, the display shows WRONG DISC.
1 Press OPEN/CLOSE to open the disc compartment.
→ OPEN CDC lights up.
2 Insert CDs in the two outer disc trays, label side up
- Press CD CHANGE
→ The CU carousel tray will rotate until the inner tray is at the right hand side
3 Insert a CD in the tray, label side up.
4 Press OPEN/CLOSE to close the compartment (see also
Playing a CDJ.
→ PERDING lights up and the display will show the type of disc inserted.
Changing discs during play
1 Press OPEN/CLOSE to open the disc compartment.
→ OPEN & DC lights up
2 The CDs in the two outer disc trays can be changed while play continues.
IMPORTMANT!
When an unfinalized disc is inserted reading may take up to 7 minute. PEREING will then be displayed, followed by NOTFINALIZED.
Playing
CD recorder
1 Press COR.
→ The CDR label lights up
2 Press PLAY/PALUSE ▶ to start play
CD changer
1 Press CD 1, 2 or 3.
2 Press PLAY/PAUSE ▶ to start play
→ Play starts with the first track of the disc in the CD recorder or the selected disc in the changer.
→ The track number and track time of the track in play appear on the display
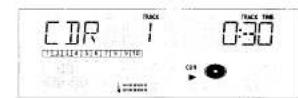
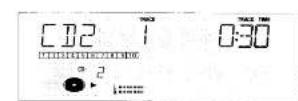
- Press DISPLAY once, twice or three times to see:
→ remaining track time, total remaining time, permanent CD text - to interrupt play temporarily, press PLAY/PAUSE ▶ II again.
→ II lights on the display.
• To continue play, press PLAY/PAUSE ▶ again.
3 To stop play, press STOP ■
→ The number of tracks and the total playing time appears on the display.
→ After the last track play will stop. If CDC was selected, play will continue with the next disc.
CD text
This feature allows the display of information such as album title or track title contained on a specially encoded CD.
• Make sure to insert a CD with CD text.
→ text is shown and the album title is scrolled once.
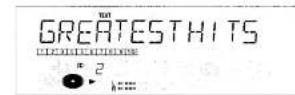
CD text when playback is stopped
- Press CD TEXT to see the following information, which will be scrolled once (if available):
- Artist name of album
- Album title
CD text during playback
- Press CD TEXT to see the following information, which will be scrolled once (if available):
– Artist name for track (on CD recorder only) - Track title
Selecting a disc
Selecting a disc during play
1 Press CD 1, 2 or 3 or COR to select a particular disc
→ Playback is stopped and the new disc is selected
2 Press YES or PLAY/PAUSE ▶ II to start play.
Selecting a CD in STOP mode
1 Press CU 1, 2 or 3 or CUR to select the required disc number
2 Press PLAY/PAUSE ▶ to start play
→ Play starts with the first track of the selected disc.
Selecting a track
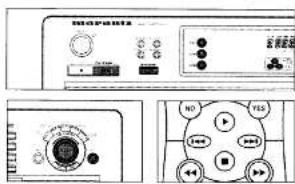
Selecting a track during play
1 Rotate = JOG CONTROL + until the required track number appears on the display.
→ Play skips to the beginning of the selected track.
Select CDR or COC (CD 1, 2 or 3) on the remote control and key in the required track number using the numerical keys on the remote control. For 2-digit track numbers, press the keys in rapid succession.
→ Play skips to the beginning of the selected track.
Press ← or → on the remote control one or more times. → Play skips to the beginning of the present, previous or subsequent tracks.
Note: For tracks on another disc, first select the required disc by pressing CD 1, CD 2, CD 3 or CDR
Selecting a track when CD play is stopped
1 Rotate - JOG CONTROL + until the required track number appears on the display.
2 Press PLAY/PAUSE ▶ or YES to start playing
1 Select CDR or CDC (CD 1, 2 or 3) on the remote control and key in the required track number using the numerical keys.
For 2 digit track numbers, press the keys in rapid succession.
CF
1 Briefly press 🏠 or 🏠 on the remote control one or more times
2 Start playback by pressing PLAY/PAUSE ▶

PLAYING
PROGRAM

Search
1 Hold down ◀◀ or ▶▶
→ The player first searches backwards or forwards at 10 times normal speed with sound at low volume, then goes to 50 times normal speed with sound muted.
2 Release the button at the desired passage.
→ Play starts at the desired passage
Note: During Shuffle, Repeat Track or Programmed play search is restricted to within the track being played at the time.
Shuffle (random order) play
1 Press SHUFFLE before or during CD play to start shuffle play.
→ The tracks on the CD(RW) in the recorder (SHUFFLE), the tracks on the CDs in the changer (SHUFFLE) or the tracks in the program (SHUFFLE PROG) play in random order.
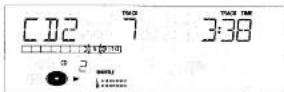
2 Press SHUFFLE again to return to normal CD play.
Note. Shuffle is also cleared if you open the disc tray
Repeat CD(s), track or program
1 Press REPEAT one or more times during CD play
When REPEAT TRACK lights up, the current track plays repeatedly. When REPEAT ALL lights up, the discs in the changer or the program plays] repeatedly. When REPEAT DISC lights up, the selected disc in the changer or the or the recorder plays repeatedly.
2 To return to normal play, press REPEAT one or more times until:
→ the REPEAT label disappears from the display.
Note:
- You can use shuffle in combination with REPAT ALL or
programmed play of the CD Changes.
- REPEAT is also cleared if you open the disc tray
Programming track numbers
You can select tracks and store them either in the CD changer, or CD recorder memory. If you use the program for playback you can choose one of the two memories, else if you like to specify tracks for recording, use the CD changer memory only! You can store any track more than once.
1 Load the desired disc(s) in the disc tray(s)
2 Press either CD 1, CD 2, CD 3, or CDR to select the disc.
3 Press PROG(raml.
→ PROG starts blinking and PROGRAM is displayed.
4 Rotate - JOG CONTROL + I press the numerical keys on the remote control; for 2-digit numbers, press the keys in rapid succession) to select the required track numbers and store each track by pressing YES.
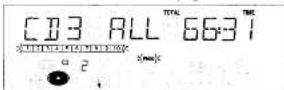
→ The number of programmed tracks (STEP), PPDS and the total program time are displayed.
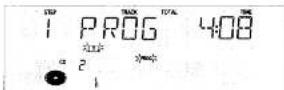
CD changer only
- If you wish to program a complete CD from the CD Changer rotate - JOG CONTROL + to select CD 1 (or 2, 3) PLL and press YES.
→ All tracks of CD 1 (or 2, 3) will be programmed.
5 Press PROG(ram) to end programming.
→ PROG stays shown and the program is currently available.
Note: If the maximum number of programmable tracks is reached, the display shows P700891 FULL.
Erasing a track from the program
1 If necessary press STOP ■
2 Press either CD 1, CD 2, CD 3, or CDR to select the desired memory.
3 Press PROG(ram), followed by ◀ or ▶ to move through the program steps.
→ The track number at the selected step and the total program time are displayed.
4 Press NO to remove the track from the program
→ CCERRED is displayed briefly.
→ The next programmed track number will move up to this position and is displayed together with the step number and the remaining total program time.
Clearing the program
1 If necessary press STOP ■
2 Press NO.
→ CLEAR PROG ? is displayed.
3 Press YES to clear the program
→ PROG CLERRED will be displayed and PROG goes off.
Note: If you open the CD recorder or the CD changer tray the respective program will be cleared.
Making a program for recording
See 'High speed recording and automatic finalizing (optional) of the current program' under chapter 'Internal recording'.

RECORDING GENERAL
Basic information
We will describe
- Digital recording from internal CDC (fast or normal recording).
- Recording from external CD player:
Digital
- Digital (synchronized start with external CD player) - Analog
- Finalizing discs:
Finalizing a CDR(W) disc is a simple procedure, necessary to - play a recorded CDR on a standard CD player - play a recorded CDRW on a CORW compatible CD player
- The recording procedure is the same for CDR and CURW discs. Make sure that the CDR(W) is absolutely free of scratches and dust particles.
- It is advisable to use a CDRW disc for your first try.
- If the disc already contains recordings, the CD recorder will automatically search for the end of the last track, so that recording can start from there.
- For recordings, the minimum track length is 4 seconds. You can record up to a maximum of 99 tracks on a disc. The minimum of recording time left on the disc is 7 seconds. Else, NOT FET12NS is displayed and you cannot enter into the record standby mode.
- When you try to record a copy protected material from an external source, COPY PROTECT will be displayed. No further digital recording is possible then.
• The Serial Copy Management System (SCMS) only allows digital recording under specific conditions:
- This means that it is not possible to make a digital copy from a digital copy.
- Analoo recording is always possible.
- The number of recordings from the original is unlimited.
- Recordings from DAT or DCC players will not always stop automatically.
Important:
If you want to play the recorded CDR disc on any regular CD player, it must first be finalised. See finalising discs.
Finalised CDRW discs play only on CDRW compatible CD players.
For recording from external CD changers do not use RU: MRNRL, but RU: TRACK or RU: CE.
Direct Line Recording (DLR)
The CD recorder is equipped with the high-performance Direct Line Recording technique. It ensures a perfect recording of the source material, meaning a true "bit for bit" recording. DLR will always become active, when you make normal recordings in listen mode as well as in double speed mode.
Auto Level Control (ALC)
Auto Level Control ensures that the tracks on the recorded disc have a similar volume level. Always the already recorded tracks of the COR(W) disc will be taken as reference for the volume level of the following recordings. ALC is active, when ALC is shown.
Auto level control becomes active, when:
- COMPILE CD is being used.
a disc, a track or a track out (A-B) is being high speed
recorded
- a program from the CD change is being high speed recorded
Auto level control will not become active, when:
- CD→CD is being used for an empty CORW
- making recordings from an external source, or
- making normal recordings in listen mode.
BALANCE key
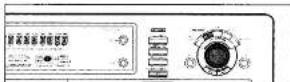
You can set the reference record balance for both digital and analog recordings
1 Keep BALANCE on the set pressed to enable the - JOG CONTRO. + to set the BALANCE.
2 Rotate the — JOG CONTROL + to set the desired balance. → The set balance will be displayed
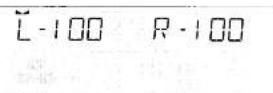
- The balance is reset after the set has been switched to standby.
RECORDING GENERAL
INTERNAL RECORDING
REC LEVEL key
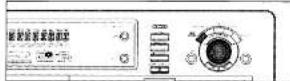
You can adjust the reference record level for both digital and analog recordings. This is also possible when ALC is active. This feature can be used for fading your recordings in or out.
1 Select the required recording mode (see Recording modes).
2 Keep REC LEVEL on the set pressed to enable the - JOG CONTROL + to adjust the record level.
3 Rotate the - .CG CONTROL + to the left to adjust the desired record level.
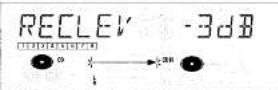
→ The actual record level (in dB) will be displayed.
- The record level is reset after the set has been switched to standby.
Remarks on recording
- During high speed recording, the original recording quality will be maintained.
- When Auto Track is on (default setting), track numbers will automatically be increased during recording.
- If a finalised CDR disc is inserted in the CD recorder and CD→CD is pressed, F\NRL\7E3 CD will be displayed. Recording is not possible.
- If a finalised CDRW disc is inserted in the CD recorder and REC TYPE is pressed, UNFINFLIZE ? will be displayed. If YES is pressed, the disc will be unfinalised.
Note: If during recording ANRLOG PEC appears, the track is copy protected and will be recorded as analog, at normal speed. All other tracks will be copied normally (at double speed).
Warning: No more recording possible after finalizing COR discs!
The CD-Recorder records the text memory simultaneously when using the internal CD-deck. Some discs are prohibited to copy the text memory. If such a disc is copied, no text memory will be recorded.
- When you copy a special disc such as HDCD or DTS, you have to
- set the sampling frequency at 44.1kHz
• use the digital connection
- set the digital rec-volume of the CD-Recorder at 0 dB. When you copy the tracks from a DAT recorded by different sampling frequencies, noise might be recorded in the disc. Please set a sampling frequency for every track in a DAT. This CD-Recorder can record about 17 seconds of a pause time, which decreases the time count just before music start in a track on the display. If you record a track including more than 17 seconds-pause time by digital recording, the pause time will be recorded the different length of time from original. However, the entire track time will not be changed and be able to listen to the music as same as original.
Recording modes
For recording from the internal CD Charger-deck you can choose following recording modes:
- High speed recording and automatic finalizing: Fast and easy! Record and finalize your CDR(W) in one quick step while the sound is muted. You can record: - the current CD (CD→CD); - a program (COMPIL F, CD).
- High speed recording (REC TYPE):
Record your CDR(M) fast while the sound is muted.
You can record
- an entire [1] /71/457
a rock TRACK CASTU
a program (COMPRE COVID PROG FAST)
- a track edge (AB FAST)
- Normal recording and listening (REC TYPE):
Listen to the recording while you are making it. You can record
- an entire CD (CD LISTEN)
- a track TRACK LISTEN
a program PROG US ITEN
a track edit (48 LISTEN)
Microphone recording
Mix sound from the internal CD Charger with microphone input (CD MIX MIC).
INTERNAL RECORDING
INTERNAL RECORDING
High speed recording and automatic finalizing
High speed recording and automatic finalizing of the current disc
Notes:
- During High Speed recording, the Pause function is not
OPERATIVE
Copy prohibited tracks will be copied analog RNPLOG REC
is displayed
- During High Speed recording, the sound is not audible.
When the CDR(M) already contains a recording the ALC
function will become active. ALC then lights up on the display.
- If required the recording level can be set first, using the REC
LEVEL key. See "Rec Level key" under "Recording General".
1 Make sure that the CDR(W) is absolutely free of scratches and dust particles.
2 Press CD→CD to enter into the record mode.
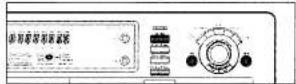
Both decks will be selected in the display, the arrow and the YES key start blinking. The remaining recording time of the COR(W), the total playing time of the source CD and REC[OP]. CD4 (or 2, 3)? are displayed.
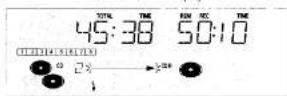
3 Press YES to start recording and finalizing.
→ The arrow lights, RECORDING IN PROGRESS and FINALIZE are shown; high speed recording and finalizing start and the actual recording time left starts to count down
- To check the elapsed recording time, press DISPLAY. This can be done during recording.
• Recording will stop automatically.
4 To stop recording manually, press STOP ■
- If STOP was pressed within 3 seconds after YES, no recording will take place.
Note: If a program was already available before pressing CD→CD, this will be ignored. PROG goes off and the current disc will be recorded. After finishing the recording, PROG is shown and the program is available again.
High speed recording and automatic finalizing (optional) of the current program
1 Make sure that the CDR(W) is absolutely free of scratches and dust particles.
2 Select and store all desired tracks in the CD changer memory (see "Programming track numbers").
24
2 Press COMPILE CD to enter into the record mode.
Both docks will be selected in the display, the arrow starts blinking. The remaining recording time of the CDR(W) the total playing time of the program and RECORD PROS ? are displayed.
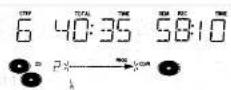
- If the total time of the program is of bigger size than the remaining recording time of the CDR(W): → NOT FITTING I will be displayed briefly, followed by the remaining recording time and RECORD PROG ? If you still start recording, only the tracks of the program that fit unto the CDR(W) will be recorded.
3. Press either:
NO to change the program.
→ PROG starts blinking. Now you can change the program (see "Program") and return to the record mode by pressing COMPILE CD
or
YES to confirm recording.
→AUTO FIN P is displayed
4 Press either
YES, if the COR(W) shall be finalized after recording.
Q1
NO. if the CDR(M) shall not be finalized after recording.
→ The recording process starts. The arrow lights, RECORDING IN PROGRESS is shown; high speed recording and FINALIZE (if selected) start and the actual recording time left starts to count down.
- To check the elapsed recording time, press DISPLAY. This can be done during recording.
- Recording will stop automatically.
To stop recording manually press STOP■
- If STOP was pressed within 3 seconds after YES, no recording will take place.
Note:
If no program is available and you press COMPILE CD, you enter immediately into the program menu. Start your programming and return to the record mode by pressing PROGRAM or COMPILE CD.
Important:
If you want to play the recorded CDR disc on any regular CD player, it must first be finalised. See 'Finalising discs'.
Finalised CDRW discs play only on CDRW compatible CD players.
High speed recording
High speed recording of an entire disc, a track, a program or a track edit
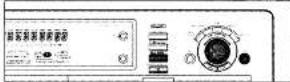
1 Make sure that the CDR(W) is absolutely free of scratches and dust particles.
2 Press either CD-1, CD-2 or CD-3 to select the disc you wish to record from.
3 Press REC TYPE on the set to enter into the recording menu.
4 Rotate - JOG CONTROL + to select one of the following high speed record modes:
If a disc from the CD changer is selected:
→ [3] FAS? 7: for high speed recording of an entire disc • Continue with step 5.
→ TRACK FIRST 2: for high speed recording of a track.
- Press YES to confirm.
- Rotate - JOC CONTROL + to select the track.
→ REC TP 7 and the tracknumber is displayed.
- Continue with step 6.
If CD changer program mode is available:
→ PROG FRET ?: for high speed recording of the selected disc or of the program.
If CD changer track edit mode is available:
→ R-2 FAS 7: for high speed recording of the A-B track.
5 Press YES to confirm your selection.
Both decks will be selected in the display, the arrow starts blinking. The remaining recording time of the CDR(W), the total recording time of the CDR(W) and either RECORD CD1 (or 2, 3)? RECORD PROG ? or RECORD A-3? is displayed.
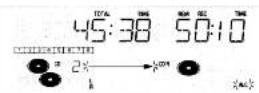
6 Press YES to start high speed recording.
→ The arrow lights. RECORDING IN PROGRESS is shown, high speed recording starts and the actual recording time left starts to count down.
- To check the elapsed recording time, press DISPLAY. This can be done during recording.
- Recording will stop automatically.
• To stop recording manually, press STOP ■.
- If STOP was pressed within 3 seconds after YES, no recording will take place.
Important:
If you want to play the recorded CDR disc on any regular CD player, it must first be finalised. See 'Finalising discs'.
Finalised CDRW discs play only on CDRW compatible CD players.
Normal speed recording and listening
Normal recording and listening of an entire disc, a track, a program or a track edit
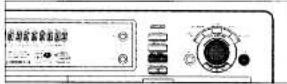
1 Make sure that the CDR(W) is absolutely free of scratches and dust particles.
2 Follow step 2 and 3 of "High speed recording".
3 Rotate - JOG CONTROL + to select one of the following normal record options:
If CD changer is selected:
→ CD LISTEN ?: for listening to the entire disc during normal recording
- Follow step 5 and 6 of "High speed recording"
→ TRACK LISTEN 7. for listening to the track during normal recording
- Press YES to confirm.
- Rotate - JOG CONTROL + to select the desired track.
→ PEC TP 2 and the tracknumber is displayed.
- Continue with step 6 of "High speed recording"
If CD changer program mode is available:
→ PROG LISTEN? for listening to the program during normal recording
If CD changer track edit mode is available:
→ A-B LISTEN? for listening to the A-B track during normal recording.
4 Follow step 5 and 6 of "High speed recording"
Note: If required the recording level can be set first, using the REC LEVEL key. See "Rec Level key" under "Recording General"
INTERNAL RECORDING
EXTERNAL RECORDING
Microphone recording
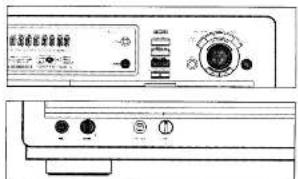
1 Make sure that the CDR(W) is absolutely free of scratches and dust particles.
2 Set MIC LEVEL to the minimum level to prevent acoustic feedback (e.g. a loud howling sound) before you connect the microphone.
3 Connect a microphone to MIC.
4 Press CD 1, CD 2 or CD 3 to select the disc you wish to mix the microphone with.
5 Press REC TYPE on the set to enter into the recording menu.
6 Rotate — JOG CONTROL + to select the manual record mode for the microphone:
→ [O] MIX MIE is displayed.
7 Press YES to confirm
→ HRET is displayed.
→ RECORD ? is displayed.
8 Press YES to confirm.
→ Recording is started
10 Press PLAY/PAUSE ▶ to start playback.
11 Rotate — JOG CONTROL + to select the desired track. → The selected source is mixed to the microphone.
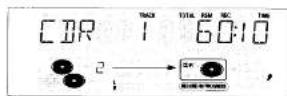
12 Press STOP ■ to stop recording.
• To perform microphone recording only see "Manual recording" of the chapter "External recording".
Note: The set is standard adjusted for a mono microphone. If you wish to use a stereo microphone, press AUX for more than 5 seconds. The set will display MONO 7. Press NO to select STEREO or YES to select MONO. STEREO MIC or MONO MIC will be displayed.
Analog or digital recording
When making recordings from an external source, we recommend to do analog recording only if digital recording is not possible. Digital recording will usually result in better sound quality.
Recording modes
For external recording you can choose following recording modes:
AUX CO - to make an automatic recording of an external source simply by starting the source.
AUX TRACK - to make an automatic recording of a single track from an external source simply by starting the source AUX MANUAL - to start a manual recording from an external source.
- AUX MIX MIC - to start a mixed recording of microphone and external source input.
MIC ONLY - manual start of microphone recording.
Automatic track increment
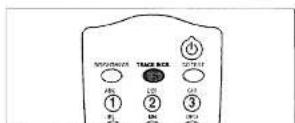
in recording mode tracks will be incremented automatically such that the track numbers are positioned on the same position as the original.
- Press as often as necessary TRACK INCREMENT on the remote control during stop when CDR is selected to switch the automatic track increment function on.
- AUTO-TR DN is displayed and the function is switched on. Track increments are now automatically detected from digital source material. In analog source material a silence of 2.7 seconds or more is detected as a track increment.
- Press as often as necessary TRACK INCREMENT on the remote control during stop when CDR is selected to switch the automatic track increment function off.
→ BLTO TP OFF is displayed and the function is switched off. Track numbers can now be incremented manually by pressing TRACK INCREMENT on the remote control during recording. The minimum track length is 4 seconds.
Notes:
- Track numbers cannot be changed after recording.
- The automatic track increment only works with consumer sources with a digital output signal according to the IEC 958 (consumer part) audio standard. DAI, DVD and DCC do not deliver this signal.
EXTERNAL RECORDING
EXTERNAL RECORDING

Recording with automatic synchronized start
Recording of an entire disc or a track with automatic start
Important:
Recording from CD-changers should always be started in the Auto-Start mode.
For recording from external CD changers do not use RU=158AUR, but RU= [RECK or RU:]
1 Make sure that the CDR(W) is absolutely free of scratches and dust particles.
2 Press repeatedly AUX to select the input for the external source you want to record from.
→ RUB DIGITAL is displayed if the digital coaxial input is selected.
→ RUS OPTICHE is displayed if the digital optical input is selected.
→ Run RARL05 is displayed if the analogue input is selected
3 Press REC TYPE on the set to enter into the recording menu.
4 Rotate - JOG CONTROL + to select either
→ P#: [3] ?: for recording with synchronised start of an entire disc
→ Run: TRRCH 7: for recording with synchronised start of a track
5 Press YES to confirm your selection.
→ ARIT is displayed for a few seconds → START SOURCE is shown.
Notes
IFCPECK INPUT is flashing, check the digital connection.
If required the recording level can be set first, using the REC LEVEL key. See "Rec Level key" under "Recording General".
6 Start playback on the selected source.
→ The CD recorder starts to record simultaneously and recording in progress is shown. The remaining recording time left of the COR(W) is displayed.
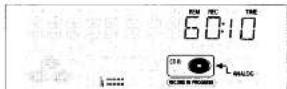
Note: if you start playback on the selected source within a track, recording starts at the beginning of the next track or after 2.7 seconds of silence in analogue recordings.
1 If a digital source is selected:
After the recording process, the CD recorder stops automatically.
Note: Recordings from DAT or DCC will automatically stop after 20 seconds silence.
If an analogue source is selected:
After the recording process, the CD recorder stops after a silence of 20 seconds on the source material.
- To stop recording manually, press STOP ■ on the set.
→ RECORDING IN PROGRESS goes off.
Important:
If you want to play the recorded CDR disc on any regular CD player, it must first be finalised. See finalising discs.
Finalised CDRW discs play only on CDRW compatible CD players.
Manual recording
Manual recording from an external source
1 Make sure that the CDR(W) is absolutely free of scratches and dust particles.
2 Press repeatedly AUX to select the input for the external source you want to record from.
→ RUI: DIGITAL is displayed if the digital coaxial input is selected.
→ RUR OPTICRL is displayed if the digital optical input is selected.
→ RUS ANNLOS is displayed if the analogue input is selected.
3 Press REC TYPE on the set to enter into the recording menu
4 Rotate - JOG CONTROL + to select the record type → BUY MANUAL 7: for manual start of recording
5 Press YES to confirm your selection.
→ HBT is displayed.
→ RECORD ? ,PU: and the remaining recording time of the CDR(W) are displayed.
6 Start playback on the external source in order to set the optimal recording level on the CD recorder (see "REC LEVEL key").
Note: IFCHECK INPUT is flashing, check the digital convection.
7 Stop playback on the external source.
8 Go to the beginning of the desired track.
9 Press YES on the set and simultaneously start playback on the external source.
→ The CD recorder starts to record and recording in progress is shown. The remaining recording time left of the CDR(W) is displayed
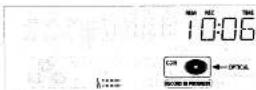
10 Press STOP ■ on the set to stop recording
→ UPDATE is displayed and RECORDING IN PROGRESS goes off.
Manual microphone recording
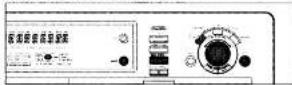
1 Make sure that the CDR(W) is absolutely free of scratches and dust particles.
2 Set MIC LEVEL to the minimum level to prevent acoustic feedback (e.g. a loud howling sound) before you connect the microphone.
3 Connect a microphone to MIC.
4 Press repeatedly AUX to select the input for the external source you wish to mix the microphone with.
5 Press REC TYPE on the set to enter into the recording menu.
6 Rotate - JOG CONTROL + to select the record type: → RUS MTM MEC: the microphone is mixed to the external source.
→MIC ONLY: only the microphone is recorded.
7 Press YES to confirm your selection.
→ RPT is displayed.
→ RECORD 2, FLU and the remaining recording time of the COR(W) are displayed
8 Set the optimal recording level on the CD recorder (see "REC LEVEL key").
- In addition you can also set the optimal recoding level of the microphone by turning MIC LEVEL.
9 HRAU: M1= M1E is selected:
Press YES on the set and simultaneously start playback on the external source
→ The CD recorder starts to record and recording in progress is shown. The remaining recording time left of the CDR(W) is displayed
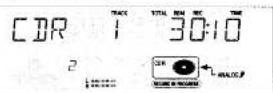
WHIC ONLY is selected:
Press YES on the set to start recording
→ The CD recorder starts to record and RECORDING IN PROGRESS is shown. The remaining recording time left of the CDR(W) is displayed.
10 Press STOP ■ on the set to stop recording.
→ UPDATE is displayed and RECORDING IN PROGRESS goes off.

EXTERNAL RECORDING
(UN)FINALIZING, ERASING

Note: The set is standard adjusted for a mono microphone. If you wish to use a stereo microphone, press AUX for more than 5 seconds. The set will display MONO P. Press NO to select STEREO or YES to select MONO STEREO MIE or MONO MIE will be displayed.
Important: If you want to play the recorded CDR disc on any regular CD player, it must first be finalised. See finalising discs.
Finalised CDRW discs play only on CDRW compatible CD players.
Finalising CDR & CDRW discs
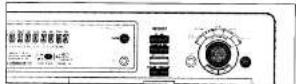
Finalizing a CDR(W) disc is a simple procedure, necessary to: - play a recorded CDR on a standard CD player - play a recorded CDRW on a CDRW compatible CD player and CD recorder - avoid further unwanted recordings on a disc - avoid erasure of tracks on a CDRW
Notes: - Finalizing will take about 2–4 minutes. - After finalization of the COR(W), COR(W) changes to CO on the display. - During finalization no other operating commands can be executed.
Auto finalizing
When you use either CD→CD or COMPILE CD, your recordings will be finalized automatically (see "High speed recording and automatic finalizing")
Manual finalizing when recording is in progress
1 Press FINALIZE on the set during recording. → RUTO FINAL ? is displayed. 2 Press YES to confirm. → FINALIZE is shown. The finalization will start after recording and the actual finalizing time left will start to count down.
Manual finalizing when recording is stopped
1 Insert the CDR(W) you want to finalize in the CD recorder tray.
2 Press CDR to select the CD recorder
3 Press FINALIZE on the set.
→ FINALIZE ? is displayed
4 Press YES to start finalizing.
→ FINALIZE is shown, FINAL is displayed and the actual finalizing time left starts to count down.
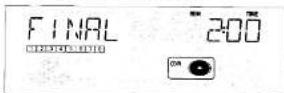
(UN)FINALIZING, ERASING
Unfinalising CDRW discs
If you want to record (or erase) on (from) an finalized CDRW, you have to unfinalize it first.
Notes:
- Uninfinizing will take approximately 2 minutes.
- After uninfinizing of the CDRW, CD changes to CDRW on the display
- When uninfinizing a CDRW with CD text on it available, this text will be transferred to the CD recorder memory. In case the memory is full, you have to erase text (see "Frasing text") or to finalize another disc first in order to obtain memory space.
1 Insert the CDRW you want to unfnalize in the CD recorder tray.
2 Press COR to select the CD recorder
3 Press FINALIZE on the set. → UNF ENRILIZE ? is displayed.
4 Press YES to start unfinalizing. → UNFINRL is displayed and the operation time left starts to count down.
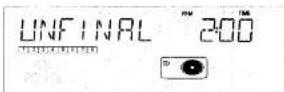
Erasing from a CDRW disc
It is possible to erase one or more tracks (starting from the end of the last track) or the entire CORW
Erasing an entire CDRW
1 Insert the CDRW you want to erase in the CD recorder tray.
2 Press CDR to select the CD recorder.
3 Press-ERASE to enter into the erasing menu.
4 Rotate — JOG CONTROL + to select:
→ EPRSE DISE ?: for erasing the entire disc.
5 Press YES to confirm your selection
→ ERRSE ? and the total number of tracks to be erased are displayed. All track numbers are blinking in the music calendar.
6 Press YLS to start erasing.
→ ERRSE is displayed and the operation time left starts to count down. The track number of the actual erased track will go off in the music calendar.
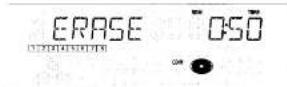
Erasing one or more tracks
1 Insert the CDRW you want to erase from in the CD recorder tray.
2 Press COR to select the CD recorder
3 Press ERASE to enter into the erasing menu.
4 Rotate - JOG CONTROL + to select the track number(s) you wish to erase:
→ ERASE and the track number (e.g. 10 +) are displayed.
• to select more tracks to be erased repeat step 4
Note: When erasing more tracks, the tracks to be erased must be selected in sequence, starting from the last recorded track. Example: The CORW has 5 tracks recorded on it. Now, you can erase track 5 and 4. You can also erase track 5, 4 and 3, however you cannot erase track 5 and 3!
→ All track numbers selected for erasing are blinking in the music calendar. The remaining track numbers light up.
5 Press YLS to confirm your selection
→ ERASE ? is displayed.
6 Press YES to start erasing.
→ ERRSE is displayed and the operation time left starts to count down. The track number of the currently erased track will go off in the music calendar.

SPECIAL FEATURES
SPECIAL FEATURES

Text edit (on CD recorder only)
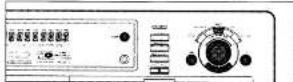
After you have recorded your COR(W), the TEXT FDIT feature allows you to give names to to discs and tracks. Disc and track names will be displayed during playback. All names will be stored in the memory and can be called up and changed at any time.
A maximum of 60 characters per item can be stored. The following items can be selected:
ALBUM ARIST for editing the CD artist.
ALLOW TITLE: FOR EDITING THE LTD (ide
ARTIST TR(jack) for editing the artist of track 1, 2, 3, etc. TITLE TR(jack) for editing the title of track 1, 2, 3, etc.
Storing text during STOP mode
1 If necessary press STOP ■
2 Press CDR to select the CD recorder.
3 Press TEXT/store to enter into the text edit menu.
→ TEXT lights up and TEXT END is displayed.
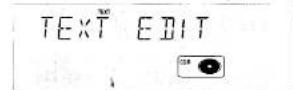
4 Press YES to confirm.
5 Rotate - JOG CONTROL + to select either:
→FL BUM ARPTST
→ALRIN TITLE
→ ARTIST TR 1 or [2,3,...]; for editing the artist of
track 1 or (2.3...)
→ FOTLE TR 1 or (2.3...) for editing the title of track 1 or (2.3...)
6 Press YES to confirm the selection.
7 Rotate - JOG CONTROL + (press the alphabet keys on the remote control) to select a character
■ Press YES to confirm the selection.
→ The cursor moves to the next character space.
9 Repeat steps 7 and 8 for adding further characters.
10 Press TEXT/store to save the characters that have been selected and to exit to the last position in the text editing menu.
→ UPDATE is displayed
Storing text during recording
You can store and edit text even while recording a single track or single CD, or when recording from an external source. Editing text during finalizing is not possible. Make sure, when using high speed recording and automatic finalizing, to enter the text before finalizing starts, otherwise automatic finalizing will be cancelled.
- Follow steps 3–10 of "Storing text during stop mode"
Note Editing text is not possible when a copy protected track is analogue recorded. Editing is stopped, "CB" TEXT SR/EB" is displayed and your text is saved for later editing."
Auto copied text
When an artists name has been stored for a track, it will be copied automatically into the next track.
- Press either:
TEXT/store to confirm the copied text
NO to delete the copied text and to enter a new one.
Inserting a space
1 Press ← or → to move to the position where the space is
to be inserted
→ The position starts blinking.
2 Press YES to confirm the position of the insert character.
→ A space will be inserted, text will move to the right.
- You can also use the SPACE button on the remote control to insert a space.
Deleting and substituting a character
1 Press ↔ or ➞ to move to the characters position to be
deleted or substituted.
→ The character starts blinking.
If you want to delete the character:
2 Press NO.
→ The character is deleted and the text is shifted one
position to the left.
If you want to substitute the character:
2 Rotate - JOG CONTROL + (press the alphabet keys on the
remote control to select a new character.
Press YES to confirm the selection.
• To change another character press ↔ or ▶
Erasing text
1 Press TEXT/store to enter into the text edit menu.
→ TEXT lights up and TEXT EDIT is displayed
2 Rotate - JOG CONTROL + to select the text erase menu.
→ TEXT ERRSE is displayed.
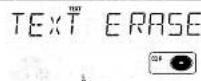
3 Press YES to confirm.
4 Rotate - JOG CONTROL + to select either
→BLL TEXT All text of the selected disc is chosen to
be erased in one step.
→FLBOM ARTIST: CD artists name is chosen to be
erased.
→FLUN TITLE: CD title is chosen to be erased
→ARTIST TR 1 or (2, 3,...): artists name of track 1 or
(2. 3...) is chosen to be erased
→ TITLE TR 1 or (2, 3...) title of track 1 or (2, 3...)
is chosen to be erased.
5 Press YES to confirm your selection.
→ERPSE? or ERPSE ALL? is displayed
6 Press YES to start erasing.
→UPDATE is displayed and the chosen text is erased.
Erasing from the memory
When the text memory of your CD recorder is full, the messages MEMORY FULL and FINPLIZE DISC will be displayed. If you still want to add a new disc to the text memory, you have either to erase another disc from the memory or you have to finalize another disc.
1 Press TEXT/store to enter into the text edit menu.
→ TEXT lights up and TEXT EDIT is displayed.
2 Rotate | JOG CONTROL.e to select the memory view menu.
→ TEXT MEMORY is displayed
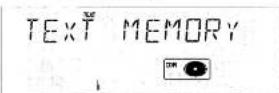
3 Press YES to confirm
4 Rotate—JOG CONTROL + to select the disc you wish to erase from the text memory.
5 Press YES to confirm.
→ ERRSE MEMORJ is displayed.
6 Press YES to confirm the text erasure of that particular disc
Note: If there are no discs in the text memory stored
MEMORY EMPTY will be displayed.

SPECIAL FEATURES
TROUBLESHOOTING

Track editing (on CD changer only)
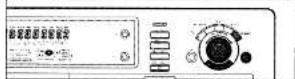
You can create a "track" by marking a passage of music within one track on the current disc. This new "track" can be used for recording or playing. The minimum track length is 4 seconds.
1 Press TRACK EDIT on the set
→ TRACK EDIT starts blinking. TRACK and the current track number 2 are displayed. The current track number is also blinking in the track bar.
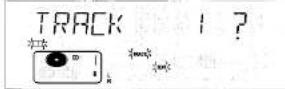
2 Rotate - JOG CONTROL + until the desired track number is displayed.
3 Press YES to confirm the selected track.
→ The marker position R and the track time will be displayed. The first 4 seconds of the track will be played continuously.
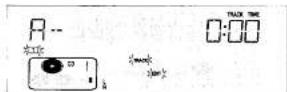
4 Press PLAY/PAUSE ▶ II on the set to play to the desired start position of your new "track" (the initial position of marker A is always the start of the chosen track).
- To fast forward to the desired start position press or on the set.
- To fine tune the position press first PLAY/PAUSE ▶ II on the set, then rotate — JOG CONTROL +.
5 Press YES to confirm the position of marker B
→ The marker position B and the new "track" time will be displayed. The first 4 seconds before marker position R until marker position R will be played continuously.
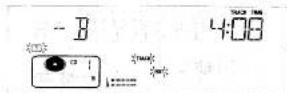
6 Press PLAY/PAUSE ▶ III on the set to play to the stop position of your new "track" (The initial position of marker B is always the position of marker A plus 4 seconds)
7 Press YES to confirm the marked passage.
→ TRACK EDIT is shown, A-3 and the track edit time are displayed
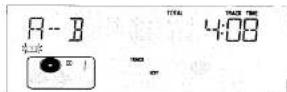
- Press TRACK EDIT again to leave Track Edit mode.
→ The new "track" will be stored.
Note: If you open the CD changer tray the edit is deleted.
Clearing the track edit
→ CLEAR A-3 ? is displayed
2 Press YES to clear the markers → The markers R 2 are cleared
WARNING
Under no circumstances should you try to repair the set yourself as this will invalidate the warranty. Do not open the set as there is a risk of electric shock.
If a fault occurs, first check the points listed, before taking the set for repair.
If you are unable to solve a problem by following these hints, consult your dealer or service center.
LASER SAFETY
This unit employs a laser. Only a qualified service person should remove the cover or attempt to service this device, due to possible eye injury.
SYMPTOM
- possible solution
No power
- ensure that the ON/CFF button is on: the set is in standby mode, press any key to activate it.
- ensure that the power cord is plugged in correctly
- switch the set OFF and then immediately back ON
Auto track does not work
- check if auto track is selected
- check if there are 2.7 seconds silence in between the tracks (analog recording only)
- check if the source is a consumer source with the digital
output according to the IEC audio standard
- source is DVD player (no track information)
No sound
- check the audio connections
- if using an amplifier, try using a different source
Amplifier sound is distorted
- check that the CD set analog output is not connected to the amplifier: Phono input.
Play will not start
- ensure that the label of the CD is facing up
- clean the disc
- check that the disc is not defective by trying another disc
Remote control does not work
- point the remote control directly at the set
- check the batteries and replace if necessary
- select the right source first
DISC RECOVER indication
- a power failure has occurred during recording, the CD recorder is attempting to repair the disc
- if JISL ERROR then appears on the display, the disc cannot be recorded further, and cannot be finalised. But it can still be played on the CD recorder or another CD recorder.
- on a CDRW disc, the track being recorded is lost, but further recording and final sation can still be done
ENSE21 3560 indication
- replace or clean the disc
- insert a CD(RW), label upwards
- wait until the lens has cleared
USE AUDIO CO indication
- insert a digital audio disc marked with "Digital"
- audio" and the special logo
CHECK INPUT indication
- select the correct input
• make sure the connection cord is properly connected
Will not record
- clean the disc
- check if CDR(M) is an unfinalised disc
- check that the disc is recordable and replace if necessary
- the disc is not an AUDIO disc (PON5 325C)
- wrong input source chosen, Input label flashing (CHECK INPUT)
- text memory full (MEMORY FULL/FINITIZE CD). When a CDRW has to be unfinalised for recording. Erase text for other disc(s) or finalise other disc(s) to obtain memory space
Recording is distorted
• make sure the recording level is correct
20 second pause between recordings
- see "Recording with automatic synchronized start".
Set does not react
- switch the set OFF and then immediately back ON
Recorded disc does not play in other standard CD player
- finalize the CDR(W)
- insert the CDRW in a CDRW compatible player

TECHNICAL SPECIFICATIONS
GENERAL
| System | Compact disc digital audio |
| Number of channels | 2 (stereo) |
| Applicable discs | CD, CD-R (digital audio), CD-RW (digital audio) |
| Power Requirement | AC 120 V 60 Hz |
| Power Consumption | 16W |
| Operating Temperature | 41 -95 °F (5 -35 °C) |
| Dimension (MAX) | |
| Width | 17-3/8 inches (440 mm) |
| Height | 5-1/2 inches (140 mm) |
| Depth | 14-3/16 inches (360 mm) |
| Weight | 13.2 lbs (6.0 Kg) |
AUDIO
| Frequency Response | 20 Hz - 20 kHz |
| Playback S/N (CD/CDR) | 105 / 98 dB |
| Playback Dynamic Range (CD/CDR) | 96 / 96 dB |
| Playback Total Harmonic Distortion | 0.003% |
| Recording S/N | 88 dB |
| Recording Dynamic Range | 90 dB |
| Recording Total Harmonic Distortion | 0.005% |
| Digital Coaxal Output | 0.5 V (p-p)/75 Ω |
| Line Output Voltage | 2 V RMS |
| Headphones | 0 - 5 Vrms/8 - 2000 Ω |
Recording values for line input
| Digital Coaxial Input (automatic sample rate conversion) | 32 - 48 kHz |
| Digital Optical Input (automatic sample rate conversion) | 32 - 48 kHz |
| Analog Input | 600 mVrms/ 50 kΩ |
Specifications subject to charge without prior notice.
| c/nico-COUNTRY | COMPANY | ADDRESS |
| ALGERIE | Aur 2000 | E. Lissosmore Ben-Hastal, Alger, Algore |
| ARWELNIA | NGYG Ltd | 374 475 St Laitons, 37900 Venezuela, Armenta |
| AUSTRALIA | Jamro Australia Pty Ltd. | 24 Louis Road, MI, Wawling, VIC 3149, Australia |
| ALISTRIA | Huber & Portafrika GmbH | Sorabraite St., Leiberschau, 11 Lauberschau, 11 Lauberschau, 11 Lauberschau, 11 Lauberschau, 11 Lauberschau, 11 Lauberschau, 11 Lauberschau, 11 Lauberschau, 11 Lauberschau, 11 Lauberschau, 11 Lauberschau, 11 Laubera |
| BANERA | Ambassador Stores | PO Box 237,141, Government Avenue, Morana Bahon |
| BANCOLOCH | Target | 1878, Ramco Marina Lane, Longping 4000, Bangladeshi |
| BELGIUM | Van der Hyclen Auto N.V. | Brassbanan 278, 9300 Exercicegem, Belgium |
| BULGARMA | Avescommerce GmbH | Macedonia Blvd. 16, 1690 Sofia, Bulgaria |
| CANADA | Lentbrook Industries Limited | 633 Grande Court, Ackering Ontario |
| CHINA | Cang Ding Ante Herderma Co., Ltd. | No35 Tavan River, Snolian, Pan Yu, Guang, Dong, China |
| CHINA US | Enjorie Hikshiyama Ltd. | PO Box 564, Nasdaq, Ogawa |
| CZECH REPUBLIC | Audio International | Baklasia 41, 67905 Rapacca, QR/Bankovic, Czech Republic |
| DEMARK | Auto Nord | Dai Mei 1, 9610 Nocteg, Denmark |
| DUBAI | VVA SONS | PO Box 105, Dubu, U.A.I. |
| EGYPT | Sanamco | 9, El Ababa Sr, Cosu, Cairo, Egypt |
| ESTONIA | H.F. Cub Estonia | Ener 4, 90503 Haapatu, Estonia |
| EFROM | EF, KOOI | 1 of Geodmi Karranger 214, Saoga, Former England Republic of Macedonia |
| EFROPE | Audiyo Ltd. | Levmonkarla Jr., C.H. Helena 5200, Finland |
| FRANCE | Manente France | 4 Museum of Manente Europe BV, PO Box 301, 82 155 Senares Cedex France |
| GERMANY | Manente Deutschland | Hafenbrach 3, 49078 Oeradrick, Germany |
| GREECE | Adamso S.A. | 185, Hippocaulous Street, 11471 Athens, Greece |
| HEAGQUARTERS EUROPE | Manente Europe B.V. | Building SPF 2, P.O. Box 8000, 5600 JB Endowton, The Netherlands |
| HONG KONG | Manente Asia Ltd. | Unit 1706, Monopatra, 223 Hong Fong Road, Kwa Fort, N.T., Kakwon, Hong Kong |
| HONGKAPY | Infinees Ltd. | See Krt 31, 1061 Budapest, Georgia |
| ICELAND | ID Electronics Ltd. | Arnia 38, 1035 Heykawa, Iceland |
| INDIA | NOVA Audio Private | 8 Punam Co sp. Society 2930 Rosada, Uran Park MUMBAI 40052, India |
| IRAN | Home Co. | In Floor no 878 Philips Buing Zhenglab asc. PO, 11069/7844 Tehran, Iran |
| IRLAND | Manente Ireland | Cosmpeak, Dublin 14, Ireland |
| ISRAEL | Ulnor Ltd. | 371 Van Bayer Street, Alvar Hernandez, Tel Aviv, Israel |
| ISRAEL | Manente Italy | Van Monaco 27, 24302 Mondo, Milan, Raly, Servizio Consumption 1670-20828, Numera Verde |
| IVORY COAST | Hilvov | B. 3428, Abdian 21, Ivory Coast |
| JAPAN | Manente Japan Inc. | 35-1 Sagami Chino 7-Chrome, Sagamharaz-Sri, Nagagawa 226 8605, Japan |
| KORSA | Mi Enterprises Ltd. | 121-210, 2F Shiran Bldg, 247-17 Senyion-tong, Mapo-Ru, Seoul, Korea |
| KLAWAT | Altenesh Electronics Intl. | PO Box 888, Selman 22932, Kuwait |
| LATIVA | Aus Ltd. | 61, Liadwina Pr, Piga IV 1015, Latvia |
| LENNON | AZ Electronics S.A. 1 | PO Box 11, 2853, Benat, Lebanon |
| LITHANUA | Accapella Ltd. | Autros, Vartu GS, Passzo SKG, 2001 Winus, Lithuania |
| MALAYSIA | We See Hong Electronics Side End | 102 Japan SS 8103, Damorsara Uoma, 47400 Peaking Jaya, Selargunkarul Ensan, Malaysia |
| MALTA | Dorea Co Ltd. | 78 The Stand, Sierna SL M07, Malta |
| MAURITUS | SKX Electronics Ltd. | PO Box 865, Bal Village, Paris Louis, Mauritius |
| MLTARY MARKET EUROPE | PASCO GmbH | PO Box 286, Sarthausen 69200, ISO |
| MERCEDES | Manente Domestic Sales | A division of Monte Europe BV, Busan, Gompan, 472 Box 8000, 5600 JB Endowton, The Netherlands |
| NEW ZULAND | Widash Auto Systems | 14 Mayev Road, Mt. Albert, Auckland, New Zealand |
| NORWAY | Auto Nord | Sanderman Rd, Cd. 5493, Norway |
| OMAN | Mustafa & Jawel Trading Co. | PO Box 1815, Rome, Qatar |
| POLAND | Philips Polska Sp. o.o. | A Jardonnishake 1953, 02 222 Wandisawa, Poland |
| PORTUGAN | Coeb! | Combeo de Ecrinrica Lda, Au, Luis Braun, No 85 A, 1500, 15000, PittOmega |
| PROFESSIONAL EUROPE | Manente Professional Products | Kanghanga House, Petbury Oms, 575-560 Bar Road, Longford Midtown UB7 06H, UK |
| PROFESSIONAL U.S.A. | Manente Professional Products | Distributed by Superstore Technologies Inc., 1000 Coprice Blvd Ste. O'Aurora, Inc. |
| QAYAR | Alimana & Farmers WW.L | PO Box 49, Dhai, Qatar |
| PELONION | Viaten s. | 180 Rue of Marecha Lodge, 97400 Saint Dave, Ide la Palomari |
| ROMANA | Nova Music Entertainment | 5, Zagatulu Sr, Bl 10 Apt 18, sector 1 Bucharest, Romania |
| RUSSIA | Absolute Auto | 20 Monotherapy Street, 102477 Moscow, Russia |
| SABARABA | Attadarko Electric Agi | PO Box 2154, Abelbert, 7262, San Jose |
| SINGAPORE | Forward Marketing (S) Pte. Ltd. | We See Hong Centre, 29, Long Kee Road, Singapore 150099, Singapore |
| SLOKARIA | Ile Autos r.lc. | Nam: SNP 10, 9600; Zoiedem, Slovakia |
| SLOVENIA | Belka | Smartindra 152, HK.A.V33 61000, Liugoya, Slovenia |
| SOUTH AFRICA | Coobrate Imports (FTY) Ltd. | PO Box 1614, Albertson, 1490, South Africa |
| SPAIN | Manente Spain | Martinez Viverge 2, Apofado 2905, Madrid 2907, Spain |
| SPIN LANKA | The Handover Span | Mozzano Flor, The Landover Span, South Rio Grande, 3 Sr. Lima |
| SWIFELIN | Jurkat Nord | Amedtavoguen 4, Grenberg 400 23, Sweden |
| SWITZCHELLAND | Sound Germany AG | Postbach, 6010 Zürich, Switzerland |
| SYRA | Hamelb & Parleria | Herby Bronne Sl No 117, Damaco Strain, Syria |
| THIBIT | Covabou | Av. Pirax hub, Duas de Turun sheke, PD Box 3334, Pirpette, Tokyo |
| TIMIAN | Pan Yang Co Ltd. | 691 No 148 Sang Kirang Road, Top 1049, Tianan F.O.C. |
| TOMATO | MHz Canada Co Ltd. | 767-780 Marsha Road, Wajakawa, Thailand |
| TUNERA | Soziale Off-VIG | 40 Avenue du Gote Abro, El Momban, 1044, Tunisia |
| TURKEY | Tok, Philips Tourier A.S. | Yukan Dubuha Organizer energy grades, 2 Cedite no 28, 81290 Umaniya-Istanbul, Turkey |
| UK | Manente Htl UK Ltd. | Kingbridge House, Patbury Oaks, 575-383 Bath Road, Longford Midtown UB7 6611 U.K. |
| U.S.A. | Manente America Inc. | 466 Modern Road, Rosella, IL 6972, U.S.A. |
| YUSCOLAVA | UIM Company | Om ednighen Vergato 86, 11670 Beiglate, Yagayala |
| YUSTT | Manente Domestic Sales | A Amaro de Manente Europe 10/16/2016, Rating FD, Po Box 50001, 5900 JB Endowton, Th:The Netherlands |

is a registered trademark.

00/12 MITI 437W851250
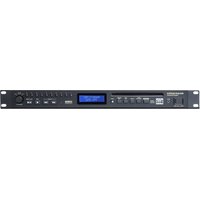
- CAUTION
- WARNING
- NOTE:
- LASER SAFETY
- IMPORTANT SAFETY INSTRUCTIONS
- AC POLARIZED PLUG
- TABLE OF CONTENTS
- GENERAL INFORMATION
- GENERAL INFORMATION AND DISCS
- Unpacking
- Setup
- Attention:
- Compact discs
- Always keep the disc surface clean.
- Maintenance
- CONTROLS AND CONNECTIONS
- About this manual
- Supplied accessories
- Controls on the front
- General
- CD changer
- CD recorder
- Recording keys
- DISPLAY
- Connections at the back
- DISPLAY indications
- TOTAL REM (TRACK) TIME
- INSTALLATION
- Recording
- Play
- Others
- Connections general
- Digital recordings (optical or coaxial) give the best
- Analog connections
- Digital coaxial connections
- Digital optical connections
- Setup recommendations
- REMOTE CONTROL
- LOADING DISCS
- PLAYING
- Changing discs during play
- IMPORTMANT!
- CD text when playback is stopped
- CD text during playback
- Selecting a disc during play
- Selecting a CD in STOP mode
- Selecting a track during play
- Selecting a track when CD play is stopped
- PROGRAM
- Hold down ◀◀ or ▶▶
- CD changer only
- Erasing a track from the program
- Clearing the program
- Making a program for recording
- RECORDING GENERAL
- Basic information
- Direct Line Recording (DLR)
- Auto Level Control (ALC)
- BALANCE key
- INTERNAL RECORDING
- REC LEVEL key
- Remarks on recording
- Recording modes
- High speed recording and automatic finalizing
- Notes:
- Press CD→CD to enter into the record mode.
- Press YES to start recording and finalizing.
- To stop recording manually, press STOP ■
- High speed recording and automatic finalizing (optional) of the current program
- Press COMPILE CD to enter into the record mode.
- Press either:
- Press either
- Important:
- High speed recording
- If a disc from the CD changer is selected:
- If CD changer program mode is available:
- If CD changer track edit mode is available:
- Press YES to confirm your selection.
- Press YES to start high speed recording.
- • To stop recording manually, press STOP ■.
- Normal speed recording and listening
- If CD changer is selected:
- EXTERNAL RECORDING
- Recording with automatic synchronized start
- Notes
- If a digital source is selected:
- If an analogue source is selected:
- Manual recording
- Manual recording from an external source
- Manual microphone recording
- (UN)FINALIZING, ERASING
- Auto finalizing
- Manual finalizing when recording is in progress
- Manual finalizing when recording is stopped
- Unfinalising CDRW discs
- Erasing from a CDRW disc
- Erasing an entire CDRW
- Erasing one or more tracks
- SPECIAL FEATURES
- Text edit (on CD recorder only)
- Storing text during STOP mode
- Storing text during recording
- Auto copied text
- Inserting a space
- Deleting and substituting a character
- If you want to delete the character:
- If you want to substitute the character:
- Erasing text
- Erasing from the memory
- TROUBLESHOOTING
- Clearing the track edit
- SYMPTOM
- No power
- Auto track does not work
- No sound
- Amplifier sound is distorted
- Play will not start
- Remote control does not work
- Will not record
- Recording is distorted
- Set does not react
- Recorded disc does not play in other standard CD player
- TECHNICAL SPECIFICATIONS
Brand : MARANTZ
Model : DR4160
Category : Audio recorder