SmartCode 916 - Security Camera Kwikset - Free user manual and instructions
Find the device manual for free SmartCode 916 Kwikset in PDF.


| Product Type | Security Camera |
| Brand | Kwikset |
| Model | SmartCode 916 |
| Dimensions (H x W x D) | 4.0 x 2.5 x 2.5 in (10.2 x 6.4 x 6.4 cm) |
| Weight | 1.2 lb (0.54 kg) |
| Power Supply | 4 x AA alkaline batteries (not included) |
| Battery Life | Up to 6 months under typical usage |
| Connectivity | Wi-Fi 802.11 b/g/n 2.4 GHz, Bluetooth 4.2 |
| Video Resolution | 1080p Full HD (1920 x 1080) |
| Field of View | 120° diagonal |
| Night Vision | IR LEDs, up to 30 ft (9 m) |
| Audio | Two-way audio with noise cancellation |
| Motion Detection | PIR sensor, adjustable zones and sensitivity |
| Smart Home Integration | Works with Amazon Alexa, Google Assistant |
| Storage | Cloud recording (subscription required), microSD card (up to 128 GB) |
| Weather Resistance | IP65 rated for outdoor use |
| Installation | Mounting bracket and screws included, easy DIY setup |
| Maintenance | Clean lens with a soft, dry cloth; replace batteries as needed |
| Security | End-to-end encryption, privacy shutter for lens |
| Spare Parts | Replacement batteries, mounting brackets, screws |
| Repairability | Battery compartment accessible; lens assembly not user-serviceable |
| Warranty | 1 year limited warranty |
Frequently Asked Questions - SmartCode 916 Kwikset
User questions about SmartCode 916 Kwikset
0 question about this device. Answer the ones you know or ask your own.
Ask a new question about this device
Download the instructions for your Security Camera in PDF format for free! Find your manual SmartCode 916 - Kwikset and take your electronic device back in hand. On this page are published all the documents necessary for the use of your device. SmartCode 916 by Kwikset.
USER MANUAL SmartCode 916 Kwikset
Installation and User Guide
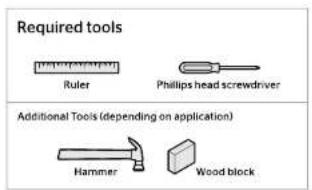

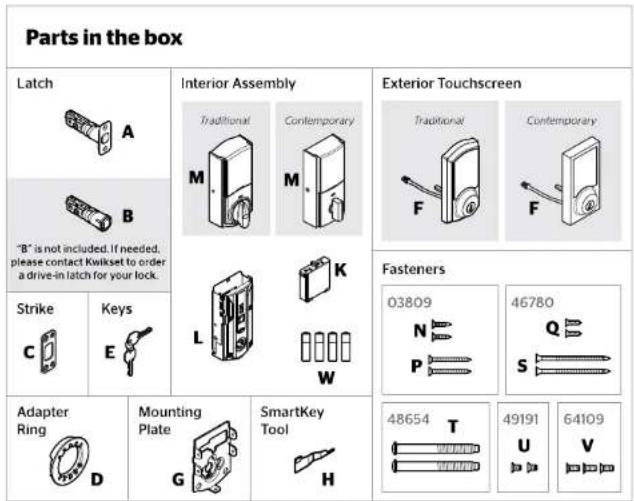
1
Prepare the door and check dimensions
If drilling a new door, use the supplied template and the complete door drilling instructions available at www.kwikset.com/doorprep.
A
Measure to confirm that the hole in the door is either 2-1/8" (54 mm) or 1-1/2" (38 mm).
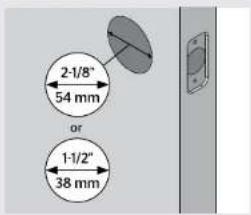
Note: Additional door preparation may be required for doors with 1-1/2" (38 mm) holes. Consult the deadbolt drilling instructions at www.kwikset.com/doorprep.
B
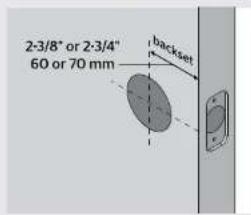
Measure to confirm that the backset is either 2·3/8" or 2·3/4" (60 or 70 mm).
C
Measure to confirm that the hole in the door edge is 1" (25 mm).
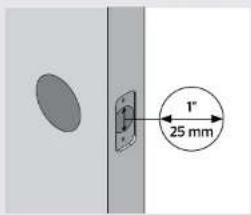
D
Measure to confirm that the door is between 1-3/8" and 2" (35 mm and 51 mm) thick.
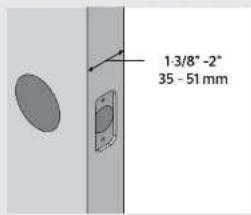
2
Install the latch and strike
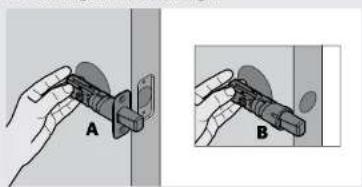
Is the door edge chiseled?
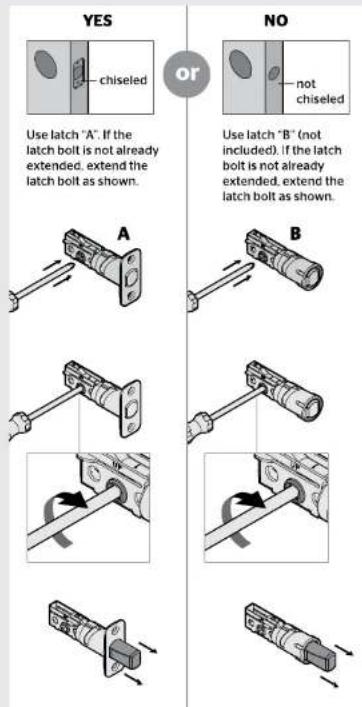
B
Hold the latch in front of the door hole, with the latch face flush against the door edge.
C
Is the D-shaped hole centered in the door hole?
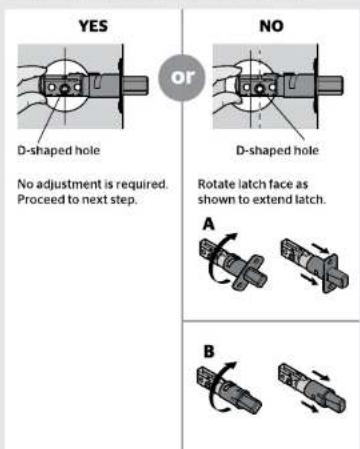
D
Which latch are you installing?
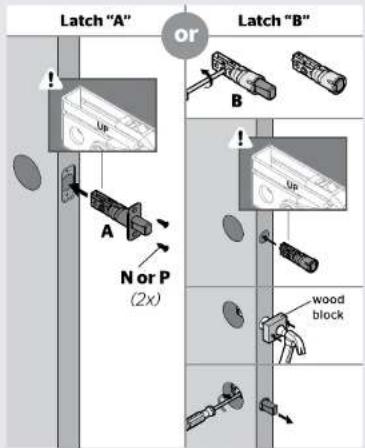
E
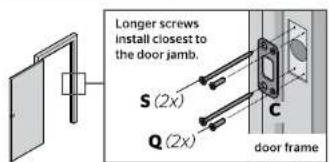
install strike on the door frame.
⚠ Make sure the hole in the door frame is drilled a minimum of 1" (25 mm) deep.

Install the exterior touchscreen

A
What is the diameter of the hole in the door?
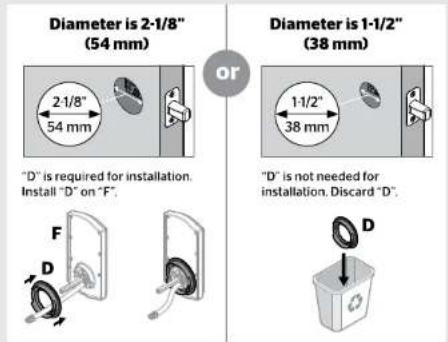
B
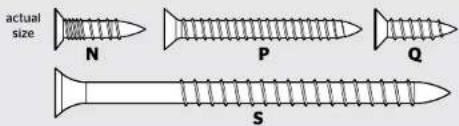
Locate screws for step 3C and keep them within reach.
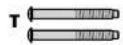
C
Install exterior touchscreen and mounting plate.
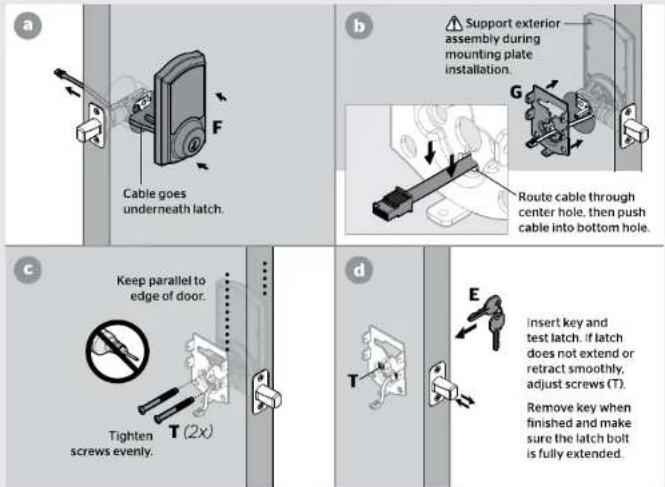

Install the interior assembly

A
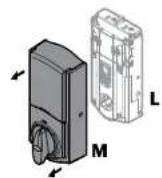
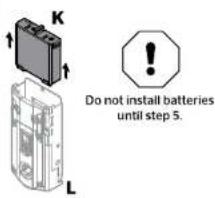
Remove interior cover and battery pack from interior assembly.
b
d
B
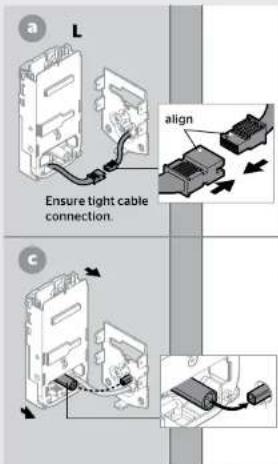
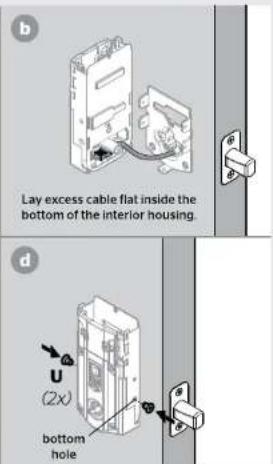
Install interior assembly onto mounting plate.

Set locking and unlocking direction
This step will teach your lock the orientation of your door and is crucial to lock operation.
A
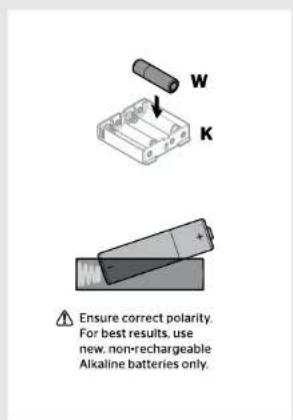
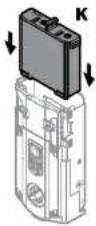
Install 4 AA batteries in battery pack.
B
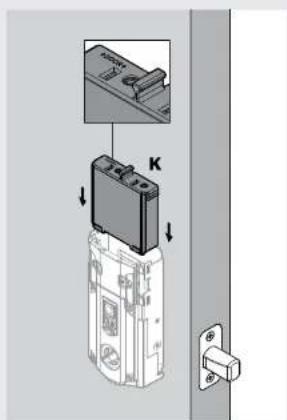
Make sure the door is open, and insert the battery pack.
C
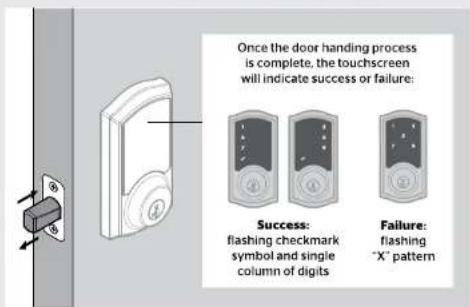
After a few seconds, the latch bolt will retract and extend on its own to learn the orientation of the door. This is called the door handing process, and it is crucial to lock operation.
D
If the touchscreen indicates a failure, attempt this procedure again.
If the door handing process is still unsuccessful after a second attempt, perform the "Manual Door Handing" procedure on page 4.
6
Add the lock to your smart home system

Initiate the process to add the lock to your system at your smart home controller. Refer to your smart home system instructions for more information.

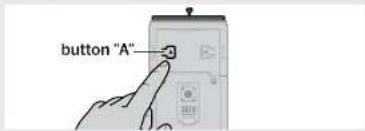
When prompted by your smart home system to add the lock, press button "A" on the lock interior one time. The red LED will illuminate when the lock enters Add Mode.
Please allow time for the controller to add the lock.

If successful, re-name the lock in your system (if applicable).

If unsuccessful, follow your system's instructions to remove the lock from the controller and any other network, then press button "A" on the lock one time. Perform steps 6A-6C again.
If still unsuccessful, consult the Programming and Troubleshooting Guide on the SmartCode 916 page at www.kwikset.com.
7
Add user codes (30 max)
It is recommended that you add and delete all user codes through your smart home control system. If your system does not allow this, codes may be added directly to the lock as shown here.
Programming Timeout During programming, if the screen is not pressed for 20 seconds, the system will time out (indicated by three beeps and the "X" pattern flashing three times), and you will need to restart the procedure.

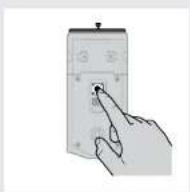
Make sure the door is open. Press the Program button once.

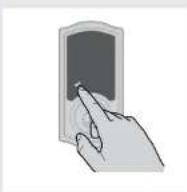
Press checkmark symbol once.

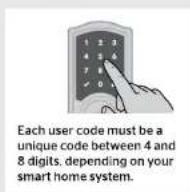
Enter user code. A total of 30 user codes may be programmed.

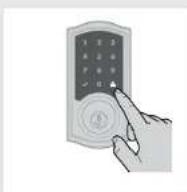
Press lock symbol once.

What digits and sounds did the lock produce?
Checkmark symbol with one beep
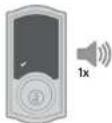
Programming was successful.

"X" pattern with three beeps
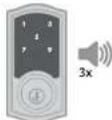
Programming was unsuccessful.
Make sure the user code is not a duplicate and that it is between 4 and 8 digits during your next attempt.
Make sure the lock has room for an additional code. If all user code positions are filled, delete a code to make room for this one.
*Beeping sound will only be heard if switch #3 (on the lock interior) is in the on position. See "Switches and Status LED Colors" on page 4.
8
Test the lock (review normal operation)
Confirm that the code(s) added in previous step can unlock the door.
Activating the Screen
Touch screen with palm or back of hand until digits illuminate.
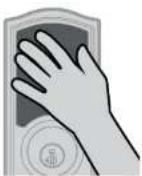
Locking the Door
- Activate the screen.
- Press Lock symbol. Note: If no user codes are programmed, the door cannot be locked via touchscreen.
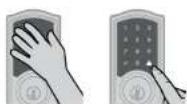
Unlocking the Door
- Activate the screen.
- If SecureScreen™ is enabled, touch the random digits that appear.
- Enter user code.
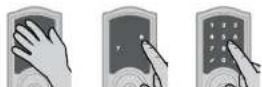
If you press the wrong digit while entering a user code, you can press the Lock symbol once to clear the digits entered previously and immediately restart the code entry process.
SecureScreen™
SecureScreen is an added-security feature that displays random digits before you enter a user code to unlock the door. This feature ensures that there are fingerprints on all digits so that codes cannot be identified by examining the touchscreen for finger prints.
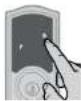
If desired, this feature can be disabled by turning switch #4 to the off position. See "Switches" on page 4.
9
Install the interior cover
Important Information about the interior cover
The window on the interior cover is locked by default to prevent someone from tampering with your lock's settings.
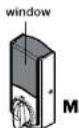
For easy access to the battery pack, unlock the window by removing the security screw.
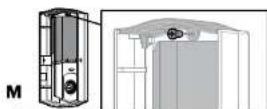
inside view of interior cover
actua
size

Cover Installation

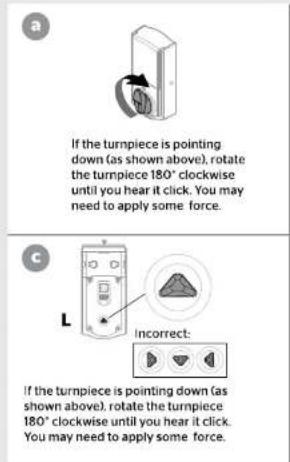
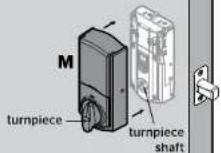
Install cover.
Note: You may need to rotate the turnpiece to align with the turnpiece shaft.

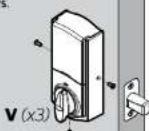
Install screws.
Battery Pack Access
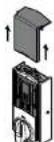
If the window is unlocked, slide up the window to access the battery pack. If the window is locked, remove the interior cover and screws to access the battery pack.
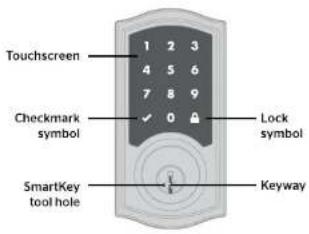
SmartCode at a Glance
Exterior
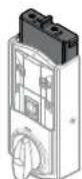
Interior (cover removed)
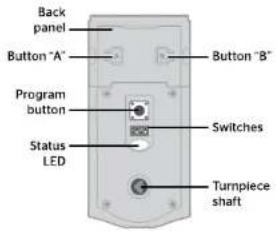
Note: When the cover is removed, the turnpiece shaft can be used to manually lock and unlock the door.
Re-key the lock (if needed)

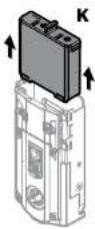
IMPORTANT: Remove battery pack before re-keying.

Re-key the lock to work with your existing key. See the supplied SmartKey Re-key instructions for more information.
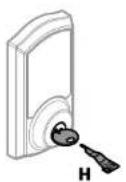

Reinstall battery pack.
Switches and Status LED Colors
Switches
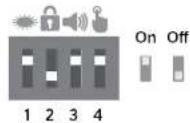
| Switch | Function |
| 1 | Door lock status LED blinks every 6 seconds |
| 2 | Lock automatically re-locks door 30 seconds after unlocking. Disabled if no codes are programmed. |
| 3 | Audio |
| 4 | SecureScreen feature displays random digits to be pressed before entering user code. This added-security feature ensures that there are fingerprints on all digits so that codes cannot be identified by examining the touchscreen for fingerprints. |
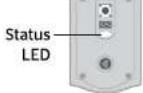
| Color | Lock Status |
| Blinking green | Unlocked |
| Blinking amber | Locked |
| Blinking red | Low battery |
System Alerts
| Display | Alert | Reason | Solution |
| “X” pattern flashes one time with one beep*. | One incorrect code entered. | Re-enter code. | |
| “X” pattern flashes three times with three beeps*. | No user code programmed. | Program at least one user code. | |
| Programming timeout after 20 seconds. | Attempt programming procedure again. | ||
| Unsuccessful programming. | |||
| “X” pattern flashes 15 times with 15 beeps* | Three incorrect codes entered within one minute. | Re-enter code after 60 second touchscreen lockout. | |
| Checkmark and lock symbols flash simultaneously five times with long continuous beep*. | Low battery. | Replace batteries. | |
| Checkmark and lock symbols alternate flashing five times with long continuous beep*. | Door jammed while attempting to lock. | Manually re-lock door. If needed, reposition strike. | |
| N/A | Lock beeps continuously. | Interior assembly is disconnected from exterior. | Remove battery pack, reconnect the interior to the exterior, then replace battery pack. |
*Beeping sound will only be heard if switch #3 is on.
Deleting a single user code
Note: All codes may be deleted at once if the mastercode is enabled. For more information about the mastercode, consult the online Programming and Troubleshooting Guide.
1 Keep door open. Press Program button once.

2 Press Checkmark symbol once.
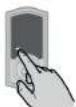
3 Press Lock symbol once.
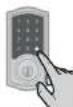
4 Enter user code to be deleted.
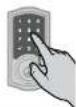
5 Press Lock symbol once.
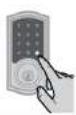
6 Re-enter user code.
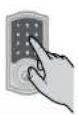
7 Press Lock symbol once.
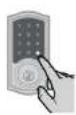
If unsuccessful
Make sure to enter the same valid code in steps 4 and 6.
Test code
While the door is open, test the user code to make sure it no longer unlocks the door.
If the screen is not pressed for 20 seconds, the system will time out, and you will need to restart the procedure.
Factory Reset
A factory reset will delete all codes associated with the lock, and it will remove it from your smart home system.
Remove battery pack.
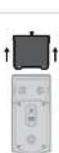
2 Press and HOLD the Program button while reinserting the battery pack. Keep holding the button for 30 seconds until the lock beeps and the status LED flashes red.
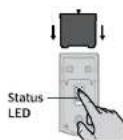
3 Press the Program button once more. The status LED will flash green and red several times.
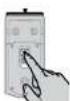
4 After a few seconds, the lock will initiate the door handing process, and the latch bolt will extend and retract to learn the orientation of the door.
Manual Door Handing
If needed, the door handing process can be initiated manually. This is useful if the lock is being moved to a different door.
1 Remove battery pack.
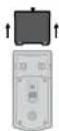
2 Press and HOLD
the Program button while reinserting the battery pack. Release button once battery pack is installed. The status LED will flash red
Status LED
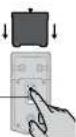
3 Press the Program button once more.
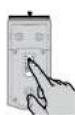
4 The latch bolt will extend and retract to learn the orientation of the door.

Success

Failure
If the touchscreen indicates a failure, see the online Programming and Troubleshooting Guide or call Technical Support.
Network Information
Removing the lock from the network
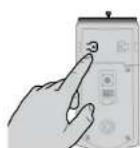
Follow your smart home system's instructions to remove the lock from the network. When prompted by the system, press button A" on the lock interior once.
Z-Wave System Notes
This product is a security enabled Z-wave Plus product and must be used with a Security Enabled Z-Wave controller to be fully utilized. Z-Wave is a "Wireless mesh network," and results may vary based on building construction and communication path.
To assure interoperability, each Z-Wave product must pass a stringent conformance test to assure that it meets the Z-Wave standard for complete compliance with all other devices and controls. The Z-Wave identity mark assures consumers, integrators, dealers and manufacturers that their products will reliably perform with any other Z-Wave device. And, regardless of the vendor, always powered nodes may act as a repeater for Kwikset/Weiser/Baldwin products.
Z-Wave Configuration and Association Parameters are available on the SmartCode 916 page at www.kwikset.com.
Important Safeguards
- Read all instructions in their entirety.
- Familiarize yourself with all warning and caution statements.
- Remind all family members of safety precautions
- Protect your user codes and mastercode.
- Dispose of used batteries according to local laws and regulations.
CAUTION: Prevent unauthorized entry. Since anyone with access to the back panel can change the user codes, you must restrict access to the back panel and routinely check the user codes to ensure they have not been altered without your knowledge. The use of a mastercode can help protect your system's settings.
WARNING: This Manufacturer advises that no lock can provide complete security by itself. This lock may be defeated by forcible or technical means, or evaded by entry elsewhere on the property. No lock can substitute for caution, awareness of your environment, and common sense. Builder's hardware is available in multiple performance grades to suit the application. In order to enhance security and reduce risk, you should consult a qualified locksmith or other security professional.
- 1
- Prepare the door and check dimensions
- A
- B
- C
- D
- 2
- Install the latch and strike
- E
- Install the exterior touchscreen
- Install the interior assembly
- Set locking and unlocking direction
- 6
- Add the lock to your smart home system
- 7
- Add user codes (30 max)
- 8
- Test the lock (review normal operation)
- 9
- Install the interior cover
- Deleting a single user code
- If unsuccessful
- Test code
- Factory Reset
- Manual Door Handing
- Network Information
- Z-Wave System Notes
- Important Safeguards
Brand : Kwikset
Model : SmartCode 916
Category : Security Camera