ST-50 - Steam cleaner SALAV - Free user manual and instructions
Find the device manual for free ST-50 SALAV in PDF.


| Product Type | Steam Cleaner |
| Brand | SALAV |
| Model | ST-50 |
| Power Consumption | 1800W |
| Input Voltage | 120V~60Hz |
| Water Tank Capacity | 1.2L |
| Steam Output Time | 60 seconds |
| Heat-up Time | 48 seconds |
| Steam Mode | Continuous steam (blue light) |
| Ironing Mode | Dry ironing (red light, no steam) |
| Standby Mode | Automatic after 15 minutes idle (ironing mode) |
| Safety Features | Auto pressure release valve, sensor switch, pinch point warning |
| Telescopic Poles | Adjustable height with locking |
| Ironing Board | Multi-functional, rotatable |
| Accessories Included | Collar hanger, metal hanger, nozzle cap |
| Cord Management | Cord wrap behind unit |
| Maintenance | Drain water tank, allow 30 min cooling before storage |
| Nozzle Rotation | 90 degrees to the left |
| Recommended Water | Distilled or filtered water |
Frequently Asked Questions - ST-50 SALAV
User questions about ST-50 SALAV
0 question about this device. Answer the ones you know or ask your own.
Ask a new question about this device
Download the instructions for your Steam cleaner in PDF format for free! Find your manual ST-50 - SALAV and take your electronic device back in hand. On this page are published all the documents necessary for the use of your device. ST-50 by SALAV.
USER MANUAL ST-50 SALAV
SALAV
USER MANUAL
Please read all instructions carefully before using this product.
www.salavusa.com
Dear Valued Customers:
Thank you for purchasing this SALAV product. Please read this manual prior to using your SALAV appliance. For more product information, FAQ and customer support please visit our website at www.salavusa.com.
⚠ WARNING: READ AND UNDERSTAND ALL SAFETY PRECAUTIONS IN THIS MANUAL BEFORE OPERATING. FAILURE TO COMPLY WITH INSTRUCTIONS IN THIS MANUAL COULD RESULT IN PERSONAL INJURY, PROPERTY DAMAGE, AND/OR VOIDING OF YOUR WARRANTY. SALAV WILL NOT BE LIABLE FOR ANY DAMAGES BECAUSE OF FAILURE TO FOLLOW THESE DIRECTIONS.
Important Safety Instructions:
⚠ WARNING: BEWARE OF PINCH POINTS FROM BLACK ADJUSTABLE ARMS ON BACK OF IRONING BOARD. DO NOT PRESS RED BUTTON BEFORE INSTALLING IRONING BOARD ONTO TELESCOPIC POLES. REFER TO STEP 4 ON PAGE 5 FOR INSTALL INSTRUCTIONS.
- The voltage of your electrical source must correspond to that of the appliance (AC 120V, 60Hz). Connecting to the incorrect voltage may cause unrepairable damage to the appliance and will invalidate the warranty.
- Do not share the power supply with other high-powered electric appliances.
- To reduce the risk of electric shock, do not immerse the appliance, plug, or power cord in water or any other liquid.
- Do not leave this appliance unattended while it is in operation.
- Fill water tank with water before use. Observe water level during use.
- Do not lay hose on the ground. Do not wind hose. Do not operate the appliance if cord is damaged.
- Always keep the hose and nozzle elevated above the water tank. Never insert any foreign objects into any openings or hose.
- Do not cut or attempt to extend the steam hose or power cord.
- Do not place the nozzle directly on any surface while it is hot or plugged in.
- Be cautious about steam spraying out from the nozzle. Do not direct steam at people or animals, or use steamer on garments while they are being worn.
- Steam only in a vertical motion. Never use steamer in a horizontal position or tilt backwards-doing so may result in hot water discharge.
- Move the appliance by firmly grasping the telescopic poles. Empty the water tank before moving.
- Turn off, unplug and allow the appliance to cool completely for at least 30 minutes prior to draining the water tank and water reservoir and storing.
- Always turn off and unplug unit before refilling, draining, cleaning, moving, or when not in use.
- Use appliance only for its intended use. For indoor use only.
- Keep the appliance away from flammable materials and chemicals.
- Do not fill the water tank with hot water or corrosive cleaning agents which could cause damage. Distilled or filtered water is strongly recommended.
- When in use, this appliance will spray hot steam from its steam nozzle. To avoid injury from hot steam, do not aim the steam nozzle at people or pets.
- Only use SALAV accessories on your SALAV appliance. The use of accessory attachments other than those provided by SALAV may result in fire, electric shock or irreversible damage to the appliance.
- This appliance is not intended for use by persons (including children) with reduced physical, sensory, or mental capabilities, or lack of experience and knowledge, unless they have been given supervision or instruction concerning use of the appliance by a person responsible for their safety. Children should be supervised to ensure that they do not play with the appliance.
COMPONENTS
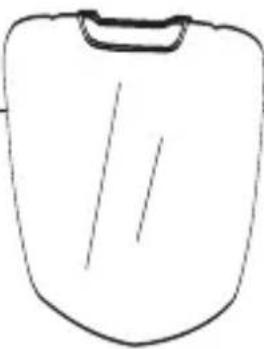
Multi-functional Rotatable Ironing Board
Collar Hanger
Metal Hanger
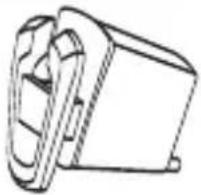
Water Tank
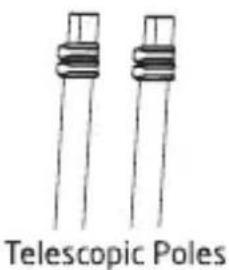
Rotatable Steam Nozzle & Iron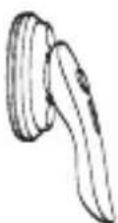
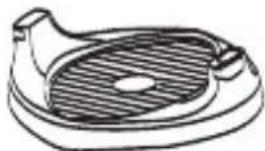
Body Base

Main Body
Nozzle Cap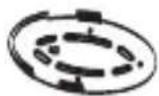
Safety Rotating Nozzle Hanger

PRODUCT SPECIFICATION
Model
ST-50
Water Tank Capacity
1.2L
Steam Output Time
60 seconds
Input Voltage
120V~60Hz
Output Power
1800W
Main Body Display Panel
Nozzle functions
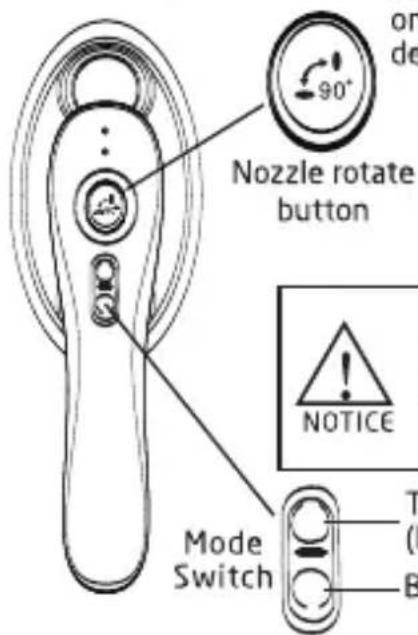
Rotate nozzle to your preference by pressing down on the nozzle rotate button to adjust the nozzle 90 degrees to the left.
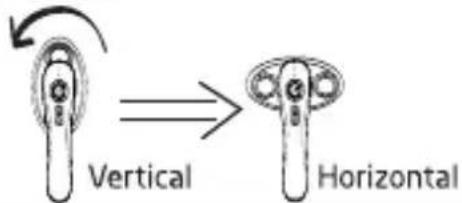
To avoid injury, please do not rotate the nozzle when the unit is on. Insert the Nozzle into the Safety Rotating Nozzle Hanger attached to the Telescopic Pole, then hold down the nozzle rotate button to adjust the nozzle to the preferred angle.
Top Switch: Steam Mode (Blue light for continuous steam)
Bottom Switch: Ironing Mode (Red light for Iron mode) If unit is idle for 15 minutes while in Ironing Mode, unit will automatically enter Standby Mode with a blinking indicator light to prevent damage to garments. To continue usage, turn the Power ON/OFF switch to on again.
Sensor Switch on Main Body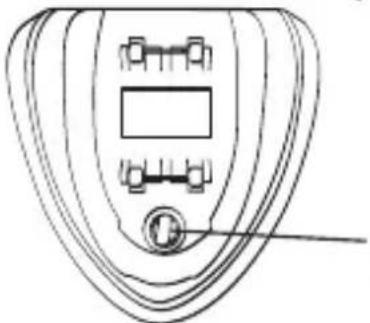
If the Sensor Switch is pushed down while the appliance is on, the unit will stop producing steam and continue to heat up. If the Sensor Switch is pushed down while the Standby Mode light is on at the same time and there has been no activity for 5 minutes, the unit will emit a buzzing alarm sound for 30 seconds then enter Standby Mode. If the Sensor Switch is released during this time, the Standby Sleep Light will turn off and the appliance will resume use.
FUNCTIONS & FEATURES
Pressure release setting
Auto Pressure Release Valve
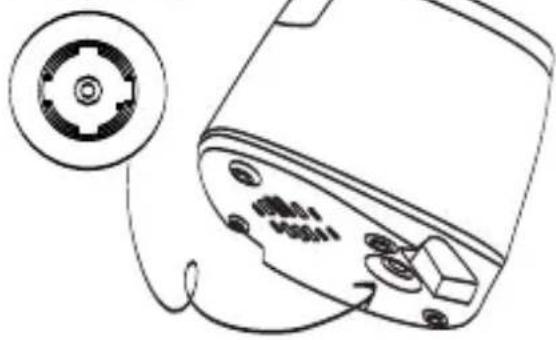
When the pressure inside the heater is too high, the setting at the bottom of the unit will release pressure automatically.
NOTICE
Be cautious of the steam spraying out from the bottom of the unit when the appliance is operating to avoid injury.
Standby mode
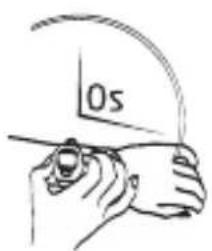
If the appliance enters standby mode for less than 3 minutes, reboot the appliance to continue usage without pre-heating.
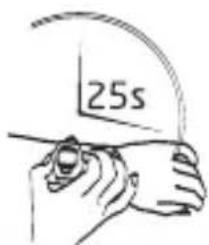
If the appliance enters standby mode for more than 3 minutes, reboot the appliance, unit will need 25 seconds to preheat for usage.

If the appliance enters standby mode for more than 5 minutes, reboot the appliance, unit will need 48 seconds to preheat for usage.
PRODUCT INSTALLATION
STEP 1
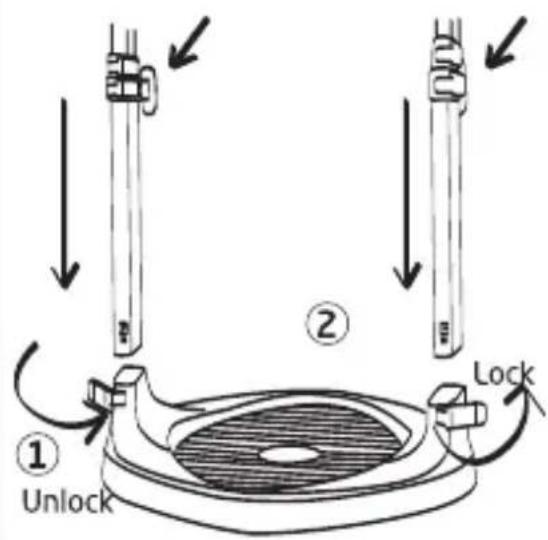
Unlock the latches on both sides of the base of the unit. Insert the Telescopic Poles into the base and lock in place.
NOTE: both poles and black oval cord wrap pieces should face the same direction.
STEP 2
Adjust the telescopic poles to desired height and lock in place.

STEP 3
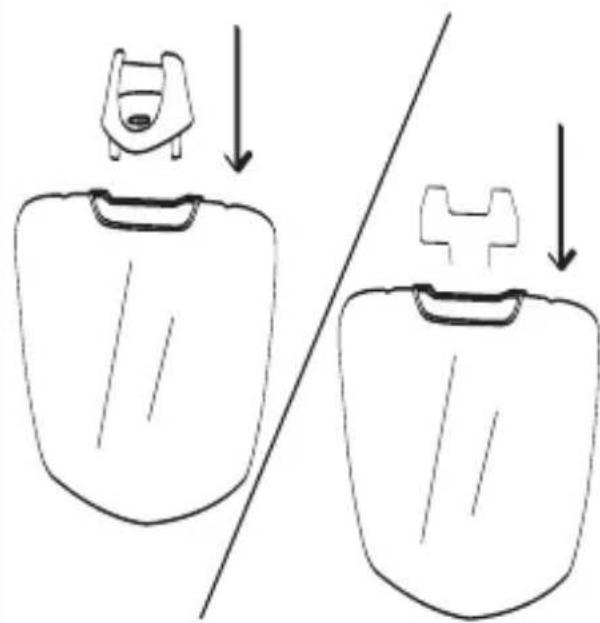
Insert the preferred hanger (Collar or Metal) into the top of the ironing board.
STEP 4
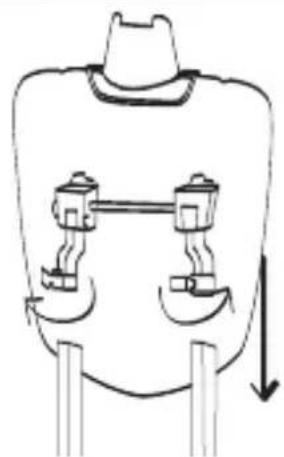
Unlock the latches at the end of the black adjustable arms. With the face of the board facing the front of the unit vertically, align unlocked black adjustable arms directly over the telescopic poles and insert and lock in place. WARNING: Do NOT press the red button while handling black adjustable arms. Adjustable arms are spring loaded and may cause bodily injury if used improperly.
PRODUCT INSTALLATION
STEP 5
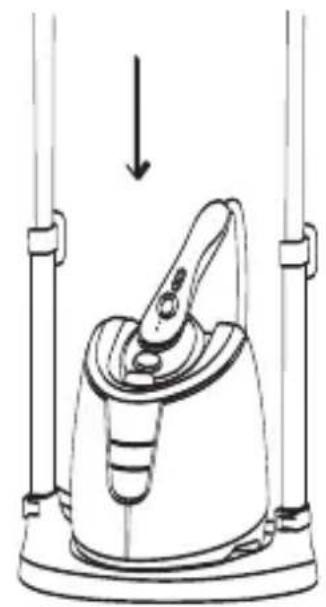
Put the main body onto the base, then set the rotatable nozzle on top of the main body nozzle holder.
STEP 6
Product should look like below once installation is complete.
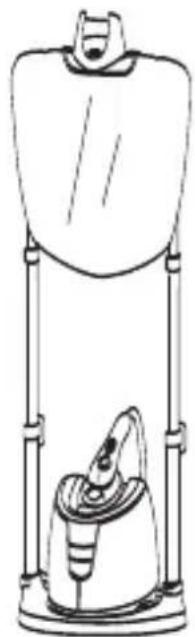
INSTALLATION OF THE IRONING BOARD
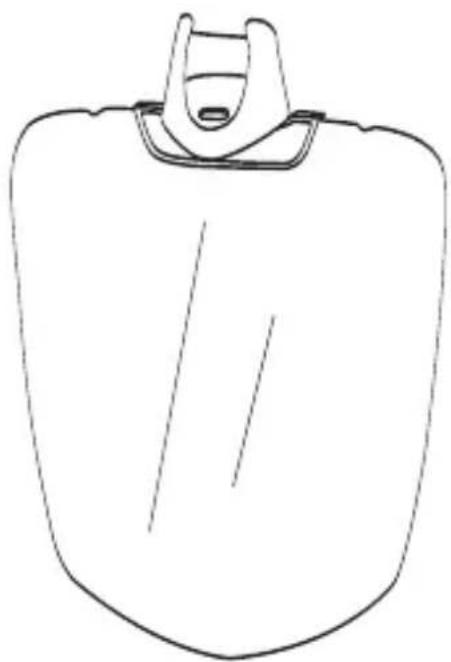
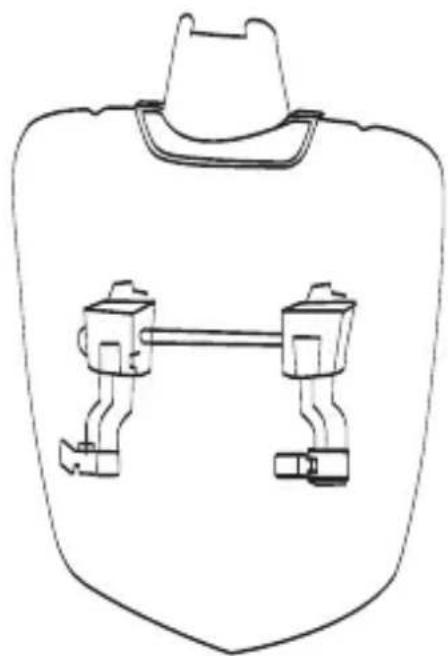
INSTALLATION OF THE IRONING BOARD
1) Unlock black latches without moving adjustable arms. 2) Insert ends of adjustable arms onto telescopic poles.

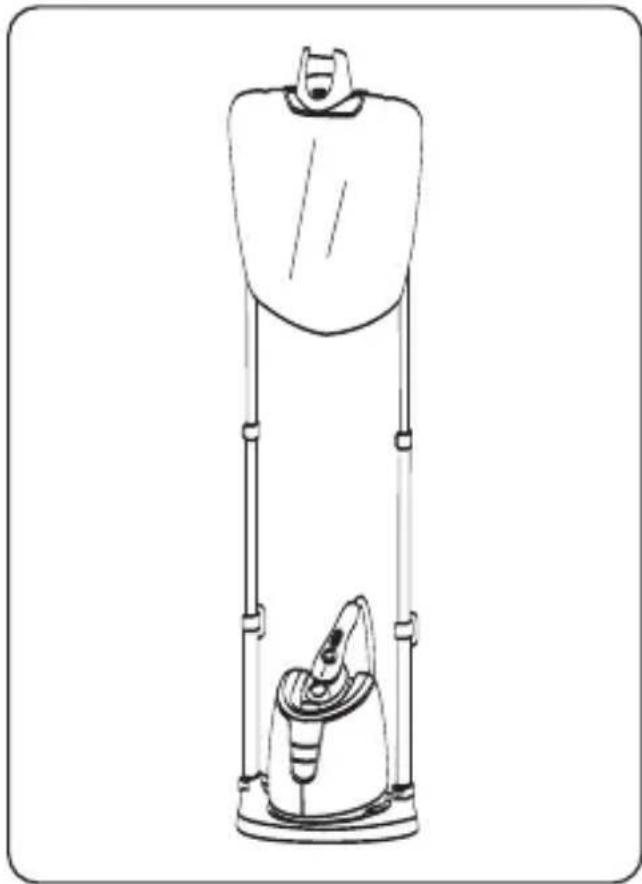

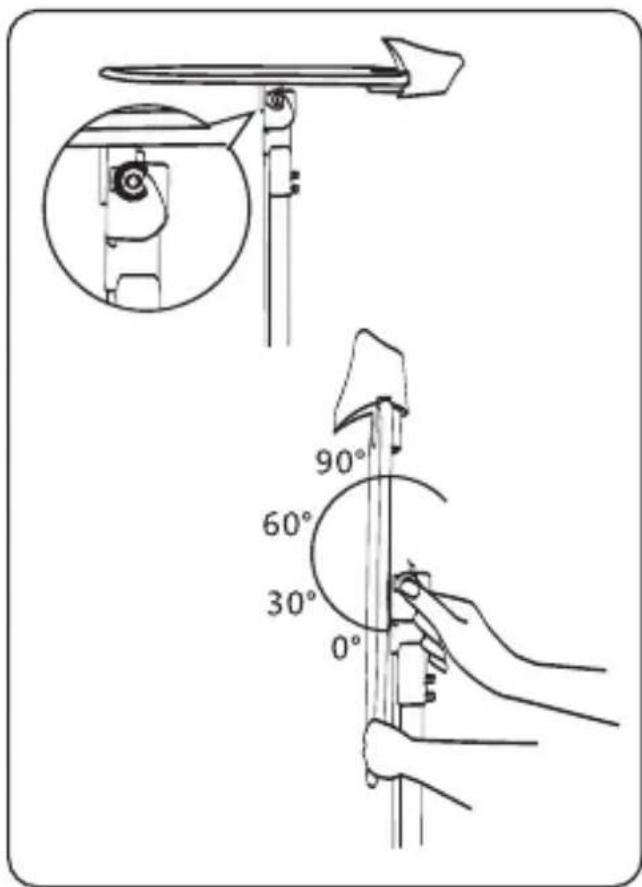
INSTALLATION OF THE IRONING BOARD
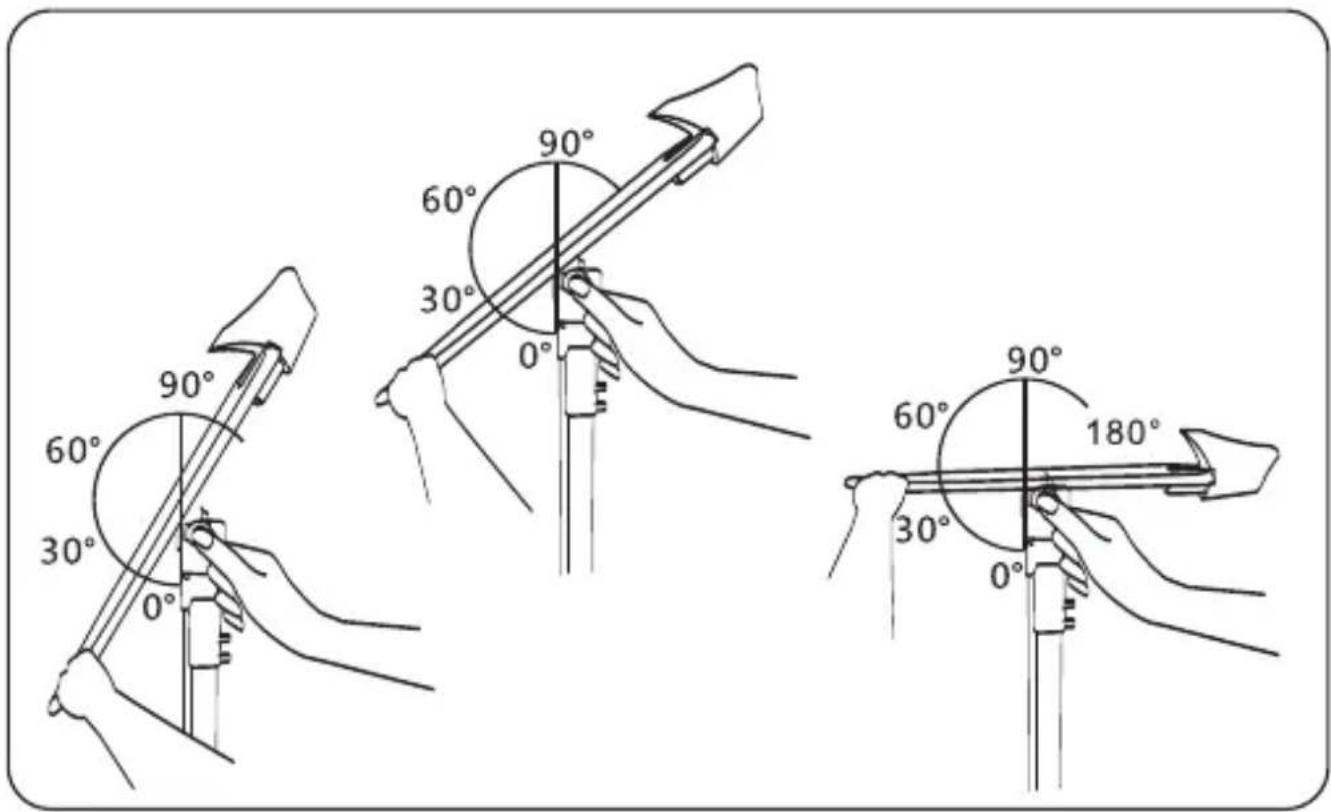
INSTRUCTIONS FOR USE
STEP 1
- Pull out water tank from behind the unit. Unlock the water tank cap and fill water tank with water.
- Tighten cap and push water tank back into unit. Water tank will make an audible click when locked in place.

STEP 2
Plug in the unit. The power indicator light will blink, and appliance will switch to standby mode.

INSTRUCTIONS FOR USE
STEP 3
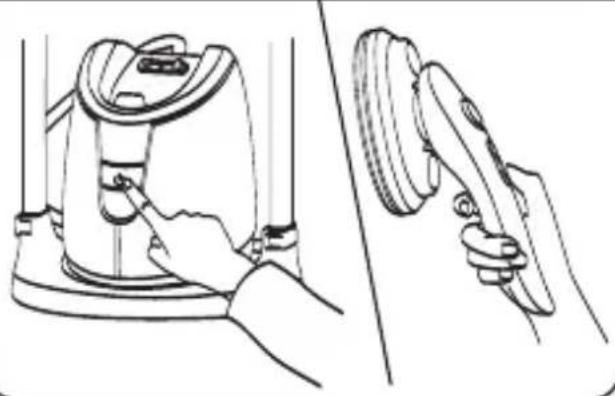
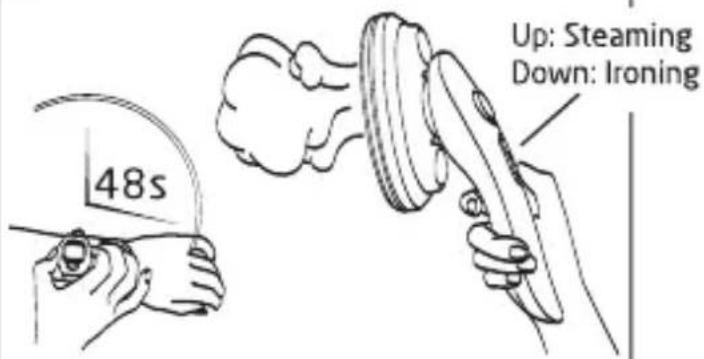
Touch the Power ON/OFF switch on the main body to turn on the unit. A mild beep will indicate the appliance is on. Once the indicator light is on, the mode will depend on the switch on the nozzle handle. A red light will indicate Ironing Mode, while a blue light will indicate Steaming Mode. The indicator light will start to blink and the unit will be ready to use after 48 seconds of heat-up time. The indicator light will stop blinking once ready to use.
STEP 4
Once the appliance is in working mode after 48 seconds heat-up time, set to Steaming Mode by sliding the top button (with blue light on and steam icon on). Set to Ironing Mode by sliding to the bottom button (with the red light on and no steam icon, no steam will be produced). Note: Switching from Steaming Mode to Ironing Mode may take 10-20 seconds.
STEP 5
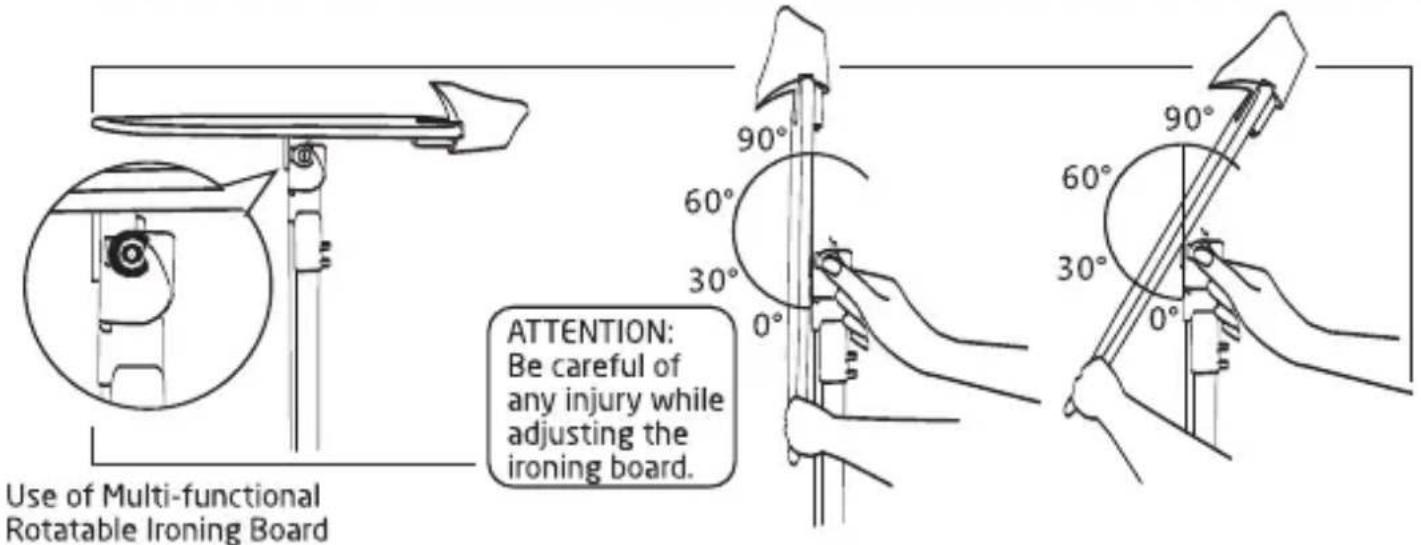
You can adjust the angle of the multi-functional rotatable ironing board by holding down the red button behind the board to your desired angle.

STEP 6
Ready for steaming or ironing.

NOZZLE ROTATION INSTRUCTIONS

NOZZLE ROTATION INSTRUCTIONS

ACCESSORIES INSTRUCTIONS
Slide on
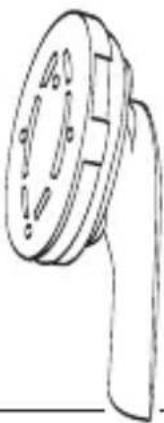
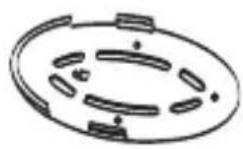
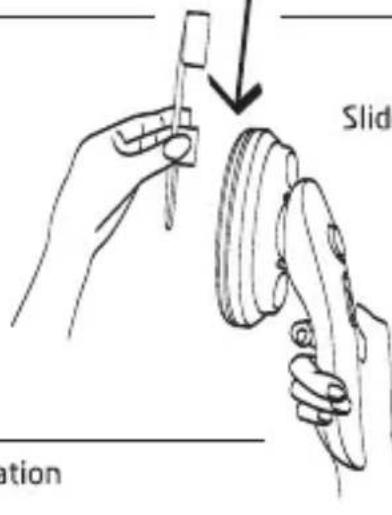
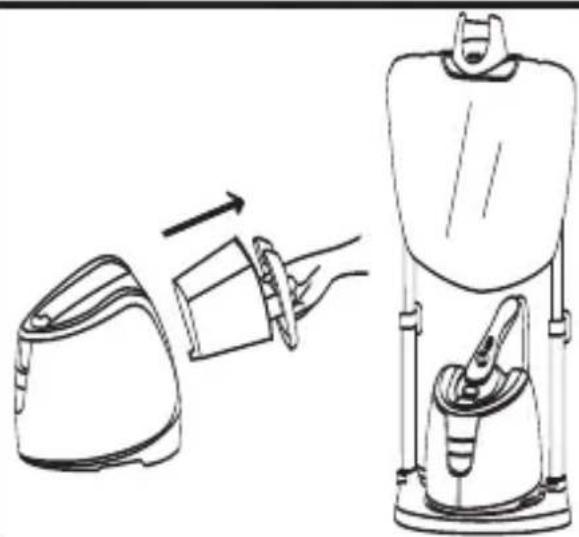
To prevent delicate fabrics from being damaged by high temperatures, please use the Nozzle Cap accordingly. Only slide the Nozzle Cap on and off when the unit is turned off and cool.
WARNING:
Do not install or dismantle the Nozzle Cap when the appliance is still operating to avoid injury.
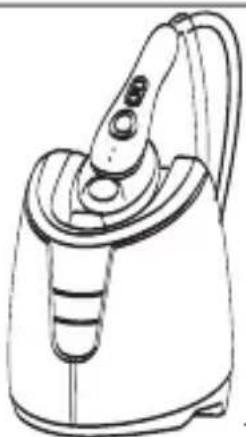

Separated base
ACCESSORIES INSTRUCTIONS
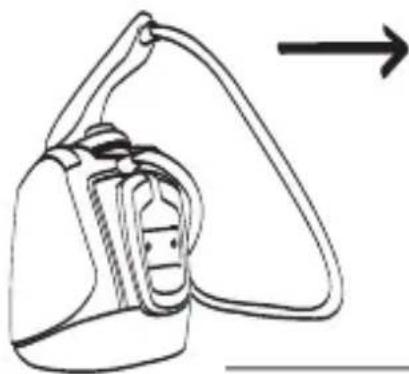
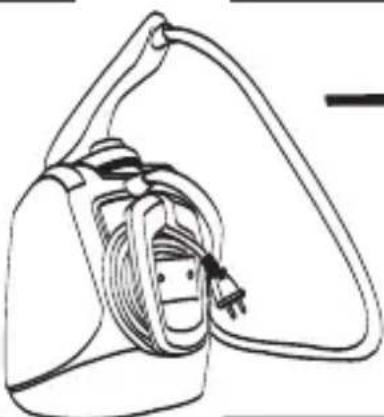
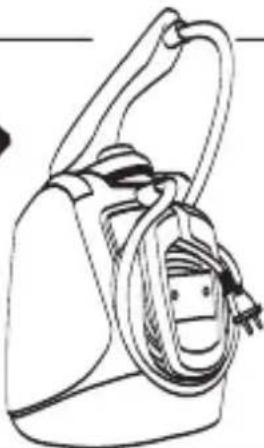
Use of cord wrap behind the appliance
ACCESSORIES INSTRUCTIONS


To prevent damage to your garment and the ironing board, please do not leave the nozzle in the same position for more than 30 seconds.
MAINTENANCE & CLEANING
STEP 1
Make sure the appliance is off by touching the Power ON/OFF on the main body. A beeping sound will indicate that the unit has entered Standby Mode. NOTE: appliance will stay in Standby Mode until unplugged from power source. Unplug the power cord and wait for at least 30 minutes until the appliance is completely cooled down.

STEP 2
Take out the water tank and drain out the water. Adjust the telescopic poles to appropriate height for easy storage.
DISASSEMBLY INSTRUCTIONS FOR BOARD CLOTH
STEP 1
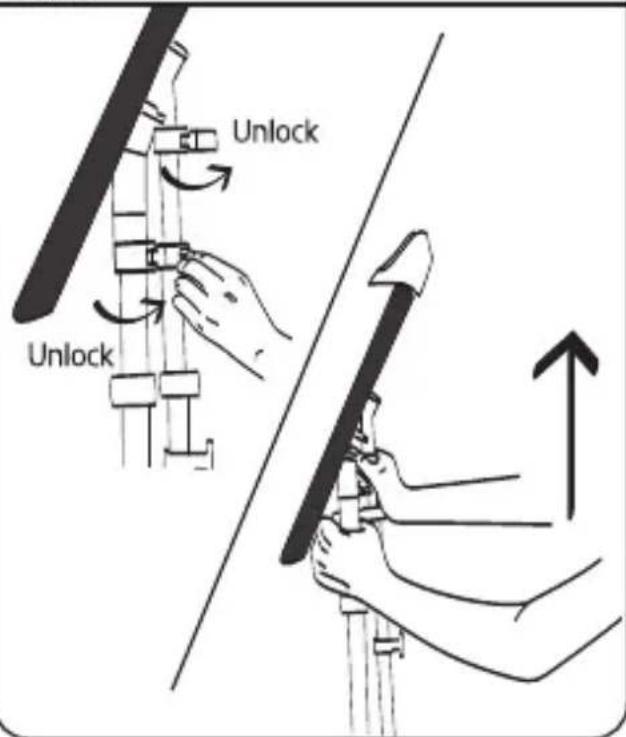
Unlock the top latches and with both hands, pull up to detach the ironing board.
STEP 2
Remove the hanger by pulling up from the hanger board.

STEP 3
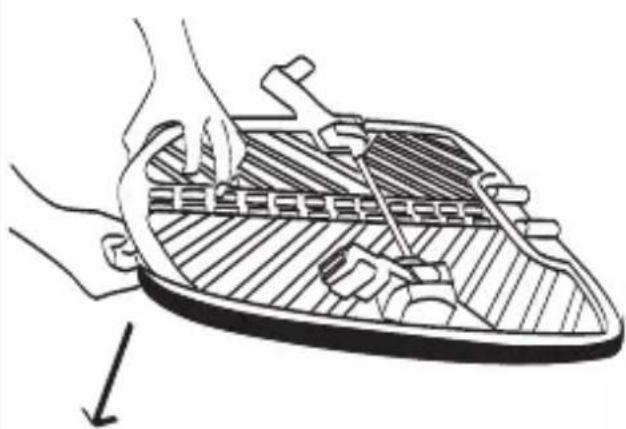
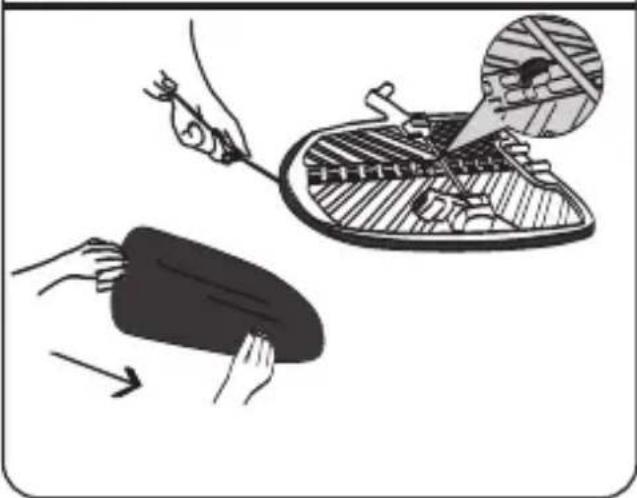
Loosen the string behind the ironing board to remove the ironing cloth (located behind or on the bottom of the board).
STEP 4
Remove the ironing cloth and cover the ironing board with new ironing cloth and lock in place. To lock in place, pull the string upwards to tighten and wrap the string to the small hook behind the board in the middle. Next, re-insert the collar hanger and hanger board back in place. Re-attach the ironing board to the telescopic poles and lock in place. The ironing board is now ready to use.
TROUBLESHOOTING
| Problem | Reason | Solution |
| Unit fails to work.Indicator light does not turn on. | ■The unit is not plugged in.■Electrical outlet power system problem/fuse is blown. | ▲ Plug in the unit.▲ Check circuit breaker, reset if necessary. |
| Unit fails to steam.Indicator light is on. | ■Water tank is empty.■Switch on handle, sensor switch on main body of appliance, or water pump is damaged. | ▲ Refill the Water Tank.▲ Make sure water tank cap is correctly fastened on to the water tank. |
| Nozzle panel is heating and working normally, but indicator light is not on. | ■Indicator light is broken. | ▲ Contact SALAVUSA for repair services. |
| Steam levels are low. | ■Voltage is too low. | ▲ Please avoid to use this appliance during the surge in electricity demand. |
| Nozzle is leaking water. | ■It is normal for a few drops of water to spray out during startup.■Heating element is not working. | ▲ Nozzle will stop spraying out water once appliance has warmed up. |
| Water Tank is leaking. | ■Water tank cap is not tightened properly.■Water tank is defective. | ▲ Tighten the water tank cap. |
| Please visit www.salavusa.com for more troubleshooting tips. | ||
Visit our website to find product tips, customer support and learn about SALAV patented steam technology.
www.salavusa.com

- USER MANUAL
- DEAR VALUED CUSTOMERS
- IMPORTANT SAFETY INSTRUCTIONS
- COMPONENTS
- PRODUCT SPECIFICATION
- FUNCTIONS & FEATURES
- PRESSURE RELEASE SETTING
- STANDBY MODE
- PRODUCT INSTALLATION
- STEP 1
- STEP 2
- STEP 3
- STEP 4
- STEP 5
- STEP 6
- INSTALLATION OF THE IRONING BOARD
- INSTRUCTIONS FOR USE
- NOZZLE ROTATION INSTRUCTIONS
- ACCESSORIES INSTRUCTIONS
- WARNING
- MAINTENANCE & CLEANING
- DISASSEMBLY INSTRUCTIONS FOR BOARD CLOTH
- TROUBLESHOOTING
Brand : SALAV
Model : ST-50
Category : Steam cleaner