
42280 - Measurement Extech - Free user manual and instructions
Find the device manual for free 42280 Extech in PDF.


| Product Type | Temperature and Humidity Datalogger |
| Model | Extech 42280 |
| Display | Multi-function LCD with status LED |
| Measurement Range (Temperature) | -20 to 70°C (-4 to 144°F) |
| Measurement Range (Humidity) | 0 to 100% RH |
| Dew Point Range | -20 to 70°C (-4 to 144°F) |
| Resolution | 0.1°C / 0.1°F / 0.1% |
| Accuracy (Temperature) | ±1.0°F (±0.6°C) from 0 to 50°C; ±2.0°F (±1.2°C) outside |
| Accuracy (Humidity) | ±3% from 10 to 90% RH; ±5% outside |
| Memory Capacity | 16,000 total (8,000 temperature + 8,000 humidity) |
| Data Logging Interval | Programmable from 1 second to 12 hours |
| Start Modes | Immediate, Keypad, Scheduled, Repeat |
| Alarm Types | Visual (LED) and Audible (with AC adapter) |
| PC Interface | USB with included software and cable |
| Power Supply | Four 1.5V AA batteries or 9V AC adapter |
| Battery Life | Not specified (typical for datalogger) |
| Mounting Options | Wall mount, tripod mount, desktop |
| Dimensions (approx.) | 120 x 80 x 30 mm |
| Weight (approx.) | 200 g (with batteries) |
| Calibration | User calibration with optional 33% and 75% RH bottles (RH300-CAL) |
| Operating Environment | Indoor air quality monitoring |
| Accessories Included | Meter, user guide, USB cable, software CD, 4x AA batteries, 9V adapter |
| Warranty | Refer to manufacturer |
Frequently Asked Questions - 42280 Extech
User questions about 42280 Extech
0 question about this device. Answer the ones you know or ask your own.
Ask a new question about this device
Download the instructions for your Measurement in PDF format for free! Find your manual 42280 - Extech and take your electronic device back in hand. On this page are published all the documents necessary for the use of your device. 42280 by Extech.
USER MANUAL 42280 Extech
Temperature and Humidity Datalogger
Model 42280
Introduction
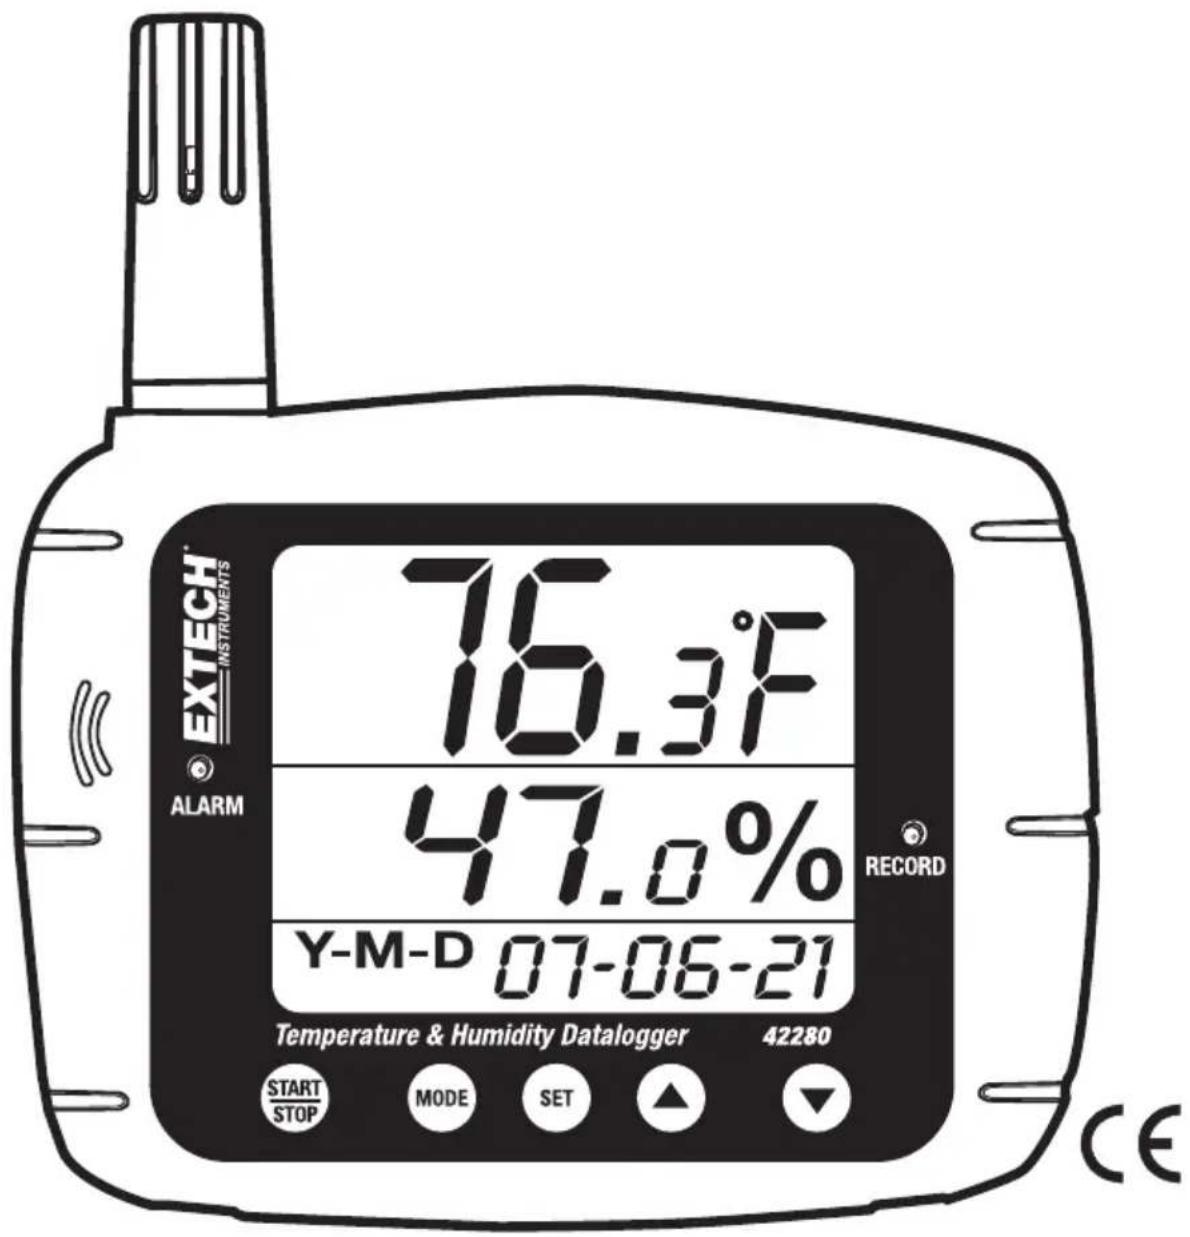
Congratulations on your purchase of the Extech 42280 Thermometer and Relative Humidity Datalogger. The 42280 is a wall-mount, tripod mount, or desktop indoor air quality monitor with an internal memory capable of storing 16,000 readings (8000 temperature readings and 8000 relative humidity readings) that can later be transferred to PC using the USB interface. This meter is shipped fully tested and calibrated and, with proper use, will provide years of reliable service.
Material list
Supplied Materials
■ Meter
- User Guide
- USB cable
Program CD
- Four (4) batteries; 1.5V 'AA'
- 9V adaptor
Optional accessories
- Calibration bottles (33% and 75%) for Relative Humidity Calibration (RH300-CAL)
Features
■ 16,000 internal memory capacity (8000 temperature; 8000 RH%)
- Visual and Audible (with 117V AC adaptor only) Alarms
- Easily configure datalogger through the keypad or via PC interface
- USB PC interface with Windows ^TM software
- Wall mount, tripod mount, or for desktop use
■ Large LCD display shows temperature, humidity, and date/time clock simultaneously
Meter Description
- Humidity Sensor (internal Temperature sensor)
- Audible alarm (with AC adaptor power only)
- Visual Alarm LED
- Relative Humidity display
- Date and Time display
- Temperature display
- RECORD status LED
- USB port
- AC Adaptor jack
- Datalogger START-STOP button
- MODE button
- SET button
- Up Arrow button
- Down Arrow button
- Tripod mount jack
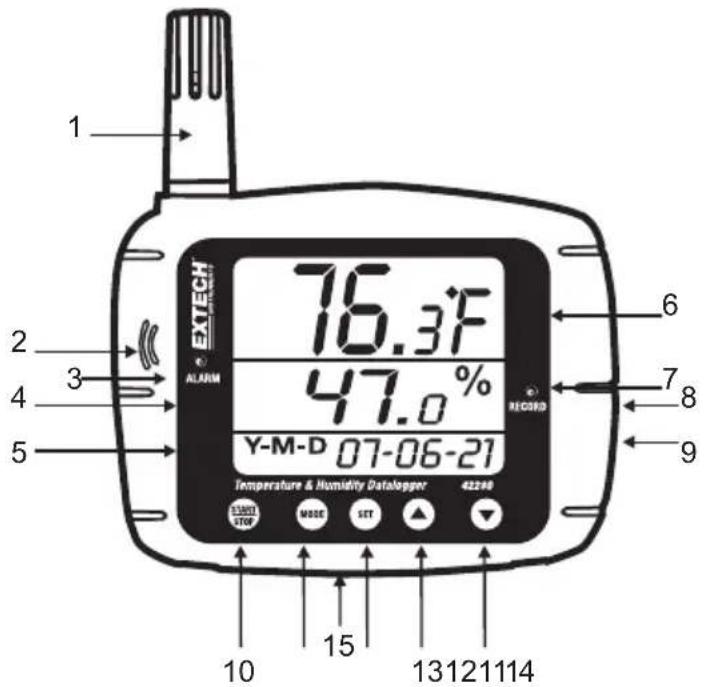
Notes: The battery compartment is located on rear of instrument. Desktop stand footers are not shown in diagram.
LCD Display Description
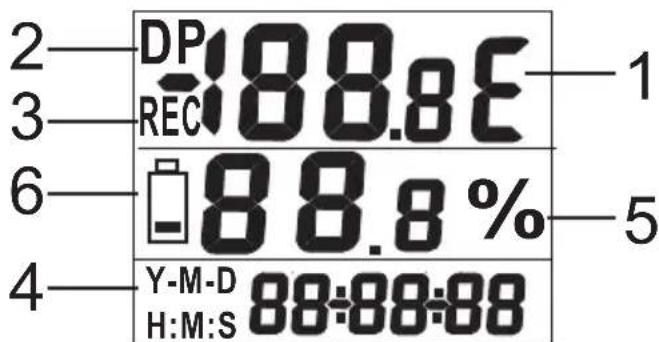
- Temperature Display
- Dew Point icon
- Datalogger icon
- Date and Time
- Humidity Display
- Low battery icon
Important Note before starting
This meter relies on firm button presses to operate correctly. Be sure to press firmly and hold the button for as long as directed in the instructions.
Meter Power
- The meter is powered by four (4) 'AA' 1.5V batteries or the 117V AC adaptor.
- When the batteries are installed or the adaptor is connected to an AC power source, momentarily press the START-STOP button to turn the meter ON.
- Press the START-STOP button again to turn the meter OFF.
Viewing the displayed readings
- Normally, the top line indicates temperature in degrees C or F. Use the MODE button to switch between degrees C and degrees F.
- Press and hold the MODE for at least 2 seconds. This will change the top display to Dew Point temperature. The 'DP' icon will appear on the LCD when in Dew Point mode. Press and hold the MODE button for at least 2 seconds to return the top display to the normal temperature display mode.
- The middle line displays Relative Humidity in %.
- The bottom line automatically alternates between Time and Date displays.
- If the ALM status LED illuminates and the display flashes, one of the Alarm limits has been reached. Program the High and Low Temperature/Humidity limits in Programming parameter P5 (detailed later in this user guide).
Datalogger Basics
The Model 42280 has a built-in Datalogger that can store up to 8000 temperature and 8000 humidity readings. Readings can be stored in the meter and transferred at a later time to a PC.
The meter must be configured before datalogging can be attempted. Parameters such as Real Time Clock and Datalogger Sample Rate must be programmed before datalogging can begin. It is strongly recommended that the user take advantage of the supplied software to configure the meter. Instructions for manually configuring the meter are provided below; however, configuring the meter via software is very convenient.
Basic instructions for connecting the meter to a PC and getting started with the supplied software are provided later in this guide. Detailed instructions regarding the supplied software are provided in a separate manual included on the supplied CD-ROM and the HELP utility in the software program.
The Model 42280 has several programming modes (P1, P2, P3, P4, P5, and P6). These parameters must be programmed before the Datalogger or the Alarm can be used.
List of Programming Modes
P1 - Number of samples to record (1, 2, 4, 8, 12, or 16 x 1000; 1=1000, 2=2000, etc.)
P2 - Datalogging Start Methods (Immediate, Keypad, Scheduled, and Repeat modes)
P3 – Start Time (set the time and date when Datalogging will automatically begin); Note that P3 will not appear in the menu if 'SCh' is not selected in P2.
P4 - Sample Rate (set the datalogging interval from 1 second up to 12 hours)
P5 - Alarm Mode (set High and Low Temperature/Humidity limits)
P6 - Real Time Clock (set the meter's internal date and time clock)
Programming Mode P1; Number of readings (sample points) to record
- Press the SET button to access the setup mode
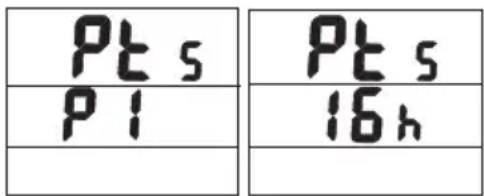
- Use the arrow buttons to select parameter P1 (see sample display below)
- Press the SET button again
- Use the up/down arrow buttons to select the desired number of samples (in thousands) to record for a datalogging session (1, 2, 4, 8, 12, or 16; where 1=1000, 2=2000, 4=4000, and so on)
- Press the SET button to save setting
- Use the arrow buttons to select another programming mode or press MODE to exit the programming mode.
Programming Mode P2; Datalogger Start Modes
- Press the SET button to access the setup mode
- Use the arrow buttons to select parameter P2
- Press the SET button again
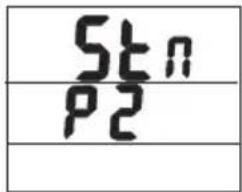
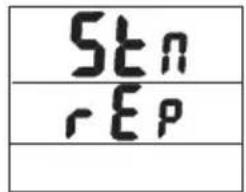
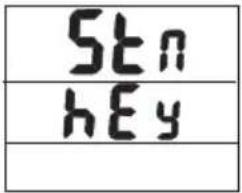
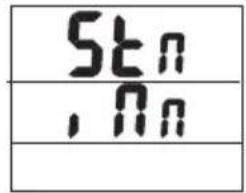
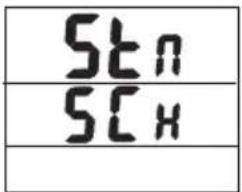
- Select one of the four Start modes using the up/down arrow buttons (see list and diagram below)
a. rEp (Repeat Start mode): Logger starts once readings are downloaded to PC
b. hEy (Keypad Start): Datalogging begins after the START/STOP button is held for 2 seconds
c. imm (Immediate Start): Recording starts immediately after exiting the setup mode
d. SCh (Scheduled Start): Logging begins at a preset date and time
- Press the SET button to save the setting
- Use the arrow buttons to select another programming mode or press MODE to exit the programming mode.
Programming Mode P3; Datalog Start Time
Note that parameter P3 will only be visible if the Start MODE is set to SHCEDULE (Parameter P2
set to 'SCh').
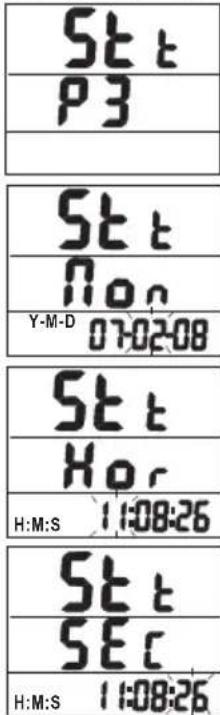
- Press the SET button to access the setup mode
- Use the arrow buttons to select parameter P3
- Press the SET button again
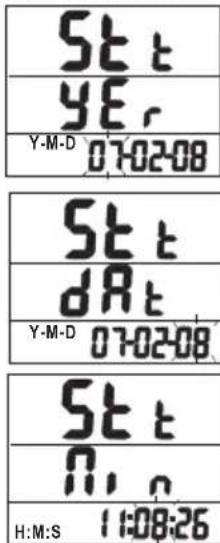
- Use the up/down arrow buttons to set the year
- Press the SET button again
- Use the up/down arrow buttons to set month
- Press the SET button again
- Use the up/down arrow buttons to set the day
- Press the SET button again
- Use up/down buttons to set the hours
- Press the SET button again
- Use up/down buttons to set the minutes
- Press the SET button again
-
Use the up/down arrow buttons to set the seconds
-
Press the SET button again to store the settings
-
Press the MODE button to back out to the top level of this menu.
-
Use the arrow buttons to select another programming mode or press MODE to exit the programming mode.
8
Programming Mode P4; Datalogger Sample Rate
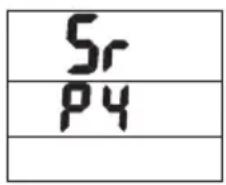
- Press the SET button to access the setup mode
- Use the arrow buttons to select parameter P4
- Press the SET button again
- Use the up/down arrow buttons to set hours
- Press the SET button again
- Use the up/down arrow buttons to set the minutes
- Press the SET button again
- Use the up/down arrow buttons to set the seconds
- Press SET again to store the settings
- Press the MODE button to back out to the top level of this menu.
- Use the arrow buttons to select another programming mode or press MODE to exit the programming mode.
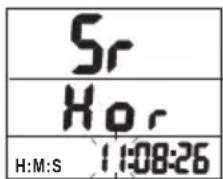
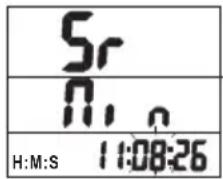
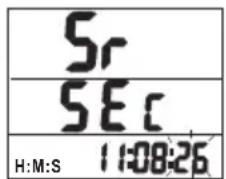
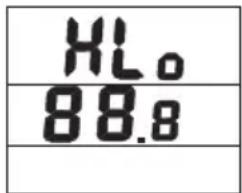
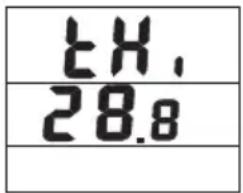
Programming Mode P5; High and Low Alarms
- Press the SET button to access the setup mode
- Use the arrow buttons to select parameter P5
- Press the SET button again
- Use the up/down arrow buttons to set the High Temperature Alarm limit
- Press the SET button again
- Use the up/down arrow buttons to set the Low Temperature Alarm limit
- Press the SET button again
- Use the up/down arrow buttons to set the High Humidity Limit
- Press the SET button again
- Use the up/down arrow buttons to set the Low Humidity Limit
- Press the SET button again to store the settings
- Press the MODE button to back out to the top level of this menu.
- Use the arrow buttons to select another programming mode or press MODE to exit the programming mode.
Note: The AC Adaptor must be used for the audible alarm to sound
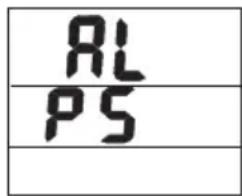
Programming Mode P6; Real Time Clock
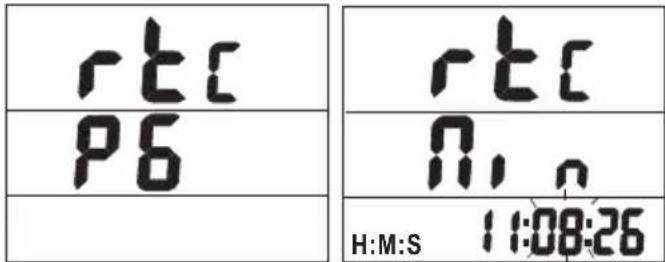
- Press the SET button to access the setup mode
- Use the arrow buttons to select parameter P6
- Press the SET button again
- Use the up/down arrow buttons to set the year
- Press the SET button again
- Use the up/down arrow buttons to set month
- Press the SET button again
- Use the up/down arrow buttons to set the day
- Press the SET button again
- Use the up/down arrow buttons to set the hours
- Press the SET button again
- Use the up/down arrow buttons to set the minutes
- Press the SET button again
- Use the up/down arrow buttons to set the seconds
- Press SET again to stores the settings
- Press the MODE button to back out to the top level of this menu.
- Use the arrow buttons to select another programming mode or press MODE to exit the programming mode.
Starting a Datalogging session
The 42280 can automatically store up to 16,000 readings (8000 temperature and 8000 humidity) for later transfer to PC. Program the controller, as discussed earlier, before Datalogging. If the Datalogger has not been configured at this point, configure as necessary. If programming is complete, continue with the next section.
Starting the Datalogger by push-button (Key Mode)
- Programming mode P2 (Datalogging Start Modes) must be set to KEY (hEy) mode for this method.
- When P2 is set to 'hEy', press and hold the START-STOP button for 2 seconds.
- The REC front-panel status light will blink indicating that readings are currently recording at the rate programmed in parameter P4 (sample rate)
- To stop recording, press and hold the START-STOP button for at least 2 seconds. The REC status light will stop blinking.
Starting the Datalogger in Immediate Mode
- Programming mode P2 (Datalogging Start Modes) must be set to 'Imm' mode for this method.
- When the programming mode is exited, Datalogger automatically begins.
- The REC front-panel status light will blink indicating that readings are currently recording.
- To stop recording, press and hold the START-STOP button for at least 2 seconds. The REC status light will stop blinking.
Starting the Datalogger in Schedule Mode
- In Schedule Mode the meter begins recording at a specific date and time, as programmed by the user.
- Programming mode P2 (Datalogging Start Modes) must be set to 'SCh' mode for this method.
- After setting P2 to 'SCh', set the desired time and date in Programming Mode P3 (P3 only appears in the menu when 'SCh' is selected in P2.
- Datalogging will start at the programmed date and time. Note that the Real Time Clock (Programming Mode P6) must first be set to the current date and time.
- When datalogging begins, the REC front-panel status light will blink indicating that readings are currently recording at the rate programmed in parameter P4 (sample rate)
- To stop recording, press and hold the START-STOP button for at least 2 seconds. The REC status light will stop blinking.
Starting the Datalogger in Repeat Mode
In Repeat Mode the meter simply begins datalogging again after readings are downloaded to a PC. This allows the user to maintain the same programming selections time after time. Datalogging is indicated by the flashing REC light as described in the other Start Modes above.
To stop recording, press and hold the START-STOP button for at least 2 seconds. The REC status light will stop blinking.
Connecting the Meter to a PC
A USB cable is provided with the meter. One end of the cable connects to the meter's USB jack and the other end connects to a USB port on the PC.
Running the supplied PC software
The supplied PC software is included on the supplied CD-ROM. Insert the CD into the computer's CD-ROM drive and follow the on-screen prompts and instructions. In the software COM PORT SETTING field, select the COM port to where the meter is connected.
Software Datalogging Parameters
From the main software screen, select LOGGER SET and set the sample rate, sample points, and start mode. These are described in some detail in the separate software manual and the software HELP utility on the supplied CD-ROM. Remember to press 'OK' after changing a setting to ensure that the software processes the changes. The meter is now ready to record.
Transferring readings to PC
- Connect and run the supplied software as previously described.
- Press the DOWNLOAD START button on the main software screen to transfer the readings.
- The separate software instructions supplied in the software's HELP utility explain how to view, graph, save, export and print the downloaded data.
NOTE: The Software's HELP utility provides in-depth software and downloading instructions, which is beyond the scope of this user guide; please refer to the HELP utility in the supplied software program for detailed guidelines and instructions.
- With the meter OFF, plug the humidity sensor probe into the 33% Calibration Reference bottle.
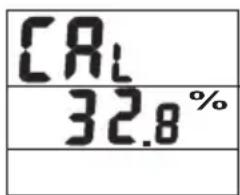
- Simultaneously press and hold the START-STOP and the SET buttons for at least 2 seconds to enter the 33% Calibration mode. The display '32.8%' will begin to flash on the display.
- Approximately 30 minutes later, the '32.8%' display will stop flashing, indicating that the 33% calibration is complete
- Plug the humidity sensor probe into the 75% Calibration Reference bottle.
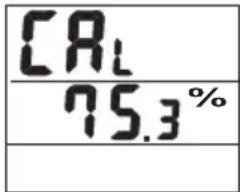
- Press and hold the START-STOP button for at least 2 seconds to enter the 75% Calibration mode. The display '75.3%' will begin to flash on the display.
- Approximately 30 minutes later, the display will stop flashing, indicating that the entire calibration is complete. The meter will automatically return to the normal operating mode
Calibration Notes:
- The user can exit the calibration without finishing by pressing the START-STOP button for 2 seconds (before reaching step 6 above).
- For best accuracy, perform the calibration at room temperature.
- Calibration Reference bottles are available optionally through Extech Instruments distributors
General Specifications
| Display | Multi-function | LCD | with status LED indic |
| Measurement ranges | Temperature: -20 to 70 | °C (-4 to 144°F) | |
| Humidity: 0 to 100% | |||
| Dew Point temperature: -20 to 70 | °C(-4 to 144°F) | ||
| Resolution | 0.1 °C / °F / % | ||
| Accuracy | Temp: 1.0°F (+/- 0.6°C) from 0 to 50°C (32 to 122°F) | ||
| 2.0°F (+/-1.2°C) outside of this range | |||
| Humidity: +/-3% from 10 to 90% (+/-5% outside of this range) | |||
| Datalogger memory | 16,000 total (8000 temperature and 8000 humidity readings) | ||
| Over range indication | Error code appears on the LCD | ||
| Low battery indication | Battery symbol appears on the LCD | ||
| Power supply | Four (4) 1.5v ‘AA’ batteries or 9V adaptor | ||
Power is ON but there's no display
Check that the batteries or the AC adaptor is installed and connected properly
Ensure that the START-STOP button is pressed firmly and for at least 100ms
Calibration Failure
Check that the batteries or the AC adaptor is installed and connected properly
Ensure that the calibration bottles are tightly sealed around the meter sensor
Ensure that calibration takes place at room temperature
Flashing LED Indicators
REC flashes when datalogging takes place
ALM light flashes when alarm limit has been exceeded
Error Codes
E02 - Under flow error
E03 - Over flow error
E04 - E02 and E03 combined error
E11 - CAL error (recalibration required)
E32 - IC read/write error. Return unit for repair
E33 - Circuit Error. Return unit for repair
Battery Replacement
You, as the end user, are legally bound (Battery ordinance) to return all used batteries and accumulators; disposal in the household garbage is prohibited!
You can hand over your used batteries / accumulators at collection points in your community or wherever batteries / accumulators are sold!
Disposal: Follow the valid legal stipulations in respect of the disposal of the device at the end of its lifecycle
Copyright © 2011-2015 FLIR Systems, Inc.
All rights reserved including the right of reproduction in whole or in part in any form
ISO-9001 Certified
www.extech.com
- Temperature and Humidity Datalogger
- Model 42280
- Introduction
- Material list
- Supplied Materials
- Optional accessories
- Features
- Meter Description
- LCD Display Description
- Important Note before starting
- Meter Power
- Viewing the displayed readings
- Datalogger Basics
- List of Programming Modes
- Programming Mode P1; Number of readings (sample points) to record
- Programming Mode P2; Datalogger Start Modes
- Programming Mode P3; Datalog Start Time
- Programming Mode P4; Datalogger Sample Rate
- Programming Mode P5; High and Low Alarms
- Programming Mode P6; Real Time Clock
- Starting a Datalogging session
- Starting the Datalogger by push-button (Key Mode)
- Starting the Datalogger in Immediate Mode
- Starting the Datalogger in Schedule Mode
- Starting the Datalogger in Repeat Mode
- Connecting the Meter to a PC
- Running the supplied PC software
- Software Datalogging Parameters
- Transferring readings to PC
- Calibration Notes:
- Power is ON but there's no display
- Calibration Failure
- Flashing LED Indicators
- Error Codes
- Battery Replacement
Brand : Extech
Model : 42280
Category : Measurement