
OSD20 - Water dispenser OMEGA - Free user manual and instructions
Find the device manual for free OSD20 OMEGA in PDF.


| Product Type | Water Dispenser |
| Brand | Omega |
| Model | OSD20 |
| Dimensions (H x W x D) | 40 cm x 30 cm x 30 cm |
| Weight | 5 kg |
| Power Consumption | 500 W (heating), 100 W (cooling) |
| Voltage | 220-240 V, 50/60 Hz |
| Water Tank Capacity | 3 L (cold), 1.5 L (hot) |
| Temperature Settings | Hot (85-95°C), Cold (5-10°C), Room Temperature |
| Water Sources | Bottled water (standard 5-gallon bottle or compatible) |
| Functions | Hot water, cold water, room temperature water; child safety lock; indicator lights |
| Safety Features | Child lock, overheat protection, anti-drip nozzle |
| Cleaning | Descaling every 3 months with citric acid; clean drip tray and nozzles weekly |
| Maintenance | Replace water bottle; clean water tank; check for leaks |
| Spare Parts Available | Drip tray, water tank, faucets, heating element |
| Reparability | User-replaceable parts: drip tray, water tank; professional repair for electrical components |
| Certifications | CE, RoHS compliant |
| User Manual | Free download in PDF (12 pages, English) |
Frequently Asked Questions - OSD20 OMEGA
User questions about OSD20 OMEGA
0 question about this device. Answer the ones you know or ask your own.
Ask a new question about this device
Download the instructions for your Water dispenser in PDF format for free! Find your manual OSD20 - OMEGA and take your electronic device back in hand. On this page are published all the documents necessary for the use of your device. OSD20 by OMEGA.
USER MANUAL OSD20 OMEGA
Eat well, drink well and live well with Omega
www.omegajuicers.com
OSD10, OSD20 & OSD30 DRINK DISPENSER

natural_image
Four identical Omega-branded water pumps with black bases and transparent lids, arranged in a triangular pattern (no visible text or symbols on the pump bodies)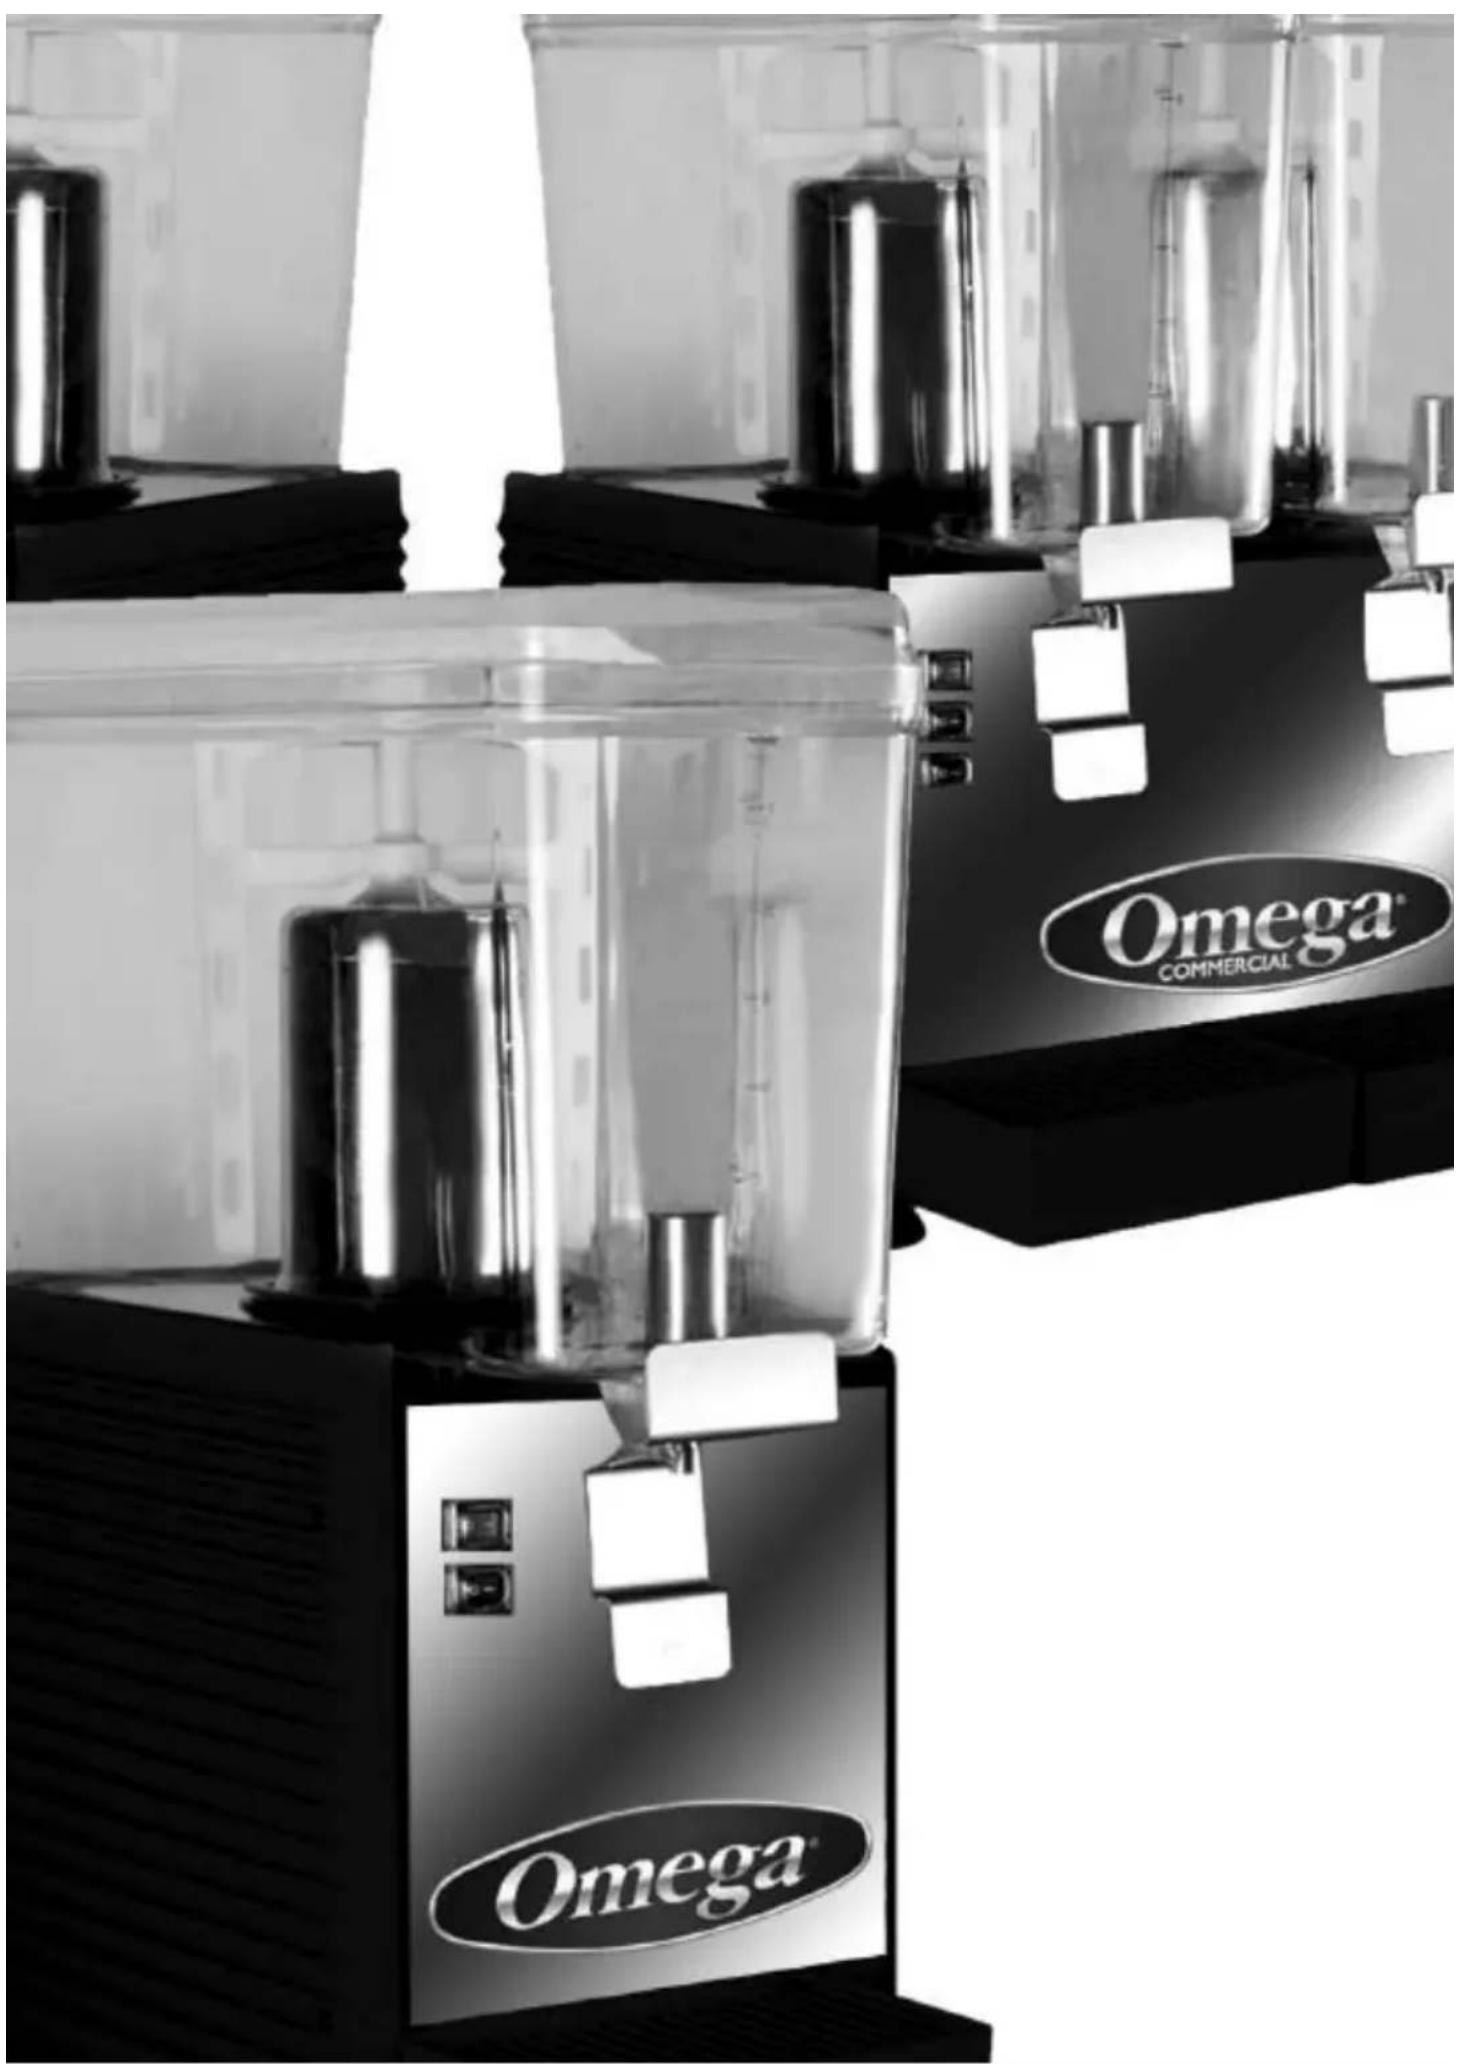
natural_image
Black-and-white photo of a row of Omega Commercial water pumps with clear glass and black casing (no visible text or symbols on main subject)TABLE OF CONTENTS
Specifications 3
Instructions for Machine Transport 4
Installation 4
Cleaning and Sanitizing Procedures 5
Exploded View 6
Parts List 7
Disassembly and Temperature Control 8
Electrical Diagram 9
Warranty 10
Specifications

OSD-10
Dimensions:
H 23in x W 8.6in x D 17in
H 59cm x W 22cm x D 43cl
Watts: 300
OSD-20
Dimensions;
H 23in x W 16in x D 17in
hh59cm x W 41cm x D 43c
Watts: 420
OSD-30
Dimensions:
H 23in x W 24in x D 17in
hh59cm x W 61cm x D 43cm
Watts: 500
Power Requirements:
Volts: 110/240VAC
Amps: OSD10: 3.2A / OSD20: 5.5A / OSD30: 7A
Hz: 50/60
Instructions for Machine Transport
NOTE: Refrigerated equipment must remain upright to avoid damage to the compressor. In order to prevent the oil contained in the compressor from flowing into the cooling system, it is necessary to always ship, carry, store and handle this drink dispenser in an upright position, following the instructions located on the packaging. Never ship, carry, store or handle this unit on its side.
1.1 RECEIVING
Each unit is completely tested under operating conditions and thoroughly inspected before shipment. At the time of shipment, the carrier is responsible for the unit and any claim for damage must be made with the carrier. Upon receiving units from the delivering carrier, carefully inspect the carton for visible indication(s) of damage. If damage exists, have carrier note same on bill of lading and file a claim with the carrier.
1.2 UNPACKING

A. Cut band and remove.
B. Carefully remove top portion of carton by lifting up, see figure 1.
C. Remove top inner carton pad from inside of packing box.
D. Inspect unit for concealed damage and if evident, notify delivering carrier and file a claim against same.
Installation Positioning the machine
The machine must be well ventilated. Leave an 8" (20 cm) clearance on the sides and back of the machine to allow proper ventilation. Installation of the machine near a heat source should be avoided. Some heat sources you should avoid locating this unit too close to are ovens, coffee machines, cold or frozen beverage dispensers or ice machines (equipment with compressors that expel hot air through its vents). A room temperature between 59°F (15°C) and 77°F (25°C) is recommended.
Connection to Main Power Supply
- The electrical safety of this drink dispenser can only be achieved if the machine is properly connected to an appropriate grounded receptacle that is in compliance with current national safety standards. Therefore, the manufacturer cannot be held responsible for damage and/or injury caused by failure to connect the unit to an appropriate source of power.
- For a safe and correct installation, connect the unit to a dedicated outlet.
- Do not alter the cord or plug in any way.
- The entire length of the power supply cord must not, in any way, be compressed, bent, or bunched together, nor may extension cords be used.
- Do not obstruct the ventilation vents on the side and rear panels of the unit. Insufficient ventilation will reduce the efficiency of the machine, causing it to function inadequately, and can cause serious damage. A minimum of eight inches (20cm) clearance is necessary on each side and behind the unit.
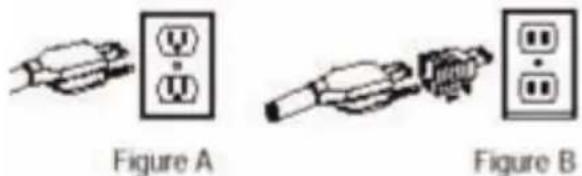
WARNING: THIS UNIT MUST BE PROPERLY ELECTRICALLY GROUNDED TO AVOID POSSIBLE FATAL ELECTRICAL SHOCK OR SERIOUS INJURY TO THE OPERATOR. THE POWER CORD IS PROVIDED WITH A THREE PRONG GROUNDED PLUG. IF A THREE-HOLE GROUNDED ELECTRICAL OUTLET IS NOT AVAILABLE, USE AN APPROVED METHOD TO GROUND THE UNIT. DO NOT USE EXTENSION CORDS WITH THIS UNIT. DO NOT "GANG" TOGETHER WITH OTHER ELECTRICAL DEVICES ON THE SAME OUTLET.
Cleaning and Sanitizing Procedures
Disconnect the unit from the power supply before sanitizing and cleaning, failure to do so may result in electric shock.
CAUTION: DO NOT USE ANY POWDERS OR ABRASIVE CLEANING COMPOUNDS THAT WILL DAMAGE THE FINISH.
Daily

Clean unit daily to optimize performance or when using dairy products. Regular cleaning of bowl components and removing dried-on beverage solids and pulp from moving sealed parts will result in maximum efficiency, proper seating and sealing, and prevention of leaks at the valve O-Ring and bowl gasket.
- Remove the product from bowls, fill them with warm water and flush each valve of dispenser until clear water flows from the nozzle.
- Remove drip tray and cup rest. Wash drip tray and cup rest thoroughly with warm, soapy water using a mild detergent. Rinse thoroughly with clean, warm water and reinstall drip tray and cup rest to dispenser.
- Wipe down dispenser to remove any product residue.
WARNING: REMOVE SANITIZING SOLUTION FROM DISPENSER AS INSTRUCTED. RESIDUAL SANITIZING SOLUTION LEFT IN SYSTEM COULD CREATE HEALTH HAZARD.
CAUTION: DO NOT SOAK NOZZLES IN CHLORINE SOLUTION OVERNIGHT. THIS WILL CAUSE NOZZLES TO SWELL AND PLASTIC WILL BEGIN TO DETERIORATE.
Weekly



- Remove the product from bowls, fill them with warm water and flush each valve of dispenser until clear water flows from the nozzle.
- Remove lid and wash thoroughly with warm, soapy water using a mild detergent. Rinse thoroughly with clean, warm water.
- Clean the bowls with warm, soapy water, and rinse thoroughly with clean, warm water.
- Remove paddles and nozzles. Wash thoroughly with warm, soapy water using a mild detergent. Rinse thoroughly with clean, warm water and replace.
- Fill each container up to the upper level mark with a cool, approved sanitizing solution with minimum 100 PPM available chlorine, but not to exceed 200 PPM.
Allow sanitizing solution to stand in containers for five (5) minutes
- Turn on motor(s) and allow sanitizer to mix around inside of bowl for a period of time as recommended by the sanitizer manufacturer, approximately 60 seconds.
Approved sanitizing solution is satisfactory for this purpose when mixed in a solution of 1 liquid ounce of cleaner to 4 gallons of water. For areas with extreme hard water, consult your local health authority.
- Drain sanitizer completely and thoroughly during each step of the cleaning process (wash, rinse, and sanitize).
Exploded View

Parts List
Item No. Part No. Description
1 PMT-S-6611 Bowl Cover
2 PMT-S-6622 Stirring Bar
3 PMT-S-6633 Stirring Paddle
4 PMT-S-6644 PC Bowl
5 PMT-S-6655 Bowl Gasket
6 PMT-S-6666 Covering
7 PMT-S-6677 Imminence O-Ring
8 PMT-S-6688 Fixed Shaft
9 PMT-S-6699 Refrigeration Bowl
10 PMT-S-6700 Motor Fixed Set
11 PMT-S-7653-1 Stirring Motor 110V
PMT-S-7653-2 Stirring Motor 220V
12 PMT-S-7654 Fluid Pin
13 PMT-S-7655 Spout O-Ring
14 PMT-S-7656 Fixed Metal Plate
15 PMT-S-7657-10 Back Panel- OSD10
PMT-S-7657-20 Back Panel- OSD20
PMT-S-7657-30 Back Panel- OSD30
16 PMT-S-7658-10 Front Panel- OSD10
PMT-S-7658-20 Front Panel- OSD20
PMT-S-7658-30 Front Panel- OSD30
17 PMT-S-7659-1-UL-BLK Side Panel (Black)
18 PMT-S-7660 Refrigeration Switch (RED)
19 PMT-S-7661 Stirring Switch (BLACK)
20 PMT-S-7662-1-BLK Drip Tray (Black)
24 PMT-S-8864-1 Motor Fixed Set (Left)
PMT-S-8864-2 Motor Fixed Set (Right)
25 PMT-S-8865 Temperature Control Switch
26 PMT-S-8866-4-1 Compressor- OSD10
PMT-S-8866-5 Compressor- OSD20
PMT-S-8866--9 Compressor- OSD30
27 PMT-S-8867-1 Condenser- OSD10
PMT-S-8867-2 Condenser- OSD20
PMT-S-8867-3 Condenser- OSD30
28 PMT-N-8868-10 Bracket For 2 Thermostat- OSD10
PMT-S-8868-1 Bracket For 2 Thermostat- OSD20
PMT-S-8868-2 Bracket For 2 Thermostat- OSD30
29 PSH-GL3010 Terminal Connectors Set
30 PMT-S-8870 Support Feet
31 PMT-S-9002 O-Ring
32 PMT-S-6622-1 Cap
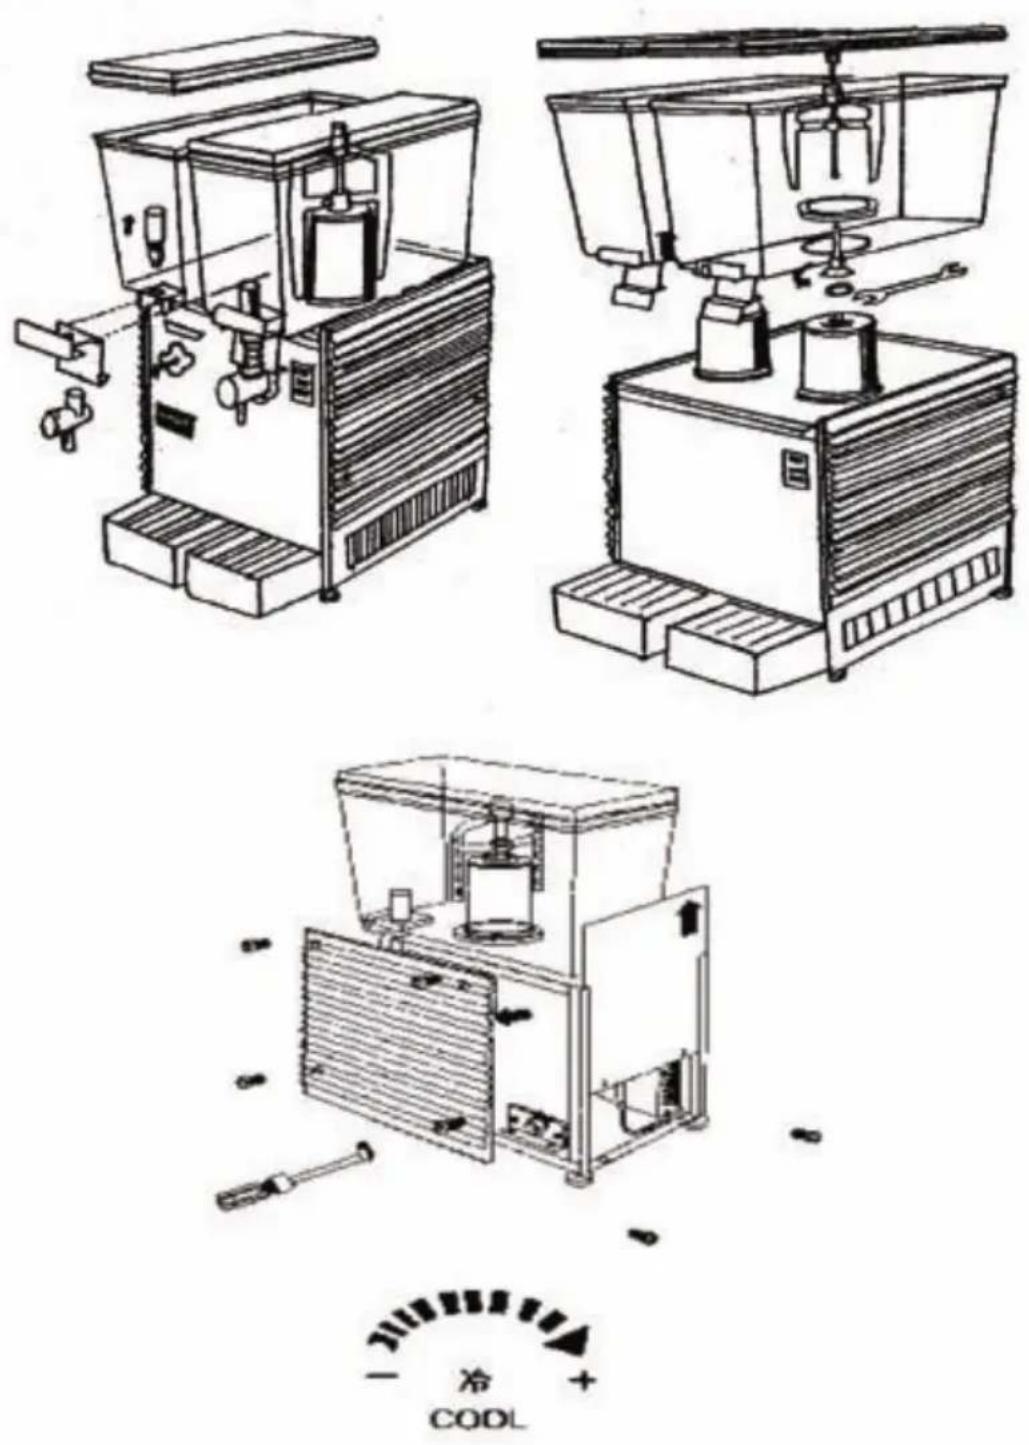
DISASSEMBLY & TEMPERATURE CONTROL
ELECTRICAL DIAGRAM MODEL (115V/220V)

flowchart
graph LR
    A["Power"] --> B["Switch A"]
    B --> C["SW"]
    B --> D["SW"]
    C --> E["MA"]
    D --> F["MB"]
    E --> G["TRA"]
    F --> H["THB"]
    G --> I["Motor"]
    H --> I
    I --> J["Motor"]
    J --> K["SB"]
    K --> L["COMP"]
    L --> M["φ-L"]
    M --> N["Ground"]

flowchart
graph TD
    A["7"] --> B["SW"]
    B --> C["10"]
    C --> D["THA"]
    D --> E["2"]
    E --> F["SR"]
    F --> G["C"]
    G --> H["START"]
    H --> I["COMP"]
    I --> J["COM"]
    K["SWA"] --> L["A"]
    M["SWB"] --> N["B"]
    O["FM"] --> P["10"]
    Q["LSA"] --> R["c"]
    S["LIMIT SWITCH B"] --> T["a"]
    U["MD"] --> V["b"]
    W["MD"] --> X["c"]
    Y["O-L"] --> Z["8"]
Limited Warranty:
One (1) Year Parts and Labor
OMEGA and Asbury Service Warranty & Parts (ASW&P) warrants to the original purchaser of the OMEGA Drink Dispenser and all parts thereof to be free from defects in material and workmanship while under normal use and service as indicated by the OMEGA installation and operating instructions for a period of one (1) year from the date of installation (warranty registration must be filed within 10 days of installation for warranty to be activated). OMEGA's obligation under this warranty shall be limited to repairing or replacing, including parts and labor, Monday thru Friday from 8:00a.m. to 5:00p.m. excluding holidays and weekends and reasonable travel not to exceed two (2) hours or one hundred (100) miles round trip, any part or assembly of such product which proves to be defective and which upon examination by an ASW&P authorized service technician shall disclose to our satisfaction to be defective. Neither Omega nor Asbury Service Warranty & Parts shall be held responsible for spoilage of products, loss of sales or consequential damages. Any after hours, premium or emergency service must have ASW&P's authorization prior to having service dispatched or a claim filed for warranty consideration. Other conditions and limitations may apply and can be found on the back of the warranty registration card (supplied separately).


- OSD10, OSD20 & OSD30 DRINK DISPENSER
- TABLE OF CONTENTS
- Specifications 3
- Specifications
- OSD-10
- OSD-20
- OSD-30
- Power Requirements:
- Instructions for Machine Transport
- RECEIVING
- UNPACKING
- Installation Positioning the machine
- Connection to Main Power Supply
- Cleaning and Sanitizing Procedures
- Daily
- Weekly
- Exploded View
- Parts List
- Item No. Part No. Description
- DISASSEMBLY & TEMPERATURE CONTROL
- ELECTRICAL DIAGRAM MODEL (115V/220V)
- Limited Warranty:
Brand : OMEGA
Model : OSD20
Category : Water dispenser