
Wanderer X - Stroller SAFETY 1ST - Free user manual and instructions
Find the device manual for free Wanderer X SAFETY 1ST in PDF.


| Product Type | 3-Wheel Stroller |
| Brand | Safety 1st |
| Model | Wanderer X |
| Suitable Age/Weight | Newborn to 17 kg (37.5 lbs) |
| Maximum Child Weight | 17 kg (37.5 lbs) |
| Maximum Shopping Basket Weight | 4 kg (8.8 lbs) |
| Harness Type | 5-point adjustable harness |
| Brake Type | Foot-operated, red/green indicators |
| Front Wheel | Swivel wheel with lock |
| Canopy | Extendable with side zip |
| Seat Orientation | Forward and rearward facing |
| Backrest Recline | 3 positions |
| Handle Height Adjustment | Yes, multiple positions |
| Legrest Adjustment | Yes, adjustable |
| Tether Strap | Included |
| Tires | Never Flat, maintenance-free |
| Folding Mechanism | Compact fold with storage latch |
| Compatible Accessories (sold separately) | Wanderer Bassinette, Maxi-Cosi Infant Carrier, Universal Raincover |
| Care Instructions | Wipe frame with damp cloth; spot clean fabrics; lubricate wheels occasionally; store dry |
| Safety Standards | AS/NZS 2088:2013 |
Frequently Asked Questions - Wanderer X SAFETY 1ST
User questions about Wanderer X SAFETY 1ST
0 question about this device. Answer the ones you know or ask your own.
Ask a new question about this device
Download the instructions for your Stroller in PDF format for free! Find your manual Wanderer X - SAFETY 1ST and take your electronic device back in hand. On this page are published all the documents necessary for the use of your device. Wanderer X by SAFETY 1ST.
USER MANUAL Wanderer X SAFETY 1ST

natural_image
Black and white stroller with black body and gray canopy, no visible text or symbolsCONTENTS
Warnings 3
Components list 4 - 5
Wheel Assembly 7 - 8
Fitting Seat 9
Bumper Bar 10
USING THE STROLLER
Canopy 11
Front Swivel Wheel 12
Operating Brakes 13
Adjusting Handle / Backrest / Legrest 14 - 15
Securing your Child 16
Adjusting Harness Height / Tether Strap 17
Folding / Unfolding / Carrying Stroller 18 - 19
BASSINETTE AND INFANT CARRIER
Install and Use Bassinette 20 - 22
Install and Use Infant Carrier 23 - 24
CARE AND MAINTENANCE
Care and Maintenance 25
Notes 26 - 27
CONTACTS
Customer Service 28
These instructions detail the safe use, assembly and maintenance of your product. Please read these instructions carefully and ensure that they are followed at all times. Failure to do so could result in serious injury or death.

WARNING TO AVOID INJURY OR DEATH:
ALWAYS APPLY THE BRAKES WHENEVER THE STROLLER IS STATIONARY.
• DO NOT LEAVE CHILDREN UNATTENDED.
• DO NOT CARRY EXTRA CHILDREN OR BAGS ON THIS STROLLER.
- MAKE SURE CHILDREN ARE CLEAR OF ANY MOVING PARTS IF YOU ADJUST THE STROLLER, OTHERWISE THEY MAY BE INJURED.
- SECURE THE CHILD IN THE HARNESS AT ALL TIMES AND ENSURE THAT THE SAFETY HARNESS IS ADJUSTED FIRMLY BUT COMFORTABLY TO THE CHILD'S BODY.
- A harness can form loops that may be a strangulation hazard, never leave harness straps connected when not fitted to a child in the stroller.
- Use the tether strap to prevent the stroller rolling away.
- Do not allow children to stand on the seat or footrest.
- Do not attempt to lift the stroller by the bumper bar.
- Remove the child from the stroller before going up or down stairs or escalators.
- Engage front wheel swivel locks when travelling on rough or uneven surfaces.
- Regularly inspect the stroller for any parts that are loose, broken, torn or missing. Attend to the problem as soon as it is noticed.
- Use only those accessories which are supplied by Dorel Australia and approved for use with this stroller.
- Do not use the stroller near an open fire, barbecue or exposed flame.
- This product is not intended for commercial use.
- Do not run or jog with this stroller.
• This product is tested to AS/NZ 2088:2013
Components Sold Separately
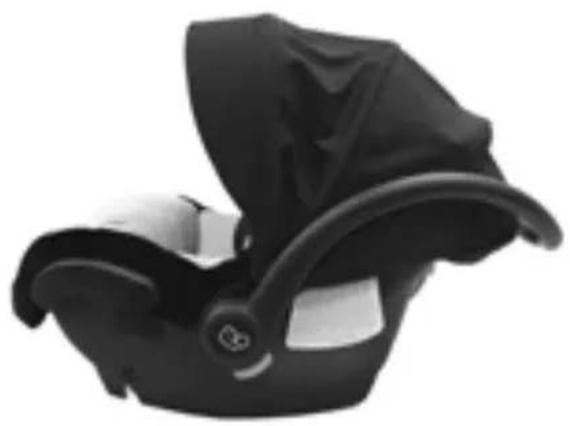
natural_image
Black baby car seat with a white strap and black fabric cover (no text or symbols visible)Maxi-Cosi Infant Carrier
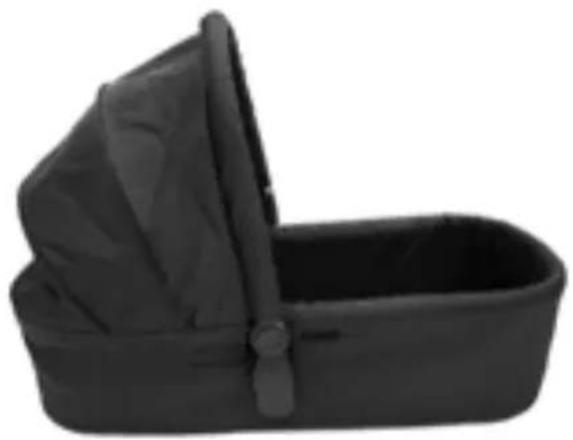
natural_image
Black plastic box with a handle and lid, no visible text or symbolsWanderer Bassinette

natural_image
Black and white photo of a baby stroller with transparent cover, no visible text or symbolsSafety 1st Universal Raincover
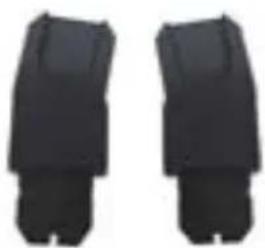
natural_image
Two black plastic or plastic component blocks with no visible text or symbolsMaxi-Cosi Infant Carrier Adaptors x2
Note:
• The weight of the child using this stroller should not be more than 17kg.
• Total weight for the shopping basket should not be more than 4kg.
- The weight of the child using the Infant Carrier should not be more than 9kg.
- The weight of the child using the Bassinette should not be more than 9kg.
- Please refer to instruction manuals of the Maxi-Cosi Infant Carrier & Wanderer Bassinette for full weight and height specifications.

- Handle Height Adjustment
- Tether Strap
- Folding Lock (both sides)
- Storage Latch
- Shopping Basket
- Brake Lever (both sides)
- Rear Wheels Assembly
-
Never Flat Tyres (x3)
-
Canopy
- Marle Seat Pad
- Bumper Bar
- Harness Pads
- Safety Harness
- Adjustable Legrest
- Swivel Wheel Lock
- Front Wheel
Assembling: Wanderer Stroller
OPENING STROLLER
- If the stroller has a security tie, please remove it.
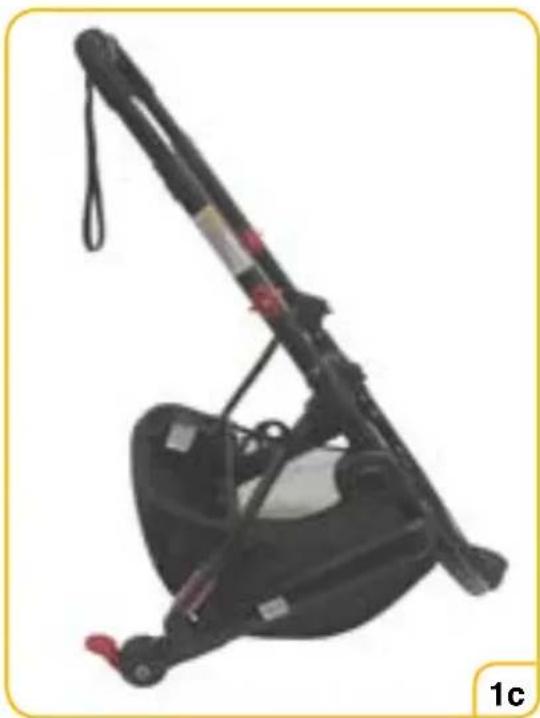
- Lift storage latch to release, as per Figure 1a.
- Unfold stroller by lifting handle as per Figure 1b until the locking mechanism engages, as per Figure 1c.

natural_image
Black and red portable toy vehicle with coiled cable and wheels, no visible text or symbols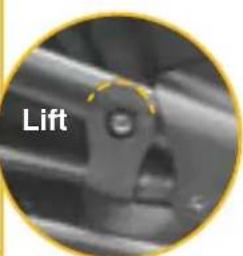
Storage Latch

natural_image
Black safety harness device with attached seat and lever mechanism (no visible text or symbols)Note:
- Folding strollers and accessories will always have the potential to trap fingers or parts of the body between moving parts, causing injuries. Care should be taken while folding or unfolding.
- This vehicle is designed for use on flat or gently sloping surfaces and may be unstable on higher sloping and uneven surfaces. You should always be aware of the possibility of the stroller tipping on uneven or higher sloping surfaces.
Assembling: Wanderer Stroller
TO FIT REAR WHEELS
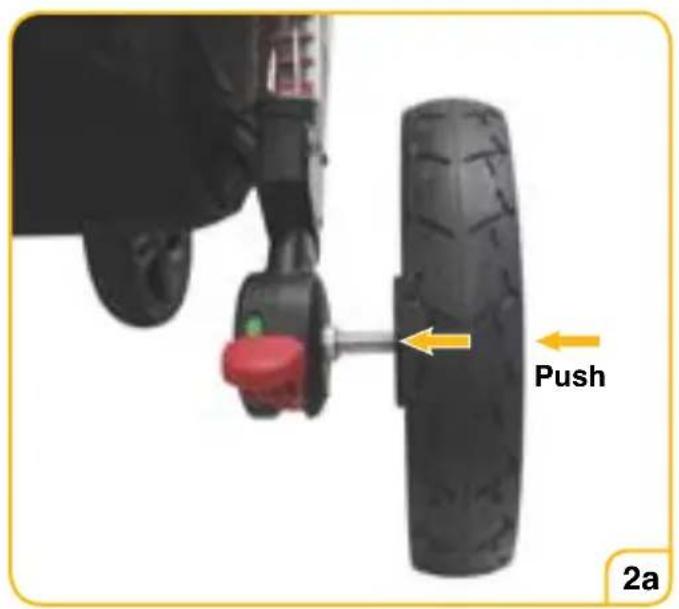
- Slide rear wheel onto the wheel hub, as per Figure 2a.
- Repeat for other side.
TO REMOVE REAR WHEELS
- Push and hold metal tab, as per Figure 2b.
• Pull rear wheel from the hub, as per Figure 2c. - Repeat on other side.


Note:
Never Flat tyres do not require air. The tyres are maintenance free.
Assembling: Wanderer Stroller
TO FIT FRONT WHEEL
- Lift the front of the stroller and push the shaft into the front wheel hub, as per Figure 3a.
- Listen for 'CLICK' to confirm locking position.
TO REMOVE FRONT WHEEL
- Slide the plastic button while pulling the front wheel off the front hub, as per Figure 3b.

TO FIT THE SEAT
- The seat can be positioned in either the forward facing Figure 4a or rearward facing Figure 4c configuration. Insert the seat onto the frame by lowering the seat into the frame, as per Figure 4b.
- Listen for 'CLICK'.
TO REMOVE THE SEAT
- Slide and hold down button (A) with one hand and press button (B) with the other hand, as per Figure 4d.
- Then press button (C) and lift out the seat, as per Figure 4e.

natural_image
Black stroller with black canopy and four wheels, no visible text or symbols

natural_image
Black baby stroller with open canopy and wheels (no text or symbols visible)


WARNING
Do not use this seat with any other models of stroller.
Using: Wanderer Stroller
TO FIT BUMPER BAR
- Align bumper bar mounting slider with the mounting brackets, as per Figure 5a and slide down until it locks into place.
- Repeat on other side.
TO REMOVE BUMPER BAR
- Remove bumper bar from frame.
- Press the plastic button and slide bumper bar upwards, as per Figure 5b & Figure 5c.


Using: Wanderer Stroller
TO FIT THE CANOPY
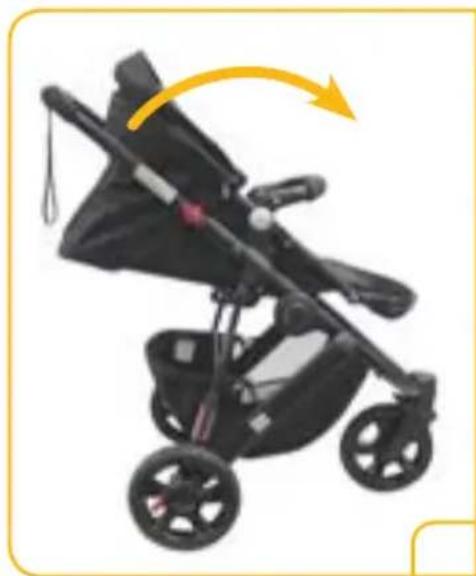
- Align the ends of the canopy with the stroller frame and push down until it locks into place, as per Figure 6a.
- Pull the front edge of the canopy to open, as per Figure 6c & 6d.
- Extend canopy by opening the zip on the side, as per Figure 6e.
TO REMOVE THE CANOPY
- Close the zip.
- Push canopy backwards.
- To remove canopy, pull the canopy ends from the mounting brackets, as per Figure 6b.


natural_image
Black stroller with yellow directional arrow indicating rotation (no text or symbols)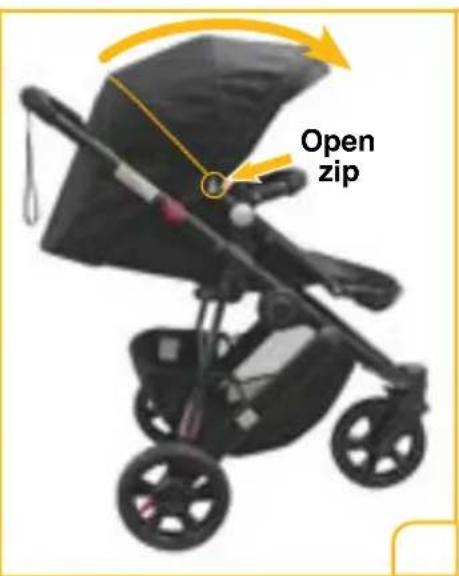

natural_image
Black stroller with yellow motion arrow indicating rotation (no text or symbols on the device itself)Using: Wanderer Stroller
FRONT SWIVEL WHEEL
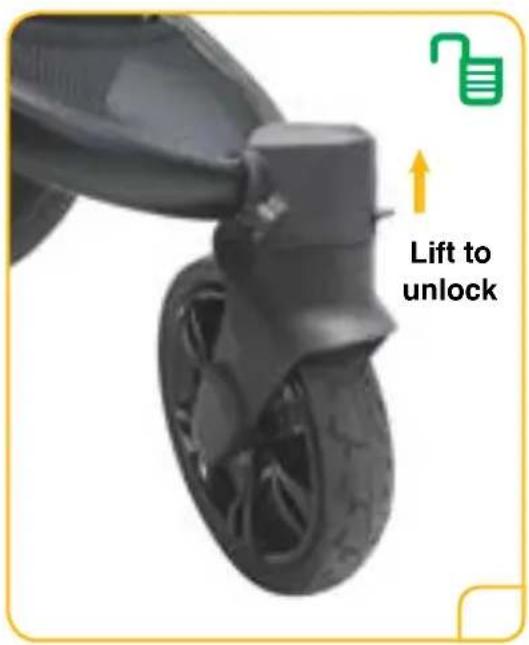
• TO LOCK: Push the swivel lock downwards, as per Figure 7a.
• TO UNLOCK: Lift the swivel lock upwards, as per Figure 7b.

Using: Wanderer Stroller
OPERATING BRAKES
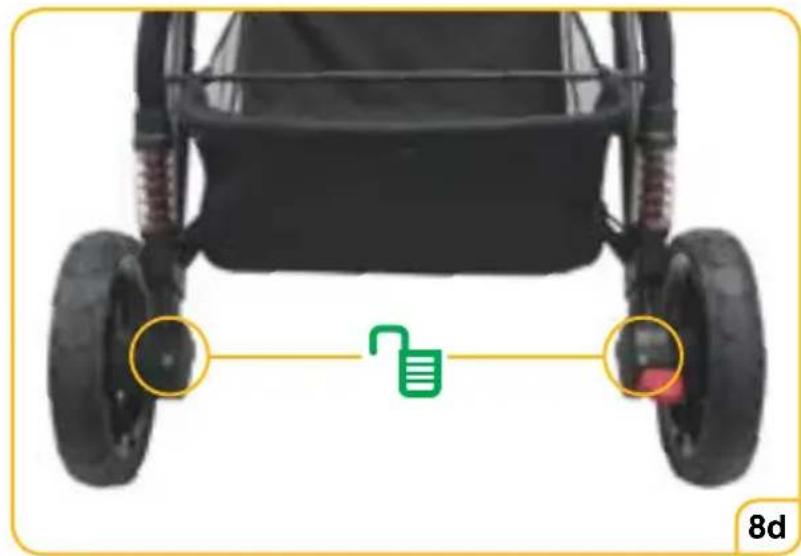
• TO APPLY THE BRAKES: Press down firmly on the brake pedal using the ball of your foot, as per Figure 8a.
• Both indicators should be red, as per Figure 8b.


natural_image
Front view of a toy car with wheels and a red sensor device connected to the lower side (no text or symbols visible)• TO RELEASE THE BRAKES: Lift the red brake pedal until it is fully disengaged, as per Figure 8c.
• Both indicators should be green, as per Figure 8d.

natural_image
Front view of a black toy car with four wheels and a green icon indicating a location or interaction point (no text or symbols on the vehicle itself)
WARNING
Apply all the brakes whenever you park the stroller.
Using: Wanderer Stroller
ADJUSTING HANDLE
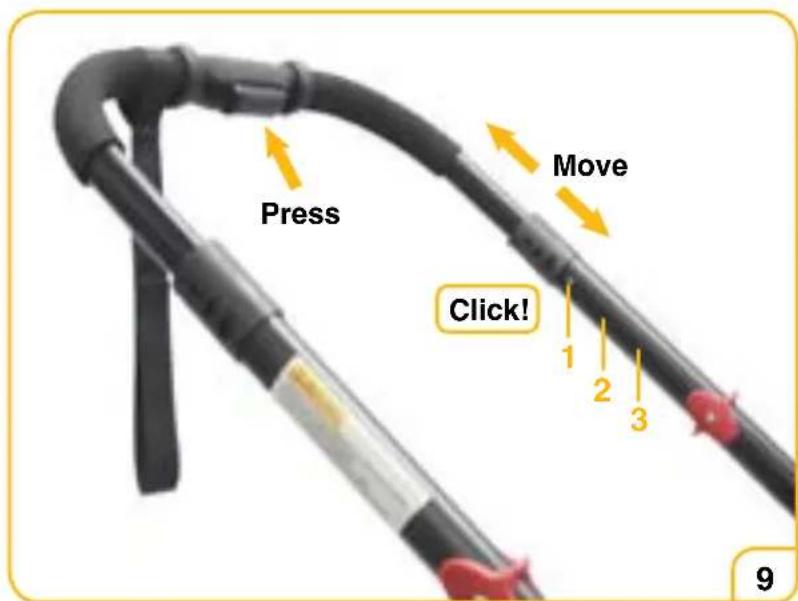
- Press adjustment button and pull the handle up or downward to the desired position, as per Figure 9.
Note: Listen for click.
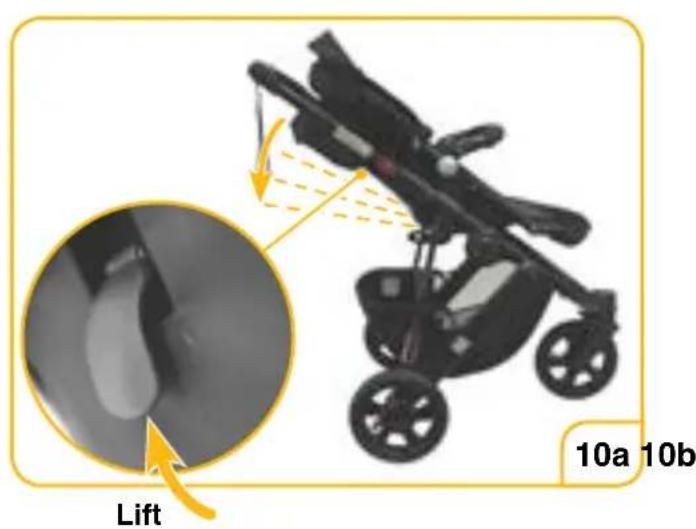
- Lift the lever, as per Figure 10a and set the backrest to the desired position, as per Figure 10b.
Note: The backrest can be adjusted to 3 different positions.

natural_image
Black stroller with yellow arrow indicating motion or change (no text or symbols)Using: Wanderer Stroller
ADJUSTING THE LEGREST
- Press both adjustment buttons simultaneously and lift to the desired position, as per Figure 11a & 11b.
Note: Listen for click.


SECURING YOUR CHILD
5 points of the harness can be adjusted by moving each straps' slider (figure A1).
To tighten or loosen the waist and/or shoulder straps, hold and lift the plastic adjuster. Adjust straps to desired position. The waist strap needs to fit firmly around the child.
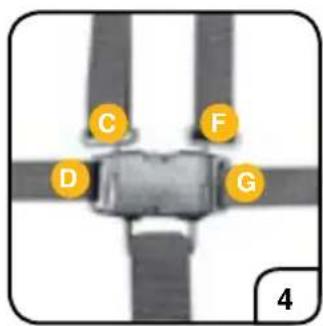
- Slip one shoulder strap (A) over each shoulder and position crotch strap between legs (B)

- Place buckle prong (D) on top of buckle prong (C)
- Insert the prongs into the buckle housing (E) until it clicks into position. Repeat the above steps for the opposite side (F and G). Pull straps to ensure they are locked into the buckle assembly.
- The harness should resemble this image.
- The buckle is released by squeezing the top and bottom prongs together until harness disengages. (Figure 5).



ADJUSTING HARNESS HEIGHT
- The harness can be set at varying heights to accommodate the child, depending on the model.
- To change the shoulder harness height, position the shoulder straps near the child's shoulders and push the shoulder harness tongue out of the current harness slot and through the back of the seat. Pull the shoulder harness tongue through the desired slot.

natural_image
Person placing a dark object on a backpack with an arrow pointing to it (no text or symbols visible)
WARNING:
• Use this harness at all times.
• A five-point harness is provided to secure your child.
- When not in use disconnect shoulder straps from the waist strap and buckle.
- The adjusted harness should closely fit the child.
TETHER STRAP

WARNING:
USE THIS STRAP TO STOP THE STROLLER ROLLING AWAY.
- Correct use of the tether strap will prevent stroller runaway and possible injury to the stroller occupant.
- Whenever a child is in the stroller and brakes are not engaged, the large loop should be around your wrist, as per Figure 14.

natural_image
Close-up of a person adjusting a backpack with a strap (no visible text or symbols)FOLDING STROLLER
- Apply brakes.
- Fold the canopy.
- Unlock the front swivel wheel.
- Adjust the seat backrest to full layback position.
- Pull the folding locks on both sides up and simultaneously press down to fold the stroller, as per Figure 15a.
- Fold the stroller, as per Figure 15b.
• Storage latch will automatically lock, as per Figure 15b.
Note: Lift handle to check that the lock has fully engaged.


UNFOLDING STROLLER
• Refer to page 6, Opening Stroller, and follow same steps to unfold.
Using: Wanderer Stroller
CARRYING STROLLER
- Fold the stroller, and ensure sure that storage latch is applied before continuing.
- Carry stroller by holding frame between folding lock and storage latch, as per Figure 16. Avoid holding the stroller in other locations to avoid injury from moving parts.


WARNING TO AVOID INJURY OR DEATH:
- WARNING: Do not use this bassinette once the child can sit up unaided.
- WARNING: Do not let other children play unattended near the bassinette.
- WARNING: Do not use if any part is broken, torn or missing.
- WARNING: Use only on a firm ground which is horizontal, level and dry.
- Only use the mattress supplied with this bassinette.
FITTING THE WANDERER BASSINETTE
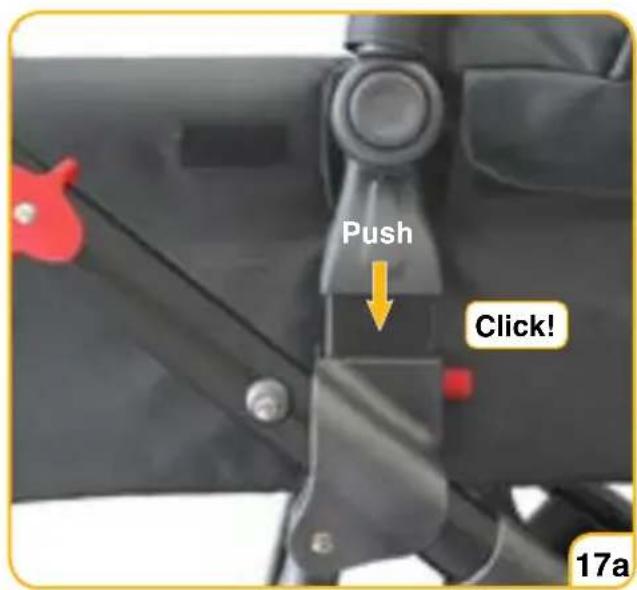
- Position the bassinette in REARWARD FACING ONLY, as per Figure 17c.
- Insert the bassinette into the frame, as per Figure 17a.
- Listen for 'CLICK'.
- Your stroller with bassinette is now ready for use.

natural_image
Black stroller with a matching backrest and wheels, labeled '17b' in the corner (no other text or symbols)×

natural_image
Black stroller with a baby in a bun, shown in a simple line drawing style (no text or symbols)√
CORRECT POSITIONINCORRECT P
Using: Bassinette (Sold Separately)
TO REMOVE THE BASSINETTE
- Slide and hold down button (A) with one hand and press button (B) with the other hand, as per Figure 18a.
- Then press button (C) and lift out the bassinette, as per Figure 18b.


SECURING YOUR CHILD
- The buckle is released by squeezing the buckle tongues together, as per Figure 19.
- Place infant in the bassinette and reattached the buckle.

Using: Bassinette (Sold Separately)
TO FIT THE BOOTCOVER
- Place the end of the footcover over the bassinette, attach the velcro on both sides.
- Inside the hood of the bassinette are two press studs, attach these to studs located on the lower inside of the bassinette hood, as per Figure 20.

Using: Infant Carrier (Sold Separately)
FITTING MAXI-COSI INFANT CARRIER
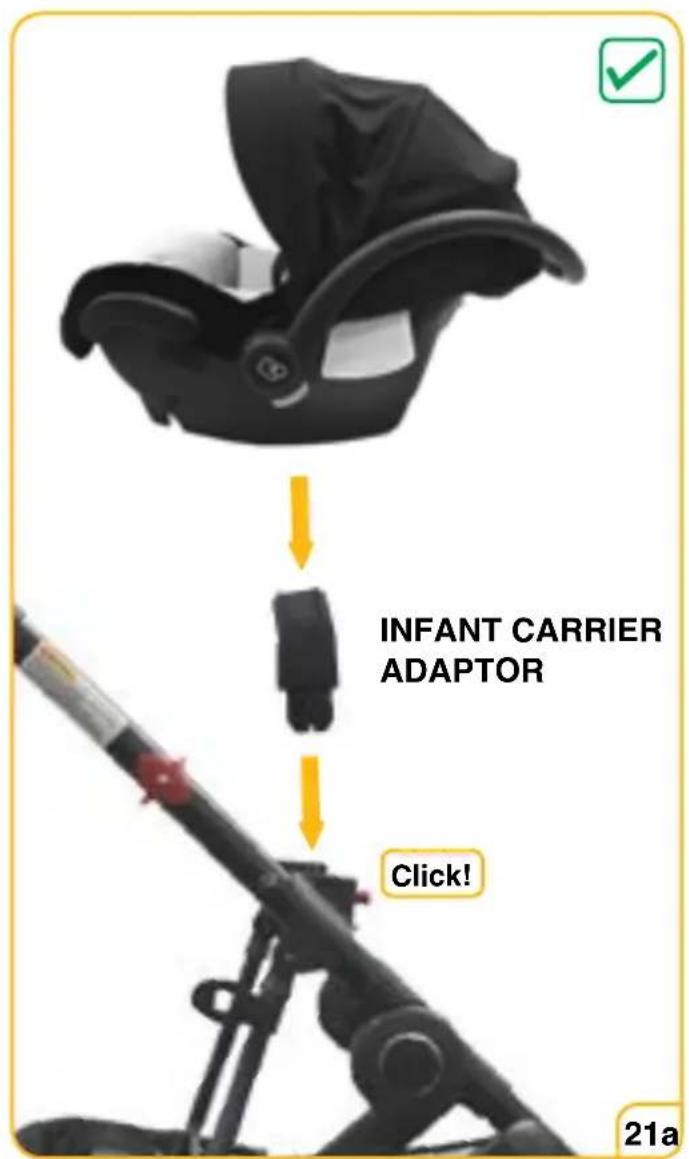
- Insert the adaptor followed by the infant carrier into the frame REARWARD-FACING ONLY as per Figure 21a. Listen for ‘CLICK’.
- Maxi-Cosi adaptors are marked with either an 'R' or 'L'. When looking from the rear of the stroller, the adaptor marked 'R' should be fitted in the right-hand side, as per Figure 21a.
Ensure top tether strap for car use has been stored in accordance with instructions provided with Infant Carrier. DO NOT attempt to install the Infant Carrier into the stroller with child FACING FORWARD. For harness fitting & adjustment instructions for your Infant Carrier, please consult your instructions supplied with your Infant Carrier.
CORRECT POSITION

INCORRECT POSITION
Using: Infant Carrier (Sold Separately)
TO REMOVE THE INFANT CARRIER AND ADAPTORS
- Press both grey buttons to unlock the infant carrier and lift the infant carrier off the frame, as per Figure 22.
- To remove the infant carrier adaptors, press the buttons on the frame and pull adaptors off.

Care and Maintenance
CARE AND MAINTENANCE
• Always store in a clean and dry place.
- Clean the frame by wiping with a damp cloth.
- Do not use abrasives, bleach or strong detergents.
- Spot clean fabrics with warm water and mild soap.
- Ensure fabric is dry before storing.
- Occasionally clean and lubricate wheels with a light lubricating oil.
- Regularly check for loose parts and tighten when required.
- Damaged or broken parts should be immediately replaced.
Notes
Notes
safety1st.com.au
DOREL AUSTRALIA PTY LTD
655-685 Somerville Road
Sunshine West Victoria 3020
Email: customerservice@dorel.com.au
Phone: 1300 809 526
Hours: 8:30 am - 5:00 pm
Monday to Friday
IGC DOREL NEW ZEALAND LTD
14 Sir William Avenue
East Tamaki Auckland 2013
Email: customerservice@igc.co.nz
Phone: 0800 628 000 (toll free)
Hours: 8:00 am - 5:00 pm
Monday to Friday




- CONTENTS
- USING THE STROLLER
- BASSINETTE AND INFANT CARRIER
- CARE AND MAINTENANCE
- CONTACTS
- WARNING TO AVOID INJURY OR DEATH:
- Components Sold Separately
- Note:
- Assembling: Wanderer Stroller
- OPENING STROLLER
- TO FIT REAR WHEELS
- TO REMOVE REAR WHEELS
- TO FIT FRONT WHEEL
- TO REMOVE FRONT WHEEL
- TO FIT THE SEAT
- TO REMOVE THE SEAT
- WARNING
- Using: Wanderer Stroller
- TO FIT BUMPER BAR
- TO REMOVE BUMPER BAR
- TO FIT THE CANOPY
- TO REMOVE THE CANOPY
- FRONT SWIVEL WHEEL
- OPERATING BRAKES
- ADJUSTING HANDLE
- ADJUSTING THE LEGREST
- SECURING YOUR CHILD
- ADJUSTING HARNESS HEIGHT
- WARNING:
- TETHER STRAP
- USE THIS STRAP TO STOP THE STROLLER ROLLING AWAY.
- FOLDING STROLLER
- UNFOLDING STROLLER
- CARRYING STROLLER
- FITTING THE WANDERER BASSINETTE
- Using: Bassinette (Sold Separately)
- TO REMOVE THE BASSINETTE
- TO FIT THE BOOTCOVER
- Using: Infant Carrier (Sold Separately)
- FITTING MAXI-COSI INFANT CARRIER
- TO REMOVE THE INFANT CARRIER AND ADAPTORS
- Notes
- safety1st.com.au
Brand : SAFETY 1ST
Model : Wanderer X
Category : Stroller