
S'mores Maker - S'mores Maker BELLA - Free user manual and instructions
Find the device manual for free S'mores Maker BELLA in PDF.


| Product Type | S'mores Maker |
| Brand | Bella |
| Model | S'mores Maker |
| Power Source | 120V AC, 60Hz |
| Indicator Lights | Power ON (orange), Ready (green) |
| Cooking Surface | Non-stick upper and lower plates |
| Basket Type | Removable metal basket with locking handles |
| Basket Capacity | Fits 1-2 standard s'mores (dependent on ingredient sizes) |
| Dishwasher Safe Parts | Metal basket (top rack) |
| Preheat Time | Approximately 2 minutes |
| Cooking Time | Approximately 5 minutes per batch |
| Plug Type | Polarized plug (one wider blade) |
| Cord Length | Short power supply cord (less than 3 ft) |
| Safety Features | Auto shut-off? No, must unplug after use; caution hot surfaces |
| Warranty | Limited 2-year warranty on mechanical parts; 90 days on non-mechanical |
| Cleaning Instructions | Wipe plates with damp cloth; basket dishwasher safe; condition with oil before use |
| Storage | Store locked basket inside unit; wrap cord under base |
| Additional Features | Includes recipe guide for classic and creative s'mores |
| Recommended Use | Indoor household use only |
Frequently Asked Questions - S'mores Maker BELLA
User questions about S'mores Maker BELLA
0 question about this device. Answer the ones you know or ask your own.
Ask a new question about this device
Download the instructions for your S'mores Maker in PDF format for free! Find your manual S'mores Maker - BELLA and take your electronic device back in hand. On this page are published all the documents necessary for the use of your device. S'mores Maker by BELLA.
USER MANUAL S'mores Maker BELLA
natural_image
Open kitchen grater with six grates, open lid open (no text or symbols visible)S'MORES MAKER
Instruction Manual and Recipe Guide
MÁQUINA DE S'MORES
www.bellahousewares.com
natural_image
Abstract logo design featuring a heart and stylized letter 'T' (no text or symbols)THANK YOU
for your purchase
REGISTER AND SIGN UP

natural_image
Generic user profile icon with a plus sign, no text or symbols presentfor special announcements and trendy recipes!
TELL US WHAT YOU THINK!

natural_image
Silhouette of a person with five stars above it, no text or symbols presentRate, review or ask us a question.
GO TO: bellahousewares.com
myBELLAlife


Table of Contents
Important Safeguards....2-3
Additional Important Safeguards....3
Notes on the Plug ....3
Notes on the Cord....4
Plasticizer Warning....4
Electric Power....4
Getting to Know Your S'mores Maker....5
Before using for the First time....6
Operating Instructions....6-7
User maintenance instructions....7
Care & Cleaning Instructions....7
Storage Instructions....8
You Don't Need A Campfire 8
Recipes....9-11
Warranty 12
Índice
WARNING: When using electrical appliances, basic safety precautions should always be followed, including the following:
- Read all instructions before using appliance.
- Do not touch hot surfaces. Use handles or knobs.
- To protect against risk of electric shock, do not immerse or partially immerse the cord, plugs, or the entire unit in water or any other liquid.
-
This appliance is not intended for use by persons (including children) with reduced physical, sensory or mental capabilities, or lack of experience and knowledge, unless they have been given supervision or instruction concerning use of the appliance by a person responsible for their safety.
-
Close supervision is necessary when any appliance is used by or near children.
-
Unplug from wall outlet when not in use and before cleaning. Allow to cool before putting on or taking off parts, and before cleaning or storing this appliance.
-
Never yank the cord to disconnect the appliance from the outlet. Instead, grasp the plug and pull to disconnect.
-
Do not operate any appliance with a damaged cord or plug or after the appliance malfunctions, or has been damaged in any manner. Return appliance to the nearest authorized service facility for examination, repair or adjustment.
-
The use of accessories attachments not recommended by the appliance manufacturer may cause fire, electrical shock or injuries.
-
Do not use outdoors. This is for household only.
-
Do not use for commercial purposes.
-
Do not let the electrical cord hang over the edge of the table or counter, or touch hot surfaces.
-
Do not place on or near a hot gas or electric burner or in a heated oven.
-
Use on a heat-resistant, flat level surface only.
-
Extreme caution must be used when moving an appliance containing hot food, hot water, hot oil or other hot liquids.
-
This appliance has a polarized plug (one blade is wider than the other). To reduce the risk of electric shock, this plug is intended to fit into a polarized outlet only one way. If the plug does not fit fully into the outlet, reverse the plug. If it still does not fit, contact a qualified electrician. Do not attempt to modify the plug in any way.
-
The cord to this appliance should be plugged into a 120V AC electrical outlet only.
-
A short power-supply cord is to be provided to reduce the risk resulting from becoming entangled in or tripping over a longer cord.
-
Longer extension cords are available and may be used if care is exercised in their use.
-
If an extension cord is used:
a. The marked electrical rating of the detachable power-supply cord or extension cord should be at least as great as the electrical rating of the appliance,
b. If the appliance is of the grounded type, the extension cord should be a grounding type 3-wire cord; and
c. The longer cord should be arranged so that it will not drape over the counter top or table top where it can be pulled on by children or tripped over unintentionally.
-
To disconnect, remove plug from outlet.
-
Always unplug after use. The appliance will remain ON unless unplugged.
- CAUTION HOT SURFACES: This appliance generates heat during use. Proper precautions must be taken to prevent the risk of burns, fire or other damage to persons or property.
- When using this appliance, provide adequate ventilation above and on all sides for air circulation. Do not allow this appliance to touch curtains, wall coverings, clothing, dish towels or other flammable materials during use.
- Use with wall receptacle only.
- Do not use appliance for other than intended use.
- The appliance is only to be operated in the closed operation.
SAVE THESE INSTRUCTIONS
ADDITIONAL IMPORTANT SAFEGUARDS
CAUTION: This appliance is hot during operation and retains heat for some time after turning OFF. Always wear oven mitts when handling hot materials and allow metal parts to cool before cleaning. Do not place anything on top of the appliance while it is operating or while it is hot.
- All users of this appliance must read and understand this Instruction Manual before operating or cleaning this appliance.
- Do not leave this appliance unattended during use.
- WARNING: To avoid burns and personal injury, do not grasp the metal basket's side handles during or after baking to raise the lid. Always use the lid handle to open the S'Mores Maker.
- WARNING: The metal basket gets hot during baking. Use basket handles to remove basket from the S'Mores Maker. Always wear oven mitts when handling and unlocking hot basket. Allow metal basket to cool before cleaning.
Notes on the Plug
This appliance has a polarized plug (one blade is wider than the other). To reduce the risk of electric shock, this plug will fit in a polarized outlet only one way. If the plug does not fit fully into the outlet, reverse the plug. If it still does not fit, contact a qualified electrician. Do not modify the plug in any way.
Notes on the Cord
A. A short power-supply cord (or detachable power-supply cord) is to be provided to reduce the risk resulting from becoming entangled in or tripping over a longer cord.
B. Longer detachable power-supply cords or extension cords are available and may be used if care is exercised in their use.
C. If a long detachable power-supply cord or extension cord is used:
- The marked electrical rating of the cord or extension cord should be at least as great as the electrical rating of the appliance;
- If the appliance is of the grounded type, the extension cord should be a grounding-type3-wire cord
- The longer cord should be arranged so that it does not drape over the countertop or table top where it can be pulled on by children or tripped over unintentionally.
Plasticizer Warning
CAUTION: To prevent Plasticizers from migrating to the finish of the counter top or table top or other furniture, place NON-PLASTIC coasters or place mats between the appliance and the finish of the counter top or table top. Failure to do so may cause the finish to darken; permanent blemishes may occur or stains can appear.
Electric Power
If the electrical circuit is overloaded with other appliances, your appliance may not operate properly. It should be operated on a separate electrical circuit from other appliances.
Getting to Know Your S'mores Maker
Product may vary slightly from illustration
Figure 1

Before using for the First time
- Carefully unpack the S'Mores Maker and remove all packaging and materials.
- Before using your S'Mores Maker for the first time, wipe the cooking plates with a damp cloth to remove all dust, and then dry.
-
Wipe outer surfaces with a slightly damp, soft cloth or sponge.
-
Rinse the metal basket and dry.
CAUTION: Take care to prevent water from running into the appliance. NEVER IMMERSE S'MORES MAKER BODY IN WATER OR ANY OTHER LIQUIDS!
- Place the empty locked metal basket onto the lower cooking plate. Make sure the basket's handles fit into the notches in the body of the S'Mores Maker. (See Figure 2.)
Figure 2

natural_image
Line drawing of a rectangular kitchen grater with side handles and internal compartments (no text or symbols)- Set the appliance on a dry, clean and flat surface. Keep the S'Mores Maker closed until needed.
Operating Instructions
- Plug closed S'Mores Maker unit into a 120V AC electrical outlet to preheat. The orange POWER ON light will illuminate. NOTE: When the S'Mores Maker is heated for the first time, it may emit slight smoke or odor. This is normal and should disappear after 1 or 2 uses. This does not affect the safety of the appliance. However, as it may affect the flavor of the first s'mores prepared in the S'Mores Maker, it is recommended that these be discarded.
- While preheating, prepare s'mores.
- Find a clean workspace: a large cutting board or large plate works well. Gather all ingredients before beginning.
- Place the metal basket base (with handles) open onto the workspace and fill with s'mores. (See Figure 3.)
Figure 3

natural_image
Technical line drawing of a cylindrical mechanical component with flanges (no text or symbols)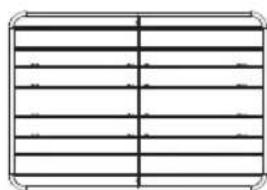
natural_image
Pure electrical circuit lines without any symbolsNOTE: Quantities to be baked will depend on the size of graham crackers or cookies used to create s'mores. When using large marshmallows, chocolate bar and 2 graham crackers (top/bottom) the fit will be snug. Marshmallows will collapse as they cook.
- With the loaded basket in on hand, flip both side handle down, the locking arms will point upwards until the basket is securely locked.(see figure 4).
Figure 4

natural_image
Pure mechanical assembly diagram showing a shaft and housing with no text or symbols-
When the green READY light illuminates, (allow 2 minutes) the S'Mores Maker is preheated.
-
Place the loaded and locked metal basket onto the lower cooking plate. Make sure the basket's handle fits into the notches in the body of the S'mores maker (see figure 2), then closed the unit. IMPORTANT: Lower the lid to make sure the metal basket is assembled properly and that the lid closes completely.
-
Bake for approximately 5 minutes.
NOTE: The green READY light will cycle on and off as the unit maintains baking temperatures.
NOTE: As s'mores bake, steam will be emitted from the S'Mores Maker. This is normal. After 5 minutes, wearing a protective oven mitt or pot holder, use the top lid handle to lift the lid to the open position.
NOTE: Cooking times may vary slightly based on the temperature of the S'Mores Maker and amount and type of filling used to prepare s'mores.
WARNING: Do not grasp the metal basket's side handles. USE THE TOP LID HANDLE.
-
If necessary, lower the top lid and continue cooking for 15 seconds at a time until marshmallows are cooked and oozing, chocolate is melting, and s'mores are baked to your liking.
-
Wearing oven mitts, grasp the metal basket side handles, lift slowly and carefully up and out of the lower cooking plate.
-
Fold handles up to unlock the metal basket. Remove metal basket lid.
-
Use a heat-proof plastic or wooden spatula to remove finished s'mores.
NOTE: If additional s'mores are to be baked, wearing a protective oven mitt, wipe the cooking plates clean with a dry cloth or paper towel. Keep the S'Mores Maker closed to retain heat. Always wait until the green READY light illuminates before baking more s'mores.
-
Add loaded and locked s'mores metal basket and bake following the instructions previously described.
-
When all s'mores baking is complete, unplug the power cord from electric outlet.
-
Do not clean unit and metal basket until fully cooled.
User maintenance instructions
This appliance requires little maintenance. It contains no user serviceable parts. Do not try to repair it yourself. Contact a qualified appliance repair technician if the product requires servicing.
Care & Cleaning Instructions
WARNING: The S'Mores Maker is very hot during use. Never use plastic or nylon utensils that are not marked heat-proof as they may melt and damage the non-stick cooking surfaces.
CAUTION: Unplug from electrical outlet and allow to cool thoroughly before cleaning.
-
Always use the side handles to remove the metal basket from the S'Mores Maker before cleaning. The metal basket is top-rack dishwasher safe or can be hand washed in hot, soapy water.
-
To remove any food baked onto the cooking plates or metal basket, pour a small amount of water or cooking oil onto the hardened food. Allow to set for 5 minutes, then wipe softened food off with a paper towel or soft cloth. Remove stubborn stains with a plastic mesh puff or pad. A clean, round kitchen brush or a toothbrush works well to remove baked-on food from the metal basket.
-
For best results, use only products with directions stating they are safe for cleaning nonstick cooking surfaces. Do not use steel wool or coarse scouring pads.
-
The cooking plates should be conditioned and conditioned before each heating. To condition plates, lightly coat the cooking surfaces with solid vegetable shortening or vegetable oil. Wipe off excess oil with a clean paper towel or napkin. Carefully follow suggested cleaning procedures below.
-
If necessary, scrub the cooking plates with a clean, soft scrub sponge or cloth. The S'Mores Maker body does not disassemble for cleaning.
-
Never immerse appliance in water or other liquids. Never place the S'Mores Maker in dishwasher.
-
The exterior finish should be cleaned with a non-abrasive cleaner and a soft, damp cloth. Dry thoroughly.
Storage Instructions
WARNING: Never store S'Mores Maker while it is hot or still plugged in.
- Make sure S'Mores Maker is unplugged and fully cooled.
- Store the empty locked metal basket inside the body of the S'Mores Maker. (See Figure 2.)
- Use the cord wrap on the bottom of the S'Mores Maker to store the cord. (See Figure 5.)
- Do not put any stress on the cord where it enters unit, as this could cause the cord to fray and break.
- Store S'Mores Maker in its box or in a clean, dry area.

natural_image
Technical line drawing of a rectangular device with side handles and a curved internal component, labeled 'Figure 5' (no text or symbols on the diagram itself)You Don't Need A Campfire
S'Mores got their beginnings in 1927 as an American Girl Scouts campfire favorite. Now the sweet, gooey chocolaty marshmallow goodness is a quick kitchen dessert your family and friends will be demanding year-round.
Classically, a s'more is a couple of toasted marshmallows sandwiched between a plain Hershey's® milk chocolate bar and 2 graham crackers. The heat of the marshmallows melts the chocolate and the dripping mess is extraordinarily edible.
With your new S'Mores Maker, you can be as creative as you want to be. Serve with a scoop of ice cream and a glass of cold milk, or go sophisticated with fresh gelato, fruited mineral water or a delicious dessert wine.
Recipes
NOTE: Quantities to be baked at one time will depend on the size of graham crackers or cookies used to create s'mores and how they fit into the locking metal basket. When using large marshmallows, chocolate bar and 2 graham crackers (top/bottom) the fit will be snug.
Marshmallows will collapse as they cook.
IMPORTANT: The loaded metal basked must FULLY LOCK in order to fit into the S'Mores Maker properly. If the S'Mores Maker top lid is not fully closed, this may cause the graham crackers or cookies to burn and the marshmallows may not cook to your satisfaction.
THE SOLUTION: Cut the marshmallows down in height/size or use miniature marshmallows. Use chocolate or flavored chips, or crushed candy bars in place of solid chocolate bars.
CAUTION: DO NOT OVERFILL S'MORES MAKER. Overflowing foods are hot and dangerous and can cause severe burns to persons or damage to property.
Recipes
Classic S'Mores
Each S'More
• 2 graham crackers
• 1 plain chocolate bar, cut to fit
- 2 marshmallows
-
Preheat S'Mores Maker.
-
Prepare s'mores in the metal basket base (with handles).
-
Add the loaded and locked metal basket and bake for approximately 5 minutes.
-
After 5 minutes, wearing a protective oven mitt or pot holder, use the lid handle to lift the top lid to the open position. Check to see if marshmallows are melted and browned to your liking.
-
If necessary, lower lid and continue to bake until done.
Creative S'Mores: Some New Spins on the Classic
Substitute the classic ingredients with these variations:
Graham Crackers: plain, chocolate, chocolate covered, cookies (thin, flexible): sugar, chocolate chip, oatmeal
Marshmallows: full-size, miniature, chocolate, flavored, toasted coconut
Chocolate: 70% - 90% cacao bars, milk chocolate bars, chocolate chips, whitechocolate chips, any flavored chips, crushed candy bars.
Triple Chocolate S'Mores
Serve topped with fresh whipped cream and shaved dark chocolate.
Each S'More
• 2 chocolate graham crackers
• 1 90% cacao chocolate bar, cut to fit
• 16 miniature marshmallows
• 1 tablespoon white chocolate chips
-
Preheat S'Mores Maker.
-
Prepare s'mores in the metal basket base (with handles).
-
Add the loaded and locked metal basket and bake for approximately 5 minutes.
-
After 5 minutes, wearing a protective oven mitt or pot holder, use the lid handle to lift the top lid to the open position. Check to see if marshmallows are melted and browned to your liking.
-
If necessary, lower lid and continue to bake until done. The creamy texture of this s'more will keep you coming back for s'more. Experiment with your favorite flavors. It's all good.
Recipes
Chocolate Raspberry Cheesecake S'Mores
Each S'More
• 2 graham crackers
• 1 - 2 tablespoons cream cheese, to taste
- 16 miniature marshmallows raspberry ice cream topping (in squirt bottle)
• 1 tablespoon semi-sweet chocolate chips
-
Preheat S'Mores Maker.
-
Prepare s'mores in the metal basket base (with handles).
-
Spread a heavy layer of cream cheese onto both graham crackers. Place the bottom graham cracker into the metal basket, cheese side up.
-
Distribute remaining ingredients over the cream cheese and cover with the second cream cheese covered graham cracker.
-
Add the loaded and locked metal basket and bake for approximately 5 minutes.
-
After 5 minutes, wearing a protective oven mitt or pot holder, use the lid handle to lift the top lid to the open position. Check to see if marshmallows are melted and browned to your liking.
-
If necessary, lower lid and continue to bake until done. The creamy texture of this s'more will keep you coming back for s'more. Experiment with your favorite flavors. It's all good.
Daddy's Favorite Peanut Butter & Bananas S'More
Each S'More
-
2 graham crackers
• 1 milk chocolate bar, cut to fit
• 2 - 4 marshmallows
• 1 tablespoon peanut butter, to taste
• 3 - 4 slices fresh banana -
Preheat S'Mores Maker.
-
Prepare s'mores in the metal basket base (with handles).
-
Spread a thin layer of peanut butter onto both graham crackers. Place the bottom graham cracker into the metal basket, peanut butter side up.
-
Add the milk chocolate bar, then distribute bananas and marshmallows. Cover with the second peanut butter covered graham cracker.
-
Add the loaded and locked metal basket and bake for approximately 5 minutes.
-
After 5 minutes, wearing a protective oven mitt or pot holder, use the lid handle to lift the top lid to the open position. Check to see if marshmallows are melted and browned to your liking.
-
If necessary, lower lid and continue to bake until done.
Toffee Butterscotch S'More
For a simple and elegant presentation, top s'more with a scoop of toffee ice cream and scattered butterscotch chips.
Each S'More
• 2 graham crackers
• 16 miniature marshmallows
• 1 - 2 tablespoons toffee candy crushed
• 1 - 2 tablespoons butterscotch chips
-
Preheat S'Mores Maker.
-
Prepare s'mores in the metal basket base (with handles).
-
Add the loaded and locked metal basket and bake for approximately 5 minutes.
-
After 5 minutes, wearing a protective oven mitt or pot holder, use the lid handle to lift the top lid to the open position. Check to see if marshmallows are melted and browned to your liking.
-
If necessary, lower lid and continue to bake until done.
Recipes
Orange-Scented Oatmeal Raisin Breakfast S'Mores
Quick and easy to make. Wrap a warm s'more in a napkin to eat on the way. Enjoy with fresh-squeezed orange juice or coffee.
Each S'More
- 2 oatmeal cookies
-
2 marshmallows
• 1 tablespoon raisins
• 1 tablespoon fresh orange zest -
Preheat S'Mores Maker.
-
Prepare s'mores in the metal basket base (with handles).
-
Place cookie into basket, flat side up. Distribute remaining ingredients and cover with the second cookie, flat side down.
-
Add the loaded and locked metal basket and bake for approximately 5 minutes.
-
After 5 minutes, wearing a protective oven mitt or pot holder, use the lid handle to lift the top lid to the open position. Check to see if marshmallows are melted and browned to your liking.
-
If necessary, lower lid and continue to bake until done.
Limited TWO-YEAR Warranty
SENSIO Inc. hereby warrants that for a period of TWO YEARS from the date of purchase, this product will be free from mechanical defects in material and workmanship, and for 90 days in respect to non-mechanical parts. At its sole discretion, SENSIO Inc. will either repair or replace the product found to be defective, or issue a refund on the product during the warranty period.
The warranty is only valid for the original retail purchaser from the date of initial retail purchase and is not transferable. Keep the original sales receipt, as proof of purchase is required to obtain warranty validation. Retail stores selling this product do not have the right to alter, modify, or in any way revise the terms and conditions of the warranty.
EXCLUSIONS:
The warranty does not cover normal wear of parts or damage resulting from any of the following: negligent use of the product, use of improper voltage or current, improper routine maintenance, use contrary to the operating instructions, disassembly, repair, or alteration by anyone other than qualified SENSIO Inc. personnel. Also, the warranty does not cover Acts of God such as fire, floods, hurricanes, or tornadoes.
SENSIO Inc. shall not be liable for any incidental or consequential damages caused by the breach of any express or implied warranty. Apart from the extent prohibited by applicable law, any implied warranty of merchantability or fitness for a particular purpose is limited in time to the duration of the warranty. Some states, provinces or jurisdictions do not allow the exclusion or limitation of incidental or consequential damages, or limitations on how long an implied warranty lasts, and therefore, the above exclusions or limitations may not apply to you. The warranty covers specific legal rights which may vary by state, province and/or jurisdiction.
HOW TO OBTAIN WARRANTY SERVICE:
You must contact Customer Service at our toll-free number: 1-866-832-4843. A Customer Service Representative will attempt to resolve warranty issues over the phone. If the Customer Service Representative is unable to resolve the problem, you will be provided with a case number and asked to return the product to SENSIO Inc. Attach a tag to the product that includes: your name, address, daytime contact telephone number, case number, and description of the problem. Also, include a copy of the original sales receipt. Carefully package the tagged product with the sales receipt, and send it (with shipping and insurance prepaid) to SENSIO Inc.'s address. SENSIO Inc. shall bear no responsibility or liability for the returned product while in transit to SENSIO Inc.'s Customer Service Center.
natural_image
Line drawing of a rectangular appliance with internal grating and side handles (no text or symbols)natural_image
Top-down schematic of a cylindrical heat exchanger or radiator with side ports (no text or symbols)
natural_image
Pure electrical circuit lines without any symbolsnatural_image
Pure mechanical assembly diagram showing a shaft and housing with no text or symbolsnatural_image
Technical line drawing of a rectangular device with side handles and a curved internal component, labeled 'Figura 5' (no text or symbols on the diagram itself)natural_image
Abstract graphic with a heart and stylized letter 'C' (no text or symbols)GRACIAS
por su compra
REGISTRARSE

natural_image
Generic user profile icon with a plus sign, no text or symbols presentnatural_image
Silhouette of a person with a star rating system (no text or symbols)natural_image
Three social media and video platform icons: Facebook, Twitter, and YouTube (no text or symbols beyond logos)BellaLife

BellaLifestyle

bellahousewares.com
For customer service questions or comments
- S'MORES MAKER
- MÁQUINA DE S'MORES
- THANK YOU
- for your purchase
- myBELLAlife
- Table of Contents
- Índice
- SAVE THESE INSTRUCTIONS
- ADDITIONAL IMPORTANT SAFEGUARDS
- Notes on the Plug
- Notes on the Cord
- Plasticizer Warning
- Electric Power
- Getting to Know Your S'mores Maker
- Before using for the First time
- Operating Instructions
- User maintenance instructions
- Care & Cleaning Instructions
- Storage Instructions
- You Don't Need A Campfire
- Recipes
- Classic S'Mores
- Each S'More
- Creative S'Mores: Some New Spins on the Classic
- Triple Chocolate S'Mores
- Chocolate Raspberry Cheesecake S'Mores
- Daddy's Favorite Peanut Butter & Bananas S'More
- Toffee Butterscotch S'More
- Orange-Scented Oatmeal Raisin Breakfast S'Mores
- Limited TWO-YEAR Warranty
- EXCLUSIONS:
- HOW TO OBTAIN WARRANTY SERVICE:
- GRACIAS
- por su compra
- REGISTRARSE
Brand : BELLA
Model : S'mores Maker
Category : S'mores Maker