
DVD6091 - Home Theater CURTIS - Free user manual and instructions
Find the device manual for free DVD6091 CURTIS in PDF.


| Product Type | Home Theater System / DVD Player |
| Brand | Curtis |
| Model | DVD6091 |
| Disc Compatibility | DVD, CD, MP3, Picture CD, CD-R, CD-RW |
| Video Outputs | Composite Video, S-Video, YPbPr (Component) |
| Audio Outputs | 5.1 Channel (FL, FR, SL, SR, CEN, SW), Stereo Down-mix, Coaxial, Optical |
| Video Format | MPEG 2 |
| Audio Format | MPEG 1, Layer 1/2/3 |
| TV System | NTSC / PAL / Auto |
| Aspect Ratio | 4:3 Letterbox, 16:9 Widescreen |
| Special Features | Multi-Angle, Multi-Subtitle (up to 32), Multi-Language Audio (up to 8), Zoom, Slow Motion, Program Play, A-B Repeat, Child Lock, Screen Saver |
| Remote Control | Yes, with AAA batteries (2x) |
| Power Supply | AC 100-240V ~ 50/60Hz |
| Dimensions (W x D x H) | 430 x 240 x 33 mm |
| Region Code | Check disc; player supports code for specific regions |
| Cleaning | Use soft dry cloth; do not use solvents or chemicals |
Frequently Asked Questions - DVD6091 CURTIS
User questions about DVD6091 CURTIS
0 question about this device. Answer the ones you know or ask your own.
Ask a new question about this device
Download the instructions for your Home Theater in PDF format for free! Find your manual DVD6091 - CURTIS and take your electronic device back in hand. On this page are published all the documents necessary for the use of your device. DVD6091 by CURTIS.
USER MANUAL DVD6091 CURTIS
HOME THEATRE SYSTEM


SAFETY INFORMATION
TO REDUCE THERISK OF FIRE AND ELECTRIC SHOCK, DO NOT EXPOSE THIS UNIT TO RAIN OR MOISTURE.
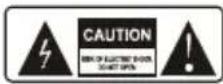
CAUTION: To reduce the risk of fire and electric shock, do not remove the cover (or
back) of the unit. Refer servicing only to qualified service personnel.

The lightning flash with arrowhead symbol, within an equilateral triangle, is intended to alert the user to the presence of uninsulated "dangerous voltage" within product's enclosure that may be of sufficient magnitude to constitute a risk of electric shock.
The exclamation point within an equilateral triangle is intended to alert the user to the presence of important operation and servicing instructions in the literature accompanying the appliance.
WARNING: TO REDUCE THE RISK OF FIRE OR ELECTRIC SHOCK, DO NOT EXPOSE THIS APPLIANCE TO RAIN OR MOISTURE.
CAUTION: TO PREVENT ELECTRIC SHOCK, MATCH WIDE BLADE OF PLUG TO WIDE SLOT, FULLY INSERT.
IMPORTANT SAFEGUARDS
In addition to the careful attention devoted to quality standards in the manufacture of your video product, safety is a major factor in the design of every instrument. However, safety is your responsibility, too. This sheet lists important information that will help to assure your enjoyment and proper use of the video product and accessory equipment. Please read them carefully before operation and using your video product.
Installation
Read all instructions carefully, even if you are familiar with the appliance.
- This appliance is not intended for use by children or infirm persons without supervision.
- Children should be prevented from playing with the appliance.
- This appliance should be placed on a dry, level surface before it is operated.
- INDOOR USE ONLY this appliance is not intended for outdoor use.
- Do not expose this appliance to rain or moisture. Do not immerse the appliance in water or any other liquid.
- Do not place items filled with liquids, such as vases, on the appliance. Do not expose the appliance to dripping or splashing liquids.
-
This appliance is not intended for use in bathrooms, laundry areas or similar moist locations. Never locate this appliance in the immediate surroundings of, or where it may fall into, a bath, basin, washtub, shower or swimming pool.
-
Do not place naked flame sources, such as candles, on the appliance.
- Do not locate the appliance or cord near heat sources such as radiators, heaters, air ducts or direct sunlight.
- Do not block any of the ventilation openings. Ensure that vents are not covered by newspapers, tablecloths, curtains, etc. Do not install in a tight-fitting cabinet.
- Do not insert or allow foreign objects to enter any grille openings.
- Do not run the cord under carpeting. Instead, arrange the cord away from traffic areas where it will not become a trip hazard.
- To disconnect the appliance, turn the appliance off, switch off the power outlet and remove the plug from the power outlet.
- Do not misuse the cord. Never carry the appliance by the cord or pull to disconnect it from the outlet. Instead, grasp the plug and pull to disconnect.
- Do not operate the appliance if it has a damaged cord or plug; after the appliance malfunctions; or has been dropped or damaged in any way. Consult Singer for examination.
- Use of controls or adjustments, or performance of procedures other than those specified herein, may result in hazardous radiation exposure.
Caution
Do not open do not attempt to repair, disassemble or modify this appliance.
Dangerous high voltages exist inside this appliance.
This appliance is only to be serviced by Singer Service Technician. There are no user-serviceable parts inside.
Do not look at laser pick-up directly. Do not touch the lens.
SAFETY INFORMATION
Installation Warnings
Ventilation Slots and openings in the case are provided for ventilation to ensure reliable operation of the video product and to protect it from overheating. These openings must not be blocked or covered. The openings should never be blocked by placing the product on a bed, sofa, rug, or heat register. This product should not be placed in a built-in installation such as a bookcase or rack, unless proper ventilation is provided or the video product manufacturer instructions have been followed.
Outdoor Antenna Grounding If an outside antenna or cable system is connected to the video product, be sure the antenna or cable system is grounded so as to provide some protection against voltage surges and builtup static charges. ANSI/NFPA No. 70-1984 provides information with respect to proper grounding of the mast and supporting structure, grounding of the lead-in wire to an antenna-discharge unit, connection to grounding electrodes, and requirements for the grounding electrode.
Power Lines An outside antenna system should not be located in the vicinity of overhead power lines, other electric light or power circuits, or where it can fall into such power lines or circuits. When installing an outside antenna system, extreme care should be taken to keep from touching or approaching such power lines or circuits, as contact with them might be fatal. Installing an outdoor antenna can be hazardous and should be left to a professional antenna installer.
Lightning For added protection for this product during a lightning storm, or when it is left unattended and unused for long periods of time, unplug it from the wall outlet and disconnect the antenna or cable system. This will prevent damage to the video product due to lightning and power line surges.
Compulsory Warnings
If the supply cord is damaged, it must be replaced by Singer service Technicion, in order to avoid a hazard. This product has not been designed for any uses other than those specified in this booklet.
Laser Safety
This compact disc player is classified as a CLASS 1 LASER PRODUCT.
Only qualified service personnel should remove the cover or attempt to service this device due to possible eye injury.
Invisible laser radiation when open and interlock failed or defeated.
Avoid direct exposure to beam.
FEATURES
DVD, CD, MP3, Picture CD compatible CD-R, CD-RW capable
TV format:
4:3 / 16:9 screen format select
Video output:
Composite Video output
S -Video output
YPbPr output
Audio output:
Down-mix stereo output
5.1 Channel output
DVD features:
Multi Subtitle select
Multi Language select
Multi Angle select
Other features:
On screen controlmenu
Digital zooming
Slow motion forward
Child lock
Auto screen saver
Packing List
- Remote control 1 piece
- AV connection line ...... 1 piece
- Battery 1 pair
- Use Manual 1 book
- 5.1CH Audio Cable ...... 1 set
CONTENTS
Page
WARNING
IMPORTANT NOTICE
FEATURES
ESSENTIAL SETUP 1
INTRODUCTION 2
About DVD 3
About the player 4
Remote control 4-5
SYSTEM CONNECTION 6
GETTING STARTED
Play a disc 7
Screen saver 8
FUNCTION BUTTONS
[Power]. [Open / Close ]. [Play / Pause / Stop]....9
[Skip], [Slow], [Select an item], [Title/Menu], [Clear] 10-11
[Angle], [Subtle], [[Audio][V-Mode] 12-13
[Search a desired section] 14
[Repeat], [A-B], [Zoom], [Mute], [Shuffle], [PBC], [Channel] 15-17
[Programme] 18
Return NIP ] 19
ON SCREEN DISPLAY
DISPLAY DVD mode 20
DISPLAY Mp3 mode 21
SETUP MENU
LANGUAGE MENU 22
OSD Menu / Subtitle / Audio / DVD Menu
VIDEO MENU 23
TV Shape
AUDIO MENU 23
Digital output
RATING MENU 24
Password / Rating
TROUBLE SHOOTING 24-25
SPECIFICATIONS 26
ESSENTIAL SETUP
Video outputs
The player is equipped with the following video output ports
Composite Video, S-Video and Y Pb/Cb Pr/Cr
For TV System setting
TV System menu is to set up the output TV system to PAL or NTSC
-
In STOP mode, press SETUP button, setup menu appears.
-
Press DOWN button, highlight "Video" icon.
- Press RIGHT button, and scroll down to highlight"TV System".
- Press ENTER button, sub menu appears. Highlight "NTSC" or "PAL" or "AUTO", press ENTER button.
- Press SETUP button to quit.

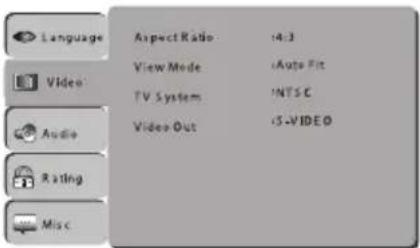
Default setting NTSC
When a DVD disc of NOT correct TV system is loaded or the TV set of NOT correct TV system with the player, a distorted video signal may come out on the screen.
INTRODUCTION
Loading batteries to the remote control
- Remove the battery compartment cover.
- Load two AAA (UM-4 or R03) batteries into the battery compartment.
- Make sure that the batteries have been inserted in the correct polarities matching to the symbols + , - marked in the battery compartment. Close the battery compartment cover.
- When replacing batteries, replace both batteries. Do not mix new and used batteries operating together, otherwise, the operation lifetime will be much shorter than normal.
- Remove the batteries if the unit will not be used for a prolonged period of time.
The remote control transmits a directional infrared beam. Be sure to aim the remote control directly at the infrared sensor of the unit during operation.
If the sensor has been covered or there is a large object between the remote control and the sensor, the sensor will not respond.
The sensor may be not able to receive the remote signal when it is exposed to direct sunlight or a strong artificial light (fluorescent or strobe light). In this case, change the direction of the light or reposition the unit to avoid direct lighting.


BE ENVIRONMENTALLY FRIENDLY
Do not dispose of batteries as normal rubbish. Be environmentally friendly, dispose of batteries following the Government's regulation.
About DVD
DVD (Digital Versatile Disc) is a digital video medium under the MPEG II format, featuring a variety of revolutionary entertainment capabilities. The MPEG II video compression technology provides capacity for an excellent picture of minimum 500 lines resolution on screen, up to 8 language soundtracks, up to 9 views from different camera angles and up to 32 language subtitles (provided the DVD disc itself supports these features).
Disc information
| Disc types | DVD | CD |
| Recording Method | Digital / MPEG II | Digital |
| Capacity | Single-layer / Single side 4.7GB = 2 hrSingle-layer / Double sides 8.5GB = 4 hrDouble-layers / Single side 9.4GB = 4.5 hrDouble-layers / Double sides 17GB = 8 hr | 650MB=74min |
| Disc size | 12cm / 8cm | 12cm / 8cm |
| Horizontal Resolution | 500 lines up | - |
| Sub-titles | 32 | - |
| Sound tracks | 8 | 1 |
| Symbol |  |  |
REMARK
Some features contained in this DVD player are related to the DVD disc's software.
Some features cannot be performed if the disc does not support the feature, or requires special settings.
Check the features printed on the disc's packing or follow the instructions of the Disc's on screen menu.
Select a DVD disc
DVD Region Code
DVD discs and DVD players are manufactured under the worldwide agreed DVD Regional Code System that the player will operate only with corresponding disc of the same Regional Code.
| Region code | Region |
| 1 | Canada, USA |
| 2 | Europe (incl. Poland, Romania, The Czech republic), Japan, Middle East (incl. Saudi Arabia, Egypt, Iran, South Africa) |
| 3 | East Asia (incl. Hong Kong, Taiwan, South Korea), South-East Asia |
| 4 | Australia, Caribbean, Central & South America, Mexico, New Zealand |
| 5 | Africa, Former Soviet Union, India, North Korea, Pakistan, Turkmenistan |
| 6 | China |
Care of disc
Video disc contains high-density compressed data that needs proper handling
- Hold the disc with fingers. Hold the disc's outer edge and/or the center spindle hole. Do not touch the disc surface.


- Do not bend or press the disc. Do NOT expose the disc to direct sunlight or heating sources.

- Store discs in cabinet vertically, in dry condition.
Prevent exposure to: • Direct sunlight
- Heat or exhaust from a heating device. - Extreme humidity
- Clean the disc surface with a soft, dry cleaning cloth. Wipe the disc surface gently, radically, from center toward the outer edge.
- Do not applythinner, alcohol chemical solvent, or sprays when cleaning. Such cleaning fluids will permanently damage the disc surface.
About the player
Front panel

① POWER
③ PLAY/PAUSE
② OPEN/CLOSE
④ STOP
Back panel

① VIDEO output jack
⑥ SW output jack
⑪ Digital signal COAXIAL output jack
② Y/Pb/Pr output jack
⑦ SR output jack
⑫ S-Video output jack
③ FL output jack
⑧ FR output jack
⑬ OPTICAL output jack
④ SL output jack
⑨ Left channel output jack
⑤ CEN output jack
⑩ Right channel output jack
Remote control
Some features of the player can only be performed by the remote control.
Some features described in this owner's manual are related to the Disc's encoding.
Some features may not be available, if the disc encoding does not support the feature.
REMARK
Some features contained in this DVD player are related to the DVD Disc's software.
Some features cannot be performed if the disc does not support the feature, or requires special settings.
Check the features printed on the disc's packing or follow the instructions of the Disc's on screen menu.

① POWER ② OPEN/CLOSE
② PROG ②2 SUBTITLE
③ DISPLAY ②3 REPEAT
④ STEP ②4 A-B
⑤ V-MODE ⑳ CLEAR
⑥ N/P ②6 SLOW
⑦ TITLE ⑳ ZOOM
⑧ MENU ⑳ PBC
⑨ SETUP ⑲ RETURN
⑩ UP ③0 RIGHT
⑪ LEFT ③ ENTER
⑫ DOWN ③2 A-MODE
⑬ ANGLE ⑳ VOLUME +
⑭ PLAY ③4 STOP
⑮ PAUSE ⑲ VOLUME -
⑯ CHANNEL ⑲ MUTE
⑰ LANGUAGE ⑳ SEARCH
⑱ 0-9 NUMBER ⑲ NEXT
⑲ REV ⑳ PREV
⑳ FWD
Notes
The remote control transmits a directiona infrared beam. Be sure to aim the remote control directly at the infrared sensor during operation. When the sensor is covered or there is a large object between the remote control and the sensor, the sensor cannot receive signals. The sensor may not be able to receive signals properly when it is exposed to direct sunlight or a strong artificial light (such as a fluorescent or strobe light). In this case, change the direction of the light or reposition the unit to avoid direct lighting.
SYSTEM CONNECTION
Preparations
Accessories
-
Remote control
-
Audio/Video cable
-
User's manual
-
2XAAA Size Battery
-
5.1CH Audio Cable
(check whether be fully equipped after open the box)
Battery installation of remote controller
Place two AAA batteries into the battery compartment. Be sure the polarities are correct. There should be no large obstacles between the remote controller and the main unit.
System connection(Optional according to your back panel)
- When making connection between this unit and other components, be sure all connection with power-off.
- Audio/Video cables are connected according to the different colour identification and they should be fitted firmly.
Yellow to video terminal
White to audio terminal L,
Red to audio terminal R, - Scheme of connection
• 5.1 CHANNEL CONNECTION

Speaker rear panel output
GETTING STARTED
- Unpack the unit
- Read through this owner's manual before installation and use.
- Load batteries into the remote control unit.
- Connect the system, make sure the connections are secured.
- Connect the power plug to the AC power outlet
REMARK
Some features contained in this DVD player are related to the DVD disc's software.
Some features cannot be performed if the disc does not support The feature, or requires special settings.
Check the features printed on the disc's packing or follow the instructions of the Disc's on screen menu.
Play a disc
Switch on the player
Push the main power button to turn on the DVD unit. Power on the TV set and the amplifier if connected.
Load a disc

Press OPENCLOSE button on the remote control (or front panel) to open the disc tray. Load a disc and press OPENCLOSE to close the disc tray
(Note, place the disc's label side up, blank side down)
Automatic Play
The unit will take a few seconds to download the disc initial data, display the disc type logo in the left upper corner of the TV screen, and then start playing automatically.
If a DVD Disc Menu appears on screen
NOTE
Normally, when a MP3 disc is loaded, the unit will
take longer time to download the initial data.
DVD disc that does not match the region code cannot be executed by this player.
Return to the disc main menu, press MENU button on the remote.
Prevent loading the disc upside down.
Screen saver
The player is equipped with an automatic screen saver, for the purpose of protecting the TV screen.
The TV screen will be black and a screen Saver SMART will appear on screen if :
• No disc is loaded for 180 seconds
- In STOP mode and no button has been Pressed for 180 seconds.
(except in the player or disc menu)
When any button is pressed, the player will resume to normal active mode.

FUNCTION BUTTONS
To switch the player Between power on and off mode:
Press POWER buttononfrontpanel
(Always switch off the player after use)
Open /Close disctray
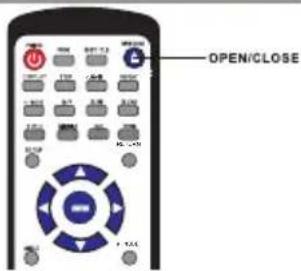
To open and close The disc tray:
Press OPEN/CLOSE button

on the remote
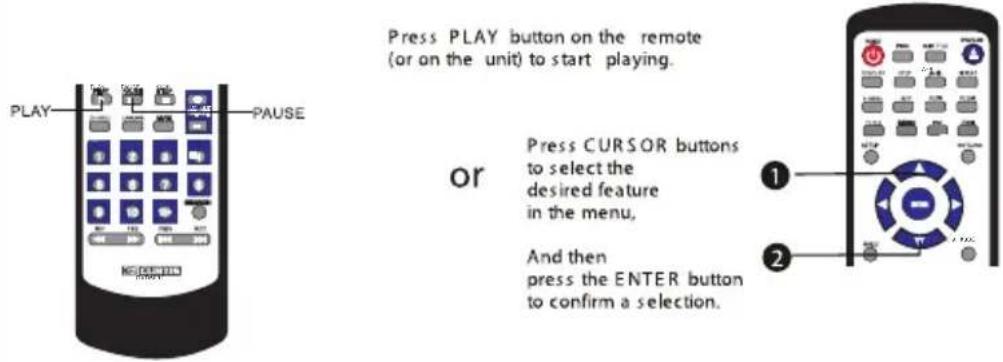
Play / Pause / Stop

1 Press PLAY button To play the Disc
② Then Press PAUSE button to pause.
Press

to resume normal playback.
③ Press STOP button to stop in two modes:
a) Press Once : STOP memorizes the interrupt position.
( May resume with Play button

b) Press Twice : To stop completely (Will NOT resume with Play button)
Skip Forward / Backward

1 Press ▶ to skip forward (chapters)
2 Press 🏠 to skip backward (chapters)
Player will not advance or reverse during "WARNING" section of any disc.
Forward / Backward
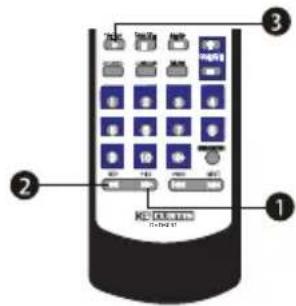
The unit mode
1 Press ▶ to Search forward Repeat pressing the button to change search speed

2 Press ◀ to search backward Repeat pressing the Button to change search speed

3 Press PLAY button to resume normal playback
Player will not advance or reverse during "WARNING" section of any Disc.
Slow Forward

The unit muted in SLOW mode
1 Press SLOW to play slow forward Repeat pressing the Button to change slow forward speed

2 Press PLAY button to resume normal playback
Select an item in menu

In the disc menu or setup menu
1 press cursor button to move between function items.
② Press ENTER to confirm a selection.
③ Press CLEAR to cancel an entry.
Disc Title /Menu

1 Press MENU button
return to the DVD disc Menu.
② Press TITLE Button
return to the DVD disc Title.
Disc MENU
Disc menu is a DVD disc feature, allowing actions on screen.
Disc TITLE
Disc title is the beginning track of a DVD disc. se the "TITLE" function.
Clear

1 Setting program or searching need to input number press CLEAR CLEAR button to clear the number when the input number is wrong.
Multi-Angle
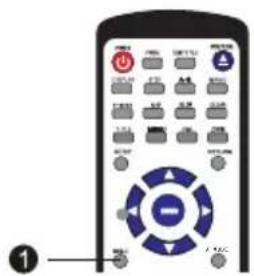
A DVD disc may contain up to 9 selectable viewing angles.
If a DVD disc contains Multi-Angle feature, viewing angles may be selected:
① During in playback, repeat pressing ANGLE button
to select the desired viewing angle Status will be displayed on screen..
Multi-Subtitle

If a DVD disc contains the Multi-Subtitle feature, subtitle may be selected:
① During in playback, repeat pressing SUBTITLE button
to select the desired subtitle. Status will be displayed on screen.

NOTE
A DVD disc may contain up to 32 subtitle selections.
Multi-Audio Soundtrack

If a DVD disc contains Multi-Audio Soundtrack feature, Audio Language can be selected:
1 During in playback, repeat pressing LANGUAGE button LANGUAGE to select the desired audio language. Playback status will be displayed on screen.

NOTE
A DVD disc may contain up to 8 audio language selections.
In most cases, an Audio Soundtrack selection will be displayed on a DVD disc start up menu.
Press CURSOR Button to select and ENTER button to confirm.
V-Mode
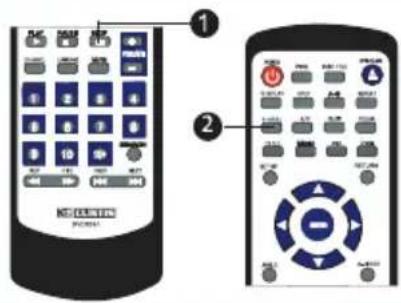
① First, You should press [STOP] Key
2 Press [V-MODE]key ☐ Video mode switch again. In the condition of NORMAL mode.press [V-MODE] key may select Composite, S-video, Component, P-Scan.
● To use this function, your TV Set must have progressive scan features.

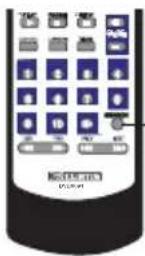
SEARCH a desired section

This function does NOT apply to MP3
SEARCH

Press the SEARCH button to play at a desired Title, Chapter or Time.
DVD disc
SEARCH
Press the SEARCH ● button select SEARCH Mode.
Press DOWN button highlight desired item.
TITLE --- Input title number
CHAPTER --- Input chapter number
TIME --:--- Input time hh:mm:ss
(Hour: Minute: Second)
Press ENTER ENTER button.
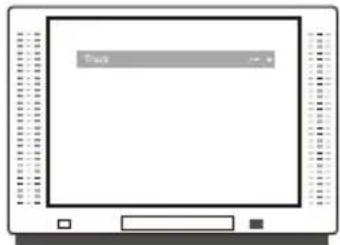
CD disc

Press the SEARCH button to Track Search mode.
Press DOWN button highlight desired item.
TIME---- Input time hh:mm:ss
(Hour: Minute: Second)
Disc Time --- Input Disc Time hh:mm:ss
(Hour:Minute:Second)
Press ENTER ENTER button

NOTE
- SEARCH functionality depends on different DVD disc's format. Some DVD discs do not allow SEARCH function.
- SEARCH does NOT function during Program playback.
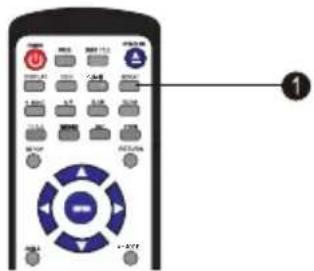
Repeat

Press REPEAT
to reach desired

button multiple times
repeat mode (see below).
DVD disc
Repeat Chapter
Repeat Title
Repeat Off
Repeat the Chapter
Repeat the Title
Repeat function off
CD disc
Repeat Single
Repeat All
Repeat Off
Repeat the existing track
Repeat all tracks
Repeat function off

MP3 disc
Repeat Single
Repeat Folder
Repeat Off
Repeat the existing track
Repeat all tracks
Repeat function off
NOTE
Repeat functionality depends on different disc's production format, some DVD discs do not allow repeat function.
Repeat the section A-B

To repeat playback of a desired section:
1) Press the A-B
at the beginning

button
of the desired section, "A".
2) Press the A-B

button again
at the end of the desired section, "B".

The player will
repeat playback of
the section from A to B.
Press the A-B

button again
to cancel the f
unction and return
to normal play .

NOTE
- A-B repeat depends on different disc's production format, some
• A-B function does not apply to MP3 disc.
• The period between A and B should be atleast 3 seconds.
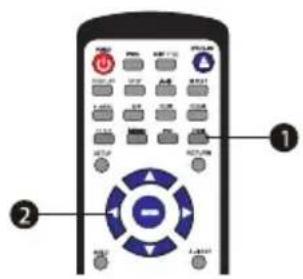
ZOOM
In DVD mode

Press the ZOOM Button to enlarge viewable picture.
Press the button repeatedly to change the zoom scale:


Press the CURSOR buttons to adjust the zooming position.

NOTE
The picture quality is degraded as the picture is increased.
Mute


Press MUTE button To mute (turn off) the audio output.
Press the button again To resume normal audio output.
PBC Play

For VCD2.0 disc playing in the condition of PBC ON, Song selection can only be done, when the playing returned to main menu in the condition of PBC OFF, press relevant number Key to get favorite song during playing
Channel
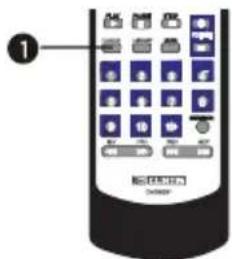
1 When play VCD CD disc press, CHANNEL CHANNEL Key to select left vocal, Right vocal Mix, Stereo vocal
A-mode

When play, VCD CD disc, press A-MODE 2 channel/5.1 channel switch (not available for 2 channel mode).
Program setting
Programto play a DVD, CD and MP3 disc in a desired sequence automatically
DVD/VCD program menu
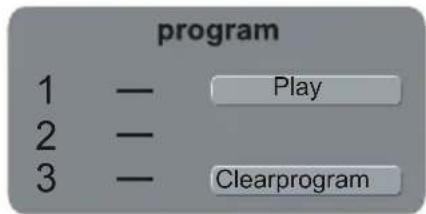
Load a DVD or VCD disc.
- Press the PROG button, the program menu will appear.
- Put the number of the song which you want to program, then press right button to move to "play", then press "enter" to confirm.
- If you want to cancel the program, press right and down button to move to "clear program", then press "enter" to confirm
- If you want to show the "DVD" or "VCD" on the TV screen, press "DISPLAY" button

CD/MP3 program menu
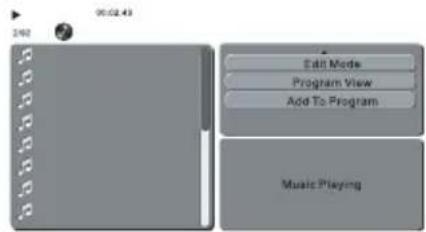
Program CD orMP3 disc.
1.CD and Mp3 play back menu will appear immediately once you put your CD in the player.
2. Press the right button to move to the play back menu.
3. Press the down button to scroll down to highlight "EDIT MODE" and press enter.
4. Press the left button to move back to the tracks and select desired tracks you want to listen to and press enter.
5. Go back to play back menu and scroll down and highlight "ADD TO PROGRAM" and press enter.
6. Scroll up and highlight "PROGRAM VIEW" and press enter so you can view the program tracks.
7. Press play to start playing.
8.Turn unit off to clear program.
NOTE
- Some DVD discs do not allow programming.
- Single track disc cannot be programmed.
Return

1 In PBC mode, when pressing "RETURN" Key to return to the menu, thus canceling the PBC mode, the "RETURN" key will be invalid
N/P

1 Press N/P when in STOP mode to select the mode from NTSC/PAL/AUTO.
ON SCREEN DISPLA Y
DISPLAY
Press ● button
an On Screen Display indicator will be displayed at the upper part of the TV screen in displaying the disc information and operation status.
The Display indicator will remain on screen until pressing the Display button to turn it off.
The Display indicator is a user friendly interface designed for displaying the status of the playback. When a different disc is loaded (DVD, CD or MP3), the Display indicator will be different.
If you want to show the "DVD" or "VCD" on the TV screen. Press "display" button.
DISPLAY- DVD mode
Press DISPLAY button once to display as follows:

Press DISPLAY button twice to display as follows:

Playback time/Track remain time
Press DISPLAY button three times to display as follows:

Disc Title ____ current title / total disc titles
Chapter current chapter / total chapters
The four times press DISPLAY button to display as follows:

The five times press DISPLAY button to display as follows:

Audio Sound Track—current audio / total tracks
The six times press DISPLAY button to display as follows:

Disc Subtitle current subtitle / total disc subtitles
The seven times press DISPLAY button to display as follows:

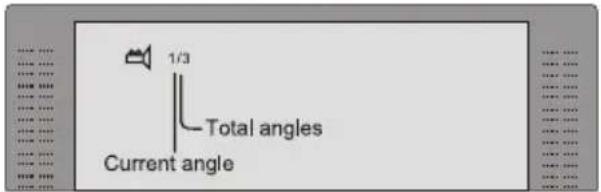
Current angle / Total angles
The eight times press DISPLAY button to display as follows:

ON SCREEN DISPLAY
MP3 mode
Playback time
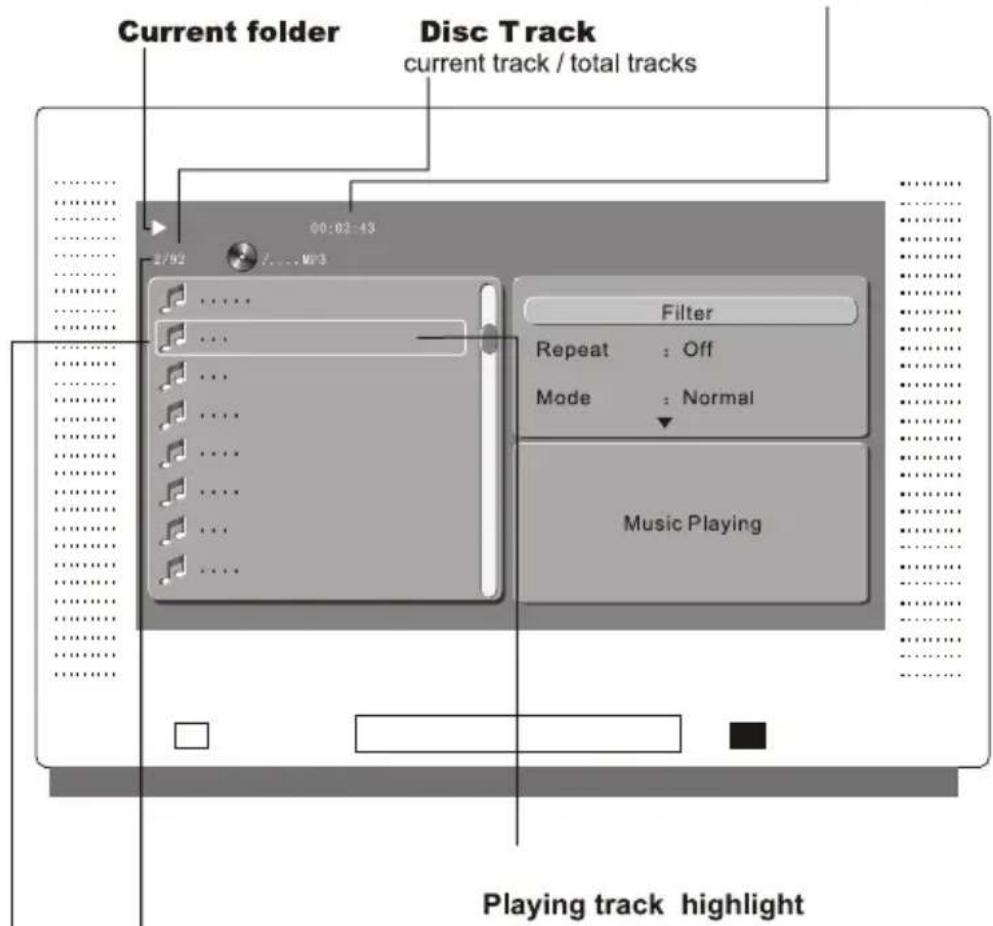
Playing track file information
(Information provided by the disc)
Selection highlight
(Press ENTER

button to play this track)
Select a track
Press MOVE button to highlight the desired track, and switch between folder and pages.
Press ENTER

button to play the selected track.
Playing track file information
You may add the information of the MP3 file while you create the disc, e.g. artist, song name and date etc., Those information of the playing track will be display at the lower part of the screen.
SETUP
Various features of the player can be adjusted in the SETUP menu:
Press SETUP ● button SETUP menu appears.

Highlight the desired icon Press RIGHT button to activate the setting sub menu.
Language
Enter this menu to setup the language in OSD display, DVD disc subtitle, DVD disc audio and DVD disc start menu.
Press SETUP ⬤ button
Highlight "Language", Press RIGHT, Language sub menu appears.

Highlight the desired item and press ENTER button,
Highlight the desired item,
Press RIGHT button to confirm.
Press SETUP ⚪ button to save the setting and quit.
Video
Enter this menu to setup the video setting
Press SETUP SETUP button
Highlight "Video",
Press RIGHT, Video sub menu appears.

Highlight the desired item and press ENTER button,
Highlight the desired item,
Press RIGHT, button to confirm.
Press SETUP ● button to save the setting and quit.
TV screen
The aspect ratio of the picture provided by the DVD player can be varied in line with the features available on the TV in use.
4:3 Letter
Allow you to see movies in their original aspect ratio.
Entire frame of the movie will be display on screen, but it will occupy a smaller portion of the screen.
SETUP MENU (Press SETUP button)
16:9 Wide Scr
When you connect to a wide screen TV, this setting will allow the original aspect ratio will be display full screen.

NOTE

Depending on the DVD disc format, e.g. 2.35:1, the wide screen setting may still having black margins above and below the picture.
TV System
TV System menu is to set up the broadcast system:

AUTO Auto switch to NTSC system according to the disc, if not, the default system is NTSC NTSC NTSC TV system

Audio (digital audio)
Enter this menu to setup the digital audio output format of different signal type. The selectable output formats are PCM, All or Off
Press SETUP ⚪ Button
Highlight "Audio".
Press RIGHT, Audio sub menu appears.

Highlight the desired item and press RIGHT button, Highlight the desired item,
Press RIGHT button to confirm.
Press SETUP SETUP button to save the setting and quit.
NOTE:
If the digital output is set in "RAW" mode, there will Be no analog output for DTS bitstreaml

Rating
RATING
Enter this menu to setup the rating level of the player.
The player will require a password to play any disc with rating level higher than the setting.
Press SETUP button.
Highlight "Rating", press ENTER button, Rating sub menu appears.

Highlight "Parental Control" selection, press ENTER, input the 4 digits password, press ENTER button. The rating lock release.
Default setting
Password : 8888
Press RIGHT button and scroll down to the desired rating you need, then press enter again to change the setting:
-
Kid Safe
-
G
-
PG
-
PG-13
-
PG-R
-
R
-
NC-17
-
Adults
Highlight "Set Password" selection, press ENTER button, input the 4 digits password, press ENTER button, to Press SETUP button to save the setting and quit.
Misc
- Using the UP/DOWN direction buttons, move to the Rating The player's Rating settings will appear.
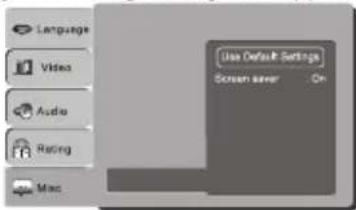
- Use the RIGHT direction buttons to skip to select the settin
- Use the UP/DOWN direction to change the setting.
- Press OK for each setting to cycle through the options and change the settings.
The following subsections explain the available options for each of the player's Misc setting.
Use Default Settings:
Press OK, pop up window "Use Default Setting",
There are two selections: YES/NO.
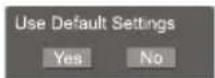
No=Return to Use Default Setting
Yes=Close Setup menu, play disc.
TROUBLE SHOOTING
Should your DVD player develop a problem, please check below before requesting service:
| Symptom | Check and Action |
| No Power | Check if the power cord has been properly connected to the power outlet.Check if the main power has been switched on. |
| Does not play | No disc, load a disc.Disc has been loaded upside down. Place the disc with the label side up.Disc's region code does not match to the player.Disc is not correct type for player.Disc is damaged or dirty, clean the disc or try another disc.Moisture may be condensed inside the player. Remove the disc and leave the unit power on for one or two hours. |
| No Picture | Check if the TV set has power on, use TV remote to select A/V signal for DVD rather than broadcast.Check if the system connection is proper and secure.Check if the connection cables are damaged.Clean the disc. |
| Picture noise / distorted | The disc is dirty or damaged. Clean the disc or try another disc.Reset the color system of the player or the TV set.Try to direct the player to the TV set instead of via other components, such as a VCR. |
| Picture not full screen | Select the screen format from the player's SETUP MENU, see "SETUP MENU" of this manual.Select the screen format from DVD disc menu. |
| Malfunction | Should the player develop a malfunction, unplug the player for 30 minutes. After 30 minutes, power on the player and the restore function should reset the player. |
| No sound | DTS disc used. Press the remote control LANGUAGE" buttonand re-select the audio setting on the remote. |
CAUTION : To reduce the risk of fire and electric shock, do not remove the cover (or back) of the unit. Refer servicing only to Singer Service Technician
| Symptom | Check and Action |
| Cannot SKIP or SEARCH | Some discs are programmed that do not allow users to SKIP or SEARCH at some sections, especially at the beginning WARNING section.Single Chapter disc cannot apply SKIP function. |
| No sound or sound output not complete | Check if the TV and Amplifier have been switched on, and correctly set.Check if the TV and Amplifier system connection is secured.Press LANGUAGE button to select other audio tracks output of disc.Check if the MUTE function of the TV or Amplifier has been activated.There will be no sound output during PAUSE / STEP / SLOW and SEARCH. |
| No surround sound | If digital output has been applied:Press SETUP buttonHighlight "AUDIO"Highlight "Digital Out"Select RAW or PCMPress SETUP buttonPower on the amplifier or active type loudspeakers. |
| MP3 disc no sound or noisy | When PC program files or other data files are mixed with MP3 files in the same disc, the player may play the non-MP3 files with noise or no sound.Check the disc, if all the files on disc are MP3 files Skip the file, try other files. |
| Remote control does not function | Remove the obst acles between the remote control and the player.Point the remote control towards the remote sensor on the player.Check if the batteries of the remote control have been loaded with correct polarities.Replace the batteries of the remote control. |
SPECIFICATIONS
| Type of Disc | DVDCD-DACD-MP3Kodak Picture CDCD-R / CD-RW |
| Video Format | MPEG 2 |
| Audio Format | MPEG 1, LAYER 1, LAYER 2, LAYER 3 |
| Signal Output | Color System: NTSCAudio System: DIGITAL down mix stereoDIGITAL digital outputAudio DAC 16bit/48KHzVideo Output: 1 Vpp (at 75 ohm)Audio Output (Stereo): 2 Vpp |
| Frequency Response | CD: 4Hz 20KHz (EIAT)DVD: 4Hz 22KHz (48K)4Hz 44KHz (96K) |
| S/N radio | >92 dB |
| THD | <0.04% |
| Output Terminals | Video (composite) output X1S -Video output X1YPbPr output X1 |
| Power Supply | AC 100-240V~ 50/60Hz |
| Dimensions | DVD size : W430xD240xH33mm |

- SAFETY INFORMATION
- IMPORTANT SAFEGUARDS
- INSTALLATION
- CAUTION
- INSTALLATION WARNINGS
- COMPULSORY WARNINGS
- LASER SAFETY
- FEATURES
- PACKING LIST
- CONTENTS
- ESSENTIAL SETUP
- VIDEO OUTPUTS
- FOR TV SYSTEM SETTING
- DEFAULT SETTING NTSC
- INTRODUCTION
- BE ENVIRONMENTALLY FRIENDLY
- ABOUT DVD
- REMARK
- SELECT A DVD DISC
- DVD REGION CODE
- CARE OF DISC
- ABOUT THE PLAYER
- REMOTE CONTROL
- NOTES
- SYSTEM CONNECTION
- PREPARATIONS
- ACCESSORIES
- BATTERY INSTALLATION OF REMOTE CONTROLLER
- SYSTEM CONNECTION(OPTIONAL ACCORDING TO YOUR BACK PANEL)
- 5.1 CHANNEL CONNECTION
- GETTING STARTED
- PLAY A DISC
- SWITCH ON THE PLAYER
- AUTOMATIC PLAY
- NOTE
- SCREEN SAVER
- FUNCTION BUTTONS
- SELECT AN ITEM IN MENU
- DISC TITLE /MENU
- DISC MENU
- DISC TITLE
- CLEAR
- MULTI-ANGLE
- MULTI-SUBTITLE
- MULTI-AUDIO SOUNDTRACK
- V-MODE
- SEARCH A DESIRED SECTION
- THIS FUNCTION DOES NOT APPLY TO MP3
- DVD DISC
- CD DISC
- REPEAT
- MP3 DISC
- REPEAT THE SECTION A-B
- ZOOM
- IN DVD MODE
- MUTE
- PBC PLAY
- CHANNEL
- A-MODE
- PROGRAM SETTING
- DVD/VCD PROGRAM MENU
- CD/MP3 PROGRAM MENU
- RETURN
- N/P
- ON SCREEN DISPLA Y
- DISPLAY
- DISPLAY- DVD MODE
- ON SCREEN DISPLAY
- SELECT A TRACK
- PLAYING TRACK FILE INFORMATION
- SETUP
- LANGUAGE
- VIDEO
- TV SCREEN
- 4:3 LETTER
- SETUP MENU (PRESS SETUP BUTTON)
- TV SYSTEM
- AUDIO (DIGITAL AUDIO)
- RATING
- DEFAULT SETTING
- MISC
- TROUBLE SHOOTING
- SPECIFICATIONS
Brand : CURTIS
Model : DVD6091
Category : Home Theater