
MMP8570 - Mp3 player MEMOREX - Free user manual and instructions
Find the device manual for free MMP8570 MEMOREX in PDF.


| Product Type | Personal FM Stereo MP3/WMA Player |
| Model | MMP8570 |
| Brand | Memorex |
| Dimensions (W x H x D) | 75 x 68 x 25 mm |
| Weight (without battery) | 50 g |
| Battery Type | 1 x AAA battery (alkaline recommended) |
| Display | Full graphic LCD with backlight |
| Internal Memory | 512 MB |
| External Memory Support | SD/MMC card up to 512 MB (not included) |
| Audio Format Support | MP3 (MPEG 1/2/2.5 Layer 3), WMA (including DRM) |
| Bit Rate Range | 8 kbps – 320 kbps |
| Frequency Response | 20 Hz – 20 kHz |
| Signal-to-Noise Ratio (MP3) | 90 dB |
| Headphone Output | 10 mW, 16 ohms (max volume) |
| FM Tuner Frequency Range | 87.5 MHz – 108 MHz |
| FM Antenna | Headphones/earphones cord |
| Preset Stations | 20 presets |
| USB Interface | USB 2.0 |
| Supported Operating Systems | Windows ME, 2000, XP, Mac OSX; Windows 98SE (driver required) |
| Max Playtime (128 kbps MP3) | Approx. 18 hours |
| Equalizer Presets | Normal, XBass, Rock, Classical, Jazz, Pop |
| Playback Modes | Normal, Repeat One, Repeat All, Random, Random All |
| Operating Temperature | 23°F to 104°F (-5°C to 40°C) |
| Country of Origin | China |
Frequently Asked Questions - MMP8570 MEMOREX
User questions about MMP8570 MEMOREX
0 question about this device. Answer the ones you know or ask your own.
Ask a new question about this device
Download the instructions for your Mp3 player in PDF format for free! Find your manual MMP8570 - MEMOREX and take your electronic device back in hand. On this page are published all the documents necessary for the use of your device. MMP8570 by MEMOREX.
USER MANUAL MMP8570 MEMOREX
Is it live or is it Memorex?TM
MMP8570A
User's Guide
Personal FM Stereo MP3/WMA Player

natural_image
Simple line drawing of a circular device with a square display and control knob (no text or symbols)Before operating this product, please read these instructions completely.
PRECAUTIONS
COPYRIGHT:
- Distributing copies of MP3, WMA, WMA with DRM tracks without permission is a violation of international copyright laws.
SAFETY:
- Vibration experienced during walking or exercising will not affect the player. However, dropping the player or dropping a heavy object on the player may result in damage or sound distortion.
- Avoid spilling any liquid onto or into the player.
- Do not leave the player in a location near heat sources; in a location subject to direct sunlight, excessive dust, sand, moisture, rain or mechanical shock; on an unlevel surface; or in a car with the windows closed during periods of excessive heat.
ROAD SAFETY:
- Do not use headphones while driving, cycling or operating any motorized vehicle. It may create a traffic hazard and it is illegal in some areas. It can be potentially dangerous to play your headset at a high volume while walking, especially at pedestrian crossings. You should exercise extreme caution or discontinue use in potentially hazardous situations.
FCC WARNING:
- This equipment may generate or use radio frequency energy. Changes or modifications to this equipment may cause harmful interference unless the modifications are expressly approved in the instruction manual. The user could lose the authority to operate this equipment if an unauthorized change or modification is made.
FCC DECLARATION
This device complies with Part 15 of the FCC rules. Operation is subject to the following two conditions: 1) This device may not cause harmful interference, and 2) This device must accept any interference received, including interference that may cause undesired operation.
Warning: Changes or modifications to this unit not expressly approved by the party responsible for compliance could void the user's authority to operate the equipment.
NOTE: This equipment has been tested and found to comply with the limits for a Class B digital device, pursuant to Part 15 of the FCC Rules. These limits are designed to provide reasonable protection against harmful interference in a residential installation. This equipment generates, uses and can radiate radio frequency energy and, if not installed and used in accordance with the instructions, may cause harmful interference to radio communications.
However, there is no guarantee that interference will not occur in a particular installation. If this equipment does cause harmful interference to radio or television reception, which can be determined by turning the equipment off and on, the user is encouraged to try to correct the interference by one or more of the following measures:
- Reorient or relocate the receiving antenna.
- Increase the separation between the equipment and receiver.
- Connect the equipment into an outlet on a circuit different from that to which the receiver is connected.
- Consult the dealer or an experienced radio/TV technician for help.
Shield cable must be used with this unit to ensure compliance with class B FCC limits.
Dear Customer:
Selecting fine audio equipment such as the unit you've just purchased is only the start of your musical enjoyment. Now it's time to consider how you can maximize the fun and excitement your equipment offers. This manufacturer and the Electronic Industries Association's Consumer Electronics Group want you to get the most out of your equipment by playing it at a safe level. One that lets the sound come through loud and clear without annoying blaring or distortion and, most importantly, without affecting your sensitive hearing.
Sound can be deceiving. Over time your hearing “comfort level” adapts to higher volumes of sound. So what sounds “normal” can actually be loud and harmful to your hearing. Guard against this by setting your equipment at a safe level BEFORE your hearing adapts.
To establish a safe level:
- Start your volume control at a low setting.
- Slowly increase the sound until you can hear it comfortably and clearly, and without distortion.
Once you have established a comfortable sound level:
- Set the dial and leave it there.
Taking a minute to do this now will help to prevent hearing damage or loss in the future. After all, we want you listening for a lifetime.
We Want You Listening For A Lifetime
Used wisely, your new sound equipment will provide a lifetime of fun and enjoyment. Since hearing damage from loud noise is often undetectable until it is too late, this manufacturer and the Electronic Industries Association's Consumer Electronics Group recommend you avoid prolonged exposure to excessive noise. This list of sound levels is included for your protection.
Decibel
Level Example
30 Quiet library, soft whispers
40 Living room, refrigerator, bedroom away from traffic
50 Light traffic, normal conversation, quiet office
60 Air conditioner at 20 feet, sewing machine
70 Vacuum cleaner, hair dryer, noisy restaurant
80 Average city traffic, garbage disposals, alarm clock at two feet
THE FOLLOWING NOISES CAN BE DANGEROUS UNDER CONSTANT EXPOSURE:
90 Subway, motorcycle, truck traffic, lawn mower
100 Garbage truck, chain saw, pneumatic drill
120 Rock band concert in front of speakers, thunderclap
140 Gunshot blast, jet engine
180 Rocket launching pad
Information courtesy of the Deafness Research Foundation.


LOCATION OF CONTROLS

- Menu/Lock Button
- VOLUME +/- Buttons
- Display
- PRESS TO OPEN Button
- PLAY/PAUSE ▶ II Button
- Tuning/Skip/Search
◀ Button - Headphone Jack
- Power/Stop ■ Button
-
Navigation Control
-
Battery Compartment (Rear of Unit)
- Preset –/Navigation Up ▲ Button
- Tuning/Skip/Search ▶▶ Button
- Preset +/Navigation Down ▼ Button
- USB Port
BATTERY INSTALLATION
When the bars in the battery indicator (in the display) become low (see figure 1), replace the battery as follows.

Figure 1
-
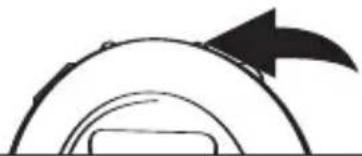
Open the rear cover by pressing the PRESS TO OPEN button, then lift the rear cover up to remove it as shown in figure 2.
-
Insert one (1) "AAA" battery as shown in figure 3. An alkaline battery is recommended for the longest playing time.
-
Put the rear cover back on until it snaps in place.

natural_image
Line drawing of a hand holding an object, possibly a tool or device (no text or symbols present)
natural_image
Simple line drawing of a helmet with no text or symbolsFigure 3 Figure 2
NOTE: Each time after you have replaced the battery, when you turn on the unit again, it will search the music files to update the index. It will take approx. several seconds to update the index; this updating time depends on the number of music files in the SD/MMC card and in the internal memory.
BATTERY PRECAUTIONS
Follow these precautions when using a battery in this device:
- Use only the size and type of battery specified.
- Be sure to follow the correct polarity when installing the battery as indicated. Reversed batteries may cause damage to the device.
- If the device is not to be used for a long period of time, remove the battery to prevent damage or injury from possible battery leakage.
- Do not try to recharge batteries not intended to be recharged; they can overheat and rupture. (Follow battery manufacturer's directions.)
INSTALL "DIGITAL AUDIO PLAYER" SOFTWARE
TO INSTALL THE "DIGITAL AUDIO PLAYER" CD SOFTWARE
For Windows ME, Windows2000 or Windows XP:
Windows will automatically detect the audio player without installing the CD software when the USB cable is connected.
For Macintosh OSX:
Macintosh OSX will automatically detect the audio player without installing the CD software (see page 12 for more details). Do not install the software when using a Macintosh.
For Windows98SE:
The USB mass storage function will not be activated without driver installation. To activate the USB mass storage function, please use the installation CD-Rom to install the driver.
For Windows 98SE, if you are connecting your player to your computer for the first time, please follow these
instructions:
Procedure to Install Player Driver
- Insert the Installation CD-Rom into the CD Drive; the auto-run program will display the Main Menu window. Click "Software Drivers".
NOTE: If the Main Menu window does not appear, double click the "Memorex Startup CD" application file on the Installation CD to open the Main Menu window.
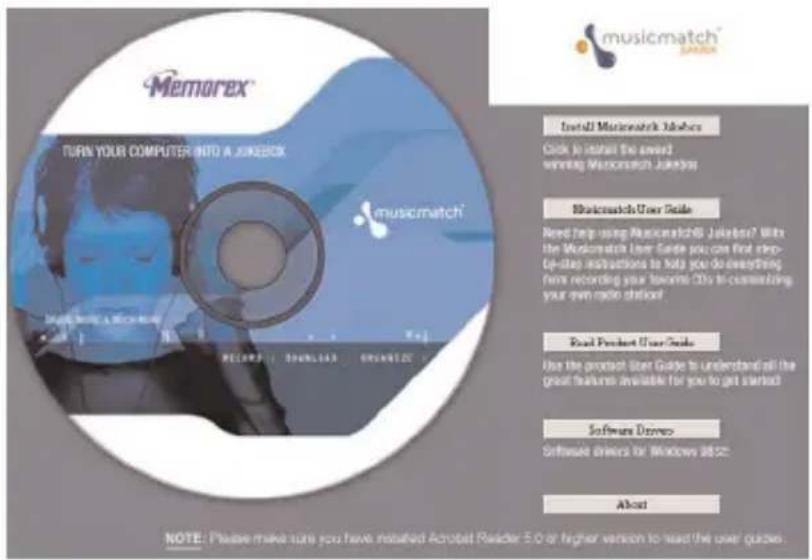
WINDOWS 98 DRIVER INSTALLATION
- Click "MMP8570" to run the Windows 98SE driver.
- Follow the on-screen instructions to install the software.

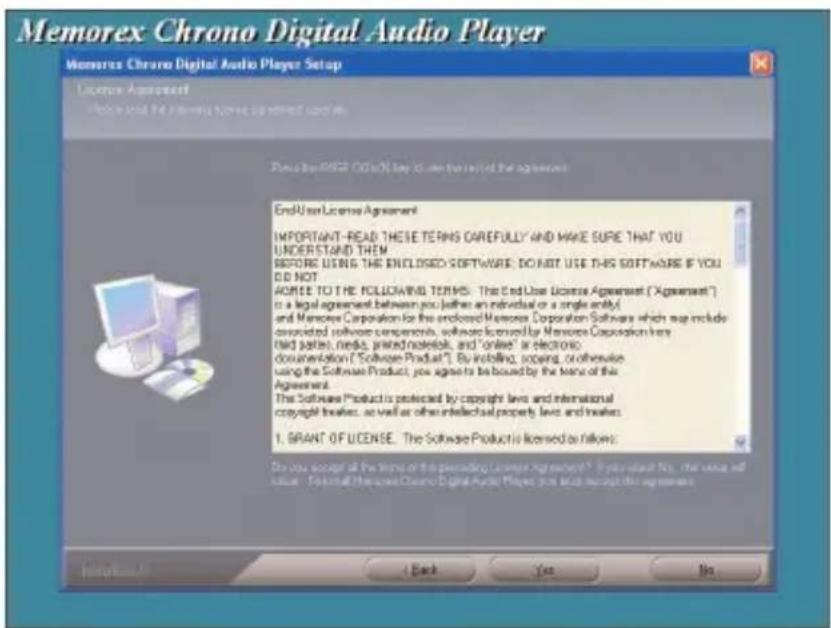
WINDOWS 98 DRIVER INSTALLATION (CONTINUED)
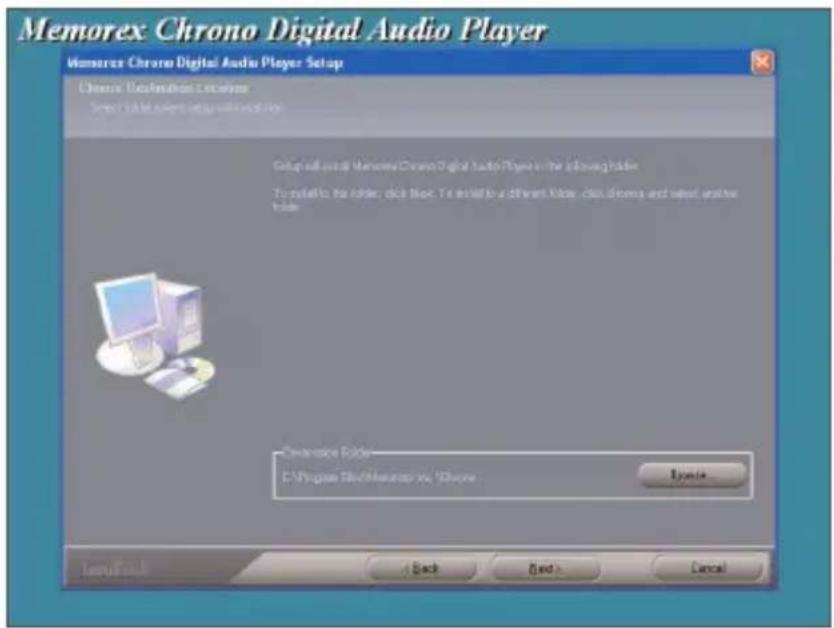
- Install the software under the directory as prompted.
Warning: DO NOT change the installation path. Otherwise, the driver may not run properly.

WINDOWS 98 DRIVER INSTALLATION (CONTINUED)
- After successfully installing the driver software, click "Finish" to finish the installation and exit the Setup menu.

- When the installation has completed, the new program, "Memorex Chrono Digital Audio Player", will be added to the PROGRAM menu on your computer.

DOWNLOADING AND TRANSFERRING FILES
TRANSFERRING FILES
You can download digital music files from the Internet or use encoding software to convert music that you have on an audio CD into MP3 or WMA format. Once these files are stored on your computer you can easily copy them to your player.
Connect the computer to your player using the supplied USB cable.
Press the Power/Stop button to turn the unit on.
A "Removable Disk" window will automatically pop-up on your computer screen.
To add more files and songs to your player simply drag and drop MP3 or WMA files from anywhere on your computer into the "Removable Disk" window.


IMPORTANT NOTE: A WMA file with DRM will not play back if you directly drag and drop it into the "Removable Disk" window. You must use MMJB or Windows Media Player to transfer copy-protected files.
When you are finished, see the Safely Remove Hardware procedure on page 13 before disconnecting the player.
DOWNLOADING AND TRANSFERRING FILES
TRANSFERRING AUDIO FILES TO YOUR DIGITAL AUDIO PLAYER USING A MACINTOSH COMPUTER
Make sure to use a Macintosh computer with an operating system of 10.0 or later to transfer audio files.
- Turn on your computer.
- Turn on your digital audio player.
- Connect the smaller end of the cable to the USB jack on the player and the larger end of the cable to your USB port on your Macintosh.
- Your computer will automatically recognize your player and mount a hard disk icon onto your desktop.
- Locate the folder where your audio files are stored on your computer's hard drive. Simply drag and drop the audio files onto the mounted hard disk drive icon of your digital audio player located on your desktop.
- After you have finished your transfer, put away the digital audio player hard disk icon(s) by dragging it to the Trash icon or Control-click its icon and choose Eject from the file menu or select Eject from the File drop down menu located at the top of your screen. You can also use the keyboard shortcuts by selecting the digital audio player hard disk icon and pressing the Command-E keys.
- Your player is ready to play the files you transferred.
SAFELY REMOVE HARDWARE (PC)
SAFELY REMOVING YOUR PLAYER FROM THE COMPUTER
NOTE: To avoid damage to your player or data loss, always follow the procedure listed below before disconnecting the USB cable from your computer or disconnecting the player from the USB cable.
Using your mouse, double-click the "Safely Remove Hardware" icon on the task bar.
From the "Safely Remove Hardware" window, select "USB Mass Storage Device" and click the "Stop"
button. The "Stop a Hardware Device" window will pop-up as shown:
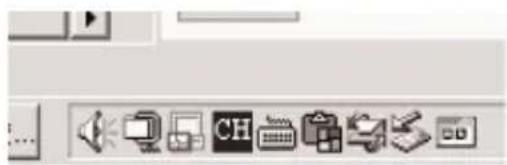

Click "OK". When the "Safe to Remove Hardware" window is displayed, you may remove the player from the USB cable or remove the USB cable from the computer.
NOTES:
- If the “Safely Remove Hardware” icon is not displayed on the task bar, please double -click on My Computer. Right-click on “Removable Disk” and left-click on “Eject”. Then it is safe to remove the player from the computer.
- The “Safely Remove Hardware” procedure is not necessary for Win98 and Win98SE users.
INSTALLING MUSICMATCH JUKEBOX
MUSICMATCH JUKEBOX INSTALLATION (PC ONLY):
-
Insert the Installation CD-ROM into the CD Drive, the auto-run program will display the Main Menu. Click "Install Musicmatch Jukebox".
NOTE: If the Main Menu Window does not appear, double click "Memorex Startup CD" Application file in the installation CD in order to open the Main Menu. -
Follow the online prompts to complete the installation.
DOWNLOADING TRACKS TO THE UNIT USING MUSICMATCH JUKEBOX (MMJB)
Please follow these instructions for transferring tracks from the computer to the unit.
NOTE: WMA DRM protected files will not play if you use the "drag and drop" procedure. You must follow the procedure below to play WMA DRM files on your MMP8570.
- Install the MMJB Software as described above.
- Turn the unit ON, then connect the USB cable to the unit and the USB port of the computer. "USB Connect" will be displayed on the LCD when it is properly connected.
- Open MMJB and click "Portable Device" on the left hand side of the window. The "Portable Device Manager" window will pop up. MMJB may need some time while synchronizing with the device.
- You may now either:
a. Click the "Add" button and search for tracks or Playlists. Highlight the desired tracks or Playlists and click "Add".
b. Drag and drop tracks into the Portable Device Manager window from anywhere on your computer or from the MMJB Library. - The tracks are now properly transferred to the player. Follow the "Safely Removing Hardware" section on the previous page. Unplug the unit from the computer and insert the headphones and listen to your music.
INSTALLING MUSICMATCH JUKEBOX (CONTINUED)
RECORDING TRACKS FROM A CD TO A COMPUTER USING MUSICMATCH JUKEBOX (MMJB)
- Click the "Copy From CD" button on the left hand side of the window to open the Recorder window.
- Insert an audio CD into your CD-ROM drive. (CD Lookup will read your CD and attempt to fill in Album, Artist, and Track (Tag) information if the computer connected to the internet )
- Tick the boxes next to the tracks that you wish to record.
- Click the "Start Copy" button. (The files will be recorded as MP3 files at 128Kbps). MMJB will start to record from the audio CD, to the digital file format you choose, and place recorded files into the Library.
Important Note: For further details please consult the "Musicmatch User Guide" located on the Main Menu of the Installation CD.
DOWNLOADING AND TRANSFERRING FILES (CONTINUED)
EXTERNAL MEMORY CARD
TO AVOID DAMAGE, make sure the unit is off before inserting or removing the card.
-
Remove the rear cover by pressing the PRESS TO OPEN button, then lift the rear cover up to remove it, as shown in Figure 1.
-
Insert a SD/MMC memory card (not included) up to 512MB, facing up, as shown in Figure 2.
- Connect the USB cable as described previously.
- Drag MP3 and WMA files into the SD/MMC memory card's "Removable Disk" window.
NOTE: A WMA file with DRM will not playback if you directly drag and drop it into the "Removable Disk" window. See page 14 for downloading WMA files with DRM from the computer to your player.
- To remove the SD/MMC memory card, turn the unit off, then push the edge of the card as shown in Figure 3, and the card will spring out. Carefully remove the card.
- Replace the rear cover until it snaps in place.
NOTE:
- If the external card is inserted, removed or replaced, the unit will search the music files to update the index when the unit is turned on again.
- If the external card is inserted, the memory card indicator will appear at the top side of the display while in the Music Player mode.

natural_image
Line drawing of a hand holding an object, possibly a fruit or vegetable (no text or symbols)Figure 1

natural_image
Technical line drawing of a circular mechanical component with mounting holes and a separate rectangular housing (no text or symbols)Figure 2

natural_image
Technical line drawing of a circular mechanical component with mounting holes and a rectangular housing (no text or symbols)Figure 3
OPERATION
natural_image
Simple black-and-white diagram showing a curved arrow pointing right, with number 1 in the top-left corner (no text or symbols on the arrow itself)Turn the unit on by pressing the Power/Stop button; the Memorex start screen will appear in the display temporarily. Then the Music Player menu will appear and the MP3/WMA track's information will appear in the display. To turn the unit off, press and hold the Power/Stop button; “Continue Holding To Power Off” will appear in the display. Do not release the Power/Stop button until the unit turns off.
LOCK SWITCH

natural_image
Simple line drawing of a curved arrow pointing right, no text or symbols presentWhile in the Music Player menu or the FM Tuner menu, press and hold the Menu/Lock button; "Holding" will appear in the display. When "Locked" appears in the display, release the button. Then a small Lock icon will appear at the bottom right side of the display which indicates that the Lock function is activated (no buttons will be able to be pressed). This is useful when you do not want the station/track changed by accidentally pressing a button. To cancel the Lock function, press and hold the Menu/Lock button, "Locked" will appear in the display. When "Unlocked" appears in the display, release the button. Then the small Lock icon will disappear from the display which indicates that the Lock function is cancelled.
While in the Music Player menu, press the Menu/Lock button ①; the Main menu will appear. Rotate the Navigation control ② to select Settings, then press the Navigation control ②; the Settings menu will appear. Rotate the Navigation control ② to select Equalizer, then press the Navigation control ②; the Equalizer menu will appear. Rotate the Navigation control ② to select the desired EQ setting: Normal, XBass, Rock, Classical, Jazz or Pop. Press the Navigation control ② to select and exit the Equalizer menu. Press the Menu/Lock button ① twice to exit the menus. The selected EQ setting will appear at the top of the display when in Music Player mode.
NOTE: To navigate up/down through the menu, you can use the Preset -/Navigation Up ▲ or Preset +/Navigation Down ▼ button in place of rotating the Navigation control.
OPERATION (CONTINUED)
TO LISTEN TO THE FM RADIO
1
natural_image
Simple line drawing of a circular object with an arrow pointing upward (no text or symbols)Turn the unit on by pressing the Power/Stop button; the Memorex start screen will appear in the display temporarily. Then the Music Player menu will appear and the MP3/WMA track's information will appear in the display.
2

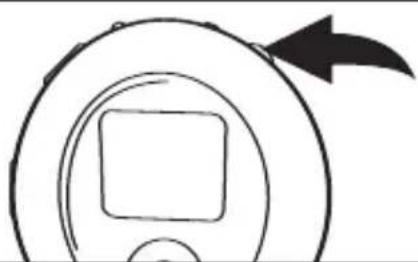
Press the Menu/Lock button ①; the Main menu will appear. Rotate the Navigation control ② to select FM, then press the Navigation control ②; the FM Tuner will appear.
NOTE: When you select the Radio mode for the first time, the unit will automatically scan and set the available stations into Presets 1 through 20. Then Preset 1 will appear with the corresponding frequency tuned in.
3
natural_image
Simple line drawing of a circular object with a central square and an arrow pointing right (no text or symbols)Select a station by rotating the Navigation control. When a station is broadcasting in stereo, "STEREO" will appear in the display, otherwise "MONO" will appear in the display.
4
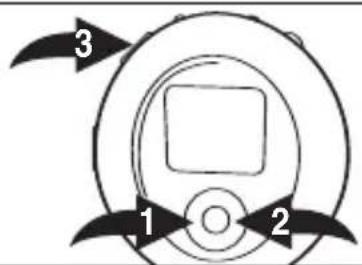
AUTOMATIC TUNING: You can also press and hold the Tuning/Skip/Search ◀/◀◀ ① or ▶/▶▶ ② button and the unit will automatically search for the next strong station. Press the VOLUME +/- buttons ③ to increase or decrease the volume.
ANTENNA
FM—The headphones act as an antenna for FM. Extend the headphone wire for best FM reception.
OPERATION (CONTINUED)
TO ADD PRESETS

While in FM Playback mode, and with a desired station selected, press the Menu/Lock button ①; the FM Menu will appear. Rotate the Navigation control ② to select Add Preset, then press the Navigation control ②.

Select a desired Preset by rotating the Navigation control ①, then press the Navigation control ①. Select Yes (confirm adding the station to the Preset) or No (cancel adding the station to the Preset) by rotating the Navigation control ①, then press the Navigation control ①. To exit the FM menu, press the Menu/Lock button ②.
TO LOAD PRESETS

While in FM Playback mode, press the Menu/Lock button ①; the FM Menu will appear. Rotate the Navigation control ② to select Load Preset, then press the Navigation control ②.

natural_image
Simple line drawing of a mechanical component with an arrow indicating direction (no text or symbols)Select a desired Preset by rotating the Navigation control, then press the Navigation control.
NOTE: You can also load a Preset while in FM Playback mode by pressing the Preset/Navigation Up ▲ or Down ▼ button.
AUTO SCAN:
While in FM Playback mode, press the Menu/Lock button; the FM menu will appear. Rotate the Navigation control to select Auto Scan then press the Navigation control. The unit will automatically scan and set the available stations into Presets 1 through 20. Then Preset 1 will appear with the corresponding frequency tuned in.
NOTE: During Auto Scan, " 🔍" will appear in the display.
OPERATION (CONTINUED)
TO DELETE A PRESET
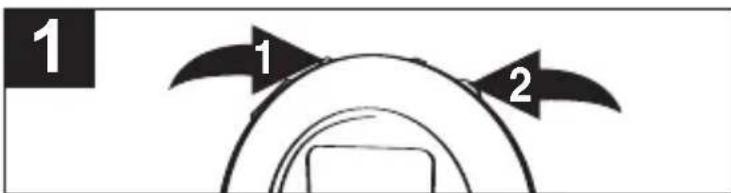
While in FM Playback mode, press the Menu/Lock button ①; the FM Menu will appear. Rotate the Navigation control ② to select Delete One, then press the Navigation control ②.

Select a desired Preset to delete by rotating the Navigation control ①, then press the Navigation control ①. Select Yes (to delete the selected preset) or No (to cancel deleting the selected preset) by rotating the Navigation control ①, then press the Navigation control ①. To exit the menus, press the Menu/Lock button ② twice.
TO DELETE ALL PRESETS

While in FM Playback mode, press the Menu/Lock button ①; the FM Menu will appear. Rotate the Navigation control ② to select Delete All, then press the Navigation control ②.

Press the Navigation control ①. Select Yes (to delete all the preset stations) or No (to cancel deleting all the preset stations) by rotating the Navigation control ①, then press the Navigation control ①. To exit the menu, press the Menu/Lock button ②.
OPERATION (CONTINUED)
TO LISTEN TO MP3s/WMAs
1

2

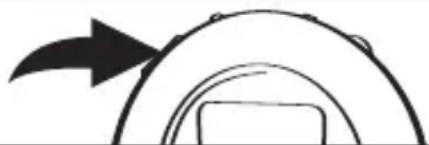
Turn the unit on by pressing the Power/Stop button ①; the Memorex start screen will appear in the display temporarily. Then the MP3/WMA track's information will scroll across the display and the song number and timer will appear at the bottom of the display, press the PLAY/PAUSE ▶II button ② to start playback.
If the unit is in FM mode, press the Menu/Lock button ①; the FM menu will appear in the display. Rotate the Navigation control ② to select "Exit FM", then press the Navigation control ② to select and enter the Music Player menu and the MP3/WMA track's information will appear in the display. Press the PLAY/PAUSE ▶ II button ③ to start playback.
3
natural_image
Simple line drawing of a circular object with an arrow pointing to it, no text or symbols present.4

natural_image
Simple line drawing of a circular object with an arrow pointing upward (no text or symbols)Set the Equalizer as shown on page 17. Press the VOLUME +/- buttons to increase or decrease the volume.
Press the Power/Stop button to stop playback. To turn the unit off, press and hold the Power/Stop button; "Continue Holding To Power Off" will appear in the display. Do not release the Power/Stop button until the unit turns off.
NOTE:
- See pages 7 through 16 for information on uploading MP3 and WMA files to this unit.
RESUME:
If you turn the unit off while playing a music file, when you turn on the unit again, the last file played will appear in the display. Press the PLAY/PAUSE ▶II button to resume playback of the music file.
NOTE: There will be no Resume after replacing the battery; inserting, removing or changing the SD/MMC card; or adding/deleting music files in the internal/external memory.
OPERATION (CONTINUED)
TO PAUSE PLAYBACK
1
natural_image
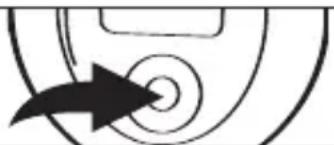
Pure diagram of a computer monitor with an arrow pointing to the screen (no text or symbols)During playback, if you wish to pause the file momentarily, press the PLAY/PAUSE ▶■ button; playback will pause, the Pause indicator will appear and the timer will stop counting.
2

natural_image
Pure diagram of a computer monitor with an arrow pointing to the screen (no text or symbols)Press the PLAY/PAUSE ▶■ button again to resume playback; the sound will return, the Play indicator will appear and the timer will start counting again.
NOTE: If you are not in the Music Player menu, the Pause function will not be available.
TO SELECT/BROWSE THROUGH THE FILES
1

Press the Menu/Lock button ①; the Main menu will appear. Rotate the Navigation control ② to select Browse, then press the Navigation control ②; the Browse Menu will appear.
2

natural_image
Simple line drawing of a circular object with an arrow pointing right (no text or symbols)Rotate the Navigation control to select the desired songs to browse (All Songs, Albums, Artists, Genres, Songs), then press the Navigation control. (See below for how to navigate within the category.)
All Songs—the unit will start playback automatically; all the music files in the player and in the SD/MMC card will be played. Albums/Genres—the Albums/Genres will be shown in the display. Select the desired Album/Genre by rotating the Navigation control and pressing the Navigation control to confirm. To playback all music files of the Album/Genre, rotate the Navigation control to select All Songs and press the Navigation control to start playback. OR rotate the Navigation control to select the desired music file inside the Album/Genres; press the Navigation control to playback the music file selected.
Artists—the Artists will be shown in the display. Select the desired Artist by rotating the Navigation control and press the Navigation control to confirm the selection. Rotate the Navigation control to select All Songs and press the Navigation control to start playback all the music files of the selected artist. OR select the desired Album by rotating the Navigation control and press the Navigation control to confirm. To playback all music files in the album, rotate the Navigation control to select All Songs and press the Navigation control to start playback of the music files in the selected album. OR rotate the Navigation control to select the desired music file inside the album. Press the Navigation control to playback the music file selected.
Songs—the Songs/music files will be shown in the display, select the desired music file by rotating the Navigation control; then press the Navigation control to playback the music file selected.
NOTE: To return to the previous menu, press the Menu/Lock button once.
OPERATION (CONTINUED)
FORWARD/REVERSE SKIP
1

natural_image
Simple line drawing of a circular device with a square display and control knob, no text or symbols present.2
natural_image
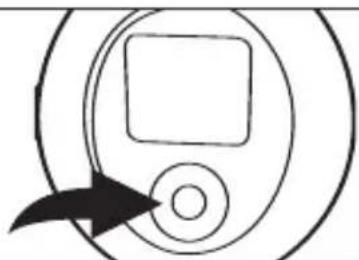
Simple line drawing of a circular device with a square display and control knob, no text or symbols present.During playback, press the Navigation/Skip/Search ▶/▶ button to advance the player to the beginning of the next file. Press the Navigation/Skip/Search ▶/▶ button repeatedly to advance the player to higher-numbered files.
During playback, press the Navigation/Skip/Search ◀/◀ button to move the player back to the beginning of the currently-playing file. Press the Navigation/Skip/Search ◀/◀ button repeatedly to move the player back to lower-numbered files.
HIGH-SPEED MUSIC SEARCH
1

During playback, press and hold the Navigation/Skip/Search ◀/◀◀ ① or ▶/▶▶ ② button to move the player forward or backward within a file to locate a specific musical passage. The player will move forward or backward at high speed as long as the button is held. When you release the button, normal playback will resume.
NOTE: If you are not in the Music Player menu, the Forward/Reverse Skip and High-Speed Music Search functions will not be available.
OPERATION (CONTINUED)
TO SELECT A PLAY MODE
1
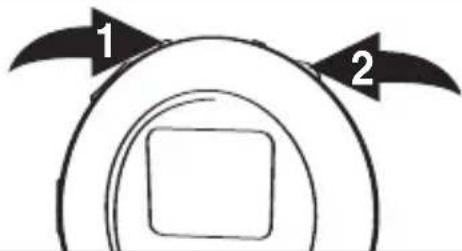
Press the Menu/Lock button ①. Rotate the Navigation control ② to select Settings, then press the Navigation control ②; the Settings menu will appear.
2

natural_image
Simple line drawing of a circular object with a square center and an arrow pointing right (no text or symbols)Rotate the Navigation control to select Play Mode, then press the Navigation control; the Play Mode menu will appear.
3

natural_image
Simple line drawing of a circular device with a central screen and an arrow pointing right (no text or symbols)Rotate the Navigation control to select a desired Play mode (Normal, Repeat One, Repeat All, Random or Random All), then press the Navigation control.
Normal-normal playback mode
Repeat One—repeatedly playback a music file
Repeat All—repeatedly playback all the selected music files
Random—randomly playback all the selected music files once
Random All-randomly playback all the selected music files repeatedly
NOTE: see page 22 for Selecting/Browsing the files.
4

natural_image
Simple line drawing of a circular device with a square center and an arrow pointing to the top (no text or symbols)Press the Menu/Lock button twice to exit the menus; the selected mode will be activated.
OPERATION (CONTINUED)
TO SET THE CONTRAST
1

Press the Menu/Lock button ①. Rotate the Navigation control ② to select Settings, then press the Navigation control ②; the Settings menu will appear. Rotate the Navigation control ② to select Contrast, then press the Navigation control ②; the Contrast setting will appear.
2

Rotate the Navigation control ① to set the contrast, then press the Navigation control ①; the Settings menu will appear. Press the Menu/Lock button ② twice to exit the menus.
TO SET THE BACKLIGHT
1

Press the Menu/Lock button ①. Rotate the Navigation control ② to select Settings, then press the Navigation control ②; the Settings menu will appear. Rotate the Navigation control ② to select Backlight, then press the Navigation control ②; the Backlight menu will appear.
2

Rotate the Navigation control ① to select Off, 3 seconds, 5 seconds, 10 seconds or Always On. This is the time the backlight will be lit before turning off when no buttons are pressed. Select Off and the backlight will not light. Press the Navigation control ① to set; the Settings menu will appear. Press the Menu/Lock button ② twice to exit the menus.
OPERATION (CONTINUED)
TO SET THE POWER SAVINGS

Press the Menu/Lock button ①. Rotate the Navigation control ② to select Settings, then press the Navigation control ②; the Settings menu will appear. Rotate the Navigation control ② to select Power Saving, then press the Navigation control ②; the Power Saving menu will appear.

Rotate the Navigation control ① to select Off, 1 minute, 2 minutes, 5 minutes or 15 minutes. This is the time the unit will stay on if it is in the Stop mode and no buttons have been pressed for the set time. Press the Navigation control ① to set; the Settings menu will appear. Press the Menu/Lock button ② twice to exit the menus.
OPERATION (CONTINUED)
TO SET THE LANGUAGE

Press the Menu/Lock button ①. Rotate the Navigation control ② to select Settings, then press the Navigation control ②; the Settings menu will appear. Rotate the Navigation control ② to select Language, then press the Navigation control ②; the Language menu will appear.

Rotate the Navigation control ① to select English, Traditional Chinese, Spanish, French, Dutch or Italian. Press the Navigation control ① to set; the Settings menu will appear. Press the Menu/Lock button ② twice to exit the menus.
TO VIEW THE SYSTEM INFO

Press the Menu/Lock button ①. Rotate the Navigation control ② to select Settings, then press the Navigation control ②; the Settings menu will appear.

natural_image
Simple line drawing of a circular device with a square display and an arrow pointing to it (no text or symbols)Rotate the Navigation control ① to select About, then press the Navigation control ①; the System Information will appear. Press or rotate the Navigation control ① to view additional System Info. Press the Menu/Lock button ② three times to exit the menus.
TROUBLESHOOTING GUIDE
If you experience a problem with this unit, check the chart below before calling for service.
| SYMPTOM CAUSE SOLUTION | ||
| Unit will not Dead battery, or not Replace battery turn on. installed properly. properly. | and install | |
| No sound. Headphones | are not Insert headphones. inserted. | |
| Volume is set too low. Raise the volume. | ||
| DRM files copied & pasted. See page 14. | ||
| The MP3 or WMA files are corrupted. files. | Download uncorrupted | |
| FM distorted. Station not tuned. Retune station and extend headphone wire. | ||
| Download Failure. | Damaged USB cable. | Replace cable. |
| The computer is not recognizing the player. | The USB cable is Make not securely connected. | sure USB cable is securely connected. |
| Win98 driver is not installed or computer is not compatible. | Install Win98 driver and/or see pages 7 through 10 for compatibility. | |
TROUBLESHOOTING GUIDE (CONTINUED)
| SYMPTOM CAUSE SOLUTION | ||
| No buttons work. | The Lock feature is Deactivate Lock feature as activated. described on page 17. | |
| Unit needs to be reset Reset unit and/or or firmware needs to be updated. page 31. | ||
| Unit acting erratically. Unit needs to be reset Reset unit and/or or firmware needs to be updated. page 31. | ||
| WMA files with DRM Incorrect downloading See cannot playback. methods. WMA files with DRM. | page 14 to download | |
FORMATTING THE PLAYER
WARNING! Do not format this player unless it stops working and you are instructed to do so by technical support personnel.
Formatting the Player
- Use the USB cable to connect the player and the computer.
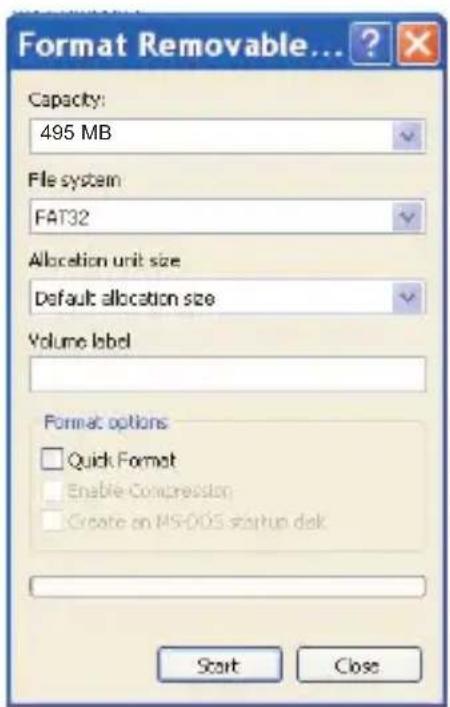
- Double click on My Computer, right-click the "Removable Disk" and left-click on "Format".
- At the "Format" window, select "FAT32" from the file system pull-down menu, then click start to format the unit (see figure to the right).
NOTE: Make sure you have selected "FAT32" at the file system pull-down menu, otherwise after formatting, the player will not work properly.
-
Click OK to confirm and the player will start to format.
-
When finished, click "Close" to close the Format window.
UPDATING THE FIRMWARE
WARNING! Do not update the firmware unless you are experiencing problems with your digital audio device. Incorrect or faulty firmware installation will cause the player to stop functioning.
- Download the updated firmware at www.memorexelectronics.com.
- Unzip the file, then double-click setup.exe in the Desktop folder to install the software to your computer.
- Connect the player to the computer using the supplied USB cable and the installation screen will appear. (If the installation screen does not appear, unplug the USB cable and turn off the unit. Connect to the computer again and press and hold the Power/Stop button until the installation screen appears.)
- Follow the on-screen instructions to install the driver.
- When finished, click START and locate the newly-installed software "Memorex Chrono Digital Audio Player" and select "Firmware Download".
RESETTING THE UNIT
If the player is not operating properly, try resetting it by removing the battery for a few seconds.
SPECIFICATIONS
Audio Frequency Range 20Hz–20KHz
Headphones Output 10mW, 16ohm (Max. Vol)
S/N Ratio 90dB (MP3)
File Support MP3 MPEG 1/2/2.5 Layer 3
WMA Windows Media Audio (WMA file with DRM)
Bit Rate 8kbps–320kbps
Tag Info ID3 Tag (Unicode OS)
FM Tuner FM Frequency Range 87.5MHz–108MHz
Antenna Headphones/Earphones Cord
Antenna
General Dimension
75 x 68 x 25 mm
Weight
50g (without battery)
Battery
1 x AAA battery
LCD
Full Graphic with Backlight
Language
6 Languages (English, Traditional
Chinese, French, Spanish, Dutch, Italian)
USB USB 2.0
Built-in Memory 512MB
Max. Playtime
Approx. 18 hours (128kbps, MP3 files)
Supported OS
Win ME, 2000, XP and Mac OSX
Win 98SE (Driver is required)
Operating Temperature
23^ F to 104^ F (-5°C to 40^ C )
Specifications are subject to change without notice.
FOR FIRMWARE UPGRADE, PLEASE VISIT OUR WEBSITE AT WWW.MEMOREXELECTRONICS.COM TO CHECK IF THERE IS NEW FIRMWARE AVAILABLE.
FOR ADDITIONAL SET-UP OR OPERATING ASSISTANCE, PLEASE VISIT OUR WEBSITE AT
WWW.MEMOREXELECTRONICS.COM
OR CONTACT CUSTOMER SERVICE AT (954) 660-7100.
PLEASE KEEP ALL PACKAGING MATERIAL FOR AT LEAST 90 DAYS IN CASE YOU NEED TO RETURN THIS PRODUCT TO YOUR PLACE OF PURCHASE OR TO MEMOREX.
FOR PARTS AND ACCESSORIES, CONTACT FOX INTERNATIONAL AT 1-800-321-6993.
Memcorp, Inc.
Weston, FL
Printed in China
Visit our website at www.memorexelectronics.com
MMP8570-A
- MMP8570A
- User's Guide
- PRECAUTIONS
- COPYRIGHT:
- SAFETY:
- ROAD SAFETY:
- FCC WARNING:
- FCC DECLARATION
- Dear Customer:
- To establish a safe level:
- Once you have established a comfortable sound level:
- We Want You Listening For A Lifetime
- Decibel
- Level Example
- THE FOLLOWING NOISES CAN BE DANGEROUS UNDER CONSTANT EXPOSURE:
- LOCATION OF CONTROLS
- BATTERY INSTALLATION
- BATTERY PRECAUTIONS
- INSTALL "DIGITAL AUDIO PLAYER" SOFTWARE
- TO INSTALL THE "DIGITAL AUDIO PLAYER" CD SOFTWARE
- For Windows ME, Windows2000 or Windows XP:
- For Macintosh OSX:
- For Windows98SE:
- Procedure to Install Player Driver
- WINDOWS 98 DRIVER INSTALLATION
- WINDOWS 98 DRIVER INSTALLATION (CONTINUED)
- DOWNLOADING AND TRANSFERRING FILES
- TRANSFERRING FILES
- TRANSFERRING AUDIO FILES TO YOUR DIGITAL AUDIO PLAYER USING A MACINTOSH COMPUTER
- SAFELY REMOVE HARDWARE (PC)
- SAFELY REMOVING YOUR PLAYER FROM THE COMPUTER
- Generic volume (F:)
- Sigma Tel Maseros Player USB 0 device
- NOTES:
- INSTALLING MUSICMATCH JUKEBOX
- MUSICMATCH JUKEBOX INSTALLATION (PC ONLY):
- DOWNLOADING TRACKS TO THE UNIT USING MUSICMATCH JUKEBOX (MMJB)
- INSTALLING MUSICMATCH JUKEBOX (CONTINUED)
- RECORDING TRACKS FROM A CD TO A COMPUTER USING MUSICMATCH JUKEBOX (MMJB)
- DOWNLOADING AND TRANSFERRING FILES (CONTINUED)
- EXTERNAL MEMORY CARD
- NOTE:
- OPERATION
- LOCK SWITCH
- OPERATION (CONTINUED)
- TO LISTEN TO THE FM RADIO
- 1
- 2
- 3
- 4
- ANTENNA
- TO ADD PRESETS
- TO LOAD PRESETS
- AUTO SCAN:
- TO DELETE A PRESET
- TO DELETE ALL PRESETS
- TO LISTEN TO MP3s/WMAs
- RESUME:
- TO PAUSE PLAYBACK
- TO SELECT/BROWSE THROUGH THE FILES
- FORWARD/REVERSE SKIP
- HIGH-SPEED MUSIC SEARCH
- TO SELECT A PLAY MODE
- TO SET THE CONTRAST
- TO SET THE BACKLIGHT
- TO SET THE POWER SAVINGS
- TO SET THE LANGUAGE
- TO VIEW THE SYSTEM INFO
- TROUBLESHOOTING GUIDE
- TROUBLESHOOTING GUIDE (CONTINUED)
- FORMATTING THE PLAYER
- UPDATING THE FIRMWARE
- RESETTING THE UNIT
- SPECIFICATIONS
Brand : MEMOREX
Model : MMP8570
Category : Mp3 player