
PJ1173 - Video projector VIEWSONIC - Free user manual and instructions
Find the device manual for free PJ1173 VIEWSONIC in PDF.


| Product Type | Video Projector |
| Brand | ViewSonic |
| Model | PJ1173 |
| Display Technology | DLP |
| Native Resolution | XGA (1024 x 768) |
| Brightness | 3000 ANSI Lumens |
| Contrast Ratio | 2000:1 |
| Lamp Life | 3000 hours (Normal), 4000 hours (Eco) |
| Keystone Correction | Vertical: ±40 degrees |
| Inputs | VGA, HDMI, Composite, S-Video, USB |
| Outputs | VGA, Audio Out |
| Dimensions (W x D x H) | 320 x 250 x 110 mm |
| Weight | 3.2 kg |
| Power Consumption | 300W (Normal), <1W (Standby) |
| Noise Level | 32 dB (Normal), 28 dB (Eco) |
| Cleaning Instructions | Clean lens with soft cloth; use compressed air for vents |
| Safety Features | Auto power-off, overheat protection, Kensington lock |
| Spare Parts | Replacement lamp (RLC-xxx), remote control |
| Reparability Index | 6.5/10 (replaceable lamp and filters) |
Frequently Asked Questions - PJ1173 VIEWSONIC
User questions about PJ1173 VIEWSONIC
0 question about this device. Answer the ones you know or ask your own.
Ask a new question about this device
Download the instructions for your Video projector in PDF format for free! Find your manual PJ1173 - VIEWSONIC and take your electronic device back in hand. On this page are published all the documents necessary for the use of your device. PJ1173 by VIEWSONIC.
USER MANUAL PJ1173 VIEWSONIC
IMPORTANT: Please read this User Guide to obtain important information on
installing and using your product in a safe manner, as well as registering your
product for future service. Warranty information contained in this User Guide will
describe your limited coverage from ViewSonic Corporation, which is also found
on our web site at http://www.viewsonic.com in English, or in specific languages
using the Regional selection box in the upper right corner of our website.
This device complies with part 15 of FCC Rules. Operation is subject to the following two conditions: (1) this device may not cause harmful interference, and (2) this device must accept any interference received, including interference that may cause undesired operation.
This equipment has been tested and found to comply with the limits for a Class B digital device, pursuant to part 15 of the FCC Rules. These limits are designed to provide reasonable protection against harmful interference in a residential installation. This equipment generates, uses, and can radiate radio frequency energy, and if not installed and used in accordance with the instructions, may cause harmful interference to radio communications. However, there is no guarantee that interference will not occur in a particular installation. If this equipment does cause harmful interference to radio or television reception, which can be determined by turning the equipment off and on, the user is encouraged to try to correct the interference by one or more of the following measures:
- Reorient or relocate the receiving antenna.
- Increase the separation between the equipment and receiver.
- Connect the equipment into an outlet on a circuit different from that to which the receiver is connected.
- Consult the dealer or an experienced radio/TV technician for help.
Warning: You are cautioned that changes or modifications not expressly approved by the party responsible for compliance could void your authority to operate the equipment.
For Canada
CE Conformity for European Countries

The device complies with the requirements of the EEC directive 2004/108/EC as amended by 92/31/EEC and 93/68/EEC Art.5 with regard to “Electromagnetic compatibility”, and 2006/95/EC as amended by 93/68/EEC Art.13 with regard to
"Safety."
Following information is only for EU-member states:
The mark shown to the right is in compliance with the Waste Electrical and Electronic Equipment Directive 2002/96/EC (WEEE).
The mark indicates the requirement NOT to dispose the equipment as unsorted municipal waste, but use the return and collection systems according to local law.

Important Safety Instructions
- Read these instructions.
- Keep these instructions.
- Heed all warnings.
- Follow all instructions.
- Do not use this unit near water.
- Clean with a soft, dry cloth. If still not clean, see “Cleaning the Display” in this guide for further instructions.
- Do not block any ventilation openings. Install the unit in accordance with the manufacturer's instructions.
- Do not install near any heat sources such as radiators, heat registers, stoves, or other devices (including amplifiers) that produce heat.
- Do not defeat the safety purpose of the polarized or grounding-type plug. A polarized plug has two blades with one wider than the other. A grounding type plug has two blades and a third grounding prong. The wide blade and the third prong are provided for your safety. If the provided plug does not fit into your outlet, consult an electrician for replacement of the obsolete outlet.
- Protect the power cord from being walked on or pinched particularly at plugs. Convenience receptacles and the point where they exit from the unit. Be sure that the power outlet is located near the unit so that it is easily accessible.
- Only use attachments/accessories specified by the manufacturer.
- Use only with the cart, stand, tripod, bracket, or table specified by the manufacturer, or sold with the unit. When a cart is used, use caution when moving the cart/unit combination to avoid injury from tipping over.
- Unplug this unit when unused for long periods of time.
- Refer all servicing to qualified service personnel. Servicing is required when the unit has been damaged in any way, such as: if the power-supply cord or plug is damaged, if liquid is spilled onto or objects fall into the unit, if the unit is exposed to rain or moisture, or if the unit does not operate normally or has been dropped.
Declaration of RoHS Compliance
This product has been designed and manufactured in compliance with Directive 2002/95/EC of the European Parliament and the Council on restriction of the use of certain hazardous substances in electrical and electronic equipment (RoHS Directive) and is deemed to comply with the maximum concentration values issued by the European Technical Adaptation Committee (TAC) as shown below:
| Substance | Proposed Maximum Concentration | Actual Concentration |
| Lead (Pb) 0.1% < 0.1% | ||
| Mercury (Hg) 0.1% < 0.1% | ||
| Cadmium (Cd) 0.01% < 0.01% | ||
| Hexavalent Chromium ( Cr^6+ ) 0.1% < 0.1% | ||
| Polybrominated biphenyls (PBB) 0.1% < 0.1% | ||
| Polybrominated diphenyl ethers (PBDE) 0.1% < 0.1% |
Certain components of products as stated above are exempted under the Annex of the RoHS Directives as noted below:
Examples of exempted components are:
- Mercury in compact fluorescent lamps not exceeding 5 mg per lamp and in other lamps not specifically mentioned in the Annex of RoHS Directive.
- Lead in glass of cathode ray tubes, electronic components, fluorescent tubes, and electronic ceramic parts (e.g. piezoelectronic devices).
- Lead in high temperature type solders (i.e. lead-based alloys containing 85% by weight or more lead).
- Lead as an allotting element in steel containing up to 0.35% lead by weight, aluminium containing up to 0.4% lead by weight and as a cooper alloy containing up to 4% lead by weight.
Copyright Information
Copyright ^© ViewSonic ^© Corporation, 2007. All rights reserved.
Macintosh and Power Macintosh are registered trademarks of Apple Computer, Inc.
Microsoft, Windows, Windows NT, and the Windows logo are registered trademarks of Microsoft Corporation in the United States and other countries.
ViewSonic, the three birds logo, OnView, ViewMatch, and ViewMeter are registered trademarks of ViewSonic Corporation.
VESA is a registered trademark of the Video Electronics Standards Association. DPMS and DDC are trademarks of VESA.
PS/2, VGA and XGA are registered trademarks of International Business Machines Corporation.
Disclaimer: ViewSonic Corporation shall not be liable for technical or editorial errors or omissions contained herein; nor for incidental or consequential damages resulting from furnishing this material, or the performance or use of this product.
In the interest of continuing product improvement, ViewSonic Corporation reserves the right to change product specifications without notice. Information in this document may change without notice.
No part of this document may be copied, reproduced, or transmitted by any means, for any purpose without prior written permission from ViewSonic Corporation.
Product Registration
To meet your future needs, and to receive any additional product information as it becomes available, please register your product on the Internet at: www.viewsonic.com. The ViewSonic® Wizard CD-ROM also provides an opportunity for you to print the registration form, which you may mail or fax to ViewSonic.
For Your Records
Product Name: PJ1173
ViewSonic LCD Projector
Model Number: VS12109
Document Number: PJ1173_UG_ENG Rev. 1A 11-22-07
Serial Number:
Purchase Date:

The lamp in this product contains mercury.
Please dispose of in accordance with local, state or federal laws.
Projector
PJ1173
User's Manual (detailed) – Operating Guide
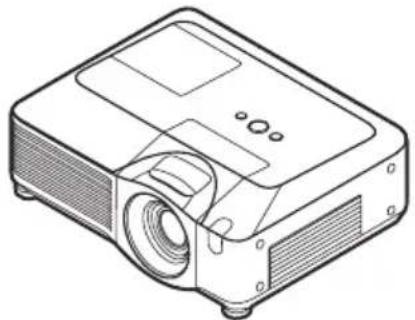
natural_image
Line drawing of a projector with lens and control panel (no text or symbols)Thank you for purchasing this projector.
⚠ WARNING ▶ Before using this product, please read the "User's Manual - Safety Guide" and related manuals to ensure the proper use of this product. After reading them, store them in a safe place for future reference.
About this manual
Various symbols are used in this manual. The meanings of these symbols are described below.
WARNING
This symbol indicates information that, if ignored, could possibly result in personal injury or even death due to incorrect handling.
CAUTION
This symbol indicates information that, if ignored, could possibly result in personal injury or physical damage due to incorrect handling.
Please refer to the pages written following this symbol.
NOTE • The information in this manual is subject to change without notice.
- The manufacturer assumes no responsibility for any errors that may appear in this manual.
- The reproduction, transfer or copy of all or any part of this document is not permitted without express written consent.
Trademark acknowledgment
• Mac is registered trademarks of Apple Computer, Inc.
• VESA and SVGA are trademarks of the Video Electronics Standard Association.
- Windows is a registered trademark of Microsoft Corporation.
• SRS(a) trademark of SRS Labs, Inc.
- WOW technology is incorporated under license from SRS Labs, Inc.
- HDMI, the HDMI logo and High-Definition Multimedia Interface are trademarks or registered trademarks of HDMI Licensing LLC.
All other trademarks are the properties of their respective owners.
Contents
About this manual.....1
Contents 2
Projector features.....4
Preparations .....4
Contents of package....4
Fastening the lens cover. . . . . . . . . 4
Part names .....5
Projector 5
Control panel....6
Rear panel 6
Remote control ..... 7
Setting up 8
Arrangement....9
Adjusting the projector's elevator . . 10
Using the security bar and slot . . . . 10
Connecting your devices. . . . . . . . 11
Connecting power supply ..... 13
Remote control....14
Laser pointer....14
Putting batteries 14
About the remote control signal . . . 15
Changing the frequency of remote control signal . 15
Using as a wired remote control . . . 16
Using as a simple PC mouse & keyboard 16
Power on/off .....17
Turning on the power 17
Turning off the power 17
Operating 18
Adjusting the volume. 18
Temporarily muting the sound.....18
Selecting an input signal.....18
Searching an input signal ..... 19
Selecting an aspect ratio. . . . . . . . 19
Adjusting the zoom and focus. . . . . 20
Adjusting the lens shift ..... 20
Using the automatic adjustment feature . . 20
Adjusting the position ..... 21
Correcting the keystone distortions . . 21
Using the magnify feature.....22
Freezing the screen 22
Temporarily blanking the screen . . . 23
Using the menu function ..... 24
EASY MENU....25
ASPECT, AUTO KEYSTONE ☐ EXECUTE,
(EASY MENU continued .....26)
KEYSTONE ☐, KEYSTONE ☑, PICTURE MODE,
BRIGHTNESS, CONTRAST, COLOR, TINT, SHARPNESS,
WHISPER, MIRROR, RESET, FILTER TIME,
LANGUAGE, GO TO ADVANCED MENU...
PICTURE Menu .....27
BRIGHTNESS, CONTRAST, GAMMA, COLOR TEMP,
COLOR, TINT, SHARPNESS, ACTIVE IRIS, MY MEMORY
IMAGE Menu 28
ASPECT, OVER SCAN, V POSITION, H POSITION,
H PHASE, H SIZE, AUTO ADJUST EXECUTE
INPUT Menu 32
PROGRESSIVE, VIDEO NR, 3D-YCS,
COLOR SPACE, COMPONENT, VIDEO FORMAT,
HDMI, FRAME LOCK, RGB IN, RESOLUTION
SETUP Menu 36
AUTO KEYSTONE ☐ EXECUTE, KEYSTONE ☐,
KEystone, WHISPER, MIRROR
AUDIO Menu ....38
VOLUME, TREBLE, BASS, SRS WOW,
SPEAKER, AUDIO, HDMI AUDIO
SCREEN Menu....39
LANGUAGE, MENU POSITION, BLANK,
START UP, MYSCREEN, MYSCREEN LOCK,
MESSAGE, SOURCE NAME
OPTION Menu 43
AUTO SEARCH, AUTO KEYSTONE ☐,
AUTO ON, AUTO OFF, LAMP TIME,
FILTER TIME, MY BUTTON, SERVICE,
SECURITY
NETWORK Menu ....56
SETUP, PROJECTOR NAME, e-SHOT,
INFORMATION, SERVICE
Main functions .....61
Configuring and controlling via a web
browser....61
e-SHOT (Still image Transfer) Display 62
Equipment connection and network setting ....62
Required equipment preparation .. 62
Manual network connection setting . 63
Equipments connection .....63
Network settings 63
"Internet Option" setting 66
Check connection 67
Management with Web browser software ....68
Configuring and controlling the
projector via a web browser ..... 69
Logon 71
Network Information ..... 72
Network Settings....73
Port Settings 75
Mail Settings 76
Alert Settings....77
Schedule Settings 79
Date/Time Settings 81
Security Settings 83
Projector Control 85
Projector Status....88
Network Restart....89
Logoff 89
E-mail Alerts 90
Projector Management using SNMP . 92
Event Scheduling 93
e-SHOT (Still Image Transfer) Display . 96
Command Control via the Network . 98
Maintenance....103
Lamp....103
Air filter 105
Internal clock battery....107
Other care....108
Troubleshooting .....109
Related messages ..... 109
Regarding the indicator lamps . . . 110
Phenomena that may be easy to be mistaken for machine defects . 112
Warranty and after-service. . 115
Specifications .....115
Projector features
This projector is used to project various picture signals onto a screen. This projector requires only a minimal amount of space for installation and can produce a large projected image from even a short distance.
Preparations
Contents of package
Please see the "Contents of package" in the "Quick Start Guide (concise)" which is a book. Your projector should come with the items shown there. Contact immediately ViewSonic if anything is missing.
NOTE • Keep the original packing materials for future reshipment. Be sure to use the original packing materials when moving the projector. Use special caution for the lens.
Fastening the lens cover
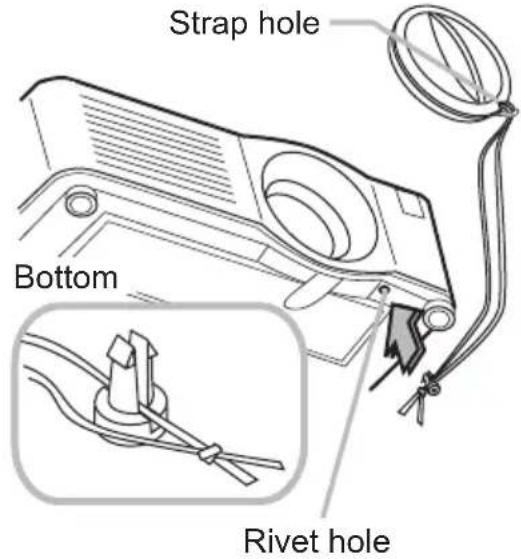
To avoid losing the lens cover, please fasten the lens cover to the projector using the included strap.
- Fix the strap to the strap hole of the lens cover.
- Put one side of the strap into the groove on the rivet.
- Push the rivet into the rivet hole.
Part names
Projector
(1) Speakers (x 4)
(2) Focus ring
(3) Zoom ring
(4) Lamp cover
The lamp unit is inside.
(5) Lens shift cover
(6) Horizontal lens shift dial
(7) Vertical lens shift dial
(8) Front cover
(9) Lens
(10) Lens cover
(11) Remote sensors (x 3)
(12) Elevator feet (x 2)
(13) Elevator knobs (x 2)
(14) Filter cover
The air filter and intake vent are inside.
(15) Exhaust vents
(16) Intake vents
(17) Rivet hole
(18) Handle
(19) Battery cover
(20) Control panel
(21) Rear panel
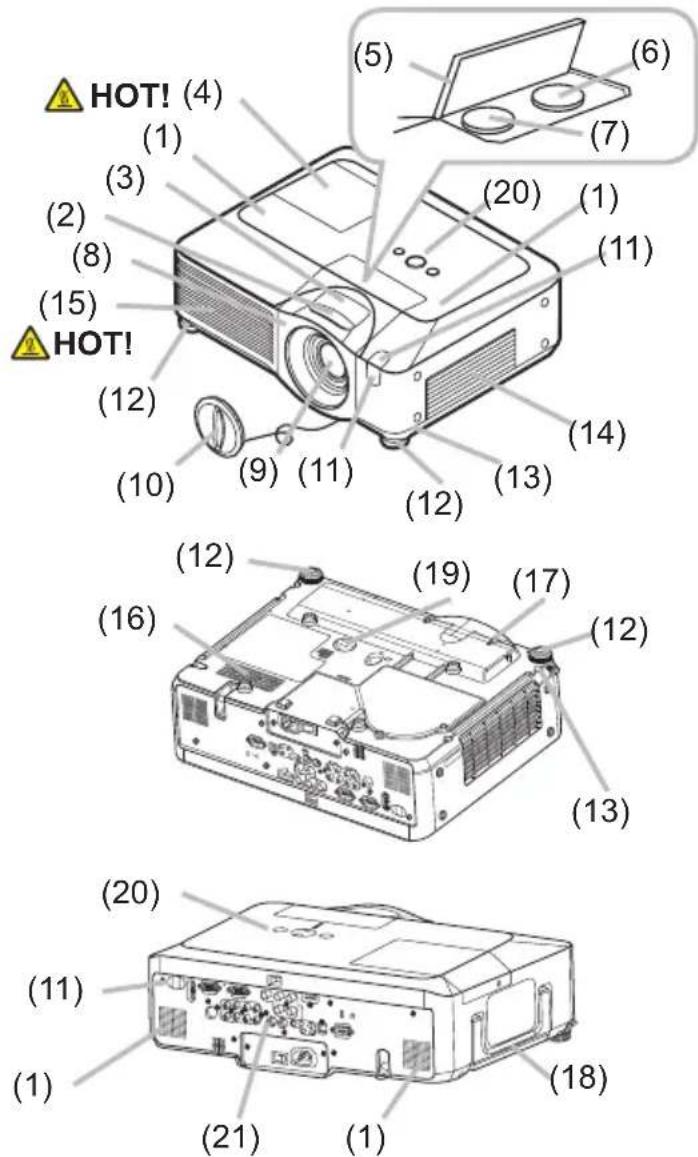
⚠ WARNING ▶HOT! : Do not touch around the lamp cover and the exhaust vents during use or just after use, since it is too hot.
▶ Do not look into the lens or vents while the lamp is on, since the strong light is not good for your eyes.
▶ Do not grab the front cover to hold the projector up, since the projector may drop down.
▶ Do not handle the elevator knobs without holding the projector, since the projector may drop down.
⚠️ CAUTION ▶ Maintain normal ventilation to prevent the projector from heating up. Do not cover, block or plug up the vents. Do not place anything that can stick or be sucked to the vents, around the intake vents. Clean the air filter periodically.
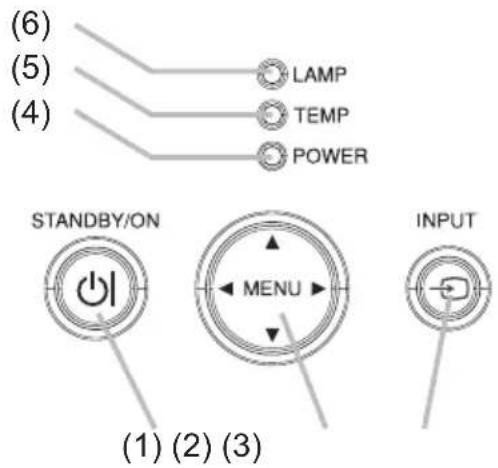
Control panel
(1) STANDBY/ON button
(2) MENU button
It consists of four cursor buttons.
(3) INPUT button
(4) POWER indicator
(5) TEMP indicator
(6) LAMP indicator
Rear panel
(1) Shutdown switch
(2) Security slot
(3) Security bar
(4) AC inlet
(5) Power switch
(6) RGB1 port
(7) RGB2(G/Y, B/C_B/P_B, R/C_R/P_R, H, V) port
(8) CONTROL port
(9) HDMI port
(10) VIDEO port
(11) S-VIDEO port
(12) COMPONENT
(Y, C_B/P_B , C_R/P_R ) ports
(13) AUDIO IN1 port
(14) AUDIO IN2 port
(15) AUDIO IN3 (R/L) ports
(16) AUDIO IN4 (R/L) ports
(17) RGB OUT port
(18) AUDIO OUT port
(19) REMOTE CONTROL port
(20) LAN port
(21) USB port
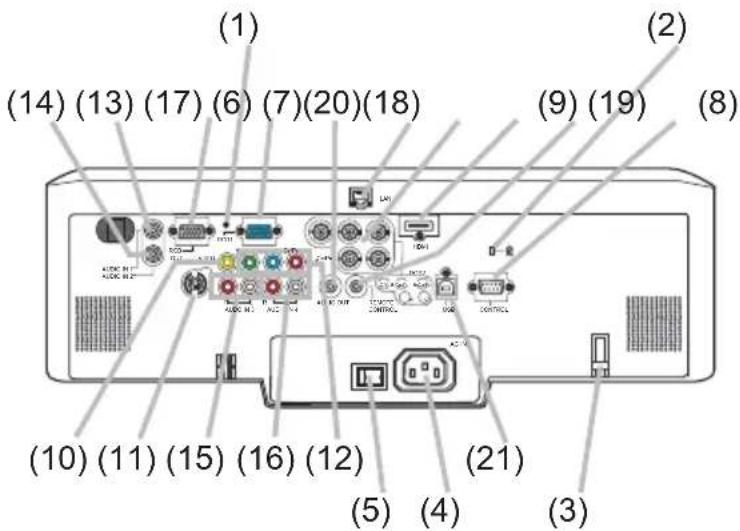
⚠ CAUTION ▶ Do not use the security bar and the security slot to prevent the projector from falling down, since it is not designed for it.
▶ Use the shutdown switch only when the projector is not turned off by normal procedure, since pushing this switch stops operation of the projector without cooling it down.
Remote control
(1) Laser pointer It is a beam outlet.
(2) LASER INDICATOR
(3) LASER button
(4) STANDBY/ON button
(5) VOLUME button
(6) MUTE button
(7) VIDEO button
(8) RGB button
(9) SEARCH button
(10) AUTO button
(11) ASPECT button
(12) POSITION button
(13) KEYSTONE button
(14) MAGNIFY - ON button
(15) MAGNIFY - OFF button
(16) FREEZE button
(17) BLANK button
(18) MY BUTTON - 1 button
(19) MY BUTTON - 2 button
(20) MENU button
(21) Lever switch : acting 3 functions as below. Cursor button ▲ : to slide toward the side marked ▲. Cursor button ▼ : to slide toward the side marked ▼. ENTER button : to push down the center point.
(22) Cursor button ◀
(23) Cursor button ▶
(24) RESET button
(25) ESC button
(26) Mouse left button
(27) Mouse right button
(28) PAGE UP button
(29) PAGE DOWN button
(30) Wired remote control port
(31) Battery cover
(32) Battery holder
(33) Frequency switch
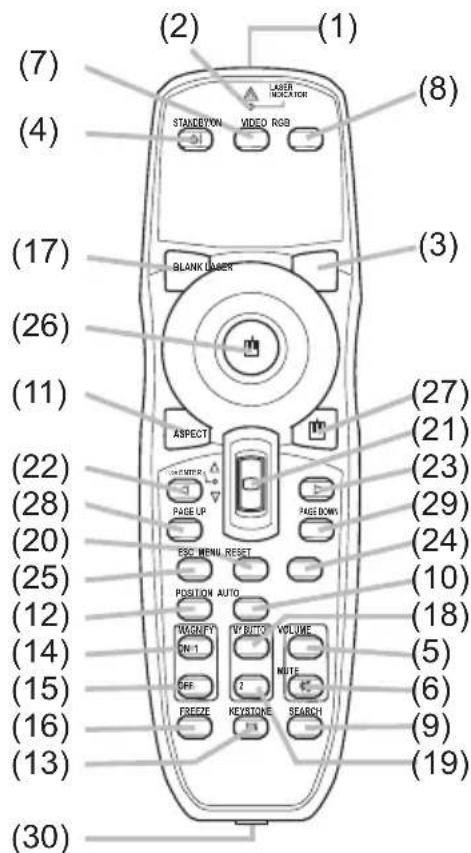
⚠ WARNING ▶ Do not look into the beam outlet and point the beam at people and pets while pressing the LASER button, since the beam is not good for eyes.
⚠️ CAUTION ▶ Note that the laser beam may result in hazardous radiation exposure. Use the laser pointer only for pointing on the screen.
Setting up
Install the projector according to the environment and manner the projector will be used in.
⚠ WARNING ▶ Place the projector in a stable horizontal position. If the projector falls or is knocked over it could cause injury and/or damage to the projector. Using a damaged projector could then result in fire and/or electric shock.
- Do not place the projector on an unstable, slanted or vibrational surface such as a wobbly or inclined stand.
- Do not place the projector on its side, front or rear position.
- Consult with ViewSonic before a special installation such as suspending from a ceiling.
▶ Place the projector in a cool place, and ensure that there is sufficient ventilation. The high temperature of the projector could cause fire, burns and/or malfunction of the projector.
- Do not stop-up, block or otherwise cover the projector's vents.
- Keep a space of 30 cm or more between the sides of the projector and other objects such as walls.
- Do not place the projector on metallic thing or anything weak in heat.
- Do not place the projector on carpet, cushions or bedding.
- Do not place the projector in direct sunlight or near hot objects such as heaters.
- Do not place anything near the projector lens or vents, or on top of the projector.
- Do not place anything that may be sucked into or stick to the vents on the bottom of the projector. This projector has some intake vents also on the bottom.
▶ Do not place the projector anyplace where it may get wet. Getting the projector wet or inserting liquid into the projector could cause fire, electric shock and/or malfunction of the projector.
- Do not place the projector in a bathroom or the outdoors.
- Do not place anything containing liquid near the projector.
⚠️ CAUTION ▶ Avoid placing the projector in smoky, humid or dusty place.
Placing the projector in such places could cause fire, electric shock and/or malfunction of the projector.
- Do not place the projector near humidifiers, smoking spaces or a kitchen.
▶ Position the projector to prevent light from directly hitting the projector's remote sensor.
Arrangement
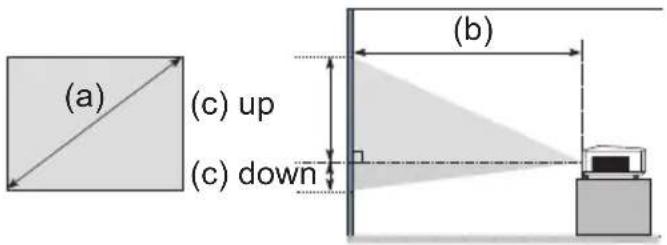
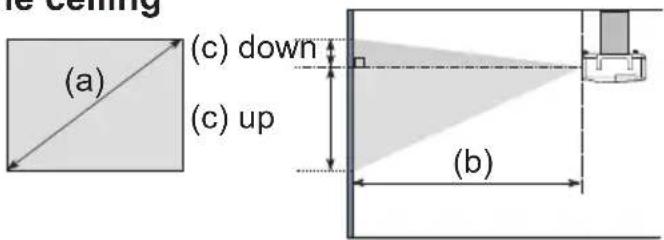
Refer to the illustrations and tables below to determine screen size and projection distance. The values shown in the table are calculated for a full size screen: 1024×768
(a) Screen size (diagonal)
(b) Projection distance (±10%)
(c) Screen height (±10%), when the vertical lens shift is set full upward.
On a horizontal surface
Suspended from the ceiling
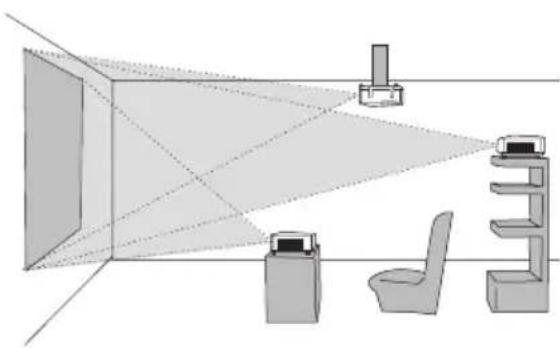
natural_image
Diagram of a room layout with a lamp, chair, and desk (no text or symbols)- Keep a space of 30 cm or more between the sides of the projector and other objects such as walls.
- Consult with ViewSonic before a special installation such as suspending from a ceiling.
| (a) Screen size[inch (m)] | 4 : 3 screen | 16 : 9 screen | ||||||
| (b) Projection distance[m (inch)] | (c) Screen height[cm (inch)] | (b) Projection distance[m (inch)] | (c) Screen height[cm (inch)] | |||||
| min. | max. down | up | min. | max. down | up | |||
| 30 (0.8) 0 | 9 (35) | 1.1 (42) | 5 (2) | 41 (16) | 1.0 (38) | 1.2 (46) | -1 (0) 39 | (15) |
| 40 (1.0) 1 | 2 (47) 1.4 (5) | 7) 6 (2) 55 | (22) 1.3 (51) | 1.6 (62) -2 | (-1) 51 (20) | |||
| 60 (1.5) 1 | 8 (71) 2.2 (8) | 6) 9 (4) 82 | (32) 2.0 (78) | 2.4 (94) -2 | (-1) 77 (30) | |||
| 70 (1.8) | 2.1 (83) | 2.6 (100) | 11 (4) | 96 (38) | 2.3 (91) | 2.8 (110) | -3 (-1) | 90 (35) |
| 80 (2.0) | 2.4 (96) | 2.9 (115) | 12 (5) | 110 (43) | 2.6 (104) | 3.2 (126) | -3 (-1) | 103 (41) |
| 90 (2.3) | 2.7 (108) | 3.3 (130) | 14 (5) | 123 (49) | 3.0 (117) | 3.6 (141) | -4 (-1) | 116 (46) |
| 100 (2.5) | 3.0 (120) | 3.7 (144) 15 | (6) | 137 (54) | 3.3 (131) | 4.0 (157) | -4 (-2) | 129 (51) |
| 120 (3.0) | 3.7 (144) | 4.4 (174) | 18 (7) | 165 (65) | 4.0 (157) | 4.8 (189) | -5 (-2) | 154 (61) |
| 150 (3.8) | 4.6 (181) | 5.5 (217) | 23 (9) | 206 (81) | 5.0 (197) | 6.0 (237) | -6 (-2) | 193 (76) |
| 200 (5.1) | 6.1 (241) | 7.4 (291) | 30 (12) | 274 (108) | 6.7 (263) | 8.0 (317) | -8 (-3) | 257 (101) |
| 250 (6.4) | 7.7 (302) | 9.2 (364) | 38 (15) | 343 (135) | 8.4 (329) | 10.1 (396) | -10 (-4) | 322 (127) |
| 300 (7.6) | 9.2 (363) | 11.1 (437) | 46 (18) | 411 (162) | 10.0 (395) | 12.1 (476) | -12 (-5) | 386 (152) |
| 350 (8.9) | 10.8 (424) | 13.0 (510) | 53 (21) | 480 (189) | 11.7 (462) | 14.1 (556) | -15 (-6) | 450 (177) |
Adjusting the projector's elevator
When the place to put the projector is slightly uneven to the left or right, use the elevator feet to place the projector horizontally.
Using the feet can also tilt the projector in order to project at a suitable angle to the screen, elevating the front side of the projector within 8 degrees.
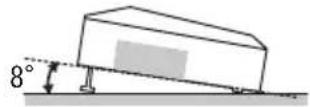
This projector has 2 elevator feet and 2 elevator knobs. An elevator foot is adjustable while pulling up the elevator knob on the same side as it.
- Holding the projector, pull the elevator knobs up to loose the elevator feet.
2 Position the front side of the projector to the desired height. - Release the elevator knobs in order to lock the elevator feet.
- After making sure that the elevator feet are locked, put the projector gently.
- If necessary, the elevator feet can be manually twisted to make more precise adjustments. Hold the projector when twisting the feet.
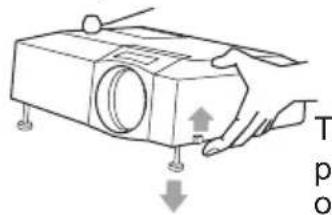
To loose an elevator foot, pull up the elevator knob on the same side as it.
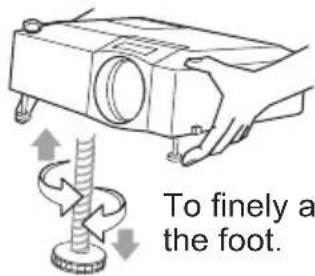
To finely adjust, twist the foot.
⚠ CAUTION ▶ Do not handle the elevator knobs without holding the projector, since the projector may drop down.
▶ Do not tilt the projector other than elevating its front within 8 degrees using the adjuster feet. A tilt of the projector exceeding the restriction could cause malfunction or shortening the lifetime of consumables, or the projector itself.
Using the security bar and slot
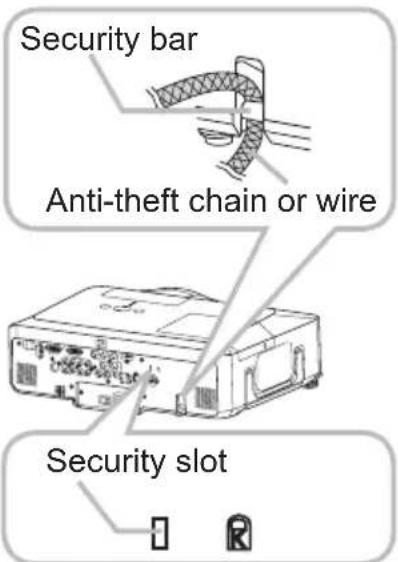
A commercial anti-theft chain or wire up to 10 mm in diameter can be attached to the security bar on the projector. Also this product has the security slot for the Kensington lock. For details, see the manual of the security tool.
⚠ WARNING ▶ Do not use the security bar and the security slot to prevent the projector from falling down, since it is not designed for it.
NOTE • The security bar and the security slot are not comprehensive theft prevention measures. They are intended to be used as supplemental theft prevention measure.
Connecting your devices
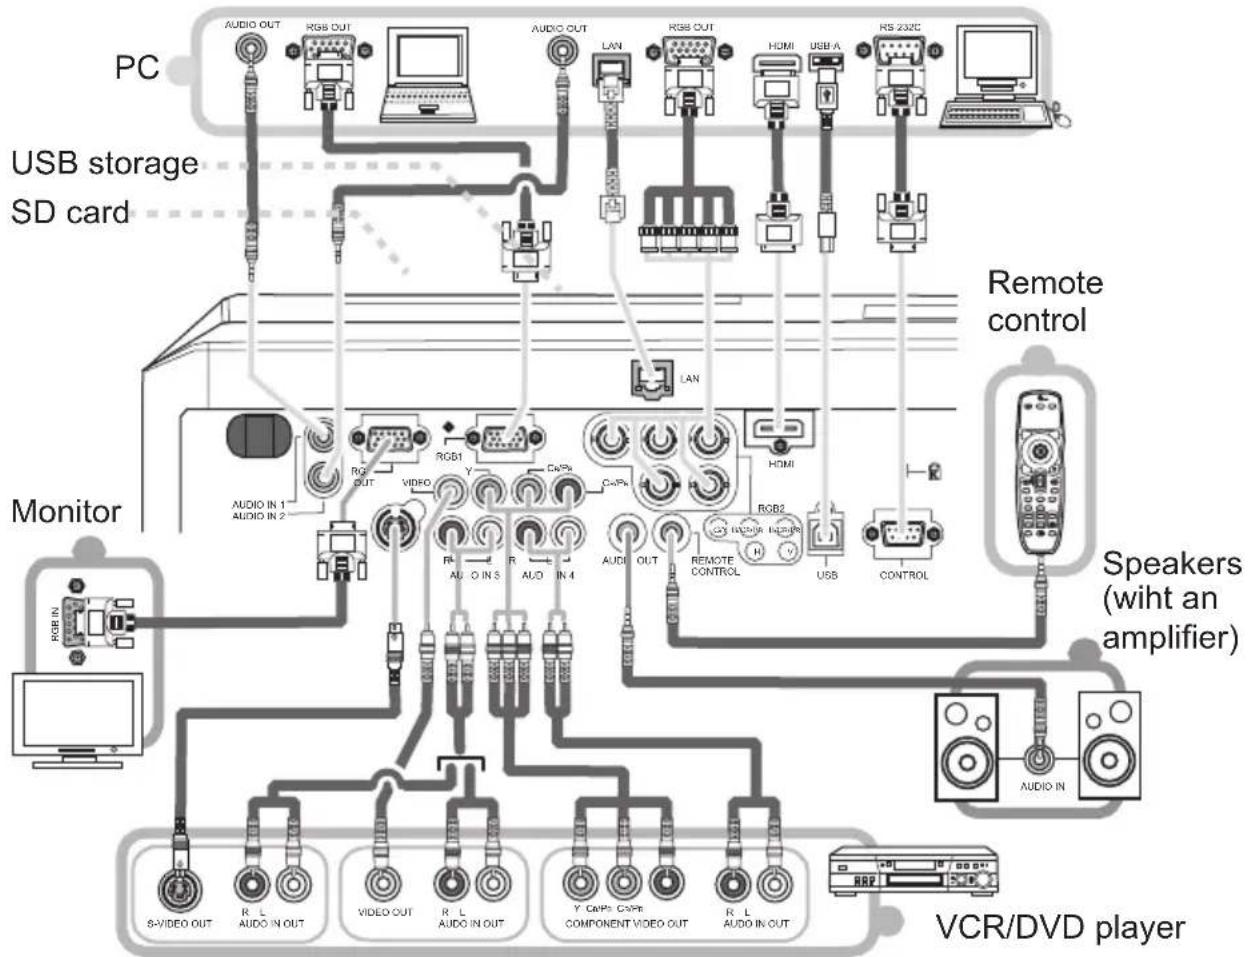
Be sure to read the manuals for devices before connecting them to the projector. Make sure that all the devices are suitable to be connected with this product, and prepare the cables required to connect.
Please refer to the following illustrations to connect them.
flowchart
graph TD
    PC["PC"] -->|USB storage SD card| Monitor["Monitor"]
    Monitor -->|Audio IN 1 Audio IN 2| VCR["DVD player"]
    VCR -->|Audio OUT| PC
    VCR -->|RGB OUT| PC
    VCR -->|RGB1| PC
    VCR -->|RGB2| PC
    VCR -->|R L AUDIO IN OUT| PC
    VCR -->|R L AUDIO IN OUT| PC
    VCR -->|Y CAPS CAFE COMPONENT VIDEO OUT| PC
    VCR -->|R L AUDIO IN OUT| PC
    VCR -->|R L AUDIO IN OUT| PC
    VCR -->|HDMI| RemoteControl["Remote control"]
    RemoteControl -->|USB| VCR
    RemoteControl -->|CONTROL| VCR
    RemoteControl --> Speakers["Speakers (wiht an amplifier)"]
    Speakers --> AudioIn["Audio In"]
    Speakers --> AudioOUT["Video OUT"]
    Speakers --> AudioIN["Audio IN"]
    Speakers --> AudioOUTOUT["Audio OUT"]
    Speakers --> AudioINOUT["Audio IN"]
    Speakers --> AudioOUTOUT["Audio OUT"]
⚠ WARNING ▶ Do not disassemble or modify the projector.
▶ Be careful not to damage the cables, and do not use damaged cables.
⚠️ CAUTION ▶ Turn off all devices and unplug their power cords prior to connecting them to projector. Connecting a live device to the projector may generate extremely loud noises or other abnormalities that may result in malfunction or damage to the device and the projector.
▶ Use appropriate accessory or designated cables. Ask ViewSonic about non-accessory cables which may be required a specific length or a ferrite core by the regulations. For cables with a core only at one end, connect the end with the core to the projector.
▶ Make sure that devices are connected to the correct ports. An incorrect connection may result in malfunction or damage to the device and the projector.
Connecting your devices (continued)
NOTE • Be sure to read the manuals for devices before connecting them to the projector, and make sure that all the devices are suitable to be connected with this product. Before connecting to a PC, check the signal level, the signal timing, and the resolution.
- Be sure to consult to the administrator of the network. Do not connect LAN port to any network that might have the excessive voltage.
- Some signal may need an adapter to input this projector.
- Some PCs have multiple screen display modes that may include some signals which are not supported by this projector.
- Although the projector can display signals with resolution up to UXGA (1600X1200), the signal will be converted to the projector's panel resolution before being displayed. The best display performance will be achieved if the resolutions of the input signal and the projector panel are identical.
- While connecting, make sure that the shape of the cable's connector fits the port to connect with. And be sure to tighten the screws on connectors with screws.
- When connecting a laptop PC to the projector, be sure to activate the PC's external RGB output. (Set the laptop PC to CRT display or to simultaneous LCD and CRT display.) For details on how this is done, please refer to the instruction manual of the corresponding laptop PC.
- When the picture resolution is changed on a computer depending on an input, automatic adjustment function may take some time and may not be completed. In this case, you may not be able to see a check box to select "Yes/No" for the new resolution on Windows. Then the resolution will go back to the original. It might be recommended to use other CRT or LCD monitors to change the resolution.
- In some cases, this projector may not display a proper picture or display any picture on screen. For example, automatic adjustment may not function correctly with some input signals. An input signal of composite sync or sync on G may confuse this projector, so the projector may not display a proper picture.
- The HDMI port of this model is compatible with HDCP (High-bandwidth Digital Content Protection) and therefore capable of displaying a video signal from HDCP compatible DVD players or the like.
About Plug-and-Play capability
Plug-and-Play is a system composed of a computer, its operating system and peripheral equipment (i.e. display devices). This projector is VESA DDC 2B compatible. Plug-and-Play can be used by connecting this projector to a computer that is VESA DDC (display data channel) compatible.
• Take advantage of this feature by connecting an RGB cable to the RGB1 port (DDC 2B compatible). Plug-and-Play may not work properly if any other type of connection is attempted.
- Please use the standard drivers in your computer as this projector is a Plug-and-Play monitor.
NOTE for HDMI
• The HDMI supports the following signals.
-Video signal : 525i(480i),525p(480p),625i(576i),750p(720p),1125i(1080i),1125p(1080p)
-PC signals : See User's Manual (detailed) Technical
-Audio signal : Format Linear PCM
Sampling Frequency 48kHz / 44.1kHz / 32kHz
- This projector can be connected with another equipment that has HDMI or DVI connector, but with some equipment the projector may not work properly, something like no video or no audio.
- Be sure to use an HDMI cable that has the HDMI logo.
- When the projector is connected with a device having DVI connector, use a DVI to HDMI cable to connect with the HDMI input and an audio cable to connect with one of the Audio input.
Connecting power supply
-
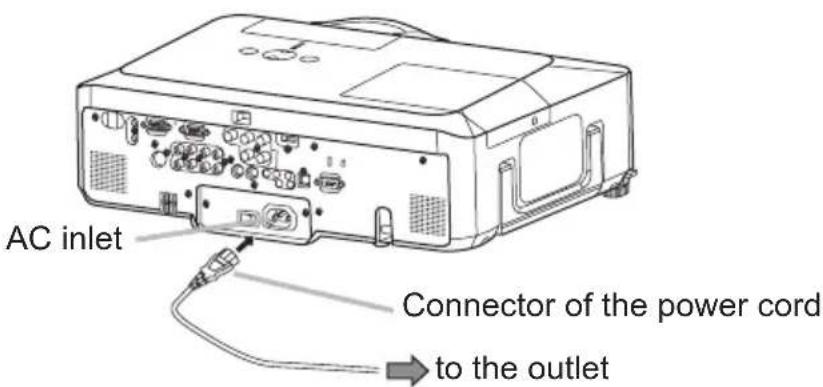
Connect the connector of the power cord to the AC inlet of the projector.
-
Firmly plug the power cord's plug into the outlet.
⚠ WARNING ▶ Please use extra caution when connecting the power cord, as incorrect or faulty connections may result in fire and/or electrical shock.
- Only use the power cord that came with the projector. If it is damaged, contact ViewSonic to newly get correct one.
- Only plug the power cord into an outlet whose voltage is matched to the power cord. The power outlet should be close to the projector and easily accessible. Remove the power cord for complete separation.
- Never modify the power cord.
Remote control
Laser pointer
This remote control has a laser pointer in place of a finger or rod. The laser beam works and the LASER INDICATOR lights while the LASER button is pressed.
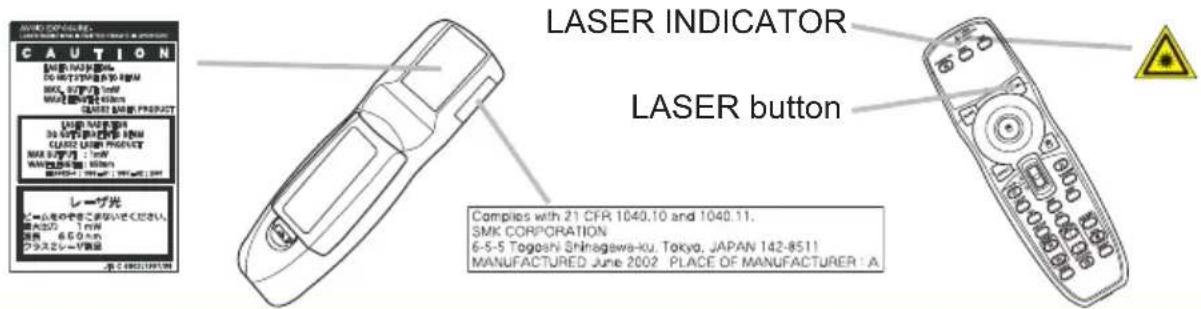
⚠ WARNING ▶ The laser pointer of the remote control is used in place of a finger or rod. Never look directly into the laser beam outlet or point the laser beam at other people. The laser beam can cause vision problems.
⚠️ CAUTION ▶ Use of controls or adjustments or performance of procedures other than those specified herein may result in hazardous radiation exposure.
Putting batteries
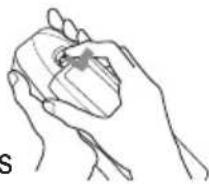
Please load the batteries before using the remote control. If the remote control starts to malfunction, replace the batteries. If you will not use the remote control for an extended period, remove the batteries from the remote control and store them in a safe place.
- Slide back and remove the battery cover in the direction of the arrow.
- Align and insert the two AA batteries (HITACHI MAXELL, Part No.LR6)
or R6P) according to their plus and minus terminals as indicated in the remote control.
- Replace the battery cover in the direction of the arrow and snap it back into place.
natural_image
Line drawing of a hand holding an object, no text or symbols present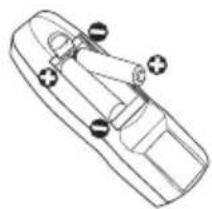
natural_image
Top-down line drawing of a car with visible seatbelt and window (no text or symbols)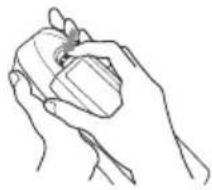
natural_image
Line drawing of a hand holding an object (no text or symbols)⚠ WARNING ▶ Always handle the batteries with care and use them only as directed. Improper use may result in battery explosion, cracking or leakage, which could result in fire, injury and/or pollution of the surrounding environment.
- Be sure to use only the batteries specified. Do not use batteries of different types at the same time. Do not mix a new battery with used one.
- Make sure the plus and minus terminals are correctly aligned when loading a battery.
- Keep a battery away from children and pets.
- Do not recharge, short circuit, solder or disassemble a battery.
- Do not allow a battery in a fire or water. Keep batteries in a dark, cool and dry place.
- If you observe battery leakage, wipe out the leakage and then replace a battery. If the leakage adheres to your body or clothes, rinse well with water immediately.
- Obey the local laws on disposing the battery.
About the remote control signal
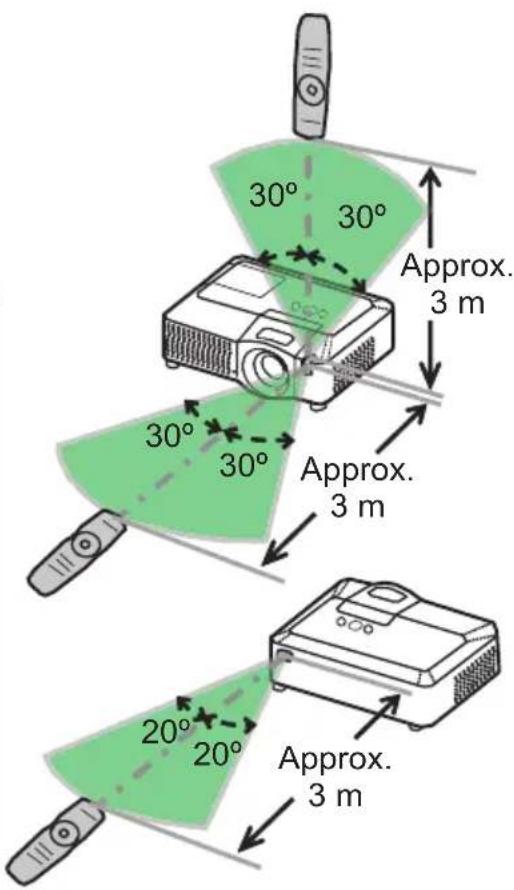
The remote control works with the projector's remote sensors. This projector has three remote sensors on the front, on the top, and on the back.
The sensors can be respectively turned active or inactive using the “REMOTE RECEIV.” in the SERVICE item of OPTION menu. Each sensor senses the signal within the following range when the sensor is active.
The front and top sensors:
60 degrees (30 degrees to the left and right of the sensor) within 3 meters about.
The back sensor:
40 degrees (20 degrees to the left and right of the sensor) within 3 meters about.
NOTE • The remote control signal reflected in the screen or the like may be available. If it is difficult to send the signal to the sensor directly, attempt to make the signal reflect.
- The remote control uses infrared light to send signals to the projector (Class 1 LED), so be sure to use the remote control in an area free from obstacles that could block the remote control's signal to the projector.
- The remote control may not work correctly if strong light (such as direct sun light) or light from an extremely close range (such as from an inverter fluorescent lamp) shines on the remote sensor of the projector. Adjust the position of projector avoiding those lights.
Changing the frequency of remote control signal
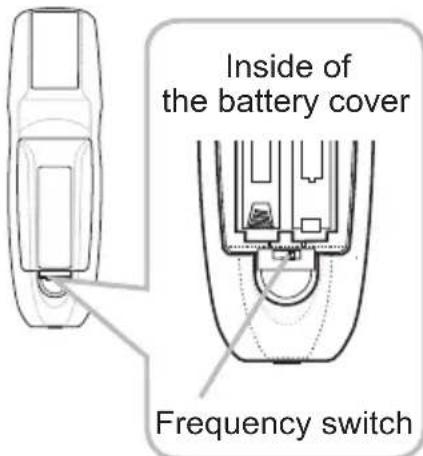
The accessory remote control has the choice of the mode 1 or the mode 2, in the frequency of its signal. If the remote control does not function properly, attempt to change the signal frequency. Please remember that the “REMOTE FREQ.” in SERVICE item of OPTION menu of the projector to be controlled should be set to the same mode as the remote control.
To set the mode of the remote control, slide the knob of the frequency switch inside the battery cover into the position indicated by the mode number to choose.
Back of the remote control
Using as a wired remote control
The accessory remote control works as a wired remote control, when the wired control port at the bottom of the remote control connects with the REMOTE CONTROL port on the back of the projector via an audio cable with 3.5 diameter stereo mini plugs. When the remote control signal is hard to reach surely to the projector in the environment, this function is effective.
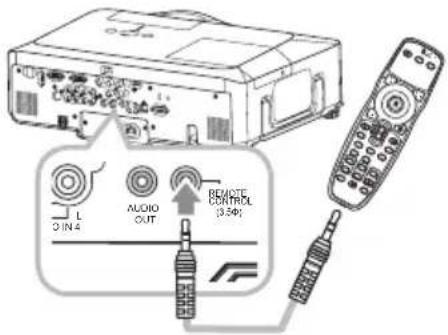
NOTE • To connect the remote control with the projector, use an audio cable with 3.5 diameter stereo mini plugs.
Using as a simple PC mouse & keyboard
The accessory remote control works as a simple mouse and keyboard of the PC, when the projector's USB port(B type) connect with the PC's USB port(A type) via a USB cable.
(1) Mouse left button
Pushing the button into the center point works instead of clicking the mouse's left button. Tilting this button to one of eight directions moves the PC's move pointer on the screen in the direction.
(2) Mouse right button
Pressing the button works instead of clicking the mouse's right button.
(3) Lever switch
Sliding toward the side marked ▲ works instead of the [↑] key on the keyboard. Sliding toward the side marked ▼ works instead of the [↓] key on the keyboard.
(4) Cursor button ◀
This button works instead of the [←] key on the keyboard.
(5) Cursor button ▶
This button works instead of the [] key on the keyboard.
(6) PAGE UP button
This button works instead of the PAGE UP key on the key board.
(7) PAGE DOWN button
This button works instead of the PAGE DOWN key on the key board.
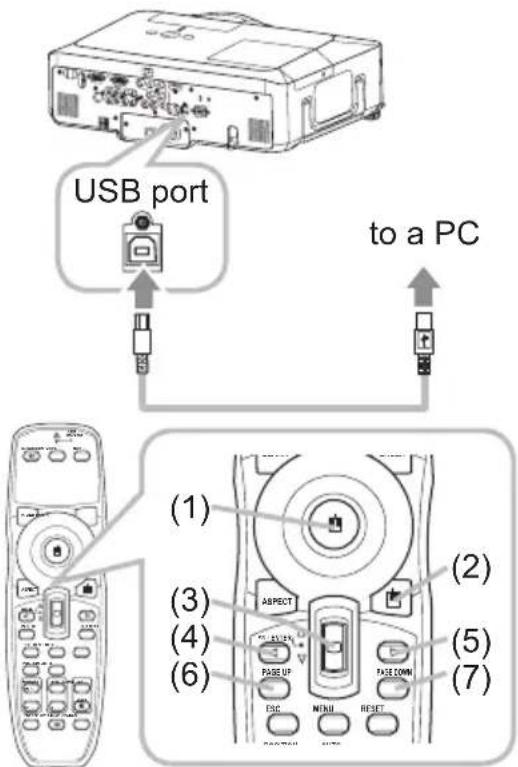
NOTE • When the simple mouse & keyboard function of this product does not work correctly, please check the following.
- When a USB cable connects this projector with a PC having a built-in pointing device (e.g. track ball) like a notebook PC, open BIOS setup menu, then select the external mouse and disable the built-in pointing device, because the built-in pointing device may have priority to this function.
- Windows 95 OSR 2.1 or higher is required for this function. And also this function may not work depending on the PC's configurations and mouse drivers.
- Operating simultaneously two or more keys is void except for mouse drag and drop operation.
- This function is activated only when the projector is working properly.
Power on/off
Turning on the power
- Make sure that the power cord is firmly and correctly connected to the projector and the outlet.
- Remove the lens cover, and set the power switch to the ON position (marked "I").
The power indicator will light up in steady orange. Then wait several seconds because the buttons may not function for these several seconds. - Press the STANDBY/ON button on the projector or the remote control.
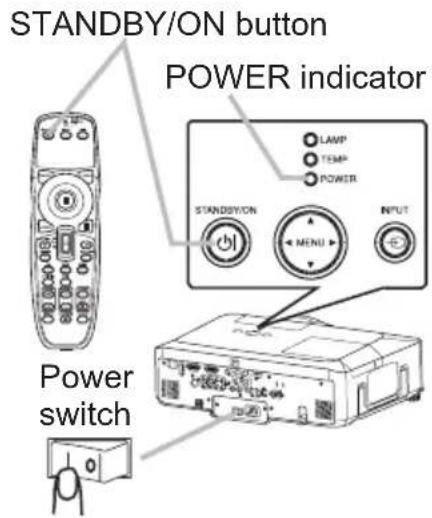
The projection lamp will light up and the POWER indicator will begin blinking in green. When the power is completely on, the indicator will stop blinking and light in steady green. To display the picture, select an input signal according to the section "Selecting an input signal".
Turning off the power
- Press the STANDBY/ON button on the projector or the remote control. The message "Power off?" will appear on the screen for about 5 seconds.
- Press the STANDBY/ON button on the projector or the remote control again while the message appears.
The projector lamp will go off, and the POWER indicator will begin blinking in orange. Then the POWER indicator will stop blinking and light in steady orange when the lamp cooling is complete. - Make sure that the power indicator lights in steady orange, and set the power switch to the OFF position (marked "O").
The POWER indicator will go off. Attach the lens cover.
Do not turn the projector on for 10 minutes or more after turning it off. Turning the projector on again too soon could shorten the lifetime of some consumable parts of the projector.
⚠ WARNING ▶ A strong light is emitted when the projector's power is on. Do not look into the lens of the projector or look inside of the projector through any of the projector's openings.
▶ Do not touch around the lamp cover and the exhaust vents during use or just after use, since it is too hot.
NOTE • Turn the power on/off in right order. Please power on the projector prior to the connected devices. Power off the projector later than the connected devices.
- When the AUTO ON of the OPTION menu is set to the TURN ON, and the power was turned off by the power switch last time, turning the power switch on makes the projection lamp light on without pushing the STANDBY/ON button
- Use the shutdown switch only when the projector is not turned off by normal procedure.
Operating
Adjusting the volume
-
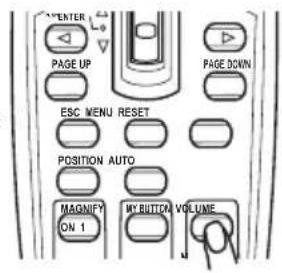
Press the VOLUME button on the remote control. A dialog will appear on the screen to aid you in adjusting the volume.
-
Use the ▲/▼ cursor buttons to adjust the volume. To close the dialog and complete the operation, press the VOLUME button again. Even if you do not do anything, the dialog will automatically disappear after a few seconds.
- When no audio port is selected for current picture input port, the volume adjustment is disable. Please see the AUDIO item of AUDIO menu.
Temporarily muting the sound
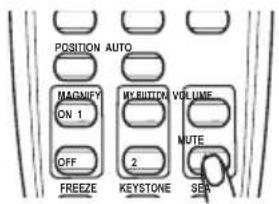
- Press the MUTE button on the remote control. A dialog will appear on the screen indicating that you have muted the sound. To restore the sound, press the MUTE or VOLUME button. Even if you do not do anything, the dialog will automatically disappear after a few seconds.
- As long as no audio input is selected for current picture input port, the sound is always muted. Please see the AUDIO item of AUDIO menu.
Selecting an input signal
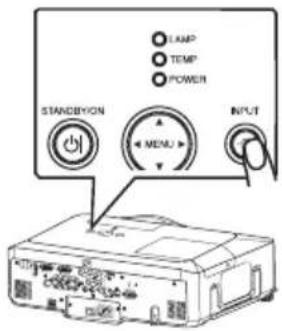
- Press the INPUT button on the projector. Each time you press the button, the projector switches its input port as below.

- Press the RGB button on the remote control to select an input port for the RGB signal. Each time you press the button, the projector switches its RGB input port as below.
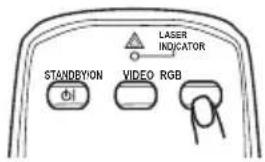

- If the RGB button is pushed (when switching from VIDEO to RGB signals) when TURN ON is selected for the AUTO SEARCH item in the OPTION menu the projector will check the RGB 1 port first. If no input is detected at the port, the projector will check other port in above order. (*)
(continued on next page)
Selecting an input signal (continued)
- Press the VIDEO button on the remote control to select an input for video signal.
Each time you press the button, the projector switches its video input port as below.
COMPONENT (Y, C_B/P_B , C_R/P_R ) → S-VIDEO → VIDEO
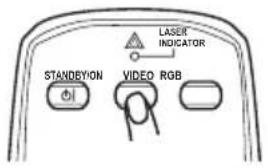

- If the VIDEO button is pushed (when switching from RGB to VIDEO signals) when TURN ON is selected for the AUTO SEARCH item in the OPTION menu the projector will check the COMPONENT (Y, C_B/P_B , C_R/P_R ) port first. If no input is detected at the port, the projector will check other ports in above order. (*)
Searching an input signal
1 Press the SEARCH button on the remote control.
The projector will start to check its input ports in order to find any input signals.
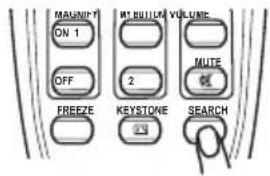
When an input is found, the projector will stop searching and display the image. If no signal is found, the projector will return to the state selected before the operation.
RGB 1 → RGB 2 → HDMI → COMPONENT (Y, C_B/P_B, C_R/P_R) → S-VIDEO → VIDEO

natural_image
Simple horizontal line with an upward arrow at the top-left corner (no text or symbols)Selecting an aspect ratio
1 Press the ASPECT button on the remote control.
Each time you press the button, the projector switches the mode for aspect ratio in turn.
○ For an RGB signal
NORMAL → 4:3 → 16:9 → SMALL

○ For an HDMI signal
NORMAL → 4:3 → 16:9 → 14:9 → SMALL

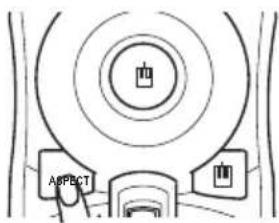
○ For a video signal, s-video signal or component video signal
4:3 → 16:9 → 14:9 → SMALL

○ For no signal
4:3 (fixed)
- The NORMAL mode keeps the original aspect ratio of the signal.
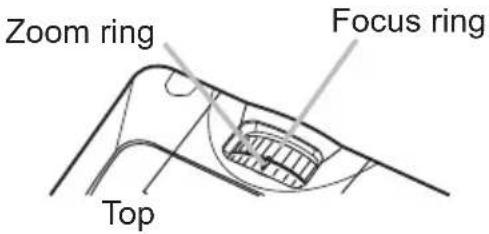
Adjusting the zoom and focus
- Use the zoom ring to adjust the screen size.
- Use the focus ring to focus the picture.
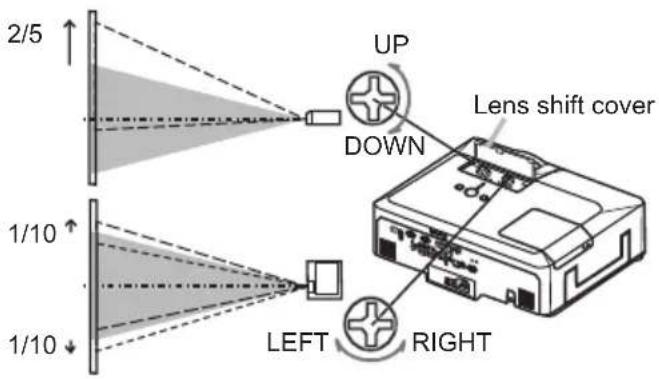
Adjusting the lens shift
- Use the vertical lens shift dial to shift the picture upward or downward.
- Use the horizontal lens shift dial to shift the picture left or right.
NOTE • When the vertical lens shift is adjusted, it is recommended to shift the picture upward.
Using the automatic adjustment feature
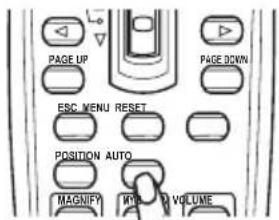
- Press the AUTO button on the remote control.
○ For an RGB signal
The vertical position, the horizontal position and the horizontal phase will be automatically adjusted. Make sure that the application window is set to its maximum size prior to attempting to use this feature. A dark picture may still be incorrectly adjusted. Use a bright picture when adjusting.
○ For a video signal and s-video signal
The video format best suited for the respective input signal will be selected automatically. This function is available only when the AUTO is selected for the VIDEO FORMAT item in the INPUT menu. The vertical position and horizontal position will be automatically set to the default.
○ For a component video signal
The vertical position, horizontal position and horizontal phase will be automatically set to the default.
- The automatic adjustment operation requires approx. 10 seconds. Also please note that it may not function correctly with some input. When this function is performed for a video signal, a certain extra such as a line may appear outside a picture.
- The items adjusted by this function may vary when the FINE or DISABLE is selected for the AUTO ADJUST item of the SERVICE item in the OPTION menu.
Adjusting the position
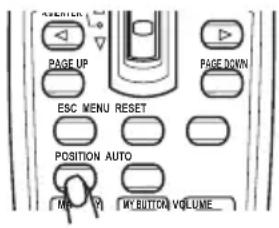
- Press the POSITION button on the remote control. The "POSITION" indication will appear on the screen.
-
Use the ▲/▼/◄/► cursor buttons to adjust the picture position. When you want to reset the operation, press the RESET button on the remote control during the operation. To complete this operation, press the POSITION button again. Even if you do not do anything, the dialog will automatically disappear after a few seconds.
-
When this function is performed on a video signal, s-video signal or component video signal, some image such as an extra-line may appear at outside of the picture.
- When this function is performing on a Video signal, S-Video signal, or component signal of 525i(480i) or 625i(576i) input from the COMPONENT port, the range of this adjustment depends on the OVER SCAN in IMAGE menu. It is not possible to adjust when the OVER SCAN is set to 10.
Correcting the keystone distortions
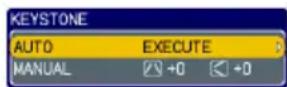
- Press the KEYSTONE button on the remote control. A dialog will appear on the screen to aid you in correcting the distortion.
- Use the ▲/▼ cursor buttons to select AUTO or MANUAL operation, and press the ▶ button to perform the following.
1) AUTO executes automatic vertical keystone correction.
2) MANUAL displays a dialog for keystone correction.
Use the ◀/▶ cursor buttons to select the direction to correct (or □) then use the ▲/▼ buttons for adjustment.
To close the dialog and complete this operation, press the KEYSTONE button again. Even if you don't do anything, the dialog will automatically disappear after a few seconds.
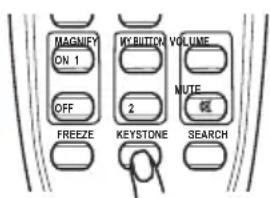
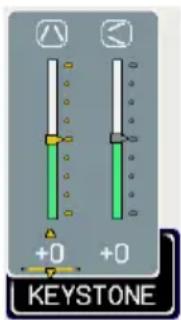
- The adjustable range of this function will vary among inputs. For some input, this function may not work well.
- When V:INVERT or H&V:INVERT is selected to the MIRROR item in the SETUP menu, if the projector screen is inclined or angled downward, this function may not work correctly.
- When the zoom adjustment is set to the TELE (telephoto focus), this function may be excessive. This function should be used when the zoom adjustment is set to the full WIDE (wide-angle focus) whenever possible.
- When the projector is placed on the level (about ± 3^ ), this function may not work.
- When the projector is inclined to near ± 30 degree or over, this function may not work well.
- When the vertical lens shift is not set fully upward (not set fully downward for the optional lens type LEN-003 only), this function may not work well.
- When the horizontal lens shift is not set to the center, this function may not work well.
- This function will be unavailable when Transition Detector is on.
Using the magnify feature
- Press the ON button of MAGNIFY on the remote control. The "MAGNIFY" indication will appear on the screen and the projector will go into the MAGNIFY mode. When the ON button of MAGNIFY is pressed first after the projector is started, the picture will be zoomed twice. The indication will disappear in several seconds with no operation.
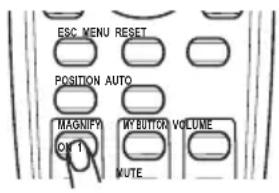
- Use the ▲/▼ cursor buttons to adjust the zoom level. The picture on screen can be zoomed in up to 4 times.
To move the zoom area, press the POSITION button in the MAGNIFY mode, then use the ▲/▼/◄/► cursor buttons to move the area. And to finalize the zoom area, press the POSITION button again.
To exit from the MAGNIFY mode and restore the screen to normal, press the OFF button of MAGNIFY on the remote control.
- The projector automatically exits from the MAGNIFY mode when the input signal is changed or when the display condition is changed.
- In the MAGNIFY mode, the keystone distortion condition may vary, it will be restored when the projector exits from the MAGNIFY mode.
NOTE • The zoom level can be finely adjusted. Closely watch the screen to find the level you want.
Freezing the screen
- Press the FREEZE button on the remote control. The "FREEZE" indication will appear on the screen (however, the indication will not appear when the TURN OFF is selected for the MESSAGE item in the SCREEN menu), and the projector will go into the FREEZE mode, which the picture is frozen.
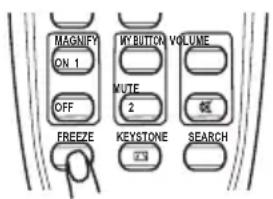
To exit the FREEZE mode and restore the screen to normal, press the FREEZE button again.
- The projector automatically exits from the FREEZE mode when one of the projector's buttons or remote control buttons of STANDBY/ON, SEARCH, RGB, VIDEO, BLANK, AUTO, VOLUME, MUTE, KEYSTONE, MENU, MAGNIFY and MY BUTTON1/2(except MY MEMORY or PICTURE MODE is assigned to) is pressed.
- If the projector continues projecting a still image for a long time, the LCD panel might possibly be burned in. Do not leave the projector in the FREEZE mode for too long.
Temporarily blanking the screen
1 Press the BLANK button on the remote control.
- The blank screen will be displayed instead of the screen of input signal. Please refer to the BLANK item in SCREEN menu.
To exit from the blank screen and return to the input signal screen, press the BLANK button again.
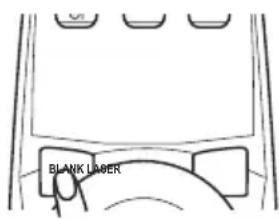
- The projector automatically returns to the input signal screen when one of the projector's buttons or the remote control buttons (except ASPECT, POSITION, MAGNIFY or FREEZE button, also except MY BUTTON1/2 if AUTO KEYSTONE or MY MEMORY or PICTURE MODE is assigned to) is pressed.
NOTE • The sound is not connected with the blank screen function. If necessary, set the volume or mute first.
Using the menu function
This projector has the following menus: PICTURE, IMAGE, INPUT, SETUP, AUDIO, SCREEN, OPTION, NETWORK, and EASY MENU. The EASY MENU consists of functions often used, and the other menus are classified into each purpose and brought together as the Advanced Menu. Each of these menus is operated using the same methods. The basic operations of these menus are as follows.

- Press the MENU button on the remote control or one of the cursor buttons on the projector.
The Advanced MENU, or EASY MENU that has priority just after powered on, will appear.
If you want to move the menu position, use the cursor buttons after pressing the POSITION button. While the projector is displaying any menu, the MENU button on the projector works as the cursor buttons.
![MENU [RGB 1] PICTURE BRIGHTNESS +0 IMAGE CONTRAST +0 INPUT GAMMA DEFAULT-1 SETUP COLOR TEMP HIGH AUDIO COLOR +0 SCREEN TINT +0 OPTION SHARPNESS 4 NETWORK ACTIVE RIS TRUN OFF EASY MENU MY MEMORY SAVE-1](/content/2026/05/951494/images/c6b71c501746dffb959b4b7ce30a48d7881122b5c0b17506172b07b99c0217ec.jpg)
In the EASY MENU
-
If you want to change it to the Advanced MENU, select the "Go to Advanced Menu..."
-
Use the ▲/▼ cursor buttons to select an item to operate.
-
Use the ◀/▶ cursor buttons to operate the item.
![EASY MENU [RGB 1] ASPECT 4:3 AUTO KEYSTONE ↻ EXECUTE KEYSTONE○ KEYSTONE○ PICTURE MODE NORMAL BRIGHTNESS CONTRAST COLOR TINT SHARPNESS WHISPER NORMAL MIRROR NORMAL RESET EXECUTE FILTER TIME On LANGUAGE ENGLISH Go to Advanced Menu...](/content/2026/05/951494/images/73f3861114575c1433e6df6a22af9cda315c48f9c24977dea86fea52eea2893d.jpg)
In the Advanced MENU
2 Use the ▲/▼ cursor buttons to select a menu.
- If you want to change it to the EASY MENU, select the EASY MENU. Then press the ▶ cursor button on the projector or remote control, or the ENTER button on the remote control to select an item. The display of the selected menu will be active.
3 Use the ▲/▼ cursor buttons to select an item to operate.
- Then press the ▶ cursor button on the projector or remote control, or the ENTER button on the remote control to progress. The operation menu of the selected item will appear.
4 Use the ▲/▼ cursor buttons to operate the item.
- Some functions cannot be performed when a certain input port is selected, or when a certain input signal is displayed.
- When you want to reset the operation, press the RESET button on the remote control during the operation. Note that items whose functions are performed simultaneously with operation (ex. LANGUAGE, H PHASE, VOLUME etc.) cannot be reset.
- In the Advanced MENU, when you want to return to the previous display, press the cursor button on the projector or remote control, or the ESC button on the remote control.
- Press the MENU button on the remote control again to close the menu and complete this operation. Even if you do not do anything, the dialog will automatically disappear after about 10 seconds.
EASY MENU
From the EASY MENU, items shown in the table below can be performed.
Select an item using the ▲/▼ cursor buttons on the projector or remote control. Then perform it according to the following table.
![EASY MENU [RGB 1] ASPECT 4:3 AUTO KEYSTONE EXECUTE KEYSTONE/√ +0 KEYSTONE/√ +0 PICTURE MODE NORMAL BRIGHTNESS +0 CONTRAST +0 COLOR +0 TINT +0 SHARPNESS 4 WHISPER NORMAL MIRROR NORMAL RESET EXECUTE FILTER TIME Oh LANGUAGE ENGLISH Go to Advanced Menu...](/content/2026/05/951494/images/427928a966e5517501a2638823bcdff998cb240b92dd9a59e1672d162552c470.jpg)
| Item Description | ||
| ASPECT | Using the ◀/► buttons switches the mode for aspect ratio.See the ASPECT item in IMAGE menu. | |
| AUTO KEYSTONE/EXECUTE | Using the ► button executes the auto keystone function.See the AUTO KEYSTONE EXECUTE item in SETUP menu . | |
| KEYSTONE | Using the ◀/► buttons corrects the vertical keystone distortion.See the KEYSTONE Item in SETUP menu. | |
| KEYSTONE | Using the ◀/► buttons corrects the horizontal keystone distortion.See the KEYSTONE Item in SETUP menu. | |
| PICTURE MODE | Using the ◀/► buttons switches the picture mode.The picture modes are combinations of GAMMA and COLOR TEMP settings. Choose a suitable mode according to the projected source.NORMAL ⇔ CINEMA ⇔ DYNAMIC ⇔ BOARD(BLACK)DAYLIGHT MODE ⇔ WHITEBOARD ⇔ BOARD(GREEN) | |
| COLOR TEMP GAMMA | ||
| NORMAL MID DEFAULT #1 DEFAULT | ||
| CINEMA LOW DEFAULT #2 DEFAULT | ||
| DYNAMIC HIGH DEFAULT #3 DEFAULT | ||
| BOARD(BLACK) Hi-BRIGHT-1 DEFAULT #4 DEFAULT | ||
| BOARD(GREEN) Hi-BRIGHT-2 DEFAULT #4 DEFAULT | ||
| WHITEBOARD MID DEFAULT #5 DEFAULT | ||
| DAYLIGHT MODE Hi-BRIGHT-3 DEFAULT #6 DEFAULT | ||
| When the combination of GAMMA and COLOR TEMP differs from pre-assigned modes above, the display on the menu for the PICTURE MODE is “CUSTOM”. Please refer to the GAMMA and COLOR TEMP items in PICTURE menu.When this function is performed, a certain extra such as a line may appear. | ||
| Item Description | ||
| BRIGHTNESS | Using the ◀/► buttons adjusts the brightness.See the BRIGHTNESS item in PICTURE menu. | |
| CONTRAST | Using the ◀/► buttons adjusts the contrast.See the CONTRAST item in PICTURE menu. | |
| COLOR | Using the ◀/► buttons adjusts the strength of whole color.See the COLOR item in PICTURE menu. | |
| TINT | Using the ◀/► buttons adjusts the tint.See the TINT item in PICTURE menu. | |
| SHARPNESS | Using the ◀/► buttons adjusts the sharpness.See the SHARPNESS item in PICTURE menu. | |
| WHISPER | Using the ◀/► buttons turns off/on the whisper mode.See the WHISPER item in SETUP menu. | |
| MIRROR | Using the ◀/► buttons switches the mode for mirror status.See the MIRROR item in SETUP menu. | |
| RESET | Performing this item resets all of the EASY MENU items except the FILTER TIME and LANGUAGE.A dialog is displayed for confirmation. Selecting the RESET using the ▲ button performs resetting. | |
| FILTER TIME | The usage time of the air filter is shown in the menu.Performing this item resets the filter time which counts usage time of the air filter.A dialog is displayed for confirmation. Selecting the RESET using the ▲ button performs resetting.See the FILTER TIME item in OPTION menu. | |
| LANGUAGE | Using the ◀/► buttons changes the display language.See the LANGUAGE item in SCREEN menu. | |
| Go to Advanced Menu... | Select “Go to Advanced Menu...” on the menu, and press the ► or ENTER button to use the menu of PICTURE, IMAGE, INPUT, SETUP, AUDIO, SCREEN, OPTION or NETWORK. | |
PICTURE Menu
From the PICTURE menu, items shown in the table below can be performed.
Select an item using the ▲/▼ cursor buttons on the projector or remote control, and press the ▶ cursor button on the projector or remote control, or the ENTER button on the remote control to execute the item. Then perform it according to the following table.
![MENU [RGB 1] PICTURE BRIGHTNESS +0 IMAGE CONTRAST +0 INPUT GAMMA DEFAULT-1 SETUP COLOR TEMP HIGH AUDIO COLOR +0 SCREEN TINT +0 OPTION SHARPNESS 4 NETWORK ACTIVE IRIS TRUN OFF EASY MENU MY MEMORY SAVE-1](/content/2026/05/951494/images/41a7d7b5099e60a07c6c413cd95c1d4425456c807c04c9085a00b2d11fd88eef.jpg)
| Item Description | |
| BRIGHTNESS | Using the ▲/▼ buttons adjusts the brightness.Light ⇔ Dark |
| CONTRAST | Using the ▲/▼ buttons adjusts the contrast.Strong ⇔ Weak |
| GAMMA | Using the ▲/▼ buttons switches the gamma mode.#1 DEFAULT ⇔ #1 CUSTOM ⇔ #2 DEFAULT ⇔ #2 CUSTOM ⇔ #3 DEFAULT#6 CUSTOM#6 DEFAULT ⇔ #5 CUSTOM ⇔ #5 DEFAULT ⇔ #4 CUSTOM ⇔ #4 DEFAULTTo adjust CUSTOMSelecting a mode whose name includesCUSTOM and then pressing the ▶ buttonor the ENTER button displays a dialog to aidyou in adjusting the mode.This function is useful when you want tochange the brightness of particular tones.Choose an item using the ◀/▶ buttons, andadjust the level using the ▲/▼ buttons.You can display a test pattern for checking the effect of youradjustment by pressing the ENTER button.Each time you press the ENTER button, the pattern changes asbelow.No pattern ⇒ Gray scale of 9 stepsRamp ⇔ Gray scale of 15 stepsThe eight equalizing bars correspond to eight tone levels of the testpattern (Gray scale of 9 steps) except the darkest in the left end.If you want to adjust the 2nd tone from left end on the test pattern,use the equalizing adjustment bar “1”. The darkest tone at the leftend of the test pattern cannot be controlled with any of equalizingadjustment bar.When this function is performed, lines or other distortion mayappear. 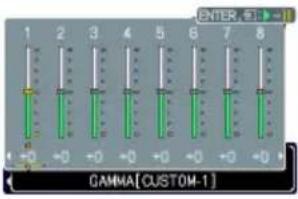 |
| COLOR TEMP | Using the ▲/▼ buttons switches the color temperature mode. To adjust CUSTOMSelecting a mode whose name includes CUSTOM and then pressing the ▶ button or the ENTER button displays a dialog to aid you in adjusting the OFFSET and GAIN of the selected mode.OFFSET adjustments change the color intensity on the whole tones of the test pattern.GAIN adjustments mainly affect color intensity on the brighter tones of the test pattern.Choose an item using the ◀/▶ buttons, and adjust the level using the ▲/▼ buttons.You can display a test pattern for checking the effect of your adjustment by pressing the ENTER button.Each time you press the ENTER button, the pattern changes as below.No pattern ⇒ Gray scale of 9 steps →Ramp ⇔ Gray scale of 15 stepsWhen this function is performed, lines or other distortion may appear. To adjust CUSTOMSelecting a mode whose name includes CUSTOM and then pressing the ▶ button or the ENTER button displays a dialog to aid you in adjusting the OFFSET and GAIN of the selected mode.OFFSET adjustments change the color intensity on the whole tones of the test pattern.GAIN adjustments mainly affect color intensity on the brighter tones of the test pattern.Choose an item using the ◀/▶ buttons, and adjust the level using the ▲/▼ buttons.You can display a test pattern for checking the effect of your adjustment by pressing the ENTER button.Each time you press the ENTER button, the pattern changes as below.No pattern ⇒ Gray scale of 9 steps →Ramp ⇔ Gray scale of 15 stepsWhen this function is performed, lines or other distortion may appear. |
| COLOR | Using the ▲/▼ buttons adjusts the strength of whole color.Strong ⇔ WeakThis item can be selected only for a video signal, s-video, component video or HDMI signal. |
| TINT | Using the ▲/▼ buttons adjusts the tint.Greenish ⇔ ReddishThis item can be selected only for a video signal, s-video, component video or HDMI signal. |
| SHARPNESS | Using the ▲/▼ buttons adjusts the sharpness.Strong ⇔ WeakThere may be some noise and/or the screen may flicker for a moment when an adjustment is made. This is not a malfunction. |
| Item Description | |
| ACTIVE IRIS | Using the ▲/▼ cursor buttons changes the active iris control mode.PRESENTATION ⇔ THEATER ⇔ TURN OFF↑↑ |
| The active iris displays the best presentation image for both bright and dark scenes. | |
| The active iris displays the best theater image for both bright and dark scenes. | |
| TURN OFF The active iris is always open. | |
| • The screen may flicker when the PRESENTATION or THEATER modes are selected. If this occurs select TURN OFF. | |
| MY MEMORY | This projector has 4 memories for adjustment data (for all the items of the PICTURE menu).Selecting a function using the ▲/▼ buttons and pressing the ▶ or ENTER button performs each function. LOAD-1, LOAD-2, LOAD-3, LOAD-4Performing a LOAD function loads the data from the memory linked in the number included in the function's name, and adjusts the picture automatically depending on the data.• The LOAD functions whose linked memory has no data are skipped.• Remember that the current adjusted condition will be lost by loading data. If you want to keep the current adjustment, please save it before performing a LOAD function.• There may be some noise and the screen may flicker for a moment when loading data. This is not malfunction.• The LOAD functions can be also performed by the MY MEMORY button which can be set by the MY BUTTON item in OPTION menu.SAVE-1, SAVE-2, SAVE-3, SAVE-4Performing a SAVE function saves the current adjustment data into the memory linked in the number included in the function's name.• Remember that the current data being stored of a memory will be lost by saving a new data into the memory. LOAD-1, LOAD-2, LOAD-3, LOAD-4Performing a LOAD function loads the data from the memory linked in the number included in the function's name, and adjusts the picture automatically depending on the data.• The LOAD functions whose linked memory has no data are skipped.• Remember that the current adjusted condition will be lost by loading data. If you want to keep the current adjustment, please save it before performing a LOAD function.• There may be some noise and the screen may flicker for a moment when loading data. This is not malfunction.• The LOAD functions can be also performed by the MY MEMORY button which can be set by the MY BUTTON item in OPTION menu.SAVE-1, SAVE-2, SAVE-3, SAVE-4Performing a SAVE function saves the current adjustment data into the memory linked in the number included in the function's name.• Remember that the current data being stored of a memory will be lost by saving a new data into the memory. |
IMAGE Menu
From the IMAGE menu, items shown in the table below can be performed.
Select an item using the ▲/▼ cursor buttons on the projector or remote control, and press the ▶ cursor button on the projector or remote control, or ENTER button on the remote control to execute the item. Then perform it according to the following table.
![MENU [RGB 1] PICTURE IMAGE INPUT SETUP AUDIO SCREEN OPTION NETWORK EASY MENU ASPECT 4:3 OVER SCAN 5 V POSITION 25 H POSITION 142 H PHASE 16 H SIZE 1344 AUTO ADJUST EXECUTE C\$SELECT](/content/2026/05/951494/images/5d1d60768b585f9f98dc23237589b1607f42c44c9e82512c10a19e43fb840ae4.jpg)
| Item Description | |
| ASPECT | Using the ▲/▼ buttons switches the mode for aspect ratio.For an RGB signalNORMAL ⇔ 4:3 ⇔ 16:9 ⇔ SMALLFor an HDMI signalNORMAL ⇔ 4:3 ⇔ 16:9 ⇔ 14:9 ⇔ SMALLFor a Video signal, S-video signal or Component video signal4:3 ⇔ 16:9 ⇔ 14:9 ⇔ SMALLFor no signal4:3 (fixed)The NORMAL mode keeps the original aspect ratio of the signal. |
| OVER SCAN | Using the ▲/▼ buttons adjusts the over-scan ratio.Large (It reduces picture) ⇔ Small (It magnifies picture)This item can be selected only for a video, s-video, component and HDMI signal.When this adjustment is too large, certain degradation may appear at the frame area of the picture. In such a case, please adjust small. |
| V POSITION | Using the ▲/▼ buttons adjusts the vertical position.Up ⇔ DownOver-adjusting the vertical position may cause noise to appear on the screen. If this occurs please reset the vertical position to the default setting. Pressing the RESET button when the V POSITION is selected will reset the V POSITION to the default setting.When this function is performed on a video signal, s-video signal, or component video signal of 525i (480i) or 625i (576i) input from the COMPONENT port, the range of this adjustment depends on the OVER SCAN setting. It is not possible to adjust when the OVER SCAN is set to 10. |
| H POSITION | Using the ▲/▼ buttons adjusts the horizontal position.Left ⇔ RightOver-adjusting the horizontal position may cause noise to appear on the screen. If this occurs please reset the horizontal position to the default setting. Pressing the RESET button when the H POSITION is selected will reset the H POSITION to the default setting.When this function is performed on a video signal, s-video signal, or component video signal of 525i (480i) or 625i (576i) input from the COMPONENT port, the range of this adjustment depends on the OVER SCAN setting. It is not possible to adjust when the OVER SCAN is set to 10. |
| Item Description | |
| H PHASE | Using the ▲/▼ buttons adjusts the horizontal phase to eliminate flicker.Right ⇔ LeftThis item can be selected only for an RGB signal or a component video signal. (except 525i (480i), 625i (576i), SCART RGB input from the COMPONENT port) |
| H SIZE | Using the ▲/▼ buttons adjusts the horizontal size.Large ⇔ SmallThis item can be selected only for an RGB signal.When this adjustment is excessive, the picture may not be displayed correctly. In such a case, please reset the adjustment by pressing the RESET button on the remote control during this operation. |
| AUTO ADJUST EXECUTE | Selecting this item performs the automatic adjustment feature.For an RGB signalThe vertical position, the horizontal position and the horizontal phase will be automatically set to default.Make sure that the application window is set to its maximum size prior to attempting to use this feature. A dark picture may still be incorrectly adjusted. Use a bright picture when adjusting.For a video signal and s-video signalThe video format best suited for the respective input signal will be selected automatically. This function is available only when the AUTO is selected for the VIDEO FORMAT item in the INPUT menu. The vertical position and horizontal position will be automatically set to the default.For a component video signalThe vertical position, horizontal position and horizontal phase will be automatically set to the default.The automatic adjustment operation requires approx. 10 seconds. Also please note that it may not function correctly with some input. When this function is performed for a video signal, a certain extra such as a line may appear outside a picture.The items adjusted by this function may vary when the FINE or DISABLE is selected for the AUTO ADJUST item of the SERVICE item in the OPTION menu. |
INPUT Menu
From the INPUT menu, items shown in the table below can be performed.
Select an item using the ▲/▼ cursor buttons on the projector or remote control, and press the ▶ cursor button on the projector or remote control, or ENTER button on the remote control to execute the item. Then perform it according to the following table.
![MENU [RGB 1] PICTURE IMAGE INPUT SETUP AUDIO SCREEN OPTION NETWORK EASY MENU PROGRESSIVE VIDEO NR 3D-YCS COLOR SPACE COMPONENT VIDEO FORMAT HDMI FRAME LOCK RGB IN RESOLUTION FILM MID MOVIE AUTO COMPONENT NORMAL](/content/2026/05/951494/images/7433b4f4fc0331ada56bff0f049405b33ff88e40a1137bcd7186b18d042c6fb4.jpg)
| Item Description | |
| PROGRESSIVE | Using the ▲/▼ buttons switches the progress mode.TV ⇔ FILM ⇔ TURN OFFThis function is performed only for an interlaced signal at the VIDEO or S-VIDEO input, and for 525i (480i), 625i (576i) or 1125i (1080i) signal at the COMPONENT VIDEO or HDMI input.When TV or FILM is selected, the screen image will be sharp. FILM adapts to the 2-3 Pull-Down conversion system. But these may cause a certain defect (for example, jagged line) of the picture for a quick moving object. In such a case, please select TURN OFF, even though the screen image may lose the sharpness. |
| VIDEO NR | Using the ▲/▼ buttons switches the noise reduction mode.HIGH ⇔ MID ⇔ LOWThis function is performed only for the VIDEO or S-VIDEO input, and for 525i (480i), 625i (576i) or 1125i (1080i) signal at the COMPONENT VIDEO or HDMI input.When this function is excessive, it may cause a certain degradation of the picture. |
| 3D-YCS | Using the ▲/▼ buttons switches the 3D-YCS mode.STILL ⇔ MOVIE ⇔ TURN OFFThis function performs only at a VIDEO input of NTSC, and PAL.MOVIE is the mode for images with a lot of motions like movies, and STILL is the mode for images with few motions or completely still ones like slides. |
| COLOR SPACE | Using the ▲/▼ buttons switches the mode for color space.AUTO ⇔ RGB ⇔ SMPTE240 ⇔ REC709 ⇔ REC601This item can be selected only for an RGB signal or a component video signal (except 525i (480i), 625i (576i) and SCART RGB).The AUTO mode automatically selects the optimum mode.The AUTO operation may not work well at some signals. In such a case, it might be good to select a suitable mode except AUTO. |
(continued on next page)
INPUT Menu (continued)
| Item Description | |
| COMPONENT | Using the ▲/▼ buttons switches the function of the COMPONENT (Y, CB/PB, CR/PR) port.COMPONENT ⇔ SCART RGBWhen the SCART RGB is selected, the COMPONENT (Y, CB/PB, CR/PR) and VIDEO ports will function as a SCART RGB port. A SCART adapter or SCART cable is required for a SCART RGB input to the projector. For details, contact ViewSonic.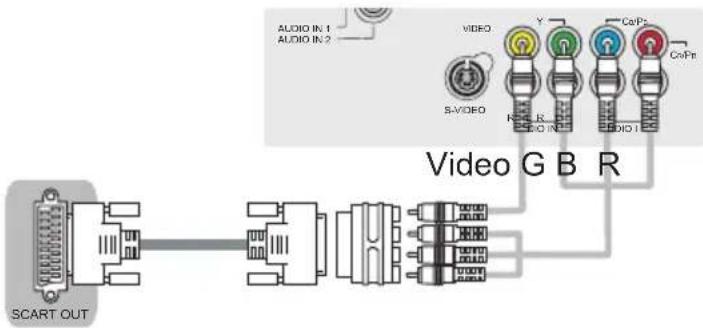 |
| VIDEO FORMAT | Set the video format for the s-video port and video port.(1) Use the ◀/► buttons to select the input port.(2) Using the ▲/▼ buttons switches the mode for video format.AUTO ⇔ NTSC ⇔ PAL ⇔ SECAM 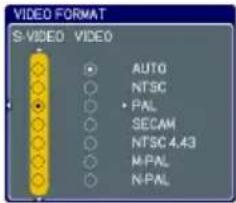 N-PAL ⇔ M-PAL ⇔ NTSC4.43This item is performed only for a video signal from the VIDEO port or the S-VIDEO port.The AUTO mode automatically selects the optimum mode.The AUTO operation may not work well for some signals. If the picture becomes unstable (e.g. an irregular picture, lack of color), please select the mode according to the input signal. N-PAL ⇔ M-PAL ⇔ NTSC4.43This item is performed only for a video signal from the VIDEO port or the S-VIDEO port.The AUTO mode automatically selects the optimum mode.The AUTO operation may not work well for some signals. If the picture becomes unstable (e.g. an irregular picture, lack of color), please select the mode according to the input signal. |
| HDMI | Using the ▲/▼ cursor buttons changes the HDMI signal mode.AUTO ⇔ NORMAL ⇔ ENHANCED If the contrast of the screen image is too strong or too weak, try finding a more suitable mode. If the contrast of the screen image is too strong or too weak, try finding a more suitable mode. |
(continued on next page)
INPUT Menu (continued)
| Item Description | ||
| FRAME LOCK | Set the frame lock function on/off for each port.(1) Use the ▲/▼ buttons to select one of following ports.RGB1 ⇔ RGB2 ⇔ HDMI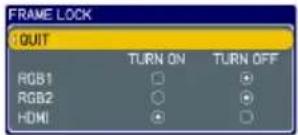 ↑→ QUIT ←→(2) Use the ◀/► buttons to turns the frame lock function on/off .TURN ON ⇔ TURN OFF ↑→ QUIT ←→(2) Use the ◀/► buttons to turns the frame lock function on/off .TURN ON ⇔ TURN OFF 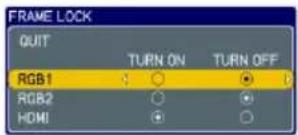 • This item can be performed only on a signal with a vertical frequency of 50 to 60 Hz.• When the TURN ON is selected, a moving pictures are displayed more smoothly.• This function may cause a certain degradation of the picture. In such a case, please select the TURN OFF. • This item can be performed only on a signal with a vertical frequency of 50 to 60 Hz.• When the TURN ON is selected, a moving pictures are displayed more smoothly.• This function may cause a certain degradation of the picture. In such a case, please select the TURN OFF. | |
| RGB IN | Set the RGB input signal type for the RGB port.(1) Use the ◀/► buttons to select the RGB port to be set.RGB1 ⇔ RGB2 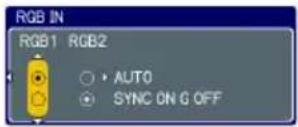 (2) Use the ▲/▼ buttons to select the RGB input signal type.AUTO ⇔ SYNC ON G OFF• Selecting the AUTO mode allows you to input a sync on G signal or component signal from the port.• In the AUTO mode, the picture may be distorted with certain input signals. In such a case, remove the signal connector so that no signal is received and select the SYNC ON G OFF, and then reconnect the signal. (2) Use the ▲/▼ buttons to select the RGB input signal type.AUTO ⇔ SYNC ON G OFF• Selecting the AUTO mode allows you to input a sync on G signal or component signal from the port.• In the AUTO mode, the picture may be distorted with certain input signals. In such a case, remove the signal connector so that no signal is received and select the SYNC ON G OFF, and then reconnect the signal. | |
(continued on next page)
INPUT Menu (continued)
| Item Description | ||
| RESOLUTION | The resolution for the RGB1 and RGB2 input signals can be set on this projector.(1) In the INPUT menu select the RESOLUTION using the ▲/▼ buttons and press the ► button.The RESOLUTION menu will be displayed.(2) In the RESOLUTION menu select the resolution you wish to display using the ▲/▼ buttons.Selecting AUTO will set a resolution appropriate to the input signal.(3) Pressing the ► or ENTER button when selecting a STANDARD resolution will automatically adjust the horizontal and vertical positions, clock phase and horizontal size.The INPUT-INFORMATION dialog will be displayed.(4) To set a custom resolution use the ▲/▼ buttons to select the CUSTOM and the CUSTOM RESOLUTION BOX will be displayed. Set the horizontal (HORZ) and vertical (VERT) resolutions using the ▲/▼/◄/► buttons.It is not guaranteed to work this function properly on any resolutions.(5) To save the setting place the cursor on the right-most digit and press the ► button.The horizontal and vertical positions, clock phase and horizontal size will be automatically adjusted.After the INPUT-INFORMATION dialog has displayed for about 10 seconds the screen will return to the RESOLUTION menu displaying the changed resolution.(6) To revert back to the previous resolution without saving changes place the cursor on the left-most digit and press the ◀ button.The screen will then return to the RESOLUTION menu displaying the previous resolution.• For some pictures, this function may not work well. | 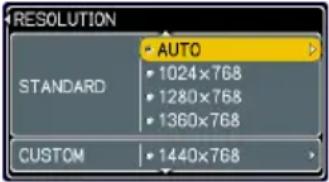 RESOLUTION MENU RESOLUTION MENU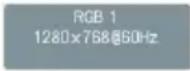 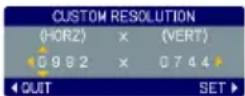 CUSTOM RESOLUTION BOX CUSTOM RESOLUTION BOX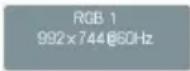 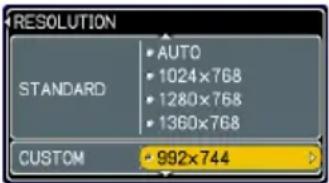 |
SETUP Menu
From the SETUP menu, items shown in the table below can be performed.
Select an item using the ▲/▼ cursor buttons on the projector or remote control, and press the ▶ cursor button on the projector or remote control, or the ENTER button on the remote control to execute the item. Then perform it according to the following table.
![MENU [RGB 1] PICTURE IMAGE INPUT SETUP AUDIO SCREEN OPTION NETWORK EASY MENU AUTO KEYSTONE ⌘ EXECUTE KEYSTONE(2) +0 KEYSTONE(3) +0 WHISPER NORMAL MIRROR NORMAL](/content/2026/05/951494/images/28af85a5ffc594e7fa6ff035c994d8c95e5dcc736a4379e2c80635964fc72091.jpg)
| Item Description | |
| AUTO KEYSTONE ⏻ EXECUTE | Selecting this item performs the Automatic keystone distortion correction. Projector automatically corrects vertical keystone distortion due to the (forward/backward) setup angle by itself.This function will be executed only once when selected in the menu. When the slant of the projector is changed, execute this function again.The adjustable range of this function will vary among inputs. For some input, this function may not work well.When V:INVERT or H&V:INVERT is selected to the MIRROR item in the SETUP menu, if the projector screen is inclined or angled downward, this function may not work correctly.When the zoom adjustment is set to the TELE (telephoto focus), this function may be excessive. This function should be used when the zoom adjustment is set to the full WIDE (wide-angle focus) whenever possible.When the projector is placed on the level (about ±3°), this function may not work.When the projector is inclined to near ±30 degree or over, this function may not work well.When the vertical lens shift is not set fully upward (not set fully downward for the optional lens type LEN-003 only), this function may not work well.When the horizontal lens shift is not set to the center, this function may not work well.This function will be unavailable when the Transition Detector is on. |
| KEYSTONE ⏻ | Using the ▲/▼ buttons corrects the vertical keystone distortion.Shrink the top of the image ⇔ Shrink the bottom of the imageThe adjustable range of this function will vary among inputs. For some input, this function may not work well.When the horizontal lens shift is not set to the center, this function may not work well.This function will be unavailable when the Transition Detector is on. |
(continued on next page)
SETUP Menu (continued)
| Item Description | |
| KEYSTONE | Using the ▲/▼ buttons corrects the horizontal keystone distortion. Shrink the right of the image ⇔ Shrink the left of the image• The adjustable range of this function will vary among inputs. For some input, this function may not work well.• When the zoom adjustment is set to the TELE (telephoto focus), this function may be excessive. This function should be used when the zoom adjustment is set to the full WIDE (wide-angle focus) whenever possible.• When the vertical lens shift is not set fully upward (not set fully downward for the optional lens type LEN-003 only), this function may not work well.• This function will be unavailable when the Transition Detector is on. |
| WHISPER | Using the ▲/▼ buttons turns off/on the whisper mode. NORMAL ⇔ WHISPER• When the WHISPER is selected, acoustic noise and screen brightness are reduced. |
| MIRROR | Using the ▲/▼ buttons switches the mode for mirror status.    NORMAL ⇔ H:INVERT ⇔ V:INVERT ⇔ H&V:INVERTIf the Transition Detector is TURN ON and MIRROR status is changed, Transition Detector Alarm will be displayed when projector is restarted after the power switch is turned off. NORMAL ⇔ H:INVERT ⇔ V:INVERT ⇔ H&V:INVERTIf the Transition Detector is TURN ON and MIRROR status is changed, Transition Detector Alarm will be displayed when projector is restarted after the power switch is turned off. |
AUDIO Menu
From the AUDIO menu, items shown in the table below can be performed.
Select an item using the ▲/▼ cursor buttons on the projector or remote control, and press the ▶ cursor button on the projector or remote control, or ENTER button on the remote control to execute the item. Then perform it according to the following table.
![MENU [RGB 1] PICTURE IMAGE INPUT SETUP AUDIO SCREEN OPTION NETWORK EASY MENU VOLUME TREBLE BASS SRS VOW SPEAKER AUDIO HDMI AUDIO 24 +0 +0 MID TURN ON 1 SELECT](/content/2026/05/951494/images/eeb676b9007eb2a3a470e2524dd1ebe2c105595f4f8cfca7d93b0393f35e18ae.jpg)
NOTE • The speaker sound may distorted or the case may be trembling when the volume is too high or treble/bass is emphasized or WOW is activated. In that case, make the volume reduced, bass/treble low or WOW effect to be weakend.
| Item Description | |
| VOLUME | Using the ▲/▼ buttons adjusts the volume.High ⇔ Low |
| TREBLE | Using the ▲/▼ buttons adjusts the treble level.High ⇔ Low |
| BASS | Using the ▲/▼ buttons adjusts the bass level.High ⇔ Low |
 | Using the ▲/▼ buttons switches the mode for SRS WOW mode.HIGH ⇔ MID ⇔ OFF↓→↑SRS WOWTM accomplishes this by providing a panoramic three-dimensional audio image that extends the sound field in both the horizontal and vertical planes, and lowers the perceived bass response well beyond the low frequency limitations of the drivers. Adjust it depending on the user's preference. |
| SPEAKER | Using the ▲/▼ buttons turns the speaker function on/off.TURN ON ⇔ TURN OFF• When the TURN ON is selected the built-in speaker works. |
| AUDIO | Allocates the audio ports.(1) Choose a picture input port using the ▲/▼ buttons.↔ RGB1 ⇔ RGB2 ⇔ HDMI ↔QUIT ⇔ VIDEO ⇔ S-VIDEO ⇔ COMPONENT(2) Select the audio port to be interlocked with the input port using the ◀/► buttons.1 ⇔ 2 ⇔ 3 ⇔ 4 ⇔ ✗ ⇔ H• H is abbreviation of HDMI.• H can be selected for HDMI port only. When H is selected, the audio signal to HDMI port will be output if HDMI is chosen as a display source.• When ✗is selected for an input, the audio will not be output if the input is chosen as a display source. |
| HDMI AUDIO | The HDMI AUDIO is set to 1 as default. In case the HDMI audio does not work well, try 2.1 ⇔ 2 |
SCREEN Menu
From the SCREEN menu, items shown in the table below can be performed.
Select an item using the ▲/▼ cursor buttons on the projector or remote control, and press the ▶ cursor button on the projector or remote control, or ENTER button on the remote control to execute the item. Then perform it according to the following table.
![MENU [RGB 1] PICTURE IMAGE INPUT SETUP AUDIO SCREEN OPTION NETWORK EASY MENU LANGUAGE MENU POSITION BLANK START UP MyScreen MyScreen Lock MESSAGE SOURCE NAME ENGLISH BLACK ORIGINAL TURN OFF TURN ON SELECT](/content/2026/05/951494/images/0a843d3950fd5baa4898d8e332f276c6bc6d7e182689cf76406592bac39ecc50.jpg)
| Item Description | |
| LANGUAGE | Using the ▲/▼ buttons switches the OSD (On Screen Display) language. ENGLISH ⇔ FRANÇAIS ⇔ DEUTSCH ⇔ ESPAÑOL ⇔ ITALIANONORSK ⇔ NEDERLANDS ⇔ PORTUGUÊS ⇔ 日本語简体中文 ⇔ 繁體中文 ⇔ 한글 ⇔ SVENSKA ⇔ РУССКИЙSUOMI ⇔ POLSKI ⇔ TÜRKÇE |
| MENU POSITION | Using the ◀/►/▲/▼ buttons adjusts the menu position. To quit the operation, press the MENU button on the remote control or keep no operation for about 10 seconds. |
| BLANK | Using the ▲/▼ buttons switches the mode for the blank screen. The blank screen is a screen for the temporarily blanking feature. It is displayed by pressing the BLANK button on the remote control.MyScreen ⇔ ORIGINAL ⇔ BLUE ⇔ WHITE ⇔ BLACK |
| Feature | |
| MyScreen Screen can be registered by the MyScreen item. | |
| ORIGINAL Screen pre set as the standard screen. | |
| BLUE, WHITE, BLACK Plain screens in each color. | |
| • To avoid remaining as an afterimage, the MyScreen or ORIGINAL screen will change to the plain black screen after several minutes. |
(continued on next page)
SCREEN Menu (continued)
| Item Description | |
| START UP | Using the ▲/▼ buttons switches the mode for the start-up screen. The start-up screen is a screen displayed when no signal or an unsuitable signal is detected.MyScreen ⇔ ORIGINAL ⇔ TURN OFF |
| MyScreen Screen can be registered by the MyScreen item. | |
| ORIGINAL Screen pre set as the standard screen. | |
| TURN OFF Plain black screen. | |
| • To avoid remaining as an afterimage, the MyScreen or ORIGINAL screen will change to the BLANK screen after several minutes. If also the BLANK screen is the MyScreen or ORIGINAL, the plain black screen is instead used.• When the TURN ON is selected to the MyScreen PASSWORD of SECURITY item in OPTION menu, the START UP is fixed to MyScreen. | |
(continued on next page)
SCREEN Menu (continued)
| Item Description | |
| MyScreen | This item allows you to capture an image for use as a MyScreen image which can be used as the BLANK screen and START UP screen. Display the image you want to capture before executing the following procedure.1. Selecting this item displays a dialog titled “MyScreen”. It will ask you if 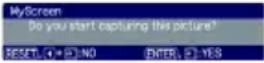 you start capturing an image from the current screen.Please wait for the target image to be displayed, and press the ENTER button on the remote control when the image is displayed. The image will freeze and the frame for capturing will appear.To stop performing, press the RESET or ESC button on the remote control.2. Using the ▲/▼/◄/► buttons adjusts the frame position.Please move the frame to the position of the image which you want to use. The frame may not be able to be moved for some input signals.To start registration, press the ENTER button on the remote control.To restore the screen and return to the previous dialog, press the RESET or ESC button on the remote control.Registration takes several minutes.When the registration is completed, the registered screen and the following message is displayed for several seconds:“MyScreen registration is finished.”If the registration failed, the following message is displayed:“A capturing error has occurred. Please try again.”This item cannot be selected for an HDMI signal.This function cannot be selected when the TURN ON is selected to the MyScreen Lock item.This function cannot be selected when the TURN ON is selected to the MyScreen PASSWORD of SECURITY item in OPTION menu. you start capturing an image from the current screen.Please wait for the target image to be displayed, and press the ENTER button on the remote control when the image is displayed. The image will freeze and the frame for capturing will appear.To stop performing, press the RESET or ESC button on the remote control.2. Using the ▲/▼/◄/► buttons adjusts the frame position.Please move the frame to the position of the image which you want to use. The frame may not be able to be moved for some input signals.To start registration, press the ENTER button on the remote control.To restore the screen and return to the previous dialog, press the RESET or ESC button on the remote control.Registration takes several minutes.When the registration is completed, the registered screen and the following message is displayed for several seconds:“MyScreen registration is finished.”If the registration failed, the following message is displayed:“A capturing error has occurred. Please try again.”This item cannot be selected for an HDMI signal.This function cannot be selected when the TURN ON is selected to the MyScreen Lock item.This function cannot be selected when the TURN ON is selected to the MyScreen PASSWORD of SECURITY item in OPTION menu. |
| MyScreen Lock | Using the ▲/▼ buttons turns on/off the MyScreen lock function.TURN ON ⇔ TURN OFFWhen the TURN ON is selected, the item MyScreen is locked. Use this function for protecting the current MyScreen.This function cannot be selected when the TURN ON is selected to the MyScreen PASSWORD of SECURITY item in OPTION menu. |
(continued on next page)
SCREEN Menu (continued)
| Item Description | |
| MESSAGE | Using the ▲/▼ buttons turns on/off the message function.TURN ON ⇔ TURN OFFWhen the TURN ON is selected, the following message function works."AUTO IN PROGRESS" while automatically adjusting"NO INPUT IS DETECTED""SYNC IS OUT OF RANGE""Searching...." while searching for the input"Detecting...." while an input signal is detectedThe indication of the input signal displayed by changingThe indication of the aspect ratio displayed by changingThe indication of the PICTURE MODE displayed by changingThe indication of the ACTIVE IRIS displayed by changingThe indication of the MY MEMORY displayed by changingThe indication of "FREEZE" and "II" while freezing the screen bypressing the FREEZE button.When the TURN OFF is selected, please remember if the pictureis freezing. Do not mistake freezing for a malfunction. |
| SOURCE NAME | Each input port for this projector can have a name applied to it.(1) Use the ▲/▼ buttons on the SCREEN menu toselect SOURCE NAME and press the ▶ button.The SOURCE NAME menu will be displayed.(2) Use the ▲/▼ buttons on the SOURCENAME menu to select the port to be namedand press the ▶ button. Right side of themenu is blank until a name is specified.The SOURCE NAME dialog will be displayed.(3) The current name will be displayed onthe first line. Use the ▲/▼/◄/► buttonsand the ENTER or INPUT button to select andenter characters. The RESET button can beused to erase 1 character at a time. Also if youmove the cursor to DELETE or ALL CLEAR onscreen and push the ENTER or INPUT button,1 character or all characters will be erased. Thename can be a maximum of 16 characters.(4) To change an already inserted character,press the ▲ button to move the cursor to thefirst line, and use the◄/► buttons to movethe cursor on the character to be changed.After pressing the ENTER or INPUT button, thecharacter is selected. Then, follow the sameprocedure as described at the item (3) above.(5) To finish entering text, move the cursor to theSAVE on screen and press the ENTER or INPUT button. To revert to theprevious name without saving changes, move the cursor to the CANCEL onscreen and press the ENTER or INPUT button. |
OPTION Menu
From the OPTION menu, items shown in the table below can be performed.
Select an item using the ▲/▼ cursor buttons on the projector or remote control, and press the ▶ cursor button on the projector or remote control, or ENTER button on the remote control to execute the item, except for the items LAMP TIME and FILTER TIME. Then perform it according to the following table.
![MENU [RGB 1] PICTURE IMAGE INPUT SETUP AUDIO SCREEN OPTION NETWORK EASY MENU AUTO SEARCH TURN ON AUTO KEYSTONE TURN ON AUTO ON TURN ON AUTO OFF Dttin LAMP TIME 1234h FILTER TIME 123h MY BUTTON SERVICE SECURITY](/content/2026/05/951494/images/cc3d1b6a3abd658df1c12267669ea8ccaa3e101b714f5d1b9cade6a717fe69a5.jpg)
| Item Description | |
| AUTO SEARCH | Using the ▲/▼ buttons turns on/off the automatic signal search function.TURN ON ⇔ TURN OFFWhen the TURN ON is selected, detecting no signal automatically cycles through input ports in the following order. The search is started from the current port. Then when an input is found, the projector will stop searching and display the image.RGB 1 ⇒ RGB 2 ⇒ HDMI ⇒ COMPONENT ⇒ S-VIDEO ⇒ VIDEO |
| AUTO KEYSTONE | Using the ▲/▼ buttons turns on/off the automatic keystone function.TURN ON ⇔ TURN OFFTURN ON : Automatic keystone distortion correction will be executed whenever changing the slant of the projector.TURN OFF : This function is disabled. Please execute the AUTO KEYSTONE EXECUTE in the SETUP Menu for automatic keystone distortion correction.When the projector is suspended from the ceiling this feature will not function properly so select the TURN OFF.This function will be unavailable when the Transition Detector is on. |
| AUTO ON | Using the ▲/▼ buttons turns on/off the AUTO ON function.TURN ON ⇔ TURN OFFWhen AUTO ON is set to TURN ON, the projector's lamp will only be automatically turned on when the Power switch is turned on if the power was turned off using the Power switch the last time the projector was turned off.After turning the lamp on by the AUTO ON function, if neither input nor operation is detected for about 30 minutes, the projector is turned off, even though the AUTO OFF function is disabled. |
(continued on next page)
OPTION Menu (continued)
| Item Description | |
| AUTO OFF | Using the ▲/▼ buttons adjusts the time to count down to automatically turn the projector off.Long (max. 99 minutes) ⇔ Short (min. 0 minute = DISABLE)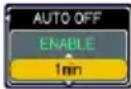 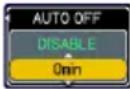 When the time is set to 0, the projector is not turned off automatically.When the time is set to 1 to 99, and when the passed time with no-signal or an unsuitable signal reaches at the set time, the projector lamp will be turned off.If one of the projector's buttons or the remote control buttons is pressed or one of the commands (except get commands) is transmitted to the control port during the corresponding time, projector will not be turned off.Please refer to the section “Turning off the power”. When the time is set to 0, the projector is not turned off automatically.When the time is set to 1 to 99, and when the passed time with no-signal or an unsuitable signal reaches at the set time, the projector lamp will be turned off.If one of the projector's buttons or the remote control buttons is pressed or one of the commands (except get commands) is transmitted to the control port during the corresponding time, projector will not be turned off.Please refer to the section “Turning off the power”. |
| LAMP TIME | The lamp time is the usage time of the lamp, counted after the last resetting. It is shown in the OPTION menu.Pressing the RESET button on the remote control or the ▶ button of the projector displays a dialog.To reset the lamp time, select the RESET using the ▲ button.RESET ⇔ CANCEL• Please reset the lamp time only when you have replaced the lamp, for a suitable indication about the lamp.• For the lamp replacement, see the section "Lamp". |
| FILTER TIME | The filter time is the usage time of the air filter, counted after the last resetting. It is shown in the OPTION menu.Pressing the RESET button on the remote control or the ▶ button of the projector displays a dialog.To reset the filter time, select the RESET using the ▲ button.RESET ⇔ CANCEL• Please reset the filter time only when you have cleaned or replaced the air filter, for a suitable indication about the air filter.• For the air filter cleaning, see the section "Air filter". |
| Item Description | |
| MY BUTTON | This item is to assign one of the following function to MY BUTTON 1 and 2 on the remote control.Choose 1 or 2 on the MY BUTTON menu using the ◀/▶ button first. Then using the ▲/▼ buttons sets one of the following functions to the chosen button.· RGB1: Sets port to RGB1.· RGB2: Sets port to RGB2.· HDMI: Sets port to HDMI.· COMPONENT: Sets port to COMPONENT (Y, CB/PB, CR/PR).· S-VIDEO: Sets port to S-VIDEO.· VIDEO: Sets port to VIDEO.· INFORMATION: Displays the INPUT-INFORMATION or INFORMATION or nothing.· AUTO KEYSTONE Perform automatic keystone distortion correction.· MY MEMORY: Loads one of adjustment data stored.When more than one data are saved, the adjustment changes every time the MY BUTTON is pushed.When no data is saved in memory, the dialog "No saved data" appears.When the current adjustment is not saved to memory, the dialog as shown in the right appears.If you want to keep the current adjustment, please press the ◀ button to quit. Otherwise loading a data will overwrite the current adjusted condition.· ACTIVE IRIS: Changes the active iris mode.· PICTURE MODE: Changes the PICTURE MODE.· FILTER RESET:Displays the filter time reset confirmation dialogue.· VOLUME+: Set the volume up.· VOLUME-: Set the volume down.· AV MUTE : Turns the picture and audio on/off.· e-SHOT: Displays the e-SHOT menu. |
| SERVICE | Selecting this item displays the SERVICE menu.Select an item using the ▲/▼ buttons, and press the ▶ button or the ENTER button on the remote control to execute the item.FAN SPEED ⇔ AUTO ADJUST ⇔ GHOST ⇔ FILTER MESSAGE ⇔ LENS TYPE ⇔ KEY LOCKFACTORY RESET ⇔ INFORMATION ⇔ REMOTE FREQ. ⇔ REMOTE RECEIV.FAN SPEEDUsing the ▲/▼ buttons switches the rotation speed of the cooling fans. The HIGH is the mode for use at highlands etc. Note that the projector is noisier when the HIGH is selected.HIGH ⇔ NORMAL |
(continued on next page)
OPTION Menu (continued)
| Item Description | |
| SERVICE(continued) | AUTO ADJUSTUsing the ▲/▼ buttons to select one of the mode.When the DISABLE is selected, the automatic adjustment feature is disabled.FINE ⇔ FAST ⇔ DISABLE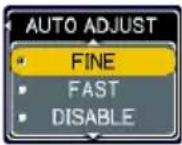 FINE: Finer tuning including H.SIZE adjustment.FAST:Faster tuning, setting H.SIZE to prearranged data for the input signal.· Depending on conditions, such as input image, signal cable to the projector, environment around the projector, etc., the automatic adjustment may not work correctly. In such a case, please choose DISABLE to disable the automatic adjustment, and make adjustment manually.GHOST1. Select a color element of ghost using the ◀/► buttons.2. Adjust the selected element using the ▲/▼ buttons to disappear ghost. FINE: Finer tuning including H.SIZE adjustment.FAST:Faster tuning, setting H.SIZE to prearranged data for the input signal.· Depending on conditions, such as input image, signal cable to the projector, environment around the projector, etc., the automatic adjustment may not work correctly. In such a case, please choose DISABLE to disable the automatic adjustment, and make adjustment manually.GHOST1. Select a color element of ghost using the ◀/► buttons.2. Adjust the selected element using the ▲/▼ buttons to disappear ghost.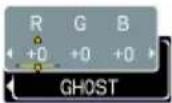 FILTER MESSAGEUse the ▲/▼ button to set the timer for the interval to show the message for cleaning up the air filter.50h ⇔ 100h ⇔ 200h ⇔ 300h ⇔ 400h ⇔ 500hTURN OFF ⇔ 800h ⇔ 700h ⇔ 600h FILTER MESSAGEUse the ▲/▼ button to set the timer for the interval to show the message for cleaning up the air filter.50h ⇔ 100h ⇔ 200h ⇔ 300h ⇔ 400h ⇔ 500hTURN OFF ⇔ 800h ⇔ 700h ⇔ 600h 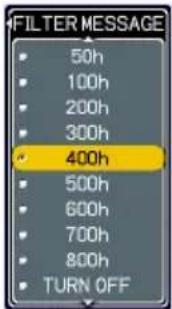 After choosing an item except TURN OFF, the message “REMINDER *** HRS PASSED AFTER THE LAST FILTER CHECK” will appear after the timer reaches the interval time set by this feature.When the TURN OFF is chosen, the message will not appear.Utilize this feature to keep the air filter clean, setting the suitable time according to your environment of this projector.· Please check and clean the air filter periodically, even if there is no message. If the air filter becomes to be blocked by dust or others, the internal temperature will rise, which could cause malfunction, or reduce the lifetime of the projector.· Please be careful with the operating environment of the projector and the condition of the air filter.LENS TYPESelect the lens type currently used using the ▲/▼ buttons.1 ⇔ 2 ⇔ 3 ⇔ 4 ⇔ 5 After choosing an item except TURN OFF, the message “REMINDER *** HRS PASSED AFTER THE LAST FILTER CHECK” will appear after the timer reaches the interval time set by this feature.When the TURN OFF is chosen, the message will not appear.Utilize this feature to keep the air filter clean, setting the suitable time according to your environment of this projector.· Please check and clean the air filter periodically, even if there is no message. If the air filter becomes to be blocked by dust or others, the internal temperature will rise, which could cause malfunction, or reduce the lifetime of the projector.· Please be careful with the operating environment of the projector and the condition of the air filter.LENS TYPESelect the lens type currently used using the ▲/▼ buttons.1 ⇔ 2 ⇔ 3 ⇔ 4 ⇔ 5 Please select one of them referring to the following.1: for a standard lens2: for a fixed short throw lens (Type LEN-003)3: for a short throw lens (Type LEN-004)4: for a long throw lens (Type LEN-005)5: for an ultra long throw lens (Type LEN-006)· This setting has an influence on the keystone distortion etc.· About the optional lens, ask you dealer. Please select one of them referring to the following.1: for a standard lens2: for a fixed short throw lens (Type LEN-003)3: for a short throw lens (Type LEN-004)4: for a long throw lens (Type LEN-005)5: for an ultra long throw lens (Type LEN-006)· This setting has an influence on the keystone distortion etc.· About the optional lens, ask you dealer. |
OPTION Menu (continued)
| Item Description | |
| SERVICE(continued) | KEY LOCKUsing the ▲/▼ buttons turns on/off the key lock feature. When TURN ON is selected, the buttons on the projector except the STANDBY/ON button are locked.TURN ON ⇔ TURN OFFPlease use to avoid a mischief and touching accidentally. This function does not have any effect on the remote control.REMOTE RECEIV.(1) Select a remote sensor using the ▲/▼ button.1:FRONT ⇔ 2:TOP ⇔ 3:REAR(2) Switch it using the ENTER or INPUT button.□ (off) ⇔ ☑ (on) 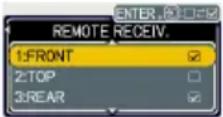 A sensor cannot be turned off when the other two are off. Always at least one sensor is on.REMOTE FREQ.Use the ▲/▼ button to change the Projector's remote sensor setting.1:NORMAL ⇔ 2:HIGHItems with a checkmark are on. The factory default setting is for both 1:NORMAL and 2:HIGH to be on. If the remote control does not function correctly set the this to either only 1 or only 2 as described in Remote Control Settings.Neither can be turned off at the same time.INFORMATIONSelecting this item displays a dialog titled “INPUT-INFORMATION”. It shows the information about the current input. A sensor cannot be turned off when the other two are off. Always at least one sensor is on.REMOTE FREQ.Use the ▲/▼ button to change the Projector's remote sensor setting.1:NORMAL ⇔ 2:HIGHItems with a checkmark are on. The factory default setting is for both 1:NORMAL and 2:HIGH to be on. If the remote control does not function correctly set the this to either only 1 or only 2 as described in Remote Control Settings.Neither can be turned off at the same time.INFORMATIONSelecting this item displays a dialog titled “INPUT-INFORMATION”. It shows the information about the current input.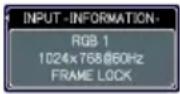 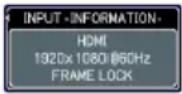 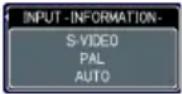 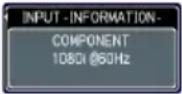 The “FRAME LOCK” message on the dialog means the frame lock function is working.The “SCART RGB” message means the COMPONENT VIDEO port is working as a SCART RGB input port. Please refer to the COMPONENT item in INPUT menu.This item can't be selected for no signal and sync out.When the MY TEXT DISPLAY is set to TURN ON, the MY TEXT is displayed together with the input information in the INPUT-INFORMATION box.FACTORY RESETSelecting RESET using the button ▲ performs this function. By this function, all the items in all of menus will collectively return to the initial setting. Note that the items LAMP TIME, FILTER TIME, LANGUAGE, SECURITY and NETWORK are not reset.RESET ⇔ CANCEL The “FRAME LOCK” message on the dialog means the frame lock function is working.The “SCART RGB” message means the COMPONENT VIDEO port is working as a SCART RGB input port. Please refer to the COMPONENT item in INPUT menu.This item can't be selected for no signal and sync out.When the MY TEXT DISPLAY is set to TURN ON, the MY TEXT is displayed together with the input information in the INPUT-INFORMATION box.FACTORY RESETSelecting RESET using the button ▲ performs this function. By this function, all the items in all of menus will collectively return to the initial setting. Note that the items LAMP TIME, FILTER TIME, LANGUAGE, SECURITY and NETWORK are not reset.RESET ⇔ CANCEL |
OPTION Menu (continued)
| Item Description | ||
| SECURITY | This projector is equipped with security functions.User registration is required before using the security functions.Please contact your local dealer.1. Using Security Features1.1 Inputting the PASSWORD1.1-1 Use the ▲/▼ buttons on the OPTION menu to select SECURITY and press the ▶ button. The ENTER PASSWORD box will be displayed. The factory default PASSWORD is 5401. This PASSWORD can be changed (1.2 Changing the PASSWORD).• It is strongly recommended the factory default PASSWORD to be changed as soon as possible.1.1-2 Use the ▲/▼/◄/► buttons to enter the registered PASSWORD. Move the cursor to the right side of the ENTER PASSWORD BOX and press the ► button to display the SECURITY menu. If an incorrect PASSWORD is input the ENTER PASSWORD BOX will be displayed again. If incorrect PASSWORD is input 3 times the projector will turn off. Afterwards the projector will turn off every time an incorrect PASSWORD is input.1.2 Changing the PASSWORD1.2-1 Use the ▲/▼ buttons on the SECURITY menu to select SECURITY PASSWORD CHANGE and press the ► button to display the ENTER NEW PASSWORD BOX.1.2-2 Use the ▲/▼/◄/► buttons to enter the new PASSWORD.1.2-3 Move the cursor to the right side of the ENTER NEW PASSWORD BOX and press the ► button to display the NEW PASSWORD AGAIN BOX, enter the same PASSWORD again.1.2-4 Move the cursor to the right side of the NEW PASSWORD AGAIN BOX and press the ► button and the NOTE NEW PASSWORD BOX will be displayed for about 20 seconds, please make note of the PASSWORD during this time. Pressing the ENTER button on the remote control or INPUT button on the projector will close the NOTE NEW PASSWORD BOX.• Please do not forget your PASSWORD. | 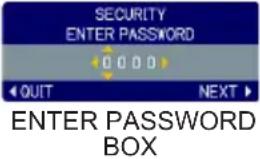 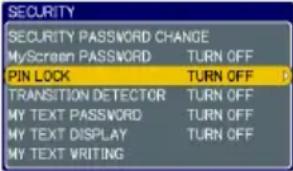 SECURITY MENU SECURITY MENU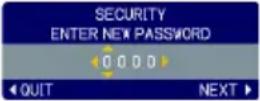 ENTER NEW PASSWORD BOX ENTER NEW PASSWORD BOX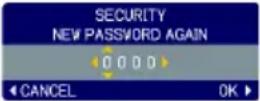 NEW PASSWORD AGAIN BOX NEW PASSWORD AGAIN BOX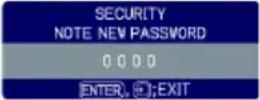 NOTE NEW PASSWORD BOX NOTE NEW PASSWORD BOX |
(continued on next page)
OPTION Menu (continued)
| Item Description | ||
| SECURITY(continued) | 1.3 If you have forgotten your PASSWORD1.3-1 Follow the procedure in 1.1-1 to display the ENTER PASSWORD BOX.1.3-2 While the ENTER PASSWORD BOX is displayed, press and hold the RESET button on the remote control for about 3 seconds or press and hold the INPUT and ▶ buttons on the projector for about 3 seconds.The 10 digit Inquiring Code will be displayed.• If there is no key input for about 55 seconds while the Inquiring Code is displayed the menu will close.If necessary repeat the process from 1.3-1.1.3-3 Contact ViewSonic with the 10 digit Inquiring Code. Your PASSWORD will be sent after your user registration information is confirmed.2. Using the MyScreen PASSWORD FunctionThe MyScreen PASSWORD function can be used to prohibit access to the MyScreen function and prevent the currently registered MyScreen image from being overwritten.2.1 Turning on the MyScreen PASSWORD Function2.1-1 Use the ▲/▼ buttons on the SECURITY menu to select MyScreen PASSWORD and press the ▶ button to display the MyScreen PASSWORD on/off menu.2.2 Setting the PASSWORD2.2-1 Display the MyScreen on/off menu using the procedure in 2.1-1.2.2-2 Use the ▲/▼ buttons on the MyScreen PASSWORD on/off menu to select TURN ON. The ENTER PASSWORD BOX (small) will be displayed.2.2-3 Use the ▲/▼/◄/► buttons to enter the PASSWORD. Move the cursor to the right side of the ENTER PASSWORD BOX (small) and press the ▶ button to display the PASSWORD AGAIN BOX, enter the same PASSWORD again. | 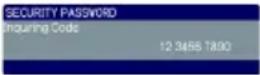 Inquiring Code(PASSWORD) Inquiring Code(PASSWORD)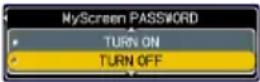 MyScreen PASSWORD on/off menu MyScreen PASSWORD on/off menu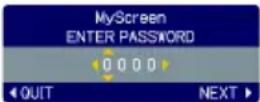 ENTER PASSWORD BOX (small) ENTER PASSWORD BOX (small)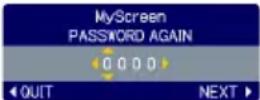 PASSWORD AGAIN BOX PASSWORD AGAIN BOX |
(continued on next page)
OPTION Menu (continued)
| Item Description | |
| SECURITY(continued) | 2.2-4 Move the cursor to the right side of the PASSWORD AGAIN BOX and press the► button to display the PASSWORD for about 20 seconds, please make note of the PASSWORD during this time.Pressing the ENTER button on the remote control or INPUT button on the projector will return to MyScreen PASS WORD on/off menu.When a PASSWORD is set for MyScreen:·The MyScreen registration function (and menu) will be unavailable.·The MyScreen Lock menu will be unavailable.·The START UP setting will be locked on MyScreen (and the menu will be unavailable).Turning the MyScreen PASSWORD off will allow normal operation of these functions.·Please do not forget your MyScreen PASSWORD.2.3 Turning the PASSWORD off2.3-1 Follow the procedure in 2.1-1 to display the MyScreen PASSWORD on/off menu.2.3-2 Select TURN OFF to display the ENTER PASSWORD BOX (large).Enter the registered PASSWORD and the screen will return to the MyScreen on/off menu.If an incorrect PASSWORD is input the menu will close. If necessary repeat the process from 2.3-1.2.4 If you have forgotten your PASSWORD2.4-1 Follow the procedure in 2.1-1 to display the MyScreen PASSWORD on/off menu.2.4-2 Select TURN OFF to display the ENTER PASSWORD BOX (large). The 10 digit Inquiring Code will be displayed inside the BOX.2.4-3 Contact ViewSonic with the 10 digit Inquiring Code. Your PASSWORD will be sent after your user registration information is confirmed.3. Using the PIN LOCK FunctionPIN LOCK is a function which prevents the projector from being used unless a registered Code is input.3.1 Registering the PIN Code3.1-1 Use the ▲/▼ buttons on the SECURITY menu to select PIN LOCK and press the ► button or the ENTER button to display the PIN LOCK on/off menu.3.1-2 Use the ▲/▼ buttons on the PIN LOCK on/off menu to select TURN ON and the PIN BOX will be displayed. |
(continued on next page)
OPTION Menu (continued)
| Item Description | |
| SECURITY(continued) | 3.1-3 Input a 4 part PIN Code using the ▲/▼/◄/►/RGB and INPUT buttons.The PIN CODE AGAIN BOX will appear.Reenter the same PIN Code. This will complete the PIN Code registration.If there is no key input for about 55 seconds while the PIN BOX or the PIN CODE AGAIN BOX is displayed the menu will close. If necessary repeat the process from 3.1-1.Afterwards, anytime the projector is restarted after the power switch is turned off the PIN BOX will be displayed. Enter the registered PIN Code.The projector can be used after entering the registered PIN Code. If an incorrect PIN Code is input the PIN BOX will be displayed again.If an incorrect PIN Code is input 3 times the projector will turn off. Afterwards the projector will turn off every time an incorrect PIN Code is input. The projector will also turn off if there is no key input for about 5 minutes while the PIN BOX is displayed.This function will activate only when the projector is started after the power switch was turned off.Please do not forget your PIN Code.3.2 Turning Off the PIN LOCK Function3.2-1 Follow the procedure in 3.1-1 to display the PIN LOCK on/off menu.Use the ▲/▼ buttons to select TURN OFF and the PIN BOX will be displayed.Enter the registered PIN Code to turn the PIN LOCK function off.If an incorrect PASSWORD is input 3 times, the menu will close.3.3 If you have forgotten your PIN Code3.3-1 While the PIN BOX is displayed, press and hold the RESET button for three seconds or press and hold the INPUT and ►buttons for three seconds. The 10 digit Inquiring Code will be displayed.If there is no key input for about 5 minutes while the Inquiring Code is displayed the projector will turn off.3.3-2 Contact ViewSonic with the 10 digit Inquiring Code. Your PASSWORD will be sent after your user registration information is confirmed. |
(continued on next page)
OPTION Menu (continued)
| Item Description | |
| SECURITY(continued) | 4. Using the Transition Detector FunctionWhile the Transition Detector function is ON, when power switch is started to supply to the projector, it might react as below.Transition Detector alarm shown below might appear on screen, if the projector has been moved or re-installed.Transition Detector alarm might appear on screen, if the MIRROR setting has been changed.Keystone adjustment feature has been prohibited as long as the Transition Detector function is ON.4.1 Turning On the Transition Detector Function4.1-1 Use the ▲/▼ buttons on the SECURITY menu to select Transition Detector and press the ▶ or the ENTER button to display the Transition Detector on/off menu. Select TURN ON and the current angle and mirror setting will be recorded.This feature may not function properly if the projector is not in a stable position when TURN ON is selected.4.1-2 If this function is set to TURN ON when the vertical angle of the projector or mirror setting at which the projector is turned on is different than the previously recorded the Transition Detector Alarm will be displayed and the projector will not display the input signal.Set the Transition Detector off in the SECURITY menu to display the input signal. If the Transition Detector ALARM is displayed for about 5 minutes the lamp will turn off. This function will activate only when the projector is started after the power switch was turned off.4.2 Setting the Transition Detector PASSWORD4.2-1 Use the ▲/▼ buttons on the SECURITY menu to select Transition Detector and press the ▶ or the ENTER button to display the Transition Detector on/off menu.4.2-2 Use the ▲/▼ buttons on the Transition Detector on/off menu to select TURN ON.The ENTER PASSWORD BOX (small) will be displayed.4.2-3 Use the ▲/▼/◄/► buttons to enter a PASSWORD. Move the cursor to the right side of the ENTER PASSWORD BOX (small) and press the ► button to display the PASSWORD AGAIN BOX, enter the same PASSWORD again.4.2-4 Move the cursor to the right side of the PASSWORD AGAIN BOX and press the ► button to display the PASSWORD for about 20 seconds, please make note of the PASSWORD during this time.Pressing the ENTER button on the remote control or the INPUT button on the projector will return to the Transition Detector on/off menu.Please do not forget your Transition Detector PASSWORD. |
(continued on next page)
OPTION Menu (continued)
| Item Description | |
| SECURITY(continued) | 4.3 Setting the Transition Detector off4.3-1 Follow the procedure in 4.1-1 to display the Transition Detector on/off menu.4.3-2 Select TURN OFF to display the ENTER PASSWORD BOX (large).Enter the registered PASSWORD and the screen will return to the Transition Detector on/off menu.If an incorrect PASSWORD is input the menu will close. If necessary repeat the process from 4.3-1.4.4 If you have forgotten your PASSWORD4.4-1 Follow the procedure in 4.1-1 to display the Transition Detector on/off menu.4.4-2 Select TURN OFF to display the ENTER PASSWORD BOX (large). The 10 digit Inquiring Code will be displayed inside the BOX.4.4-3 Contact ViewSonic with the 10 digit Inquiring Code. Your PASSWORD will be sent after your user registration information is confirmed.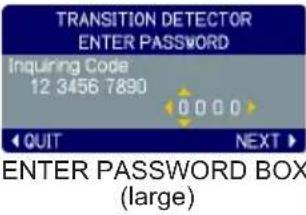 5. Using the MY TEXT PASSWORD functionThis item allows you to display your own message (MY TEXT) on the START UP screen and INPUT-INFORMATION. It can be protected by a password to prevent it from being overwritten.5.1 Writing the MY TEXT(1) Use the ▲/▼ buttons on the SECURITY menu to select the MY TEXT WRITING menu and press the ▶ button. The MY TEXT WRITING dialog will be displayed.(2) The current MY TEXT will be displayed on the first 3 lines. If not yet written, the lines will be blank.Use the ▲/▼/◄/► buttons and the ENTER or INPUT button to select and enter characters. The RESET button can be used to erase 1 character at a time. Also if you move the cursor to DELETE or ALL CLEAR on screen and push the ENTER or INPUT button, 1 character or all characters will be erased. The MY TEXT can be input up to 24 characters on each line.(3) To change an already inserted character, press the ▲/▼ button to move the cursor to one of the first 3 lines, and use the ◀/► buttons to move the cursor on the character to be changed. After pressing the ENTER or INPUT button, the character is selected. Then, follow the same procedure as described at the item (2) above.(4) To finish entering text, move the cursor to the SAVE on screen and press the ENTER or INPUT button. To revert to the previous MY TEXT without saving changes, move the cursor to the CANCEL on screen and press the ENTER or INPUT button.• The MY TEXT WRITING function is available only when the MY TEXT PASSWORD function is set to TURN OFF. 5. Using the MY TEXT PASSWORD functionThis item allows you to display your own message (MY TEXT) on the START UP screen and INPUT-INFORMATION. It can be protected by a password to prevent it from being overwritten.5.1 Writing the MY TEXT(1) Use the ▲/▼ buttons on the SECURITY menu to select the MY TEXT WRITING menu and press the ▶ button. The MY TEXT WRITING dialog will be displayed.(2) The current MY TEXT will be displayed on the first 3 lines. If not yet written, the lines will be blank.Use the ▲/▼/◄/► buttons and the ENTER or INPUT button to select and enter characters. The RESET button can be used to erase 1 character at a time. Also if you move the cursor to DELETE or ALL CLEAR on screen and push the ENTER or INPUT button, 1 character or all characters will be erased. The MY TEXT can be input up to 24 characters on each line.(3) To change an already inserted character, press the ▲/▼ button to move the cursor to one of the first 3 lines, and use the ◀/► buttons to move the cursor on the character to be changed. After pressing the ENTER or INPUT button, the character is selected. Then, follow the same procedure as described at the item (2) above.(4) To finish entering text, move the cursor to the SAVE on screen and press the ENTER or INPUT button. To revert to the previous MY TEXT without saving changes, move the cursor to the CANCEL on screen and press the ENTER or INPUT button.• The MY TEXT WRITING function is available only when the MY TEXT PASSWORD function is set to TURN OFF. |
OPTION Menu (continued)
| Item Description | ||
| SECURITY(continued) | 5.2 Displaying the MY TEXT(1) Use the ▲/▼ buttons on the SECURITY menu to select the MY TEXT DISPLAY menu and press the ▶ button to display the MY TEXT DISPLAY on/off menu.(2) Use the ▲/▼ buttons on the MY TEXT DISPLAY on/off menu to select on or off.TURN ON ⇔ TURN OFFWhen it is set TURN ON, the MY TEXT will be displayed on the START UP screen. Whichever is selected, the MY TEXT will be displayed on the INPUT-INFORMATION when the INFORMATION on the SERVICE menu is chosen.This function is available only when the MY TEXT PASSWORD function is set to the TURN OFF.5.3 Turning on the MY TEXT PASSWORDThe MY TEXT PASSWORD function can prevent the MY TEXT from being overwritten.5.3-1 Turning on the MY TEXT PASSWORD function(1) Use the ▲/▼ buttons on the SECURITY menu to select the MY TEXT PASSWORD menu and press the ▶ button to display the MY TEXT PASSWORD on/off menu.5.3-2 Setting the MY TEXT PASSWORD(1) Display the MY TEXT PASSWORD on/off menu using the procedure in 5.3-1(2) Use the ▲/▼ buttons on the MY TEXT PASSWORD menu to select TURN ON. The ENTER PASSWORD BOX (small) will be displayed.(3) Use the ▲/▼/◄/► buttons to enter the PASSWORD. Move the cursor to the right side of the ENTER PASSWORD BOX (small) and press the ▶ button to display the PASSWORD AGAIN BOX, and then enter the same PASSWORD again.(4) Move the cursor to the right side of the PASSWORD AGAIN BOX and press ▶ button to display the PASSWORD for about 20 seconds, then please make note of the PASSWORD during this time.Pressing the ENTER button on the remote control or INPUT button on the projector will return to the MY TEXT PASSWORD on/off menu. When the PASSWORD is set for the MY TEXT;The MY TEXT DISPLAY menu will be unavailable, which can prohibit changing the DISPLAY setting.The MY TEXT WRITING menu will be unavailable, which can prevent the MY TEXT from being overwritten. |  MY TEXT DISPLAY on/off menu MY TEXT DISPLAY on/off menu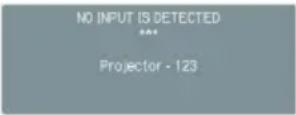 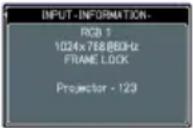 [KKGDMY TEXT PASSWORD [KKGDMY TEXT PASSWORD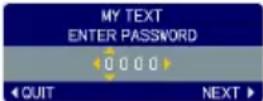 ENTER PASSWORD BOX (small) ENTER PASSWORD BOX (small)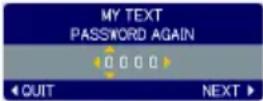 PASSWORD AGAIN BOX PASSWORD AGAIN BOX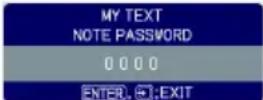 NOTE PASSWORD BOX NOTE PASSWORD BOX |
OPTION Menu (continued)
| Item Description | |
| SECURITY(continued) | 5.3-3 Turning the MY TEXT PASSWORD off(1) Follow the procedure in 5.3-1 to display the MY TEXT PASSWORD on/off menu.(2) Select TURN OFF to display the ENTER PASSWORD BOX (large). Enter the registered PASSWORD and the screen will return to the MY TEXT PASSWORD on/off menu.If an incorrect PASSWORD is input, the menu will close. If necessary, repeat the process from 5.3-3(1)5.3.4 If you have forgotten your PASSWORD.(1) Follow the procedure in 5.3-1 to display the MY TEXT PASSWORD on/off menu.(2) Select TURN OFF to display the ENTER PASSWORD BOX (large). The 10 digit inquiring code will be displayed inside the box.(3) Contact ViewSonic with the 10 digit inquiring code. Your PASSWORD will be sent after your user registration information is confirmed. |
NETWORK Menu
Remember that incorrect network settings on this projector may cause trouble on the network. Be sure to consult with your network administrator before connecting to an existing access point on your network.
Select "NETWORK" from the main menu to access the following functions.
![MENU [RGB 1] PICTURE IMAGE INPUT SETUP AUDIO SCREEN OPTION NETWORK EASY MENU E-SELECT SETUP PROJECTOR NAME e-SHOT INFORMATION SERVICE](/content/2026/05/951494/images/87202db52a5675fe97d410cf48c50dc62d0c2cc49a4c1bff7eb743fe4963dc5c.jpg)
Select an item using the ▲/▼ cursor buttons on the projector or remote control, and press the ▶ cursor button on the projector or remote control, or ENTER button on the remote control to execute the item. Then perform it according to the following table.
See the User's Manual - Network Guide for details of NETWORK operation.
NOTE • The factory default setting for DHCP is OFF. If your network has DHCP enabled, and needs to set IP ADDRESS, SUBNET MASK and DEFAULT GATEWAY automatically, please set DHCP to ON.• If you are not utilizing SNTP, then you must set the DATE AND TIME during the initial installation.
| Item Description | ||
| SETUP | Selecting this item displays the SETUP menu for the network.Use the ▲/▼ buttons to select an item, and the ▶ or ENTER button on the remote control to perform the item. 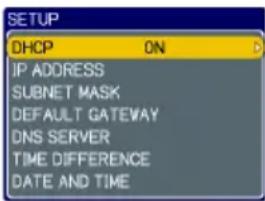 | |
| DHCP (Dynamic Host Configuration Protocol) | Use the ▲/▼ buttons to turn DHCP on/off.ON ⇔ OFFSelect OFF when the network does not have DHCP enabled. 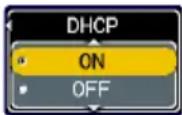 When the “DHCP” setting changes to “ON”, it takes a little time to obtain IP address from DHCP server.Auto IP function will be assigned an IP address if the projector could not obtain an IP address from server even if DHCP is “ON”. When the “DHCP” setting changes to “ON”, it takes a little time to obtain IP address from DHCP server.Auto IP function will be assigned an IP address if the projector could not obtain an IP address from server even if DHCP is “ON”. | |
(continued on next page)
NETWORK Menu (continued)
| Item Description | ||
| SETUP(continued) | IP ADDRESS | Use the ▲/▼/◄/► buttons to enter the IP ADDRESS. This function can only be used when DHCP is set to OFF. 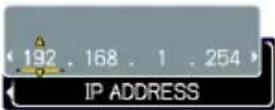 • The IP ADDRESS is the number that identifies this projector on the network. You cannot have two devices with the same IP ADDRESS on the same network.• The IP ADDRESS "0.0.0.0" is prohibited. • The IP ADDRESS is the number that identifies this projector on the network. You cannot have two devices with the same IP ADDRESS on the same network.• The IP ADDRESS "0.0.0.0" is prohibited. |
| SUBNET MASK | Use the ▲/▼/◄/► buttons to enter the same SUBNET MASK used by your PC. This function can only be used when DHCP is set to OFF. 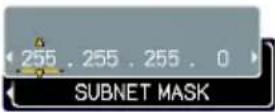 • The SUBNET MASK "0.0.0.0" is prohibited. • The SUBNET MASK "0.0.0.0" is prohibited. | |
| DEFAULT GATEWAY | Use the ▲/▼/◄/► buttons to enter the DEFAULT GATEWAY (a node on a computer network that serves as an access point to another network) address. 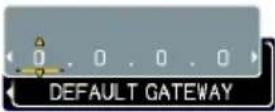 This function can only be used when DHCP is set to OFF. This function can only be used when DHCP is set to OFF. | |
| DNS SERVER | Use the ▲/▼/◄/► buttons to input the DNS server address. The DNS server is a system to control domain names and IP addresses on the Network. 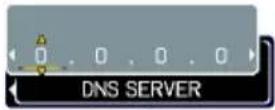 | |
| TIME DIFFERENCE | Use the ▲/▼ buttons to enter the TIME DIFFERENCE.Set the same TIME DIFFERENCE as the one set on your PC. If unsure, consult your IT manager.Use the ◀ button to return to the menu after setting the TIME DIFFERENCE. 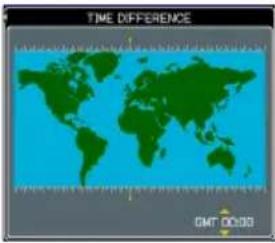 | |
| DATE AND TIME | Use the ▲/▼/◄/► buttons to enter the Year (last two digits), Month, Date, Hour and Minute. 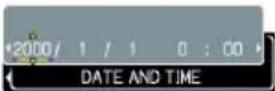 • The projector will override this setting and retrieve DATE AND TIME information from the Time server when SNTP is enabled. • The projector will override this setting and retrieve DATE AND TIME information from the Time server when SNTP is enabled. | |
| PROJECTOR NAME | (1) Use the▲/▼buttons on the NETWORK menu to select the PROJECTOR NAME menu and press the ▶ button. The PROJECTOR NAME dialog will be displayed.(2) The current PROJECTOR NAME will be displayed on the first 3 lines.If not yet written, the lines will be blank.Use the▲/▼/◄/►buttons and theENTERor INPUTbutton to select and enter characters. TheRESETbutton can be used to erase 1 character at a time. Also if you move the cursor to DELETE or ALL CLEAR on screen and push theENTERor INPUTbutton, 1 character or all characters will be erased.The PROJECTOR NAME can be input up to 64 characters.(3) To change an already inserted character, press the▲/▼button to move the cursor to one of the first 3 lines, and use the◄/►buttons to move the cursor on the character to be changed. After pressing theENTERor INPUTbutton, the character is selected. Then, follow the same procedure as described at the item (2) above.(4) To finish entering text, move the cursor to the SAVE on screen and press theENTERor INPUTbutton. To revert to the previous PROJECTOR NAME without saving changes, move the cursor to the CANCEL on screen and press theENTERor INPUTbutton. | 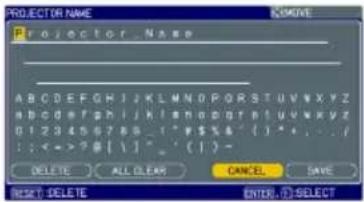 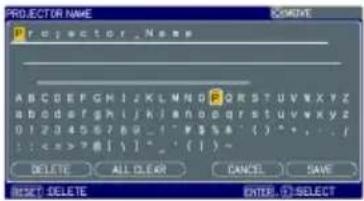 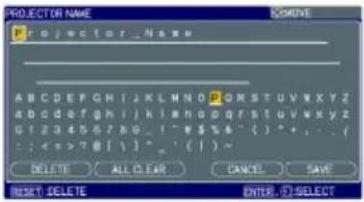 |
(continued on next page)
NETWORK Menu (continued)
| Item Description | |
| e-SHOT | Selecting this item displays the e-SHOT menu.The application software “PJTransfer” is required to store image(s) into the projector.Use the ▲/▼ buttons to select an item which is a still image by the e-SHOT and the ▶ or ENTER button to display the image.• The item without image stored cannot be selected.• The image names are each displayed in 16 characters or less.To switch the image displayedUse the ▲/▼ buttons.To return to the menuPress the ◀ or ESC button on the remote control.To erase the image displayed and its source file in the projector.(1) Press the RESET button on the remote control while displaying an image to display the e-SHOT - RESET menu.(2) Press the ENTER button on the remote control or the INPUT button on the projector to perform to erase.To stop erasing, press the ESC button on the remote control or the ◀ button on the projector. |
(continued on next page)
NETWORK Menu (continued)
| Item Description | |
| INFORMATION | Selecting this item displays the NETWORK -INFORMATION- dialog for confirming the network settings.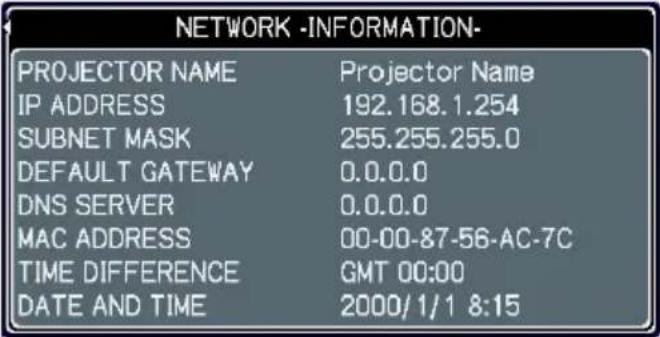 The PROJECTOR NAME is displayed.Nothing (blank) is shown in the “PROJECTOR NAME” field until you setup the item.When the voltage level of the battery for the built in clock decreases, the set time may become incorrect even though accurate date and time are input. Replace the battery suitably.IP ADDRESS, SUBNET MASK and DEFAULT GATEWAY indicate “0.0.0.0” when DHCP is ON and the projector has not gotten address from DHCP server. The PROJECTOR NAME is displayed.Nothing (blank) is shown in the “PROJECTOR NAME” field until you setup the item.When the voltage level of the battery for the built in clock decreases, the set time may become incorrect even though accurate date and time are input. Replace the battery suitably.IP ADDRESS, SUBNET MASK and DEFAULT GATEWAY indicate “0.0.0.0” when DHCP is ON and the projector has not gotten address from DHCP server. |
| SERVICE | Executing this item restarts and initializes the network functions.Choose the RESTART using the button ▶.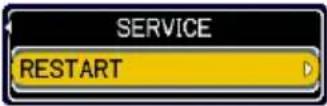 Then use the button ▲ to execute. Then use the button ▲ to execute.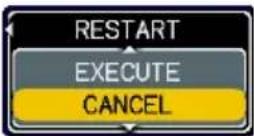 Network will be once cut off when choose restart.If DHCP is selected on, IP address may be changed.After selecting RESTART, NETWORK menu may not be controlled approx. 30 seconds. Network will be once cut off when choose restart.If DHCP is selected on, IP address may be changed.After selecting RESTART, NETWORK menu may not be controlled approx. 30 seconds. |
This projector has the network function that brings you the following main features.
√ Web control
The projector can be controlled and monitored by a web browser software on your PC, which can help you to setup and maintain the projector.
√ e-SHOT (Still Image Transfer) Display
The projector can display still images that are transferred via the network.
Main functions
Configuring and controlling via a web browser
You can adjust or control the projector via a network from a web browser on a PC that is connected to the same network.
Logon the network from the web browser and it offers the menus to configure the network settings, monitor the projector and so on.
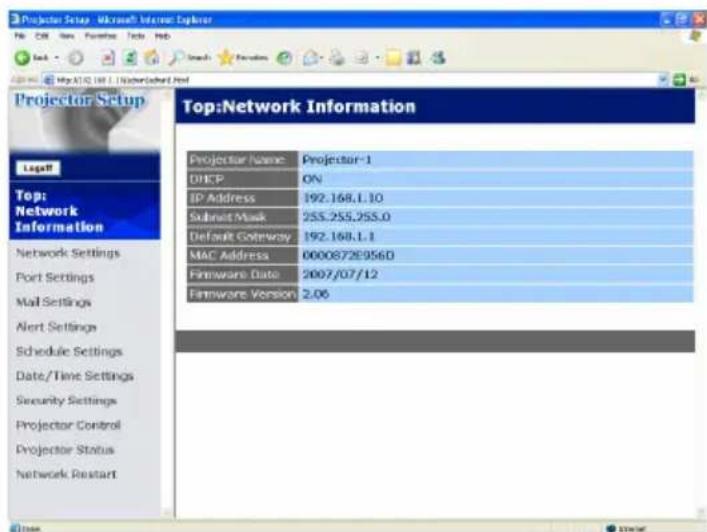
e-SHOT (Still image Transfer) Display
Image files can be sent via the network, and up to 4 image data can be stored in the projector and displayed on screen one by one.
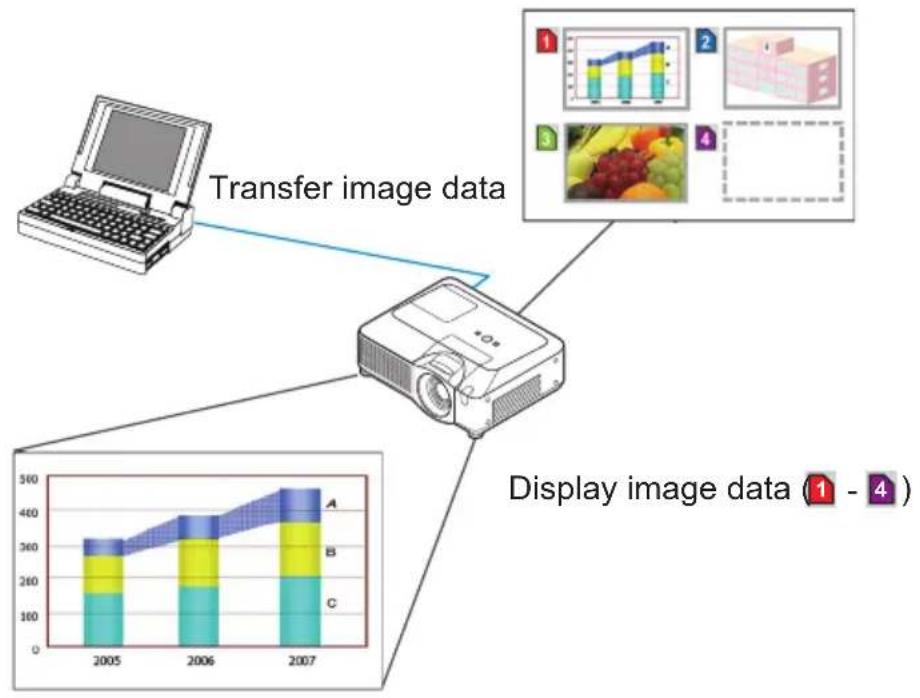
flowchart
graph TD
    A["Transfer image data"] --> B[" projector"]
    B --> C["Display image data (1 - 4)"]
Equipment connection and network setting
Required equipment preparation
The following equipments are required to connect the projector to your PC through the network.
PC : 1) equipped with the network feature
2) installed a web browser software
LAN cable : CAT-5 or greater
Manual network connection setting
Equipments connection
Connect the projector and PC with a LAN cable.
* Before connecting with an existing network, contact the network administrator.
Next, please check the PC setting as explained below.
Network settings
This is the explanation of network connection settings for Windows XP and Internet Explorer.
1) Log on to Windows XP as administrator authority. (*)
2) Open "Control Panel" from "Start" menu.
3) Open "Network and Internet Connections" in "Control Panel".
* Administrator authority is the account, which can access to all functions.
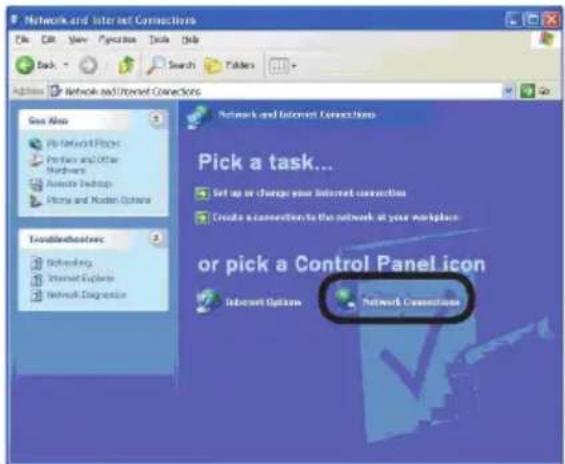
"Network and Internet Connections" window
4) Open "Network Connections".
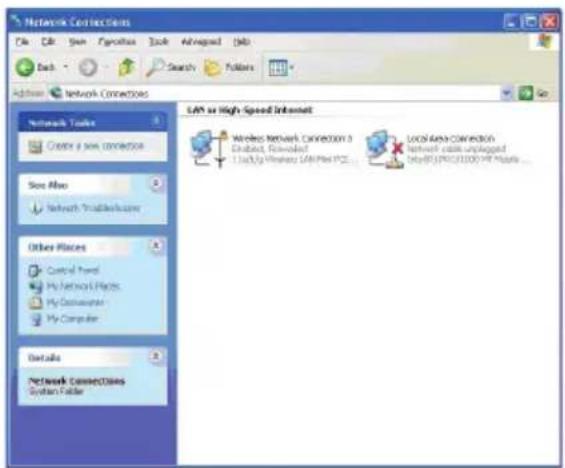
"Network Connections" window
Manual network connection setting (continued)
5) Open "Local Area Connection Properties" window you use for network device.
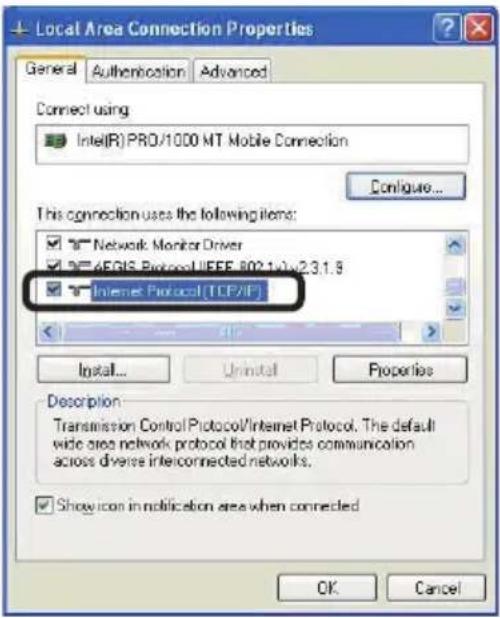
"Local Area Connection Properties" window
6) Set used protocol as "TCP/IP" and open "Internet Protocol (TCP/IP) Properties" window.
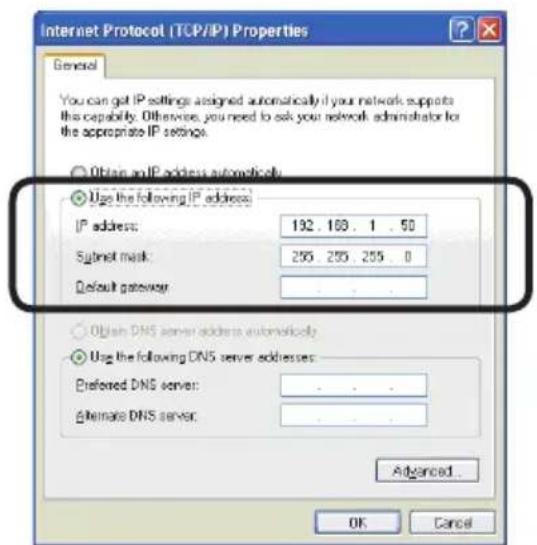
"Internet Protocol (TCP/IP) Properties" window
7) Set IP address, subnet mask and default gateway for PC.
Manual network connection setting (continued)
[About IP address]
■ Setting manually
The Network address portion included in the IP address set into your PC should be common with projector's one. And the entire IP address in the PC should not be overlapped with other equipments in the same network, including the projector.
For example
The projector's initial settings are as follows.
IP address: 192.168.1.10
Subnet mask: 255.255.255.0
(Network address: 192.168.1 in this case)
Therefore, specify PC's IP address as follows.
IP address: 192.168.1.xxx (xxx shows decimal number.)
Subnet mask: 255.255.255.0
(Network address: 192.168.1 in this case)
Select from 1 to 254 for “xxx” not duplicating with any other equipments. In this case, projector has “192.168.1.10” IP address, specify from 1 to 254 except 10 for PC.
NOTE • "0.0.0.0" cannot be set to the IP address.
- The projector's IP address can be changed by using the configuration utility via a web browser.
- If the projector and PC exist in the same network (i.e. network address is common), default gateway can be blank.
- When the projector and PC exist in different networks, default gateway setting is necessary. Contact the network administrator in detail.
■ Setting automatically
When DHCP server exists in network, it is possible to assign IP address to the projector and PC automatically.
* DHCP is abbreviation for “Dynamic Host Configuration Protocol” and has the function to provide necessary setting for network like IP address from server to client. A server that has DHCP function is called DHCP server.
Manual network connection setting (continued)
"Internet Option" setting
1) Click "Internet Options" in "Network and Internet Connections" window to open "Internet Properties" window.
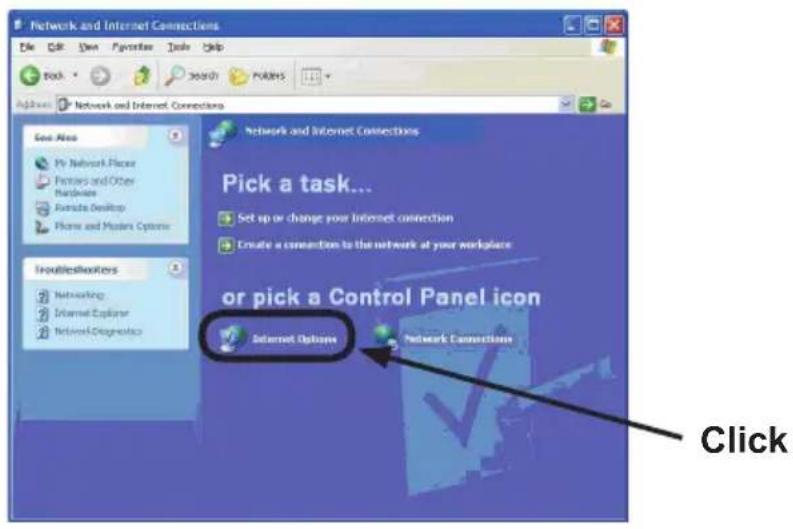
"Network and Internet Connections" window
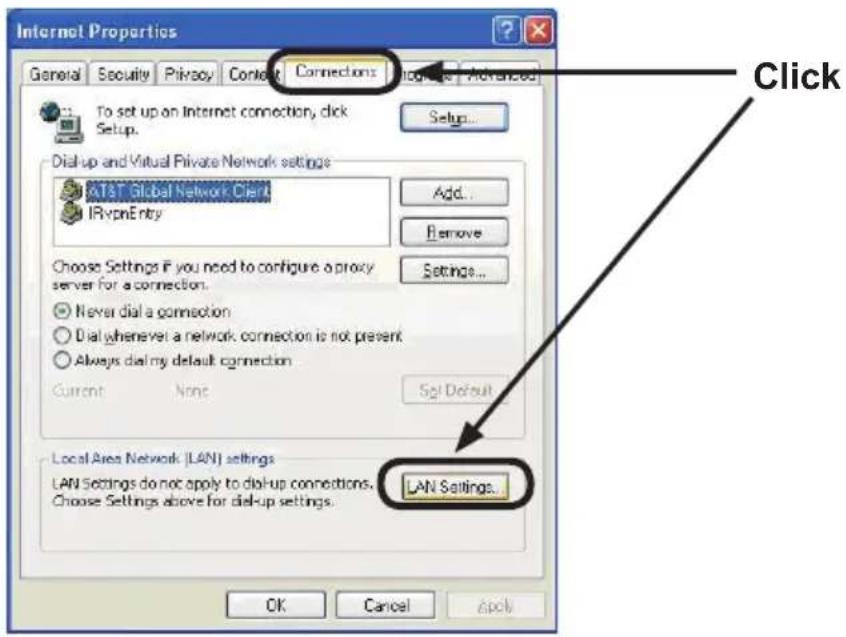
"Internet Properties" window
2) Click "Connections" tab and then click [LAN Settings] button to open "Local Area Network (LAN) settings".
Manual network connection setting (continued)
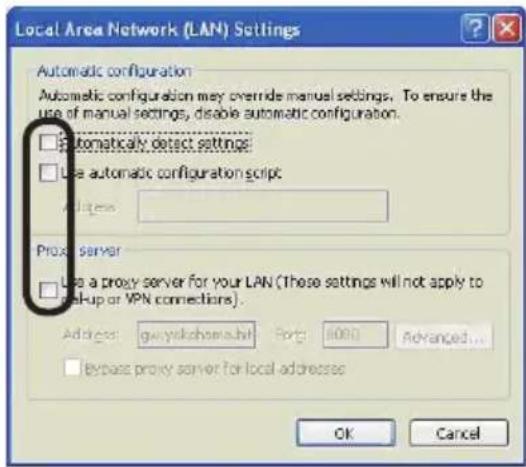
"Local Area Network (LAN) Settings" window
3) Uncheck all boxes in "Local Area Network (LAN) Settings" window.
Check connection
Check PC and projector are connected properly here. If it is not connected, check cable connections and settings are properly or not.
1) Start browser in PC and specify following URL, then click "Go" button.
URL: http://(Projector IP address)/
For example, if projector IP address is 192.168.1.10, specify
URL: http://192.168.1.10/
2) If appears, it succeeds.
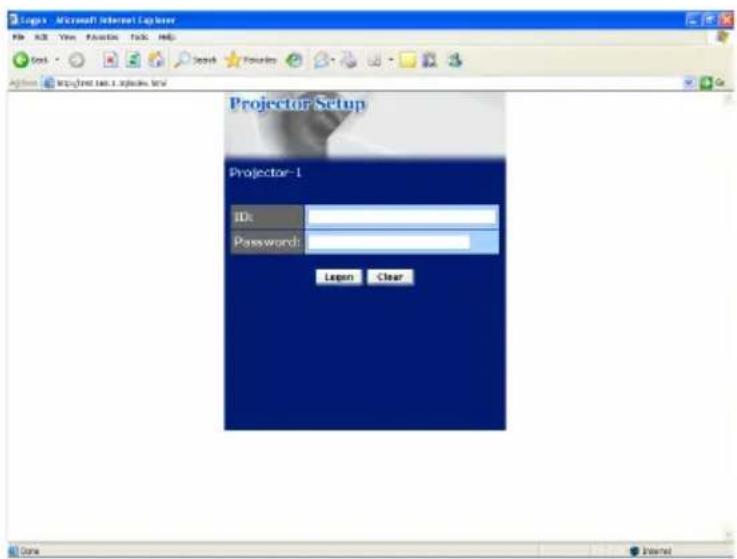
"Logon Menu"
Management with Web browser software
This projector is equipped with the following network functions by using a web browser software.
Configuring and Controlling the Projector via a Web Browser
You can change the settings of or control the projector via a network by using a web browser from a PC that is connected to the same network.
E-mail Alerts
The projector can automatically send an alert to specified e-mail addresses when the projector requires maintenance or has encountered an error.
Projector Management using SNMP
This projector is SNMP (Simple Network Management Protocol) compliant, allowing you to monitor it from a remote location using SNMP software. In addition, the projector is able to send failure & warning alerts to a specified PC.
Event Scheduling
You can schedule the projector to perform various functions according to the date and time.
e-SHOT (Still Image Transfer) Display
The projector can display still images that are transferred via the network.
Command Control via the Network
The projector can be controlled using RS-232C commands over a network.
Configuring and controlling the projector via a web browser
You can adjust or control the projector via a network from a web browser on a PC that is connected to the same network.
NOTE • Internet Explorer 5.5 or later is required.
- If JavaScript is disabled in your web browser configuration, you must enable JavaScript in order to use the projector web pages properly. See the Help files for your web browser for details on how to enable JavaScript.
- You can communicate using SSL (Secure Socket Layer) if you are using Windows XP Service Pack 2 or earlier versions of Microsoft Windows. Please specify “https://” when you enter the IP address of the projector on the web browser. You can't communicate the projector using SSL on Windows Vista.
- It is recommended that all web browser updates are installed. It is especially recommended that all users running Internet Explorer on a Microsoft Windows version prior to Windows XP Service Pack 2 install security update Q832894 (MS04-004) or the web browser interface may not be displayed correctly.
And when using an earlier version of Internet Explorer, during operations the browser will log out after 50 seconds.
Configuring and controlling the projector via a web browser (continued)
When configuring or controlling the projector via a web browser, an ID and password are required. There are two types of IDs, Administrator ID and User ID. The following chart describes the differences between Administrator and User IDs.
| Item Description | Administrator User | ||
| Network Information | Displays the projector's current network configuration settings. | √ | √ |
| Network Settings | Displays and configures network settings. | √ N/A | |
| Port Settings | Displays and configures communication port settings. | √ N/A | |
| Mail Settings | Displays and configures e-mail addressing settings. | √ N/A | |
| Alert Settings | Displays and configures failure & warning alerts. | √ N/A | |
| Schedule Settings | Displays and configures schedule settings. | √ N/A | |
| Date/Time Settings | Displays and configures the date and time settings. | √ N/A | |
| Security Settings | Displays and configures passwords and other security settings. | √ N/A | |
| Projector Control Controls the projector. √ √ | |||
| Projector Status | Displays and configures the current projector status. | √ | √ |
| Network Restart | Restarts the projector's network connection. | √ N/A | |
Configuring and controlling the projector via a web browser (continued)
Logon
Refer to the following for configuring or controlling the projector via a web browser.
Example: If the IP address of the projector is set to 192.168.1.10:
1) Enter "http://192.168.1.10/" into the address bar of the web browser and press "Enter" key or click "Go" button. The screen in Fig. 3.1.1a will be displayed.
2) Enter your ID and password and click [Logon].
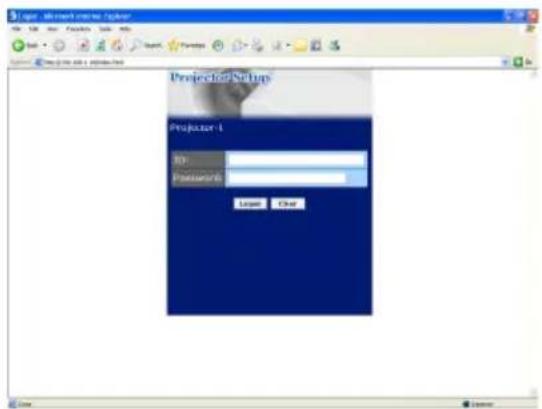
"Logon Menu"
Below are the factory default settings for administrator ID, user ID and passwords.
| Item ID Password | |
| Administrator Administrator | |
| User User |
If the logon is successful, either the screen will be displayed.
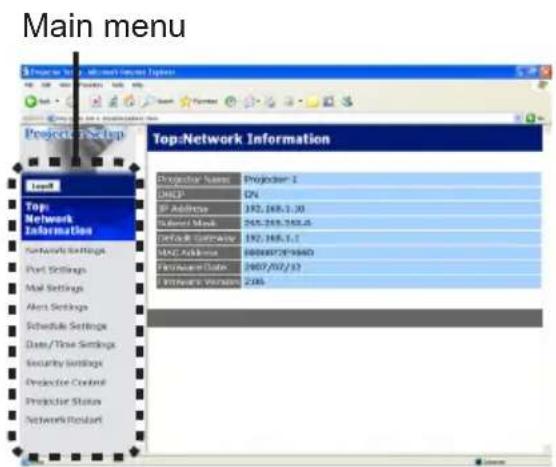
"Logon with Administrator ID"
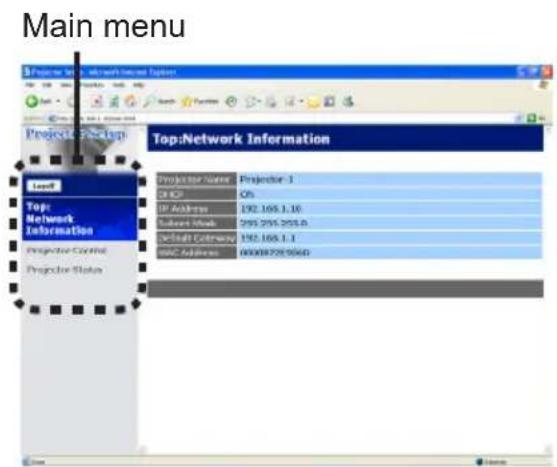
"Logon with User ID"
3) Click the desired operation or configuration item on the main menu located on the left-hand side of the screen.
Configuring and controlling the projector via a web browser (continued)
Network Information
All screen drawings in this manual are shown when you logon with the Administrator ID. Any functions that are available only for the Administrator will not be shown when you logon with the User ID. Refer to the table.
Displays the projector's current network configuration settings.
| Item Description | |
| Projector Name Displays the projector name settings. | |
| DHCP Displays the DHCP configuration settings. | |
| IP Address Displays the current IP address. | |
| Subnet Mask Displays the subnet mask. | |
| Default Gateway Displays the default gateway. | |
| MAC Address Displays the ethernet MAC address. | |
| Firmware Date | Displays the network firmware time stamp. This information is only displayed when logged on using an Administrator ID. |
| Firmware Version | Displays the network firmware version number. This information is only displayed when logged on using an Administrator ID. |
Configuring and controlling the projector via a web browser (continued)
Network Settings
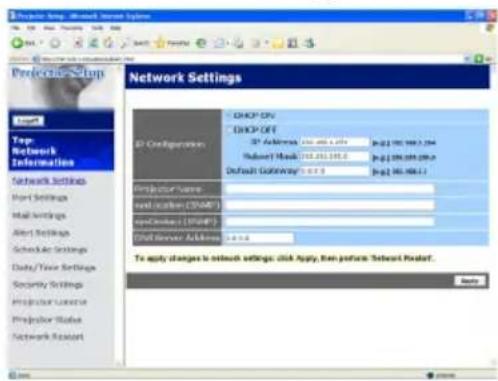
Displays and configures network settings.
| Item Description | ||
| IP Configuration Configures network settings. | ||
| DHCP ON Enables DHCP. | ||
| DHCP OFF Disables DHCP. | ||
| IP Address Configures the IP address when DHCP is disabled. | ||
| Subnet Mask Configures the subnet mask when DHCP is disabled. | ||
| Default Gateway Configures the default gateway when DHCP is disabled. | ||
| Projector Name | Configures the name of the projector.The length of the Projector Name can be up to 64 alphanumeric characters. Only alphabets, numbers and following symbols can be used. !"#$%&'()*+,-./:;<=>?@[^_^_{}~ and space | |
| sysLocation (SNMP) | Configures the location to be referred to when using SNMP.The length of the sysLocation can be up to 255 alphanumeric characters. Only numbers '0-9' and alphabet 'a-z', 'A-Z' can be used. | |
| sysContact (SNMP) | Configures the contact information to be referred to when using SNMP.The length of the sysContact can be up to 255 alphanumeric characters. Only numbers '0-9' and alphabet 'a-z', 'A-Z' can be used. | |
| DNS Server Address Configures the DNS server address. | ||
Click [Apply] button to save the settings.
Configuring and controlling the projector via a web browser (continued)
NOTE • The new configuration settings are activated after restarting the network connection. When the configuration settings are changed, you must restart the network connection. You can restart the network connection by clicking [Network Restart] on the main menu.
- If you connect the projector to an existing network, consult a network administrator before setting server addresses.
Configuring and controlling the projector via a web browser (continued)
Port Settings
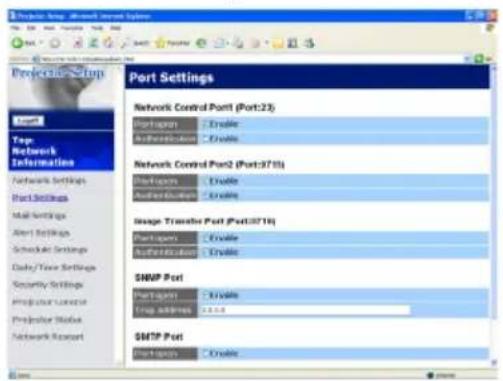
Displays and configures communication port settings.
| Item Description | |
| Network Control Port1 (Port:23) | Configures command control port 1 (Port:23). |
| Port open Click [Enable] | check box to use port 23. |
| Authentication | Click [Enable] check box when authentication is required for this port. |
| Network Control Port2 (Port:9715) | Configures command control port 2 (Port:9715). |
| Port open Click [Enable] | check box to use port 9715. |
| Authentication | Click [Enable] check box when authentication is required for this port. |
| Image Transfer Port (Port:9716) | Configures the image transfer port (Port:9716). |
| Port open Click the [Enable] | check box to use port 9716. |
| Authentication | Click the [Enable] check box when authentication is required for this port. |
| SNMP Port Configures the SNMP port. | |
| Port open Click [Enable] | check box to use SNMP. |
| Trap address Configures the destination of the SNMP Trap in IP format. | |
| SMTP Port Configures the SMTP port. | |
| Port open Click [Enable] | check box to use the e-mail function. |
Click [Apply] button to save the settings.
NOTE • The new configuration settings are activated after restarting the network connection. When the configuration settings are changed, you must restart the network connection. You can restart the network connection by clicking [Network Restart] on the main menu.
Configuring and controlling the projector via a web browser (continued)
Mail Settings
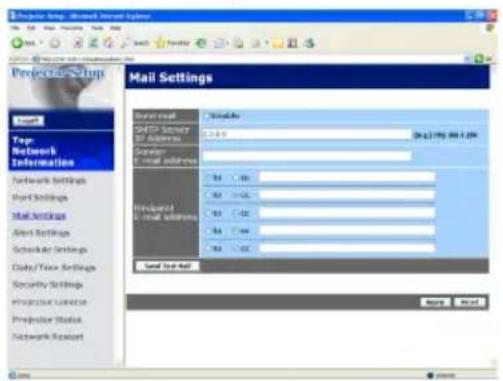
Displays and configures e-mail addressing settings.
| Item Description | |
| Send mail | Click [Enable] check box to use the e-mail function.Configure the conditions for sending e-mail under the Alert Settings. |
| SMTP Server IP Address | Configures the address of the mail server in IP format.• The address allows not only IP address but also domain name if the valid DNS server is setup in the Network Settings. The maximum length of host or domain name is up to 255 characters. |
| Sender E-mail address | Configures the sender e-mail address.The length of the sender e-mail address can be up to 255 alphanumeric characters. |
| Recipient E-mail address | Configures the e-mail address of up to five recipients. You can also specify [TO] or [CC] for each address. The length of the recipient e-mail address can be up to 255 alphanumeric characters. |
Click [Apply] button to save the settings.
NOTE • You can confirm whether the mail settings work correctly using [Send Test Mail] button. Please enable Send mail setting before clicking [Send Test Mail].
- If you connect the projector to an existing network, consult a network administrator before setting server addresses.
Configuring and controlling the projector via a web browser (continued)
Alert Settings
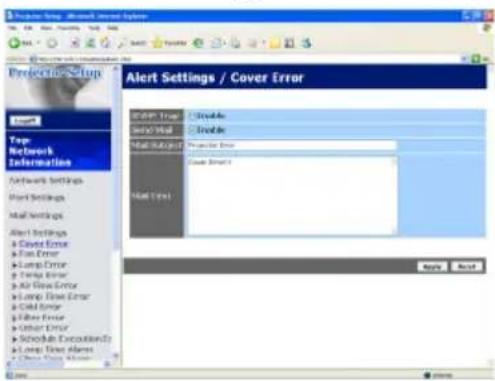
Displays and configures failure & alert settings.
| Alert Item Description | Description |
| Cover Error The lamp cover | has not been properly fixed. |
| Fan Error The cooling fan is | not operating. |
| Lamp Error | The lamp does not light, and there is a possibility that interior portion has become heated. |
| Temp Error | There is a possibility that the interior portion has become heated. |
| Air Flow Error The internal | temperature is rising. |
| Lamp Time Error Lamp time over. | |
| Cold Error | There is a possibility that the interior portion has become overcooled. |
| Filter Error Filter time over. | |
| Other Error | Other error.If displaying this error, please contact ViewSonic. |
| Schedule Execution Error | Schedule Execution error. |
| Lamp Time Alarm Lamp time over Alarm Time setting. | |
| Filter Time Alarm Filter time over Alarm Time setting. | |
| Transition Detector Alarm | Transition Detector Alarm. |
| “CHANGE THE LAMP” is displayed. | “CHANGE THE LAMP” is displayed. |
| Cold Start | The Power switch is turned on.(Off → standby mode) |
| Authentication Failure | The SNMP access is detected from the invalid SNMP community. |
Refer to "Troubleshooting" in the User's Manual (detailed) – Operating Guide for further detailed explanation of Error except Other Error and Schedule Execution Error.
Configuring and controlling the projector via a web browser (continued)
The Alert Items are shown below.
| Setting Item Description | |
| Alarm Time | Configures the time to alert.(Only Lamp Time Alarm and Filter Time Alarm.) |
| SNMP Trap Click [Enable] | check box to enable SNMP Trap alerts. |
| Send Mail | Click [Enable] check box to enable e-mail alerts.(Except Cold Start and Authentication Failure.) |
| Mail Subject | Configures the subject line of the e-mail to be sent.The length of the subject line can be up to 255 alphanumeric characters.(Except Cold Start and Authentication Failure.) |
| Mail Text | Configures the text of the e-mail to be sent.The length of the text can be up to 1024 alphanumeric characters.(Except Cold Start and Authentication Failure.) |
Click [Apply] button to save the settings.
NOTE • The trigger of Filter Error e-mail is depending on the FILTER MESSAGE setting in the SERVICE item of the OPTION menu which defines the period until the filter message is displayed on the projector screen. The e-mail will be sent when the filter timer exceeds 50, 100, 200, 300, 400, 500, 600, 700 or 800 hours based on the configuration. No notification e-mail will be sent if the FILTER MESSAGE is set to TURN OFF.
- Lamp Time Alarm is defined as a threshold for e-mail notification (reminder) of the lamp timer. When the lamp hour exceeds this threshold that is configured through the Web page, the e-mail will be sent out.
- Filter Time Alarm is defined as a threshold for e-mail notification (reminder) of the filter timer. When the filter hour exceeds this threshold, the e-mail will be sent out.
Configuring and controlling the projector via a web browser (continued)
Schedule Settings
![Schedule Settings / Daily Schedule Create Time Command(Parameters) 08:00 Power [ON] 17:00 Power [OP] Power [ ] Input Source [ Command n ] Display Image [ Import n ] Time Command(Parameters) Next](/content/2026/05/951494/images/2a614822fda488eb6689caf313539119947e39e2ccc45a8cc7469fcc946ab29d.jpg)
Displays and configures schedule settings.
| Item Description | |
| Daily Configures the daily schedule. | |
| Sunday Configures the Sunday schedule. | |
| Monday Configures the Monday schedule. | |
| Tuesday Configures the Tuesday schedule. | |
| Wednesday Configures the Wednesday schedule. | |
| Thursday Configures the Thursday schedule. | |
| Friday Configures the Friday schedule. | |
| Saturday Configures the Saturday schedule. | |
| Specific date No.1 Configures the specific date (No.1) schedule. | |
| Specific date No.2 Configures the specific date (No.2) schedule. | |
| Specific date No.3 Configures the specific date (No.3) schedule. | |
| Specific date No.4 Configures the specific date (No.4) schedule. | |
| Specific date No.5 Configures the specific date (No.5) schedule. | |
Configuring and controlling the projector via a web browser (continued)
The daily and weekly event items are shown below.
| Item Daily & Weekly Description | |
| Schedule Click [Enable] check box to enable the schedule. | |
| Schedule List Displays the current schedule. |
The specific date event items are shown below.
| Item Specific date (No.1-5) Description | |
| Schedule | Click [Enable] check box to enable specific date (No.1-5) schedule. |
| Date (Month/Day) Configures the month and date. | |
| Schedule List Displays the current specific date (No.1-5) schedule. | |
Click [Apply] button to save the settings.
To add additional functions and events, click [Add] button and set the following items.
| Item Description | |
| Time Configures the time to execute commands. | |
| Command[Parameter] | Configures the commands to be executed. |
| Power Configures the parameters for power control. | |
| Input Source Configures the parameters for input switching. | |
| Display Image Configures the parameters for display of transfer image data. | |
Click [Register] button to add new commands to the Schedule List.
Click [Delete] button to delete commands from the Schedule List.
Click [Reset] button to delete all commands from the Schedule List.
NOTE • After the projector is moved, check the date and time set for the projector before configuring the schedules. Strong shock may make the date and time settings get out of tune.
Configuring and controlling the projector via a web browser (continued)
Date/Time Settings
![Product Time - Microsoft Access Systems File Edit View Tools Help Help Preview Setup Date/Time Settings Current Data Current Time Default Network Settings Word: [p@2019123] Word: [p@2019123] Word: [p@2019123] Word: [p@2019123] Word: [p@2019123] Word: [p@2019123] Word: [p@2019123] Word: [p@2019123] Word: [p@2018146] Word: [p@2018146] Word: [p@2018146] Word: [p@2018146] Word: [p@2018146] Word: [p@2018146] Word: [p@2018146] Word: [p@2018146] Word: [p@2020123] Word: [p@2020123] Word: [p@2020123] Word: [p@2020123] Word: [p@2020123] Word: [p@2020123] Word: [p@2020123] Word: [p@2020123] Word: [p@2019123] Word: [p@2019123] Word: [p@2019123] Word: [p@2019123] Word: [p@2019123] Word: [p@2019123] Word: [p@2019123] Word: [p# 75.5.55] Word: [p# 75.5.55] Word: [p# 75.5.55] Word: [p# 75.5.55] Word: [p# 75.5.55] Word: [p# 75.5.55] Word: [p# 75.5.55] Word: [p# 75.5.55] To apply changes to database settings, click Apply, then perform Network Provider. Name: Top Network Information Network Settings Word Settings Mail Settings Alert Settings Schedule Settings Data/Time Settings Security Settings Predictor Location Predictor Status Network Resource](/content/2026/05/951494/images/090d515135c5d259d7653f89273af3ef95decd3e5c945a844592d4749ab04ae7.jpg)
Displays and configures the date and time settings.
| Item Description | |||
| Current Date Configures the current date in year/month/day format. | |||
| Current Time Configures the current time in hour:minute:second format. | |||
| Daylight Savings Time | Click [ON] check box to enable daylight savings time and set the following items. | ||
| Start Configures the date and time daylight savings time begins. | |||
| Month Configures the month daylight savings time begins (1~12). | |||
| Week | Configures the week of the month daylight savings time begins (First, 2, 3, 4, Last). | ||
| Day | Configures the day of the week daylight savings time begins (Sun, Mon, Tue, Wed, Thu, Fri, Sat). | ||
| Time | hour Configures the hour daylight savings time begins (0 ~ 23). | ||
| minute Configures the minute daylight savings time begins (0 ~ 59). | |||
| End Configures the date and time daylight savings time ends. | |||
| Month Configures the month daylight savings time ends (1 ~ 12). | |||
| Week | Configures the week of the month daylight savings time ends (First, 2, 3, 4, Last). | ||
| Day | Configures the day of the week daylight savings time ends (Sun, Mon, Tue, Wed, Thu, Fri, Sat). | ||
| Time | hour Configures the hour daylight savings time ends (0 ~ 23). | ||
| minute Configures the minute daylight savings time ends (0 ~ 59). | |||
| Time difference | Configures the time difference. Set the same time difference as the one set on your PC. If unsure, consult your IT manager. | ||
| SNTP | Click the [ON] check box to retrieve Date and Time information from the SNTP server and set the following items. | ||
| SNTP Server IP Address | |||
| Cycle | |||
Click [Apply] button to save the settings.
NOTE • The new configuration settings are activated after restarting the network connection. When the configuration settings are changed, you must restart the network connection. You can restart the network connection by clicking [Network Restart] on the main menu.
- If you connect the projector to an existing network, consult a network administrator before setting server addresses.
- To enable the SNTP function, the time difference must be set.
- The projector will retrieve Date and Time information from the time server and override time settings when SNTP is enabled.
- The internal clock's time may not remain accurate. Using SNTP is recommended to maintain accurate time.
Configuring and controlling the projector via a web browser (continued)
Security Settings
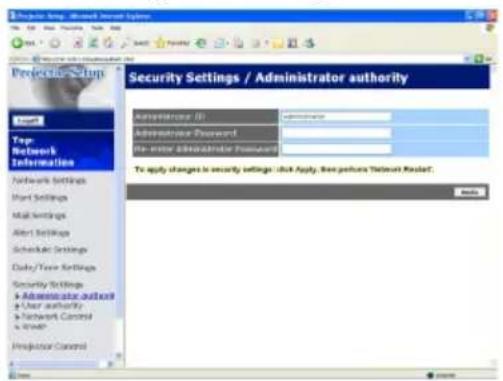
Displays and configures passwords and other security settings.
| Item Description | ||
| Administrator authority Configures the Administrator ID and password. | ||
| Administrator ID | Configures the Administrator ID.The length of the text can be up to 32 alphanumeric characters. | |
| Administrator Password | Configures the Administrator password.The length of the text can be up to 255 alphanumeric characters. | |
| Re-enter Administrator Password | Reenter the above password for verification. | |
| User authority Configures the User ID and password. | ||
| User ID | Configures the User ID.The length of the text can be up to 32 alphanumeric characters. | |
| User Password | Configures the User password.The length of the text can be up to 255 alphanumeric characters. | |
| Re-enter User Password | Reenter the above password for verification. | |
| Item Description | ||
| Network Control | Configures the Authentication password for the command control. | |
| Authentication Password | Configures the Authentication password. The length of the text can be up to 32 alphanumeric characters. | |
| Re-enter Authentication Password | Reenter the above password for verification. | |
| SNMP Configures the community name if SNMP is used. | ||
| Community name | Configures the community name. The length of the text can be up to 64 alphanumeric characters. | |
Click [Apply] button to save the settings.
NOTE • The new configuration settings are activated after restarting the network connection. When the configuration settings are changed, you must restart the network connection. You can restart the network connection by clicking [Network Restart] on the main menu.
- Only numbers ‘0-9’ and alphabet ‘a-z’, ‘A-Z’ can be used.
Configuring and controlling the projector via a web browser (continued)
Projector Control
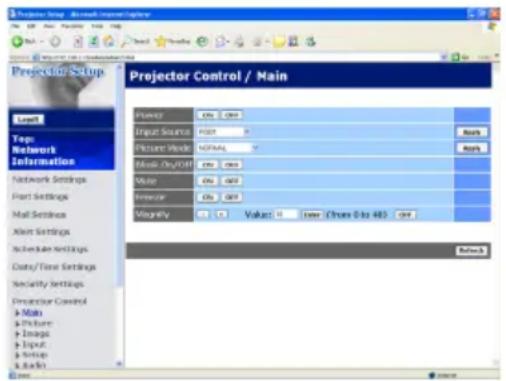
The items shown in the table below can be performed using the Projector Control menu. Select an item using the up and down arrow keys on the PC. Most of the items have a submenu. Refer to the table below for details.
NOTE • The setting value may not match with the actual value if the user changes the value manually. In that case, please refresh the page by clicking [Refresh] button.
Controls the projector.
| Item Description | ||
| Main | ||
| Power Turns the power on/off. | ||
| Input Source Selects the input source. | ||
| Picture Mode Selects the picture mode setting. | ||
| Blank On/Off Turns Blank on/off. | ||
| Mute Turns Mute on/off. | ||
| Freeze Turns Freeze on/off. | ||
| Magnify | ||
| Picture | ||
| Brightness Adjusts the brightness setting. | ||
| Contrast Adjusts the contrast setting. | ||
| Gamma Selects the gamma setting. | ||
| Color Temp Selects the color temperature setting. | ||
| Color Adjusts the color setting. | ||
| Tint Adjusts the tint setting. | ||
| Sharpness Adjusts the sharpness setting. | ||
| Active Iris | ||
| MyMemory Save | ||
| MyMemory Recall | ||
Configuring and controlling the projector via a web browser (continued)
| Item Description | |||
| Image | |||
| Aspect Selects the aspect setting. | |||
| Over Scan Adjusts the over scan setting. | |||
| V Position Adjusts the vertical position. | |||
| H Position | Adjusts the horizontal position. | ||
| H Phase Adjusts the horizontal phase. | |||
| H Size Adjusts the horizontal size. | |||
| Auto Adjust Execute Performs the automatic adjustment. | |||
| Input | |||
| Progressive Selects the progressive setting. | |||
| Video NR Selects the video noise reduction setting. | |||
| 3D-YCS Selects the 3D-YCS setting. | |||
| Color Space Selects the color space. | |||
| Component Selects the component terminal setting. | |||
| C-Video Format Selects the video format setting. | |||
| S-Video Format Selects the s-video format setting. | |||
| HDMI Selects the HDMI setting. | |||
| Frame Lock-RGB1 Turns the frame lock-RGB1 function on/off. | |||
| Frame Lock-RGB2 Turns the frame lock-RGB2 function on/off. | |||
| Frame Lock-HDMI Turns the frame lock-HDMI function on/off. | |||
| RGB in-1 Selects the RGB1 input signal type. | |||
| RGB in-2 Selects the RGB2 input signal type. | |||
| Setup | |||
| Auto Keystone Execute Performs the automatic keystone distortion correction. | |||
| Keystone V Adjusts the vertical keystone distortion setting. | |||
| Keystone H Adjusts the horizontal keystone distortion setting. | |||
| Whisper Selects the whisper mode. | |||
| Mirror Selects the mirror status. | |||
Configuring and controlling the projector via a web browser (continued)
| Item Description | ||
| Audio | ||
| Volume Adjusts the volume setting. | ||
| Treble Adjust the Treble setting. | ||
| Bass Adjusts the Bass setting. | ||
| SRS WOW Selects the SRS WOW setting. | ||
| Speaker Turns the built-in speaker on/off. | ||
| Audio-RGB1 Assigns the AUDIO-RGB1 input port. | ||
| Audio-RGB2 Assigns the AUDIO-RGB2 input port. | ||
| Audio-HDMI Assigns the AUDIO-HDMI input port. | ||
| Audio-Video Assigns the AUDIO-VIDEO input port. | ||
| Audio-S-Video Assigns the AUDIO-S-VIDEO input port. | ||
| Audio-Component Assigns the AUDIO-COMPONENT input port. | ||
| HDMI-Audio Selects the HDMI audio setting. | ||
| Screen | ||
| Language Selects the language for the OSD. | ||
| Menu Position V Adjusts the vertical Menu position. | ||
| Menu Position H Adjusts the horizontal Menu position. | ||
| Blank Selects the Blank mode. | ||
| Startup Selects the startup screen mode. | ||
| MyScreen Lock Turns MyScreen lock function on/off. | ||
| Message Turns the message function on/off. | ||
| Option | ||
| Auto Search Turns the automatic signal search function on/off. | ||
| Auto Keystone Turns the automatic keystone distortion correction function on/off. | ||
| Auto on Turns the auto on function on/off. | ||
| Auto off Configures the timer to shut off the projector when no signal is detected. | ||
| My Button-1 Assigns the functions for the MY BUTTON1 buttons on the included remote control. | ||
| My Button-2 Assigns the functions for the MY BUTTON2 buttons on the included remote control. | ||
| Remote Receiv. Front Enable/Disable remote receiv. front. | ||
| Remote Receiv. Rear Enable/Disable remote receiv. rear. | ||
| Remote Receiv. Top Enable/Disable remote receiv. top. | ||
| Remote Freq. Normal Enables/Disables the remote control signal frequency normal. | ||
| Remote Freq. High Enables/Disables the remote control signal frequency high. | ||
Configuring and controlling the projector via a web browser (continued)
Projector Status
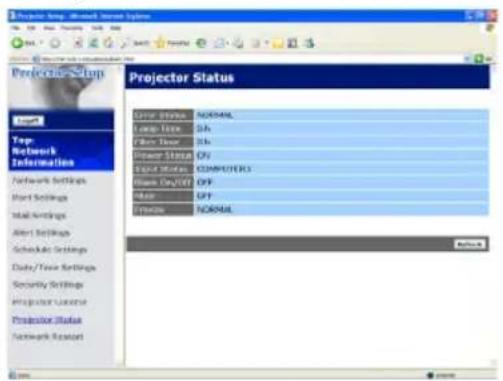
Displays and configures the current projector status.
| Item Description | |
| Error Status Displays the current error status | |
| Lamp Time Displays the usage time for the current lamp. | |
| Filter Time Displays the usage time for the current filter. | |
| Power Status Displays the current power status. | |
| Input Status Displays the current input signal source. | |
| Blank On/Off Displays the current Blank on/off status. | |
| Mute Displays the current Mute on/off status. | |
| Freeze Displays the current Freeze status. | |
Configuring and controlling the projector via a web browser (continued)
Network Restart
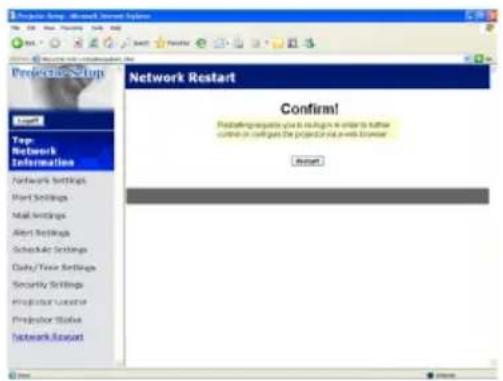
Restarts the projector's network connection.
| Item Description | |
| Restart | Restarts the projector's network connection in order to activate new configuration settings. |
NOTE • Restarting requires you to re-log on in order to further control or configure the projector via a web browser. Wait 1 minute or more after clicking [Restart] button to log on again.
- The Logon menu is displayed after restarting the projector's network connection if the DHCP is set to ON.
Logoff
When [Logoff] is clicked, the Logon menu is displayed.
E-mail Alerts
The projector can automatically send an alert message to the specified e-mail addresses when the projector detects a certain condition that is requiring maintenance or detected an error.
NOTE • Up to five e-mail addresses can be specified.
- The projector may be not able to send e-mail if the projector suddenly loses power.
Mail Settings
To use the projector's e-mail alert function, please configure the following items through a web browser.
Example: If the IP address of the projector is set to 192.168.1.10:
1) Enter "http://192.168.1.10/" into the address bar of the web browser.
2) Enter the Administrator ID and password and click [Logon].
3) Click [Port Settings] on the main menu.
4) Click [Enable] check box to open the SMTP Port.
5) Click [Apply] button to save the settings.
NOTE • A Network Restart is required after the SMTP Port configuration settings have changed. Click [Network Restart] and configure the following items.
6) Click [Mail Settings] and configure each item. Refer to the item 3.1.5 Mail Settings for further information.
7) Click [Apply] button to save the settings.
NOTE • Click [Send Test Mail] button in [Mail Settings] to confirm that the e-mail settings are correct. The following mail will be delivered to the specified addresses.
Subject line :Test Mail
E-mail Alerts (continued)
8) Click [Alert Settings] on the main menu to configure the E-mail Alerts settings.
9) Select and configure each alert item. Refer to the item 3.1.6 Alert Settings for further information.
10) Click [Apply] button to save the settings.
Failure/Warning e-mails are formatted as follows:
Subject line : <Mail title> <Projector name>
Text : <Mail text>
Date <Failure/Warning date>
Time <Failure/Warning time>
IP Address <Projector IP address>
MAC Address <Projector MAC address>
Projector Management using SNMP
The SNMP (Simple Network Management Protocol) enables to manage the projector information, which is a failure or warning status, from the computer on the network. The SNMP management software will be required on the computer to use this function.
NOTE • It is recommended that SNMP functions be carried out by a network administrator.
- SNMP management software must be installed on the computer to monitor the projector via SNMP.
SNMP Settings
Configure the following items via a web browser to use SNMP.
Example: If the IP address of the projector is set to 192.168.1.10:
1) Enter "http://192.168.1.10/" into the address bar of the web browser.
2) Enter the Administrator ID and Password and click [Logon].
3) Click [Port Settings] on the main menu.
4) Click [Enable] check box to open the SNMP Port. Set the IP address to send the SNMP trap to when a Failure/Warning occurs.
NOTE • A Network Restart is required after the SNMP Port configuration settings have been changed. Click [Network Restart] and configure the following items.
5) Click [Security Settings] on the main menu.
6) Click [SNMP] and set the community name on the screen that is displayed.
NOTE • A Network Restart is required after the Community Name has been changed. Click [Network Restart] and configure the following items.
7) Configure the settings for Trap transmission of Failures/Warnings. Click [Alert Settings] on the main menu and select the Failure/Warning item to be configured.
8) Click [Enable] check box to send out the SNMP trap for Failures/Warnings. Clear [Enable] check box when SNMP trap transmission is not required.
9) Click [Apply] button to save the settings.
Event Scheduling
The scheduling function enables to setup scheduled events including power on / power off. It enables to be “self-management” projector.
![Schedule Settings / Daily Schedule Options Time: Connected (External) 06:00: Power (ON) 17:00: Power (OFF) Power [ ] Input Source [ ] Display Image [ ] Time: Connected (External) Next](/content/2026/05/951494/images/d4170292ee9ed2f3893ecb1ca80195c55a1a33b3887156025d3ae42db0ecc843.jpg)
NOTE • You can schedule the following control events: Power ON/OFF, Input Source and Transferred Image Display.
- The power on / off event has the lowest priority among the all events that are defined at the same time.
- There are 3 types of Scheduling, 1) daily 2) weekly 3) specific date.
• The priority for scheduled events is as follows 1) specific date 2) weekly 3) daily.
- Up to five specific dates are available for scheduled events. Priority is given to those with the lower numbers when more than one event has been scheduled for the same date and time (e.g., 'Specific day No. 1' has priority over 'Specific day No. 2' and so on.
- Be sure to set the date and time before enabling scheduled events.
Event Scheduling (continued)
Schedule Settings
Schedule settings can be configured from a web browser.
Example: If the IP address of the projector is set to 192.168.1.10:
1) Enter "http://192.168.1.10/" into the address bar of the web browser.
2) Enter the Administrator ID and password and click [Logon].
3) Click [Schedule Settings] on the main menu and select the required schedule item. For example, if you want to perform the command every Sunday, please select [Sunday].
4) Click [Enable] check box to enable scheduling.
5) Enter the date (month/day) for specific date scheduling.
6) Click [Apply] button to save the settings.
7) Click [Add] to create new event. After configure the time, command and parameters, click [Register] to add the new event. To return the previous page, click [Cancel] button.
8) Click [Delete] button when you want to delete a schedule.
There are three types of scheduling.
1) Daily: Perform the specified operation at a specified time every day.
2) Sunday \~ Saturday: Perform the specified operation at the specified time on a specified day of the week.
3) Specific Date: Perform the specified operation on the specified date and time.
NOTE • In Standby mode the power indicator will flash green for approx. 3 seconds when at least 1 “Power ON” schedule is saved.
- When the schedule function is used, the power cord must be connected to the projector and the outlet and the power switch must be turned on, [ | ]. The schedule function does not work when the power switch is turned off, [O] or the breaker in a room is tripped. The power indicator will lights orange or green when the projector gets is receiving the power.
Event Scheduling (continued)
Date/Time Settings
The Date/Time setting can be adjusted via a web browser.
Example: If the IP address of the projector is set to 192.168.1.10:
1) Enter "http://192.168.1.10/" into the address bar of the web browser. Enter the Administrator ID and Password and click [Logon].
2) Click [Date/Time Settings] on the main menu and configure each item. Refer to the item 3.1.8 Data/Time Settings for further information.
3) Click [Apply] button to save the settings.
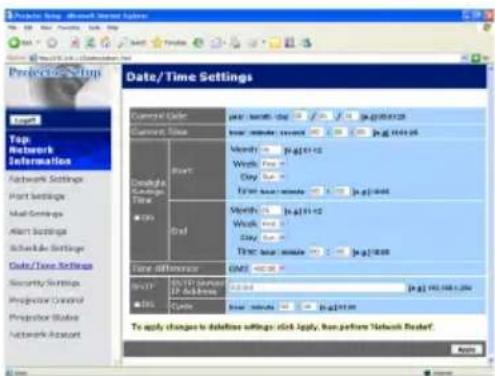
NOTE • A Network Restart is required after the Daylight Savings Time or SNTP configuration settings have been changed.
- The battery for the built in clock may be dead if the clock loses time even when the date and time have been set correctly. Replace the battery by following the instructions on replacing the battery.
- The internal clock's time may not remain accurate. Using SNTP is recommended to maintain accurate time.
e-SHOT (Still Image Transfer) Display
The projector can display still images that are transferred via the network.
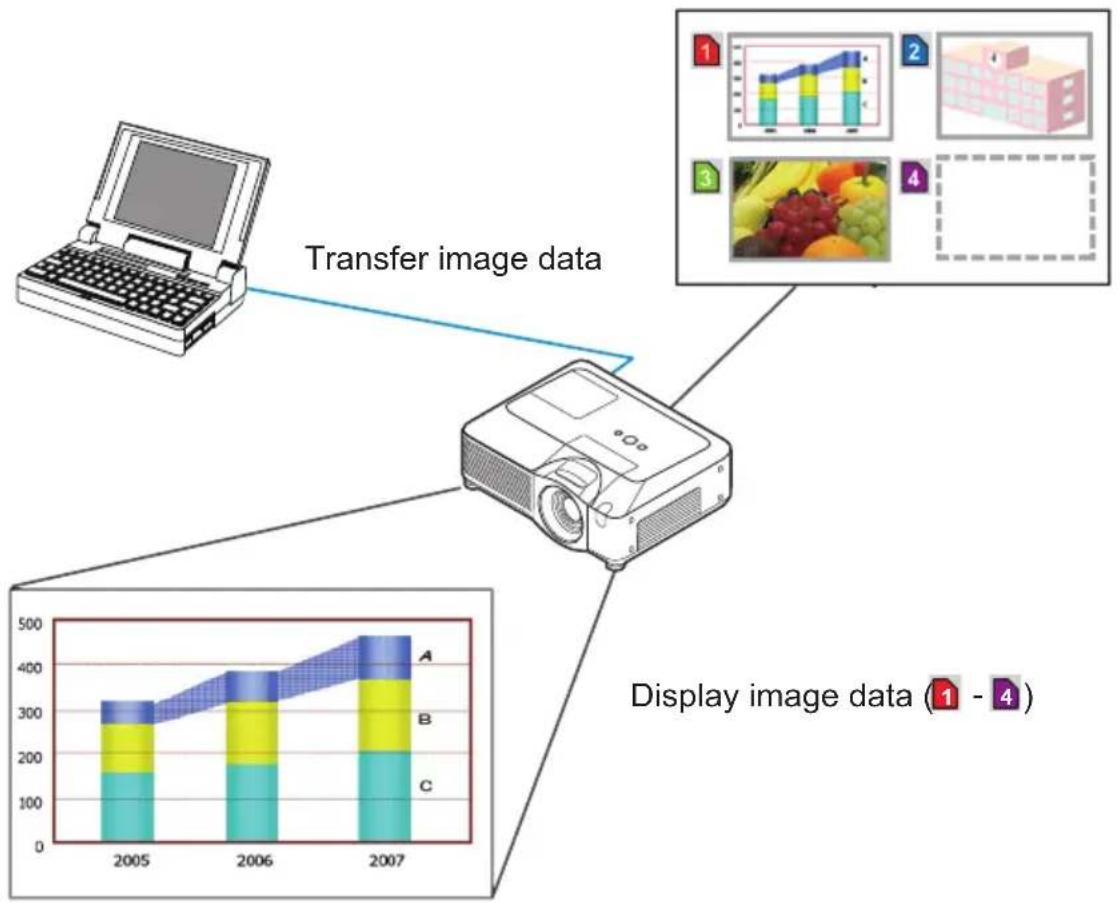
flowchart
graph TD
    A["Transfer image data"] --> B["Image projector"]
    B --> C["Display image data (1 - 4)"]
Still Image Transfer
e-SHOT transmission requires an exclusive application for your PC. You can download it from the ViewSonic web site. Refer to the manual for the application for instructions.
To display the transferred image, select the e-SHOT item in the NETWORK Menu. For more information, please see the description of the e-SHOT item of the NETWORK Menu.
NOTE • It is possible to allocate the image file up to 4 in the maximum.
- The image file also can be displayed by using schedule function from the web browser. Refer to the item 3.4 Event Scheduling in detail.
e-SHOT (Still Image Transfer) Display (continued)
Configure the following items from a web browser when e-SHOT is used.
Example: If the IP address of the projector is set to 192.168.1.10:
1) Enter "http://192.168.1.10/" into the address bar of the web browser.
2) Enter the Administrator ID and password and click [Logon].
3) Click [Port Settings] on the main menu.
4) Click the [Enable] check box to open the Image Transfer Port (Port: 9716). Click the [Enable] check box for the [Authentication] setting when authentication is required, otherwise clear the check box.
5) Click the [Apply] button to save the settings.
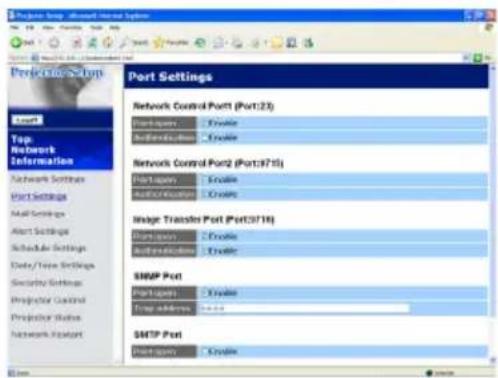
When the authentication setting is enabled, the following settings are required.
6) Click [Security Settings] on the main menu.
7) Select [Network Control] and enter the desired authentication password.
8) Click the [Apply] button to save the settings.
NOTE • The Authentication Password will be the same for Network Control Port1 (Port: 23), Network Control Port2 (Port: 9715), and Image Transfer Port (Port: 9716).
- The new configuration settings are activated after restarting the network connection. When the configuration settings are changed, you must restart the network connection. You can restart the network connection by clicking [Network Restart] on the main menu.
Command Control via the Network
You can configure and control the projector via the network using RS-232C commands.
Communication Port
The following two ports are assigned for the command control.
TCP #23
TCP #9715
NOTE • Command control is not available via communication port (TCP #9716) that is used for the e-SHOT transmission function.
Command Control Settings
Configure the following items from a web browser when command control is used.
Example: If the IP address of the projector is set to 192.168.1.10:
1) Enter "http://192.168.1.10/" into the address bar of the web browser.
2) Enter the Administrator ID and password and click [Logon].
3) Click [Port Settings] on the main menu.
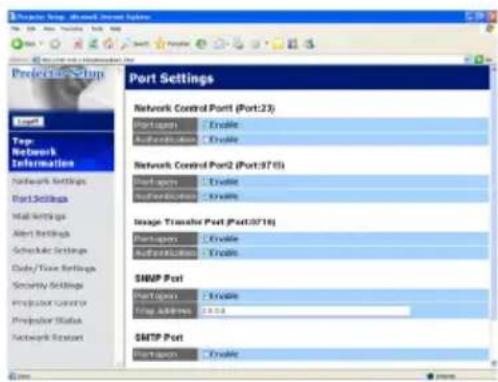
4) Click [Enable] check box to open Network Control Port1 (Port: 23) to use TCP #23. Click [Enable] check box for [Authentication] setting when authentication is required, otherwise clear the check box.
5) Click [Enable] check box to open Network Control Port2 (Port: 9715) to use TCP #9715. Click [Enable] check box for [Authentication] setting when authentication is required, otherwise clear the check box.
6) Click [Apply] button to save the settings.
Command Control via the Network (continued)
When the authentication setting is enabled, the following settings are required.
7) Click [Security Settings] on the main menu.
8) Click [Network Control] and enter the desired authentication password.
* See NOTE.
9) Click [Apply] button to save the settings.
NOTE • The Authentication Password will be the same for Network Control Port1 (Port: 23), Network Control Port2 (Port: 9715), and Image Transfer Port (Port: 9716).
- The new configuration settings are activated after restarting the network connection. When the configuration settings are changed, you must restart the network connection. You can restart the network connection by clicking [Network Restart] on the main menu.
Command Control via the Network (continued)
Command Format
Command formats differ among the different communication ports.
- TCP #23
You can use the RS-232C commands without any changes. The reply data format is the same as the RS-232C commands. However, the following reply will be sent back in the event of authentication failure when authentication is enabled.
| Reply Error code | ||
| 0x1F 0x04 0x00 | ||
- TCP #9715
Send Data format
The following formatting is added to the header (0x02), Data length (0x0D), Checksum (1byte) and Connection ID (1 byte) of the RS-232C commands.
| Header Data length RS-232C command Check sum | Connection ID | |||
| 0x02 0x0D | 13 bytes 1 byte | 1 byte | ||
Header → 0x02, Fixed
Data length → RS-232C commands byte length (0x0D, Fixed)
RS-232C commands → RS-232C commands that start with 0xBE 0xEF (13 bytes)
Check Sum → This is the value to make zero on the addition of the lower 8 bits from the header to the checksum.
Connection ID → Random value from 0 to 255 (This value is attached to the reply data)
Command Control via the Network (continued)
Reply Data format
The connection ID (the data is same as the connection ID data on the sending data format) is attached to the RS-232C commands reply data.
| Reply | Connection ID |
| 0x06 1 byte | |
| Reply | Connection ID |
| 0x15 1 byte | |
| Reply Error code | Connection ID |
| 0x1C 2 bytes 1 byte |
| Reply Data | Connection ID |
| 0x1D 2 bytes 1 byte |
| Reply Status code | Connection ID |
| 0x1F 2 bytes 1 byte |
| Reply | Authentication Error code | Connection ID |
| 0x1F 0x04 | 0x00 1 byte |
Command Control via the Network (Continued)
Automatic Connection Break
The TCP connection will be automatically disconnected after there is no communication for 30 seconds after being established.
Authentication
The projector does not accept commands without authentication success when authentication is enabled. The projector uses a challenge response type authentication with an MD5 (Message Digest 5) algorithm. When the projector is using a LAN, a random 8 bytes will be returned if authentication is enabled. Bind this received 8 bytes and the Authentication Password and digest this data with the MD5 algorithm and add this in front of the commands to send.
Following is a sample if the Authentication Password is set to “password” and the random 8 bytes are “a572f60c”.
1) Select the projector.
2) Receive the random 8 bytes "a572f60c" from the projector.
3) Bind the random 8 bytes "a572f60c" and the Authentication Password "password" and it becomes "a572f60cpassword".
4) Digest this bind "a572f60cpassword" with MD5 algorithm. It will be "e3d97429adffa11bce1f7275813d4bde".
5) Add this "e3d97429adffa11bce1f7275813d4bde" in front of the commands and send the data.
Send "e3d97429adffa11bce1f7275813d4bde"+command.
6) When the sending data is correct, the command will be performed and the reply data will be returned. Otherwise, an authentication error will be returned.
NOTE • As for the transmission of the second or subsequent commands, the authentication data can be omitted when the same connection.
Maintenance
Lamp
A lamp has finite product life. Using the lamp for long periods of time could cause the pictures darker or the color tone poor. Note that each lamp has a different lifetime, and some may burst or burn out soon after you start using them.
Preparation of a new lamp and early replacement are recommended. To prepare a new lamp, contact ViewSonic and tell the lamp type number.
Type number = RLC-038 (DT00871)
Replacing the lamp
- Turn the projector off, and unplug the power cord. Allow the projector to cool for at least 45 minutes.
2 Prepare a new lamp. - If the projector is mounted on a ceiling, or if the lamp has broken, also ask the dealer to replace the lamp.
In case of replacement by yourself,
-
Loosen the screw (marked by arrow) of the lamp cover and then slide the lamp cover to the side to remove it.
-
Loosen the 3 screws (marked by arrow) of the lamp, and slowly pick up the lamp by the handles.
-
Insert the new lamp, and retighten firmly the 3 screws of the lamp that are loosened in the previous process to lock it in place.
-
Slide the lamp cover back in place and firmly fasten the screw of the lamp cover.
-
Turn the projector on and reset the lamp time using the LAMP TIME item in the OPTION menu.
(1) Press the MENU button to display a menu.
(2) Point at the "Go to Advanced Menu ..." in the menu using the ▼/▲ button, then press the ▶ button.
(3) Point at the "OPTION" in the left column of the menu using the ▼/▲button, then press the ▶ button.
(4) Point at the “LAMP TIME” using the ▼/▲ button, then press the ▶ button. A dialog will appear.
(5) Press the ▲ button to select "RESET" on the dialog. It performs resetting the lamp time.
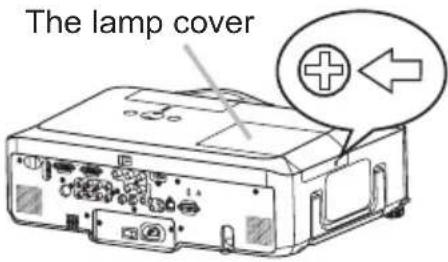
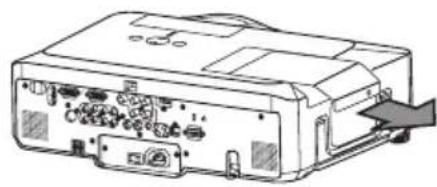
natural_image
Line drawing of a computer monitor case with ports and an arrow indicating a cable (no text or symbols present)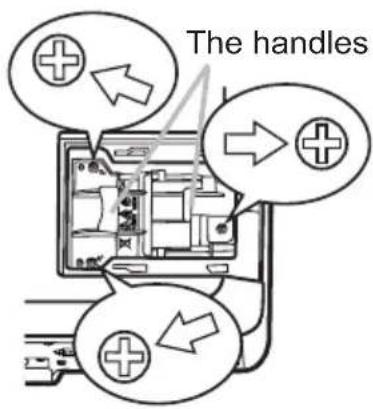
NOTE • Please reset the lamp time only when you have replaced the lamp, for a suitable indication about the lamp.
Lamp (continued)
Lamp warning

HIGH VOLTAGE

HIGH TEMPERATURE HIGH PRESSURE
⚠ WARNING ▶ The projector uses a high-pressure mercury glass lamp. The lamp can break with a loud bang, or burn out, if jolted or scratched, handled while hot, or worn over time. Note that each lamp has a different lifetime, and some may burst or burn out soon after you start using them. In addition, when the bulb bursts, it is possible for shards of glass to fly into the lamp housing, and for gas containing mercury to escape from the projector's vent holes.
▶ About disposal of a lamp: This product contains a mercury lamp; do not put it in a trash. Dispose of it in accordance with environmental laws.
- For lamp recycling, go to www.lamprecycle.org (in the US).
- For product disposal, contact your local government agency or www.eiae.org (in the US) or www.epsc.ca (in Canada).
For more information, call ViewSonic.

Disconnect the plug from the power outlet
- If the lamp should break (it will make a loud bang when it does), unplug the power cord from the outlet, and make sure to request a replacement lamp from your local dealer. Note that shards of glass could damage the projector's internals, or cause injury during handling, so please do not try to clean the projector or replace the lamp yourself.
- If the lamp should break (it will make a loud bang when it does), ventilate the room well, and make sure not to breathe the gas that comes out of the projector vents, or get it in your eyes or mouth.
- Before replacing the lamp, turn the projector off and unplug the power cord, then wait at least 45 minutes for the lamp to cool sufficiently. Handling the lamp while hot can cause burns, as well as damaging the lamp.

- Never unscrew except the appointed (marked by an arrow) screws.
- Do not open the lamp cover while the projector is suspended from a ceiling. This is dangerous, since if the lamp's bulb has broken, the shards will fall out when the cover is opened. In addition, working in high places is dangerous, so ask your local dealer to have the lamp replaced even if the bulb is not broken.
- Do not use the projector with the lamp cover removed. At the lamp replacing, make sure that the screws are screwed in firmly. Loose screws could result in damage or injury.

- Use only the lamp of the specified type.
- If the lamp breaks soon after the first time it is used, it is possible that there are electrical problems elsewhere besides the lamp. If this happens, contact your local dealer or a service representative.
- Handle with care: jolting or scratching could cause the lamp bulb to burst during use.
- Using the lamp for long periods of time, could cause it dark, not to light up or to burst. When the pictures appear dark, or when the color tone is poor, please replace the lamp as soon as possible. Do not use old (used) lamps; this is a cause of breakage.
Air filter
Please check and clean the air filter periodically. If the air filter becomes clogged by dust or the like, internal temperatures rise, which could cause a fire, a burn or malfunction to the projector. When the indicators or a message prompts you to clean the air filter, comply with it as soon as possible. Note that the projector may shut down, when the projector heats too much.
Please replace the air filter when it is damaged or too soiled. Preparation of a new air filter is recommended. To prepare a new air filter, contact with ViewSonic and tell the air filter type number.
Cleaning the air filter
- Turn the projector off, and unplug the power cord. Allow the projector to sufficiently cool down.
- Use a vacuum cleaner on and around the filter cover.
- Hold the filter cover knobs while lifting it. The filter unit made up the filter cover and others will come off.
- Use a vacuum cleaner for the filter vent of the projector and the filter frame side of the filter unit.
If the air filter is damaged or too soiled, replace it according to the following procedure number 5 to 7. Otherwise, please jump to the procedure number 8.
- To remove the filter frame, hold the filter cover while holding and pulling the filter frame's knob by another hand.
- Replace the air filter with new one. It is recommended that the fluted surface of the air filter faces the filter cover.
- Put the filter frame back.
- Put the filter unit back into the projector.
The front side of the projector
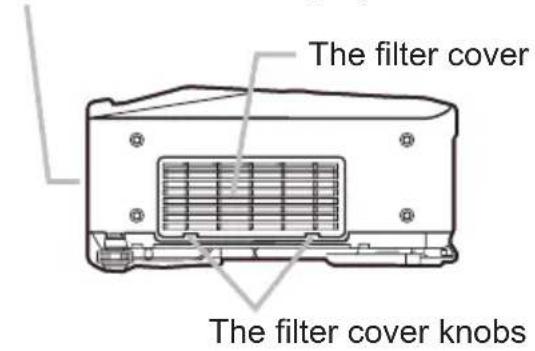
The filter unit
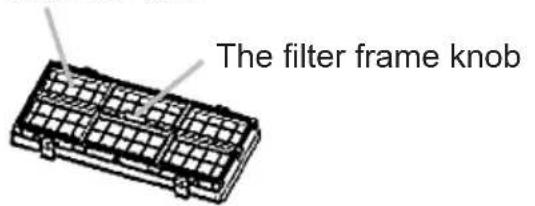
The filter frame
The air filter
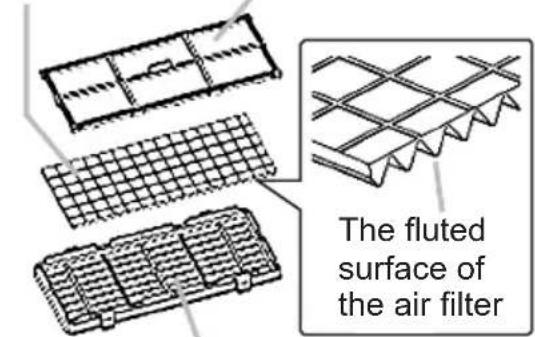
The filter cover
Air filter (continued)
- Turn the projector on and reset the filter time using the FILTER TIME item in the EASY MENU.
(1) Press the MENU button to display a menu.
(2) Point at the "FILTER TIME" using the ▼/▲ button, then press the ▶ button. A dialog will appear.
(3) Press the ▲ button to select "RESET" on the dialog. It performs resetting the filter time.
⚠ WARNING ▶ Before taking care of the air filter, make sure the power switch is off and the power cable is not plugged in, then allow the projector to cool sufficiently. Taking care of the air filter in a high temperature state of the projector could cause an electric shock, a burn or malfunction to the projector.
▶ Use only the air filter of the specified type. Do not use the projector without the air filter or the filter cover. It could result in a fire or malfunction to the projector.
▶ Clean the air filter periodically. If the air filter becomes clogged by dust or the like, internal temperatures rise and could cause a fire, a burn or malfunction to the projector.
NOTE • Please replace the air filter when it is damaged or too soiled.
- When you replace the projection lamp, please replace the air filter. An air filter of specified type will come together with a replacement lamp for this projector.
- Please reset the filter time only when you have cleaned or replaced the air filter, for a suitable indication about the air filter.
- The projector may display the message such as “CHECK THE AIR FLOW” or turn off the projector, to prevent the internal heat level rising.
Internal clock battery
Consumption of the battery makes the clock not to work correctly. When the clock is wrong or it has stopped, please replace the battery according to the following procedures.
- Turn the projector off, and unplug the power cord. Allow the projector to cool sufficiently.
- After making sure that the projector has cooled adequately, slowly turn over the projector, so that the bottom is facing.
2 Remove the battery cover. - Turn the battery cover in the direction indicated "OPEN" using such as coins. Then the battery cover will come up. While removing the battery cover, pick its knob.
4 Take the old battery out. - Press the metal claw of the battery holder. Then the battery will come up. Remove the battery.
5 Put a new battery in. - Replace battery with HITACHI MAXELL, Part No.CR2032 only. Use of another battery may present a risk of fire or explosion. Insert a new battery in the battery holder according to its minus terminal ⊖ as indicated in the battery holder, so that the side marked by + is facing. And push the battery into the battery holder fully to fix.
- Close the battery cover.
Replace the battery cover in place, then turn it in the direction
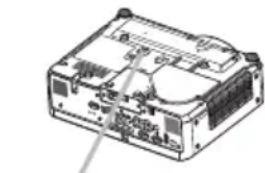
natural_image
Technical line drawing of a mechanical device with no visible text or symbolsBattery Cover
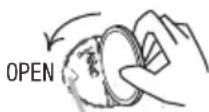
Knob
Metal claw


“+” marking
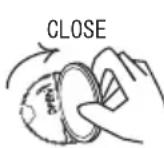
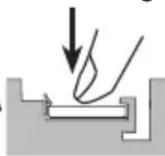
⚠ WARNING ▶ Always handle the batteries with care and use them only as directed. Battery may explode if mistreated. Do not recharge, disassemble or dispose of in fire.
And also improper use may result in cracking or leakage, which could result in fire, injury and/or pollution of the surrounding environment.
- Be sure to use only the batteries specified.
- Make sure the plus and minus terminals are correctly aligned when loading a battery.
If the battery is placed in the battery holder upside-down, it may be hard to remove. - Keep a battery away from children and pets. If swallowed consult a physician immediately for emergency treatment.
- Do not short circuit or solder a battery.
- Do not allow a battery in a fire or water. Keep batteries in a dark, cool and dry place.
- If you observe battery leakage, wipe out the leakage and then replace a battery. If the leakage adheres to your body or clothes, rinse well with water immediately.
- Obey the local laws on disposing the battery.
NOTE • If the battery is placed in the battery holder upside-down, follow the procedure below to remove and reload it properly.
- Remove the battery cover as described in steps 1 through 3 above.
- Turn the projector over again, so that the top of the projector is facing up.
- While lifting the side of the projector closest to the lens, press the metal claw of the battery holder. The battery will fall out of the holder, so be careful not to lose it.
- Turn the projector over once more, so that the bottom faces up, and reload the battery correctly.
- The internal clock's time will be reset when the battery is removed.
Please reconfigure the time via the menu or a web browser after replacing the battery.
Other care
Inside of the projector
In order to ensure the safe use of your projector, please have it cleaned and inspected by ViewSonic about once every year.
Caring for the lens
If the lens is flawed, soiled or fogged, it could cause deterioration of display quality. Please take care of the lens, being cautious of handling.
- Turn the projector off, and unplug the power cord. Allow the projector to cool sufficiently.
- After making sure that the projector is cool adequately, lightly wipe the lens with a commercially available lens-cleaning wipe. Do not touch the lens directly with your hand.
Caring for the cabinet and remote control
Incorrect care could have adverse influence such as discoloration, peeling paint, etc.
- Turn the projector off, and unplug the power cord. Allow the projector to cool sufficiently.
- After making sure that the projector is cool adequately, lightly wipe with gauze or a soft cloth.
If the projector is extremely dirty, dip soft cloth in water or a neutral cleaner diluted in water, and wipe lightly after wringing well. Then, wipe lightly with a soft, dry cloth.
⚠ WARNING ▶ Before caring, make sure the power switch is off and the power cable is not plugged in, and then allow the projector to cool sufficiently. The care in a high temperature state of the projector could cause a burn and/or malfunction to the projector.
▶ Never try to care for the inside of the projector personally. Doing is so dangerous.
▶ Avoid wetting the projector or inserting liquids in the projector. It could result in a fire, an electric shock, and/or malfunction to the projector.
- Do not put anything containing water, cleaners or chemicals near the projector.
- Do not use aerosols or sprays.
⚠️ CAUTION ▶ Please take right care of the projector according to the following. Incorrect care could cause not only an injury but adverse influence such as discoloration, peeling paint, etc.
▶ Do not use cleaners or chemicals other than those specified in this manual.
▶ Do not polish or wipe with hard objects.
Troubleshooting
Related messages
When the unit's power is on, messages such as those shown below may be displayed. When any such message is displayed on the screen, please follow the instructions described below. If the same message is displayed after the remedy, or if a message other than the following appears, please contact ViewSonic or service company.
Although these messages will be automatically disappeared around several minutes, it will be reappeared every time the power is turned on.
| Message Description | |
 | There is no input signal.Please confirm the signal input connection, and the status of the signal source. |
 | The horizontal or vertical frequency of the input signal is not within the specified range.Please confirm the specs for your projector or the signal source specs. |
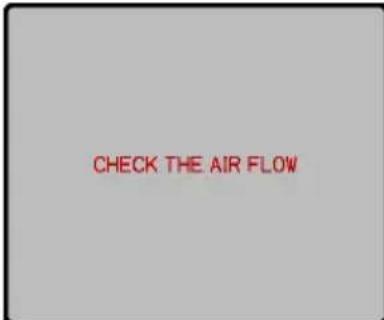 | The internal temperature is rising.Please turn the power off, and allow the projector to cool down at least 20 minutes. After having confirmed the following items, please turn the power ON again.Is there blockage of the air passage aperture?Is the air filter dirty?Does the peripheral temperature exceed 35°C?If the same indication is displayed after the remedy, please set FAN SPEED of the SERVICE item in the OPTION menu to HIGH. |
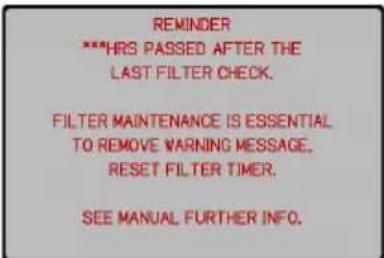 | A note of precaution when cleaning the air filter.Please immediately turn the power off, and clean or change the air filter referring to the “Air filter” section of this manual. After you have cleaned or changed the air filter, please be sure to reset the filter timer. |
Regarding the indicator lamps
Lighting and flashing of the POWER indicator, the LAMP indicator, and the TEMP indicator have the meanings as described in the table below. Please follow the instructions within the table. If the same indication is displayed after the remedy, or if an indication other than the following is displayed, please contact ViewSonic or service company.
| POWER indicator | LAMP indicator | TEMP indicator | Description |
| Lighting In Orange | Turned off | Turned off | The projector is in a standby state.Please refer to the section “Power On/Off”. |
| Blinking In Green | Turned off | Turned off | The projector is warming up.Please wait. |
| Lighting In Green | Turned off | Turned off | The projector is in an on state. Ordinary operations may be performed. |
| Blinking In Orange | Turned off | Turned off | The projector is cooling down.Please wait. |
| Blinking In Red | (discretionary) | (discretionary) | The projector is cooling down. A certain error has been detected.Please wait until the POWER indicator finishes blinking, and then perform the proper measure using the item descriptions below. |
| Blinking In Red or Lighting In Red | Lighting In Red | Turned off | The lamp does not light, and there is a possibility that interior portion has become heated.Please turn the power off, and allow the projector to cool down at least 20 minutes. After the projector has sufficiently cooled down, please make confirmation of the following items, and then turn the power on again.Is there blockage of the air passage aperture?Is the air filter dirty?Does the peripheral temperature exceed 35°C?If the same indication is displayed after the remedy, please change the lamp referring to the section “Lamp”. |
| Blinking In Red or Lighting In Red | Blinking In Red | Turned off | The lamp cover has not been properly fixed.Please turn the power off, and allow the projector to cool down at least 45 minutes. After the projector has sufficiently cooled down, please make confirmation of the attachment state of the lamp cover. After performing any needed maintenance, turn the power on again. If the same indication is displayed after the remedy, please contact ViewSonic or service company. |
| Blinking In Red or Lighting In Red | Turned off | Blinking In Red | The cooling fan is not operating.Please turn the power off, and allow the projector to cool down at least 20 minutes. After the projector has sufficiently cooled down, please make confirmation that no foreign matter has become caught in the fan, etc., and then turn the power on again.If the same indication is displayed after the remedy, please contact ViewSonic or service company. |
| Blinking In Red or Lighting In Red | Turned off | Lighting In Red | There is a possibility that the interior portion has become heated.Please turn the power off, and allow the projector to cool down at least 20 minutes. After the projector has sufficiently cooled down, please make confirmation of the following items, and then turn the power on again.Is there blockage of the air passage aperture?Is the air filter dirty?Does the peripheral temperature exceed 35°C?If the same indication is displayed after the remedy, please set FAN SPEED of the SERVICE item in the OPTION menu to HIGH. |
| Lighting In Green | Simultaneous blinking in Red | It is time to clean the air filter.Please immediately turn the power off, and clean or change the air filter referring to the section “Air Filter”. After cleaning or changing the air filter, please be sure to reset the filter timer. After the remedy, reset the power to ON. | |
| Lighting In Green | Alternative blinking in Red | There is a possibility that the interior portion has become overcooled.Please use the unit within the usage temperature parameters (5°C to 35°C). After the treatment, reset the power to ON. | |
| Blinking in Green for approx. 3 seconds | Turned off | Turned off | At least 1 “Power ON” schedule is saved to the projector.(Please refer to the User’s Manual-Network Guide: Schedule Settings for more information.) |
NOTE • When the interior portion has become overheated, for safety purposes, the power source is automatically turned off, and the indicator lamps may also be turned off. In such a case, press the “O” (OFF) side of the power switch, and wait at least 45 minutes. After the projector has sufficiently cooled down, please make confirmation of the attachment state of the lamp and lamp cover, and then turn the power on again.
Phenomena that may be easy to be mistaken for machine defects
⚠ WARNING ▶ Never use the projector if abnormal operations such as smoke, strange odor, excessive sound, damaged casing or elements or cables, penetration of liquids or foreign matter, etc. should occur. In such cases, immediately turn off the power switch and then disconnect the power plug from the power outlet. After making sure that the smoke or odor has stopped, contact ViewSonic or service company.
- Before requesting repair, please check in accordance with the following chart. This operation sometimes resolves your problem. If the situation cannot be corrected,
2 The projector's microprocessor may need to be reset. - Please push the Shutdown switch by using a pin or similar and the projector will be turned off immediately. Before turning it again, wait at least 10 minutes to make the projector cool down enough.
- Some setting may be wrong. Please use the FACTORY RESET function of the SERVICE item in the OPTION menu to reset all settings to factory default.
Then, if the problem is not removed after the remedy, please contact ViewSonic or service company.
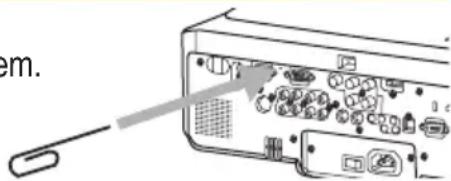
| Phenomenon Cases not involving a machine defect | Reference page | |
| Power does not come on. | The electrical power cord is not plugged in.Correctly connect the power cord. | 13 |
| The power switch is not set to the on position.Set the power switch to [ | ] (On). | 17 | |
| The main power source has been interrupted during operation such as by a power outage (blackout), etc.Please turn the power off, and allow the projector to cool down at least 2 minutes, then turn the power on again. | 17 | |
| Either there is no lamp and/or lamp cover, or either of these has not been properly fixed.Please turn the power off, and allow the projector to cool down at least 45 minutes. After the projector has sufficiently cooled down, please make confirmation of the attachment state of the lamp and lamp cover, and then turn the power on again. | 103 | |
| Neither sounds nor pictures are outputted. | The signal cables are not correctly connected.Correctly connect the connection cables. | 11 |
| Signal source does not correctly work.Correctly set up the signal source device by referring to the manual of the source device. | - | |
| The input changeover settings are mismatched.Select the input signal, and correct the settings. | 18, 19 | |
| The BLANK function for pictures and the MUTE function for sounds are working.AV Mute may be active. Refer to the item “Sound does not come out” and “No pictures are displayed” on the next page to turn off the MUTE and BLANK functions. | 18, 23 | |
| Sound does not come out. | The signal cables are not correctly connected.Correctly connect the audio cables. | 11 |
| The MUTE function is working.Restore the sound pressing the MUTE or VOLUME button on the remote control. | 18 | |
| The volume is adjusted to an extremely low level.Adjust the volume to a higher level using the menu function or the remote control. | 18 | |
| The AUDIO setting is not correct.Correctly set the items in the AUDIO menu. | 38 | |
| The audio on your HDMI equipment is not set to Linear PCM.The HDMI input on this projector supports Linear PCM audio only. Check the audio setting on your HDMI equipment. | 12 | |
| The audio on the HDMI input is muted.Change the audio setting in the AUDIO menu. | 38 | |
| The digital audio in HDMI signal does not work well.Use the analogue audio, connecting either an RCA audio cable or stereo mini cable. | 11 | |
| No pictures are displayed. | The lens cover is attached.Remove the lens cover. | 4, 17 |
| The signal cables are not correctly connected.Correctly connect the connection cables. | 11 | |
| The brightness is adjusted to an extremely low level.Adjust BRIGHTNESS to a higher level using the menu function or the remote control. | 26, 27 | |
| The computer cannot detect the projector as a plug and play monitor.Make sure that the computer can detect a plug and play monitor using another plug and play monitor. | 12 | |
| The BLANK screen is displayed.Press the BLANK button on the remote control. | 23 | |
| No pictures or disturbed pictures are displayed on HDMI input. | The HDMI cable is not correctly connected.Correctly connect the HDMI cable. | 11 |
| Your HDMI equipment is not compatible with the projectorThis projector can be connected with another equipment that has HDMI or DVI connector, but with some equipment the projector may not work properly. | 12 | |
| Your HDMI equipment and the projector are not harmonized.Turn off the both equipment, and turn on them again | - | |
| The signal format on the HDMI is not supported.Check the video setting on your HDMI equipment. | 12 | |
| Video screen display freezes. | The FREEZE function is working.Press the FREEZE button to restore the screen to normal. | 22 |
| Colors have a faded-out appearance, or Color tone is poor. | Color settings are not correctly adjusted.Perform picture adjustments by changing the COLOR TEMP, COLOR, TINT and/or COLOR SPACE settings, using the menu functions. | 26, 28, 32 |
| COLOR SPACE setting is not suitable.Change the COLOR SPACE setting to AUTO, RGB, SMPTE240, REC709 or REC601. | 32 | |
| Pictures appear dark. | The brightness and/or contrast are adjusted to an extremely low level.Adjust BRIGHTNESS and/or CONTRAST settings to a higher level using the menu function. | 26, 27 |
| The WHISPER function is working.Select NORMAL for the WHISPER item in the SETUP menu. | 26, 37 | |
| The lamp is approaching the end of its product lifetime.Replace the lamp. | 104, 105 | |
| Pictures appear blurry. | Either the focus and/or horizontal phase settings are not properly adjusted.Adjust the focus using the focus ring, and/or H PHASE using the menu function. | 20, 31 |
| The lens is dirty or misty.Clean the lens referring to the section “Caring for the lens”. | 108 | |
| Pictures are trembling. | The exhaust ventilation holes at front is blocked by some objects.Remove any objects from front side of the projector. | 5 |
NOTE • Although bright spots or dark spots may appear on the screen, this is a unique characteristic of liquid crystal displays, and it does not constitute or imply a machine defect.
Warranty and after-service
If a problem occurs with the equipment, first refer to the “Troubleshooting” and run through the suggested checks. If this does not resolve the problem, please contact ViewSonic or service company. They will tell you what warranty condition is applied.
Specifications
| Item Specifications | ||
| Product name Liquid crystal | stal projector | |
| Liquid Crystal Panel | Panel size 2.0cm (0.79 type) | |
| Drive system TFT active matrix | ||
| Pixels 786,432 | pixels (1024 horizontal x 768 vertical) | |
| Lens Zoom lens F=1.7 ~ 1.9 f=24 ~ 29 mm (approx.) | ||
| Lamp 275W UHB | ||
| Audio output 4W x 4 | ||
| Power supply AC 100-1 | 20V/5.0A, AC220-240V/2.1A | |
| Power consumption 460W | ||
| Temperature range 5 ~ 35°C (Operating) | ||
| Size | 418 (W) x 139 (H) x 319 (D) mm(Not including protruding parts)* Please refer to the following figure. | |
| Weight (mass) | 7.1kg (approx.) | |
| Ports | RGB1 ...... D-sub 15 pin mini x 1RGB2 G/Y, B/CB/PB, R/CR/PR, H, V ......BNC x 5S-VIDEO ......mini DIN 4 pin x 1VIDEO ......RCA x 1Y, CB/PB, CR/PR (component video) ......RCA x 3HDMI ......HDMI x1AUDIO IN1 ......Stereo mini x 1AUDIO IN2 ......Stereo mini x 1AUDIO IN3 R/L ......RCA x 1AUDIO IN4 R/L ......RCA x 1RGB OUT ......D-sub 15 pin mini x 1AUDIO OUT ......Stereo mini x 1USB ......USB (B) x 1REMOTE CONTROL ......Stereo mini x1CONTROL ......D-sub 9 pin x 1LAN ......RJ45 x 1 | |
| Optional parts | Lamp: RLC-038* For more information, please consult ViewSonic. | |
NOTE • These specifications are subject to change without notice.
Specifications (continued)
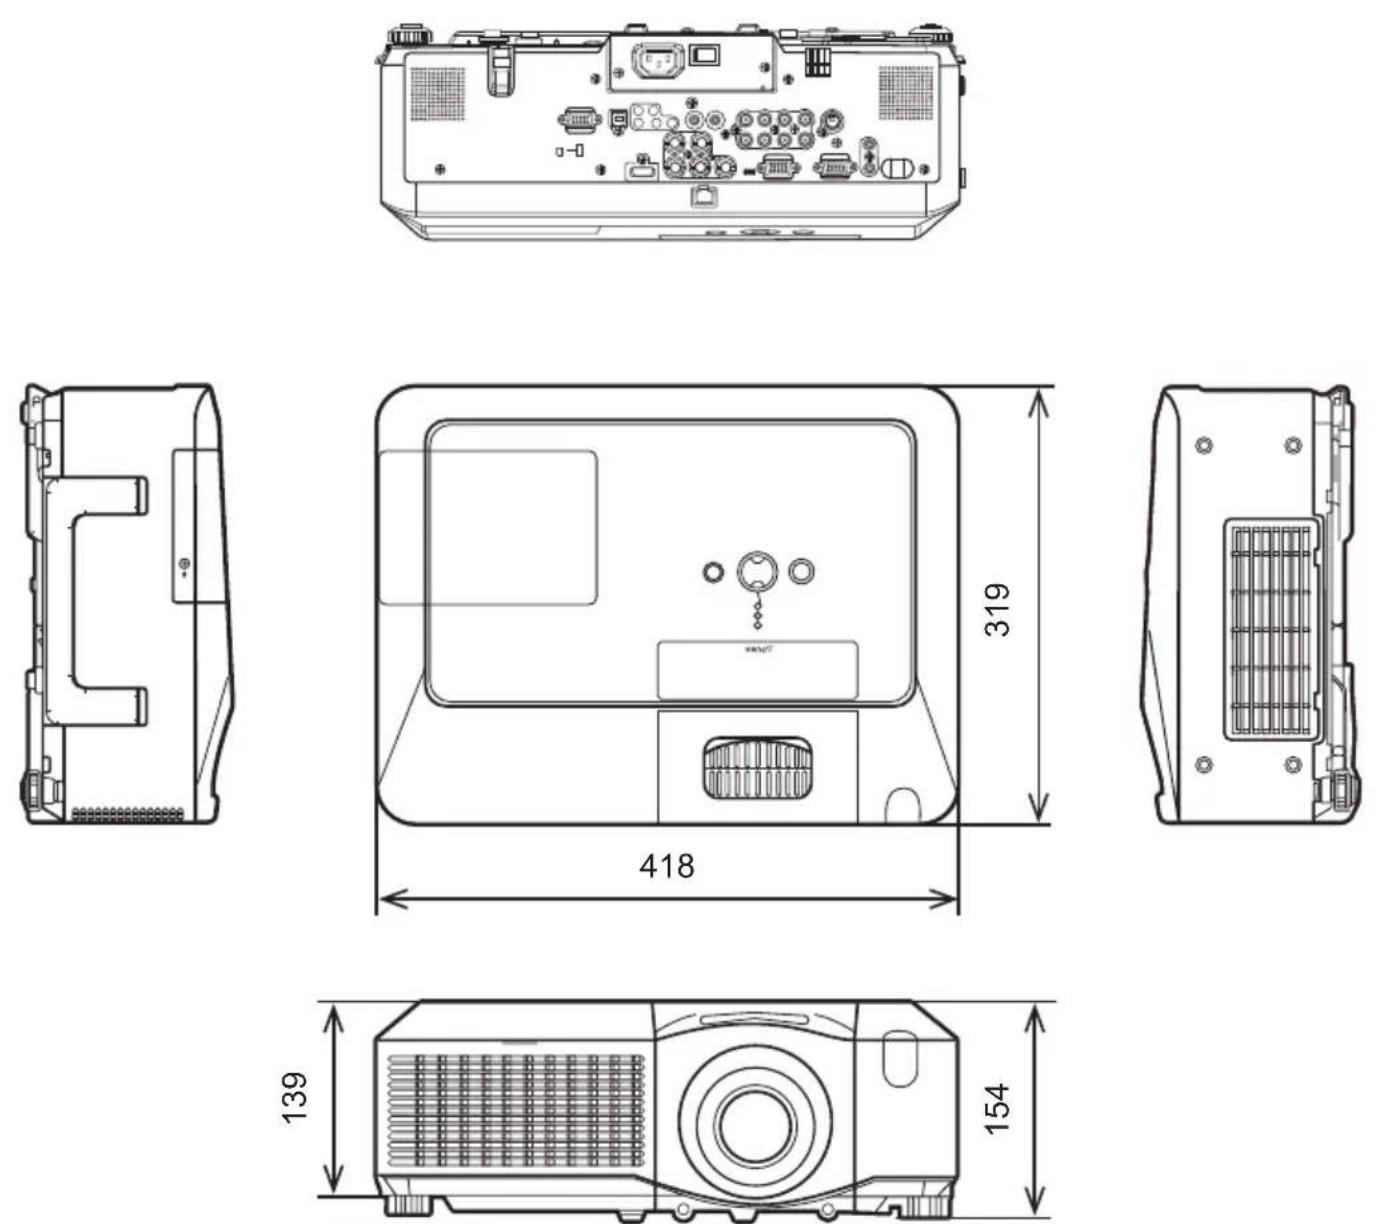
[unit: mm]
Customer Support
For technical support or product service, see the table below or contact your reseller.
Note: You will need the product serial number.
| Country/Region Web Site | T=TelephoneF=Fax | ||
| Australia/New Zealand www.viewsonic.com.au | AUS=1800 880 818NZ=0800 008 822 | service@au.viewsonic.com | |
| Canada www.viewsonic.com | T=1-866-463-4775F=1-909-468-5814 | service.ca@viewsonic.com | |
| Europe/Middle East/Baltic countries/North Africa | www.viewsoniceurope.com Contact: your reseller | ||
| Hong Kong www.hk.viewsonic.com T=852 3102 2900 service@hk.viewsonic.com | |||
| India www.in.viewsonic.com T=1800 11 9999 service@in.viewsonic.com | |||
| Korea www.kr.viewsonic.com T=080 265 9080 service@kr.viewsonic.com | |||
| Latin America (Argentina) www.viewsonic.com/la/ | T=0800-666-0098F=1-909-444-5655 | soporte@viewsonic.com | |
| Latin America (Brazil) www.viewsonic.com/la/ | T=0800-891-1829F=1-909-444-5655 | soporte@viewsonic.com | |
| Latin America (Chile) www.viewsonic.com/la/ | T=800-440303F=1-909-444-5655 | soporte@viewsonic.com | |
| Latin America (Columbia) | www.viewsonic.com/la/ | T=01800-9-156588F=1-909-444-5655 | soporte@viewsonic.com |
| Latin America (Mexico) | www.viewsonic.com/la/ | T=001-866-823-2004F=1-909-444-5655 | soporte@viewsonic.com |
| Renta y Datos, 29 SUR 721, COL. LA PAZ, 72160 PUEBLA, PUE. Tel: 01.222.891.55.77 CON 10 LINEASElectroser, Av Reforma No. 403Gx39 y 41, 97000 Merida, Yucatan. Tel: 01.999.925.19.16Other places please refer to http://www.viewsonic.com/la/soporte/index.htm#Mexico | |||
| Latin America (Peru) | www.viewsonic.com/la/ | T=0800-53311F=1-909-444-5655 | soporte@viewsonic.com |
| Macau | www.hk.viewsonic.com T=853 700 303 service@hk.viewsonic.com | ||
| Puerto Rico & Virgin Islands | www.viewsonic.com | T=1-800-688-6688 (English)T=1-866-379-1304 (Spanish)F=1-909-468-1202 | service.us@viewsonic.comsoporte@viewsonic.com |
| Singapore/Malaysia/Thailand | www.ap.viewsonic.com | T=65 6461 6044 | service@sg.viewsonic.com |
| South Africa | www.viewsoniceurope.com www.viewsoniceurope.com/uk/Support/Calldesk.htm | ||
| United Kingdom | www.viewsoniceurope.com/uk/ | www.viewsoniceurope.com/uk/Support/Calldesk.htm | |
| United States | www.viewsonic.com | T=1-800-688-6688F=1-909-468-1202 | service.us@viewsonic.com |
Limited Warranty
VIEWSONIC® PROJECTOR
What the warranty covers:
ViewSonic warrants its products to be free from defects in material and workmanship, under normal use, during the warranty period. If a product proves to be defective in material or workmanship during the warranty period, ViewSonic will, at its sole option, repair or replace the product with a like product. Replacement product or parts may include remanufactured or refurbished parts or components.
How long the warranty is effective:
North and South America: 3 years for all parts excluding the lamp, 3 years for labor, 1 year for the original lamp from the date of the first consumer purchase.
Europe: 3 years for all parts excluding the lamp, 3 years for labor, 1 year for the original lamp from the date of the first consumer purchase.
Other regions or countries: Please check with your local dealer or local ViewSonic office for the warranty information.
Lamp warranty subject to terms and conditions, verification and approval. Applies to manufacturer's installed lamp only.
All accessory lamps purchased separately are warranted for 90 days.
Who the warranty protects:
This warranty is valid only for the first consumer purchaser.
What the warranty does not cover:
- Any product on which the serial number has been defaced, modified or removed.
- Damage, deterioration or malfunction resulting from:
a. Accident, misuse, neglect, fire, water, lightning, or other acts of nature, unauthorized product modification, or failure to follow instructions supplied with the product.
b. Repair or attempted repair by anyone not authorized by ViewSonic.
c. Any damage of the product due to shipment.
d. Removal or installation of the product.
e. Causes external to the product, such as electric power fluctuations or failure.
f. Use of supplies or parts not meeting ViewSonic's specifications.
g. Normal wear and tear.
h. Any other cause which does not relate to a product defect.
-
Any product exhibiting a condition commonly known as “image burn-in” which results when a static image is displayed on the product for an extended period of time.
-
Removal, installation, and set-up service charges.
How to get service:
- For information about receiving service under warranty, contact ViewSonic Customer Support (please refer to “Customer Support” page). You will need to provide your product’s serial number.
- To obtain warranted service, you will be required to provide (a) the original dated sales slip, (b) your name, (c) your address, (d) a description of the problem, and (e) the serial number of the product.
- Take or ship the product freight prepaid in the original container to an authorized ViewSonic service center or ViewSonic.
- For additional information or the name of the nearest ViewSonic service center, contact ViewSonic.
Limitation of implied warranties:
There are no warranties, express or implied, which extend beyond the description contained herein including the implied warranty of merchantability and fitness for a particular purpose.
Exclusion of damages:
ViewSonic's liability is limited to the cost of repair or replacement of the product. ViewSonic shall not be liable for:
- Damage to other property caused by any defects in the product, damages based upon inconvenience, loss of use of the product, loss of time, loss of profits, loss of business opportunity, loss of goodwill, interference with business relationships, or other commercial loss, even if advised of the possibility of such damages.
- Any other damages, whether incidental, consequential or otherwise.
- Any claim against the customer by any other party.
Effect of state law:
This warranty gives you specific legal rights, and you may also have other rights which vary from state to state. Some states do not allow limitations on implied warranties and/or do not allow the exclusion of incidental or consequential damages, so the above limitations and exclusions may not apply to you.
Sales outside the U.S.A. and Canada:
For warranty information and service on ViewSonic products sold outside of the U.S.A. and Canada, contact ViewSonic or your local ViewSonic dealer.
The warranty period for this product in mainland China (Hong Kong, Macao and Taiwan Excluded) is subject to the terms and conditions of the Maintenance Guarantee Card.
For users in Europe and Russia, full details of warranty provided can be found in www.viewsoniceurope.com under Support/Warranty Information.
Mexico Limited Warranty
VIEWSONIC® PROJECTOR
What the warranty covers:
ViewSonic warrants its products to be free from defects in material and workmanship, under normal use, during the warranty period. If a product proves to be defective in material or workmanship during the warranty period, ViewSonic will, at its sole option, repair or replace the product with a like product. Replacement product or parts may include remanufactured or refurbished parts or components & accessories.
How long the warranty is effective:
3 years for all parts excluding the lamp, 3 years for labor, 1 year for the original lamp from the date of the first consumer purchase.
Lamp warranty subject to terms and conditions, verification and approval. Applies to manufacturer's installed lamp only. All accessory lamps purchased separately are warranted for 90 days.
Who the warranty protects:
This warranty is valid only for the first consumer purchaser.
What the warranty does not cover:
-
Any product on which the serial number has been defaced, modified or removed.
-
Damage, deterioration or malfunction resulting from:
a. Accident, misuse, neglect, fire, water, lightning, or other acts of nature, unauthorized product modification, unauthorized attempted repair, or failure to follow instructions supplied with the product.
b. Any damage of the product due to shipment.
c. Causes external to the product, such as electrical power fluctuations or failure.
d. Use of supplies or parts not meeting ViewSonic's specifications.
e. Normal wear and tear.
f. Any other cause which does not relate to a product defect.
-
Any product exhibiting a condition commonly known as “image burn-in” which results when a static image is displayed on the product for an extended period of time.
-
Removal, installation, insurance, and set-up service charges.
How to get service:
For information about receiving service under warranty, contact ViewSonic Customer Support (Please refer to the attached Customer Support page). You will need to provide your product's serial number, so please record the product information in the space provided below on your purchase for your future use. Please retain your receipt of proof of purchase to support your warranty claim.
For Your Records
Product Name: ____ Model Number: ____
Document Number: ____ Serial Number: ____
Purchase Date: ____ Extended Warranty Purchase? ____(Y/N)
If so, what date does warranty expire?
-
To obtain warranty service, you will be required to provide (a) the original dated sales slip, (b) your name, (c) your address, (d) a description of the problem, and (e) the serial number of the product.
-
Take or ship the product in the original container packaging to an authorized ViewSonic service center.
-
Round trip transportation costs for in-warranty products will be paid by ViewSonic.
Limitation of implied warranties:
There are no warranties, express or implied, which extend beyond the description contained herein including the implied warranty of merchantability and fitness for a particular purpose.
Exclusion of damages:
ViewSonic's liability is limited to the cost of repair or replacement of the product. ViewSonic shall not be liable for:
-
Damage to other property caused by any defects in the product, damages based upon inconvenience, loss of use of the product, loss of time, loss of profits, loss of business opportunity, loss of goodwill, interference with business relationships, or other commercial loss, even if advised of the possibility of such damages.
-
Any other damages, whether incidental, consequential or otherwise.
-
Any claim against the customer by any other party.
-
Repair or attempted repair by anyone not authorized by ViewSonic.
| Contact Information for Sales & Authorized Service (Centro Autorizado de Servicio) within Mexico: |
| Name, address, of manufacturer and importers:México, Av. de la Palma #8 Piso 2 Despacho 203, Corporativo Interpalmas,Col. San Fernando Huixquilucan, Estado de MéxicoTel: (55) 3605-1099http://www.viewsonic.com/la/soporte/index.htm |
| NÚMERO GRATIS DE ASISTENCIA TÉCNICA PARA TODO MÉXICO: 001.866.823.2004 | |
| Hermosillo:Distribuciones y Servicios Computacionales SA de CV.Calle Juarez 284 local 2Col. Bugambilas C.P: 83140Tel: 01-66-22-14-9005E-Mail: disc2@hmo.megared.net.mx | Villahermosa:Compumantenimietnos Garantizados, S.A. de C.V.AV. GREGORIO MENDEZ #1504COL, FLORIDA C.P. 86040Tel: 01 (993) 3 52 00 47 / 3522074 / 3 52 20 09E-Mail: compumantenimientos@prodigy.net.mx |
| Puebla, Pue. (Matriz):RENTA Y DATOS, S.A. DE C.V. Domicilio:29 SUR 721 COL. LA PAZ72160 PUEBLA, PUE.Tel: 01(52).222.891.55.77 CON 10 LINEASE-Mail: datos@puebla.megared.net.mx | Veracruz, Ver.:CONEXION Y DESARROLLO, S.A DE C.V. Av.Americas # 419ENTRE PINZÓN Y ALVARADOFracc. Reforma C.P. 91919Tel: 01-22-91-00-31-67E-Mail: gacosta@qplus.com.mx |
| ChihuahuaSoluciones Globales en ComputaciónC. Magisterio # 3321 Col. MagisterialChihuahua, Chih.Tel: 4136954E-Mail: Cefeo@soluglobales.com | CuernavacaCompusupport de Cuernavaca SA de CVFrancisco Leyva # 178 Col. Miguel HidalgoC.P. 62040, Cuernavaca MorelosTel: 01 777 3180579 / 01 777 3124014E-Mail: aquevedo@compusupportcva.com |
| Distrito Federal:QPLUS, S.A. de C.V.Av. Coyoacán 931Col. Del Valle 03100, México, D.F.Tel: 01(52)55-50-00-27-35E-Mail : gacosta@qplus.com.mx | Guadalajara, Jal.:SERVICRECE, S.A. de C.V.Av. Niños Héroes # 2281Col. Arcos Sur, Sector Juárez44170, Guadalajara, JaliscoTel: 01(52)33-36-15-15-43E-Mail: mmiranda@servicrece.com |
| Guerrero AcapulcoGS Computación (Grupo Sesicomp)Progreso #6-A, Colo Centro39300 Acapulco, GuerreroTel: 744-48-32627 | Monterrey:Global Product ServicesMar Caribe # 1987, Esquina con Golfo PérsicoFracc. Bernardo Reyes, CP 64280Monterrey N.L. MéxicoTel: 8129-5103E-Mail: aydecem@gps1.com.mx |
| MERIDA:ELECTROSERAv Reforma No. 403Gx39 y 41Mérida, Yucatán, México CP97000Tel: (52) 999-925-1916E-Mail: rrrb@sureste.com | Oaxaca, Oax.:CENTRO DE DISTRIBUCION YSERVICIO, S.A. de C.V.Murguía # 708 P.A., Col. Centro, 68000, OaxacaTel: 01(52)95-15-15-22-22Fax: 01(52)95-15-13-67-00E-Mail. gpotai2001@hotmail.com |
| Tijuana:STDAv Ferrocarril Sonora #3780 L-CCol 20 de NoviembreTijuana, Mexico | FOR USA SUPPORT:ViewSonic Corporation381 Brca Canyon Road, Walnut, CA. 91789 USATel: 800-688-6688 (English); 866-323-8056 (Spanish);Fax: 1-800-685-7276E-Mail: http://www.viewsonic.com |
- For Canada
- CE Conformity for European Countries
- Following information is only for EU-member states:
- Important Safety Instructions
- Declaration of RoHS Compliance
- Copyright Information
- Product Registration
- For Your Records
- Projector
- PJ1173
- User's Manual (detailed) – Operating Guide
- About this manual
- WARNING
- CAUTION
- Trademark acknowledgment
- Contents
- About this manual.....1
- Contents 2
- Projector features.....4
- Preparations .....4
- Part names .....5
- Setting up 8
- Remote control....14
- Power on/off .....17
- Operating 18
- EASY MENU....25
- (EASY MENU continued .....26)
- PICTURE Menu .....27
- IMAGE Menu 28
- INPUT Menu 32
- SETUP Menu 36
- AUDIO Menu ....38
- SCREEN Menu....39
- OPTION Menu 43
- NETWORK Menu ....56
- Main functions .....61
- Equipment connection and network setting ....62
- Management with Web browser software ....68
- Maintenance....103
- Troubleshooting .....109
- Warranty and after-service. . 115
- Specifications .....115
- Projector features
- Preparations
- Contents of package
- Fastening the lens cover
- Part names
- Control panel
- Rear panel
- Remote control
- Setting up
- Arrangement
- Adjusting the projector's elevator
- Using the security bar and slot
- Connecting your devices
- Connecting your devices (continued)
- About Plug-and-Play capability
- NOTE for HDMI
- Connecting power supply
- Laser pointer
- Putting batteries
- About the remote control signal
- The front and top sensors:
- The back sensor:
- Changing the frequency of remote control signal
- Using as a wired remote control
- Using as a simple PC mouse & keyboard
- Mouse left button
- Mouse right button
- Lever switch
- Cursor button ◀
- Cursor button ▶
- PAGE UP button
- PAGE DOWN button
- Power on/off
- Turning on the power
- Turning off the power
- Operating
- Adjusting the volume
- Temporarily muting the sound
- Selecting an input signal
- Selecting an input signal (continued)
- Searching an input signal
- Selecting an aspect ratio
- Adjusting the zoom and focus
- Adjusting the lens shift
- Using the automatic adjustment feature
- Adjusting the position
- Correcting the keystone distortions
- Using the magnify feature
- Freezing the screen
- Temporarily blanking the screen
- Press the BLANK button on the remote control.
- Using the menu function
- In the EASY MENU
- In the Advanced MENU
- EASY MENU
- PICTURE Menu
- IMAGE Menu
- INPUT Menu
- INPUT Menu (continued)
- SETUP Menu
- SETUP Menu (continued)
- AUDIO Menu
- SCREEN Menu
- SCREEN Menu (continued)
- OPTION Menu
- OPTION Menu (continued)
- NETWORK Menu
- NETWORK Menu (continued)
- √ Web control
- √ e-SHOT (Still Image Transfer) Display
- Main functions
- Configuring and controlling via a web browser
- e-SHOT (Still image Transfer) Display
- Equipment connection and network setting
- Required equipment preparation
- Manual network connection setting
- Equipments connection
- Network settings
- Manual network connection setting (continued)
- [About IP address]
- ■ Setting manually
- For example
- NOTE • "0.0.0.0" cannot be set to the IP address.
- ■ Setting automatically
- "Internet Option" setting
- Check connection
- Management with Web browser software
- Configuring and Controlling the Projector via a Web Browser
- E-mail Alerts
- Projector Management using SNMP
- Event Scheduling
- Command Control via the Network
- NOTE • Internet Explorer 5.5 or later is required.
- Configuring and controlling the projector via a web browser (continued)
- Logon
- Logoff
- Mail Settings
- E-mail Alerts (continued)
- SNMP Settings
- Event Scheduling (continued)
- Schedule Settings
- Date/Time Settings
- e-SHOT (Still Image Transfer) Display (continued)
- Communication Port
- Command Control Settings
- Command Control via the Network (continued)
- Command Format
- - TCP #23
- - TCP #9715
- Send Data format
- Reply Data format
- Automatic Connection Break
- Authentication
- Maintenance
- Lamp
- Replacing the lamp
- In case of replacement by yourself,
- Lamp (continued)
- Lamp warning
- HIGH VOLTAGE
- HIGH TEMPERATURE HIGH PRESSURE
- Air filter
- Cleaning the air filter
- Air filter (continued)
- Internal clock battery
- Other care
- Inside of the projector
- Caring for the lens
- Caring for the cabinet and remote control
- Troubleshooting
- Related messages
- Regarding the indicator lamps
- Phenomena that may be easy to be mistaken for machine defects
- Warranty and after-service
- Specifications (continued)
- Customer Support
- Limited Warranty
- VIEWSONIC® PROJECTOR
- What the warranty covers:
- How long the warranty is effective:
- Who the warranty protects:
- What the warranty does not cover:
- How to get service:
- Limitation of implied warranties:
- Exclusion of damages:
- Effect of state law:
- Sales outside the U.S.A. and Canada:
- Mexico Limited Warranty
Brand : VIEWSONIC
Model : PJ1173
Category : Video projector