
SB3014 - Phone AT&T - Free user manual and instructions
Find the device manual for free SB3014 AT&T in PDF.


| Product Type | Conference phone with wireless microphones |
| Brand | AT&T |
| Model | SB3014 |
| Power Supply | AC adapter (wall plug) and rechargeable lithium-ion battery (model BT191665) |
| Main Functions | Hands-free calls, wireless communication between base and microphone, conferencing with multiple microphones |
| Maintenance and Cleaning | Clean with a soft, slightly damp cloth, no liquid or aerosol cleaners |
| Safety | Do not use near water, do not block ventilation openings, do not disassemble, unplug before cleaning, use only the provided battery |
| General Information | Possibility of interference with televisions, limited privacy (radio transmission), do not use during a storm |
| Spare Parts and Repairability | Contact AT&T customer service for spare parts and repairs |
Frequently Asked Questions - SB3014 AT&T
User questions about SB3014 AT&T
0 question about this device. Answer the ones you know or ask your own.
Ask a new question about this device
Download the instructions for your Phone in PDF format for free! Find your manual SB3014 - AT&T and take your electronic device back in hand. On this page are published all the documents necessary for the use of your device. SB3014 by AT&T.
USER MANUAL SB3014 AT&T
natural_image
Abstract spherical object with horizontal striped pattern (no text or symbols)at&t
User's manual
SB3014
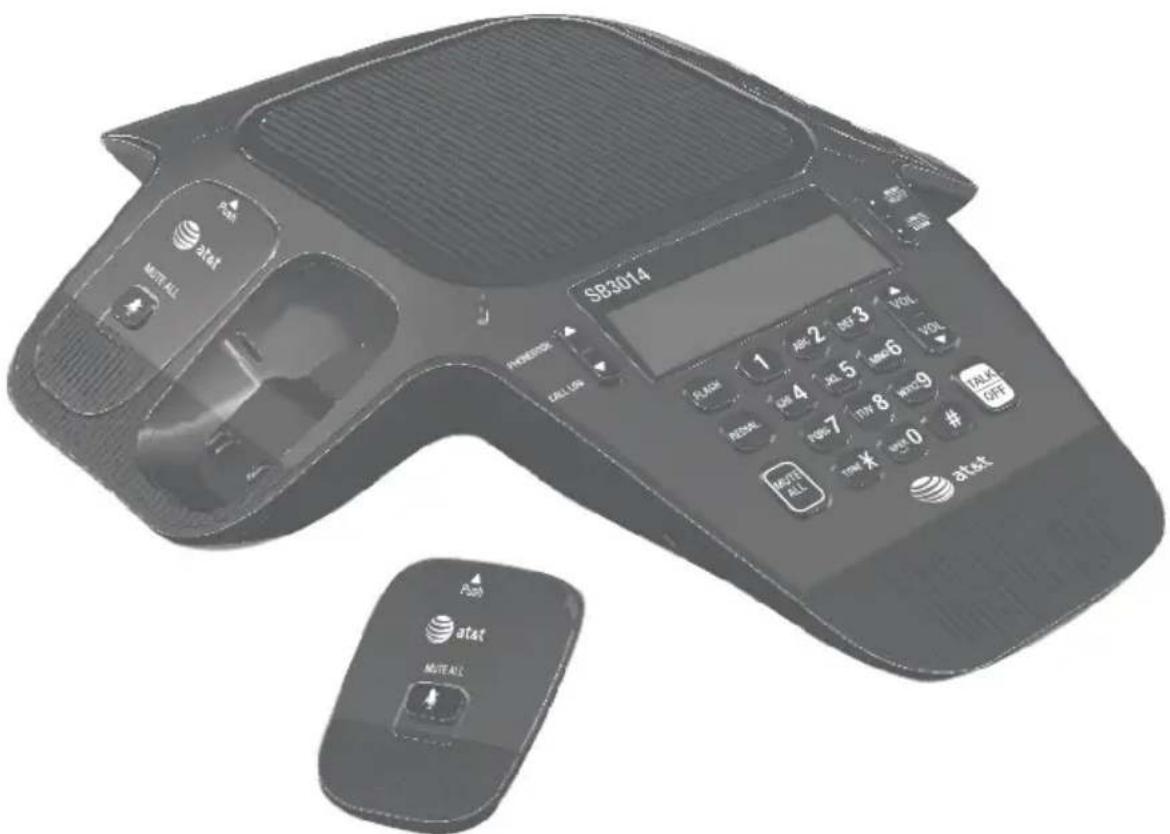
DECT 6.0 conference speakerphone with wireless mics
Congratulations
on your purchase of this AT&T product. Before using this AT&T product, please read the Important safety information section on pages 47-48 of this manual. Please thoroughly read this user's manual for all the feature operations and troubleshooting information necessary to install and operate your new AT&T product. You can also visit our website at
www.smbtelephones.att.com or call 1 (800) 222-3111.
In Canada, dial 1 (866) 288-4268.
This telephone meets the California Energy Commission regulations for energy consumption. Your telephone is set up to comply with the energy-conserving standards right out of the box. No further action is necessary.
Model number: SB3014
Type: DECT 6.0 Conference Speakerphone with Wireless Mics
Serial number: ____
Purchase date: ____
Place of purchase: ____
Both the model and serial numbers of your AT&T product can be found on the bottom of the base unit.
Save your sales receipt and original packaging in case it is necessary to return your telephone for warranty service.
User's manual
SB3014
DECT 6.0 conference
speakerphone with wireless mics
natural_image
Black office computer with keyboard, mouse, and control panel (no visible text or symbols)Table of contents
Getting started
Parts checklist ....1
Quick reference guide - base unit (front)....2
Quick reference guide - base unit (rear) 4
Quick reference guide - wireless mic ....5
Quick reference guide - status indicators 6
Status indicators on the base unit 6
Status indicator on the wireless mic 6
Installation 7
Base unit installation....8
Battery installation and charging .....9
Before use 10
Operation
Conference speakerphone operation 11
Making a call 11
On hook dialing (predialing) ..... 11
Answering a call 11
Ending a call 11
Temporary ringer silencing ..... 11
Last number redial 12
Clear the redial number 12
Three-way conference 12
Paging 13
Join a call in progress 13
Options while on calls 14
Volume control 14
Call waiting 14
Mute 14
Temporary tone dialing 14
Chain dialing 15
Settings
Conference speakerphone settings 16
Ringer volume 16
Ringer tone 17
Set date/time 17
LCD language 18
Rename base unit 18
Key tone 19
Dial mode 19
Area code 20
Loop gain 21
Reset 21
Phonebook
About phonebook 22
Capacity 22
Create phonebook entries 23
Create a new phonebook entry 23
Add a predialed telephone number to the phonebook ..... 24
Review the phonebook.... 25
Review phonebook entries ..... 25
Search by name 26
Dial, delete or edit phonebook entries 27
Display dial 27
Delete a phonebook entry ..... 27
Delete all phonebook entries ..... 27
Edit a phonebook entry 28
Speed dial 29
Assign a speed dial number...... 29
Reassign a speed dial number .... 29
Delete a speed dial number...... 30
Make a call using speed dial ..... 30
Call log
About caller ID 31
Information about caller ID with call waiting 31
About the call log 32
How the call log works 32
Missed (new) call indicator 32
Call log operation 33
Memory match 33
Review the call log 33
View dialing options 34
Dial a call log entry 34
Delete a call log entry 34
Delete all call log entries 34
Save a call log entry to the phonebook 35
Caller ID screen messages 36
Appendix
Registering wireless mics 37
Register a wireless mic to your base unit 37
Deregistering wireless mics 38
Deregister a wireless mic from your base unit 38
Base unit display screen messages 39
Troubleshooting 40
Maintenance.... 46
Important safety information ..... 47
Precautions of users of implanted cardiac pacemakers 49
About wireless mics 49
Operating range 49
For C-UL compliance 50
FCC Part 68 and ACTA.... 53
FCC Part 15 54
The RBRC ^® seal 54
California Energy Commission battery charging testing instructions 55
Limited warranty 56
Technical specifications 58
Index
Index 59
Getting started
Parts checklist
Your product package contains the following items. Save your sales receipt and original packaging in the event warranty service is necessary.
User's manual
Quick start guide
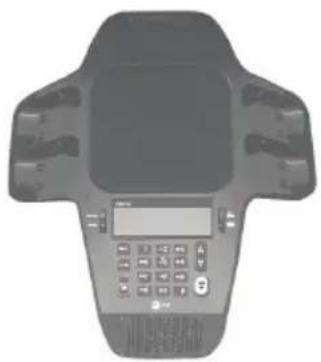
natural_image
Front view of a black electronic device with a central display and keypad (no visible text or symbols)Base unit
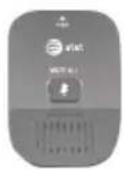
Wireless mic X4
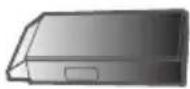
Battery X4
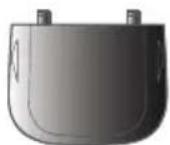
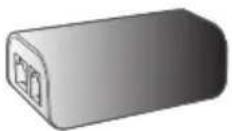
Power adapterBattery door X4
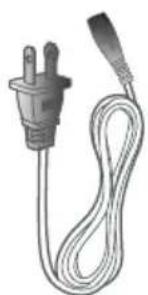
natural_image
Illustration of a black electrical outlet with two leads and a coiled cable (no text or symbols)AC power cord
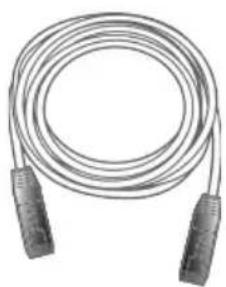
natural_image
Coiled cable with two connectors, no text or symbols visibleDC power cable
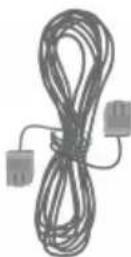
Telephone line cord
Getting started
Quick reference guide - base unit (front)
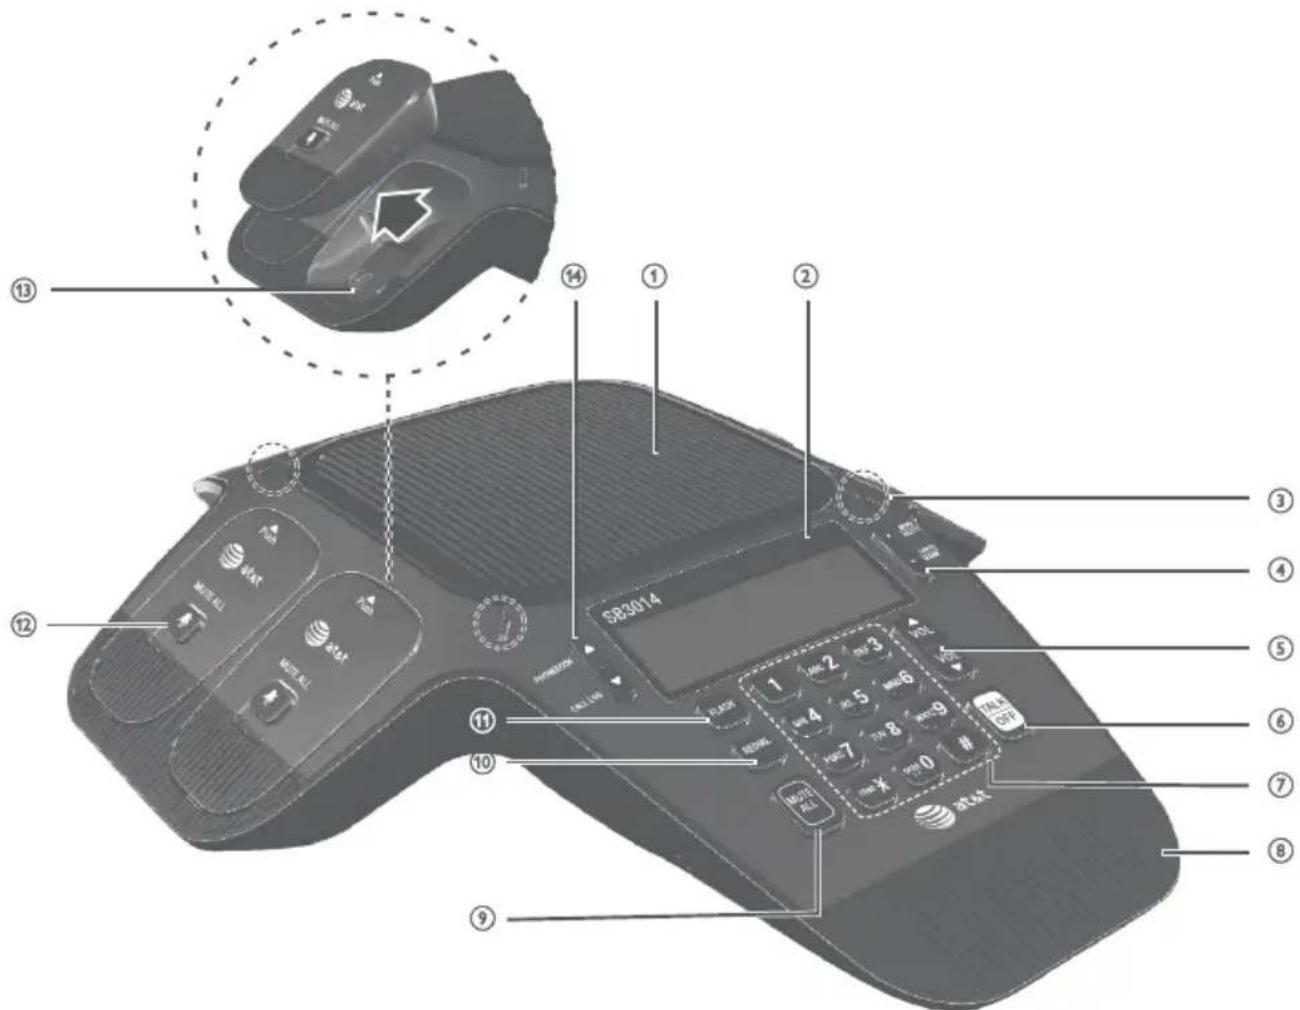
1. Speakerphone
2. LCD display
3. Status indicators
- Indicate the system status. See also Status indicators overview on page 6.
4. MENU SELECT
- Press to show the menu.
- Press to select an item, or save an entry or setting in a menu.
CANCEL CLEAR
- While in a menu, press to return to the previous menu.
- While editing numbers or names, press to delete a character; or press and hold to delete all characters.
5. vol
- Press to scroll through the menu, phonebook, or call log.
- Press to adjust the ringer volume.
• During a call, press to adjust the listening volume.
Getting started
Quick reference guide - base unit (front)
6.
TALK OFF
- Press to make, answer, or end a call.
7. Dialing keys
- Press to enter numbers or characters.
OPER0
- While entering numbers, press and hold to insert a dialing pause.
• While editing names, press to add a space.
TONE
- Press to switch to tone dialing temporarily when using pulse service while on a call.
8. Front microphone
9.
MUTE ALL
- During a call, press to mute or end mute all microphones in the system.
10. REDIAL
- Press to redial the last number dialed.
11. FLASH
- During a call, press to answer an incoming call when you receive a call waiting alert.
12. Wireless mic
• See Quick reference guide - wireless mic on page 5.
13. Charging contacts
14. PHONEBOOK ▲
- Press to access the phonebook when idle.
CALL LOG ▼
- Press to access the call log when idle.
Menu Scroll (▲/ ▼)
- Press to scroll up or down while in the menu, phonebook, or call log.
- While entering names or numbers, press to move the cursor to right or left.
Getting started
Quick reference guide - base unit (rear)
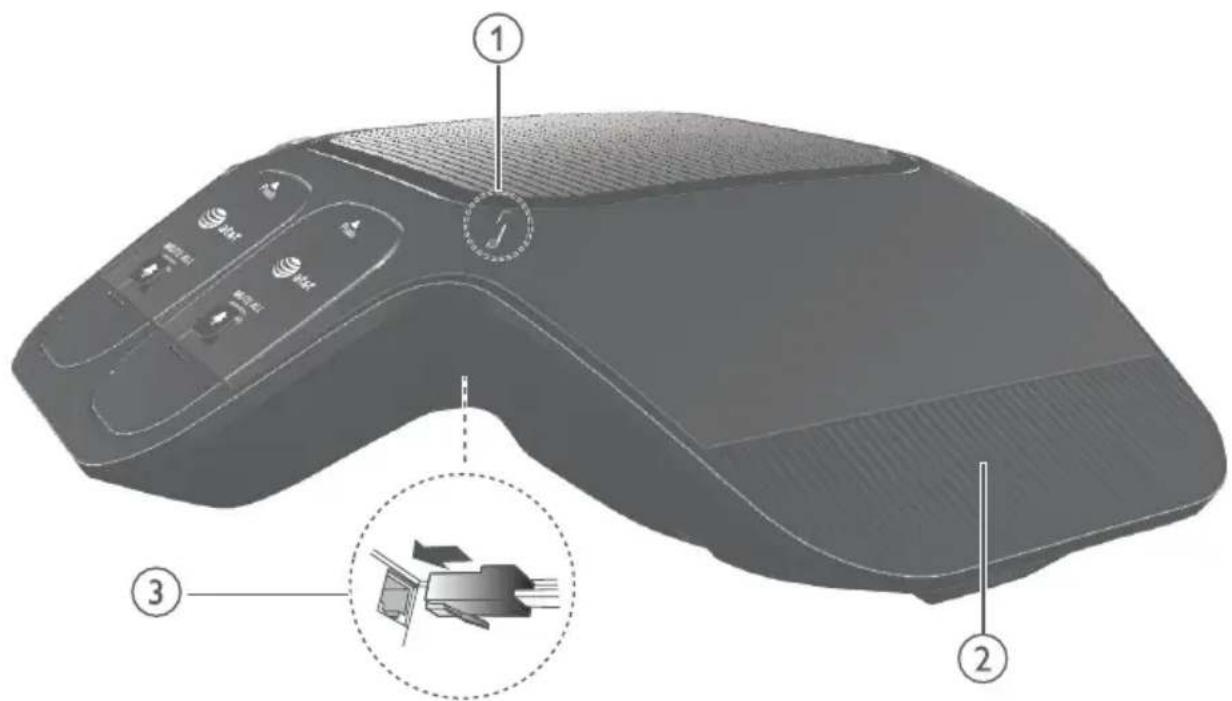
- Status indicator
- Indicates the system status. See also Status indicators overview on page 6.
-
Rear microphone
-
Adapter jack
Quick reference guide - wireless mic
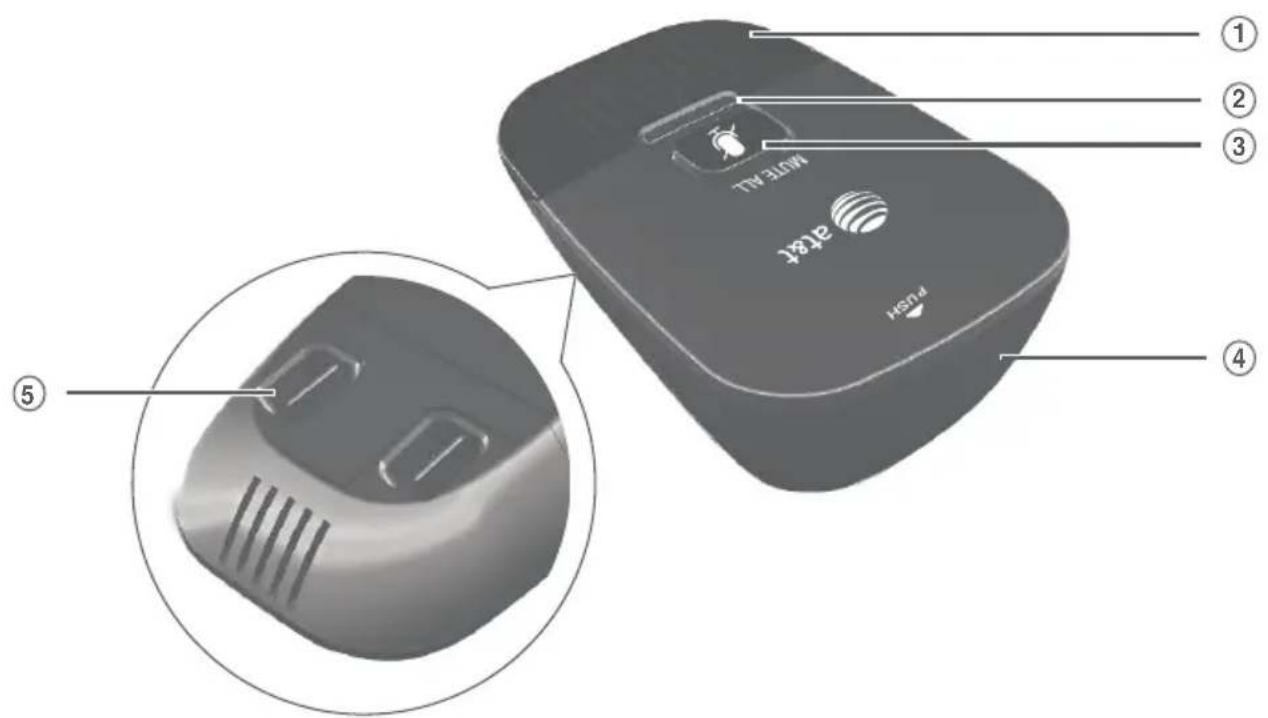
1. Microphone
- Functions as an extended microphone of the base unit during a call.
2. Status indicator
- Indicates the system status. See also Status indicators overview on page 6.
3. (MUTE ALL)
- During a call, press to mute or end mute all microphones in the system.
4. Battery door
5. Charging contacts
Status indicators on the base unit
| Power up Turn | green for about two seconds. |
| On a call Turn | green during a call.Turn red when the system is muted during a call. |
| Incoming call | flash green when there is an incoming call. |
Status indicator on the wireless mic
| Power up Turns | orange for about two seconds. |
| On the cradle Turns | Turns orange when charging on the cradle except during registration.Flashes red and green alternately, when the non-registered wireless mic is charging on the cradle. |
| Off the cradle Turns | Turns green during a call.Turns red when the system is muted during a call.Off when the wireless mic is in idle mode or without a battery.Flashes orange when the wireless mic's battery is low.Flashes green when there is an incoming call.Flashes red slowly when the wireless mic is:out of range; ornot registered; oroff cradle during paging (with a paging tone). |
| During registration | Flashes red and green alternately. |
You must install and charge the battery before using the wireless mics.
STOP!
See page 9 for easy instructions.
Install the base unit close to a telephone jack and a power outlet not controlled by a wall switch. For optimum range and better reception, place the base unit in a central and open location.
If you subscribe to high-speed Internet service (DSL - digital subscriber line) through your telephone line, you must install a DSL filter between the telephone line cord and the telephone wall jack (see the following page). The filter prevents noise and caller ID problems caused by DSL interference. Please contact your DSL service provider for more information about DSL filters.
Your product may be shipped with a protective sticker covering the base unit display - remove it before use.
For customer service or product information, visit our website at www.smbtelephones.att.com or call 1 (800) 222-3111. In Canada, dial 1 (866) 288-4268.
Avoid placing the base unit and wireless mics too close to:
- Communication devices such as television sets, VCRs, or other cordless telephones.
• Excessive heat sources. - Noise sources such as a window with traffic outside, motors, microwave ovens, refrigerators, or fluorescent lighting.
- Excessive dust sources such as a workshop or garage.
- Excessive moisture.
• Extremely low temperature. - Mechanical vibration or shock such as on top of a washing machine or workbench.
Getting started
Base unit installation
Install the base unit, as shown below. When the base unit is powered up, the status indicators turn green for about two seconds.
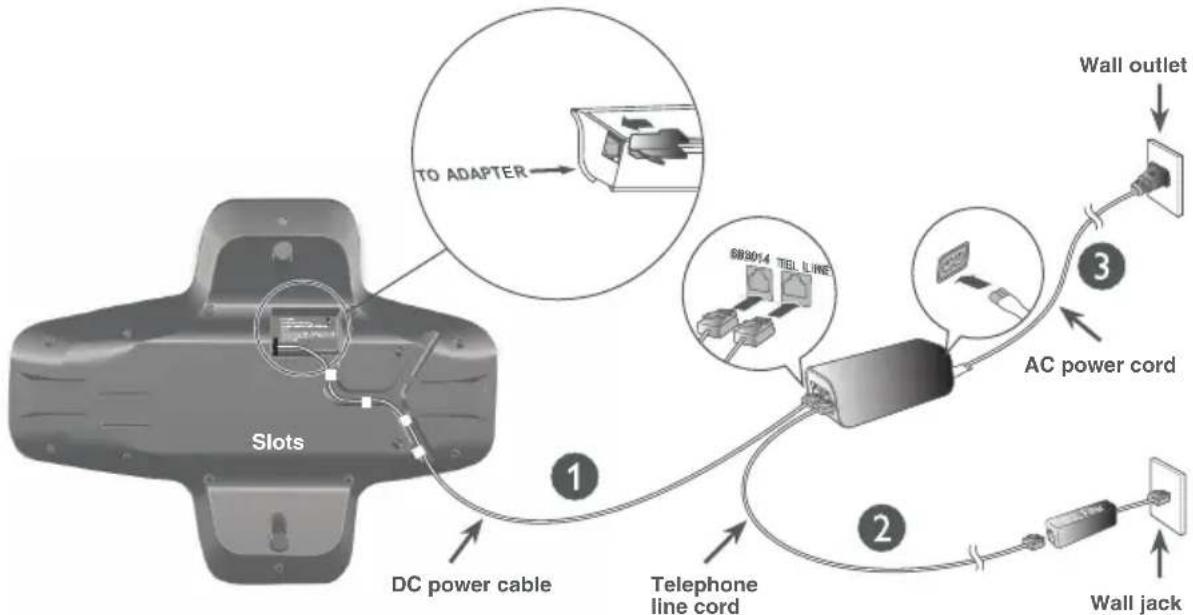
- Plug one end of the DC power cable into the base unit, and plug the other end into the SB3014 jack of the power adapter. Route the cord through the slots.
- Plug one end of the telephone line cord into the TEL LINE jack of the power adapter, and plug the other end into a wall jack.
- Plug the small end of the AC power cord into the power jack of the adapter, and plug the large end into the wall outlet not controlled by a switch.

NOTES:
- The AT&T SB3014 Conference Speakerphone with Wireless Mics is not a network device and is not PoE (Power over Ethernet) compatible. It does not require an Ethernet network to work Do not connect it to your Ethernet network or directly with any other network devices.
- The SB3014 is not compatible with IP-PBX systems, unless it comes with an analog-line interface with RJ-11 connector. If you already have an IP-PBX system in place, please contact your system provider for a digital-to-analog interface converter.
- The supplied power adapter is designed for use with only the SB3014. It is not PoE compatible and is not designed to power any network devices. Do not connect the supplied power adapter to any other network devices through the supplied DC power cable or any other Cat5e Ethernet cable.
• The SB3014 requires connection to AC power and a telephone line to operate. - If you subscribe to digital subscriber line (DSL) high-speed Internet service through your telephone line, you must install a DSL filter between the telephone line cord and wall jack. Contact your DSL service provider for more information about DSL filter.
IMPORTANT INFORMATION
- Use only the AC power adapter supplied with this product. To order a replacement, visit our website at www.smbtelephones.att.com or call
1 (800) 222-3111. In Canada, dial 1 (866) 288-4268.
- The AC power cord is intended for a vertical or floor mount position. The prongs are not designed to hold the plug in place if it is plugged into a ceiling or cabinet outlet.
Getting started
Battery installation and charging
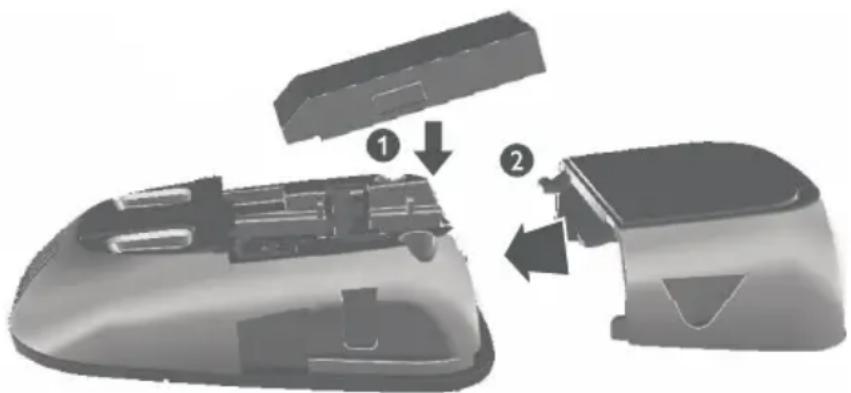
Install the battery, as shown below. The battery needs charging when it is newly installed into the wireless mic, or the status indicator on the wireless mic flashes orange. For best performance, keep the wireless mics on the charging cradles when not in use. The battery is fully charged after eight hours of continuous charging.
The status indicator on the wireless mic turns orange when charging, and turns off when the battery is fully charged.
natural_image
Exploded view diagram of a device showing internal components and part assembly (no text or symbols)- Place the battery with the label THIS SIDE UP facing up onto the battery compartment. The status indicator flashes orange once in three seconds.
- Slide the battery door until it clicks into place.
natural_image
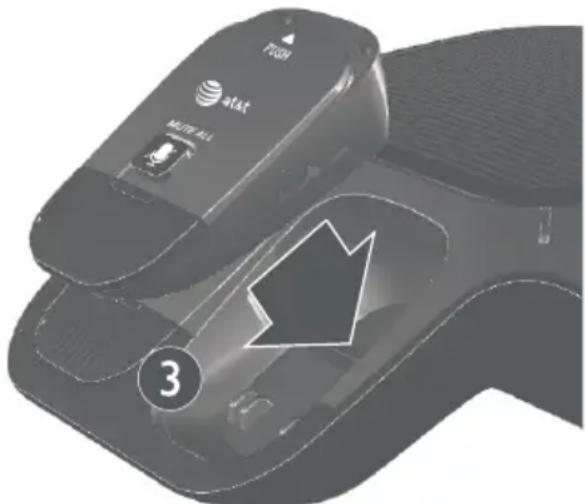
Close-up of a black wireless ear adapter device with AT&T logo and directional arrow (no text or symbols on device body)- Place the wireless mics on the charging cradles until they are flush.
IMPORTANT INFORMATION
- Use only the supplied rechargeable battery or replacement battery (model BT191665). To order, visit our website at www.smbtelephones.att.com or call 1 (800) 222-3111. In Canada, dial 1 (866) 288-4268.
- If you do not use the wireless mics for a long time, disconnect and remove the battery to prevent possible leakage.
Check for dial tone
- Lift all the wireless mics from the charging cradles, and then put them on the table.
- After that, press if you hear a dial tone, and see that the status indicators turn green on both the base unit and the wireless mics, the installation is successful.
Using the wireless mic
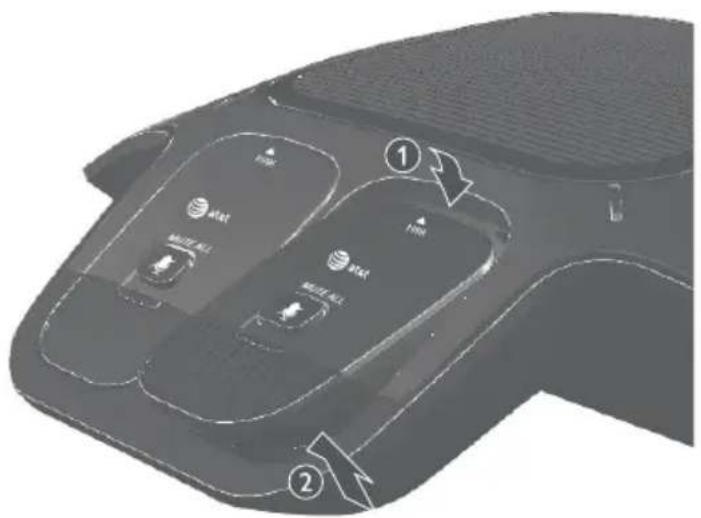
Your wireless mic works when it is lifted during a call.
-
Push the wireless mic, as shown above.
-
Lift the wireless mic from its bottom.

NOTES:
- For best performance, speak to the microphone on the wireless mic at a distance of no more than 3 feet.
• Always return the wireless mics to the charging cradles after use.
Conference speakerphone operation
Making a call
Press on the base unit, then enter the telephone number.
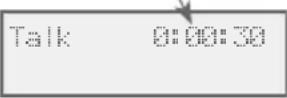
The screen displays the elapsed time as you talk (in hours, minutes and seconds).
Elapsed time
On hook dialing (predialing)
- Enter the telephone number with the dialing keys (0-9,
TONE*, or #).
- Press CANCEL to delete one digit.
- Press and hold CANCEL CLEAR delete all digits.
-
Press and hold ^0 to insert a dialing pause (a p appears).
-
Press to dial.
Answering a call
Press on the base unit.
Temporary ringer silencing
MUTE
Press ALL on the base unit while it is ringing to silence the ringer of the base unit. This turns off the ringer without disconnecting the call. The next incoming call rings normally at the preset volume.
[Unreadable]

NOTES:
- The base unit rings when there is an incoming call unless the ringer volume of the base unit is turned off.
- You can also press _VOR^▲ VOL on the base unit to adjust the ringer volume. The adjustment will be saved and applied to the next incoming call.
Last number redial
Press REDIAL the base unit to redial the last number dialed.
000-005-2445
Clear the redial number
-
Press MENU when the base unit is not in use.
-
Press ▼or ▲ to scroll to Clear Redial.
-
Press MENU TO confirm. You hear a confirmation tone and the base unit displays Redial empty briefly.
Call 109
Clear Radial
[1] [2] [3] [4]
Three-way conference
If your telephone network supports three-way conference, and two called parties remain on the line, you can establish a three-way conference.

NOTES:
- If you are using a public switched telephone network (PSTN)* line, contact your telephone service provider to check the subscription status for the three-way conference feature.
- If you are using a private branch exchange (PBX)** line, contact your PBX system administrator to check the subscription status for the three-way conference feature.
To establish a three-way conference:
- Press on the base unit.
- When you hear a dial tone, dial the number of the first call.
- When the first call is connected, press FLASH to put the current call on hold.
- When you hear a dial tone, enter number of the new outgoing call.
- When the second call is connected, press FLASH three-way conference is established.
To end the three-way conference:
Press on the base unit.
* Public switched telephone network (PSTN) provides traditional landline phone service to residences and many other establishments.
** Private branch exchange (PBX) is a private telephone network used within a company, It allows a single access number to provide several lines to outside callers while providing a range of external lines to internal callers or staff. It relies on computer equipment to perform all the switching of calls, and to make internal calls between extensions within the organizations. It also provides a connection between extensions and external phone lines.
Paging
This feature helps you find any misplaced wireless mics within the range of the base unit.
To start the paging tone:
-
Press MENU SELECT the base unit.
-
Press ▼or ▲ to scroll to Find microphone, and then press MENU SELECT the base unit displays ** Paging **. All wireless mics that are not on the charging cradles play the paging tone for 60 seconds.
Settling Find microphone
: Faying the
To mute the paging tone:
Press 🚗 on a wireless mic, or put it back on the charging cradle.
To stop paging:
Press MUTE ALL on the base unit.

NOTE: An incoming call stops the paging process.
Join a call in progress
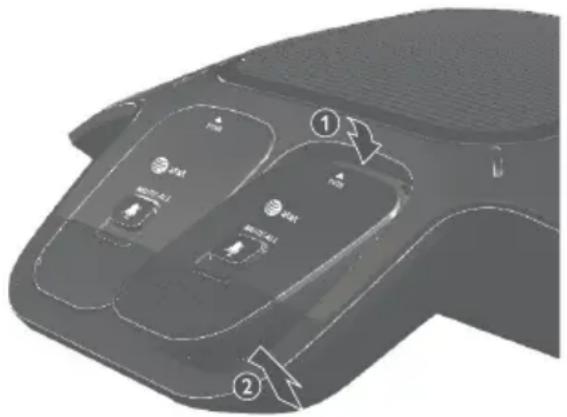
When the base unit is already on a call and you would like to join the call using a wireless mic, push the wireless mic and then lift it from the cradle.
Place the wireless mic on the cradle to end the call. The call does not end until the base unit hangs up.
Volume control
While on a call, press to increase or press to decrease the listening volume. You can set the listening volume to one of the 10 levels.

NOTE: When the volume reaches the minimum or maximum setting, you hear two beeps.
Call waiting
If you subscribe to call waiting service from your telephone service provider, and someone calls while you are already on a call, you hear an alert beep. Press FLASHput your current call on hold and take the new call. Press FLASHny time to switch back and forth between calls.

NOTE: Missed call waiting calls are not counted as missed calls.
Mute
Use the mute function to turn off the microphones of the base unit and all wireless mics. You can hear the caller, but the caller cannot hear you.
To mute a call:
- While on a call, press MUTE ALL on the base unit or on a wireless mic. When mute is on, the base unit displays Muted. All microphones in the system are muted until the mute function is turned off.
TALK 0.00039 [1]
To take a call off mute
- Press MUTE ALL on the base unit or 📋 on a wireless mic to end mute all microphones in the system. When mute is off, the base unit displays Microphone ON briefly.
[Non-Text]
Temporary tone dialing
If you have pulse (rotary) service only, you can switch from pulse to touch-tone dialing temporarily during a call. This is useful if you need to send touch-tone signals to access your telephone banking or long distance services.
- During a call, press TONE ✕
- Use the dialing keys to enter the desired number. The base unit sends touch-tone signals.
- The base unit automatically returns to pulse dialing after you end the call.
Options while on calls
Chain dialing
Use this feature to initiate a dialing sequence from the numbers in the phonebook, call log, or the last number dialed while you are on a call using the base unit.
Chain dialing is useful when you are required to enter a PIN code to access a conference call. You can save the PIN code to the phonebook and retrieve it from your phonebook entries during a call.
To access a number from the phonebook while on a call:
- Press MENU and then press again to select Phonebook.
-OR-
Press PHONEBOOK the phonebook.
*Phonebook Call log
- Press ▼or ▲to scroll to the desired number.
- Press MENU SELECT dial the number shown.
To access a number from the call log while on a call:
- Press MENU and then or ▼to scroll to Call log. Press .
MENU SELECT
-OR-
Press CALL to access the call log.
Phonebook
Call to9
- Press ▼or ▲to scroll to the desired number.
- Press MENU SELECT the number shown.
To access the last number dialed while on a call:
Press REDIAL the last number dialed.

NOTES:
- You cannot edit a phonebook entry while on a call. For more details about the phonebook, see page 22.
- You cannot copy a call log entry into the phonebook while on a call. For more details about the call log, see page 31.
- You cannot erase the last number dialed while on a call. For more details about the redialing, see page 12.
- Press exit redial, phonebook or call log while on a call.
Settings
Conference speakerphone settings
You can use the menu to set the date and time and change other settings. In the Ringers menu, you can adjust the ringer volume and select the ringer tones for incoming calls.
In the Settings menu, you can change the settings for LCD language, base unit name, key tone, dial mode, area code, and loop gain. You can also reset the base unit to default settings.
To enter the menu:
- Press MENU Select when in idle mode (when the base unit is not in use) to enter the main menu.
- Press ▼or ▲ to scroll to the feature to be changed. When scrolling through the menu, the > symbol indicates the selected menu item.
- Press MENU SELECT select the item.
Phenck Q. 109

NOTE: Press CANCEL cancel an operation, back up to the previous menu or exit the menu display.
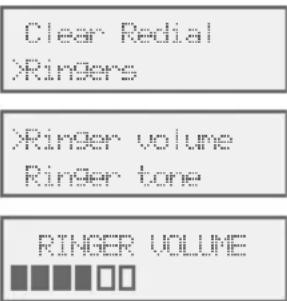
Ringer volume
You can set the ringer volume level (1-6) to one of six levels or turn the ringer off. When the ringer is off, Ringer off appears on the screen.
- Press ▲ vol voor in▼ idle mode to sample each ringer volume level (Ringer off, or 1 to 6).
- Press MENU TO save your preference. There is a confirmation tone and the screen returns to idle mode.
-OR-
- Press MENU SELECT mode to enter the main menu.
- Press ▼or ▲to scroll to Ringers, then press .MENU SELECT
- Press MENU SELECT to select Ringer volume.
- Press ▼or ▲to sample each ringer volume level (Ringer off, or 1 to 6).
- Press MENU TO save your preference. There is a confirmation tone and the screen returns to the previous menu.

NOTE: If the ringer volume is set to off, that base unit is silenced for all incoming calls. However, the wireless mics still play the paging tone when responding to paging feature (page 13).
Conference speakerphone settings
Ringer tone
You can choose one of the 10 ringer tones.
- Press MENU SELECT the mode to enter the main menu.
- Press ▼or ▲ to scroll to Ringers, then press .MENU SELECT
- Press ▼or ▲ to scroll to Ringer tone, then press .MENU SELECT
-
Press ▼or ▲ to sample each ringer tone (Tone 1 to Tone 10).
-
Press MENU SELECT save your preference. There is a confirmation tone and the screen returns to the previous menu.
| >Ringer volume |
| Ringer tone |
| RINGER TONE |
| >Tone 1 √ |

NOTE: If you turn off the ringer volume, you do not hear ringer tone samples.
Set date/time
The date and time display on the base unit in idle mode. Before using the SB3014, set the date and time, as mentioned below. If you subscribe to caller ID service, the day, month and time are set automatically with each incoming call. However, The year must be set so that the day of the week can be calculated from the caller ID information.
- Press MENU SELECT file mode to enter the main menu.
- Press ▼or ▲ to scroll to Set date/time, then press .MENU SELECT
-
Press ▼or ▲to select the month, then press MENU SELECT enter the number using the dialing keys.
-
Press ▼or ▲to select the day, then press MENU SELECT enter the number using the dialing keys.
-
Press ▼ or ▲ to select the year, then press MENU SELECT enter the number using the dialing keys, then press to move on to set the time.
| Ringers |
| Set date/time |
| SET DATE |
| MM/DD/YY |
| SET TIME |
| HH:HH — |
-
Press ▼ or ▲ to select the hour, then press MENU SELECT enter the number using the dialing keys.
-
Press ▼ or ▲ to select the minute, then press MENU ENTER the number using the dialing keys.
-
Press ▼ or ▲ to select AM or PM, or press 2 for AM or 7 for PM. Press MENU SELECT to confirm. There is a confirmation tone and the screen returns to the previous menu.

NOTE: The base unit beeps twice if you enter an invalid number.
Conference speakerphone settings
LCD language
You can select the language used for all screen displays.
- Press MENU SELECT the mode to enter the main menu.
- Press ▼or ▲ to scroll to Settings, then press MENU SELECT
- Press MENU SELECT LCD language.
- Press ▼ or ▲ to choose English, Français or Español, then press MENU SELECT Screen prompts Set English/Français/Espanol as LCD language?
S. 1. 1. 2. 3. 4. 5. 6. 7. 8. 9. 10. 11. 12. 13. 14. 15. 16. 17. 18. 19. 20. 21. 22. 23. 24. 25. 26. 27. 28. 29. 30. 31. 32. 33. 34. 35. 36. 37. 38. 39. 40. 41. 42. 43. 44. 45. 46. 47. 48. 49. 50. 51. 52. 53. 54. 55. 56. 57. 58. 59. 60. 61. 62. 63. 64. 65. 66. 67. 68. 69. 70. 71. 72. 73. 74. 75. 76. 77. 78. 79. 80. 81. 82. 83. 84. 85. 86. 87. 88. 89. 90.
XLOI [1994]
LOD LANGUAGE
English
- Press MENU to confirm. There is a confirmation tone and the screen returns to the previous menu.

NOTE: If you accidentally change the LCD language to French or Spanish, you can reset it back to English without going through the French or Spanish menus. Press MENU SELECT in idle mode, then enter ✕364#. There is a confirmation tone.
Rename base unit
You can create a new name for the base unit. The default name is Conference Phone.
- Press MENU selection mode to enter the main menu.
- Press ▼ or ▲ to scroll to Settings, then press MENU SELECT
-
Press ▼ or ▲ to scroll to Rename base, then press MENU SELECT
-
Change the base unit name when prompted.
-
Press ▼ or ▲ to move the cursor to the left or right.
- Use the dialing keys to enter a name (up to 16 characters). Each time you press a key, a character on that key appears. Additional key presses produce other characters on that key. See the chart on page
LOU
-
-
-
-
-
-
-
-
-
-
-
-
-
-
-
-
-
-
-
-
-
-
-
-
-
-
-
-
-
-
-
-
-
-
-
-
-
-
-
-
-
-
-
-
-
-
-
-
-
-
-
-
-
-
-
-
-
-
-
-
-
-
-
-
-
-
-
-
-
-
-
-
-
-
-
-
-
-
-
-
-
-
-
-
-
-
-
-
-
-
-
-
-
-
-
-
-
- 99.
-
-
-
-
-
-
-
-
-
-
-
-
-
-
-
-
-
-
-
-
-
-
-
-
-
-
-
-
-
-
-
-
-
-
-
-
-
-
-
-
-
-
-
-
-
-
-
-
-
-
-
-
-
-
-
-
-
-
-
-
-
-
-
-
-
-
-
-
-
-
-
-
-
-
-
-
-
-
-
-
-
-
-
-
-
-
-
-
-
-
-
-
-
-
-
-
-
Press CANCEL CLEAR backspace and delete characters.
- Press and hold CANCEL CLEAR delete all characters.
-
Press TO change the next letter to upper or lower case.
-
Press MENU Select save the setting and return to the previous menu. There is a confirmation tone.
Settings
Conference speakerphone settings
Key tone
The base unit is set to beep with each key press. You can adjust the key tone volume or turn it off. If the key tone is off, there are no beeps when you press the keys.
- Press MENU SELECT mode to enter the main menu.
- Press ▼ or ▲ to scroll to Settings, then press
MENU SELECT - Press ▼ or ▲ to scroll to Key tone, then press
MENU SELECT - Press ▼ or ▲ to sample each key tone (Off, or 1 to 3).
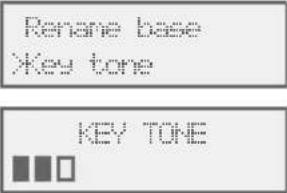
- Press MENU TO save your preference. There is a confirmation tone and the screen returns to the previous menu.
Dial mode
The dial mode is preset to tone dialing. If you have pulse (rotary) service, you must change the dial mode to pulse dialing before using the base unit to make a call.
- Press MENU SELECTLE mode to enter the main menu.
- Press ▼or ▲to scroll to Settings, then press
MENU ·SELECT -
Press ▼or ▲ to scroll to Dial mode, then press
MENU ·SELECT -
Press ▼ or ▲ to choose Touch-tone or Pulse, then press MENU SELECT. The screen shows DIAL MODE is touch-tone or
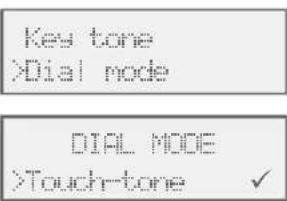
DIAL MODE is pulse. There is a confirmation tone and the screen returns to the previous menu.

NOTE: You can press TOX to switch to tone dialing temporarily when using pulse service while on a call.
Settings
Conference speakerphone settings
Area code
If you dial seven digits to make a local call (no area code required), program your area code so that when you receive a call from within your local area, the call log only displays the seven digits of the telephone number.
This feature makes it easy for you to place a call from the call log. If you dial 10 digits to make a local phone call, do not use this area code feature. If you do, you cannot place local calls from your call log, as they will have only seven digits.
To set the home area code:
- Press MENU SELECT mode to enter the main menu.
- Press ▼or ▲to scroll to Settings, then press .MENU SELECT
-
Press ▼or ▲to scroll to Area code, then press ⓂMENU SELECT The screen briefly shows Only for 7digit dial from CID.
-
Use the dialing keys to enter a three-digit area code.
-
Press ▼or ▲to move the cursor to the left or right.
- Press to delete a digit.
- Press and hold CANCEL CLEAR delete all digits.
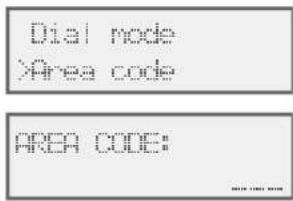
- Press MENU SELECT Save. There is a confirmation tone and the screen shows Area code will not show in CID briefly before returning to the previous menu.
Settings
Conference speakerphone settings
Loop gain
The default setting of the loop gain feature is Off. Turn this feature on only when the callers cannot hear you well, and you are using a public switched telephone network (PSTN) line.
-
Press MENU SELECT mobile mode to enter the main menu.
-
Press ▼or ▲to scroll to Settings, then press
MENU ·SELECT
- Press ▼or ▲to scroll to Loop gain, then press
MENU ·SELECT
- Press ▼or ▲to choose On or Off.
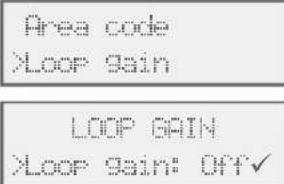
- Press MENU SELECT save your preference. There is a confirmation tone and the screen returns to the previous menu.

NOTE: Turn the loop gain feature back to Off if the callers cannot observe any improvement or are experiencing any new audio issues like echo or dropout.
Reset
You can reset the base unit to the default settings. Once the base unit is reset, all your customized settings, call log entries, and redial entry will be deleted. All the phonebook records and speed dial entries will remain.
The default settings are listed, as shown below.
| Feature Default Value | |
| Call log Empty | |
| Listening volume Volume 6 | |
| Ringer volume Volume 4 | |
| Ringer tone Tone 1 | |
| Date and time Empty | |
| LCD language English | |
| Base name Conference Phone | |
| Key tone level Level 2 | |
| Dial mode Touch-tone | |
| Area code Empty | |
| Loop gain | Off |
-
Press MENU SELEOP mode to enter the main menu.
-
Press ▼or ▲to scroll to Settings, then press
MENU SELECT
- Press ▼or ▲to scroll to Reset, then press
MENU SELECT
- The screen prompts Reset to default? Press MENU SELECT. The settings are reset to the default values and the screen returns to idle mode.
Loop Gain Xpert
Capacity
The phonebook can store up to 50 entries, with a maximum of 15 alphanumeric characters (including spaces) for names and 30 digits for telephone numbers. A convenient search feature can help you find and dial numbers quickly (page 26).
- When you access the phonebook without an entry, the screen shows Phonebook empty.
- When you try to save an entry when there are already 50 entries, the screen shows Phonebook full. You cannot store a new number until you delete one.
- When you try to add entry already stored in the phonebook, the screen shows Number already saved.
Create a new phonebook entry
-
Press MENU SELEOP mode to enter the main menu.
-
Press MENU SELECT select Phonebook.
-
Press ▼ or ▲ to scroll to Add contact, then press MENU SELECT
-
Use the dialing keys to enter a telephone number (up to 30 digits) when prompted.
-
Press ▼ or ▲ to move the cursor to the left or right.
- Press CANCEL CLEAR erase a digit.
- Press and hold CANCEL CLEAR erase all digits.
- Press and hold OPERato enter a three-second dialing pause (a p appears).
-OR-
Copy the last number dialed by pressing REDIAN.
MENU SELECT
- The first letter of every word is a capital letter. The remaining letters in a word start as lower case letters, as shown in the chart on the next page.
-
If you are using a private branch exchange (PBX) line and want to add an external number to the phonebook, make sure the dialing prefix (usually 9), followed by a dialing pause (press and hold OPER0 and a p appears), are inserted before the external number.
-
2018年1月1日
Pavita Yad com.
2013-2015 2016-2018 2019-2020 2021-2023 2024-2026 2027-2028 2029-2030 2031-2033 2034-2036 2037-2038 2039-2040 2041-2043 2044-2046 2047-2048 2049-2050 2051-2053 2054-2056 2057-2058 2059-2060
Create phonebook entries
Character chart:
| Dialing keys | Characters by number of key presses | ||||||||||
| 1 2 3 4 5 6 | 7 8 9 10 11 | ||||||||||
| 1 | 1 . - ( ) * # | & / , | |||||||||
| 2 a b c A B C | 2 | ||||||||||
| 3 d e | f D E F 3 | ||||||||||
| 4 g h | i | G | H I 4 | ||||||||
| 5 | j k | I J | K L 5 | ||||||||
| 6 | m n o M N | O 6 | |||||||||
| 7 p q r s P Q R S 7 | |||||||||||
| 8 | t u v | T U V 8 | |||||||||
| 9 | w | x | y | z | W | X | Y | Z | 9 | ||
| 0 space 0 | |||||||||||
| * | |||||||||||
| # | |||||||||||
Add a predialed telephone number to the phonebook
You can save a predialed telephone number to the phonebook.
- Enter the telephone number when in idle mode.
- Follow the steps in Edit a phonebook entry on page 28.
Review phonebook entries
- Press PHONEBOOK the base unit is not in use. The screen displays the first entry in the phonebook.
-OR-
Press MENU SELECT Press again to select Review.
- Press ▼or ▲to browse through the phonebook. Entries appear alphabetically by the first letter in the name.
- Press CANCEL CLEAR exit the phonebook.

NOTES:
- If the telephone number in the phonebook exceeds 16 digits, ≤slant appears in front of the telephone number. Press TO move towards the end of the telephone number or press (pound key) to move towards the beginning of the telephone number.
- If there are no phonebook entries, the screen shows Phonebook empty before returning to idle mode.
Search by name
- Press PHONEBOOK the base unit is not in use.
-OR-
Press MENU SELECT Press when in idle mode, then press to select MENU SELECT Phonebook.
Press MENU SELECT again to select Review.
-
When an entry appears, press the dialing keys (0-9) to start a name search. The phonebook shows the first name beginning with the first letter associated with the dialing key, if there is an entry in the phonebook beginning with that letter. Press ▼ or ▲ to scroll through the phonebook.
-
To see other names starting with the letters on the same dialing key, keep pressing the key. The names appear in alphabetical order.
For example, if you have the names Jennifer, Jessie, Kevin and Linda in your phonebook:
- If you press 5 (JKL) once, you see Jennifer. Press ▼ and you see Jessie.
- If you press 5 (JKL) twice, you see Kevin.
• If you press 5 (JKL) three times, you see Linda.
- If you press 5 (JKL) four times, you see 5 and then the phonebook entry beginning with 5 or the next closest entry after 5.
• If you press 5 (JKL) five times, you see Jennifer again.

NOTES:
- If there is no name matching the first letter of the key you press, the phonebook shows a name matching the following letters of the key.
- If you press a key (0-9) and no name starts with any of the letters on that key, the phonebook shows the entry matching the next letter in the phonebook.
Phonebook
Dial, delete or edit phonebook entries
To dial, delete or edit a phonebook entry (name and number), the entry must be displayed on the base unit. Use Review the phonebook (page 25) or Search by name (page 26) to show an entry.
Display dial
To dial a displayed number from the phonebook, press
Delete a phonebook entry
- When a phonebook entry displays, press
MENU
SELECT - Press ▼or ▲to scroll to Delete, then press .SELECT screen prompts Delete contact?
MENU the SELECT - Press MENU SELECT Confirm. The screen displays Contact deleted, then returns to the phonebook list. You hear a confirmation tone. You cannot retrieve a deleted entry.
[1] [2]
Robert Brown
Delete contact?
Delete all phonebook entries
- Press MENU SELECT mode to enter the main menu.
- Press MENU SELECT select Phonebook.
- Press ▼ or ▲ to scroll to Delete all, then press MENU SELECT The screen prompts Delete all contacts?
- Press MENU confirm. The screen displays All contacts deleted, then returns to idle mode. You hear a confirmation tone. You cannot retrieve the deleted entries.
Speed dial No label all
Delete all contacts?
Edit a phonebook entry
- When a phonebook entry displays, press MENU SELECT
-
Press MENU select in to select Edit contact. The screen shows EDIT NUMBER along with the phone number to be edited. If you only want to edit the name, skip to Step 4.
-
To edit the number:
-
Press the dialing keys to add digits.
- Press ▼ or ▲ to move the cursor to the left or right.
- Press CANCEL CLEAR erase a digit.
- Press and hold CANCEL CLEAR erase all digits.
-
Press and hold OPERIO enter a three-second dialing pause (a p appears).
-
Press MENU to save the number and move on to the name.
-
To edit the name:
-
Press the dialing keys to add characters (page 24).
- Press ▼ or ▲ to move the cursor to the left or right.
- Press ^OPEN to add a space.
- Press CANCEL TO erase a character.
- Press and hold CANCEL CLEAR erase all characters.
-
Press TONE to change the next letter to upper or lower case.
-
Press MENU SELECT here is a confirmation tone and the screen shows Saved.
-
2014年1月1日,公司召开2014年第一次临时股东大会,并于2014年3月15日召开2014年第二次临时股东大会。
-
2017年1月1日,公司召开2017年第二次临时股东大会,审议通过了《关于使用部分闲置募集资金进行现金管理的议案》,同意公司使用不超过人民币5,000万元的闲置募集资金进行现金管理。
The system has 10 speed dial locations (0 and 1-9) where you can store the telephone numbers you wish to dial more quickly. The base unit displays up to 12 characters for a speed dial entry Speed dial assignments can only be selected from the existing phonebook entries.
Assign a speed dial number
- Press MENU SELECT the mode to enter the main menu.
- Press MENU SELECT select Phonebook.
- Press ▼ or ▲ to scroll to Speed dial, then press MENU SELECT
- Press ▼ or ▲ or a dialing key (0 or 1-9), to choose your desired speed dial location, then press MENU SELECT the screen
Find contact,
[Unreadable]
1:
2"Robert Brown
briefly shows Copy from Phonebook, then enters your phonebook list.
- Press ▼ or ▲ to scroll to the phone number you wish to assign to the selected speed dial location.
- Press MENU SELECT save the setting and return to the previous menu. There is a confirmation tone.
Reassign a speed dial number
- Press MENU SELECT role mode to enter the main menu.
- Press MENU TO select Phonebook.
- Press ▼ or ▲ to scroll to Speed dial, then press MENU SELECT
- Press ▼ or ▲ or a dialing key (0 or 1-9), to choose the location you wish to reassign, then press MENU SELECT show the phonebook entry.
- Press MENU SELECT
- Press MENU SELECT Select Change Sp dial. The screen briefly shows Copy from Phonebook, then enters your phonebook list.
- Press ▼ or ▲ to scroll to the phone number you wish to reassign to the selected speed dial location.
- Press MENU Select save the setting and return to the previous menu. There is a confirmation tone.
Robert, H.
[1] [2] [3]
3000000000000000000000000000000000000
Clear SP dis
Copy from
Facebook
Delete a speed dial number
- Press MENU SELECT mode to enter the main menu.
- Press MENU to select Phonebook.
- Press ▼ or ▲ to scroll to Speed dial, then press MENU SELECT
-
Press ▼ or ▲ or a dialing key (0 or 1-9), to choose the desired speed dial location, then press MENU SELECT
-
Press MENU SELECT
-
Press ▼ or ▲ to scroll to Clear Sp dial, then press .→ there is a confirmation tone and the screen shows Speed dial empty before returning to the previous menu.
Charge SP dial
Clear SP dial
Make a call using speed dial
When in idle mode, press and hold the dialing key (0 and 1-9) corresponding to the assigned location you wish to call.
-OR-
-
Press MENU SELECT the mode to enter the main menu.
-
Press MENU TO select Phonebook.
-
Press ▼ or ▲ to scroll to Speed dial, then press MENU SELECT
-
Press ▼ or ▲, or a dialing key (0 or 1-9), to choose the desired speed dial location, and then press and then press.
About caller ID
This product supports caller ID services offered by most telephone service providers. Caller ID allows you to see the name, number, date and time of calls. The available caller ID information will appear after the first or second ring.
Information about caller ID with call waiting
Caller ID with call waiting lets you see the name and telephone number of the caller before answering the call, even while on another call.
It might be necessary to change your telephone service to use this feature. Contact your telephone service provider if:
- You have both caller ID and call waiting, but as separate services (you might need to combine these services).
- You have only caller ID service, or only call waiting service.
- You don't subscribe to caller ID or call waiting services.
There may be fees for caller ID services. In addition, services may not be available in all areas.
This product can provide information only if both you and the caller are in areas offering caller ID service and if both telephone service providers use compatible equipment. The time and date, along with the call information, are from the telephone service provider.
Caller ID information might not be available for every incoming call. Callers may intentionally block their names and/or telephone numbers (see page 36).

NOTE: You can use this product with regular caller ID service, or you can use this product's other features without subscribing to caller ID or combined caller ID with call waiting service.
How the call log works
The system stores caller ID information about the last 50 incoming calls in the base unit. Entries are stored in reverse chronological order. When the call log is full, the oldest entry is deleted to make room for new calls. If you answer a call before the information appears on the screen, it does not show in the call log.

NOTE: Each entry may have up to 16 digits for the phone number and 15 characters for the name. If the phone number has more than 16 digits, only the last 16 digits appear. If the name has more than 15 characters, only the first 15 characters are shown and saved in the call log.
Missed (new) call indicator
When the base unit is in idle mode and has new or missed calls, its screen shows XX Missed calls.
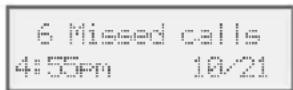
All new or missed entries are counted as missed calls. Each time after you reviewed a new call log entry, the number of missed calls decreases by one.
If the base unit resumes power after power outage, the missed calls indicator goes away.
Memory match
If the incoming telephone number matches the last seven digits of a telephone number in your phonebook, the name that appears on the screen matches the corresponding name in your phonebook.
For example, if Christine Smith calls, her name appears as Chris if this is how you entered it into your phonebook.
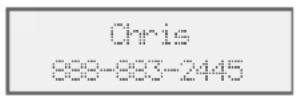

NOTE: The number shown in the call log will be in the format sent by the telephone service provider. The telephone service provider usually delivers 10-digit phone numbers (area code plus telephone number). If the telephone number of the caller does not match a number in your phonebook, the name will appear as it is delivered by the telephone service provider.
Review the call log
Review the call log to find out who called, to return the call, or to copy the caller's name and number into your phonebook. Call log empty appears if there are no records in the call log.
- Press CALL LOG (▼) when the base unit is not in use. The screen displays the call log in reverse chronological order starting with the most recent call.
-OR-
Press MENU select in idle mode, then press or ▼ to scroll to Call log. Press MENU select.
- Press ▼or ▲ to browse through the call log.
- Press exit the call log.
You hear a double beep when the list reaches the beginning or end of the call log.

View dialing options
Although the incoming call log entries have 10 digits (the area code plus the seven-digit number), in some areas, you might need to dial only the 7 digits, 1 plus the seven digits, or 1 plus the area code plus the seven digits. You can change and store the number of digits that you dial in the call log.
While reviewing the call log, press # (pound key) repeatedly to show different dialing options for local and long distance numbers before dialing or saving the telephone number in the phonebook.
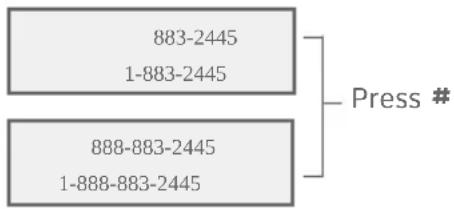
When the number is in the correct format for dialing, press to call the number.
To save the number to the phonebook, see Save a call log entry to the phonebook on the next page.
Dial a call log entry
- When in the call log, press ▼ or ▲ to browse.
- Press to dial the displayed entry.
Delete a call log entry
- When the desired entry displays in the call log, press MENU SELECT twice.
- Press ▼ or ▲ to scroll to Delete, then press ⚡ SELECT is a confirmation tone and the screen shows Deleted before returning to the call log.

Store to PB
Delete
Delete all call log entries
- Press MENU SELECF when in idle mode.
- Press ▼ or ▲ to scroll to Call log, then press Ⓜ MENU SELECT
- Press ▼ or ▲ to scroll to Del all calls, then press .MENU SELECT
- When the screen shows Delete all calls?, press MENU SELECT to confirm. There is a confirmation tone and the screen returns to the previous menu.
ReviewDel all calls
Save a call log entry to the phonebook
- When in the call log, press ▼ or ▲ to browse.
- When the desired entry displays, press MENU SELECT twice.
- Press MENU Select Store to PB. The screen displays EDIT NUMBER.
-
Use the dialing keys to edit the number.
-
Press ▼or ▲to move the cursor to the left or right.
- Press CANCEL CLEAR
- Erase a digit.
- Press and hold CANCEL CLEAR erase all digits.
-
Press and hold OPEN enter a three-second dialing pause (a p appears).
-
Press MENO SELECT move to the name. The screen displays EDIT NAME. Use the dialing keys (page 24) to edit the name.
-
Press ▼or ▲to move the cursor to the left or right.
- Press to add a space.
- Press CANCEL CLEAR a character.
- Press and hold to erase all characters.
- Press TONE change the next letter to upper or lower case.
-
Press #(pound key) to move the last word to the front. For example, Johnson Charlie becomes Charlie Johnson when you press #
-
Press MENU SELECT when done. The base unit displays Saved and returns to the call log.

NOTES:
- You might need to change how a caller ID number is dialed if the entry does not appear in the correct format. Caller ID numbers might appear with an area code that is not necessary for local calls, or without a 1 that is necessary for long distance calls (see View dialing options on page 34).
- If the name you received from the telephone service provider is all in capital letters, the first letter of every word remains a capital letter, while other letters become lower case. However, the next letter after the prefix "Mac", "Mc", or "O", is kept as a capital letter. For example, the "D" in "MacDonald" is kept as a capital letter.
- If the telephone number from the caller ID information has already been saved in the phonebook under a different name, the new name will overwrite the old one.
Ybox to PU Bags
Caller ID screen messages
There are occasions when other information or no information shows for various reasons:
| On-screen message Reason | |
| PRIVATE NUMBER | The caller prefers not to show the phone number. |
| PRIVATE CALLER | The caller prefers not to show the phone number and name. |
| UNKNOWN NUMBER | Your telephone service provider cannot determine the caller's number. |
| UNKNOWN CALLER | Your telephone service provider cannot determine the caller's name and telephone number. |
| L | This is a long distance call. |
Appendix
Registering wireless mics
Your wireless mics are pre-registered. If for some reasons, you want to purchase replacement wireless mics (AT&T model SB3014-WM), visit our website at www.smbtelephones.att.com or call 1 (800) 222-3111. In Canada, dial 1 (866) 288-4268. Each new wireless mic must be registered to the base unit before use.
Follow the instructions on this page to register your new wireless mics to the base unit.
Register a wireless mic to your base unit
As part of this registration process, all existing, broken, or misplaced wireless mics will be deregistered first. Then, the base unit will re-register the four wireless mics that are placed on the charging cradles.
Before registration, unplug the telephone line cord from the wall jack to make sure there are no incoming calls during the registration.
- Gather the four wireless mics that are to be registered and place them on the charging cradles. Registration has not yet started.
- Enter ✦331734# on the base unit when it is not in use, then press MENU SELECT. The screen displays Please place all wireless mics on cradle, then press 'SELECT'.
- Make sure all the four wireless mics are on the charging cradles, and then press MENU SELECT the wireless mics enter the deregistration mode, and the screen displays Processing...
Registration starts after deregistration completed. The screen displays Registering... 1 2 3 4. The number X blinks while registering the X-th wireless mic. The status indicators on the wireless mics flash red and green, alternately. You hear a confirmation tone when each wireless mic is registered. When all the four wireless mic are registered, the base unit displays Registration done.
After registration, plug the telephone line cord back into the wall jack.

NOTES:
- If registration failed, there is an error tone and the base unit displays Registration failed. Try again, and returns to idle mode. Remove the wireless mics from the charging cradles and start again from Step 1.
- If the screen does not display Registration done after Registering... 1 2 3 4, start again from Step 1.
- All wireless mics should be kept on the charging cradles during deregistration and registration. Any wireless mic, that is registered before but is not put on the charging cradle, will be deregistered.
- To cancel registration, press CANCEL CLEAR. The base unit displays Registration cancelled. If registration is cancelled, some of the wireless mics may be deregistered. To register them back to the base unit, start again from Step 1.
Appendix
Deregistering wireless mics
You may deregister manually a wireless mic that you are not going to use for some time.
Please read carefully through all the instructions on this page before beginning the deregistration process.
Deregister a wireless mic from your base unit
- Remove the battery from the wireless mic you want to deregister, then press and hold on the wireless mic.
- While you press and hold insert the battery back into the wireless mic (see page 9). The status indicator on the wireless mic flashes orange once in three seconds. Then, it turns red after about seven seconds.
- Release 📋, then press it again within one second. The status indicator turns off, and then it turns back on. It changes from orange to red, and then it flashes red slowly. The wireless mic is now deregistered.

NOTES:
• If deregistration failed, start again from Step 1.
- The wireless mic will function as normal if you failed to press within one second in Step 3.
- To register the wireless mic to the base unit again, follow the registration instructions on the previous page.
Base unit display screen messages
| All contacts deleted | All phonebook entries are deleted. |
| Call log empty | There are no entries in the call log. |
| Contact deleted | A phonebook entry is deleted. |
| Deleted | A call log entry or all call log entries are deleted. |
| Ended | You have just ended a call. |
| Incoming call | There is a call coming in. |
| Microphone ON | Mute is off so the other party can hear you. |
| Muted | The microphone is off. The other party cannot hear you. |
| No line | There is no telephone line connection. |
| Number already saved | The telephone number you have entered is already in the phonebook. |
| ** Paging ** | The wireless mics are paged by the base unit. |
| Phonebook empty | There are no phonebook entries. |
| Phonebook full | The phonebook is full. You cannot save any new entries unless you delete some current entries. |
| Registering... 1 2 3 4 | The wireless mics are registering to the base unit. |
| Registration cancelled | The wireless mic registration is canceled. |
| Registration done | The wireless mic registration is successful. |
| Registration failed. Try again | The wireless mic registration is not successful. |
| Ringer muted | The ringer is off temporarily while the base unit is ringing. |
| Ringer off | The ringer is turned off. |
| Saved | An entry has been successfully saved in the phonebook. |
| Speed dial empty | There are no assigned speed dial locations. |
| Talk | The base unit is on a call. |
| XX Missed calls | There are new calls in the call log. |
Appendix
Troubleshooting
If you have difficulty with your phone, please try the following suggestions. For Customer Service, visit our website at www.smbtelephones.att.com or call 1 (800) 222-3111. In Canada, dial 1 (866) 288-4268.
My Conference Speakerphone with Wireless Mics does not work at all.
After powering up the base unit with a correct setup (page 8), the LCD display will show the default name of the base, "Conference Phone". Press TALK and you will hear a dial tone. If any of this does not happen, please try the following:
- Make sure the DC power cable is securely plugged into the base unit and the power adapter.
- Make sure the telephone line cord is plugged firmly into the power adapter and the wall jack.
- Make sure the AC power cord is securely plugged into the power adapter and a wall outlet not controlled by a wall switch.
The LCD display shows No line. I cannot hear the dial tone.
Disconnect the telephone line cord from the power adapter and plug it into a working telephone. If the other telephone does not work, the problem is probably in the telephone line cord. Try replacing the telephone line cord.
If the line cord has been replaced and both the SB3014 and the other telephone do not work, the problem is in the wall jack, wiring, or telephone/PBX service.
- If you are using a public switched telephone network (PSTN) line, contact your telephone service provider (charges may apply).
- If you are using a using a private branch exchange (PBX) extension line, contact your PBX system administrator.
- If you have changed your telephone service to digital service from a cable company or a VoIP service provider, the telephone line may need to be rewired to allow all existing telephone jacks to work. Contact your telephone service provider (charges may apply).
I cannot dial out.
- Try all the above suggestions.
• Make sure there is a dial tone before dialing. - If other telephones in your office are having the same problem, the problem is in the wiring or telephone service. Contact your telephone service provider (charges may apply) or PBX system administrator.
- Eliminate any background noise. Dial from another room in your office with less background noise.
Appendix
Troubleshooting
- If you have changed your telephone service to digital service from a cable company or a VoIP service provider, the telephone line may need to be rewired to allow all existing telephone jacks to work. Contact your telephone service provider (charges may apply).
- If you are using a PBX line and want to dial an external number, make sure the dialing prefix (usually 9), followed by a dialing pause (press and hold OPER0 and a p appears), are inserted before the external number.
The base unit does not ring when there is an incoming call.
• Make sure there is a dial tone before dialing.
- Make sure the ringer volume of the base unit is not set to off (page 16).
- Make sure the DC power cable, telephone line cord, AC power cord, and the power adapter are plugged in properly (page 8).
- There may be too many extension phones on the telephone line to allow all of them to ring simultaneously. Unplug some of them.
- If other telephones in your office are having the same problem, the problem is in the wiring or telephone/PBX service. Contact your telephone service provider (charges may apply) or PBX system administrator.
- Disconnect the telephone line cord from the power adapter and plug it in a working telephone. If the other telephone also does not ring, the problem is probably in the telephone line cord. Try replacing the telephone line cord and retest.
- If the line cord has been replaced and both the SB3014 and the other telephone do not ring, the problem is in the wall jack, wiring or telephone/PBX service. Contact your telephone service provider (charges may apply) or PBX system administrator.
- Other electronic products such as HAM radios and other DECT phones, can cause interference with your conference phone. Try installing your conference phone as far away as possible from these types of electronic devices.
- Unplug the AC power cord from the wall outlet. Wait for approximately 15 seconds, and then plug it back in. If you still cannot see "Conference Phone" on the LCD display, or cannot get a dial tone, please contact our customer service hotline designated above for assistance.
Appendix
Troubleshooting
My wireless mic does not work at all.
The wireless mic works only when the base unit is properly powered and the wireless mic is lifted from the charging cradle.
If the wireless mic works, with the wireless mic lifted, the status indicator under the 📁 button turns green within two seconds when you press 🔊 on the base unit.
If the status indicator remains off and inactive, please follow the steps:
- Remove the battery from battery compartment.
- Insert the battery again and secure the battery door. Then, return the wireless mic to the charging cradle.
- Make sure the wireless mic is placed on the charging cradle correctly (page 9). The status indicator under the button should turn orange.
If the status indicator remains off at the time the wireless mic returned to the charging cradle, the wireless mic or the charging cradle is probably defective. Please contact customer service for assistance.
If the status indicator does not turn orange, please follow the steps:
- Remove the wireless mic from the charging cradle and install the battery again (page 9).
- Return the wireless mic to the charging cradle. The status indicator under the button should turn orange. The wireless mic is charging now.
- Allow the wireless mic to be changed for at least 30 minutes.
- Remove the wireless mic from the charging cradle again.
- Press the status indicator under button should turn green within two seconds.
If that still does not work, the wireless mic might have lost its connection to the base unit.
- Re-register all the wireless mics with the base unit (page 37).
- Remove the wireless mic from the charging cradle.
- Press TALK OFF again. The status indicator under the button should turn green.
If that still does not work, you might have a defective battery or a defective wireless mic. Please contact customer service for assistance.

NOTES:
- Every time the base unit is powered up, the wireless mics will need some time to connect to the base unit. Please allow at least one minute for the wireless mic and base unit to synchronize before use after the base unit has powered up.
- If your have more than one SB3014 in the office, use the paging function (page 13) to identify the wireless mics that are connected to the corresponding base unit. Make sure that they are not mixed up between each of your SB3014.
Appendix
Troubleshooting
The callers cannot hear me when I am using the wireless mic.
• Make sure the wireless mic is not muted during a call.
- Move the wireless mic closer to the base unit. It may be out of range.
- Speak to the wireless mic (page 10) at a distance of no more than 3 feet.
- Reset the base unit. Unplug the AC power cord from the wall outlet. Wait for approximately 15 seconds, and then plug it back in. Allow at least one minute for the wireless mic and base unit to synchronize.
- If your have more than one SB3014 Conference Speakerphone with Wireless Mics in the office, use the paging function (page 13) to identify the wireless mics that are connected to the corresponding base unit. Make sure that they are not mixed up between each of your SB3014.
- Other electronic products such as HAM radios and other DECT phones, can cause interference with your SB3014. Try installing your SB3014 as far away as possible from these types of electronic devices.
Status Indicator on the wireless mic flashes orange.
The wireless mic has low battery.
- Place the wireless mic on the charging cradle for recharging.
For optimal battery life performances:
- Charge the wireless mics for up to eight hours before the first time of use.
- Return the wireless mics to the charging cradle after use. Charge them for at least 30 minutes before subsequent uses.
Status Indicator on the wireless mic flashes orange even after a long period of charging.
The efficiency of the battery might have been reduced after being used for some time.
- Make sure the wireless mic is placed on the charging cradle correctly (page 9) when charging.
- Remove and install the battery again (page 9). Use it until the battery is fully depleted, and then charge the wireless mic on the charging cradle for eight hours.
- If the above measures do not solve the problem, replace the battery.
Troubleshooting
The status indicator on the wireless mic does not turn orange when on the charging cradle.
• The wireless mic might be fully charged.
- Clean the charging contacts on the wireless mic and the charging cradles each month with a pencil eraser or a dry non-abrasive fabric.
- Make sure the DC power cable, telephone line cord, AC power cord, and the power adapter are plugged in properly (page 8).
- Make sure the wireless mic is placed on the charging cradle correctly (page 9).
- Unplug the power cable. Wait for 15 seconds before plugging it back in. Allow up to one minute for the wireless mic and base unit to reset.
- Lift the wireless mic and place it back on the charging cradle. If the wireless mic status indicator turns orange for 5 seconds, and then lights off, the battery is fully charged.
There is interference during a telephone conversation. My calls fade out when I am using the wireless mic.
- Move the wireless mic closer to the base unit. It may be out of range.
- If you subscribe to high-speed Internet service (DSL - digital subscriber line) through your telephone line, you must install a DSL filter between the telephone line cord and the telephone wall jack. The filter prevents noise and caller ID problems caused by DSL interference. Contact your DSL service provider for more information about DSL filters.
- Appliances plugged into the same circuit as the base unit can cause interference. Try moving the appliance or base unit to another outlet.
- Other electronic products such as HAM radios and other DECT phones, can cause interference with your conference phone. Try installing your conference phone as far away as possible from these types of electronic devices.
- If your telephone is plugged into a modem or a surge protector, plug the telephone (or modem/surge protector) into a different location. If this doesn't solve the problem, relocate your telephone or modem farther apart from each other, or use a different surge protector.
- If other telephones in your office are having the same problem, the problem is in the wiring or telephone/PBX service. Contact your telephone service provider (charges may apply) or PBX system administrator.
I hear other calls when using the telephone.
- Disconnect the base unit from the telephone wall jack. Plug in a different telephone. If you still hear other calls, the problem is probably in the wiring or telephone/PBX service. Contact your telephone service provider (charges may apply) or PBX system administrator.
Appendix
Troubleshooting
My caller ID features are not working properly.
If you are using a PSTN line, please refer to the following details:
- Caller ID is a subscription service. You must subscribe to this service from your telephone service provider for this feature to work on your telephone.
- The caller may not be calling from an area which supports caller ID.
- Both your and the caller's telephone service providers must use equipment compatible with the caller ID service.
- The caller ID information shows after the first or second ring.
- If you subscribe to high-speed Internet service (DSL - digital subscriber line) through your telephone line, you must install a DSL filter between the telephone line cord and the telephone wall jack. The filter prevents noise and caller ID problems caused by DSL interference. Contact your DSL service provider for more information about DSL filters.
If you are using a PBX extension line, please note:
- PBX switches do not transfer caller ID to extension lines. Please contact your PBX system administrator for more information.
The SB3014 does not receive caller ID while on a call.
- The SB3014 does not support type II caller ID. No caller ID is shown when the line is already in use during a call.
I have accidentally set my LCD language to Spanish or French, and I don't know how to change it back to English.
- When the base unit is not in use or on a call, press MENU SELECT, and then enter TM364.#
Common cure for electronic equipment.
If the telephone is not responding normally, put the wireless mics on the charging cradles. If it does not respond, try the following (in the order listed):
- Disconnect the power to the base unit.
- Remove the battery from the wireless mics.
- Wait a few minutes before connecting power to the base unit.
- Install the battery again and place the wireless mics on the charging cradles.
- Wait for the wireless mic to synchronize with the base unit. Allow up to one minute for this to take place.
Maintenance
Taking care of your Conference Speakerphone with Wireless Mics
- Your SB3014 contains sophisticated electronic parts, so it must be treated with care.
Avoid rough treatment
- Place the wireless mic down gently. Save the original packing materials to protect your SB3014 if you ever need to ship it.
Avoid water
- Your SB3014 can be damaged if it gets wet. Do not use the wireless mic outdoors in the rain, or handle it with wet hands. Do not install the base unit near a sink, bathtub or shower.
Electrical storms
- Electrical storms can sometimes cause power surges harmful to electronic equipment. For your own safety, take caution when using electric appliances during storms.
Cleaning your Conference Speakerphone with Wireless Mics
- Your SB3014 has a durable plastic casing that should retain its luster for many years. Clean it only with a soft cloth slightly dampened with water or mild soap.
- Do not use excess water or cleaning solvents of any kind.
Remember that electrical appliances can cause serious injury if used when you are wet or standing in water. If the base unit should fall into water, DO NOT RETRIEVE IT UNTIL YOU UNPLUG THE AC POWER CORD AND TELEPHONE LINE CORDS FROM THE WALL. Pull the unit out by the unplugged cords.
Appendix
Important safety information
When using your Conference Speakerphone with Wireless Mics, basic safety precautions should always be followed to reduce the risk of fire, electric shock and injury, including the following:
- Read and understand all instructions.
- Follow all warnings and instructions marked on the product.
- Unplug this product from the wall outlet before cleaning. Do not use liquid or aerosol cleaners. Use a damp cloth for cleaning.
- Do not use this product near water such as near a bath tub, wash bowl, kitchen sink, laundry tub or swimming pool, or in a wet basement or shower.
- Do not place this product on an unstable table, shelf, stand or other unstable surfaces.
- Slots and openings in the back or bottom of the base unit and wireless mic are provided for ventilation. To protect them from overheating, these openings must not be blocked by placing the product on a soft surface such as a bed, sofa or rug. This product should never be placed near or over a radiator or heat register. This product should not be placed in any area where proper ventilation is not provided.
- This product should be operated only from the type of power source indicated on the marking label. If you are not sure of the type of power supply in your office, consult your dealer or local power company.
- Do not allow anything to rest on the power cord. Do not install this product where the cord may be walked on.
- Never push objects of any kind into this product through the slots in the base unit or wireless mic because they may touch dangerous voltage points or create a short circuit. Never spill liquid of any kind on the product.
- To reduce the risk of electric shock, do not disassemble this product, but take it to an authorized service facility. Opening or removing parts of the base unit or wireless mic other than specified access doors may expose you to dangerous voltages or other risks. Incorrect reassembling can cause electric shock when the product is subsequently used.
- Do not overload wall outlets and extension cords.
- Unplug this product from the wall outlet and refer servicing to an authorized service facility under the following conditions:
- When the power supply cord or plug is damaged or frayed.
• If liquid has been spilled onto the product.
• If the product has been exposed to rain or water. - If the product does not operate normally by following the operating instructions. Adjust only those controls that are covered by the operation instructions. Improper adjustment of other controls may result in damage and often requires extensive work by an authorized technician to restore the product to normal operation.
-
If the product has been dropped and the base unit and/or wireless mic has been damaged.
• If the product exhibits a distinct change in performance. -
Avoid using the SB3014 during an electrical storm. There is a remote risk of electric shock from lightning.
Appendix
Important safety information
- Do not use the SB3014 to report a gas leak in the vicinity of the leak. Under certain circumstances, a spark may be created when the adapter is plugged into the power outlet, or when the wireless mic is replaced in its cradle. This is a common event associated with the closing of any electrical circuit. The user should not plug the phone into a power outlet, and should not put a charged wireless mic on the charging cradle, if the phone is located in an environment containing concentrations of flammable or flame-supporting gases, unless there is adequate ventilation. A spark in such an environment could create a fire or explosion. Such environments might include: medical use of oxygen without adequate ventilation; industrial gases (cleaning solvents; gasoline vapors; etc.); a leak of natural gas; etc.
- Only put the wireless mic next to your mouth when it is in normal talk mode.
- The power cables are intended to be correctly oriented in a vertical or floor mount position. The prongs are not designed to hold the plug in place if it is plugged into a ceiling or cabinet outlet.
SAVE THESE INSTRUCTIONS
Appendix
Precautions of users of implanted cardiac pacemakers
Cardiac pacemakers (applies only to digital cordless telephones):
Wireless Technology Research, LLC (WTR), an independent research entity, led a multidisciplinary evaluation of the interference between portable wireless telephones and implanted cardiac pacemakers. Supported by the U.S. Food and Drug Administration, WTR recommends to physicians that:
Pacemaker patients
- Should keep the wireless telephone at least six inches from the pacemaker.
- Should NOT place wireless telephones directly over the pacemaker, such as in a breast pocket, when it is turned ON.
- Should use the wireless telephone at the ear opposite the pacemaker.
WTR's evaluation did not identify any risk to bystanders with pacemakers from other persons using wireless telephones.
About wireless mics
- Privacy: The same features that make a wireless mic convenient create some limitations. Calls on conference phones are transmitted between the base unit and the wireless mic by radio waves, so there is a possibility that the wireless mic conversations could be intercepted by radio receiving equipment within range of the wireless mic. For this reason, you should not think of conference phone conversations as being as private as those on corded telephones.
- Electrical power: The base unit of this conference phone must be connected to a working electrical outlet. The electrical outlet should not be controlled by a wall switch. Calls cannot be made from the conference phone if the base unit is unplugged, switched off or if the electrical power is interrupted.
- Potential TV interference: Wireless mic operates at frequencies that may cause interference to televisions and VCRs. To minimize or prevent such interference, do not place the base unit near or on top of a TV or VCR. If interference is experienced, moving the wireless mic farther away from the TV or VCR often reduces or eliminates the interference.
- Rechargeable batteries: Exercise care in handling batteries in order not to create a short circuit with conducting material such as rings, bracelets and keys. The battery or conductor may overheat and cause harm.
- Lithium-ion rechargeable batteries: Dispose of these batteries in a safe manner. Do not burn or puncture. Like other batteries of this type, if burned or punctured, they could release caustic material which could cause injury.
Operating range
This conference phone operates with the maximum power allowed by the Federal Communications Commission (FCC). Even so, this wireless mic and base unit can communicate over a certain distance, which can vary with the locations of the base unit and wireless mic, the weather, and the layout of your office.
When the wireless mic is out of range, the status indicator flashes red quickly on the wireless mic. The wireless mic will sleep after out of range for 30 minutes. Therefore, you should always return the wireless mic to the charging cradle after use.
If there is an incoming call while the wireless mic is out of range, the incoming call green light may not flash on the wireless mic, or if it flashes, the call may not connect well when you press on the base unit. Move the wireless mic closer to the base unit, and then press on the base unit to answer the call. If the wireless mic moves out of range during a telephone conversation, there may be interference. To improve reception, move closer to the base unit.
In compliance with the bilingual requirements for safety, caution, and warning markings of Canadian Federal and Provincial/Territorial statutes and regulations, the French version of Important safety information is included.
FCC Part 68 and ACTA
This equipment complies with Part 68 of the FCC rules and with technical requirements adopted by the Administrative Council for Terminal Attachments (ACTA). The label on the back or bottom of this equipment contains, among other things, a product identifier in the format US:AAAEQ##TXXXX. This identifier must be provided to your telephone service provider upon request.
The plug and jack used to connect this equipment to premises wiring and the telephone network must comply with the applicable Part 68 rules and technical requirements adopted by ACTA. A compliant telephone cord and modular plug is provided with this product. It is designed to be connected to a compatible modular jack that is also compliant. An RJ11 jack should normally be used for connecting to a single line and an RJ14 jack for two lines. See the installation instructions in the user's manual.
The Ringer Equivalence Number (REN) is used to determine how many devices you may connect to your telephone line and still have them ring when you are called. The REN for this product is encoded as the 6th and 7th characters following the US: in the product identifier (e.g., if ## is 03, the REN is 0.3). In most, but not all areas, the sum of all RENs should be five (5.0) or less. For more information, please contact your telephone service provider.
This equipment may not be used with Party Lines. If you have specially wired alarm dialing equipment connected to your telephone line, ensure the connection of this equipment does not disable your alarm equipment. If you have questions about what will disable the alarm equipment, consult your telephone service provider or a qualified installer.
If this equipment is malfunctioning, it must be unplugged from the modular jack until the problem has been corrected. Repairs to this telephone equipment can only be made by the manufacturer or its authorized agents. For repair procedures, follow the instructions outlined under the Limited warranty.
If this equipment is causing harm to the telephone network, the telephone service provider may temporarily discontinue your telephone service. The telephone service provider is required to notify you before interrupting service. If advance notice is not practical, you will be notified as soon as possible. You will be given the opportunity to correct the problem and the telephone service provider is required to inform you of your right to file a complaint with the FCC. Your telephone service provider may make changes in its facilities, equipment, operation, or procedures that could affect the proper functioning of this product. The telephone service provider is required to notify you if such changes are planned.
If this product is equipped with a corded or cordless handset, it is hearing aid compatible.
If this product has memory dialing locations, you may choose to store emergency telephone numbers (e.g., police, fire, medical) in these locations. If you do store or test emergency numbers, please:
Remain on the line and briefly explain the reason for the call before hanging up.
Perform such activities in off-peak hours, such as early morning or late evening.
Industry Canada
This device complies with Industry Canada license-exempt RSS standard(s).
Operation is subject to the following two conditions: (1) this device may not cause harmful interference, and (2) this device must accept any interference received, including interference that may cause undesired operation.
Privacy of communications may not be ensured when using this telephone.
The term "IC:" before the certification/registration number only signifies that the Industry Canada technical specifications were met.
The Ringer Equivalence Number (REN) for this terminal equipment is 1.0. The REN is an indication of the maximum number of devices allowed to be connected to a telephone interface. The termination on an interface may consist of any combination of devices subject only to the requirement that the sum of the RENs of all the devices does not exceed five.
This product meets the applicable Industry Canada technical specifications.
Appendix
FCC Part 15
This equipment has been tested and found to comply with the requirements for a Class B digital device under Part 15 of the Federal Communications Commission (FCC) rules. These requirements are intended to provide reasonable protection against harmful interference in a residential installation. This equipment generates, uses and can radiate radio frequency energy and, if not installed and used in accordance with the instructions, may cause harmful interference to radio communications. However, there is no guarantee that interference will not occur in a particular installation. If this equipment does cause harmful interference to radio or television reception, which can be determined by turning the equipment off and on, the user is encouraged to try to correct the interference by one or more of the following measures:
• Reorient or relocate the receiving antenna.
- Increase the separation between the equipment and receiver.
- Connect the equipment into an outlet on a circuit different from that to which the receiver is connected.
- Consult the dealer or an experienced radio/TV technician for help.
Changes or modifications to this equipment not expressly approved by the party responsible for compliance could void the user's authority to operate the equipment.
This device complies with Part 15 of the FCC Rules. Operation is subject to the following two conditions: (1) this device may not cause harmful interference, and (2) this device must accept any interference received, including interference that may cause undesired operation. Privacy of communications may not be ensured when using this telephone.
To ensure safety of users, the FCC has established criteria for the amount of radio frequency energy that can be safely absorbed by a user or bystander according to the intended usage of the product. This product has been tested and found to comply with the FCC criteria. The wireless mic may be safely held against the face of the user. The telephone base shall be installed and used such that parts of the user's body other than the hands are maintained at a distance of approximately 20 cm (8 inches) or more.
This Class B digital apparatus complies with Canadian requirement:
CAN ICES-3 (B)/NMB-3(B)
The RBRC ^® seal

The RBRC® Seal means that the manufacturer is voluntarily participating in an industry program to collect and recycle lithium-ion rechargeable batteries when taken out of service within the United States. These batteries may be taken to a participating local retailer of replacement batteries or recycling center. Or you may call 1-800-8-BATTERY® for locations accepting spent Li-ion batteries.
RBRC® and 1-800-8-BATTERY® are registered trademarks of the Rechargeable Battery Recycling Corporation.
Appendix
California Energy Commission battery charging testing instruc
This telephone is set up to comply with the energy-conserving standards right out of the box. These instructions are intended for California Energy Commission (CEC) compliance testing only. When the CEC battery charging testing mode is activated, all telephone functions, except battery charging, will be disabled.
To activate the CEC battery charging testing mode:
- Place all wireless mics (with batteries inserted) into the base unit to make sure they can work normally with the base unit.
- Unplug the power cable from the power outlet.
- While you press and hold MUTE ALL on the base unit, plug the power cable back to the power outlet.
- After about 20 seconds, when the base unit status indicators start flashing, release MUTE ALL and then press it again within one second. You hear a confirmation tone.

The process takes up to one minute to complete. When the base unit successfully enters the CEC battery charging testing mode, the base unit status indicators turn off and all wireless mics are deregistered. All telephone functions, except battery charging, will be disabled.
If the base unit fails to enter this mode, start again from Step 1.
Note: The base unit will be powered up as normal if you fail to press MUTE ALL within one second in Step 4.
To deactivate the CEC battery charging testing mode:
- Unplug the power cable from the power outlet, and then plug it back in. The base unit is powered up as normal.
- Register your wireless mics back to the base unit. See page 37 for registration instructions.

Appendix
Limited warranty
The AT&T brand is used under license - any repair, replacement or warranty service, and all questions about this product should be directed to our website at
www.smbtelephones.att.com or call 1 (800) 222-3111. In Canada, dial 1 (866) 288-4268.
1. What does this limited warranty cover?
The manufacturer of this AT&T branded product warrants to the holder of a valid proof of purchase (“CONSUMER” or “you”) that the product and all accessories provided in the sales package (“PRODUCT”) are free from defects in material and workmanship, pursuant to the following terms and conditions, when installed and used normally and in accordance with the PRODUCT operating instructions. This limited warranty extends only to the CONSUMER for products purchased and used in the United States of America and Canada.
2. What will be done if the PRODUCT is not free from defects in materials and workmanship during the limited warranty period ("materially defective PRODUCT")?
During the limited warranty period, the manufacturer's authorized service representative will repair or replace at the manufacturer's option, without charge, a materially defective PRODUCT. If the manufacturer repairs the PRODUCT, they may use new or refurbished replacement parts. If the manufacturer chooses to replace the PRODUCT, they may replace it with a new or refurbished PRODUCT of the same or similar design. The manufacturer will retain defective parts, modules, or equipment. Repair or replacement of the PRODUCT, at the manufacturer's option, is your exclusive remedy. The manufacturer will return repaired or replacement products to you in working condition. You should expect the repair or replacement to take approximately 30 days.
3. How long is the limited warranty period?
The limited warranty period for the PRODUCT extends for TWO (2) YEARS from the date of purchase. If the manufacturer repairs or replaces a materially defective PRODUCT under the terms of this limited warranty, this limited warranty also applies to repaired or replacement PRODUCT for a period of either (a) 90 days from the date the repaired or replacement PRODUCT is shipped to you or (b) the time remaining on the original two-year limited warranty; whichever is longer.
4. What is not covered by this limited warranty?
This limited warranty does not cover:
- PRODUCT that has been subjected to misuse, accident, shipping or other physical damage, improper installation, abnormal operation or handling, neglect, inundation, fire, water, or other liquid intrusion; or
- PRODUCT that has been damaged due to repair, alteration, or modification by anyone other than an authorized service representative of the manufacturer; or
- PRODUCT to the extent that the problem experienced is caused by signal conditions, network reliability or cable or antenna systems; or
- PRODUCT to the extent that the problem is caused by use with non-AT&T accessories; or
- PRODUCT whose warranty/quality stickers, PRODUCT serial number plates or electronic serial numbers have been removed, altered or rendered illegible; or
- PRODUCT purchased, used, serviced, or shipped for repair from outside the United States of America or Canada, or used for commercial or institutional purposes (including but not limited to products used for rental purposes); or
• PRODUCT returned without valid proof of purchase (see item 6); or - Charges for installation or setup, adjustment of customer controls, and installation or repair of systems outside the unit.
5. How do you get warranty service?
To obtain warranty service, visit our website at www.smbtelephones.att.com or call 1 (800) 222-3111. In Canada, dial 1 (866) 288-4268.
NOTE: Before calling for service, please review the user's manual; a check of the PRODUCT's controls and features may save you a service call.
Except as provided by applicable law, you assume the risk of loss or damage during transit and transportation and are responsible for delivery or handling charges incurred in the transport of the PRODUCT(s) to the service location. The manufacturer will return repaired or replaced PRODUCT under this limited warranty to you. Transportation, delivery or handling charges are prepaid. The manufacturer assumes no risk for damage or loss of the PRODUCT in transit. If the PRODUCT failure is not covered by this limited warranty, or proof of purchase does not meet the terms of this limited warranty, the manufacturer will notify you and will request that you authorize the cost of repair prior to any further repair activity. You must pay for the cost of repair and return shipping costs for the repair of products that are not covered by this limited warranty.
6. What must you return with the PRODUCT to get warranty service?
You must:
- Return the entire original package and contents including the PRODUCT to the service location along with a description of the malfunction or difficulty; and
- Include a "valid proof of purchase" (sales receipt) identifying the PRODUCT purchased (PRODUCT model) and the date of purchase or receipt; and
- Provide your name, complete and correct mailing address, and telephone number.
7. Other limitations
This warranty is the complete and exclusive agreement between you and the manufacturer of this AT&T branded PRODUCT. It supersedes all other written or oral communications related to this PRODUCT. The manufacturer provides no other warranties for this PRODUCT. The warranty exclusively describes all of the manufacturer's responsibilities regarding the PRODUCT. There are no other express warranties. No one is authorized to make modifications to this limited warranty and you should not rely on any such modification.
State/Provincial Law rights: This warranty gives you specific legal rights, and you may also have other rights which vary from state to state or province to province.
Limitations: Implied warranties, including those of fitness for a particular purpose and merchantability (an unwritten warranty that the PRODUCT is fit for ordinary use) are limited to two years from date of purchase. Some states/provinces do not allow limitations on how long an implied warranty lasts, so the above limitation may not apply to you. In no event shall the manufacturer be liable for any indirect, special, incidental, consequential, or similar damages (including, but not limited to lost profits or revenue, inability to use the PRODUCT or other associated equipment, the cost of substitute equipment, and claims by third parties) resulting from the use of this PRODUCT. Some states/provinces do not allow the exclusion or limitation of incidental or consequential damages, so the above limitation or exclusion may not apply to you.
Please retain your original sales receipt as proof of purchase.
| Frequency control Crystal controlled PLL synthesizer | |
| Transmit frequency Wireless mic: 1921.536-1928.448 MHzBase unit: 1921.536-1928.448 MHz | |
| Channels 5 | |
| Nominal effective range | Maximum power allowed by FCC and IC. Actual operating range may vary according to environmental conditions at the time of use. |
| Optimal and minimum distances | Optimal distance between the base unit/wireless mic and the participant: 2 feetMinimum distance between each wireless mic: 1 foot |
| Power requirements Wireless mic: Li-ion Battery Pack; 3.7V; 240mAh rechargeable batteryBase unit adapter: Input: 100-240V AC 50/60HzOutput: 9V DC @ 2000mA | |
| Memory Phonebook: | 50 memory locations; up to 30 digits and 15 charactersCall log:50 memory locations; up to 16 digits and 15 characters |
| Operation Operating time* | |
| Talk time (while the wireless mic is in use) Up to 8 hours | |
| Standby** Up to 70 hours | |
* Operating times vary depending on your actual use and the lifespan of the battery.
** The wireless mic is not charging or in use.
DECT 6.0 digital technology
Digital Enhanced Cordless Telecommunications (DECT) 6.0 is a new frequency band that transmits your voice across multiple channels. This technology provides superior quality of voice and sound, high protection against wiretapping and better range than 2.4 GHz and 5.8 GHz phone systems, while not interfering with wireless routers.
Operating range
This Conference Speakerphone with Wireless Mics operates within the maximum power allowed by the Federal Communications Commission (FCC). Even so, the wireless mics and base unit can communicate over a certain distance — which can vary with the locations of the base unit and wireless mics, the weather, and the construction of your home or office.
Full-duplex speakerphones
The full-duplex speakerphones on your base unit and wireless mics allow both ends of a call to speak and be heard at the same time. Optimal performance is subject to external factors and individual usage.
A
Answering calls, 11
Area code, 20
Assign a speed dial entry, 29
B
Base unit,
Installation, 8
Quick reference guide, 2–4
Reset, 21
Ringer tone, 17
Ringer volume, 16
Status indicators, 6
Temporary ringer silencing, 11
Battery charging, 9
Battery installation, 9
C
Call log, 31–36
Add entries to phonebook, 35
Delete entries, 34
Dial entries, 34
Review entries, 33
View dialing options, 34
Call waiting, 14
Chain dialing, 15
Character chart, 24
Clock, 17
D
Date and time, 17
Delete a speed dial number, 30
Delete call log entries, 34
Deregister a wireless mic, 38
Dialing,
From a record in the call log, 34
From the phonebook, 27
Dial mode, 19
Dial tone, 10
Display dial, 27
DSL filter 8
E
Ending calls, 11
|
Important safety information, 47–48
Installation, 7–9
J
Join a call in progress, 13
K
Key tone, 19
L
Last number redial, 12
LCD language, 18
Reset to English, 18
Limited warranty, 56–57
Loop gain, 21
M
Maintenance, 46
Making calls, 11
Memory match, 33
Mute, 14
N
Names,
Enter into phonebook, 23
Search, 26
0
On-hook dialing (predialing), 11
Operating range, 49
P
Paging, 13
Phonebook, 22–30
Capacity, 22
Delete entries, 27
Dial number, 27
Edit an entry, 28
Name search, 26
New entries, 23
Review entries, 25
Predialing, 11
Q
Quick reference guide, 2–5
R
Reassign a speed dial number, 29
Receiving calls, 11
Redial, 12
Clear the redial number, 12
Register a wireless mic, 37
Rename base, 18
Reset, 21
Ringer silencing, 11
Ringer volume, 16
Ring tone options, 17
S
Safety information, 47–48
Screen messages, 39
Search by name, 26
Speed dial, 29–30
Assign or reassign number, 29
Delete number, 30
Make a call, 30
Status indicators, 6
T
Technical specifications, 58
Temporary ringer silencing, 11
Temporary tone dialing, 14
Three-way conference, 12
Time setting, 17
Troubleshooting, 40–45
V
Volume control, 14
W
Warranty, 56–57
Wireless mic
Status indicator, 6
Wireless mic, 10
Deregistration, 38
Join a call in progress, 13
Quick reference guide, 5
Registration, 37

natural_image
Abstract spherical object with horizontal striped pattern (no text or symbols)at&t
www.smbtelephones.att.com
- at&t
- User's manual
- Congratulations
- SB3014
- DECT 6.0 conference
- speakerphone with wireless mics
- Table of contents
- Getting started
- Operation
- Settings
- Phonebook
- Call log
- Appendix
- Index
- Parts checklist
- Quick reference guide - base unit (front)
- Speakerphone
- LCD display
- Status indicators
- MENU SELECT
- CANCEL CLEAR
- vol
- 6.
- Dialing keys
- Front microphone
- 9.
- REDIAL
- FLASH
- Wireless mic
- Charging contacts
- PHONEBOOK ▲
- Quick reference guide - wireless mic
- Microphone
- Status indicator
- (MUTE ALL)
- Battery door
- Charging contacts
- STOP!
- Avoid placing the base unit and wireless mics too close to:
- Base unit installation
- NOTES:
- IMPORTANT INFORMATION
- Battery installation and charging
- Check for dial tone
- Using the wireless mic
- Conference speakerphone operation
- Making a call
- On hook dialing (predialing)
- Answering a call
- Temporary ringer silencing
- MUTE
- Last number redial
- Clear the redial number
- Three-way conference
- To establish a three-way conference:
- To end the three-way conference:
- Paging
- To start the paging tone:
- To mute the paging tone:
- To stop paging:
- Join a call in progress
- Volume control
- Call waiting
- To mute a call:
- To take a call off mute
- Temporary tone dialing
- Options while on calls
- Chain dialing
- To access a number from the phonebook while on a call:
- To access a number from the call log while on a call:
- To access the last number dialed while on a call:
- Conference speakerphone settings
- To enter the menu:
- Ringer volume
- -OR-
- Ringer tone
- Set date/time
- LCD language
- Rename base unit
- Key tone
- Dial mode
- Area code
- To set the home area code:
- Loop gain
- Reset
- Capacity
- Create a new phonebook entry
- Create phonebook entries
- Add a predialed telephone number to the phonebook
- Review phonebook entries
- Search by name
- Dial, delete or edit phonebook entries
- Display dial
- Delete a phonebook entry
- Delete all phonebook entries
- Edit a phonebook entry
- Assign a speed dial number
- Reassign a speed dial number
- Delete a speed dial number
- Make a call using speed dial
- About caller ID
- Information about caller ID with call waiting
- How the call log works
- Missed (new) call indicator
- Memory match
- Review the call log
- View dialing options
- Dial a call log entry
- Delete a call log entry
- Delete all call log entries
- Save a call log entry to the phonebook
- Caller ID screen messages
- Registering wireless mics
- Register a wireless mic to your base unit
- Deregistering wireless mics
- Deregister a wireless mic from your base unit
- Base unit display screen messages
- Troubleshooting
- My Conference Speakerphone with Wireless Mics does not work at all.
- The LCD display shows No line. I cannot hear the dial tone.
- I cannot dial out.
- The base unit does not ring when there is an incoming call.
- My wireless mic does not work at all.
- The callers cannot hear me when I am using the wireless mic.
- Status Indicator on the wireless mic flashes orange.
- Status Indicator on the wireless mic flashes orange even after a long period of charging.
- The status indicator on the wireless mic does not turn orange when on the charging cradle.
- There is interference during a telephone conversation. My calls fade out when I am using the wireless mic.
- I hear other calls when using the telephone.
- My caller ID features are not working properly.
- The SB3014 does not receive caller ID while on a call.
- I have accidentally set my LCD language to Spanish or French, and I don't know how to change it back to English.
- Common cure for electronic equipment.
- Maintenance
- Taking care of your Conference Speakerphone with Wireless Mics
- Avoid rough treatment
- Avoid water
- Electrical storms
- Cleaning your Conference Speakerphone with Wireless Mics
- Important safety information
- SAVE THESE INSTRUCTIONS
- Precautions of users of implanted cardiac pacemakers
- Pacemaker patients
- About wireless mics
- Operating range
- FCC Part 68 and ACTA
- Industry Canada
- FCC Part 15
- The RBRC ® seal
- California Energy Commission battery charging testing instruc
- To activate the CEC battery charging testing mode:
- To deactivate the CEC battery charging testing mode:
- Limited warranty
- What does this limited warranty cover?
- What will be done if the PRODUCT is not free from defects in materials and workmanship during the limited warranty period ("materially defective PRODUCT")?
- How long is the limited warranty period?
- What is not covered by this limited warranty?
- How do you get warranty service?
- What must you return with the PRODUCT to get warranty service?
- You must:
- Other limitations
- DECT 6.0 digital technology
- Full-duplex speakerphones
- A
- B
- C
- D
- E
- |
- J
- K
- L
- M
- N
- 0
- P
- Q
- R
- S
- T
- V
- W
Brand : AT&T
Model : SB3014
Category : Phone