
X209D - Browser ALPINE - Free user manual and instructions
Find the device manual for free X209D ALPINE in PDF.


| Product Type | Car Navigation Browser |
| Brand | Alpine |
| Model | X209D |
| Display Size | 6.1 inch |
| Resolution | 800 x 480 pixels |
| Dimensions (W x H x D) | 178 x 100 x 160 mm |
| Weight | 1.2 kg |
| Power Supply | 12V DC |
| Operating Temperature | -10°C to 60°C |
| GPS Chipset | SiRFstar IV |
| Preloaded Maps | Europe |
| Bluetooth | Yes, hands-free calling |
| USB Port | Yes |
| Audio Output | 4 x 50W max |
| Built-in Microphone | Yes |
| Steering Wheel Control Compatible | Yes |
| Maintenance | Wipe with soft damp cloth, no solvents |
| Safety | For use only when vehicle is stationary |
| Spare Parts Availability | Through Alpine authorized dealers |
| Warranty | 2 years |
| Certifications | CE, RoHS |
| Language Support | Multi-language |
| Map Updates | Free for 1 year |
Frequently Asked Questions - X209D ALPINE
User questions about X209D ALPINE
0 question about this device. Answer the ones you know or ask your own.
Ask a new question about this device
Download the instructions for your Browser in PDF format for free! Find your manual X209D - ALPINE and take your electronic device back in hand. On this page are published all the documents necessary for the use of your device. X209D by ALPINE.
USER MANUAL X209D ALPINE
Thank you for purchasing this Alpine product. Please take a moment to protect your purchase by registering your product now at the following address: www.alpine-usa.com/registration You will be informed of product and software updates (if applicable), special promotions, news about Alpine.
Resistant to Dust and Fresh Water (X209D Only)
| IP53 rating Resistant to D | Dust and Fresh Water. Rated IP53 under IEC standard 60529. |
| IP test condition | This product has been tested in a controlled, laboratory environment with an IP (Ingress Protection) rating of IP53 under IEC standard 60529, which is an international standard for measuring the level of protection from dust and fresh water.The IP rating is a 2-digit code – the first digit indicates the protection level against dust, and the second digit indicates the protection level against fresh water.IP53 means protected against dust with limited ingress, and protected against spraying fresh water up to 60 degrees from vertical. |
| Terms of Use and Risk | Although this product is rated IP53, it is not impervious to dust or water damage in all situations.Dust and water resistance is not permanent; resistance may decrease as a result of normal wear or other damage to the product.Do not expose to sea/salt water, chlorinated water, mud, detergent or other liquids.Do not expose to prolonged rain, fog, humidity, temperature changes or other prolonged weather and environmental conditions. Condensation, moisture or debris may accumulate in the product. Close vehicle windows, roof and other openings to avoid exposure to the product.If the product gets wet, dry thoroughly with a soft cloth.Open/close the product nose with care – dust or water may enter the product. |
| Disclaimers | Liquid and dust damage are not covered under warranty.Failure to install the product as directed in the installation manual may degrade dust and water resistance. |
X208U/INE-W977HD








X209D













Contents
Operating Instructions
PRECAUTIONS
IMPORTANT INFORMATION ....8
WARNING
Points to Observe for Safe Usage ....8
WARNING 9
CAUTION 10
NOTICE 10
Features
Favorite Function ....13
About Swiping the Touch Screen ....13
Switching the Audio Sources Screen to a Dedicated Screen ....14
About Dual Screen 15
Dual Screen Display Position .....15
Getting Started
Location of Controls ....16
Turning Power On or Off ....17
Turning the System On ....17
Initial System Start-Up ....17
Adjusting the Volume ......17
Lowering Volume Quickly ....17
Touch Screen Operation ....18
Switching Sources ....18
Operating the Function Button on the Audio/Video Main Screen ....19
About Basic Operation for List Screen .....19
About the Shortcut Setup Screen ....20
Sound Setup Function ......20
Rear Seat Entertainment Function .....21
About the Menu Screen 22
Edit Menu 22
About the Indicator Display 23
Opening screen Customization ....23
How to Input Characters and Numbers
(Keypad) 24
Favorite Function
Using the Favorite Function 25
Editing the Favorite Screen 25
Registering Items 25
Changing Item Names 26
Changing Icons (only the Shortcut Dialing and Navigation icons) 26
Changing the Layout 27
Deleting Items 27
Applying Alpine Tunelt App
Adjusting the sound via the Smartphone .....28
Facebook Notification Function 28
Setup
Setup Operation ....30
Wireless (Bluetooth) Setup
Bluetooth Setup 31
Displaying Bluetooth Information .... 31
Pairing a Bluetooth Device 31
Hands-free Device Primary/Secondary Setting 32
iPhone Auto Pairing Setting 32
Device Setup 32
Setting the Passcode 32
Changing the Character Code of the Phone Book 33
Selecting the Output Speaker 33
Setting the Microphone Select (X208U/INE-W977HD only) 33
General Setup
Sound Setup 34
Setting the Balance/Fader/Rear Speaker/ Subwoofer 34
Setting the Media Xpander (MX HD) ..... 35
Equalizer Presets 35
Adjusting the Parametric Equalizer Curve (Dual HD EQ) 35
Adjusting the Crossover Settings (X-Over) 36
Adjusting the Time Correction (TCR) ...... 37
Setting Defeat 37
Setting the Volume for Each Source ...... 37
Adjusting the Caller Level 37
Adjusting the Microphone Level 37
Adjusting the Ring Tone Level 38
Volume Setting 38
Setting Audio Mute On/Off while Backing up 38
Setting the Microphone Effect 38
Default Sound Settings 38
About the Crossover 38
About Time Correction 39
Picture Quality Setup 40
Selecting the Visual EQ Mode (Factory's setting) 40
Adjusting Brightness 40
Adjusting Color of Picture 40
Adjusting Tint of Picture 40
Adjusting Image Contrast 40
Adjusting Picture Quality 40
Saving and calling the adjusted picture quality 40
Display/Key Setup 41
Screen/Lighting Customize 41
Switching the Display Color 41
Switching the Illumination Color (X208U/INE-W977HD only) 41
Setting the Text Scroll 41
Switching the Artwork Position 41
General Setup 42
Setting the Menu Language 42
Format settings 42
About X209D/X208U/INE-W977HD ..... 42
Setting Demo mode to Off/On 42
Vehicle Setup 42
Steering wheel Setting 42
Installation Setup 42
Source Setup
Radio Setup 43
Setting the TUNER (FM) Tone Quality (Tuner Condition) 43
Setting the TUNER (FM) Frequency Step ... 43
SiriusXM Setup 43
Setting the Alert individually for an Artist/ Song/Favorite Team 44
Setting ON/OFF of all Songs/Artists/Games Alert 44
Deleting all stored Alert 44
Setting the Favorite Sports Team Alerts ..... 44
Setting the Parental Lock 44
Signal Strength Information 45
AUX Setup 45
Setting the Auxiliary (AUX) Name ...... 45
Switching the Visual Input Signal System ... 45
HDMI Setup 46
Setting the Bluetooth Pandora ^® 46
Apple CarPlay Setup 46
System Setup
Camera Setup 47
Setting the Camera Input 47
Setting the Camera Signal Input 47
Switching Video Source for Multi View Camera 47
Adjusting the Rear/Front/Side Camera Guide 47
Camera Interrupt Setting (Power OFF Mode) (Rear Camera Only) 48
Setting Multi Camera to On/Off 49
Factory System Setup 49
Setting the Source Category 49
Setting the Default Vehicle Screen .... 49
Setting the Maestro Module 49
Rear Seat Entertainment Setup 50
Remote Sensor Setting 50
External Accessories Setup 50
Setting the External Audio Processor .... 50
Setting the HDMI Selector On/Off 50
Setting the External Accessory Control ..... 50
Smartphone Apps Setup 51
Apple CarPlay (Optional)
Access to Apple CarPlay 51
Android Auto (Optional)
What is Android Auto 52
Activate Android Auto 52
Alpine Connect App (Optional)
Activate Alpine Connect App 52
Radio/HD Radio™/RBDS
Radio Basic Operation
Listening to the Radio 54
Presetting Stations Manually 54
Presetting Stations Automatically 54
Tuning to Preset Stations 54
Inputting Frequency Directly and Receiving the Radio Station 55
Receiving a Multicast (HD Radio™ Mode only) 55
Selecting the Receivable Program Type (RBDS FM Radio mode only) 55
Forced Analog Mode 55
Displaying Radio Text (RBDS FM Radio mode only) 55
Using Ballgame Mode (HD Radio™ Mode only) 56
About the Feature Logos 56
USB Flash drive (Optional)
Playback 58
Fast-forwarding/Fast-reversing (USB Video only) 58
Stopping Playback (USB Video only) 58
Repeat Play 58
Random Play (USB Audio only) 58
Searching for a Desired Song 58
Switching Display Modes (During Video File Play Back) 59
About USB Video format 59
iPod/iPhone (Optional)
Playback 61
Searching for a Music File 61
Quick Search Mode 61
Full Search Mode 61
Alphabet Search Function 62
Repeat Play 62
Random Play (Shuffle) 62
Pandora® internet radio (optional)
Listening to Pandora ^ 63
"Thumbs" Feedback 64
Searching for a Desired Station 64
Shuffle 64
Creating a New Station 64
Bookmarking a Desired Track or Artist ...... 64
Connecting a Bluetooth Device (Bluetooth Pandora® Only) 65
Disconnecting the Bluetooth Connection ... 65
Changing the connecting Bluetooth Device 65
SiriusXM Satellite Radio Operation (Optional)
Receiving Channels with the SiriusXM Tuner .... 67
Tuning Channels by Category 67
Changing the Display 67
Checking the SiriusXM Radio ID Number ..... 67
Storing Channel Presets 67
Tuning Channels using Presets 67
SmartFavorites Functions 68
TuneStart™ Function 68
TuneScan™ Function 68
Search Function 68
Selecting the Channel Directly 69
Storing the desired Song/Artist 69
Receiving and Tuning to an Alert 69
Replay Function 70
Parental Lock Function 70
Using Jump Memory and Jump Recall function 70
HDMI Device
About HDMI selector (Optional) 71
DVD Player Operation
Inserting/Ejecting a Disc 71
Inserting the Disc 71
Removing the Disc 71
DVD Player SETUP 71
System Setup 72
DVD Contents Setup 72
CD Contents Setup 73
Audio Setup 73
CD/MP3/WMA/AAC/WAV
Playback 74
Stopping Playback 74
Repeat Play 74
MIX (Random Play) 75
File/Folder Name Search (Concerning MP3/WMA/AAC/WAV) 75
Selecting Folders (Concerning MP3/WMA/AAC/WAV) 75
Info Mode Function 75
DVD
Playing a Disc 76
If a Menu Screen Appears 77
Numeric Keypad Input Operations 77
Displaying the Top Menu Screen 77
Displaying the Menu Screen 77
Playing Still Frames (Pausing) 77
Stopping Playback 78
Fast-forwarding/Fast-reversing 78
Finding the Beginnings of Chapters/Tracks/ Files 78
Forward/Reverse frame-by-frame Playback 78
Repeat Playback 78
Searching by Title Number 79
Searching Directly by Chapter Number ...... 79
Switching the Angle 79
Switching the Audio Tracks 79
Switching the Subtitles (Subtitle Language) ... 79
Info Mode Function 79
Switching Display Modes 79
HDMI Operation
Bluetooth Operation
Setup Before Using 81
About Bluetooth 81
About the Hands-free Phone 81
Before Using Bluetooth 81
Hands-free Phone Control
Answering a Call 82
Hanging up the Telephone 82
Call Waiting Function 82
Calling 83
Calling by Favorite Function 83
Making a phone call using the Phone Menu 83
Using Voice Recognition function 84
Using Siri 84
Voice Dial Function 84
Operations During a Conversation 85
Adjusting the Speech Volume 85
Changing the Voice Output 85
DTMF (Touch-Tone) Function 85
Phone Book Function 85
Synchronizing the Phone Book 85
Adding the Phone Book 85
Deleting the Phone Book Entries 86
Searching in the Phone Book 86
Bluetooth Audio
Playback 87
Repeat Play 87
Random Play 87
Search Function 87
Connecting a Bluetooth Device 88
Disconnecting the Bluetooth Connection ... 88
Changing the connecting Bluetooth Device 88
Auxiliary Device (Optional)
Operating Auxiliary Devices (Optional) ...... 89
Operating an AUX, AUX DVD or GAME 89
Operating an External DVD Player 89
Camera Operation (Optional)
Rear Camera Operation 91
Displaying the Rear Camera Image from the Menu screen 91
Displaying the rear view video while the car is in reverse 91
Switching the Image for the Rear Camera ... 91
Guide Display ON/OFF Setting 91
Adjusting the Caution Display Location ..... 92
About the Rear Camera Guide 92
Front Camera Operation 93
Displaying the Front Camera image from the Menu screen. 93
Switching the Image Pattern for the Front Camera 93
About the adjustment of guide display ON/OFF setting and adjustment of Caution display location 94
Side Camera Operation 94
Displaying the Side Camera image from the Menu screen. 94
Switching the Image Pattern for the Side Camera 94
iDataLink Operation
Access to iDataLink Mode 95
About Parking Sensor screen 96
External Accessory Control Operation ...... 97
About Remote Control Operation (X209D only)
When Using the Remote Control 98
Battery Replacement 98
Operating the DVD Player 99
Information
Product Software Update 100
Cautions about Discs (X209D only) 100
Discs Playable on This Unit (X209D only) ... 101
About the Supported Formats ......102
About MP3/WMA/AAC/FLAC 102
About WAV (Disc) 103
About DVDs 104
List of Language Codes 105
In Case of Difficulty 106
If this Message Appears 107
Specifications 110
END USER LICENSE AGREEMENT
(HERE) 112
LIMITED WARRANTY
Operating Instructions
PRECAUTIONS
IMPORTANT INFORMATION
PLEASE READ CAREFULLY BEFORE USING THIS PRODUCT
This product is intended to provide turn by turn instructions to get you to a desired destination. Please make certain that all persons using this navigation system carefully read these precautions and the following instructions fully.
- This product is not a substitute for your personal judgment. Any route suggestions made by this navigation system may never supersede any local traffic regulations or your personal judgment and/or knowledge of safe driving practices. Do not follow route suggestions if the navigation system instructs you to perform an unsafe or illegal maneuver, places you in an unsafe situation, or routes you into an area which you consider unsafe.
- Glance at the screen only when necessary and safe to do so. If prolonged viewing of the screen is necessary, pull over in a safe and legal manner and location.
- Do not input destinations, change settings, or access any functions requiring a prolonged view of the monitor and/or remote control while you are driving. Pull over in a safe and legal manner and location before attempting to access the system.
- Do not use the navigation system to route you to emergency services. Not all locations of emergency services such as police and fire stations, hospitals and clinics are contained in the database. Please use your own judgment and ask for directions in these situations.
- The map database used in the navigation system is the most recent map data available at the time of production. Because of changes in streets and neighborhoods, there may be situations where the navigation system is not able to route you to your desired destination. In these cases, use your own judgment.
- The map database is designed to provide you with route suggestions and does not take into account the relative safety of a suggested route or of factors which may affect the time required to reach your destination. The system does not reflect road closures or construction, road characteristics (i.e. type of road surface, slope or grade, weight or height restrictions, etc.), traffic congestion, weather conditions, or any other factors which may affect the safety or timing of your driving experience. Use your own personal judgment if the navigation system is unable to provide you with an alternate route.
- There may be situations where the navigation system displays the vehicle's location erroneously. Use your own driving judgment in this situation, taking into account current driving conditions. Please be aware that in this situation the navigation system should correct the vehicle's position automatically. However, there may be times where you may have to correct the position yourself. If this is the case, pull over in a safe and legal manner and location before attempting operation.
- Make certain that the volume level of the navigation system is set to a level which still allows you to hear outside traffic and emergency vehicles.
If there is anything in the manual about the operation of the navigation system which you are uncertain about, please contact your local Alpine authorized navigation dealer or Alpine at 1-888-NAV-HELP (1-888-628-4357) before using the navigation system.
FCC COMPLIANCE STATEMENT
This equipment has been tested and found to comply with the limits for a Class B digital device, pursuant to part 15 of the FCC Rules. These limits are designed to provide more reasonable protection against harmful interference in a residential installation, and are more stringent than "outdoor" requirements.
Operation is subjected to the following two conditions: (1) This device may not cause harmful interference, and (2) this device must accept any interference received, including interference that may cause undesired operation.
This equipment generates, uses, and can radiate radio frequency energy and, if not installed and used in accordance with the instructions, may cause harmful interference to radio communications. However, there is no guarantee that interference will not occur in a particular installation. If this equipment does cause harmful interference to radio or television reception, which can be determined by turning the equipment off and on, you are encouraged to try to correct the interference by one of the following measures:
- Reorient or relocate the receiving antenna.
- Increase the separation between the equipment and the receiver.
- Connect the equipment into an outlet on a circuit different from that to which the receiver is connected.
- Consult an experienced radio/TV technician.
WARNING
Points to Observe for Safe Usage
- Read this manual carefully before using this disc and the system components. They contain instructions on how to use this product in a safe and effective manner. Alpine cannot be responsible for problems resulting from failure to observe the instructions in this manual.
- This manual uses various pictorial displays to show you how to use this product safely and to alert you to potential dangers resulting from improper connections and operation. Following are the meanings of these pictorial displays. It is important to fully understand the meanings of these pictorial displays in order to use this manual and the system properly.
- This product may be used with software applications. Please follow all usage instructions and warnings when using this product at all times. Do not use this product or any software application in a manner which will hinder safe operation of your vehicle.
- This product may be used in conjunction with the Alpine KAC-001 External Accessory Control module, which works with various accessory products manufactured by third parties. Please review and follow all manufacturer's instructions and warnings for all accessory products.

WARNING
- Operation of the system while driving is dangerous. Users should stop vehicle before operating the software.
- Road conditions and regulations take precedence over information contained on the map display: observe actual traffic restrictions and circumstances while driving.
- This software is designed for use exclusively in the unit. It cannot and may not be used in conjunction with other hardware.

WARNING
This symbol means important instructions. Failure to heed them can result in serious injury or death.
INSTALL THE PRODUCT CORRECTLY SO THAT THE DRIVER CANNOT WATCH TV/VIDEO UNLESS THE VEHICLE IS STOPPED AND THE EMERGENCY BRAKE IS APPLIED.
It is dangerous for the driver to watch TV/Video while driving a vehicle. Installing this product incorrectly enables the driver to watch TV/Video while driving. This may cause a distraction, preventing the driver from looking ahead, thus causing an accident. The driver or other people could be severely injured.
DO NOT WATCH VIDEO WHILE DRIVING.
Watching the video may distract the driver from looking ahead of the vehicle and cause an accident.
DO NOT OPERATE ANY FUNCTION THAT TAKES YOUR ATTENTION AWAY FROM SAFELY DRIVING YOUR VEHICLE.
Any function that requires your prolonged attention should only be performed after coming to a complete stop. Always stop the vehicle in a safe location before performing these functions. Failure to do so may result in an accident.
DO NOT FOLLOW ROUTE SUGGESTIONS IF THE NAVIGATION SYSTEM INSTRUCTS YOU TO PERFORM AN UNSAFE OR ILLEGAL MANEUVER, OR PLACES YOU IN AN UNSAFE SITUATION OR AREA.
This product is not a substitute for your personal judgement. Any route suggestions by this system should never supersede any local traffic regulations or your personal judgement or knowledge of safe driving practice.
KEEP THE VOLUME AT A LEVEL WHERE YOU CAN STILL HEAR OUTSIDE NOISES WHILE DRIVING.
Excessive volume levels that obscure sounds such as emergency vehicle sirens or road warning signals (train crossings, etc.) can be dangerous and may result in an accident. LISTENING AT LOUD VOLUME LEVELS IN A CAR MAY ALSO CAUSE HEARING DAMAGE.
MINIMIZE DISPLAY VIEWING WHILE DRIVING.
Viewing the display may distract the driver from looking ahead of the vehicle and cause an accident.
DO NOT DISASSEMBLE OR ALTER.
Doing so may result in an accident, fire or electric shock.
USE ONLY IN CARS WITH A 12 VOLT NEGATIVE GROUND.
(Check with your dealer if you are not sure.) Failure to do so may result in fire, etc.
KEEP SMALL OBJECTS SUCH AS SCREWS OUT OF THE REACH OF CHILDREN.
Swallowing them may result in serious injury. If swallowed, consult a physician immediately.
USE THE CORRECT AMPERE RATING WHEN REPLACING FUSES.
Failure to do so may result in fire or electric shock.
DO NOT BLOCK VENTS OR RADIATOR PANELS.
Doing so may cause heat to build up inside and may result in fire.
USE THIS PRODUCT FOR MOBILE 12V APPLICATIONS.
Use for other than its designed application may result in fire, electric shock or other injury.
MAKE THE CORRECT CONNECTIONS.
Failure to make the proper connections may result in fire or product damage.
BEFORE WIRING, DISCONNECT THE CABLE FROM THE NEGATIVE BATTERY TERMINAL.
Failure to do so may result in electric shock or injury due to electrical shorts.
DO NOT ALLOW CABLES TO BECOME ENTANGLED IN SURROUNDING OBJECTS.
Arrange wiring and cables in compliance with the manual to prevent obstructions when driving. Cables or wiring that obstruct or hang up on places such as the steering wheel, gear lever, brake pedals, etc. can be extremely hazardous.
DO NOT SPLICE INTO ELECTRICAL CABLES.
Never cut away cable insulation to supply power to other equipment. Doing so will exceed the current carrying capacity of the wire and result in fire or electric shock.
DO NOT DAMAGE PIPE OR WIRING WHEN DRILLING HOLES.
When drilling holes in the chassis for installation, take precautions so as not to contact, damage or obstruct pipes, fuel lines, tanks or electrical wiring. Failure to take such precautions may result in fire.
DO NOT USE BOLTS OR NUTS IN THE BRAKE OR STEERING SYSTEMS TO MAKE GROUND CONNECTIONS.
Bolts or nuts used for the brake or steering systems (or any other safety-related system), or tanks should NEVER be used for installations or ground connections. Using such parts could disable control of the vehicle and cause fire etc.
DO NOT INSTALL IN LOCATIONS WHICH MIGHT HINDER VEHICLE OPERATION, SUCH AS THE STEERING WHEEL OR GEARSHIFT.
Doing so may obstruct forward vision or hamper movement etc. and results in serious accident.

CAUTION
This symbol means important instructions. Failure to heed them can result in injury or material property damage.
HALT USE IMMEDIATELY IF A PROBLEM APPEARS.
Failure to do so may cause personal injury or damage to the product. Return it to your authorized Alpine dealer or the nearest Alpine Service Center for repairing.
HAVE THE WIRING AND INSTALLATION DONE BY EXPERTS.
The wiring and installation of this unit requires special technical skill and experience. To ensure safety, always contact the dealer where you purchased this product to have the work done.
USE SPECIFIED ACCESSORY PARTS AND INSTALL THEM SECURELY.
Be sure to use only the specified accessory parts. Use of other than designated parts may damage this unit internally or may not securely install the unit in place. This may cause parts to become loose resulting in hazards or product failure.
ARRANGE THE WIRING SO IT IS NOT CRIMPED OR PINCHED BY A SHARP METAL EDGE.
Route the cables and wiring away from moving parts (like the seat rails) or sharp or pointed edges. This will prevent crimping and damage to the wiring. If wiring passes through a hole in metal, use a rubber grommet to prevent the wire's insulation from being cut by the metal edge of the hole.
DO NOT INSTALL IN LOCATIONS WITH HIGH MOISTURE OR DUST.
Avoid installing the unit in locations with high incidence of moisture or dust. Moisture or dust that penetrates into this unit may result in product failure.

NOTICE
Product Cleaning
Use a soft dry cloth for periodic cleaning of the product. For more severe stains, please dampen the cloth with water only. Anything else has the chance of dissolving the paint or damaging the plastic.
Temperature
Be sure the temperature inside the vehicle is between +45°C (+113°F) and 0°C (+32°F) before turning your unit on.
Maintenance
If you have problems, do not attempt to repair the unit yourself. Return it to your Alpine dealer or the nearest Alpine Service Station for servicing.
Protecting the USB connector
- Only an iPod/iPhone or USB flash drive can be connected to the USB connector on this unit. Correct performance using other USB products cannot be guaranteed.
- If the USB connector is used, be sure to use only the supplied connector cable with the unit. A USB hub is not supported.
- Depending on the connected USB flash drive, the unit may not function or some functions may not be performed.
- The audio file format that can be played back on the unit is MP3/WMA/AAC/FLAC.
- Artist/song name, etc., can be displayed. Certain, special characters may not be correctly displayed.

CAUTION
Alpine accepts no responsibility for lost data, etc., even if data, etc., is lost while using this product.
On Handling USB Flash drive
- This unit can control a memory storage device that supports the USB Mass Storage Class (MSC) protocol. Playable audio file formats are MP3, WMA, AAC and FLAC.
- USB Flash drive function is not guaranteed. Use USB flash drive according to the terms of agreement. Read the USB flash drive Owner's Manual thoroughly.
- Avoid usage or storage in the following locations: Anywhere in the car exposed to direct sunlight or high temperatures. Anywhere the possibility of high humidity or corrosive substances are present.
- Fix the USB flash drive in a location where driver operation will not be hindered.
- USB Flash drive may not function correctly at high or low temperature.
- Use only certified USB flash drive. Note that even certified USB flash drive, may not function correctly depending on its type or state.
- Depending on the settings of the USB flash drive type, memory state or encoding software, the unit may not play back or display properly.
- USB Flash drive may take time to start playback. If there is a particular file other than audio in the USB flash drive, it may take considerable time before the file is played back or searched.
- The unit can play back "mp3," "wma" or "m4a" file extensions.
- Do not add the above extensions to a file other than audio data. This non-audio data will not be recognized. The resulting playback may contain noise that can damage speakers and/or amplifiers.
- It is recommended to back up important data on a personal computer.
-
Do not remove the USB device while playback is in progress. Change SOURCE to something other than USB, then remove the USB device to prevent possible damage to its memory.
-
Windows Media and the Windows logo are trademarks, or registered trademarks of Microsoft Corporation in the United States and/or other countries.
- Apple, iPhone, iPod, and iPod touch are trademarks of Apple Inc., registered in the U.S. and other countries. Apple CarPlay is a trademark of Apple Inc.
- “Made for iPod” and “Made for iPhone” mean that an electronic accessory has been designed to connect specifically to iPod, or iPhone, respectively, and has been certified by the developer to meet Apple performance standards.
- Use of the Apple CarPlay logo means that a vehicle user interface meets Apple performance standards. Apple is not responsible for the operation of this vehicle or its compliance with safety and regulatory standards. Please note that the use of this product with iPhone, or iPod may affect wireless performance.
- Pandora, the Pandora logo, and the Pandora trade dress are trademarks or registered trademarks of Pandora Media, Inc., used with permission. Pandora is currently available in the U.S., Australia and New Zealand.
- HD Radio Technology manufactured under license from iBiquity Digital Corporation. U.S. and Foreign Patents. For patents see http://patents.dts.com/. HD Radio and the HD, HD Radio, and "ARC" logos are registered trademarks or trademarks of iBiquity Digital Corporation in the United States and/or other countries.
- Sirius, XM and all related marks and logos are trademarks of Sirius XM Radio Inc. All rights reserved.
- Google, Android, Android Auto, Google Play and other marks are trademarks of Google Inc.
- The Bluetooth* word mark and logos are registered trademarks owned by the Bluetooth SIG, Inc. and any use of such marks by Alpine Electronics, Inc. is under license.
- The terms HDMI and HDMI High-Definition Multimedia Interface, and the HDMI Logo are trademarks or registered trademarks of HDMI Licensing, LLC in the United States and other countries.
- MPEG Layer-3 audio coding technology licensed from Fraunhofer IIS and Thomson. Supply of this product only conveys a license for private,non-commercial use and does not convey a license nor imply any right to use this product in any commercial (i.e. revenue-generation) real time broadcasting (terrestrial, satellite, cable and/or any other media), broadcasting/streaming via internet, intranets and/or other networks or in other electronic content distribution systems, such as pay-audio or audio-on-demand applications. An independent license for such use is required. For details, please visit http://www.mp3licensing.com
• ©1987-2015 HERE. All rights reserved.
X209D only
- This item incorporates copy protection technology that is protected by U.S. patents and other intellectual property rights of Rovi Corporation. Reverse engineering and disassembly are prohibited.
- Manufactured under license from Dolby Laboratories. Dolby, Dolby Audio and the double-D symbol are trademarks of Dolby Laboratories.
- For DTS patents, see http://patents.dts.com. Manufactured under license from DTS Licensing Limited. DTS, the Symbol, & DTS and the Symbol together are registered trademarks, and DTS 2.0+Digital Out is a trademark of DTS, Inc. © DTS, Inc. All Rights Reserved.
- is a Trademark of DVD Format/Logo Licensing Corporation.
Features
The screen design used in the Owner's Manual may differ from the actual screen.
Favorite Function
Frequently used functions can be easily recalled. For details, see "Favorite Function" (page 25).
- Favorite screen example
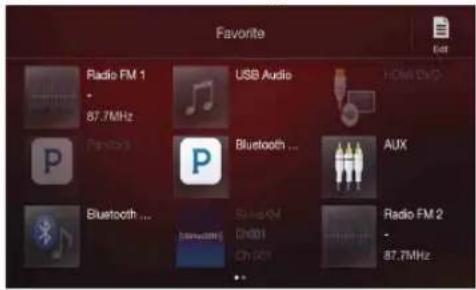
- Frequently used functions and useful functions can be customized for your convenience.
- You can register up to 54 functions.
- You cannot register a function more than once.
About Swiping the Touch Screen
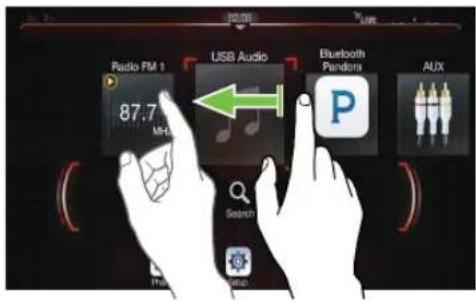
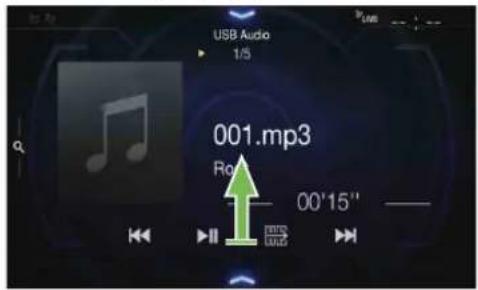
You can change a screen or a page by swiping the touch screen vertically or horizontally with your finger. For details, see "Touch Screen Operation" (page 18).
Swipe the display with your finger lightly.
Switching the Audio Sources Screen to a Dedicated Screen
You can switch the Audio Sources screen to a dedicated screen by touching the icon on one of the four edges of the screen, or by swiping vertically or horizontally. For details on how to swipe the screen, see “Touch Screen Operation” (page 18).
• The operation is not available when using Apple CarPlay or Android Auto.
Shortcut Setup Screen (page 20)
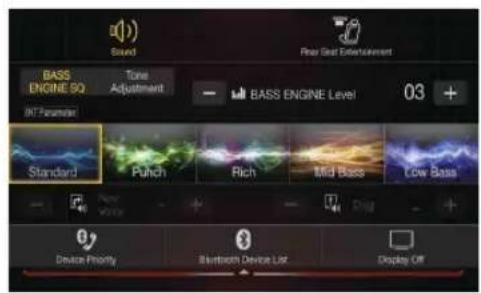
You can set the Sound Setup or Rear Seat Entertainment System.

natural_image
Simple gray curved arrow pointing downward (no text or symbols)Dual Screen (page 15)
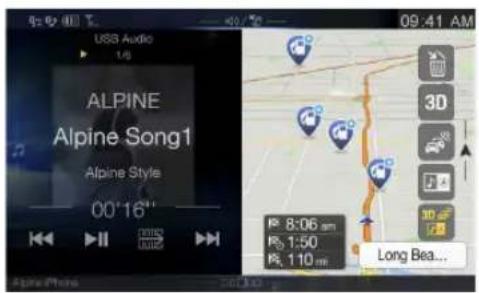
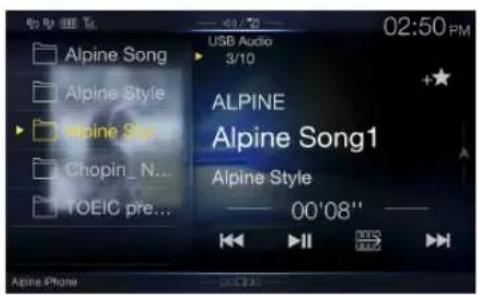
You can switch between the displayed screens on the Dual Screen.
natural_image
Gray curved arrow pointing downward (no text or symbols)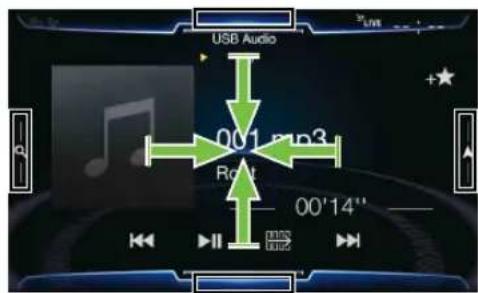

natural_image
Simple gray upward arrow graphic pointing to the right (no text or symbols)Preset button or Quick Search mode Screen *1
Menu Screen *(page 22)
You can make settings on the Menu Screen.
*1 The Search mode differs depending on the audio source. For details, see the operating instructions of the audio source.
*2 The screen also switches by pressing the Menu button.
About Dual Screen
Dual Screen allows you to display the Navigation and Audio/Visual screens simultaneously.
Audio full Screen
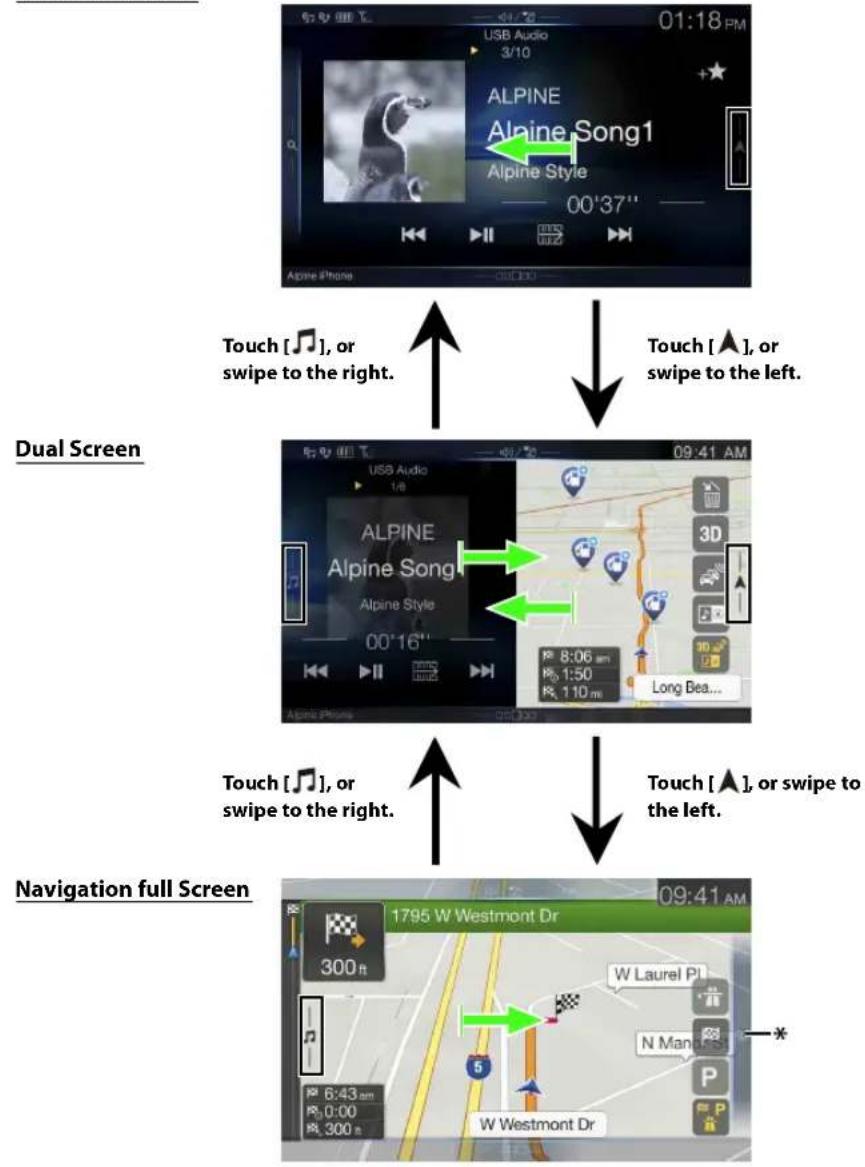
flowchart
graph TD
    A["Alpine iPhone"] -->|Touch["♪"], or swipe to the right.| B["Dual Screen"]
    B -->|Touch["▲"], or swipe to the left.| C["Navigation full Screen"]
    C -->|Touch["♪"], or swipe to the right.| D["Alpine Song1"]
    D -->|Touch["▲"], or swipe to the left.| E["1795 W Westmont Dr"]
* Touch [Q], or swipe to the left to switch to the Navigation menu screen. For details of navigation operations, refer to "Navigation System OM" in the website at http://www.alpine-usa.com.
Dual Screen Display Position
You can switch the left/right positions of the Audio/Visual screen and Navigation screen.
Each time you touch the positions of Audio/Visual screen and Navigation screen switch.
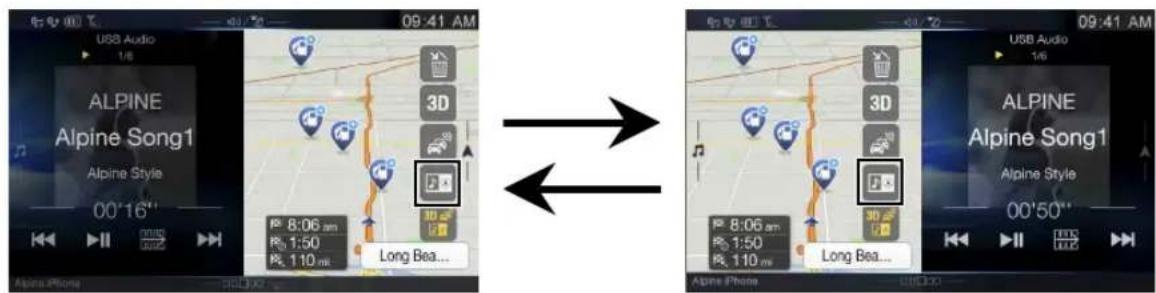
- When i#ot displayed, touch [

Location of Controls
For X208U/INE-W977HD
For X209D
(NAV) button
Recalls the navigation map screen.
Press again to switch to Navigation menu screen.
Press and hold this button for at least 2 seconds to change to Go Home route screen. (If Home is not set yet, it will change to the Home setting screen.)
When the Apple CarPlay or Android Auto is used, the operation may differ. Press (NAV) to change the map screen between smartphone and this unit.
For details of navigation operations, refer to "Navigation System OM" in the website at http://www.alpine-usa.com.
Remote Sensor
Point the remote control transmitter towards the remote sensor within a range of 2 meters.
(Eject) button (X209D only)
Ejects a disc.
Controllable with Remote Control
This unit can be controlled with an optional Alpine remote control. For details, consult your Alpine dealer. Point the optional remote control transmitter at the remote control sensor.
About the button descriptions used in this Owner's
Manual
The buttons found on the face of the unit are expressed in bold (e.g. MENU). The buttons found on the touch-screen display are shown in bold within brackets, [ ] (e.g. [ ] ).
Microphone (X208U/INE-W977HD only)
Used for Hands-free or Voice Control modes.
(AUDIO) button
Displays the Audio/Visual screen. If the Audio/Visual screen is already displayed, changes the source.
or VOICE button
Depending on the connected smartphone, press to recall Siri function or voice recognition mode.
/ or / (UP/DOWN) button
Press to adjust the volume.
(Favorite) button
Recalls the Favorite screen.
- Press and hold this button for at least 2 seconds to switch to the iDataLink mode screen. (When connected to the optional iDataLink module.)
MENU/ (Power Off) button
Recalls the Menu screen.
Press and hold this button for at least 5 seconds to turn the power off.
/
button
Press to seek down/up a station in radio mode or down/up a track, chapter, etc., in other audio/visual sources.
RESET switch
The system of this unit is reset.
Turning Power On or Off
Some of this unit's functions cannot be performed while the vehicle is in motion. Be sure to stop your vehicle in a safe location and apply the parking brake, before attempting these operations.
1 Turn the ignition key to the ACC or ON position.
The system turns on.
- When turned on, the system displays the last screen that was displayed before the ignition key was turned off. For example, if the unit is in radio mode when ignition is turned off, it will remain in radio mode when ignition is turned back on.
2 Press and hold the MENU/(Power Off) button for at least 5 seconds to turn the power off.
• The unit can be turned on by pressing any button.
- The unit is a precision device. Careful handling of the unit should provide you with years of trouble-free operation.
Turning the System On
When the system is used for the first time, the language selection menu is displayed. Swipe the Language list screen vertically, then touch your choice from the list of 23 languages.
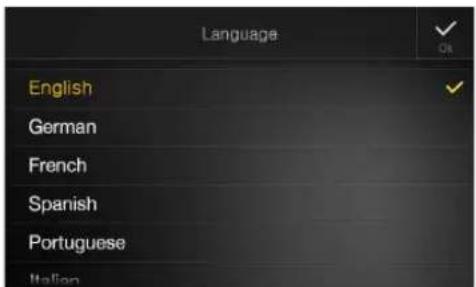
- Some of this unit's functions cannot be performed while the vehicle is in motion. Be sure to stop your vehicle in a safe location and apply the parking brake before attempting these operations.
Initial System Start-Up
Be sure to press the RESET switch when using the unit for the first time, after changing the car battery, etc.
1 Turn off the unit power.
2 Press the RESET switch with a ballpoint pen or similar pointed object.
For X208U/INE-W977HD
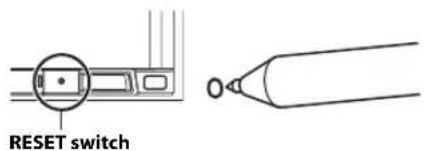
For X209D
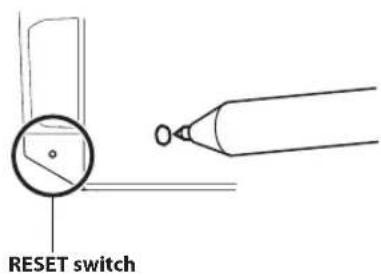
Adjusting the Volume
Adjust the volume by pressing /or/ - +
Volume decreases/increases continuously by pressing and holding
$$ \vee / \wedge o - r + /. $$
Volume: 0 - 35
Lowering Volume Quickly
Audio Mute function instantly lowers the volume level to 0.
1 Press / or/ to display the Volume adjustment screen.
2 Touch the speaker icon to activate the MUTE mode and the speaker icon change to
The audio level will be 0.
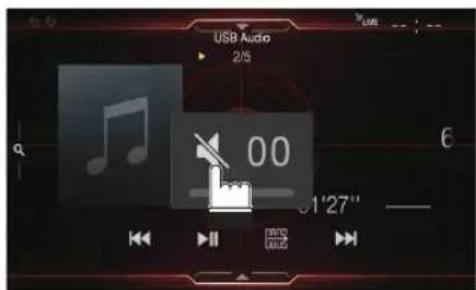
3 Press and hold or/button continuously to increase the volume.
Touch Screen Operation
You can operate the system by using the touch panel on the screen.
- Be sure to touch the onscreen button lightly with the pad of your finger to avoid scratching the display.
Touch operation
Touch a button or list item on the screen lightly.
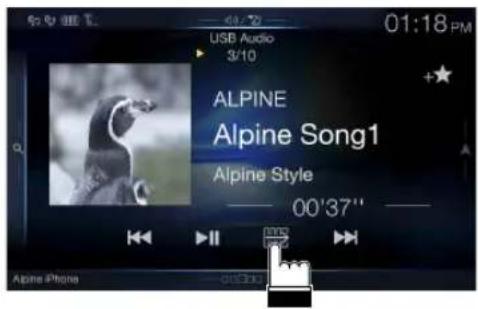
- If you touch a button and there is no reaction, remove your finger. - Onscreen buttons that cannot be operated are dimmed.
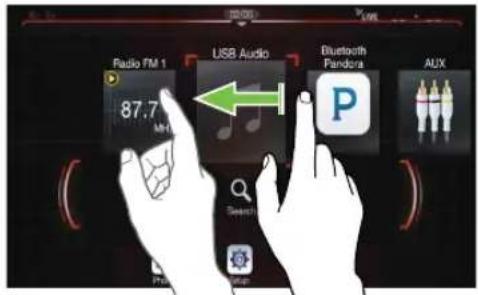
Swipe operation
Move your finger lightly with a swipe.
Drag & Drop operation
Touch and hold the desired item, then drag it to its new location by moving your finger, then release your finger to place the item.
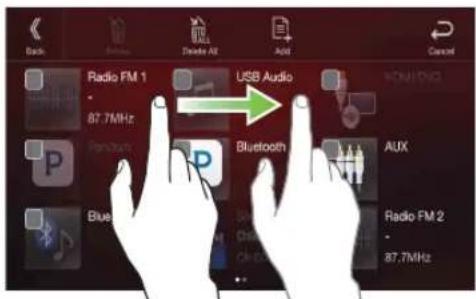
- It is not possible to narrow the screen with two fingers (pinch in) or spread the screen (pinch out).
Switching Sources
Press the (AUDIO) button to change the source.
Switching sources using the (AUDIO) button
During audio/visual playback, press the ⏻AUDIO button repeatedly to switch to the desired source.
Radio → USB/iPod*Factory Media (USB/iPod)* 2 → HDMI/DVD*1,3 → Pandora*Bluetooth Pandora* 1,4 → SiriusXMor Factory SiriusXM* 2 → AUX6 Bluetooth Audio* 1 → Apple CarPlay Music/Google Play Music* 6 → Radio
*1 When no USB flash drive/iPod/HDMI device/Smartphone/Bluetooth compatible device/SiriusXM Tuner is connected, this option is not available. When using Apple CarPlay, some option may not available.
*2 Not displayed when your car does not support the source or "Setting the Source Category" (page 49) is set to "Aftermarket." This is also not displayed when the iDataLink module is not connected.
*3 The name set for "HDMI Setup" (page 46), "Setting the Auxiliary (AUX) Name" (page 45), is displayed.
*4 When Bluetooth Pandora is set to "Off", this option is not available. (page 46)
*5 When AUX is set to "Off," this option is not available. (page 45) When the iDataLink module (sold separately) is connected, the Auxiliary (AUX) mode is not available.
*6 Available when Apple CarPlay is used/Android™ smartphone which installed Android Auto App is connected.
To play Apple CarPlay music shall impact iPod source when an iPhone 5 or later is connected and vice versa. Refer to "Apple CarPlay Setup" (page 46).
Switching Sources from the Menu screen
1 Press the MENU button.
The menu screen is displayed.
- You can also display the menu screen by touching the lower part of the Audio source screen or by swiping upward.
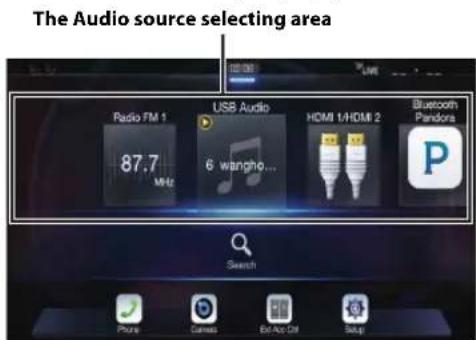
2 Touch your desired source in the Audio source selecting area.
- In the menu screen, you can change the Audio source directly or change the order in which sources change. For details, see "About the Menu Screen" (page 22).
Operating the Function Button on the Audio/Video Main Screen
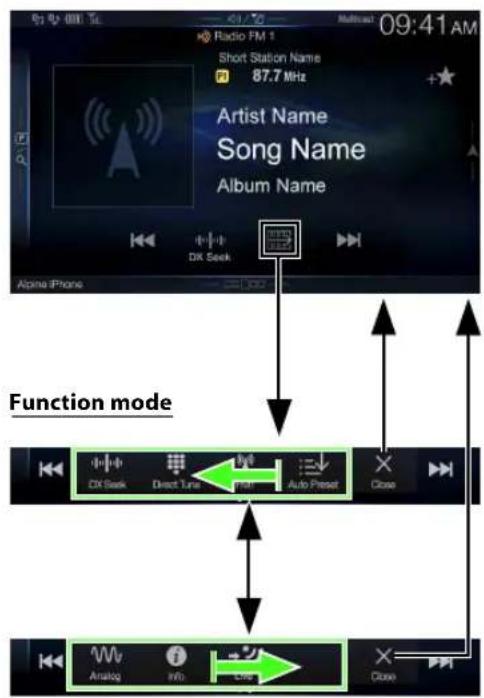
Using the Function button on the Audio/Visual main screen.
Touch [→] to change to the Function mode.
HD Radio main screen example
flowchart
graph TD
    A["Artist Name\nSong Name\nAlbum Name"] --> B["Function mode"]
    B --> C["DX Seek"]
    B --> D["Direct Tune"]
    B --> E["Auto Preset"]
    B --> F["Close"]
    B --> G["Analog"]
    B --> H["Info"]
    B --> I["Live"]
    style A fill:#f9f,stroke:#333
    style B fill:#ccf,stroke:#333
Swipe to the right or left to change to the Function mode.
To close the Function mode, touch [X].
- Depending on the Audio source, the Function mode displays from the beginning.
About Basic Operation for List Screen
Basic operations on the Setup list screen and the Search list screen.
How to display on the list screen differs depending on the selected item.
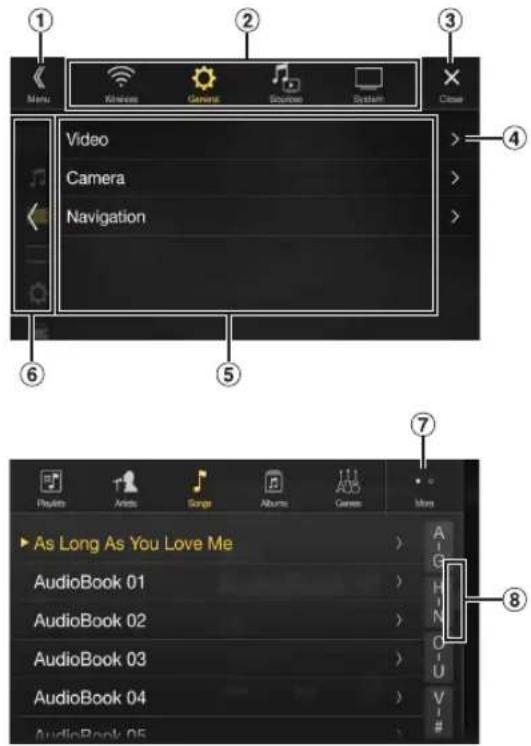
① Switches to the menu screen or the previous screen.
② Item select button
③ Closes the window.
④ Displays the next list page.
- When the next selection item does not exist, the list item is not displayed.
⑤ Lists items for selection
- When there are more than five list items, the page can be changed by swiping vertically.
⑥ Returns to the list screen of the page that you touched.
- The list screens that can be displayed are up to the 2 previous pages. If you touch [<], you can recall your desired page.
⑦ Changes the page of the Item select button above.
- “” indicates the total number of pages, “” indicates the location of the current page.
⑧ List screen close button
- Touch or swipe to the left on the search screen, etc. to close the list screen.
About the Shortcut Setup Screen
Displaying the Sound Setup screen, or the Shortcut Setup screen of the Rear Seat Entertainment System screen.
Touch the top part of the Audio source screen or swipe downward.
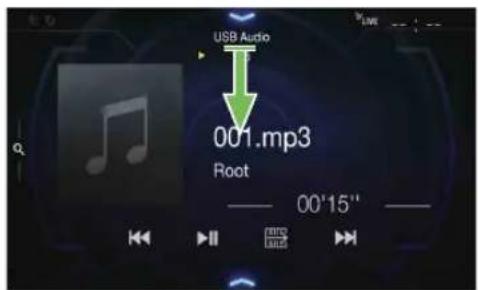
The Sound Setup screen or the Rear Seat Entertainment System Setup Screen is displayed.
Sound Setup screen (Tone Adjustment mode) example
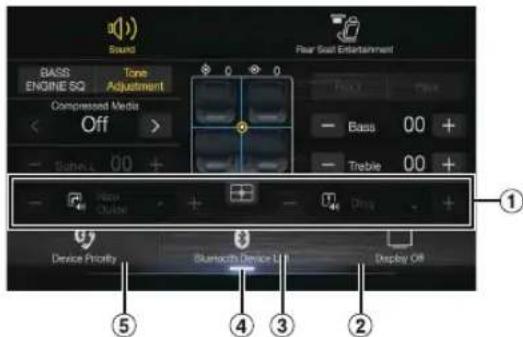
① You can adjust the attention tone (Ding) before the voice navigation starts and Navi voice interrupt volume (Navi Guide).
Volume: 0 - 35
② Button for Display Off *
③ Displays the registered Bluetooth Device List screen. • See "Pairing a Bluetooth Device" (page 31).
④ Touch this or swipe upward to change to the currently playing source screen.
⑤ Displays the Hands-free Device Primary/Secondary setting screen.
• See "Hands-free Device Primary/Secondary Setting" (page 32).
* Display Off mode
- To cancel Display Off mode, touch the screen or press any button.
- Display Off mode is canceled when the power or ACC is turned off.
- When the gear lever is shifted to the reverse (R) position and the rear camera is connected, the rear camera image is displayed.
- When a call is received on a Bluetooth-connected phone, the incoming call screen is displayed.
Sound Setup Function
■ Tone Adjustment mode
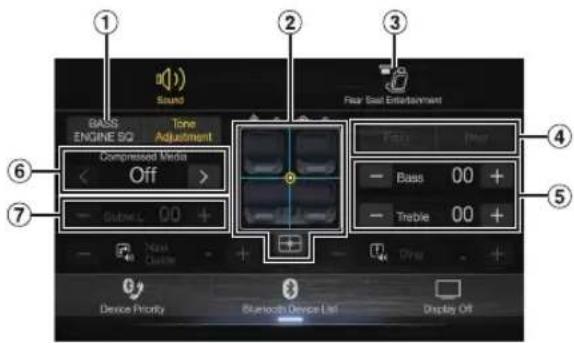
BASS ENGINE SQ mode
① Button for changing the BASS ENGINE SQ mode screen
② Balance/Fader Image area*1
• To reset to the initial settings (Balance: 0, Fader: 0), touch [☐].
③ Rear Seat Entertainment Function screen switch button
- When Setting the Rear Seat Entertainment is "Off," you cannot change the screen. For details on Rear Seat Entertainment setting, see "Rear Seat Entertainment Setup" (page 50).
④ Buttons for switching between Front/Rear when adjusting Bass/Treble*2
⑤ Buttons for adjusting Bass Level/Treble Level*3, 4
⑥ Buttons for adjusting Media Xpander *1, 3, 5
⑦ Buttons for adjusting Subwoofer Level *1, 3, 6
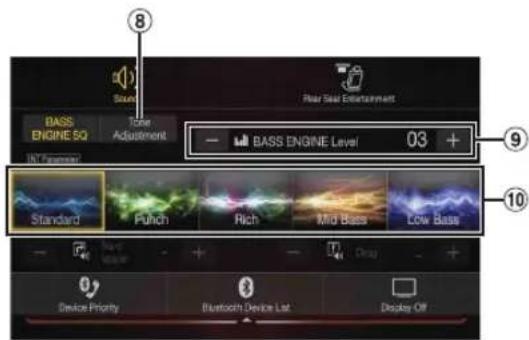
⑧ Button for changing the Tone Adjustment mode screen • If changing to the Tone Adjustment mode, BASS ENGINE SQ mode will be disabled.
⑨ Buttons for adjusting the BASS ENGINE Level*4
⑩ Buttons for selecting the BASS ENGINE type *4
*1 You can perform a more detailed set up in "Sound Setup" (page 34).
*2 You cannot switch when Front/Rear Sync in "Adjusting the Parametric Equalizer Curve (Dual HD EQ)" (page 35) is "On."
*3 When you switch to the BASS ENGINE SQ mode, the value you have set is ignored.
*4 When the Defeat setting is "On," you cannot perform the set up.
*5 Not available during an interruption such as traffic announcement is broadcasting.
*6 If the Subwoofer setting is "Off," the setting cannot be changed. See "Turning Subwoofer ON/OFF" (page 34).
Adjusting Bass Level/Treble Level
Bass Level and Treble Level can be set independently set for Front and Rear speakers by touching [Front] or [Rear].
Setting item:
Bass / Treble
Setting contents:
-14 to +14 (Initial setting: 0)
- When "BASS ENGINE SQ" is selected in the Shortcut Setup, this setting is disabled.
- Adjustment cannot be performed when Defeat is set to "On."
- The Bass adjusted setting value is interlinked with Band2 of Dual HD EQ, and the Treble adjusted setting value is interlinked with Band8.
Setting the BASS ENGINE SQ
Setting the BASS ENGINE Type
Creating the ideal Bass impact for your musical taste using BASS ENGINE SQ.
Setting contents:
Standard (Initial setting) / Punch / Rich / Mid Bass / Low Bass
Standard: Mild low-end boost with mid-range focus for front-center staging.
Punch: Mid-bass punched up with mid-range impact.
Rich: Accented highs and mid-bass giving outstanding balance for all types of music.
Mid Bass: Strong high frequency emphasis with mid-bass boost for more low-end attack.
Low Bass: Strong, low-bass boost with extended highs for a very dynamic sound.
Adjusting the BASS ENGINE Level
You can adjust the BASS ENGINE Level.
Setting item:
BASS ENGINE Level
Setting contents:
0 to 6 (Initial setting: 3)
- The BASS ENGINE Level 0 of the BASS ENGINE SQ is common to all the types.
■ About setup when the external power amplifier is connected
In order to optimize the BASS ENGINE SQ mode, we recommend the following procedure to set up the power amplifier.
Use your favorite music to make the following amplifier adjustment.
1) Set GAIN of the power amplifier to "MIN."
2) Set the Crossover Mode Selector switch to "OFF."
- If the switch has no "OFF" position, set as near as possible to full range.
3) Set the BASS ENGINE Level to "03."
4) Play a song of the genre you frequently listen to, and adjust GAIN of the power amplifier.
Rear Seat Entertainment Function
The Rear Seat Entertainment function independently routes different sources to the front and the rear side of the car. For example, while listening to the radio or other audio sources in the front, HDMI can be enjoyed at the rear with optional rear monitors and headphones.
Rear Seat Entertainment System Setup screen
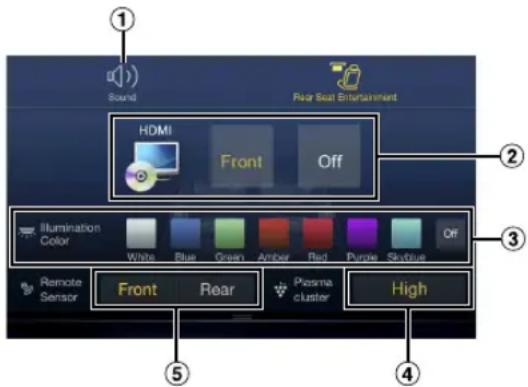
① Button for changing to the Sound Setup screen.
② Visual source selection area that is displayed on the Rear monitor.*1
Touch the source icon displayed on the Rear monitor.
Front: The image and sound of the same visual source as the unit are output.
Off: Stops output to the Rear monitor.
③ Illumination Color button
The color coordination select button of the Rear monitor: White/Blue/Green/Amber/Red/Purple/Skyblue/Off (This function is depended on Over Head Monitor)
④ Plasmacluster air volume adjustment button*2
Whenever you touch the button, you can change the air volume.
Off Low Mid High> Off →
- While the plasmcluster is operating, the indicator is displayed on the Audio source screen.
⑤ Remote Sensor
You can set whether the sensor on Rear monitor receives remote control operation, or the unit receives it.
*1 The visual source that can be output to the Rear monitor is "HDMI/DVD," and "AUX." When the unit plays back the visual source, you can only select the same visual source as the unit.
*2 When the Plasmacluster in "Setting the Rear Seat Entertainment System" (page 50) is set to "Off," the Plasmacluster air volume adjustment button is not displayed.
- If the same visual source is being output to both the unit and the Rear monitor when an incoming/outgoing call is made, the visual/audio output to the Rear monitor is interrupted temporarily depending on the source.
If different visual sources are being output to the unit and the Rear monitor, visual/audio output to the Rear monitor continues without interrupting playback.
About the Menu Screen
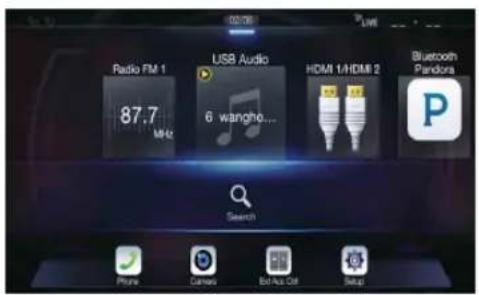
In the menu screen, you can select the audio source and perform various setups or operations on the unit.
Press the MENU button.
The menu screen is displayed.
- You can also display the menu screen by touching the lower part of the Audio source screen or by swiping upward.
■ Menu screen example
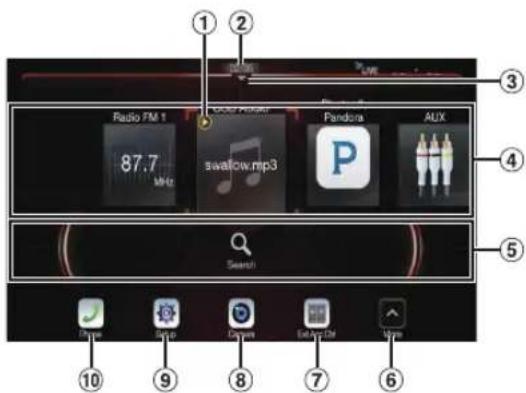
① Displays the currently playing audio source.
② Displays the total number of the audio sources that can be selected. Also displays the current position, counting from the leftmost audio source.
③ Touch or swipe downward to return to the Audio source screen.
④ Audio source select area
Touch your desired source icon to change the audio source.
- Swiping to the right or left in the Audio source select area, you can change one audio source at a time. Moreover, swiping to the right or left outside the Audio source select area (upper and lower sides), you can change pages of the Audio source select area.
- The source icon displayed in the Audio source select area is the one checked on the Edit menu screen. For details on how to display/ hide the source icon, see "Edit Menu" (page 22).
⑤ Displays Preset No, and information of the Search mode, etc., located in the middle of the Audio source select area.
- Touch the desired preset number or the Search mode to change the audio source directly.
- The displayed information differs depending on the audio source. Some sources are not displayed.
⑥ Touch to display more icons. (Displayed only when icons' number over 5.)
⑦ External Accessory Control button
Is displayed when the optional External Accessory Control module is connected and "Setting the External Accessory Control" is set to "On" (page 50).
- You can operate the external accessories from this unit. For details, see "External Accessory Control Operation" (page 97).
⑧ Camera button*1
Displays camera images. (page 91)
⑨ Setup button
Displays the Setup screen. (page 30)
⑩ Phone button*2
Displays the Phone menu screen. (page 81)
- Depending on the setting and connected devices, the displayed icons and orders may differ. Touch 📄 to display more icons such as [Notifications]*3, [Android Auto]*4, [Apple CarPlay]*5, [Vehicle Info]*6 and [Alpine Connect]*7.
*1 Displays when the Camera Select is set to "Front," "Rear," or "Other." (page 47)
*2 Displays when the Bluetooth setting is set to "On." (page 31)
*3 Use to display the Facebook Notification List on the connected smartphone via this unit. (page 29)
Displays when Alpine TuneIt App is set to "USB (iPhone)" or "Bluetooth (Android)," and when a smartphone with Alpine TuneIt App installed is connected. (page 28)
*4 Displays the Android Auto screen, displayed when an Android Smartphone installed Android Auto App is connected. (page 52)
*5 Displays the Apple CarPlay screen, displayed when Apple CarPlay is turned on and an iPhone 5 or later is connected. (page 51)
*6 Displays the iDataLink mode screen. (page 95)
*7 Set Connectivity Setting or Alpine Connect to USB (iPhone) or Bluetooth (Android) depending on the connected Smartphone. For details, see "Alpine Connect App (Optional)" (page 52).
Edit Menu
You cannot operate the Edit Menu screen while driving. Your vehicle must be parked with the ignition key in the ACC or ON position. For details, see "To display the Setup Menu screen" in "Setup Operation" (page 30).
In the Edit Menu screen, you can change the audio source order or set the display/hide settings.
1 Touch the desired source icon in the Menu screen for at least 2 seconds.
A checkbox (or) is displayed on the upper left area of the source icon and switches to the edit mode.
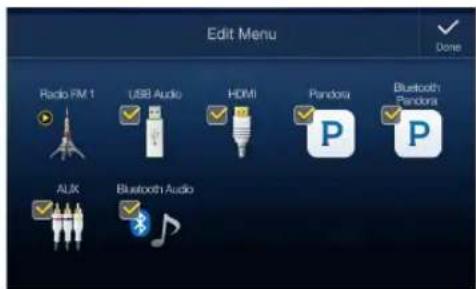
- The source icon displayed in the Edit Menu screen is displayed only when usable setup and conditions of each Audio source are fulfilled. For details on setup and conditions of each audio source, see "Switching Sources" (page 18).
■ Changing the order of Audio source
Drag and drop the source icon to the desired location.
■ Hiding/Displaying Audio source
Place a check in the checkbox (☐ to display the Audio source icon. Uncheck the checkbox (☐ to hide it.
- You cannot hide the icon of a source that is currently playing.
2 Touch [Done].
The editing content is confirmed, and returns to the menu screen.
- Editing here is reflected in the order of ♪ (AUDIO) button touching and change of the Audio source. (page 18)
About the Indicator Display
The Indicator Bar at the bottom of the screen displays various types of information, like the current time.
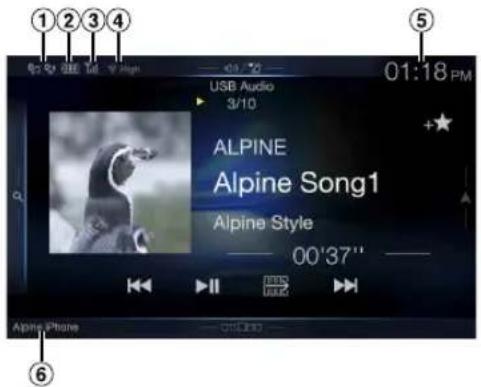
① Lights up when connected to a Bluetooth compatible device. (Does not display when connection is set to OFF.)
: Bluetooth connection to audio device
: Bluetooth connection to Hands Free Phone Blinks while reconnecting.
② Indicates the battery level of the connected Bluetooth device*.
| Battery Level | Level 3 Level | Level 2 Level 1 | No Battery | |
| Icon |
This may not be displayed depending on the connected Bluetooth device. Whenever one battery level decreases, the alarm sounds.
③ Indicates the signal strength level of the connected Bluetooth compatible device*.
Displayed when Bluetooth setting is ON.
| 0 | 1 | 2 | 3 | N |
| No Service |
④ Plasmacluster indicator
Indicates the setting value (Low/Mid/High) selected in "Plasmacluster air volume adjustment."
⑤ The clock display
You can switch between the 12 hour display and 24 hour display options.
For details of navigation operations, refer to "Navigation System OM" in the website at http://www.alpine-usa.com.
⑥ Bluetooth devices Name*
* When you connect two Hands-Free Phones, the information of the Bluetooth device set to Primary is displayed.
Opening screen Customization
You can set a BMP image that is stored on a USB flash drive as the opening screen.
This setting requires the following image format, folder name and file name.
Usable file format:
- B M P i m a g e
- Image size: 800 × 480 pixels (RGB 24 bit or less/number of color bit: 24, 8, 1 bit)
- Compression format: non-compressed
- F o l d e ^1 : OPENINGFILE *
- F i l e ^2 :openingfile.bmp
1 Connect the USB flash drive to the USB extension cable.
A message confirming the opening screen change is displayed.
2 Touch [OK].
An update indicator " (Loading)" is displayed, and update for the opening screen starts.
3 After the update is complete, the following message is displayed. ^*3
"The logo has been updated successfully! Please remove Flash Memory and press OK."
4 After removing the USB flash drive, touch [OK].
The opening screen setting is complete.
*1 Be sure to save the folder to the first layer of the USB flash drive.
*2 Only one BMP image can be set as the opening screen.
*3 If "Customization failed," is displayed, touch [OK] and then check that the folder name, file name and file format are correct.
- Do not perform the following actions during the update.
- Do not turn off the ACC to the car.
- Do not unplug the USB flash drive.
- Do not turn off or operate the unit.
- To return the opening screen to its original image, you must Clear All Settings. Be careful of this operation, as your other settings are also initialized. For details, see "Initializing the System" (page 42).
How to Input Characters and Numbers (Keypad)
The displayed screens and procedures may vary slightly depending on the function used, but the basic input method is the same.
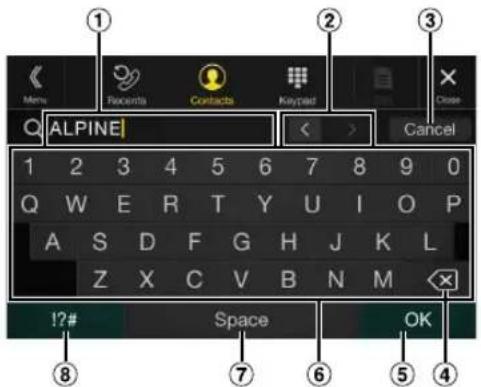
① Input screen area.
② Cursor position alteration switch
③ Cancel
Keypad mode finishes.
④ (Delete)
Returns to the previous character and erases it.
Touching here for more than 2 seconds will erase all input characters.
⑤ Input number is confirmed.
⑥ Character keypad
⑦ Space
⑧ Special character selector switch
The Alphanumeric/Special characters/Symbols selection popup is displayed.
Touch the desired character type.
Favorite Function
Using the Favorite Function
This unit enables you to recall functions easily by registering frequently used items such as the Audio source, the navigation search function, etc. to the Favorite screen. You can recall any of these items easily.
1 Press the ★ (Favorite) button.
The Favorite screen is displayed.
- Favorite screen example
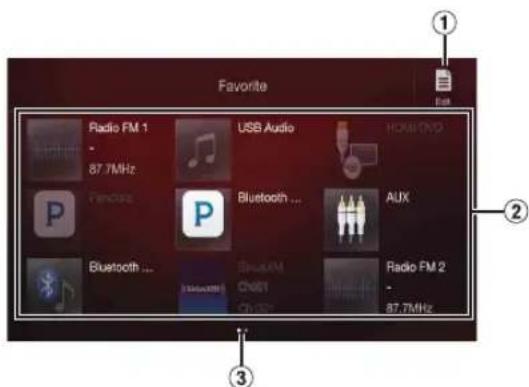
① Changes to the Edit screen used for registering items or changing names.
② Favorite registration item
Swipe to the left and right to change the pages. You can add up to 6 pages.
③ Indicates the location of the currently displayed Favorite screen.
2 Touch your desired Favorite registered item.
The desired item is displayed.
- When making a phone call by choosing shortcut dialing, after the message of confirmation of outgoing phone calls is displayed, touch [Call]. For details, see "Calling by Favorite Function" (page 83).
Editing the Favorite Screen
You cannot edit the Favorites screen while driving.
Your vehicle must be parked with the ignition key in the ACC or ON position. For details, see "To display the Setup Menu screen" in "Setup Operation" (page 30).
1 Touch [ ] (Edit).
A checkbox is displayed on the upper left area of the registration icon and it changes to Edit mode.
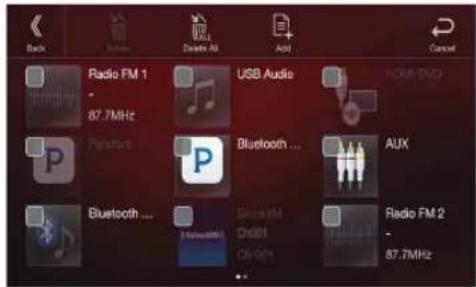
Setting item:
Item registration / Item name change / Icon change / Layout change / Item deletion
2 After editing is complete, touch [《》(Back).
3 After the caption for the confirmation is displayed, touch [OK].
4 Editing is complete and the screen switches to the Favorite screen.
- If you touch [←] (Cancel) while editing, the edits are reset and the screen returns to the previous Edit screen.
Registering Items
1 Touch [ ] (Add).
The items to be added (categories) are displayed.
2 Touch the desired item to be added (category).
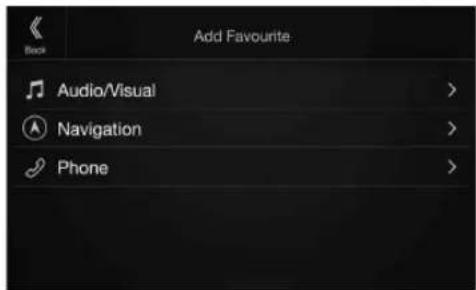
3 Choose the desired item to be added.
- You can add up to 54 items.
- You cannot register an item more than once.
Audio/Visual
[Radio] ^1 / [USB/iPod] / [Factory Media (USB/iPod)] ^2 / [HDMI/DVD] / [Pandora] / [Bluetooth Pandora] / [SiriusXM] ^3 or [Factory SiriusXM] ^4,3 / [AUX] ^4 / [Bluetooth Audio] / [Apple CarPlay] ^5 / [Android Auto] ^*5
*1 Choose a frequency from Preset 1 - 12 in any of the tuner preset bands.
*2 Not displayed when your car does not support the source or "Setting the Source Category" (page 49) is set to "Aftermarket." This is also not displayed when the iDataLink module is not connected.
*3 You can choose a channel registered to Presets 1 - 18.
*4 When "AUX" is selected, the source name set in "Setting the Auxiliary (AUX) Name" (page 45) is also displayed in the Favorite screen. When the iDataLink module (sold separately) is connected, the Auxiliary (AUX) mode is not available.
*5 You can register now playing Apple CarPlay Music or Google Play Music depending on the connected Smartphone.
- When using Apple CarPlay, some option may not available.
- You can also register directly by touching [+★] in the Audio source screen.
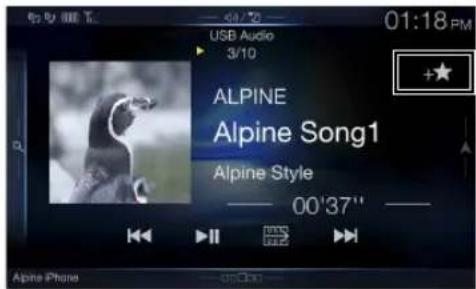
However, if it is already registered, [+★] is not displayed.
Navigation
[Specific Place]:
You can display places registered in Favorite and set your destination.
[Quick Place Search]:
Displays the address search keypad.
[Help Nearby]:
Displays the nearby search screen.
[Place Categories]:
Displays the selected Place Categories list.
- For details of navigation operations, refer to "Navigation System OM" in the website at http://www.alpine-usa.com.
■ Phone (Shortcut Dialing)\* 6
You can register the user's shortcut dialing stored in the Phone Book.
- If multiple phone numbers are stored, select a number you want to register.
- You can register directly by touching [+★] of the Contacts list. (page 81)
- You can change the icon you registered. (page 26)
*6 You can only select Phone when a mobile phone is connected. For details on how to register a mobile phone and downloading Phone Book, see "Bluetooth Operation" (page 81).
Changing Item Names
1 Touch the text area of the registered item.
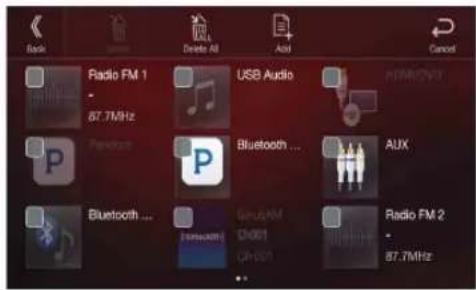
The Input User Name screen (Keypad) is displayed.
2 Input the name and touch [OK].
- For details on how to input characters using the keypad, see "How to Input Characters and Numbers (Keypad)" (page 24).
Changing Icons (only the Shortcut Dialing and Navigation icons)
You can change the icons of Shortcut Dialing and Navigation category. The following example explains how to change the Shortcut Dialing icon. Perform the same procedure to change the Navigation category icon.
1 Touch the icon that you want to change.
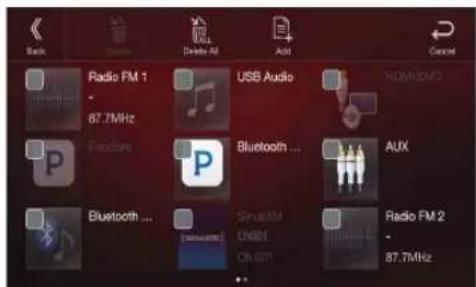
The icon list is displayed.
2 Touch the icon you want to change from the icon list.
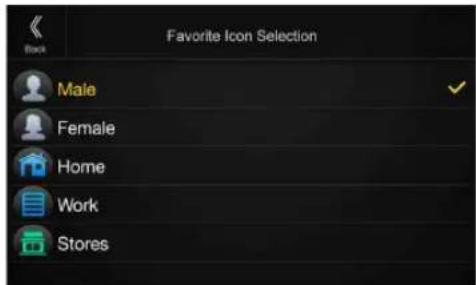
The icon is changed to the selected icon.
Changing the Layout
Drag and drop the item to the desired location.
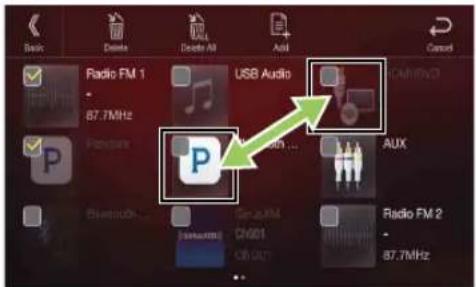
The item location is changed.
- When you move to other pages, switch pages, or when you make a new page and move to another, drag to the end of the screen, and lift your finger after the page changes.
Deleting Items
When deleting a selected item
1 Touch the checkbox at the left of the item you want to delete and place a check (√) it.
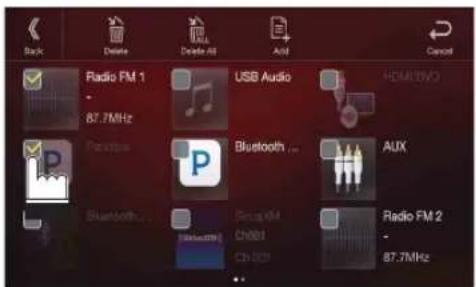
2 Touch [ ] (Delete).
The selected item will be deleted.
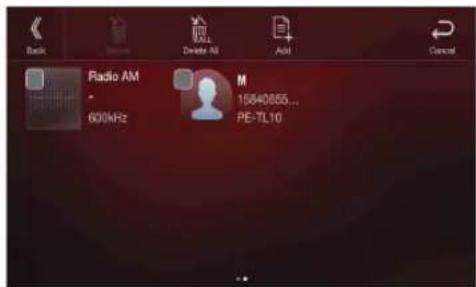
When deleting all items
Touch [ ] (Delete All).
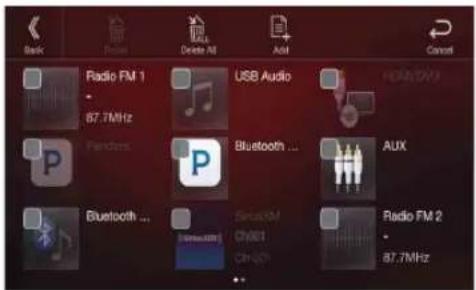
All items are deleted.
Applying Alpine Tunelt App
This unit's sound tuning is programmable from a connected Smartphone. It is also possible to download specific parameters for certain vehicles from Alpine's TuneIt database stored in the Cloud. Using the Alpine TuneIt App, customized parameters can also be uploaded for others to share and rate.
Through this unit, it is also possible to receive and respond to information from Alpine's Social Network Service (SNS) available through the connected Smartphone.
The installed Alpine TuneIt App should be launched on the Smartphone before connection to the head unit.
Alpine TuneIt App, is downloadable from Apple's App Store; the Android user can download it from Google Play™. For details, consult your Alpine dealer.
Before these operations, set TuneIt to USB (iPhone) or Bluetooth (Android) depending on the connected Smartphone. For details, see "Smartphone Apps Setup" (page 51).
- The application program and related specifications and data may be deleted or terminated without notice.
- Some Alpine TuneIt App functions may not be available if the Smartphone is not in a service area or receives no signal.
- Turn Apple CarPlay to Off before using Alpine TuneIt App. Refer to "Apple CarPlay Setup" (page 46).
Adjusting the sound via the Smartphone
After setting the above procedure, you can adjust the unit's sound function on the Smartphone.
1 Make sure the unit is powered on.
2 Launch the Alpine Tunelt App on the Smartphone. Adjust the unit's sound accordingly on the Smartphone.
- The setting cannot be done on both the Smartphone and this unit at the same time. While the sound function of this unit is set via Smartphone, the sound function settings on the unit will be displayed as “Sound APP Connected.”
- In some situations, such as the unit is powered off or during a call, etc., sound setting cannot be done via the Smartphone.
- This function may not be available depending on the paired Smartphone.
- Please obey all local traffic laws while using this function.
- When “Setting the External Audio Processor” (page 50) “On,” this function is not available.
Facebook Notification Function
Some functions may be available in a future version of Alpine TuneIt App.
- Depending on the paired Smartphone, the following functions may not be available even though the Alpine TuneIt App version is updated.
Receiving Notification
When the smartphone connected to the unit receives new notifications from Facebook, the unit emits a notification sound or displays the notification screen. Set this up in the Alpine TuneIt App settings.
■ Notification Incoming screen example
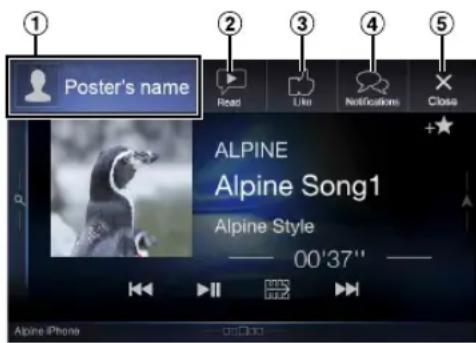
① Poster's picture and name
Touch here to switch to Facebook screen.
Facebook screen is not displayed while driving.
② Read (Stop) button
Touch to play the notification using TTS (Text to Speech)
(Depending on the status, operation may not be available).
During TTS play mode, touch [Stop] to stop play.
③ Like button
For "Like" operation. (Valid when Wall Posts or Comments is received)
④ Notifications button
Touch to switch to Notifications List screen.
⑤ Close button
Close the notification screen.
Touch the desired button to operate.
- A new received Notification prompt will last for 15 seconds. If there is no operation within 15 seconds, the unit will return to normal mode.
- Touching current main screen will close the notification screen.
• Volume adjustment during TTS play can be adjusted by / or √ + - (0-35). Settings will be reflected at the next TTS reproduction. - The TTS volume is output via the car's front right and left speakers.
Displaying Facebook Screen
During Notification incoming or Notification List screen, you can switch to Facebook screen.
■ Facebook screen example
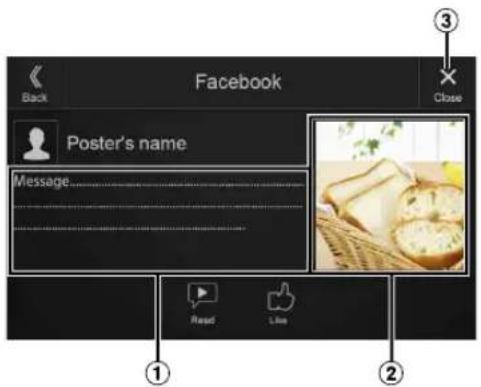
① Message content
② Poster's photo
③ Close button: Close the Facebook screen.
Touch the poster's picture and name to switch to the Facebook screen.
The detailed information of Notification is displayed.
• T o u« c h [ ] (Back) to return to Notifications List screen.
- Depending on the status, contents of message and photo may not be displayed.
- In some situations, such as the unit is powered off or during a call, etc., Notification of the Smartphone will not be prompted by this unit.
• Facebook screen is not displayed while driving.
Displaying Notification List
You can view the received Notification from Facebook in the connected Smartphone via this unit.
■ Notification List screen example
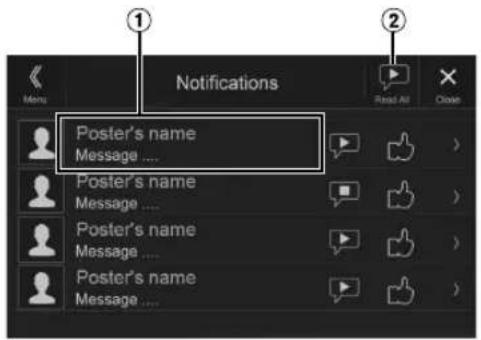
① Poster's Name and Message
Messages are not displayed while driving.
② Touch [Read All]/[Stop] to play/stop all Notifications.
- You can switch to the Notification List screen from the Menu screen.
• T o u×c h [ ] to return to Current screen. - Depending on the status, some functions may not be available.
- The displayable amount of the Notification list depends on the connected Smartphone.
Setup
Setup Operation
To display the Setup Menu screen:
Your vehicle must be parked with the ignition key in the ACC or ON position. To do this, follow the procedures below.
1 Bring your vehicle to a complete stop at a safe location. Engage the parking brake.
2 Release the parking brake. (For safety, release the parking brake while depressing the foot brake pedal).
3 Engage the parking brake again.
- For automatic transmission vehicles, place the transmission lever in the Park position.
Now, the locking system for the Setup operation has been released. Engaging the parking brake can reactivate the Setup Menu, as long as the car's ignition has not been turned off. It is not necessary to repeat the above procedure (1 through 3) of "To display the Setup Menu screen."
Each time the ignition is turned OFF, perform the procedure of "To display the Setup Menu screen."
1 Press the MENU button.
The Menu screen is displayed.
- You can also display the menu screen by touching the lower part of the Audio source screen or by swiping upward.
![Radio FM 1 87.7 MHz USB Audio 6 wangho... HDMI 1/HDMI 2 Bluetooth Pandora Search Phone Canvas Ex-Acc Off Setup [Setup] button](/content/2026/05/950811/images/05cd5062ed76406b46d69d4c87064d2f90b928372ee387928270a6dae2cb3beb.jpg)
2 Touch [Setup].
The Setup main screen is displayed.
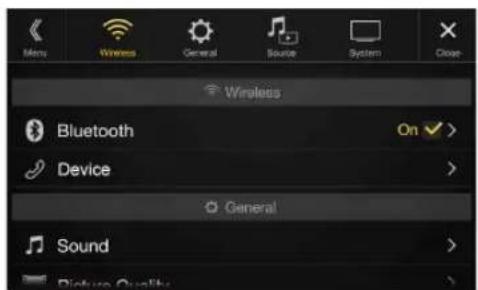
3 Touch the required setting icon on the upper part of the Setup main screen or swipe the list area vertically, then touch the setting item.
Setting items:
Wireless: See "Wireless (Bluetooth) Setup" (page 31).
General: See "General Setup" (page 33).
Source: See "Source Setup" (page 43).
System: See "System Setup" (page 46).
Wireless (Bluetooth) Setup
[Wireless] is selected on the Setup main screen in step 3. See "Setup Operation" (page 30).
■ Wireless Setup Menu screen
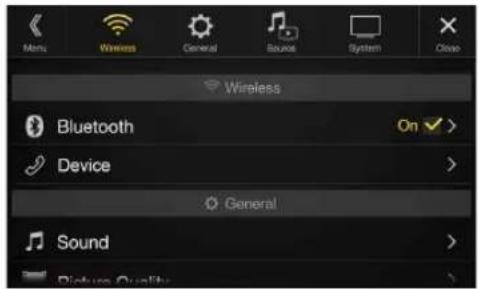
| Bluetooth | |
| Bluetooth Information*1/2 | |
| Set Bluetooth Device*1/2 | |
| Hands-free Device Priority*1/2 | |
| iPhone Auto Pairing*1/2 | |
| Device | |
| Passcode Change | |
| Default Phone Book Format | |
| Phone Speaker | |
| Microphone Select (X208U/INE-W977HD olny) | |
*1 This setting is only available when "Bluetooth" is set to "On" (☑)
*2 Cannot be adjusted when Apple CarPlay is used/Android smartphone which installed Android Auto App is connected, and "Bluetooth" is fixed to "On".
The following steps 1 to 3 are common to each "Setting item" of Wireless Setup. See each section for details.
1 Select the desired item.
2 To switch the setting, touch [<], [>], [+], [-], or mark the checkboxes "Off" (or "On").
- If “” appears, there is a further hierarchy. Touch the desired item.
3 Touch [X] to return to the main source screen.
- To return to the previous List screen, touch [<<] or [<] in the previous page. For details, see "About Basic Operation for List Screen" (page 19).
Bluetooth Setup
[Bluetooth] is selected on the Wireless Setup Menu screen in step 1. See "Wireless (Bluetooth) Setup" (page 31).
You can register and set up Bluetooth compatible devices.
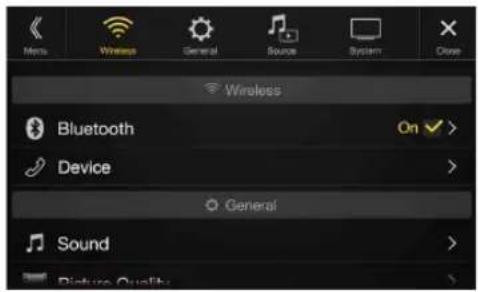
Setting item:
Bluetooth
Setting contents:
Off / On (Initial setting)
Off: Bluetooth function is not used. When the phone function is during using via Apple CarPlay or Android Auto, you cannot select "Off".
On: Turn ON to begin phone pairing process.
Displaying Bluetooth Information
Make sure the "Bluetooth" setting is "On".
You can display the Bluetooth device name and device address of this unit.
Setting item:
Bluetooth Information
Pairing a Bluetooth Device
Make sure the "Bluetooth" setting is "On" ☑. See "Bluetooth Setup" (page 31).
Search for Bluetooth compatible devices.
Setting item:
Set Bluetooth Device
1 Touch [Q] (Search) of "No Device."
The Bluetooth devices can be searched are displayed in a list.
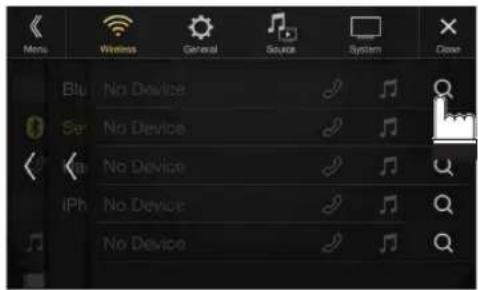
2 Touch [♪] (Audio), [♪] (Hands-free) or [♪/♪] (Both) of the device you want to connect from the list.
Audio: Device is used as an Audio device.
Hands-free: Device is used as a Hands Free Device.
Both: Device is used as both an Audio device and Hands Free Device.
- You can register up to 5 Bluetooth compatible mobile phones.
- You can connect three Bluetooth Devices; two exclusively for Hands-Free Phone and one exclusively for Bluetooth Audio.
- When you register a Hands-Free Phone for the first time, Primary is set automatically. When you connect two Hands-Free Phones, select "Hands-free" or "Both." You can then set the priority on the Primary/Secondary setting screen. For details, see "Hands-free Device Primary/Secondary Setting" (page 32).
3 When the device registration is complete, a message appears and the device returns to normal mode.
- The Bluetooth registration process differs depending on the device version and SSP (Simple Secure Pairing). If a 4 or 6 character Passcode appears on this device, enter the Passcode using the Bluetooth compatible device.
If a 6 character Passkey appears on this device, make sure the same passkey is displayed on the Bluetooth compatible device and touch "Yes." - If all 5 devices have been registered, you cannot register a 6th device. To register another device, you need to delete one of the other 5 devices first.
Setting the Bluetooth Device
Select one of 5 paired Bluetooth compatible devices that you previously registered.
Touch [♪] (Audio) or [♪] (Hands free) of the device you want to connect from the Paired Device list.
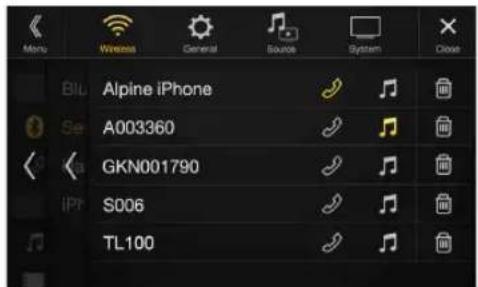
Deleting a Bluetooth Device from the list
You can delete the information of a previously connected Bluetooth compatible device.
1 Touch [图标] (Delete) of the Bluetooth compatible device to delete from the Paired Device list.
2 Touch [OK].
- T o u c h i n g [Cancel] will cancel the setting.
Hands-free Device Primary/Secondary Setting
Make sure the "Bluetooth" setting is "On". See "Bluetooth Setup" (page 31).
When you connect two Hands-Free Phones, set the priority of the operation and the setting of incoming-outgoing calls.
Setting item:
Hands-free Device Priority
Setting contents:
Primary / Secondary
Touch the checkbox for Primary/Secondary of the device names that are registered to the unit to set them.
- When connected to two hands-free phones, operating restrictions apply to the hands-free phone registered to Secondary. For details, see "Hands-free Phone Control" (page 81).
iPhone Auto Pairing Setting
Make sure the "Bluetooth" setting is "On" ☑. See "Bluetooth Setup" (page 31).
When an iPhone is connected via USB and it is not on the Registered Device list, it will be paired automatically.
Setting item:
iPhone Auto Pairing
Setting contents:
On / Off (Initial setting)
On: Performs iPhone Auto Pairing setting. Off: Does not perform iPhone Auto Pairing setting.
- This setting supports iPhones with iOS Ver.5.5 or later. - When more than 5 Bluetooth devices are registered, Auto Pairing does not start.
Device Setup
[Device] is selected on the Wireless Setup Menu screen in step 1. See "Wireless (Bluetooth) Setup" (page 31).
You can make various settings for a Bluetooth compatible device.
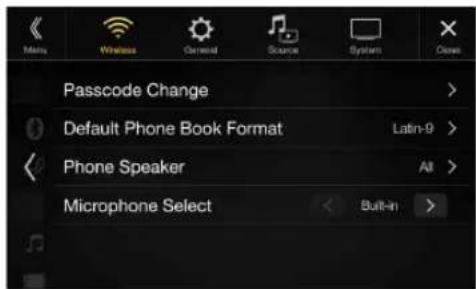
Setting the Passcode
You can set the code for connecting with a Bluetooth compatible device.
Setting item:
Passcode Change
1 Enter a 4-digit passcode (old), and then touch [OK].
• The initial number is 0000.
- For details on how to input the numeric keypad, see "Numeric Keypad Input Operations" (page 77).
2 Enter a 4-digit passcode (new), and then touch [OK].
3 Enter the passcode that you entered in step 2 again, and then touch [OK].
Changing the Character Code of the Phone Book
You can select the character code that is used when transferring the phone book or history from a mobile phone. If unreadable characters appear in the transferred data, select the correct character code.
Setting item:
Default Phone Book Format
Setting contents:
Latin-1 / Latin-9 (Initial setting) / Russian / Chinese / Thai / Arabic / UTF-8 / UTF-16LE / UTF-16BE
Latin-1: ISO 8859-1
Latin-9: ISO 8859-15
Russian: ISO 8859-5
Chinese: GB18030
Thai: CP874
Arabic: CP1256
UTF-8
UTF-16LE
UTF-16BE
Selecting the Output Speaker
You can select which speaker in the car will output the audio from the phone.
Setting item:
Phone Speaker
Setting contents:
All (Initial setting) / Front Left / Front Right / Front Left + Right
All: The sound is output from all speakers in car.
Front Left: The sound is only output from the front left speaker.
Front Right: The sound is only output from the front right speaker.
Front Left + Right: The sound is output from the front left and front right speakers.
- The setting cannot be adjusted during a phone call. Adjust the setting before placing a call.
- This option is not available when "External Audio Processor" (page 50) is set to On.
Setting the Microphone Select (X208U/INE-W977HD only)
You can select the built-in microphone or the supplied microphone as a Hands-Free Microphone.
Setting item:
Microphone Select
Setting contents:
Built-in / Add-on (Initial setting)
Built-in: Use the built-in microphone. (see location on page 16)
Add-on: Use the supplied microphone.
General Setup
[General] is selected on the setup main screen in step 3. See "Setup Operation" (page 30).
■ General Setup Menu screen
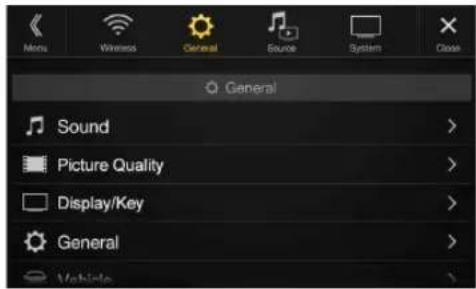
| Sound | |
| Balance / Fader *1 | |
| Rear Speaker*2 | |
| Subwoofer*2 | |
| Subwoofer Level*1, 2, 3, 5 | |
| Subwoofer Phase*2, 3 | |
| MX HD*1, 4, 5 | |
| EQ Presets*4, 5 | |
| Dual HD EQ*4, 5 | |
| X-Over*5 | |
| Time Correction (TCR) | |
| Defeat | |
| Source Volume Setup | |
| Caller Level*6 | |
| Microphone Level*6 | |
| Ring Tone Level*6 | |
| Key Sound Feedback | |
| Mute While Backing Up | |
| Microphone EC/NR | |
| Default Sound Settings | |
| Picture Quality | |
| Video*7 | |
| Camera*8 | |
| Navigation | |
| Display/Key | |
| Screen/Lighting | |
| Screen Color | |
| Illumination Color (X208U/INE-W977HD only) | |
| Text Scroll | |
| Artwork Position | |
| General | |
| Language | |
| Format | |
| About | |
| Demo Mode | |
| Vehicle | |
| Steering wheel | |
| Installation Status | |
*1 You can make this setting in the Sound Setup screen of the Shortcut Setup. For details, see "Sound Setup Function" (page 20).
*2 You can also make the setting in the Bal./Fad. screen.
For details on how to adjust, see “Setting the Balance/Fader/Rear Speaker/Subwoofer” (page 34).
*3 This setting is only available when "Subwoofer" is set to "On" (☑)
*4 When the Defeat setting is "On," you cannot perform the set up.
*5 When "BASS ENGINE SQ" is selected in the Shortcut Setup, this setting is disabled.
*6 Not displayed when Apple CarPlay is used/Android smartphone which installed Android Auto App is connected.
*7 "Video" can be selected while a video is playing.
*8 The camera names are not displayed when Camera Select (page 47) is set to "Off."
The following steps 1 to 3 are common to each "Setting item" of General Setup. See each section for details.
1 Select the desired item.
2 To switch the setting, touch [<], [>], [+], [-], or mark the checkboxes "Off" (☐ or "On" (). √
- If “” appears, there is a further hierarchy. Touch the desired item.
3 Touch [X] to return to the main source screen.
- To return to the previous List screen, touch [«] or [<] in the previous page. For details, see “About Basic Operation for List Screen” (page 19).
Sound Setup
[Sound] is selected on the General Setup Menu screen in step 1. See "General Setup" (page 33).
You can set up items related to the sound quality.
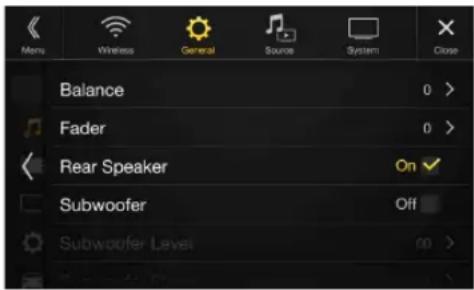
- X209D is designed exclusively for a certain car model. The Initial setting for sound setup items may differ from the description of Owner's Manual.
Setting the Balance/Fader/Rear Speaker/Subwoofer
Set Balance/Fader/Rear Speaker/Subwoofer/Subwoofer Level/Subwoofer Phase in the Bal./Fad. screen.
Setting item:
Balance*1 / Fader*1 / Rear Speaker / Subwoofer*2 / Subwoofer Level*1,2 / Subwoofer Phase*1
*1 When selecting either of the above setting items, the Bal./Fad. screen is displayed.
*2 When "BASS ENGINE SQ" is selected in the Shortcut Setup, this setting is disabled.
Fad./Bal. screen
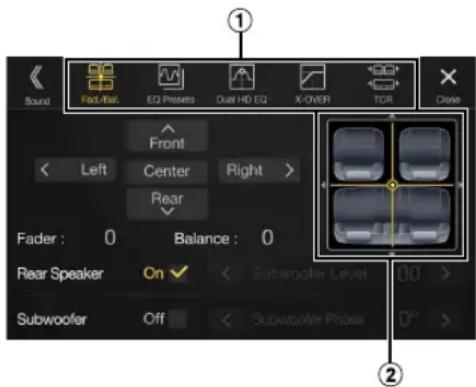
① Enables you to change to each setting screen.
② Balance/Fader Image area
Setting the Balance/Fader
Touch the desired point within the image area. Or touch [∧] [∨][⟨⟩].
Balance:
L15 to R15
Fader:
F15 to R15
- To reset to the initial setting (Balance: 0, Fader: 0), touch [Center].
Rear Speaker Setting
You can set the rear speaker output to "Off."
Setting item:
Rear Speaker
Setting contents:
On (Initial setting) / Off
Turning Subwoofer ON/OFF
If an optional subwoofer is connected to the unit, make the following setting.
Setting item:
Subwoofer
Setting contents:
On / Off (Initial setting)
Adjusting the Subwoofer Level
You can set the Subwoofer level when a Subwoofer is connected.
Setting item:
Subwoofer Level
Setting contents:
0 to 15 (Initial setting: 0)
- This setting is only available when "Subwoofer" is set to "On" ()
Setting the Subwoofer Phase
The subwoofer output phase is toggled Subwoofer Normal ( 0^ ) or Subwoofer Reverse ( 180^ ).
Setting item:
Subwoofer Phase
Setting contents:
0^ (Initial setting) / 180^
- This setting is only available when "Subwoofer" is set to "On" ()
Setting the Media Xpander (MX HD) Equalizer Presets
Media Xpander (MX HD) makes vocals or instruments sound distinct regardless of the music source. The HD-Radio Technology (FM)/SiriusXM, USB Flash drive and iPod/iPhone, will be able to reproduce the music clearly even in cars with a lot of road noise.
Setting item:
MX HD
- When the Defeat setting is "On," you cannot perform the set up.
- When "BASS ENGINE SQ" is selected in the Shortcut Setup, this setting is disabled.
- The MX HD setting can be performed only when a source is currently selected.
■ Adjustable source (media) and setting value
HD-Radio™ (FM)/SiriusXM: Off (Initial setting) / Level1 / Level2 / Level3
The medium to high frequencies become more clear, and produces well balanced sound in all the bands.
Compressed Media/Factory Audio: Off (Initial setting) / Level1 / Level2 / Level3
This corrects information that was omitted at the time of compression. This reproduces a well-balanced sound close to the original.
HDMI/AUX: Off (Initial setting) / Compressed Media / Movie / Music
Choose the MX HD mode (Compressed Media, Movie, or Music) that corresponds to the media connected.
(Movie)
The dialog portion of the video is reproduced more clearly
(Music)
This file contains a large quantity of data such as music clip. MX uses this data to reproduce the sound accurately.
• The effect increases as the MX HD setting value increases Level1 → Level2 → Level3.
- You can set this for each source.
- iPod/iPhone/USB Audio/USB Video/Bluetooth Audio/Pandora/Bluetooth Pandora/Alpine Connect App/Apple CarPlay Music/Google Play Music correspond to Compressed Media.
- Factory Media (USB/iPod)/Factory SiriusXM correspond to Factory Audio.
10 typical equalizer settings are preset at the factory for a variety of musical source material.
Setting item:
EQ Presets
Setting contents:
FLAT (Initial setting) / POP / ROCK / NEWS / JAZZ / ELECTRONIC / HIP HOP / EASY LISTENING / COUNTRY / CLASSICAL
- Only one type can be set to ON.
- When Equalizer Presets is set, the linked Dual HD EQ settings are also changed. We recommend storing Dual HD EQ settings in a Preset in advance.
- The Equalizer Presets setting can be configured when Defeat is "Off."
Adjusting the Parametric Equalizer Curve (Dual HD EQ)
Parametric Equalizer (Dual HD EQ) can adjust the center frequency/Q Factor (bandwidth)/level for the front and rear speakers independently. You can adjust only to the approximate frequency zone, but can then compensate by performing advanced correction of the sound.
Setting item:
Dual HD EQ
- When the Defeat setting is "On," you cannot perform the set up.
- When "BASS ENGINE SQ" is selected in the Shortcut Setup, this setting is disabled.
1 Adjust the Dual HD EQ to your preference.
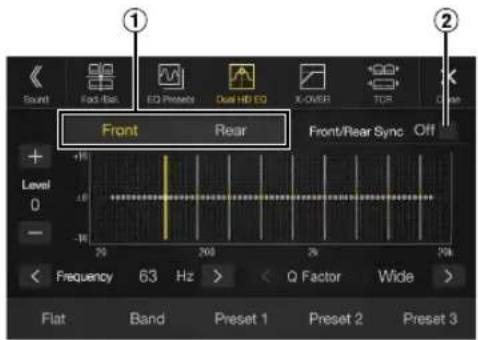
① Front/Rear speaker switching button
Not displayed when Front/Rear Sync is "On" (☑)
② Front/Rear speaker interlock button
On: When you want the Front and Rear speakers to have the same setting, set to "On" (☑)
Off: When you want to set the Front and Rear speakers independently, set to "Off" (☐)
Adjusting the Band
Touch [Band] to select the band to be adjusted.
Band1 Band2 ... Band8 Band9 Band1 →
- You can select a band directly by touching the screen.
Adjusting the Frequency
Touch [<] or [>] of "Frequency" to adjust the frequency of the selected band.
Adjustable frequency bands:
20 Hz to 20 kHz (in 1/3 octave steps)
Band1: 20 Hz\~100 Hz (63 Hz)
Band2: 63 Hz\~315 Hz (125 Hz)
Band3: 125 Hz\~500 Hz (250 Hz)
Band4: 250 Hz\~1 kHz (500 Hz)
Band5: 500 Hz\~2 kHz (1 kHz)
Band6: 1 kHz\~4 kHz (2 kHz)
Band7: 2 kHz\~7.2 kHz (4 kHz)
Band8: 5.8 kHz\~12 kHz (8 kHz)
Band9: 9 kHz\~20 kHz (16 kHz)
Adjusting the Level
Touch [−] or [+] of "Level" to adjust the level of selected band.
Setting contents:
-14 to +14 (Initial setting: 0)
Setting the Bandwidth
Touch [<] or [>] of "Q Factor" to select the bandwidth.
Setting contents:
Wide (Initial setting) / Medium / Narrow
2 To adjust another band, repeat step 1, and adjust all bands.
3 To store the adjusted setting value, touch and hold [Preset 1], [Preset 2], or [Preset 3] for at least 2 seconds.
- Band2 and Band8 are the same as the Bass and Treble controls.
- For details on setting Bass and Treble, see "Adjusting Bass Level/Treble Level" (page 21).
- Settings exceeding the frequency of adjacent bands are not available.
- While adjusting the Dual HD EQ, you should consider the frequency response of the connected speakers.
- When the Dual HD EQ is adjusted, the Equalizer Presets are overridden.
- When Equalizer Presets is set, the linked Dual HD EQ settings are also changed. We recommend storing Dual HD EQ settings in a Preset in advance.
- T o u c h [Flat] to initialize all values.
Calling the Dual HD EQ adjusted value
Calling the pre-set Dual HD EQ adjusted value.
Touch [Preset 1], [Preset 2], or [Preset 3] on the Dual HD EQ screen.
The setting stored in the Preset will be recalled.
Adjusting the Crossover Settings (X-Over)
Before performing the following procedures, see "About the Crossover" (page 38).
Setting item:
X-Over
- When "BASS ENGINE SQ" is selected in the Shortcut Setup, this setting is disabled.
1 Touch [Channel] to select the channel.
Each time you touch, the channel switches.
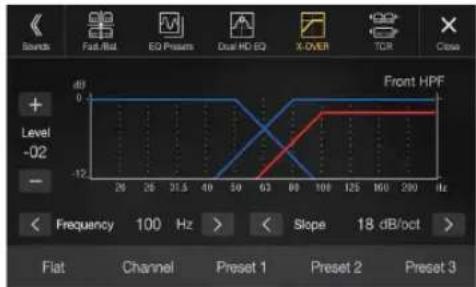
• The channel being adjusted is displayed in red.
Front HPF Rear HPF Subw. LPF Front HPF
2Adjust the crossover to your preference.
Selecting the Cut-Off Frequency
Touch [<] or [>] of "Frequency," and then select the cut-off frequency.
Setting contents:
20/25/31.5/40/50/63/80 (Initial setting) / 100/125/160/200 Hz
Adjusting the Slope
Touch [<] or [>] of "Slope," and then adjust the HPF or LPF slope.
Setting contents:
0 (Initial setting) / 6 / 12 / 18 / 24 dB/oct.
Adjusting the Level
Touch [−] or [+] of "Level," and then adjust the HPF or LPF level.
Setting contents:
-12 to 0 dB (Initial setting: 0)
3 Repeat steps 1 to 2 to make adjustment to the other channels.
4To store the adjusted setting value, touch and hold [Preset 1], [Preset 2], or [Preset 3] for at least 2 seconds.
- T o u c h [Flat] to initialize all values.
- If the Rear Speaker setting is "Off," the Rear Speaker setting cannot be edited (page 34).
- If the Subwoofer setting is "Off," the Subwoofer setting cannot be edited (page 34).
- While adjusting the X-Over you should consider the frequency response of the connected speakers.
Calling the X-Over adjusted value
Calling the pre-set X-Over adjusted value.
Touch [Preset 1], [Preset 2], or [Preset 3] on the X-Over screen.
The setting stored in the Preset will be recalled.
Adjusting the Time Correction (TCR)
Before performing the following procedures, see “About Time Correction” (page 39).
Setting item:
Time Correction
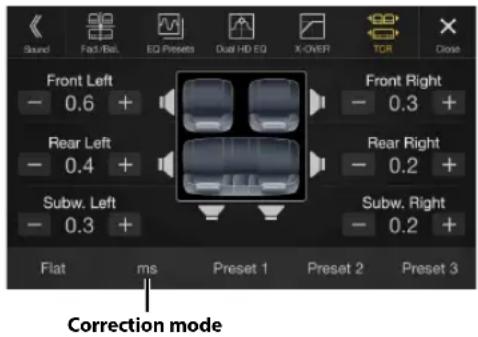
1 Touch the Correction mode button.
The pop up screen for selecting the correction mode is displayed.
2 Touch [ms], [cm] or [inch] to select the mode for making adjustments.
The selected mode is displayed on the Correction mode button.
3 Touch [−] or [+] for each speaker to adjust the time or distance.
0.0 msec to 9.9 msec (0.1 msec/step)
0.0 cm (0.0 inch) to 336.6 cm (132.7 inch) (3.4 cm/step)
All speaker setting values are adjustable in the range of 15 ms or 510 cm.
4To store the adjusted setting value, touch and hold [Preset 1], [Preset 2], or [Preset 3] for at least 2 seconds.
- To u c h [Flat] to set all values to 0.0.
- If the Rear Speaker setting is "Off," the Rear Speaker setting cannot be edited (page 34).
- If the Subwoofer setting is "Off," the Subwoofer setting cannot be edited (page 34).
Calling the Time Correction Value
Calling the pre-set time correction value.
Touch [Preset 1], [Preset 2], or [Preset 3] on the time correction screen.
The setting stored in the Preset will be recalled.
Setting Defeat
If Defeat is "On," MX HD, Equalizer Presets and Dual HD EQ functions are turned Off. This disables any settings made for these functions.
Setting item:
Defeat
Setting contents:
Off (Initial setting) / On
Setting the Volume for Each Source
Setting item:
Source Volume Setup - Radio / SiriusXM / Compressed Media* ^1 / iPod Music / AUX ^2 / HDMI* ^2,3 / Bluetooth Audio / Factory Audio* ^4 / Apple Carplay ^6 / Android Auto* ^5
Setting contents ^*6 :
-14 to +14 (Initial setting: 0)
*1 Compressed Media is the music data and video data in a USB flash drive (MP3/WMA/AAC/FLAC/AVI/MKV/MP4).
*2 The source name set in "HDMI Setup" (page 46) and "Setting the Auxiliary (AUX) Name" (page 45) is displayed.
*3 Not displayed when an HDMI device is not connected.
*4 Not displayed when an iDataLink module is not connected.
*5 Available when an iPhone 5 or later/Android smartphone which installed Android Auto App is connected.
*6 Except for Apple CarPlay/Android Auto mode.
- Settable source differs depending on the connected device and settings.
Setting the Volume for Apple CarPlay
When an iPhone 5 or later is connected, after touching [Apple CarPlay], you can adjust Media, Phone Calls, Ringtones & Alerts level, Notifications & Guidance level, Siri and Microphone Level for Apple CarPlay mode.
Setting item:
Media / Phone Calls / Ringtones & Alerts / Notifications & Guidance / Siri / Microphone Level
Setting contents for Media:
-14 to +14 (Initial setting: 0)
Setting contents for Ringtones & Alerts:
1 to 6 (Initial setting: 3)
Setting contents for other items:
1 to 11 (Initial setting: 5)
Setting the Volume for Android Auto
When an Android Smartphone is connected, after touching [Android Auto], you can adjust Media, Phone Calls, Ringtones & Alerts level, Notifications & Guidance level, Voice Recognition and Microphone Level for Android Auto mode.
Setting item:
Media / Phone Calls / Ringtones & Alerts / Notifications & Guidance / Voice Recognition / Microphone Level
Setting contents for Media:
-14 to +14 (Initial setting: 0)
Setting contents for Ringtones & Alerts:
1 to 6 (Initial setting: 3)
Setting contents for other items:
1 to 11 (Initial setting: 5)
Adjusting the Caller Level
You can adjust the volume of the incoming call.
Setting item:
Caller Level
Setting contents:
1 to 11 (Initial setting: 5)
Adjusting the Microphone Level
You can adjust the transmit volume, during the call.
Setting item:
Microphone Level
Setting contents:
1 to 11 (Initial setting: 5)
Adjusting the Ring Tone Level
You can adjust the receive volume, during the call.
Setting item:
Ring Tone Level
Setting contents:
1 to 6 (Initial setting: 3)
Volume Setting
You can change the volume of the sound heard when a button is touched.
Setting item:
Key Sound Feedback
Setting contents:
0 to 6 (Initial setting: 3)
Setting Audio Mute On/Off while Backing up
The sound can be muted when the shift gear lever is set to the reverse (R) position enabling you to easily hear sensors, etc., while reversing your car.
Setting item:
Mute While Backing Up
Setting contents:
Off / On (Initial setting)
Off: Does not mute.
On: Mutes when the shift gear lever is set to the reverse (R) position.
Setting the Microphone Effect
Set this item when an iPhone 5 or later/Android smartphone with Android Auto App is connected.
You can turn on or off the Microphone Effect.
This setting influences Apple CarPlay/Android Auto mode.
Setting item:
Microphone EC / NR
Setting contents:
On (Initial setting:) / Off
Default Sound Settings
You can restore the Dual HD EQ*/X-Over*/Time Correction*/MX HD Level/Rear Speaker/Subwoofer/Subwoofer Level/Subwoofer Phase to factory settings.
Setting item:
Default Sound Settings
Touch [Set], and the confirmation message appears.
To initialize, touch [OK].
* The setting values that are stored in Preset 1 to Preset 3 cannot be initialized.
About the Crossover
Crossover (X-Over):
This unit is equipped with an active crossover. The crossover limits the frequencies delivered to the outputs. Each channel is controlled independently. Thus, each speaker pair can be driven by the frequencies for which they have been optimally designed.
The crossover adjusts the HPF (high pass filter) or LPF (low pass filter) of each band, and also the slope (how fast the filter rolls off the highs or lows).
Adjustments should be made according to the reproduction characteristics of the speakers. Depending on the speakers, a passive network may not be necessary. If you are unsure about this point, please consult your authorized Alpine dealer.
| Cut-off frequency (1/3 octave steps) | Slope | Level | |||
| HPF LPF | HPF LPF | ||||
| Subwoofer (LPF) | ---- | 20 Hz - 200 Hz | ---- | 0, 6, 12, 18, 24 dB/oct. | 0 to -12 dB |
| Rear speaker (HPF) | 20 Hz - 200 Hz | ---- | 0, 6, 12, 18, 24 dB/oct. | ---- | 0 to -12 dB |
| Front speaker (HPF) | 20 Hz - 200 Hz | ---- | 0, 6, 12, 18, 24 dB/oct. | ---- | 0 to -12 dB |
Low range High range
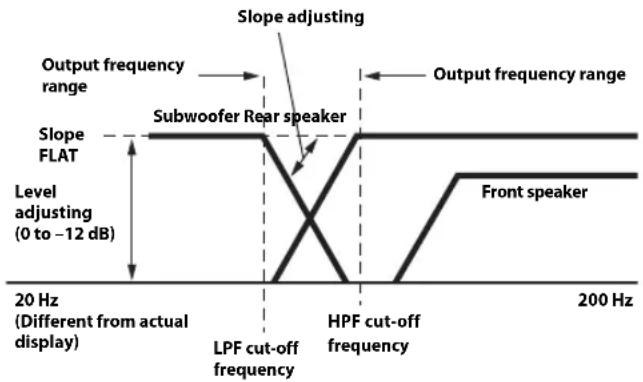
- HPF (high pass filter): Cuts the lower frequencies and allows the higher frequencies to pass.
- LPF (low pass filter): Cuts the higher frequencies and allows the lower frequencies to pass.
- Slope: The level change (in dB) for a frequency change of one octave.
- The higher the slope value, the steeper the slope becomes.
- Adjust the slope to FLAT to bypass the HP or LP filters.
- Do not use a tweeter without the HPF on or set to a low frequency, as it may cause damage to the speaker due to the low frequency content.
- Adjustment should be made according to the recommended crossover frequency of the connected speakers. Determine the recommended crossover frequency of the speakers. Adjusting to a frequency range outside that recommended may cause damage to the speakers. For the recommended crossover frequencies of Alpine speakers, refer to the respective Owner's Manual.
We are not responsible for damage or malfunction of speakers caused by using the crossover outside the recommended value.
About Time Correction
The distance between the listener and the speakers in a car vary widely due to the complex speaker placement. This difference in the distances from the speakers to the listener creates a shift in the sounds image and frequency characteristics. This is caused by the time delay between the sound reaching the listener's right versus the left ear.
To correct this, this unit is able to delay the audio signal to the speakers closest to the listener. This effectively creates a perception of increased distance for those speakers. The listener can be placed at an equal distance between the left and right speakers for optimum staging.
The adjustment will be made for each speaker in 3.4 cm steps.
Example 1. Listening Position: Front Left Seat
Adjust the time correction level of the front left speaker to a high value and the rear right to zero or a low value.
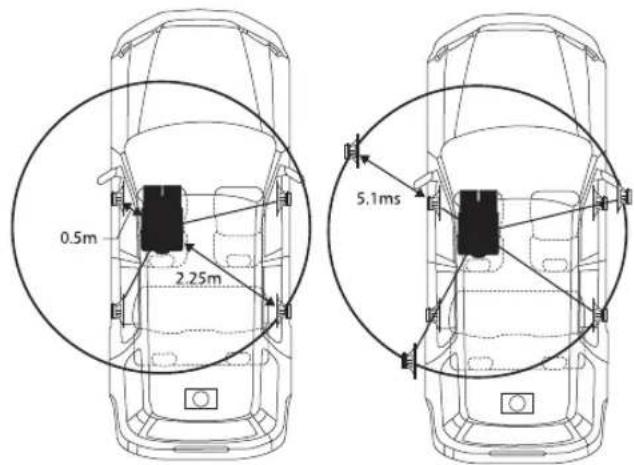
The sound is not balanced because the distance between the listening position and the various speakers is different.
The difference in distance between the front left speaker and the rear right speaker is 1.75 m (68-7/8").
Here we calculate the time correction value for the front left speaker in the diagram on the above.
Conditions:
Farthest Speaker – listening position : 2.25 m (88-9/16")
Front left speaker – listening position : 0.5 m (19-11/16")
Calculation: L = 2.25 m - 0.5 m = 1.75 m (68-7/8")
Time correction = 1.75 ÷ 343* × 1,000 = 5.1 (ms)
* Speed of sound: 343 m/s (765 mph) at 20°C
In other words, giving the front left speaker a time correction value of 5.1 ms makes it seem as if its distance from the listener is the same as the distance to the farthest speaker.
Time correction eliminates the differences in the time required for the sound to reach the listening position.
The time of the front left speaker is corrected by 5.1 ms so that its sound reaches the listening position at the same time as the sound of other speakers.
Example 2. Listening Position: All Seats
Adjust the time correction level of each speaker to almost the same level.
1 Sit in the listening position (driver's seat, etc.) and measure the distance (in meters) between your head and the various speakers.
2 Calculate the difference between the distance correction value to the farthest speaker and the other speakers.
L = (distance to farthest speaker) - (distance to other speakers)
These values are the time correction values for the different speakers. Setting these values to make each sound reach the listening position at the same time as the sound of other speakers.
Time Correction Value List
| Time Difference (msec) | Distance (cm) | Distance (inch) | Time Difference (msec) | Distance (cm) | Distance (inch) |
| 0.0 0.0 0 | 0 5.1 173.4 68.3 | ||||
| 0.1 3.4 1 | 3 5.2 176.8 69.7 | ||||
| 0.2 6.8 2 | 7 5.3 180.2 71.0 | ||||
| 0.3 10.2 | 4.0 5.4 183.6 72.4 | ||||
| 0.4 13.6 | 5.4 5.5 187.0 73.7 | ||||
| 0.5 17.0 | 6.7 5.6 190.4 75.0 | ||||
| 0.6 20.4 | 8.0 5.7 193.8 76.4 | ||||
| 0.7 23.8 | 9.4 5.8 197.2 77.7 | ||||
| 0.8 27.2 | 10.7 5.9 200.6 79.1 | ||||
| 0.9 30.6 | 12.1 6.0 204.0 80.4 | ||||
| 1.0 34.0 | 13.4 6.1 207.4 81.7 | ||||
| 1.1 37.4 | 14.7 6.2 210.8 83.1 | ||||
| 1.2 40.8 | 16.1 6.3 214.2 84.4 | ||||
| 1.3 44.2 | 17.4 6.4 217.6 85.8 | ||||
| 1.4 47.6 | 18.8 6.5 221.0 87.1 | ||||
| 1.5 51.0 | 20.1 6.6 224.4 88.4 | ||||
| 1.6 54.4 | 21.4 6.7 227.8 89.8 | ||||
| 1.7 57.8 | 22.8 6.8 231.2 91.1 | ||||
| 1.8 61.2 | 24.1 6.9 234.6 92.5 | ||||
| 1.9 64.6 | 25.5 7.0 238.0 93.8 | ||||
| 2.0 68.0 | 26.8 7.1 241.4 95.1 | ||||
| 2.1 71.4 | 28.1 7.2 244.8 96.5 | ||||
| 2.2 74.8 | 29.5 7.3 248.2 97.8 | ||||
| 2.3 78.2 | 30.8 7.4 251.6 99.2 | ||||
| 2.4 81.6 | 32.2 7.5 255.0 100.5 | ||||
| 2.5 85.0 | 33.5 7.6 258.4 101.8 | ||||
| 2.6 88.4 | 34.8 7.7 261.8 103.2 | ||||
| 2.7 91.8 | 36.2 7.8 265.2 104.5 | ||||
| 2.8 95.2 | 37.5 7.9 268.6 105.9 | ||||
| 2.9 98.6 | 38.9 8.0 272.0 107.2 | ||||
| 3.0 102.0 | 40.2 8.1 275.4 108.5 | ||||
| 3.1 105.4 | 41.5 8.2 278.8 109.9 | ||||
| 3.2 108.8 | 42.9 8.3 282.2 111.2 | ||||
| 3.3 112.2 | 44.2 8.4 285.6 112.6 | ||||
| 3.4 115.6 | 45.6 8.5 289.0 113.9 | ||||
| 3.5 119.0 | 46.9 8.6 292.4 115.2 | ||||
| 3.6 122.4 | 48.2 8.7 295.8 116.6 | ||||
| 3.7 125.8 | 49.6 8.8 299.2 117.9 | ||||
| 3.8 129.2 | 50.9 8.9 302.6 119.3 | ||||
| 3.9 132.6 | 52.3 9.0 306.0 120.6 | ||||
| 4.0 136.0 | 53.6 9.1 309.4 121.9 | ||||
| 4.1 139.4 | 54.9 9.2 312.8 123.3 | ||||
| 4.2 142.8 | 56.3 9.3 316.2 124.6 | ||||
| 4.3 146.2 | 57.6 9.4 319.6 126.0 | ||||
| 4.4 149.6 | 59.0 9.5 323.0 127.3 | ||||
| 4.5 153.0 | 60.3 9.6 326.4 128.6 | ||||
| 4.6 156.4 | 61.6 9.7 329.8 130.0 | ||||
| 4.7 159.8 | 63.0 9.8 333.2 131.3 | ||||
| 4.8 163.2 | 64.3 9.9 336.6 132.7 | ||||
| 4.9 166.6 | 65.7 | ||||
| 5.0 170.0 | 67.0 | ||||
Picture Quality Setup
[Picture Quality] is selected on the General Setup Menu screen in step
- See "General Setup" (page 33).
You can set up items related to an image.
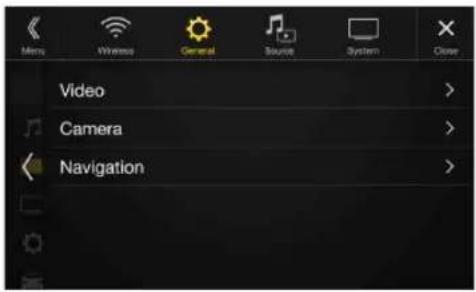
Settable items differ depending on the application.
[Video] (Video media) ^4 :
Visual EQ / Brightness / Color / Tint / Contrast / Sharpness
[Camera]*2:
Brightness / Color / Contrast
[Navigation]:
Brightness / Contrast
*1 "Video" can be selected while a video is playing.
*2 The camera names are not displayed when "Off" is set (page 47).
Selecting the Visual EQ Mode (Factory's setting)
You can select a mode suitable for the subject image.
Setting item:
Visual EQ
Setting contents:
Off (Initial setting) / Night / Soft / Sharp / Contrast
Off: Initial Setting
Night: Suitable for movies in which dark scenes frequently appear.
Soft: Suitable for CGs and animated films.
Sharp: Suitable for old movies where images are not clearly shown.
Contrast: Suitable for recent movies.
- To return to the default video settings, set this function to Off. Any Visual EQ selection or changes made are reset their initial settings.
Adjusting Brightness
Setting item:
Brightness
Setting content:
-15 to +15 (Initial setting: 0)
You can adjust the brightness between MIN (-15) and MAX (+15).
When it reaches the minimum or maximum point, the display shows
"MIN" or "MAX" respectively.
Adjusting Color of Picture
Setting item:
Color
Setting content:
-15 to +15 (Initial setting: 0)
You can adjust the color between MIN (-15) and MAX (+15). When it reaches the minimum or maximum point, the display shows "MIN" or "MAX" respectively.
Adjusting Tint of Picture
Setting item:
Tint
Setting content:
R15 to G15 (Initial setting: 0)
Adjust the Color from R15 to G15.
Adjusting Image Contrast
Setting item:
Contrast
Setting content:
-15 to +15 (Initial setting: 0)
You can adjust the contrast between MIN (-15) and MAX (+15). When it reaches the minimum or maximum point, the display shows "MIN" or "MAX" respectively.
Adjusting Picture Quality
Setting item:
Sharpness
Setting content:
-5 to +5 (Initial setting: 0)
Picture quality adjustment range is -5 to +5. "SOFT" and "HARD" appear as the minimum and maximum values specified.
Saving and calling the adjusted picture quality
When adjusting audio (video media), you can store the settings made for "Adjusting Brightness, Color, Tint, Contrast and Sharpness."
Setting item:
Preset 1 / Preset 2
1 After completing "Adjusting Brightness, Color, Tint, Contrast and Sharpness" (page 40), touch and hold [Preset 1] or [Preset 2] to save the settings.
2 Touch [Preset 1] or [Preset 2] to call the saved settings.
Display/Key Setup
[Display/Key] is selected on the General Setup Menu screen in step 2.
See "General Setup" (page 33).
You can set up the brightness, color, display, etc., of the screen.
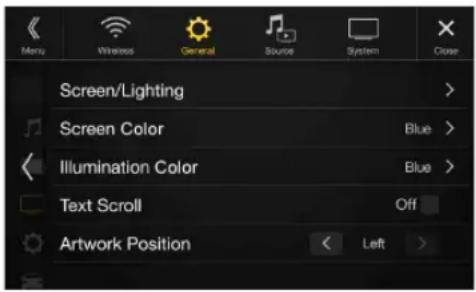
Screen/Lighting Customize
1 Touch [Screen/Lighting] in the Display/Key Setup Menu screen.
The Screen/Lighting setup screen appears.
Setting item:
Dimmer / Key Illumination Level / Screen Dimmer Level
Setting the Brightness of the Backlighting
Backlighting is provided by LEDs light built into the liquid crystal panel.
The illumination control adjusts the brightness of the backlighting based on the car ambient lighting for easier viewing.
Setting item:
Dimmer
Setting contents:
Auto (Initial setting) / On / Off
Auto: Adjust the brightness of the background illumination of the monitor automatically to the brightness of the car interior.
On: Keep the background illumination of the monitor dark.
Off: Deactivate Auto Dimmer mode to keep the background illumination of the monitor bright.
- When "On" is set, the setting is also applied for the button lighting in "Adjusting the Dimmer of Button Lighting at Night" (page 41), and "Adjusting the Minimum Level of Backlight" (page 41).
Adjusting the Dimmer of Button Lighting at Night
You can adjust the brightness of the button lighting at night with the dimmer.
Setting item:
Key Illumination Level
Setting level:
-2 to +2 (Initial setting: 0)
- This setting is only available when "Dimmer" is set to "On" or "Auto."
Adjusting the Minimum Level of Backlight
You can adjust the brightness of the backlight. This function could be used, for instance, to change the screen brightness while traveling at night.
Setting item:
Screen Dimmer Level
Setting content:
-15 to +15 (Initial setting: 0)
You can adjust the level between MIN (-15) and MAX (+15). When it reaches the minimum or maximum point, the display shows "MIN" or "MAX" respectively.
- This setting is only available when "Dimmer" is set to "On" or "Auto."
Switching the Display Color
You can choose from 8 different display colors.
Setting item:
Screen Color
Setting contents:
Glass Blue / Glass Green / Glass Light Blue / Glass Red / Steel White / Steel Green / Steel Light Blue / Steel Red
Switching the Illumination Color (X208U/INE-W977HD only)
You can choose the color of the Front Panel button from one of 7 colors.
Setting item:
Illumination Color
Setting contents:
Blue (Initial setting) / Light Blue / Aqua / Red / Green / Amber / Yellow
Setting the Text Scroll
Scroll display is available if folder name, file name or tag information is entered.
Setting item:
Text Scroll
Setting contents:
Off (Initial setting) / On
Off: Turns off the scroll mode.
On*: Turns on the Auto scroll mode. Scroll display is repeated as long as the mode is turned on.
* The text scroll is not available while driving.
Switching the Artwork Position
You can set the artwork position to the center or the left.
Setting item:
Artwork Position
Setting contents:
Center / Left (Initial setting)
General Setup
[General] is selected on the General Setup Menu screen in step 1. See "General Setup" (page 33).
You can set up items related to the language, etc.
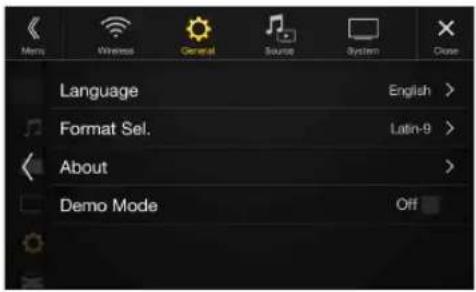
Setting the Menu Language
The Setup menu, feedback information, etc. for this unit can be changed to appear in the selected language.
Setting item:
Language
Setting contents:
English / Deutsch / Français / Español /
Português / Italiano / Nederlands / Suomi /
Norsk / Svenska / Dansk / русский язык /
Slovenčina / Polski / Český / Magyar / 'Ελληνικά /
اللهmat / Türkçe / 中文 / العربية /
Bahasa Indonesia
Format settings
The character code to be used for tag text information displayed on the screen can be selected from 7 character codes.
Setting item:
Format
Setting contents:
Latin-1 / Latin-9 (Initial setting) / Russian / Chinese / Thai / Arabic / Hebrew
Latin-1: ISO 8859-1
Latin-9: ISO 8859-15
Russian: ISO 8859-5
[About] enables you to check the Serial No., Firmware Version, Model Name, and to initialize various settings.
Displaying the Product Information
You can view the version information of this product. Make note of this information and refer to it whenever you contact Alpine Tech Support or an Alpine-authorized dealer.
Setting contents:
Serial No. / Firmware Version / Model Name
Initializing the System
You can initialize all data, to restore the factory settings. Remove the USB flash drive, etc. from the system before operation
Setting item:
Clear All Settings
1 Touch [Reset] of "Clear All Settings."
2 After the confirmation message appears, touch [OK]. The confirmation screen appears again.
3 Touch [OK].
The system starts initialization.
- Do not turn on/off the power, change the ignition key position or remove the screen panel until system restart is completed.
Setting Demo mode to Off/On
This unit has a Demonstration feature for the display. If the unit is in Demo mode, set Demo mode to OFF to turn it OFF.
Setting item:
Demo mode
Setting contents:
Off (Initial setting) / On
- If you perform an operation during the Demo mode, the demonstration is temporarily stopped.
Vehicle Setup
[Vehicle] is selected on the General Setup Menu screen in step 1. See "General Setup" (page 33).
Steering wheel Setting
Set this item when an iPhone 5 or later/Android smartphone with Android Auto App is connected.
This setting influences Apple CarPlay/Android Auto mode.
Setting item:
Steering wheel
Setting contents:
Left (Initial setting) / Right
Installation Setup
Vehicle Setup enables you to check the connection status of Reverse Lead/Parking Brake Lead.
Setting item:
Installation Status
The Installation check screen is displayed.
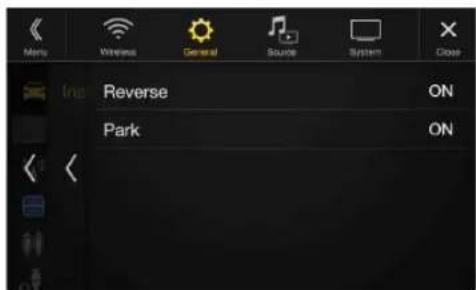
Source Setup
[Source] is selected on the Setup main screen in step 3. See "Setup Operation" (page 30).
■ Source Setup Menu screen
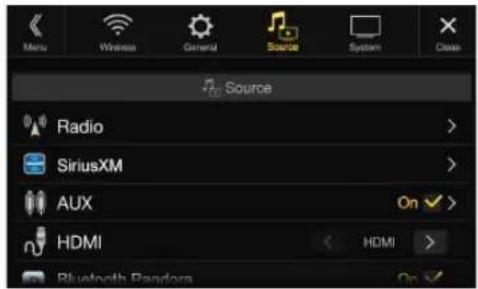
| Radio | |
| FM Tuner Setting | |
| FM Frequency Step | |
| SiriusXM*1 | |
| Alert Setup | |
| Alert | |
| Alert Delete All | |
| Favorite Team Setup | |
| Parental Lock | |
| Signal Indicator | |
| AUX*2, 5 | |
| AUX Name*3 | |
| Signal*3 | |
| HDMI*4 | |
| Bluetooth Pandora | |
| Apple CarPlay*6 | |
*1 This setting can be set when the SiriusXM source is being selected.
*2 This setting cannot be changed while the AUX source is being selected.
*3 This setting is only available when "AUX" is set to "On" (☑)
*4 This setting cannot be changed while the HDMI source is being selected.
*5 This setting cannot be set when the iDataLink module (sold separately) is connected.
*6 This setting cannot be adjusted when an iPod/iPhone is connected or Apple CarPlay/iPod/Pandora source is being selected.
The following steps 1 to 3 are common to each "Setting item" of Source Setup. See each section for details.
1 Select the desired item.
2 To switch the setting, touch [<], [>], [+], [-], or mark the checkboxes "Off" (or "On" (). √
- If “” appears, there is a further hierarchy. Touch the desired item.
3 Touch [X] to return to the main source screen.
- To return to the previous List screen, touch [«] or [<] in the previous page. For details, see "About Basic Operation for List Screen" (page 19).
Radio Setup
[Radio] is selected on the Source Setup Menu screen in step 1. See "Source Setup" (page 43).
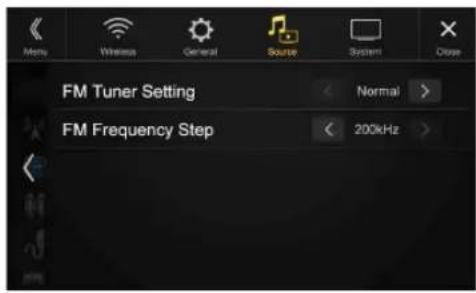
Setting the TUNER (FM) Tone Quality (Tuner Condition)
This unit can set your preferred tone quality for FM radio source.
Setting item:
FM Tuner Setting
Setting contents:
Normal (Initial setting) / HiFi / Stable
Normal: Standard setting
HiFi: High-quality setting
Stable: Control noise
- Noise may be more noticeable when HiFi is set, depending on the reception status. In this case, the Normal setting is recommended.
Setting the TUNER (FM) Frequency Step
During manual tuning, you can select the frequency step for FM analog radio station searching.
Setting item:
FM Frequency Step
Setting contents:
200kHz (Initial setting) / 100kHz
SiriusXM Setup
[SiriusXM] is selected on the Source Setup Menu screen in step 1. See "Source Setup" (page 43).
The following operations can be performed to manage the stored Songs, Artists and Sports Teams information. (To learn about how to store the information, see “Storing the desired Song/Artist” on page 69 and “Setting the Favorite Sports Team Alerts” on page 44.)
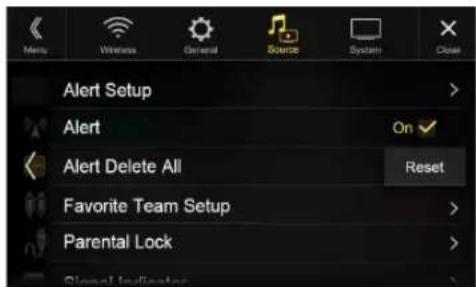
Setting the Alert individually for an Artist/Song/Favorite Team
This menu option allows you to enable the Artist/Song/Team alert for individual Artists/Songs/Teams (On or Off) or to delete individual stored Artist/Song/Team alerts (Delete).
Setting item:
Alert Setup
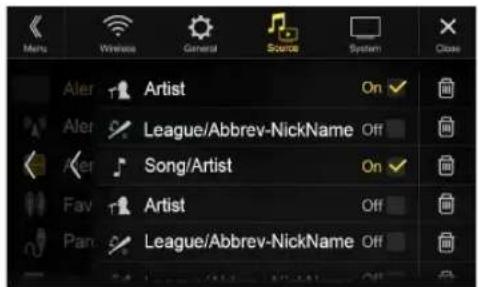
Set to "On" (No enable the alert for the Artist/Song or Team. Set to "Off" (To disable the alert for the Artist/Song or Team.
• To delete the list, touch [☐] (Delete), and then touch [OK].
Setting ON/OFF of all Songs/Artists/Games Alert
This menu option allows you to temporarily disable the Artist/Song/Game Alerts for all Artists/Songs/Games. When the Alerts are re-enabled, individual Artist/Song/Game Alert disabled in the Alert List menu setting remain disabled.
Setting item:
Alert
Setting contents:
On/Off
If "On" (Ms set, the alert for all stored Artists/Songs/Games is enabled.
If "Off" (☐) is set, the alerts for all stored Artists/Songs/Games are disabled.
Deleting all stored Alert
This operation will delete all alerts (artists, songs and teams) stored in memory.
Setting item:
Alert Delete All
1 Touch [Reset] of "Alert Delete All."
A message is displayed.
2 Touch [OK] to clear the information of all stored Artist, Song, and Game alert items.
Touch [Cancel] to cancel.
Setting the Favorite Sports Team Alerts
This menu option allows you to select your favorite teams, organized by leagues, so that you will be alerted later when your favorite teams are playing on other channels. Once selected, you will be alerted when games that those teams are playing in can be heard on a SiriusXM channel.
Setting item:
Favorite Team Setup
Setting contents:
On/Off
1 Touch [Favorite Team Setup].
A sports league list is displayed.
2Select the desired league.
The display changes to the team list of the selected league.
3 Touch the checkboxes on the Team list to set teams to "☑" (registered) or "☐" (released).
- When “☑” (registered) is set, scrolling text of the Team name, Total registrations, and Remaining number of registration slots is displayed for two seconds, then the team is registered as a Favorite Team.
- When you set a team that is registered as an Alert to “ (released), scrolling text for confirmation is displayed. Touch [OK] to cancel the registration.
- The maximum number of registered Teams, Artists, and Songs is 50. For details on how to register an Artist alert or Song alert, see "Storing the desired Song/Artist" (page 69).
When the number of registered Teams, Artist, and Songs exceeds 50
If the total number of registered Teams, Artists, and Songs is already at 50 when “☑” (registered) is set, then scrolling text is displayed, asking whether you want to replace a registered Artist/Song/Team with the new one. If you want to replace one, go to step 4.
4 Touch [OK].
The list of registered Artists/Songs/Teams is displayed.
- If you want to cancel the registration of your Favorite Team, then touch [Cancel], and return to step 3.
5 Touch the Artist, Song, or Team name that you want to replace.
Scrolling text of the Team name, Total registrations, and Remaining number of registration slots is displayed for 2 seconds, then the team is registered as a Favorite Team.
- For details on deleting a registered Artist, Song, or Team beforehand, to secure a registration slot in advance, see "Setting the Alert individually for an Artist/Song/Favorite Team" (page 44).
Setting the Parental Lock
You can lock out channels with passcode protection. Channels that are locked cannot be accessed without entering the passcode. You can unlock a channel or change the passcode using this menu option.
Setting item:
Parental Lock
1 Touch [Parental Lock].
A passcode input screen is displayed.
2 Touch the numeric keypad to input a 4-digit passcode.
The initial default 4-digit passcode is set to 0000.
After entering the digit, it is displayed as “*” (asterisk).
• T o u Ⓤ h [ ] to delete an entered number.
- T o u c h [Delete All] to delete all entered numbers.
3 Touch [Enter].
Setting the Lock status of individual channels
4 Touch [Locked Channels].
The channels list screen is displayed.
5 Touch the checkboxes "On" (☑) or "Off" (☐) of the channels list to set the Parent Lock Off/On.
Clearing the Lock of ALL the locked Channels
4 Touch [Clear All Locked Channels].
5 Touch [OK] to clear the lock of all the locked channels.
Touch [Cancel] to cancel.
Changing the Lock Passcode
4 Touch [Edit Code].
The numeric keypad screen is displayed.
5 Use the keypad to enter the current (old) 4-digit passcode.
The initial passcode is set to 0000.
• T o u x h [ ] to delete an entered number.
- T o u c h [Delete All] to delete all entered numbers.
6 Touch [Enter] to confirm the entry.
7 Now use the keypad to enter the new 4-digit passcode.
8 Touch [Enter].
9 Then use the keypad to enter the new 4-digit passcode a second time to verify it.
10 Touch [Enter].
- Remember to keep a note of the passcode in a safe place in case you forget the code.
Signal Strength Information
While listening to a SiriusXM Channel, the Signal strength of the current channel will be displayed.
Setting item:
Signal Indicator
This menu item displays the SiriusXM signal strength as Strong, Good, Weak or No Signal.
- If the Signal Indicator reports Weak or No Signal and your vehicle is parked outside with no obstructions to the southern sky, then your SiriusXM antenna may not be properly installed or may have become damaged.
AUX Setup
[AUX] is selected on the Source Setup Menu screen in step 1. See
"Source Setup" (page 43).
You can set up the items related to the Auxiliary device.
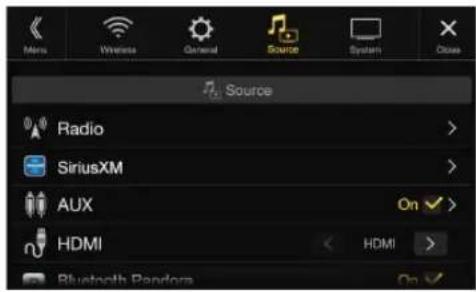
Setting item:
AUX
Setting contents:
Off / On (Initial setting)
Off: AUX source is not displayed.
On: AUX source is displayed.
The unit accepts the following 4-pole mini AV plug pin-out:
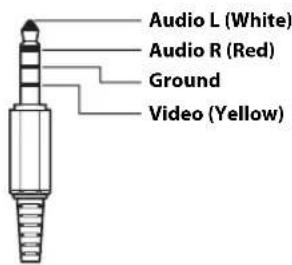
- Please check pin-out carefully before use of this product. Depending on the cable, there may be no picture and/or sound.
Setting the Auxiliary (AUX) Name
Make sure the AUX is set to "On" (See "AUX Setup" (page 45).
Setting item:
AUX Name
Setting contents:
AUX (Initial setting) / AUX DVD / GAME / External DVD / DVD Changer* / DVB-T* / TV*
* Not used for this unit.
Switching the Visual Input Signal System
You can make this setting only when AUX is set to "On" ☑. See "AUX Setup" (page 45).
Setting item:
Signal
Setting contents:
Auto (Initial setting) / NTSC/PAL
Auto: The video input signal type (NTSC or PAL) will be automatically selected.
NTSC/PAL: Choose the video input signal type manually.
HDMI Setup
[HDMI] is selected on the Source Setup Menu screen in step 1. See "Source Setup" (page 43).
You can set the name of an external device connected via HDMI.
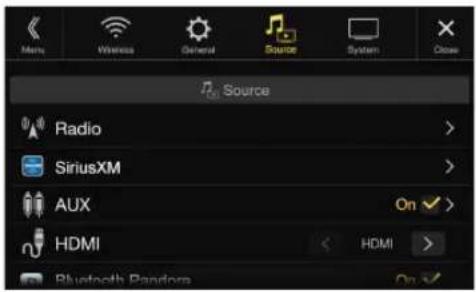
Setting item:
HDMI
Setting contents:
HDMI (HDMI 1*) (Initial setting) / DVD
HDMI Set when a smartphone is connected via HDMI.
(HDMI 1): DVD: Set when an external DVD player is connected.
* When the HDMI selector is set to "On," "HDMI 1" is displayed in the Setting contents. For details on setting the HDMI selector, see "Setting the HDMI Selector On/Off" (page 50).
- The initial setting of X208U/INE-W977HD is "HDMI", and initial setting of X209D is "DVD".
Setting the Bluetooth Pandora®
[Bluetooth Pandora] is selected on the Source Setup Menu screen in step 1. See "Source Setup" (page 43).
To use Bluetooth Pandora, set the Bluetooth Pandora setting to "On."
Setting item:
Bluetooth Pandora
Setting contents:
Off / On (Initial Setting)
- When "On" is set, the Bluetooth Pandora* source is displayed on the Menu screen.
- When the current source is Bluetooth Pandora, this setting cannot be adjusted.
Apple CarPlay Setup
[Apple CarPlay] is selected on the Sources Setup Menu in step 1. See "Source Setup" (page 43).
Before connecting an iPhone 5 or later, turn on this item to use the Apple CarPlay function.
Setting item:
Apple CarPlay
Setting contents:
On (Initial setting) / Off
On: Set before an iPhone 5 or later is connected. Apple CarPlay can be used but all apps may not be available on your device.
Off: Set when you want to use the iPod source, etc., of the connected iPhone 5 or later.
- This setting is invalid for music playing of iPhone 4S and iPod.
System Setup
[System] is selected on the Setup main screen in step 3. See "Setup Operation" (page 30).
System Setup Menu screen
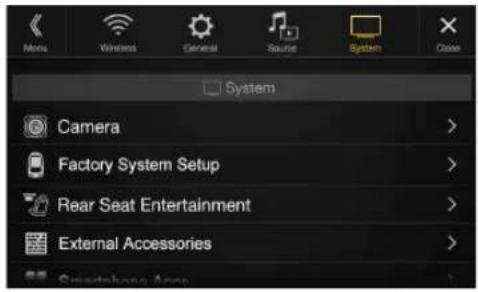
| Camera*1 | |
| Camera Select | |
| Camera Signal*2 | |
| Guide Adjustment*3 | |
| Camera Interrupt (Power Mode)*4 | |
| Factory System Setup | |
| USB/iPod / SiriusXM | |
| Default Vehicle Screen | |
| Maestro Module | |
| Rear Seat Entertainment | |
| Rear Seat Entertainment | |
| Remote Sensor | |
| External Accessories | |
| External Audio Processor | |
| HDMI selector | |
| External Accessory Ctrl | |
| Smartphone Apps | |
| Connectivity Setting*5 | |
| Alpine Tunelt App*6 | |
| Alpine Connect*7 | |
*1 When you select "Camera Selector" in "Camera Select", the setting item is different. For details, see "Setting Multi Camera to On/Off" (page 49).
*2 When Camera Select is set to "Off," you cannot select this item.
*3 You can select this item only when Camera Select is "Front" or "Rear."
*4 You can select this item only when Camera Select is "Rear."
*5 Set this setting after closing the Alpine TuneIt App and Alpine Connect App.
*6 Set this setting after closing the Alpine TuneIt App.
*7 Set this setting after closing the Alpine Connect App.
The following steps 1 to 3 are common to each "Setting item" of System Setup. See each section for details.
1 Select the desired item.
2 To switch the setting, touch [<], [>], [+], [-], or mark the checkboxes "Off" (or "On" (). √
- If “” appears, there is a further hierarchy. Touch the desired item.
3 Touch [×] to return to the main source screen.
- To return to the previous List screen, touch [«] or [◀] in the previous page. For details, see “About Basic Operation for List Screen” (page 19).
Camera Setup
[Camera] is selected on the System Setup Menu screen in step 1. See "System Setup" (page 46). You can set up items related to the Camera.
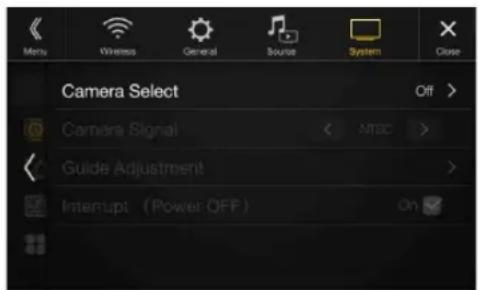
Setting the Camera Input
Setting item:
Camera Select
Setting contents:
Off (Initial setting) / Front / Rear / Other / Camera Selector
Front: Front camera
Rear: Rear camera
Other: Side camera, Room camera, etc.
Camera Front Camera/Rear Camera/Side Camera connected to
Selector*: the optional Multi Camera Interface module.
* When selecting Camera Selector, you can set the Front Camera/Rear Camera/Side Camera to On/Off. For details, see "Setting Multi Camera to On/Off" (page 49).
Setting the Camera Signal Input
When the camera is connected, the video input signal type can be chosen.
Further setting item:
Camera Signal
Setting contents:
NTSC (Initial setting) / PAL
Switching Video Source for Multi View Camera
The video source can be changed when connected to Multi View Camera.
When Camera Select is set to "Off" or "Other," you cannot select this item.
Setting item:
Guide Adjustment
1 Touch [Guide Adjustment].
The camera guide adjustment screen is displayed.
Multi View compatible Side Camera
2 Touch [Front] or [Rear].
The view will change to the selected view.
Multi View compatible Front Camera/Rear Camera
2 Touch [Back], [Panorama], [Corner], or [Top].
The view will change to the selected view.
- [Back] will not appear for the Front camera.
- For an explanation of video patterns, see the camera Owner's Manual.
Adjusting the Rear/Front/Side Camera Guide
You can adjust the camera guide position.
Setting item:
Guide Adjustment
1 Touch [Guide Adjustment].
The camera guide adjustment screen is displayed.
- If the video pattern is set to "Corner (Rear/Front Camera only)," the camera guide will not be displayed.
- When you connect a Multi View compatible camera, select a Video Pattern to make a guide adjustment.
- To adjust the guide position of the Rear Camera, touch [Hitch Guide On] or [Hitch Guide Off] to display/hide the Hitch Guide. You can adjust the Hitch Guide to mark the position of the junction between your vehicle and your trailer.
- When you connect a Multi View compatible Side Camera, after selecting the Video Pattern, touch [ ] (Left steering) or [ ] (Right steering) to make the guide adjustment that matches the position of the steering wheel in your vehicle.
2 Touch [Adjust].
• I f [Adjust] does not appear, proceed to step 3.
3 Touch the guide you intend to adjust.
Guide line can also be selected by touching [▼][▲].
■ Rear Camera screen example
When Hitch Guide is set to Off
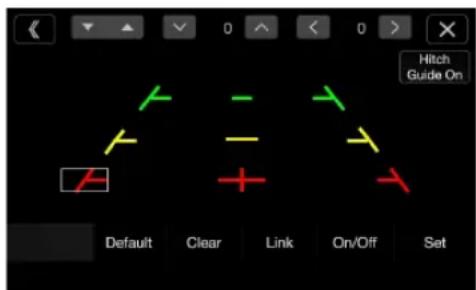
- You cannot adjust the position of the yellow guide line “” in the center independently. It is controlled by a system to be the center of the two yellow guide lines “—” and “—” on the left and right, or the central green line “—” and red guide line “+”.
When Hitch Guide is set to On
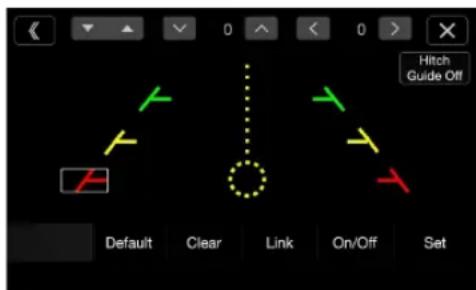
- You can adjust the Hitch Guide to mark the position of the junction between your vehicle and your trailer.
Front Camera screen example
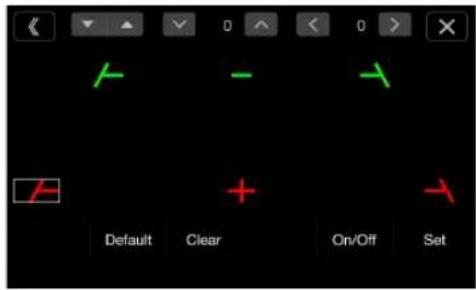
Side Camera screen example
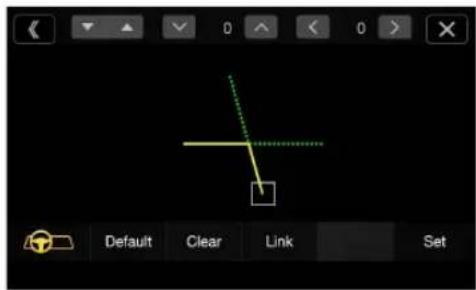
4 Touch [ ∨], [ ∧ ], [ ⟨ ] or [ ⟩ ] to adjust the position of the guide.
Touching [Clear] clears adjustments and returns to the setting before guide line alteration.
5 After the adjustment is completed, touch [Set].
Adjusting Guides Simultaneously (for Rear/Side Camera only)
1 Touch [Link].
The 3 vertical guides of the currently-selected guide link together, allowing them to be adjusted simultaneously.
When Hitch Guide is set to Off
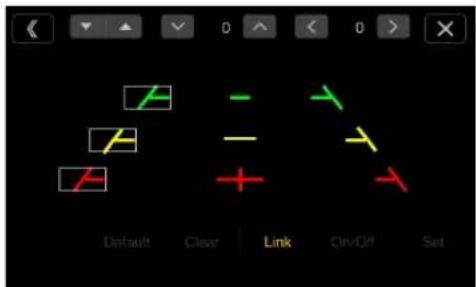
- Note on the yellow guide line " in the center
The yellow guide line “” in the center is controlled by a system that locates it in the center of the two yellow guide lines, “” and “” on the left and right, or the green line “” on the top and red guide line “” below. Therefore you cannot move it manually.
When Hitch Guide is set to On
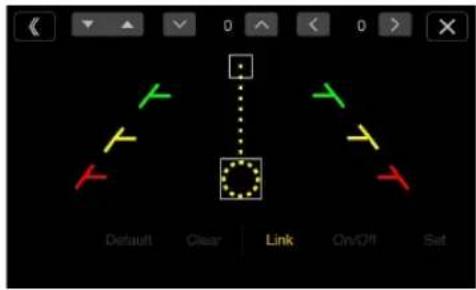
1 Touch [Link].
The 2 vertical guides of the currently-selected guide link together, allowing them to be adjusted simultaneously.
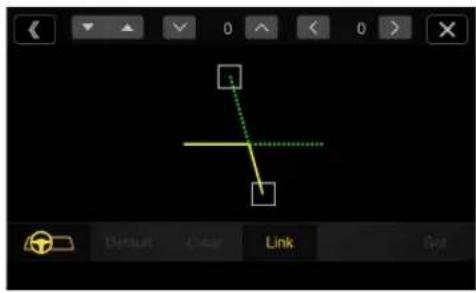
Turning Guide Display On/Off (Rear/Front Camera only)
Turning the selected guide off.
1 Touch [On/Off].
The currently selected guide will turn off.
2 To turn the guide on, touch [On/Off] again.
• Guides that are turned off are still adjustable.
Returning Guides to Default
1 Touch [Default].
A message window will appear.
2 Touch [OK].
Adjusted values will return to default settings.
Camera Interrupt Setting (Power OFF Mode) (Rear Camera Only)
You can set whether to display the rear camera image when the gear lever is moved to the reverse (R) position while the unit is turned off. You can select this item only when Camera Select is "Rear."
Setting item:
Camera Interrupt (Power Mode)
Setting contents:
On (Initial setting) / Off
On: The rear camera image is displayed
Off: The rear camera image is not displayed
Setting Multi Camera to On/Off
When connecting the optional Multi Camera Interface module, you can connect up to 3 cameras as Front Camera/Rear Camera/Side Camera.
- When using the optional Multi Camera Interface module, select "Camera Selector" to set the "Front Camera /Rear Camera/Side Camera" to "On" (Off).
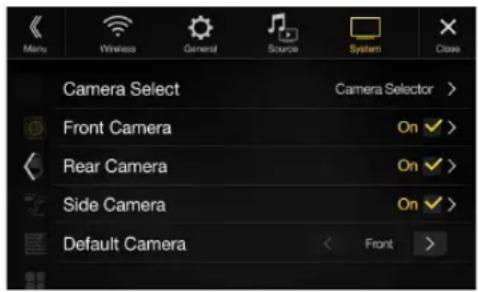
Setting item:
Front Camera / Rear Camera / Side Camera / Default Camera*
Setting contents:
Off (Initial setting) / On
Camera See "Setting the Camera Signal Input" (page 47)
Signal:
Guide See "Adjusting the Rear/Front/Side Camera Guide" Adjustment: (page 47)
Camera See "Camera Interrupt Setting (Power OFF Mode) (Rear Interrupt Camera Only)" (page 48)
(Power Mode):
* You can change the Default Camera only when you set more than one camera for Front Camera/Rear Camera/Side Camera to "On." For details, see "Setting a Default Camera" (page 49).
Setting a Default Camera
When connecting an optional Multi View Camera, you can set which camera image is displayed when you touch the Camera button on the Menu screen or press the ⓄCAMERA) button (X209D only).
Setting item:
Default Camera
Setting contents:
Front / Rear / Side
- The initial setting differs depending on the cameras set to "On" in "Setting Multi Camera to On/Off."
Factory System Setup
[Factory System Setup] is selected on the System Setup Menu screen in step 1. See "System Setup" (page 46).
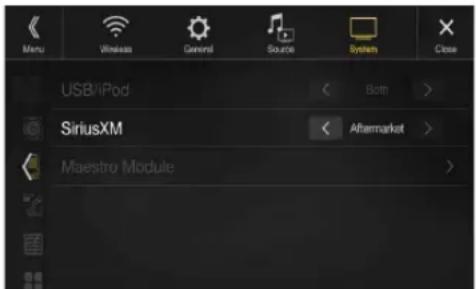
Setting the Source Category
You can set whether the following source icon in the Menu screen is available.
Setting item:
USB/iPod (Initial setting: Both) / SiriusXM (Initial setting: Aftermarket)
Setting contents:
Both / Factory / Aftermarket
Both*: Both the sources listed above from this unit and iDataLink module are available.
Factory: Only the source listed above from iDataLink module is available.
Aftermarket: Only the source listed above from this unit is available.
* USB/iPod only.
- The iDataLink source icons not displayed on the Menu screen when no iDataLink module is connected even though "Both" or "Factory" is set.
- You cannot set the source that is currently being played.
Setting the Default Vehicle Screen
Press and hold the ★Favorite) button for at least 2 seconds or touch the Menu screen (page 22) to display the Info mode screen, and then set the following.
Setting item:
Default Vehicle Screen
Setting contents:
Climate / Vehicle Info. / Gauges / Parking Assist / Last mode (Initial setting)
- Depending on the car, some setting contents or this setting item may not be displayed.
Setting the Maestro Module
You can change the setting of the connected iDataLink module.
Setting item:
Maestro Module
- Depending on the iDataLink module, the setting contents may differ.
Rear Seat Entertainment Setup
[Rear Seat Entertainment] is selected on the System Setup Menu screen in step 1. See "System Setup" (page 46).
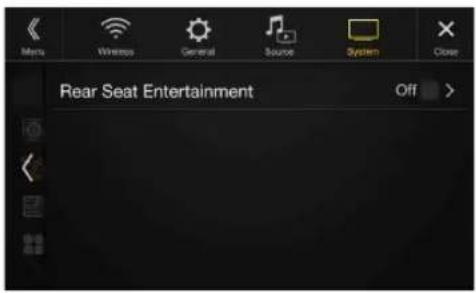
When a Rear monitor equipped with HDMI input is connected to this unit, change this setting to "On." You can output images to the Rear monitor. For details, see "Rear Seat Entertainment Function" (page 21).
Setting item:
Rear Seat Entertainment
Setting contents:
Off (Initial setting) / On
Setting the Rear Seat Entertainment System
Make sure the Rear Seat Entertainment is set to "On" (See "Rear Seat Entertainment Setup" (page 50).
Setting item:
Plasmacluster/Illumination Color
Setting contents:
Off (Initial setting) / On
- For details on adjusting Plasmacluster/Illumination, see "Rear Seat Entertainment Function" (page 21).
- When the Rear Seat Entertainment setting is set to "Off," you cannot select this item.
- Set the coordination color and Plasmacluster controls on the Rear monitor to "Navi." When set to "Rear monitor," you cannot operate them from this unit.
Remote Sensor Setting
Make sure the Rear Seat Entertainment is set to "On" (See "Rear Seat Entertainment Setup" (page 50).
For remote control operation, the remote sensor of the external device (Rear monitor, etc.) can be switched, as you prefer.
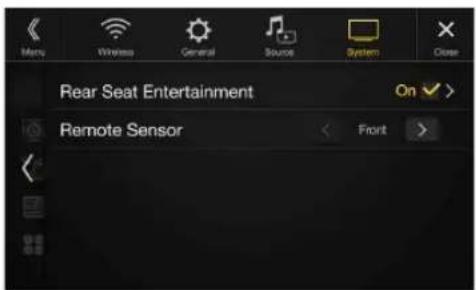
Setting item:
Remote Sensor
Setting contents:
Front (Initial setting) / Rear
Front: The remote sensor of this unit is effective.
Rear: The remote sensor of Rear monitor is effective.
- You can also control this setting from the Rear Seat Entertainment System Setup screen. For details, see "Rear Seat Entertainment Function" (page 21).
External Accessories Setup
[External Accessories] is selected on the System Setup Menu screen in step 1. See "System Setup" (page 46).
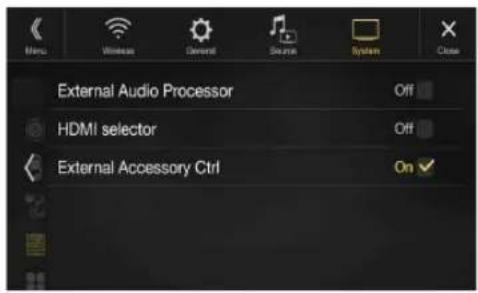
Setting the External Audio Processor
When using an external audio processor, set to "On" (☑)
Setting item:
External Audio Processor
Setting contents:
Off (Initial setting) / On
- When this setting is "On," the Volume level is fixed at 10. Also, Balance/Fader/Subwoofer Level/Subwoofer Phase/Bass/Treble/MX HD/EQ Presets/Dual HD EQ/X-Over/Time Correction/Defeat/Phone Speaker/Default Sound Settings are set to "Off" or "Flat" and cannot be adjusted.
- Use the External Audio Processor to adjust volume.
Setting the HDMI Selector On/Off
If you connect an HDMI selector, you can connect two HDMI devices. When using an HDMI selector, set to "On" (☑)
Setting item:
HDMI selector
Setting contents:
Off (Initial setting) / On
- For details on switching the HDMI source when two HDMI devices are connected, see "HDMI Operation" (page 80).
Setting the External Accessory Control
When you have connected the optional External Accessory Control module, set this setting to "On" to turn the headlights ON/OFF or adjust the air suspension from this unit.
Setting item:
External Accessory Ctrl
Setting contents:
Off (Initial setting) / On
- When set to "On," the [Ext Acc Ctrl] icon is displayed on the Menu screen.
- For details on the External Accessory screen and its operation, see "External Accessory Control Operation" (page 97).
Smartphone Apps Setup
[Smartphone Apps] is selected on the System Setup Menu screen in step 1. See “System Setup” (page 46).
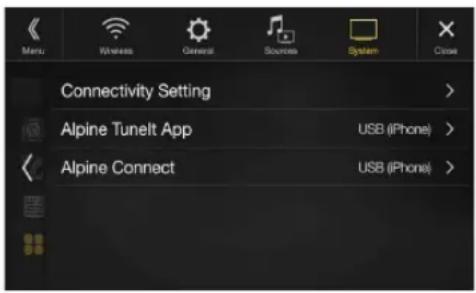
Set Alpine TuneIt App and Alpine Connect App to USB (iPhone) when an iPhone is connected, or set to Bluetooth (Android) when an Android Smartphone is paired.
Setting item:
Connectivity Setting ^1 / Alpine Tunelt App ^2 / Alpine Connect ^*3
Setting contents:
Off/USB (iPhone) (Initial setting) / Bluetooth (Android) ^4
Off: No Smartphone is connected.
USB (iPhone): When an iPhone is connected to the unit's USB port, you can programme the unit's sound tuning parameters, or communicate with SNS.
Bluetooth (Android): Set this when an Android Smartphone is paired with this unit via Bluetooth technology. And after Bluetooth Audio is connected, you can programme the unit's sound tuning parameters, or communicate with SNS.
- Set this setting after closing the Alpine TuneIt App and Alpine Connect App.
- For this function to work properly, specific applications must be installed on your Smartphone before connection. Consult your Alpine dealer or the Alpine website for details.
- Only the iPhone and certain Android Smartphones support this function.
*1 Select "Connectivity Setting" to set the connection procedure for the "Alpine TuneIt App" and "Alpine Connect" to the same setting.
*2 Set this setting after closing the Alpine TuneIt App.
*3 Set this setting after closing the Alpine Connect App.
*4 Not displayed when Bluetooth is set to Off. For details, see “Bluetooth Setup” (page 31).
Apple CarPlay (Optional)
Apple CarPlay is a smarter, safer way to use your iPhone in the car. Apple CarPlay takes the things you want to do with your iPhone while driving and puts them right on the unit. You can get directions, make calls, send and receive messages, and listen to music, all in a way that allows you to stay focused on the road. Just plug in your iPhone to the unit and go.
- Before using this function, turn Apple CarPlay to On (page 46) and plug in your iPhone using Lightning to USB Cable (Supplied with iPhone) to the unit.
- Some functions may not be available while driving.
- About iPhone models usable with this unit, see “iPod/iPhone (Optional)” (page 60). Only an iPhone 5 or later compatible with Apple CarPlay function.
Access to Apple CarPlay
1 Press the MENU button.
The Menu screen is displayed.
2 Touch [Apple CarPlay].
The Apple CarPlay mode is activated.
Touch the desired App icon on the unit, or use Siri function by pressing 🖼or VOICE button.
- When an iPhone 5 or later is reconnected, touch the pop-up message- "Apple CarPlay connected." within 5 seconds to access to Apple CarPlay screen, or you can ignore prompt by touching[X] on the top right.
- The App must be Apple CarPlay compatible in order to appear in the Home screen.
Android Auto (Optional)
What is Android Auto
Android Auto is designed to make it easier to use apps from your phone while you're on the road. Navigate with Google Maps, listen to playlists or podcasts from your favorite apps, and more.
Activate Android Auto
Download the Android Auto App from the Google Play store before continuing.
Just plug in your smartphone to the unit's USB connector, then follow the prompt to pair your smartphone with the unit.
- The connected smartphone with Android Auto will disconnect other phone's Bluetooth connection and pair to the unit.
1 Press the MENU button.
The Menu screen is displayed.
2 Touch [Android Auto].
The Android Auto screen is displayed.
- When a used smartphone is reconnected, touch the pop-up message- "Android Auto connected" within 5 seconds to access to Android Auto screen, or you can ignore prompt by touching [X] on the top right.
- You can make a call, use voice recognition function and Android Auto's compatible navigation app, etc.,
- Only Google approved apps with necessary driver-safety measures in place can be used.
Alpine Connect App (Optional)
Activate Alpine Connect App
Download an app that supports Alpine Connect to your smartphone, and you can operate it from the unit.
Alpine Connect App is downloadable from Apple's App Store; the Android user can download it from Google Play. For details, consult your Alpine dealer.
Before these operations, set Connectivity Setting or Alpine Connect to USB (iPhone) or Bluetooth (Android) depending on the connected Smartphone. For details, see "Smartphone Apps Setup" (page 51).
1 Launch Alpine Connect App.
2 Then connect the smartphone to this unit.
3 Press the MENU button.
The Menu screen is displayed.
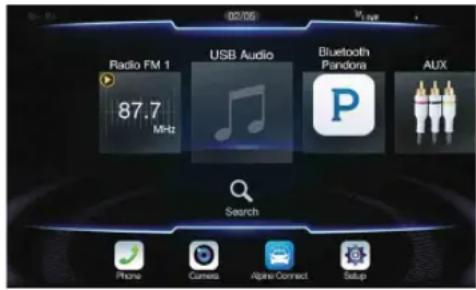
4 Touch [Alpine Connect].
The Alpine Connect App select screen is displayed.
5 Select the desired App.
The selected App screen is displayed.
- Before an iPhone 5 or later is connected, turn Apple CarPlay to Off, then enjoy iHeartRadio. (page 46)
Radio/HD Radio™/ RBDS
The unit can receive HD Radio broadcasting signals based on digital radio broadcast standards, in addition to analog radio broadcasts using RBDS.
HD Radio broadcasting signals are broadcast in the service areas of the current AM/ FM broadcasters where they provide digital audio distribution and data services. This unit receives the above digital broadcasts for your high-quality sound enjoyment.
Depending on the signal strength in TUNER mode, the unit will automatically switch between digital signals if they can be received, and analog radio using RBDS if digital signals cannot be received. For details, please see "Switching between Digital and Analog," "Forced Analog Mode."
- RBDS mode is only available during FM broadcast reception.
This unit is able to receive signals based on the terrestrial digital radio broadcasting standard.
When current AM/FM broadcasters are transmitting digital audio and data services, HD Radio broadcasting signals are on-the-air in their service area. You can receive their digital broadcast and enjoy high quality sound.
If there is no HD Radio broadcasting signal in the current area, after 10 seconds, this unit will switch to receive the RBDS Radio signal automatically. However, the display is still HD Radio Technology mode screen.
■ HD Radio main screen example
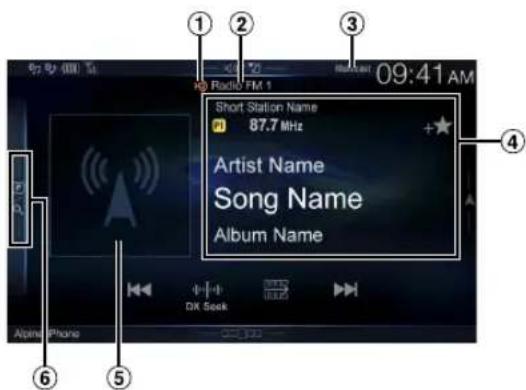
Function mode
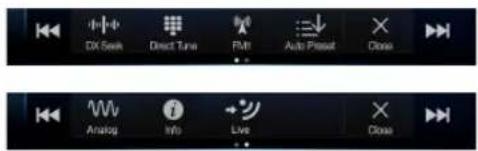
① HD Radio Indicator *1
② Band display
Displays the band of the signal currently being received.
③ Multicast Indicator ^2 Lights during multicast reception.
④ Info area
RBDS
Station Info. mode:
Program Type / Frequency and PS Name/Artist Name/Song Name/Album Name
Radio Text mode:
Frequency/ Radio Text
- For details on switching the display of the Radio text, see "Displaying Radio Text (RBDS FM Radio mode only)" (page 55).
HD Radio Technology
Station Info. mode:
Short Station Name/Frequency/Artist Name/Song Name/Album Name
⑤ Artwork etc./Station Logo display*1
⑥ Preset mode button
Swipe to the right when you use the Preset mode screen.
*1 HD Radio™ mode only.
*2 Lights during multicast reception. (Displays the LIVE Indicator when the Ballgame Mode is set to "On".)
■ Preset mode screen example
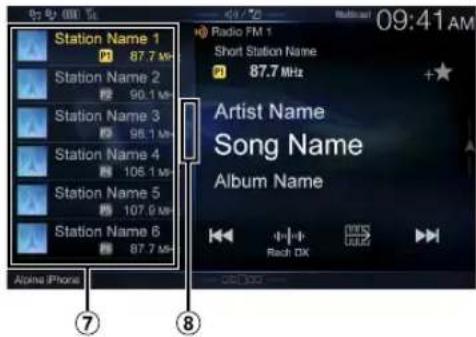
⑦ Preset button
Swipe vertically in the list to change pages.
⑧ Program Type list button (RBDS FM Radio mode only)
Swipe to the right when you use the Program Type list screen.
Listening to the Radio
1 Press the ♪ (AUDIO) button to select radio mode.
The display shows the radio mode screen.
- You can select and change the source from the Menu screen (page 22) or the Favorite screen (page 25).
2 Touch [icon].
The radio band select pop up screen is displayed.
• [ ^(0) button displays the current selected band. (e.g. [FM1])
3 Select the desired band from FM1/FM2/AM.
4 Touch [||||].
The tuning mode selection popup is displayed.
• [||||] button displays the current selected mode. (e.g. [DX Seek])
5 Touch the desired tuning mode.
The radio frequency up or down button changes depending on the tuning mode.
DX Seek
Local Seek
D.DX Seek
D.Local Seek




Manual
Program Type


- There are two modes you can select for auto tuning, DX and Local:
Both strong and weak stations will be tuned in.
- Local Seek mode * ; Only strong stations will be tuned in. The initial setting is DX.
- D (Digital).DX Seek mode; Automatically receives a receivable digital broadcast.
- D (Digital).Local Seek mode; Automatically receives a strong digital broadcast only.
- Manual mode; The frequency is manually tuned in steps
- Program Type Seek mode (RBDS FM Radio mode only); The currently selected program type station will be tuned.
- During Forced Analog mode, digital broadcasts cannot be received.
* Depending on the signal, a digital or analog broadcast is received.
6 Touch [|◀◀], [▶▶] or [◀◀], [▶▶] to change the radio frequency up or down respectively.
In manual mode, touch and hold to change the frequency continuously.
• The ◀◀◀ ▶▶buttons provide the same functions above.
Presetting Stations Manually
1 Tune in a desired radio station you wish to store in the preset memory by manual or automatic seek tuning.
2 Touch the Preset number you want to store, for at least 2 seconds.
The selected station is stored.
3 Repeat the procedure to store up to 11 other stations onto the same band.
To use this procedure for other bands, simply select the desired band and repeat the procedure.
A total of 36 stations can be stored in the preset memory (12 stations for each band; FM1, FM2, or AM).
- For details on switching to the Preset mode screen, see ⑥ in "HD Radio main screen example" (page 53).
- If a preset memory has already been set in the same preset number, it will be cleared and the new station will be memorized.
Presetting Stations Automatically
The tuner can automatically seek and store 12 strong stations in the selected band.
Select the desired band then touch and hold [≡↓] (Auto Preset).
The tuner automatically seeks and stores 12 strong stations into the preset buttons in ascending order of frequency.
When automatic storing has completed, the station stored in the preset 1 is selected.
- If no stations are stored, the tuner will return to the original station you were listening to before the automatic storing procedure began.
- You can cancel this process by touching [≡↓] (Auto Preset) while the tuner is automatically seeking stations. Canceling will return the tuner preset to the previous setting.
Tuning to Preset Stations
You can tune in the preset stations in memory on either band using its preset number.
1 Touch [ ]
The radio band select pop up screen is displayed.
• [ˈɑːt] button displays the current selected band. (e.g. [FM1])
2Select the desired band from FM1/FM2/AM.
3 Touch any one of the Preset numbers you have already stored in the Preset mode screen.
The preset station is received.
- For details on switching to the Preset mode screen, see ⑥ in "HD Radio main screen example" (page 53).
Inputting Frequency Directly and Receiving the Radio Station
You can input a frequency of the same band directly and receive the radio station.
1 Touch [■] (Direct Tune).
The numeric keypad input mode screen appears.
2 Touch a desired number.
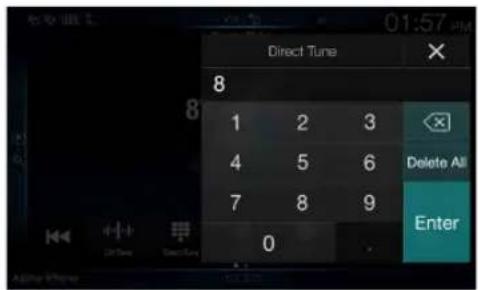
Touch[✗] to delete an entered number. Touch[Delete All] to delete all entered numbers
3 Touch [Enter] on the numeric keypad mode screen to confirm your selection.
Touch[ ✗] to hide the keypad display.
Receiving a Multicast (HD Radio™ Mode only)
Multicasting is the ability to broadcast multiple program streams over a single FM frequency. This increases the amount and diversity of content choices. A maximum of 8 multicast station channels can be selected on this unit.
- "Multicast" indicator appears when signal reception is possible.
- The station number of the current broadcast station appears behind the frequency (ex. 90.3 MHz-HD5 means there are 5 stations on 90.3 MHz).
Touch [◀◀], [▶▶] or [◀◀], [▶▶].
The sub channel of the received radio station is changed.
- If reception is lost during SPS broadcasting due to weak or no signal, the screen will display "HDx Signal loss."
Selecting the Receivable Program Type (RBDS FM Radio mode only)
You can select and receive the currently receivable stations in the Program Type list screen.
Program Type list screen example
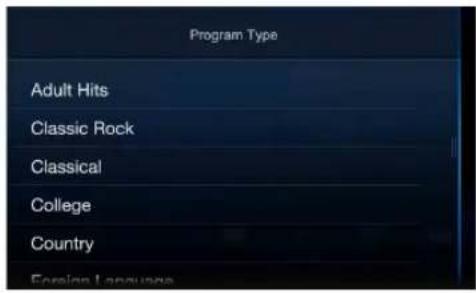
- For details on switching to the Program Type list screen, see "Preset mode screen example" (page 53).
Select the desired program type in the Program Type list screen.
Program Type Seek starts and the receivable program type is received.
If no Program Type station is found, "No program type available." will be displayed.
- Touch [◀] or [▶] to select the same program type station as the currently selected program type after switching the tuning mode to Program Type (Program Type Seek) mode.
Forced Analog Mode
Activate the Compulsory Analog Radio mode to receive only analog radio signals.
Touch [ ] (Analog).
The [^^] (Analog) button is highlighted. To cancel Compulsory Analog Radio mode, touch [^^] (Analog) again.
- During Forced Analog mode, only analog broadcasts will be received even when digital broadcasts become available.
Displaying Radio Text (RBDS FM Radio mode only)
Text messages from a radio station can be displayed.
1 Tune in a radio station that transmits text messages.
2 Touch [i] (Info) in the FM radio mode repeatedly to switch to the desired display.
Station Info.Mode → Radio Text Mode → Station Info.Mode
Station Info. Mode
Program Type /Frequency and PS Name/Artist Name/Song Name/Album Name
Radio Text Mode
Frequency/Radio Text
Using Ballgame Mode (HD Radio™ Mode only)
In live broadcast, such as sportscasts, etc., a time lag occurs between digital sound and analog sound. Therefore, when live broadcasts are received, a time lag between the real broadcast may occur and the unit can change to analog broadcasting automatically.
Touch [→] (Live) to switch On/Off.
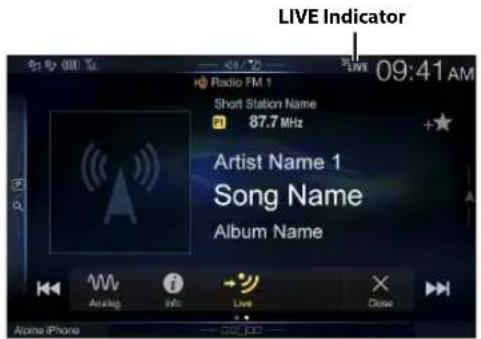
The LIVE Indicator is displayed when Ballgame Mode is set to "On."
- When receiving a live broadcast while the Ballgame mode is on, the LIVE indicator is highlighted.
^25 LIVE →(During live broadcast)
About the Feature Logos
Digital Sound
- Digital, CD-quality sound. HD Radio Technology enables local radio stations to broadcast a clean digital signal. AM sounds like today's FM and FM sounds like a CD.
PSD)
- Program Service Data: Contributes to the superior user experience of HD Radio Technology. Presents song name, artist, station IDs, HD2/HD3 Channel Guide, and other relevant data streams.
HD2/HD3)
- Adjacent to traditional main stations are extra local FM channels. These HD2/HD3 Channels provide new, original music as well as deep cuts into traditional genre.
Artist Experience)
- Visual information related to content being played on your HD Radio receiver, such as Album Art, historical photographs, still art from live broadcasts, among other related content.
You can play back music files (MP3/WMA/AAC/FLAC) and video files (AVI/MKV/MP4) stored in a USB flash drive on the internal player of this system.
WARNING
It is dangerous for the driver to watch video while driving the vehicle. The driver may be distracted from looking ahead and an accident could occur.
Install the unit correctly so that the driver cannot watch a video unless the car is stopped and the parking brake is applied.
If the unit is not installed correctly, the driver will be able to watch a video while driving and may be distracted from looking ahead and cause an accident. The driver or other people could be severely injured.
USB Audio main screen example
Artwork display
- You can change the artwork position. For details, see "Switching the Artwork Position" (page 41).
Current track no./Total song no.
Artist title
Song title
Album title
Elapsed time
Info mode switching button
Info mode display
File Name
Quick Search button
Touch or swipe to the right to use the Quick Search mode.
Quick Search mode screen example
Swipe right vertically in the list to change pages.
Function mode
Full Search mode button
Swipe to the right when you use the Full Search mode screen.
The USB Video operation screen display during video file playback
Touch the screen while the USB Video playback screen is displayed.
The USB Video operation screen is displayed.
- The operation screen changes to the visual screen in the USB Video mode for 5 seconds after an operation has been performed.
- For your safety, video is not displayed and only audio can be heard while driving.
Playback
1 Press the ♪ (AUDIO) button to select USB mode.
The display shows the USB mode screen.
- You can select and change the source in the Menu screen (page 22) or Favorite screen (page 25).
2 Touch [◀◀] or [▶▶] or to select the desired track (file).
Returning to the beginning of the current (or previous) track (file): Touch[ ◀◀◀ ]
Fast reverse :
Touch and hold [ ◀◀◀]
Advancing to the beginning of the next track (file):
Touch[▶▶]
Fast forward :
Touch and hold [▶]
• The , butons provide the same functions above.
3 To pause playback, touch [▶ III].
Touching [▶] again will resume playback. During playback, the [▶] indicator is displayed in Audio main screen. During a pause, the [■■] indicator is displayed in the Audio main screen.
- The playback time may not be correctly displayed when a VBR (Variable Bit Rate) recorded file is played back.
- If there is tag information, artist name/album name/track name is displayed.
- ID3 tag/WMA tag If an MP3/WMA/AAC/FLAC file contains ID3 tag/WMA tag information, the ID3 tag/WMA tag information is displayed. (e.g., song name, artist name, and album name)
Fast-forwarding/Fast-reversing (USB Video only)
1 During playback, touch and hold [ ] (Fast-reverse) or touch and hold [▶▶] (Fast-forward).
Touch and hold for more than 1 second to forward/reverse at 8x speed. Keep touching to switch the speed to 16x and 32x.
2 Release [] or [] to return to normal playback.
- No sound is played back during fast-forwarding/fast-reversing.
Stopping Playback (USB Video only)
Touch [■] during playback.
"STOP" indicator is displayed, and playback stops.
- Playback starts from the beginning when [▶ III] is touched while playback is stopped.
Repeat Play
1 Touch [ ⟶ ].
The Repeat mode select pop up screen is displayed.
• The [☐] button displays the currently selected mode.
2Select your desired Repeat mode.
Folder ☐: Only files in a folder are repeatedly played back. File ☐: Only the file currently playing is repeatedly played back. OFF ☐: Repeat mode Off.
Random Play (USB Audio only)
1 Touch [×].
The Random Play mode select pop up screen is displayed. • The [×] button displays the currently selected mode.
2Select your desired Random Play mode.
ALL ALL: All songs in the USB flash drive are played back in random sequence. Any one song does not play back again until all songs have been played back.
Folder A folder is selected randomly and songs in the Folder are played back in order. After all songs are played in a Folder, the next Folder is selected randomly.
File ✗ : All songs in the Folder (Folder/File) including the song currently being played are played back in random sequence.
OFF ✗: Random mode Off.
- If you select a track by using the search mode, the Random Play mode will be canceled.
Searching for a Desired Song
You can search for your desired song by using one of two modes; the Quick Search mode and the Full Search mode.
Quick Search mode
Touch your desired Folder name or File name.
The selected Folder ^*1 or File is played.
*1 The first file in the selected folder is played back.
- For details on switching to the Quick Search mode, see ⑩in "USB Audio main screen example" (page 57).
Full Search mode
1 Touch [Audio] or [Video] to switch whether the search list displays music files or video files.
2 Touch your desired Folder name\* 2 or File name.
When you select a File name, the selected song is played.
When you select a Folder name, repeat the same procedure to select another Folder name or File name.
*2 When you touch the [▶] by a Folder name, the unit plays from the first song in the Folder.
- For details on switching to the Full Search mode, see in"Quick Search mode screen example" (page 57).
- To switch the displayed list or return to the previous page in the Full Search mode, see "About Basic Operation for List Screen" (page 19).
Switching Display Modes (During Video File Play Back)
You can switch the Display Mode while playing a Video File.
Touch [ ]
Each time you touch, the Display Mode is switched.
Fit → Fill Fit
• The [☐] button displays the currently selected mode. (e.g. [Fit])
- You cannot operate them while driving.
Fit mode
natural_image
Simple line drawing of a village landscape with houses, trees, and a church (no text or symbols)The mode displays a picture while holding its aspect ratio.
- Black bands appear at the top/bottom or right/left side of the screen depending on the picture.
Fill mode
natural_image
Simple line drawing of a village with houses, trees, and a church (no text or symbols)The mode displays a picture to fit its size vertically and horizontally with the monitor size.
About USB Video format
The video formats (USB Flash drive) supported by the unit are as follows.
- Supported Container: AVI, MKV, MP4
- Supported Video Coding: H.264/MPEG-4 AVC
- Supported Audio Coding: MP3, ACC, MPEG2 audio
- MAX File Size: 4GB
iPod/iPhone (Optional)
A separately sold Lightning to USB cable (KCU-471i), etc., is required. When the unit is connected by the above cable, the controls on the iPod are disabled.
- This unit does not support video playback from iPod/iPhone which connected to this unit via USB Connector.
- Internet or telephone functions, etc., of the iPhone or iPod touch are not controllable from the unit, but these functions can be controlled using the iPhone or iPod touch itself.
- Before an iPhone 5 or later is connected, turn Apple CarPlay to Off, then play iPod music. (page 46)
About iPod/iPhone models usable with this unit
- The following devices have been tested and shown to work with this unit. Correct function of earlier versions cannot be guaranteed.
iPod touch 6th generation: Ver.10.1.1
iPod touch 5th generation: Ver.9.3.5
iPod nano 7th generation: Ver.1.0.4
- The following devices have been tested and shown to work with this unit. Correct function of earlier versions cannot be guaranteed.
iPhone SE: Ver.10.1.1
iPhone 6S Plus: Ver.10.1.1
iPhone 6S: Ver.10.1.1
iPhone 6 Plus: Ver.10.1.1
iPhone 6: Ver.10.1.1
iPhone 5S: Ver.10.1.1
iPhone 5C: Ver.10.1.1
iPhone 5: Ver.10.1.1
iPhone 4S: Ver.9.3.5
■ iPod/iPhone main screen example
Audio mode
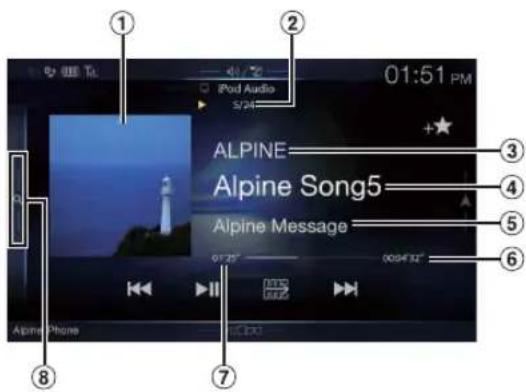
Function mode

① Artwork display
- You can change the artwork position. For details, see "Switching the Artwork Position" (page 41).
② Current song no./Total song no.
③ Artist title/Release Date*
④ Song title/Episode title*1
⑤ Album title/Podcast title*1
⑥ Total time for playing
⑦ Elapsed time
⑧ Quick Search button*2
Touch or swipe to the right when using Quick Search mode.
*1 Podcast mode.
*2 If you have never used Search mode with the currently connected iPod/ iPhone, pressing the Quick Search button switches the screen to the Full Search mode screen.
■ Quick Search mode screen example
Swipe vertically in the list to change pages.
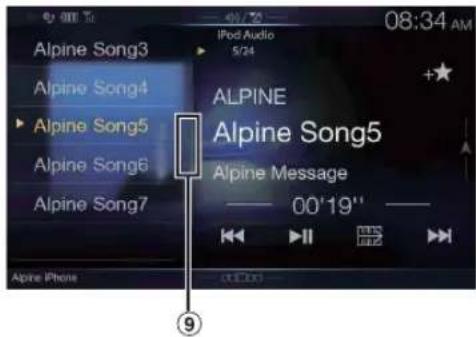
⑨ Full Search button
Swipe to the right when using Full Search mode.
Playback
1 Press the ♪ (AUDIO) button to select iPod mode.
The display shows the iPod mode screen.
- You can select and change the source in the Menu screen (page 22) or Favorite screen (page 25).
2 Touch [|◀◀] or [▶▶] or to select the desired track (file).
Returning to the beginning of the current (or previous) track (file): Touch[ ◀◀◀ ] .
Fast reverse the current track : Touch and hold [ ]
Advancing to the beginning of the next track (file) : Touch[▶▶] .
Fast forward the current track : Touch and hold [ ▶ ] .
• The , buttons provide the same functions above.
3 To pause playback, touch [▶ III].
- If a song is playing on the iPod/iPhone before it is connected to the unit, it will continue playing when it is connected.
- An episode may have several chapters. The chapter can be changed by touching [◀◀] or [▶▶].
- If the artist, album or song name, created in iTunes, has too many characters, songs may not be played back when connected to the unit. Therefore, a maximum of 64 characters is recommended. The maximum number of characters for the unit is 64.
• Some characters may not be correctly displayed.
Searching for a Music File
An iPod/iPhone can contain thousands of songs. For this reason, this unit can make various searches using the search function as shown below.
Using the Playlist/Artist/Album/Podcast/Audiobook/Genre/Composer/Song/iTunes Radio search mode's individual hierarchy, you can narrow down your search as shown in the table below.
| Hierarchy 1 | Hierarchy 2 | Hierarchy 3 | Hierarchy 4 |
| Playlists | Songs | — | — |
| Artists | Albums | Songs | — |
| Albums | Songs | — | — |
| Songs | — | — | — |
| Podcasts | Episodes | — | — |
| Genres | Artists | Albums | Songs |
| Composers | Albums | Songs | — |
| Audiobooks | — | — | — |
| iTunes Radio | — | — | — |
Quick Search Mode
In Quick Search mode, the list from the previous search mode is displayed. For example, if the last time you searched for songs was in Albums, the Album list is displayed. If you have not used the search mode, the list is not displayed in the Quick Search mode. In this case, go to the Full Search mode.
In Quick Search mode, touch the desired list (for example, Album list).
The selected Album is played.
- To switch into Quick Search mode, see i8 "iPod/iPhone main screen example" (page 60).
• To search within an Album, go to the Full Search mode. - Depending on the connected iPod/iPhone, this function may not available.
Full Search Mode
For example: Searching by Artist name
The following example explains how an Artists search is performed. Another search mode can be used for the same operation, although the hierarchy differs.
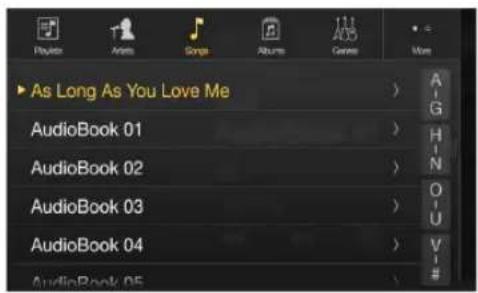
1 Touch [Artists] in the Full Search mode screen.
The Artists search screen is displayed.
- To switch into Full Search mode, see in"Quick Search mode screen example" (page 60).
2Select the desired artist.
To play back the Artist directly
1 Touch [▶] of the artist's name. All songs of the selected artist are played back.
To search for the Album of the Artist
1 Touch the selected artist name.
The Albums search screen of the selected artist is displayed.
2 Touch [▶] of the desired album's name.
All songs of the selected album are played back.
To search for a Song in the Album of the Artist
1 Touch the desired artist's name. All albums of the selected artist are displayed.
3 Touch the desired album's name.
All songs of the selected album are displayed.
4Touch the desired song's name.
The selected song is played back.
- An alphabet skip function is available. See "Alphabet Search Function" (page 62).
- To switch the displayed list or return to the previous page in the Full Search mode, see "About Basic Operation for List Screen" (page 19).
Alphabet Search Function
The unit is provided with an alphabet search function for effective searching. When you use this function in the search mode, you can quickly search an artist or a song, etc.
This is an example of how to search Artist Name for names beginning with "R".
1 Touch "O-U" of the alphabet group.
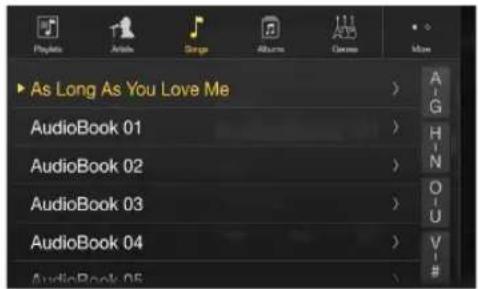
"O P Q R S T U" of the alphabet group "O - U" is displayed.
2 Touch "R" you want to search.
Artist names beginning with "R" are displayed.
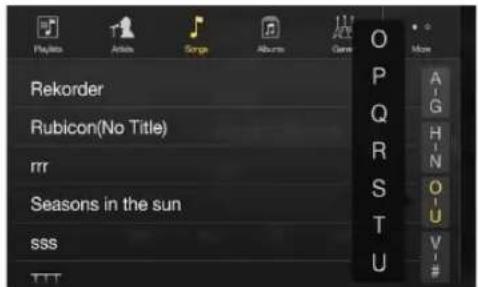
3 Touch your desired artist name.
- If there are no names in the list beginning with that letter, the next letter of the alphabet is searched.
For example: If there are no names beginning with "R," the search list begins with "S.".
Repeat Play
Touch [ ⟶ ] to repeatedly play back the currently track.
The tracks (files) will be played repeatedly.
Touch[ ] again to deactivate Repeat play.
Repeat All Track Repeat OFF Repeat All

Random Play (Shuffle)
1 Touch [×].
The Random Play mode select pop up screen is displayed.
• T h e [ ] button displays the currently selected mode.
2Select your desired Random Play mode.
The selected Random Play mode changes the button.
Album The songs on each album are played back in proper order. Upon completing of all the songs on the album, the next album is selected randomly. This continues until all albums have been played.
Songs : song shuffle randomly plays back songs within a selected category (playlist, album, etc.). The songs within the category are played just once until all songs have been played.
OFF ✗: Random mode Off.
• The action depends on the connected iPod.
Pandora® internet radio (optional)
Pandora* internet radio is your own FREE personalized radio now available to stream music on your Smartphone (which runs Android OS or iOS).
Just start with the name of one of your favorite artists, songs or classical composers and Pandora* will create a "station" that plays their music and more music like it.
The unit enables you to interact with your Pandora® account by connecting an iPhone or Android smartphone that has the latest version of the Pandora® application installed.
- Before selecting Pandora® source in the Menu screen, turn Apple CarPlay to Off. (page 46)
- You can also enjoy Pandora* from Apple CarPlay screen.
- If no sound is output when you connect an iPhone with a "Set Bluetooth Device" setting of both "Hands-free" and "Bluetooth Audio" to the unit's USB port and change the Audio source from Bluetooth Audio, set "Alpine TuneIt App" to "USB (iPhone)" or "Off." For more details, see "Pairing a Bluetooth Device" (page 31) and "Smartphone Apps Setup" (page 51).
■ iPhone Pandora main screen example
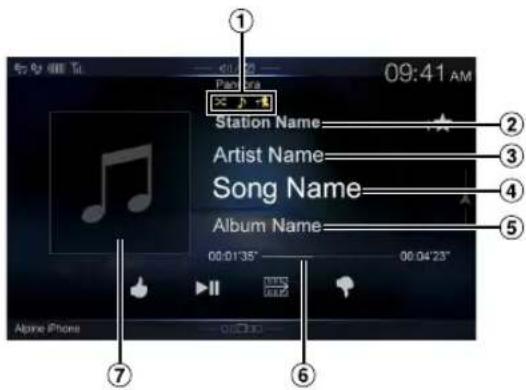
Function mode
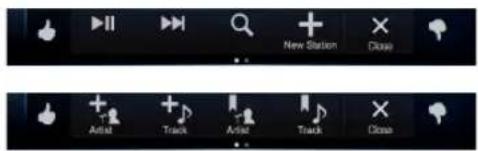
Bluetooth Pandora main screen example
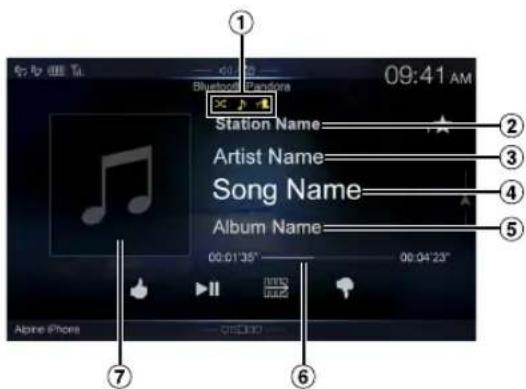
Function mode
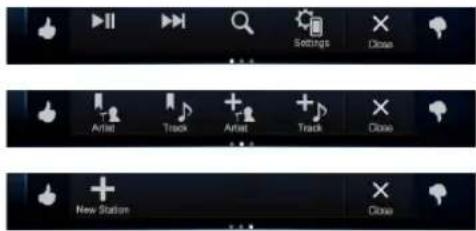
① Track/Artist bookmark icon/Shuffle indicator
② Station name
③ Artist Name
④ Song Name
⑤ Album Name
⑥ Playing time
⑦ Artwork display
Listening to Pandora®
1 Launch the Pandora® on the smartphone.
2 Press the ♪ (AUDIO) button to select Pandora® or Bluetooth Pandora® mode.
The display shows the Pandora mode screen.
- You can select and change the source in the Menu screen (page 22) or Favorites screen (page 25).
3 To pause playback, touch [▶ III].
4 To skip to the next song, touch [▶▶].
• The operation to replay a previous song is not available.
- Pandora® limits the number of skips allowed on their service. If you attempt to skip songs beyond the limit, "Our content licenses limit the number of tracks you may skip." is displayed.
- Even if you reconnect an iPhone without launching Pandora Application while the power is off, Pandora mode (not iPod mode) is displayed when power is turned back on.
- Depending on the signal status, song may be stopped during playback.
- While receiving an advertisement, you cannot operate any buttons other than [▶ II] (play/pause) and [Q] (Search).
• The playback time may not be correctly displayed.
• The display content varies when ads are received.
"Thumbs" Feedback
You can personalize your stations with “Thumbs Up” or “Thumbs Down” feedback, which the system takes into account for future music selections.
During playback, touch [ 👍 ] for thumbs up, or touch [ ⬇ ] for thumbs down.
The " 👍" indicator appears in the display. Pandora® will add similar music to your station.
The "?" indicator is displayed. Pandora® will ban that song from your station, and the current song is skipped. If the number of skips allowed has reached its limit, the current song continues to play back.
- In some situations, "Thumbs" feedback may not be available.
Searching for a Desired Station
You can display your station list and select stations directly from the unit.
1 Touch [Q] (Search) to activate the Search mode.
Alphabet Search
2 Touch [By A-Z].
The "By A-Z" search mode is activated and the station names are listed alphabetically.
3 Touch the desired station.
Pandora will play that station.
Search by Date Added
2 Touch [By Date].
The "By Date" search mode is activated and the station names are listed by the date they were added to the account.
3 Touch the desired station.
Pandora will play that station.
Shuffle
Use Shuffle to create a playlist based on two or more of your Pandora stations. Edit your Shuffle station selections on the Pandora Compatible Application for iPhone when it is not connected to the unit.
1 Touch [Q] (Search) to activate the Search mode.
The "By A-Z" or "By Date" search mode is activated and the station name is displayed.
2 Touch [×] (Shuffle).
- The indicator lights, and the songs from the created stations are played back in random sequence.
Creating a New Station
Based on the currently playing song or artist, a personalized Pandora station can be created. The new station will play more music like it.
Free word
1 During playback, touch [+] (New Station).
The Key Pad screen is displayed. You can enter a keyword and search for Artist/Song.
2 Enter a keyword and touch [OK].
3 Touch the desired list.
The new station is automatically applied.
- For details of how to input characters from the keypad, refer to "How to Input Characters and Numbers (Keypad)" (page 24).
- You cannot operate them while driving.
Artist/Track
During playback, touch [+_1] (Artist) or [+_2] (Track).
- The created station is saved to your station list.
- When the Smartphone is not connected to this unit, you can create personalized Pandora® stations using the Pandora® Application on your Smartphone. You can also create stations on the web at www.pandora.com.
- In some situations, creating a new station may not be available.
Bookmarking a Desired Track or Artist
The currently playing song or artist can be bookmarked and saved to your Pandora account.
During playback, touch [ˈɪk] (Artist) or [ˈjʊ] (Track).
The current track or artist is bookmarked. "♪" icon or "◀" icon is displayed.
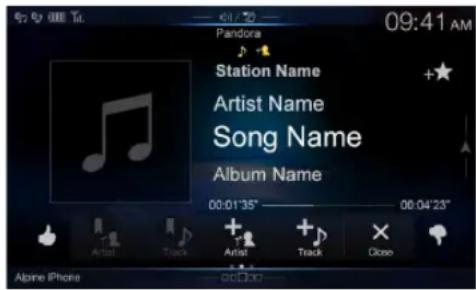
- Your bookmarks can be viewed on your "Profile" page at www.pandora.com.
• In some situations, bookmarks may not be available.
Connecting a Bluetooth Device (Bluetooth Pandora® Only)
Registering a Bluetooth device in the unit enables automatic connection. If it does not connect automatically, run through the connection procedure again.
1 Touch [icon] (Phone Setting).
The Device Setting select pop up screen is displayed.
2 Touch [Reconnect].
Bluetooth connection will start.
Disconnecting the Bluetooth Connection
1 Touch [icon] (Phone Setting).
The Device Setting select pop up screen is displayed.
2 Touch [Disconnect].
The Bluetooth connection is disconnected.
Changing the connecting Bluetooth Device
If multiple Bluetooth devices are registered in this device, you can change the connection among the registered devices.
1 Touch [icon] (Phone Setting).
2 Touch [Change Phone].
3 Touch [♪] (Audio) or [♪] (Hands-free) of the selected device.
The connection will transfer to the selected device.
< During Replay mode >
SiriusXM Tuner operation:
When an optional SiriusXM Tuner is connected to this unit, the following operations may be performed.
SiriusXM main screen example (Song Info. Mode)
Signal Indicator
Indicates the signal strength of SiriusXM.
Info area
Channel Info. Mode*:
Channel No/Long Channel Name/Category Name
Song Info.Mode:
Artist Name/Song Name/Content Info
Album Art
The image that corresponds with the channel currently being received is displayed.
- You can change the artwork position. For details, see “Switching the Artwork Position” (page 41).
Preset mode button
Touch or swipe to the right when you use the Preset mode screen.
* In Channel Info. Mode, the Channel logo currently being received is displayed on the left side of the Long Channel Name.
Preset mode screen example
Function mode
The Function mode switch is different depending on TuneStart mode and Replay mode.
Preset buttons
Swipe vertically in the list to change pages.
SmartFavorites () button
“” is a symbol of SmartFavorites channel. When a preset channel is stored, it will be designated as a SmartFavorites channel and the button lights up. Touch this button to cancel the SmartFavorites channel and is displayed.
Search mode button
Swipe to the right when you use the Search mode screen.
Receiving Channels with the SiriusXM Tuner
About SiriusXM Satellite Radio
Only SiriusXM ^® brings you more of what you love to listen to, all in one place. Get over 140 channels, including commercial-free music plus the best sports, news, talk, comedy and entertainment. Welcome to the world of satellite radio. A SiriusXM Vehicle Tuner and Subscription are required. For more information, visit www.siriusxm.com.
After you have found the SiriusXM Radio ID, you can activate your radio. See section "Checking the SiriusXM Radio ID Number."
In the USA, you can activate online or by calling SiriusXM Listener Care:
- Visit www.siriusxm.com/activatenow
• Call SiriusXM Listener Care at 1-866-635-2349
For Canadian Subscriptions, please contact:
- Visit www.siriusxm.ca/ac CI
• Call XM Customer Care at 1-877-438-9677
- The SiriusXM Satellite Radio controls on this unit are available only when a SiriusXM Tuner is connected.
1 Press the ♪ (AUDIO) button to select SiriusXM mode.
The display shows the SiriusXM mode screen.
- You can select and change the source in the Menu screen (page 22) or Favorites screen (page 25).
2 Touch [◀] or [▶] to select the desired channel. Touching and holding either button will rapidly browse through the channels.
- Refer to the SiriusXM Tuner User Guide for details on how to install the SiriusXM Tuner.
Tuning Channels by Category
Channels are grouped into categories based on the type of content heard on the channels.
1 Touch [ ] (Category) on the SiriusXM main screen to activate the category browsing mode.
The channels within the category of the current channel are listed.
Category browsing mode screen example
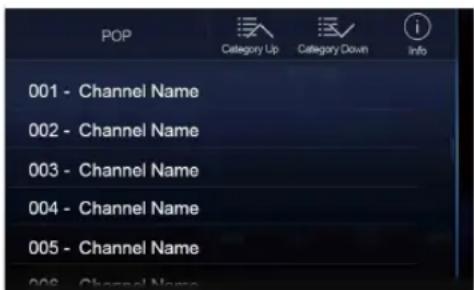
- Touching [①] (Info) changes the display of information for the channels in the category with the following three options. Channel No./Channel Name—Channel No./Artist Name → Channel No./Song Title—Channel No./Content Info → Channel No./ Channel Name
2 Touch [≡] (Category Up) or [≡] (Category Down) on the category browsing mode screen to select a desired category.
The Category Name is shown at the top of the display.
3Select the desired channel.
Changing the Display
Text information, such as the channel name, artist name/feature, and song/program title, is available with SiriusXM. The unit can display this text information as explained below.
Touch [i] (Info).
Each time you touch this button, the Channel Info. mode and the Song Info. mode switch alternately. For displayed contents, see "SiriusXM main screen example (Song Info. Mode)" (page 66).
Checking the SiriusXM Radio ID Number
To subscribe to the SiriusXM Satellite Radio service, it is necessary to locate and identify the Radio ID of your SiriusXM Tuner. You can check the Radio ID on the bottom surface of the SiriusXM Tuner box. You can also check it from this unit by performing the following procedure.
1 While receiving SiriusXM Radio, touch [◀] or [▶] to select channel "0".
The unit displays the Radio ID number.
2 To cancel the Radio ID number display, change the channel to a channel other than "0".
- The SiriusXM Radio ID does not contain the letters I, O, S, or F.
Storing Channel Presets
You can store 18 of your favorite SiriusXM channels for easy recall with Preset buttons.
1 Press the Preset number you want to store, for at least 2 seconds to store the channel.
The selected channel is designated as a SmartFavorites channel.
2 Repeat the procedure to store up to 17 other channels.
A total of 18 channels can be stored in the preset memory.
- For details about SmartFavorites channels, see "SmartFavorites Functions" (page 68).
- To switch to the Preset mode screen, see ④ in "SiriusXM main screen example (Song Info. Mode)" (page 66).
- If you store a new channel into a preset which already has a channel assigned, the current channel will be cleared and replaced with the new one.
Tuning Channels using Presets
Touch any one of the Preset numbers you have already stored in the Preset mode screen.
The preset channel is received.
- To switch to the Preset mode screen, see ④ in "SiriusXM main screen example (Song Info. Mode)" (page 66).
SmartFavorites Functions
SmartFavorites allow you to rewind and replay any missed programming from your current Band of Preset channels. Miss a music, news, talk or sports segment? No Problem, because you can rewind and replay when you tune to one of your SmartFavorites channels and hear what you missed. Note that buffering starts 5 seconds after changing the band. It takes 5 seconds for SmartFavorites to start buffering the preset channels in the new band. TuneScan and TuneStart functions are enabled by the above-mentioned SmartFavorites functionality.
TuneStart™ Function
With the TuneStart ^™ feature turned ON, you will hear the beginning of the song when you tune to one of your SmartFavorites channels. It may take a minute or two for the feature to work after power up or after changing preset bands.
1 Touch and hold [TuneStart] for at least 2 seconds to activate or deactivate the TuneStart function. When the TuneStart function is activated, [TuneStart] is highlighted.
2 On the Preset Mode screen, touch the Preset number. TuneStart mode will begin.
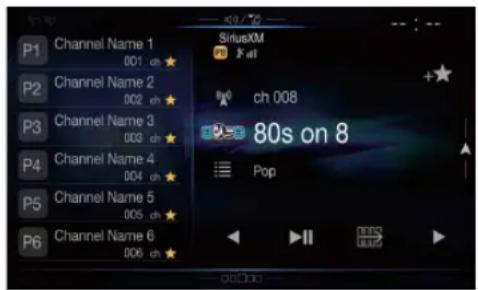
During TuneStart mode, the time difference between the play point and Live radio is displayed by the " indicator.
- To switch to the Preset mode screen, see ④“SiriusXM main screen example (Song Info. Mode)” (page 66).
- The number of preset channels that TuneStart can access differs depending on the SiriusXM Tuner Box.
- Touching [▶▶] (Track Up) or [|◀◀] (Track Down) will move a track up/down.
- To fast reverse, touch and hold [|◀◀] (Track Down) and to fast forward, touch and hold [ ] (Track Up).
- When you touch [→▶] (Live) or [▶▶] (TuneStart) during TuneStart, the program currently selected in TuneStart mode changes to the program currently being broadcast.
- This function is available only when SiriusXM Tuner-SXV200 or later is connected. When Tuner-SXV200 is connected, this function is available only for Preset channels 1-6. When Tuner-SXV300 is connected, this function is available for all Preset channels.
- Preset channels that play other than music-type content will start playing the channel from the current live play point when selected.
TuneScan™ Function
If you've got more than one Favorites music channel, you've got a lot of choices every time you tune in. Instead of pushing every preset button and hearing the live song, you can simply use the TuneScan function to get a short preview of songs that you have missed on each of your SmartFavorites music channels.
1 Touch [TuneScan]. The [TuneScan] (TuneScan) icon is highlighted during TuneScan mode.
2 Touch [TuneScan] (TuneScan) during scan playback, TuneScan mode will be canceled and the selected track will be played back normally. Touch and hold [TuneScan] (TuneScan) for at least 2 seconds during scan playback to cancel TuneScan mode. The tuner returns to the channel before TuneScan was initiated.
- This function is available only when SiriusXM Tuner-SXV200 or later is connected. When Tuner-SXV200 is connected, this function is available only for Preset channels 1-6. When Tuner-SXV300 is connected, this function is available for all Preset channels.
- If no operation is performed during the scanning process, when scanning finishes, the next mode depends on the SiriusXM Tuner.
- During TuneScan mode, the artist and song name will be displayed.
- The SiriusXM Tuner scans through the songs from the preset music channels on the current band only, scanning from oldest to newest.
- The number of Preset channels and the play times that can perform TuneScan differ depending on the SiriusXM Tuner box.
Search Function
1 Touch the Search mode button on the Preset mode screen.
The Search list screen appears.
- To switch into Search mode, see in "Preset mode screen example" (page 66).
Search item:
All Channels / Category Name ^1 / My Music / My Games / Featured ^2
*1 The Category name for the channel currently being received is displayed.
*2 Displayed only when the SiriusXM Tuner-SXV200 or later is connected.
- You can switch the category by touching [≡] (Category Up) or [≡] (Category Down) on the List screen after selecting a Search item other than Featured.
- You can switch the display format by touching [①] (Info) in the List screen after selecting a Search item. Channel No./Channel Name Channel No./Artist Name Channel No./Song Title → Channel No./Content Info → Channel No./Channel Name
Searching by Channel
2 Touch [All Channels]. All Channels will be displayed in a list.
3 Touch the selected channel. The channel you selected is received.
Searching by Category
2 Touch Category Name. The channels within the category of the current channel are listed.
3 Touch the selected channel. The channel you selected is received.
Searching by My Music
2 Touch [My Music]\*.
The artist names and song titles that you have stored and are currently playing will be displayed in a list.
* Displayed only when the stored song or artist is broadcasting.
3 Touch the desired artist/song.
The channel of the selected artist/song being broadcast is received.
Searching by My Games
2 Touch [My Games]\*.
When the sports teams that you have stored are currently playing a game that is being broadcast, they will be displayed in a list.
* Displayed only when the game of stored team is broadcasting.
3 Touch the desired team.
The channel of the selected game being broadcast is received.
Searching by Featured Favorites
1 Touch [Featured]\*.
The Category that SiriusXM recommends will be displayed in a list.
* Displayed only when the SiriusXM Tuner-SXV200 or later is connected.
2 Touch the desired category.
3 Touch the desired channel within the selected category.
The channel you selected is received.
Selecting the Channel Directly
You can directly select the channel number by using the numeric keypad.
1 Touch [■] (Direct Tune).
The numeric keypad input screen is displayed.
2 Touch to input the channel number.
3 Touch [Enter].
The selected channel is received.
Storing the desired Song/Artist
While listening to SiriusXM Satellite Radio, you can be alerted when your favorite songs or artists are playing on other channels. The radio will display an Alert message when a matching artist or song is found on another channel. Then you can choose if you want to tune to that favorite or you can ignore the alert and stay on your current channel. Information on setting up the Artist and Song Alerts is described in "Receiving and Tuning to an Alert".
1 Touch [≡↓] (Set Alert) on the SiriusXM mode screen.
The Memory type selection screen is displayed.
2 Touch the "Artist Saved" or "Song Saved" to choose to store the Artist or the Song.
Total registrations and Remaining number of registration slots is displayed for 2 seconds, then the Artist or Song is registered as an Artist alert or Song alert.
- The maximum number of registered Teams, Artists, and Songs is 50. For details on how to register a Favorite Team, see “Setting the Favorite Sports Team Alerts” (page 44).
- "Artist /Song Unavailable" appears on the display if both the artist and song is not available to be stored.
- "Artist (Song) Unavailable" is displayed if just the artist (song) is not available to be stored.
"Artist (Song) Saved" is displayed if this Artist (Song) was previously stored. - If there is no memory space, "Alert Memory Full" is displayed, and then you are asked whether you want to replace a stored item. If you select "OK," then the list of stored alert items is displayed. Touch the item that you want to replace.
Receiving and Tuning to an Alert
Whenever a stored sports team, artist, or song is playing on another channel, an interruption Alert appears on the unit display. To tune to the game, artist or song identified by the alert, follow the steps below:
1 When stored information is broadcast, after displaying "Song Alert", "Artist Alert" or "Game Alert," a Pop up screen is displayed.
2 Touch [Tune] to receive.
Touch [Dismiss] to skip.
- Touch [ ⓘ ] (Info) on the My Music list/My Games list screen, the information of the broadcasting channels will be changed. Each time you touch the [ ⓘ ] (Info), the display changes as below. My Music list:
Artist name → Song Title → Content Info → Channel name → Artist name
My Games list:
League Short Name Team Abbrev/Team Nickname G content Info → Channel name → League Short Name
Replay Function
In SiriusXM mode, you can pause, rewind and replay live Satellite Radio.
■ Replay mode screen example
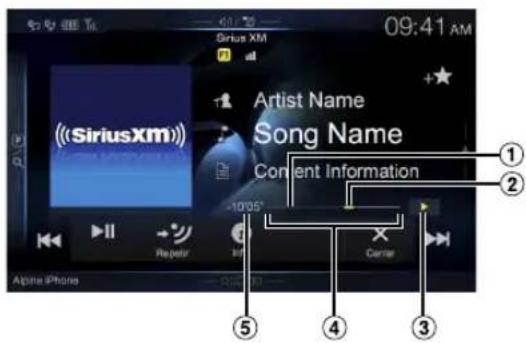
① Buffer usage
② Current Replay point
③ Replay status indicator (Ior)
④ Replay range
⑤ Time to live
1 Touch [▶ III] to Pause playing of the channel content.
The "((Pause)" indicator and replay progress bar is displayed.
2 Touch [▶ II] again to resume playing the content.
The "Play" indicator lights up and offset playback commences.
3 Touch [ ] (Live) to exit Instant Replay and listen to live content.
- To fast reverse, touch and hold [|◀◀] and to fast forward, touch and hold [▶▶]
- Touching [|◀◀] or [▶▶] will move a track up/down.
- If you change channels while in Replay mode, the contents of the replay buffer are emptied.
- The allowed recording time differs depending on the SiriusXM Tuner box.
Parental Lock Function
The Parental Control feature allows you to limit access to any SiriusXM channels, including those with mature content. When enabled, the Parental Control feature requires you to enter a passcode to tune to the locked channels. For information on setting the Parental Control passcode, see "Setting the Parental Lock" (page 44).
When a locked channel is selected, "Channel
Input the 4-digit passcode you set in "Setting the Parental Lock" (page 44).
The initial number is 0000.
- If you input a wrong passcode, "Incorrect Pass Code entered" is displayed.
- After entering the correct passcode, you can access all locked channels without entering the passcode again until the unit is powered off and then back on.
Using Jump Memory and Jump Recall function
The Jump Channel is a special channel that you can jump to with the press of a dedicated button and then jump back to the previous channel. This channel is often used to select your favorite SiriusXM traffic and weather report channel.
1 To store the Jump channel in memory, touch and hold [→] ( J u m p ) for at least 2 seconds.
2 Touch [→] (Jump) to recall and tune to the saved Jump channel.
3 Touch [→] (Jump) again to receive the previous channel.
- While receiving the Jump channel, you cannot perform other operations.
- Only one channel can be stored as the jump source channel. When you want to store a new channel, the old channel will be cleared and the new one will be stored.
HDMI Device
For X208U/INE-W977HD, when you connect an optional DVE-5300 (DVD Player), you can operate it from the unit.
When making HDMI connections, you need to set HDMI on the unit suitable for the connected device. For details, see "HDMI Setup" (page 46).
For details on how to operate the DVD player, see "DVD Player Operation".
For details on how to operate iPhones and Smartphones, see "HDMI Operation" (page 80).
About HDMI selector (Optional)
HDMI selector is used when you add HDMI devices (iPhone or other Smartphones).
If you connect an HDMI selector, you can connect one HDMI device for X209D and up to 2 HDMI devices including the optional DVE-5300 (DVD Player) for X208U/INE-W977HD.
- Set "Setting the HDMI Selector On/Off" (page 50) to "On" when using the HDMI selector.
- For details on how to switch the HDMI source by using the HDMI selector, see "Switching the source when two HDMI devices are connected" (page 80).
DVD Player Operation
You can also operate the DVD player using the Remote Control unit supplied with X209D. (For X208U/INE-W977HD, supplied with the DVE-5300) For detailed notes on handling and operating the Remote Control unit, see "About Remote Control Operation (X209D only)" (page 98).
- For precautions concerning the use of discs, usable discs, and formats, see “Cautions about Discs (X209D only)” (page 100) and “About the Supported Formats” (page 102).
Inserting/Ejecting a Disc
Inserting the Disc
Insert the disc with the label side facing up.
For X209D
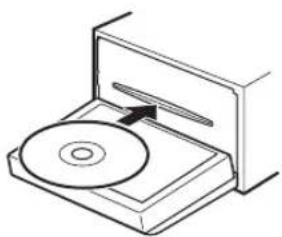
natural_image
Line drawing of a CD or DVD disc mounted on a base (no text or symbols)For X208U/INE-W977HD (DVE-5300)
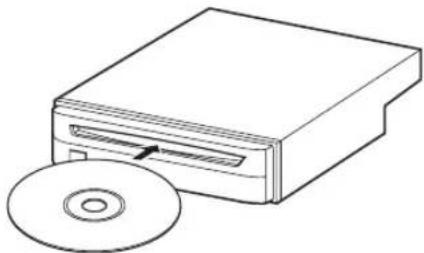
natural_image
Line drawing of a CD or DVD disc attached to a rectangular box (no text or symbols)Insert the disc until it is automatically pulled into the unit.
- Do not touch the surface of the disc directly with your fingers.
- Before inserting or removing the disc, always turn the ignition key to ACC or ON.
- You cannot remove or insert the disc with the ignition key turned to OFF.
Removing the Disc
Press ▲ (Eject) button.
When the disc has been ejected part way, take it out.
- Press the [▲] (Eject) button on the front panel of the optional DVD Player (DVE-5300).
- If the disc cannot be ejected by pressing [▲] (Eject), press and hold [▲] (E j e c t) again for at least 3 seconds.
DVD Player SETUP
You cannot perform DVD Player Setup while driving.
Your vehicle must be parked with the ignition key in the ACC or ON position. For details, see "To display the Setup Menu screen" in "Setup Operation" (page 30).
You can setup only when a disc is not inserted or playback stops.
1 Touch [💡] (Setup).
The Setup main screen is displayed.
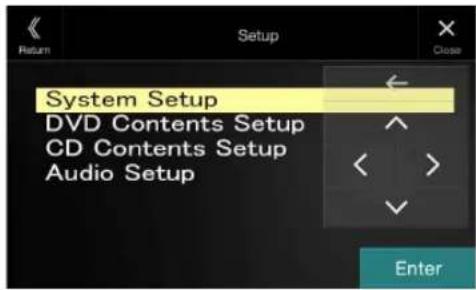
Setting items:
System Setup / DVD Contents Setup / CD Contents Setup / Audio Setup
2 Touch [∧] or [∨] to select the setting item.
3 Touch [Enter], then touch [<], [>], [^] or [∨] to change the setting item.
4 Touch [X] to return to the main source screen.
- Touch [«] (Return) to return to the previous display.
- For details on the [⚙️] (Setup) button, see Function mode in "CD/MP3/WMA/AAC/WAV" (page 74) or "DVD" (page 75).
System Setup
Switching the Bar Color
Select the colors (8) used for highlighting items in the System Setup screen.
Setting items:
Bar Color
Setting contents:
Blue / Green / Light blue / Amber (Initial setting) / Aqua blue / Yellow / Red / White
Setting the TV Screen Mode
Setting item:
TV Screen Aspect
Setting contents:
16:9 (Initial setting) / 4:3LB / 4:3PS
- For some discs, the picture may not be set to the selected screen size. (For details, refer to the explanation on the disc's jacket.)
- You can also switch the TV Screen mode by touching [ ] ( D Mode) on the display of this unit. For details, see "Switching Display Modes (During Video File Play Back)" (page 59).
4:3 LETTER BOX:
Select this when connected to an older, 4:3 aspect ratio, TV monitor. There may be black stripes visible at the top and bottom of the screen (when playing a 16:9 size movie). The width of these stripes will depend upon the original aspect ratio of the theatrical release of the movie.
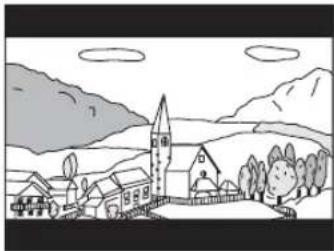
natural_image
Simple line drawing of a mountain village with houses, trees, and a church (no text or symbols)4:3 PAN-SCAN:
Select this when connected to an older, 4:3 aspect ratio, TV monitor. The picture will fill the entire TV screen. However, due to the mismatch in aspect ratio, parts of the movie at the extreme left and right sides will not be visible (when playing a 16:9 size movie).
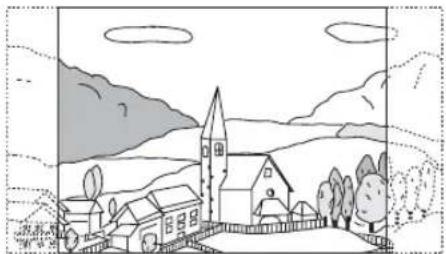
natural_image
Simple line drawing of a village with houses, trees, and mountains under a cloudy sky (no text or symbols)16:9 WIDE:
Select this when connected to a wide screen TV. This is the factory setting.
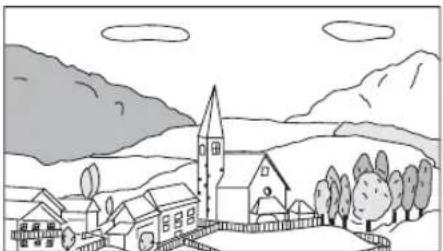
natural_image
Simple line drawing of a village landscape with houses, trees, and mountains under a cloudy sky (no text or symbols)Delaying Image Output
Use this function when an external audio processor is connected. Depending on the connected audio processor, the audio and image currently played back may not be output at the same time. In this case, you can output an image delayed by 0.1 second by setting to On.
Setting item:
Video Delay
Setting contents:
Off (Initial setting) / On
On: Output image is delayed by 0.1 second.
- If a disc with a high compression rate is played back, the image and audio may be distorted.
Returning to the Initial Setting
You can return the contents you previously set to the initial factory settings.
Setting item:
Setup Initialize a v
Setting contents:
Yes / No (Initial setting)
Yes: Returns to the initial setting.
No: Does not returns to the initial setting.
DVD Contents Setup
Setting the language
The audio language, subtitle language and menu language can be set according to your preferences.
Once set, this becomes the default language. This function is convenient when you always want to listen in English. (Not all discs allow changing the default language. If not, the factory default language applies.)
Setting item:
Languages
Setting contents:
Audio / Subtitle / Menu
Audio: Set the audio track language.
Subtitle: Set the language of the subtitles displayed on the screen.
Menu: Set the language used for the menus (title menu, etc.).
Further Setting contents:
Auto (Initial setting) / Off (Subtitle only) / English / French / Japanese / Italian / German / Swedish / Spanish / Chinese / Russian / Others
Auto: The disc is played with the audio language or subtitle language set as the priority language for the disc.
Off: Subtitles are not displayed. (Subtitle only)
Others: Set this to play the disc with a language other than one of the languages displayed. Touch [Enter], then use the numeric keypad ("0" to "9") to input the 4-digit language code. Then touch [Enter] again. For the language codes, refer to "List of Language Codes" (page 105).
- If you change the language setting when the disc is in the unit, the setting is decided with one of the following operations.
- D i s c e j e c t .
- Turn OFF the main unit.
- Switch the source on the head unit.
- To temporarily change the language of the current disc, either do so from the DVD menu or using the operation described in the section "Switching the Audio Tracks" (page 79).
- If the disc does not include the selected language, the disc's default language is set.
• Languages set upon shipment from the factory:
Audio language : Auto
Subtitle language : Auto
Menu language : Auto
• T o uK c h [ ] ( R e t u r n ) to return to the previous
CD Contents Setup
Playing MP3/WMA/AAC/WAV Data
Setting item:
CD Play Mode
Setting contents:
CD-DA / Compress (Initial setting)
This unit can play back CDs containing both CD and MP3/WMA/AAC/WAV data (created in Enhanced CD (CD Extra) format).
CD-DA: Only CD data can be played back.
Compress: Only MP3/WMA/AAC/WAV data can be playedback.
Setting the Video CD Play Mode
When playing a Playback Control (PBC) enabled video CD, you can choose to set PBC On or Off.
Setting item:
VCD Play Mode
Setting contents:
PBC On (Initial setting) / PBC Off
PBC On: The PBC menu is displayed.
PBC Off: The PBC menu is not displayed.
- You can set PBC On or Off directly by pressing MENU.
Displaying the Disc Status Automatically (CD/MP3/WMA/AAC/WAV only)
When playing a CD/MP3/WMA/AAC/WAV file, you can choose to display the Disc Status (track number, etc.) automatically.
Setting item:
Audio Display
Setting contents:
Off / On (Initial setting)
On: The Disc Status is displayed automatically while playing back.
Off: Disc Status is not displayed automatically while playing back.
Audio Setup
Setting the Digital Output
Use the following procedure to set the digital audio signal output from the DVE-5300 (DVD Player).
Setting item:
Digital Out
Output Modes:
Dolby D / DTS
Setting contents:
Bitstream / LPCM (Initial setting)
Bitstream: Select "Bitstream" when you want to connect a digital audio processor to play Dolby Digital or DTS audio. When "Bitstream" is selected, the HDMI audio will be muted. The DVE-5300 (DVD Player) optical output must be used for the external processor.
LPCM: The audio signal recorded on the disc is converted to 48 kHz/16 bit (for DVDs) or 44.1 kHz (for video CDs and CDs) linear PCM audio signals for output.
- Touch [K] (Return) will return to the previous screen.
- Set to "LPCM" to connect to the unit.
Digital audio output
| Disc | Audio recording format | Digital output setting | Optical digital audio output (when a digital audio processor is connected) | Digital audio output (HDMI output) | |
| disFormat | Fs | Q | |||
| LPCM (DVD, CD) | 48/96kHz | 16/20/24bit | Bitstream | LPCM 2ch Down mix (48kHz/16bit) | — |
| LPCM | LPCM 2ch Down mix (48kHz/16bit) | ||||
| 44.1kHz | 16bit | Bitstream | LPCM 2ch (44.1kHz/16bit) | — | |
| LPCM | LPCM 2ch (44.1kHz/16bit) | ||||
| Dolby Digital (DVD) | 48kHz | 16/18/20bit | Bitstream | Bit stream (Max 7.1ch) | — |
| LPCM | LPCM Encode 2ch Down mix (48kHz/16bit) | LPCM Encode 2ch Down mix (48kHz/16bit) | |||
| DTS (DVD, CD) | 48/96kHz | 16/20/24bit | Bitstream | Bit stream (Max 6.1ch) | — |
| LPCM | LPCM Encode 2ch Down mix (48kHz/16bit) | LPCM Encode 2ch Down mix (48kHz/16bit) | |||
| 44.1kHz | 16/20/24bit | Bitstream | Bit stream (Max 5.1ch) | — | |
| LPCM | LPCM Encode 2ch Down mix (44.1kHz/16bit) | LPCM Encode 2ch Down mix (44.1kHz/16bit) | |||
| MPEG1 (DVD, Video CD) | 48kHz | 16bit | Bitstream | Bitstream (Max 5.1ch) | — |
| LPCM | LPCM Encode 2ch Down mix (48kHz/16bit) | LPCM Encode 2ch Down mix (48kHz/16bit) | |||
| 44.1kHz | 16bit | Bitstream | Bit stream | — | |
| LPCM | LPCM Encode 2ch (44.1kHz/16bit) | LPCM Encode 2ch (44.1kHz/16bit) | |||
| MPEG2 (DVD) | 48kHz | 16bit | Bitstream | Bit stream (Max 5.1ch) | — |
| LPCM | LPCM Encode 2ch Down mix (48kHz/16bit) | LPCM Encode 2ch Down mix (48kHz/16bit) | |||
| MP3/WMA/AAC | 8/11.025/12/16/22.05/24/32/44.1/48kHz | 16bit | Bitstream | LPCM Encode 2ch (32kHz, 44.1kHz or 48kHz/16bit) | — |
| LPCM | LPCM Encode 2ch (32kHz, 44.1kHz or 48kHz/16bit) | ||||
| WAV | 44.1kHz | 16bit | Bitstream | LPCM Encode 2ch (44.1kHz/16bit) | — |
| LPCM | LPCM Encode 2ch (44.1kHz/16bit) | ||||
Setting the Downmix Mode
This function applies to Dolby Digital, DTS stream sound.
Setting item:
Downmix Mode
Setting contents:
Stereo (Initial setting) / Surround Encoded
Stereo: Stereo Downmix.
Surround Surround compatible Downmix.
Encoded:
CD/MP3/WMA/AAC/WAV
■ MP3/WMA/AAC main screen example
Info mode
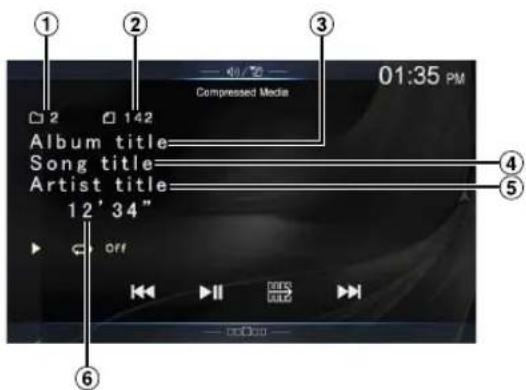
Function mode (MP3/WMA/AAC)
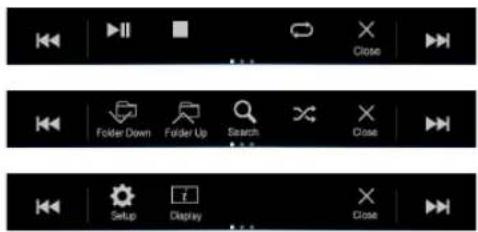
① Current song no.
② Total song no.
③ Album title
④ Song title
⑤ Artist title
⑥ Elapsed time
Function mode (CD)
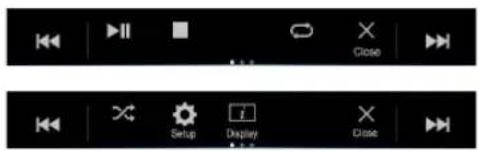
- If there is no CD text, the message "No Text" appears.
Playback
1 Press the ♪ (AUDIO) button to select DVD (CD) mode. The display shows the DVD (CD) mode screen.
- You can also select and change from the Menu screen (page 22) or Favorite screen (page 25). When a disc is inserted into the disc slot of the DVD Player, with the label side facing up, the unit starts playback of the disc.
2 Touch [◀◀] or [▶▶] to select the desired track (file).
Returning to the beginning of the current (or previous) track (file): Touch [ ◀◀◀ ]
Fast reverse :
Touch and hold [◀◀]
Advancing to the beginning of the next track (file) : Touch [▶▶▶]
Fast forward :
Touch and hold [▶▶]
• The , button provide the same functions above.
3 To pause playback, touch [▶ II].
- Any file protected by DRM (Digital Rights Management) copy protection, cannot be played back on this unit.
- If a disc contains both audio data and MP3/WMA/AAC/WAV data, this unit plays back only the audio data.
- The track display for CD audio data playback shows the track numbers recorded on the disc.
- If an MP3/WMA/AAC/WAV disc with many files and folders is played, it may take longer than normal to start playback.
- The playback time may not be correctly displayed when a VBR (Variable Bit Rate) recorded file is played back.
Stopping Playback
Touch [■] during playback.
"STOP" indicator is displayed, and playback stops.
- Playback starts from the beginning when [▶ II] is touched while playback is stopped.
Repeat Play
Touch [ ⟶ ] to repeatedly play back.
The tracks (files) will be played repeatedly.
The repeat mode switches every time the button is touched.
CD:
Track Repeat Off Track Repeat
MP3/WMA/AAC:
Repeat File → Repeat Folder* → Off Repeat File
* Only files in a folder are repeatedly played back.
- If the Repeat Play mode is activated during MIX playback, the MIX mode will be canceled.
MIX (Random Play)
Touch [×] during playback.
The tracks (files) on the disc will be played back in a random sequence.
The MIX mode switches every time [✗] is touched.
CD:
MIX → Off → MIX
MP3/WMA/AAC:
MIX Folder*1 → MIX (Disc)*2 → Off → MIX Folder*1
*1 Only files in a folder are played back in random sequence.
*2 All files on the disc will be played back in a random sequence.
- If the MIX mode is activated during Repeat playback, the Repeat Play mode will be canceled.
- If you select a track by using the search mode, the MIX play mode will be canceled.
File/Folder Name Search (Concerning MP3/WMA/AAC/WAV)
1 Touch [Q] (Search) during playback.
The search mode is activated.
The mode is changed to the search mode, and the list select panel appears.
2 Touch [ ∧] or [ ∨] in the list select panel to select Folder or File, then touch [Enter].
When selecting Folder, select File following same procedure, then touch [Enter].
- When there are 9 or more names on the list, a page number is displayed. Touch [<] or [>] to change the page.
- Touch [←] or [→] to change the list select panel location from right to left or vice-versa.
• To return to the previous hierarchy, touch [ K .
Selecting Folders (Concerning MP3/WMA/AAC/WAV)
Touch [ ] (Folder Down) or [ ] (Folder Up) to select the folder.
Info Mode Function
You can display the DISC information.
1 During playback, touch i. The playback status is displayed.
2 The playback status display closes when [ ] (Display) is touched.
- For details on the display example, see Info mode in "MP3/WMA/AAC main screen example" (page 74).
DVD
DVD Video main screen example
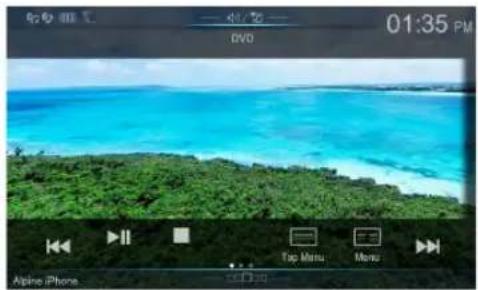
natural_image
Coastal beach scene with turquoise water and green shoreline, displayed within a video player interface (no readable text or symbols on the scene itself)Function mode
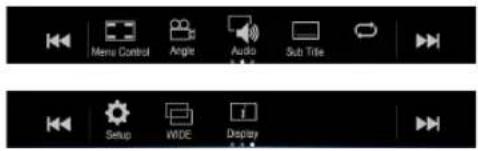
Info mode
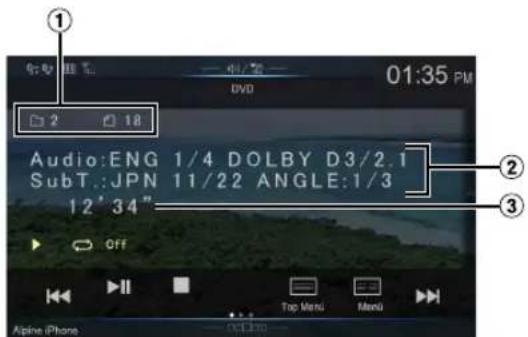
① Title no./Chapter no.
② Audio signal output/Subtitle/Angle
③ Elapsed time
■ Video CD main screen example
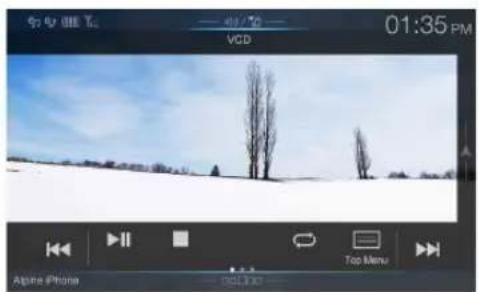
Function mode
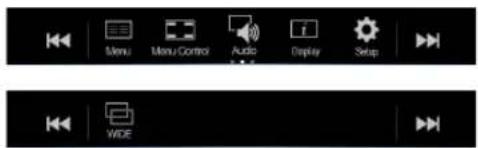
Info mode
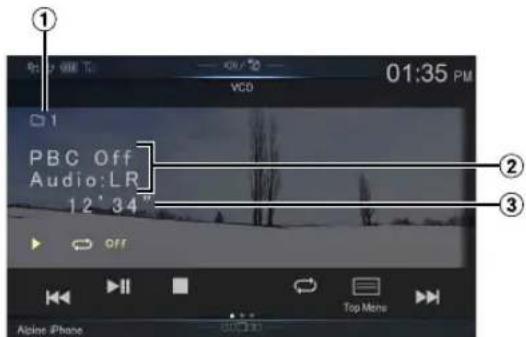
① Current track no.
② Playback control (PBC)/Current audio status
③ Elapsed time
Disc types that can be used for each heading are represented by the following marks.

DVD Commercial Video discs (used for the distribution of movies, etc.) or a DVD-R/DVD-RW, DVD+R/DVD+RW recorded in a video mode can be used.

Video-CD discs can be used.
The DVD operation screen display
Touch the screen while the DVD playback screen is displayed. To display the operation screen, touch [Control].
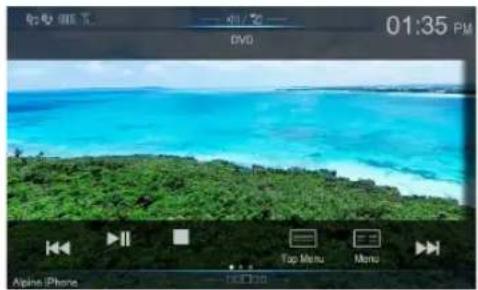
- The operation screen changes to the visual screen in the DVD mode for 5 seconds after an operation has been performed.
- If you try to activate the DVD while driving, the display will show the warning-Picture off for your safety.
- Some operations cannot be carried out depending on the disc or playback screen.
Playing a Disc DVD-V V CD
WARNING
It is dangerous for the driver to watch the DVD while driving the vehicle. The driver may be distracted from looking ahead and an accident could occur.
Install the unit correctly so that the driver cannot watch DVD unless the vehicle is stopped and the emergency brake is applied.
If the unit is not installed correctly, the driver will be able to watch DVDs while driving the vehicle and may be distracted and could cause an accident. The driver or other people could be severely injured.
CAUTION
- Not all functions will operate for every DVD. See the individual DVD's instructions for details on the features supported.
- Fingerprints on a disc may adversely affect playback. If a problem occurs, remove the disc and check for fingerprints on the playback side. Clean the disc if necessary.
- If you switch the power or Ignition key OFF or change sources during playback, playback will continue where you left off when you resume playback.
- If you try to perform an invalid operation (based on the type of disc being played), the following mark is displayed on the monitor screen:
- Play Position Memory Function Even if you turn power off or switch the Ignition key to OFF during playback or change the source, playback will continue from the point where playback stopped when the power is turned ON again.
1 Press the 🍷(AUDIO) button to select DVD (CD) mode. The display shows the DVD (CD) mode screen. When a disc is inserted into the disc slot of the DVD Player, with the label side facing up, the unit starts playback of the disc.
- The reverse side of a double-sided DVD will not be played automatically.
Remove the disc, turn it over, and reinsert it. - DO NOT insert discs containing maps for the navigation system. Doing so could result in damage.
- For your safety, video is not displayed and only audio can be heard while driving.
If a Menu Screen Appears
On DVD mode, menu screens may appear automatically. If this happens, perform the operation described below to start playback.
Direct Menu Operations DVD-V
1 Touch the screen while the DVD menu is being displayed.
Directly touch operation switches displayed on the screen to operate.
• To display the operation screen, touch [Control].
2 Touch the DVD menu directly.
- Some operations cannot be performed depending on the disc.
Menu Operations DVD-V V CD
1 Touch [☐] (Menu Control).
The menu operation mode will be displayed.
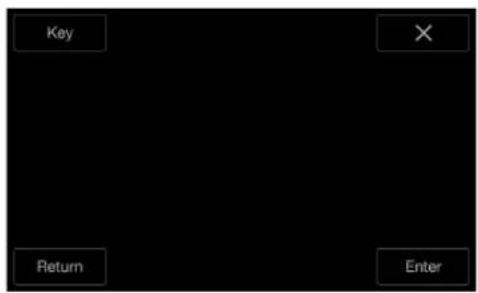
- You cannot operate them while driving.
2 Touch [Key].
The Key panel is displayed.
Touch [Return] to return to the previous display.
3 Select a desired menu item by touching [∨], [∧], [〈] or [〉].
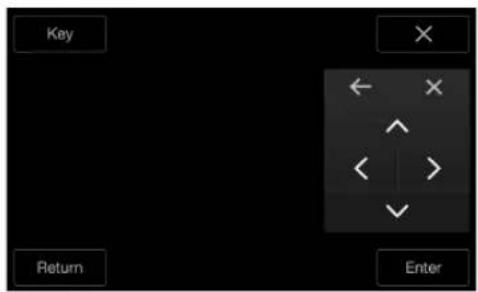
- Touch [←] or [→] to change the Key panel location from right to left or vice-versa.
- Touching [X] in the operation panel returns to the screen in step 1.
- Touching [Key] displays the numeric keypad input mode screen. For details of the numeric keypad input mode screen, see "Numeric Keypad Input Operations" (page 77).
4 Touch [Enter] to confirm the selected item.
Numeric Keypad Input Operations DVD-V
1 Touch [Key] again in the menu operation mode. The numeric keypad input mode screen appears.
2 Touch a desired number.
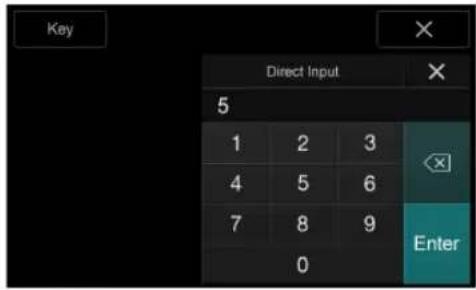
Touch [×] to delete an entered number.
To delete all the numbers you have entered, touch [×] for at least 2 seconds.
3 Touch [Enter] on the numeric keypad input mode screen to confirm your selection.
Touch [×] to hide the keypad display.
- You cannot operate them while driving.
Displaying the Top Menu Screen
DVD-V VCD
When a DVD contains two or more titles, the top menu screen appears.
Touch [≡] (Top Menu).
The top menu screen appears.
- To perform necessary operations, see "If a Menu Screen Appears" (page 77).
Displaying the Menu Screen DVD-V V CD
With a DVD having two or more menus, a menu screen will appear for the programs available, in addition to the main programs.
Touch [≡≡] (Menu).
The Root menu screen appears.
- To perform necessary operations, see "If a Menu Screen Appears" (page 77).
Playing Still Frames (Pausing) DVD-V V CD
1 During playback, touch [▶ II].
2 Touch [▶ III] to resume playback.
- No sound is played during the still frame mode.
- The image or sound may stop temporarily when playback starts from the pause mode. This is not a malfunction.
Stopping Playback DVD-V VCD
Touch [■] during playback.
"Indicator is displayed, and playback stops.
- Playback starts from the beginning when [▶ III] is touched while playback is stopped.
Fast-forwarding/Fast-reversing DVD-V V CD
1 During playback, touch and hold [|◀◀] (Fast-reverse) or touch and hold [▶▶] (Fast-forward).
When pressed for more than 1 second, the disc is forwarded/reversed at double speed.
When held for 5 more seconds, the disc is forwarded/reversed at 8 times the normal speed.
When held for 10 more seconds, the disc is forwarded/reversed at 32 times the normal speed.
2 Release [|◀◀] or [▶▶] to return to normal playback.
- No sound is played back during fast-forwarding/fast-reversing.
- On DVD mode, the menu screen may reappear during fast-forwarding/fast-reversing.
• This operation may not be possible on certain discs.
Finding the Beginnings of Chapters/Tracks/Files
DVD-V V CD
During playback, touch [◀◀] or [▶▶].
The chapter/track/file switches each time the button is touched, and playback of the selected chapter/track/file starts.
▶▶: Touch this to start playback from the beginning of the following chapter, track or file.
: Touch this to start playback from the beginning of the current chapter, track or file.
• Some DVDs do not have chapters.
Supplementary explanations
"Chapters" are divisions of movies or musical selections on DVDs. "Tracks" are divisions of movies or musical selections on Video CD.
Forward/Reverse frame-by-frame Playback
DVD-V V CD
1 In the pause mode, touch [◀◀] or [▶▶].
The picture advances by one frame each time the button is touched.
2 Touch [▶ II] to return to normal mode.
- No sound is output during forward frame-by-frame playback.
- You can only execute reverse frame-by frame playback when playing DVD-V.
Repeat Playback DVD-V V CD
Use this function to play the disc's titles, chapters or tracks, etc., repeatedly.
Touch [ ⟶ ] to repeatedly play back.
The repeat mode switches every time the button is touched.
DVD Video
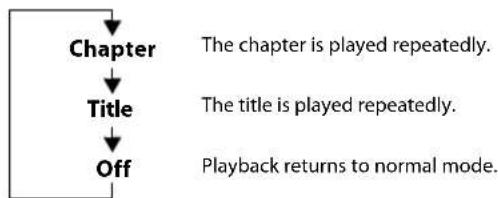
flowchart
graph TD
    A["Chapter"] --> B["Title"]
    B --> C["Off"]
    D["The chapter is played repeatedly."] --> E["The title is played repeatedly."]
    E --> F["Playback returns to normal mode."]
- The Repeat mode is always turned off when [ ⟶ ] is touched and held for at least 2 seconds.
- Only discs containing a Playlist can be displayed.
Video CD
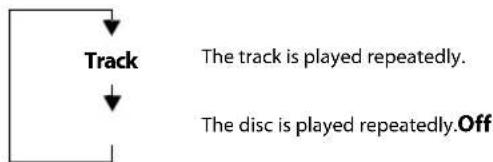
flowchart
graph TD
    A["Track"] --> B["The track is played repeatedly."]
    C["The disc is played repeatedly.Off"] --> D["End"]
- Display may vary depending on the connected devices.
- For some discs it is not possible to switch the repeat mode.
Searching by Title Number DVD-V
Use this function to easily find positions on the DVD using the DVD's titles. Perform operations while playback is stopped.
1 Touch [☐] (Menu Control).
The menu operation mode screen appears.
2 Touch [Key] again in the menu operation mode.
3 Enter a desired title by touching its number.
See page 77 for operation of the numeric keypad.
4 Touch [Enter].
Playback will start from the number selected.
5 Touch [×].
- This function cannot be used on discs on which no title numbers are recorded.
- Some disc may not accept any operation.
- You cannot operate them while driving.
Searching Directly by Chapter Number
DVD-V V CD
Use this function to easily move to the beginnings of the chapters on the disc. Perform operations during playback, during PRE-STOP or while playback is paused.
1 Touch [☐] (Menu Control).
The menu operation mode screen appears.
2 Touch [Key] again in the menu operation mode.
3 Touch and enter the chapter number you want to play.
See page 77 for operation of the numeric keypad.
4 Touch [Enter] to confirm your selection.
Playback will start from the selected chapter.
5 Touch [X].
- This function is not available for a disc on which chapters are not stored.
- You cannot operate them while driving.
Switching the Angle DVD-V
On DVDs in which scenes have been filmed from multiple angles, the angle can be switched during playback.
Touch [☐] (Angle).
The angle switches between the angles recorded on the disc every time the button is touched.
- Some time may be required for the angle to change.
- Depending on the disc, the angle may switch in one of two ways.
- Seamless: The angle switches smoothly.
- Non-seamless: When the angle is switched, a still picture is displayed first, after which the angle switches.
Switching the Audio Tracks DVD-V V CD
DVDs with multiple audio tracks or languages allow switching the sound during playback.
Touch [ ] (Audio).
The sound switches between the alternate audio tracks recorded on the disc every time the button is touched.
- The alternate track selected becomes the default setting every time the power is turned on or the disc is replaced. If the disc does not include that track, the disc's default language is selected instead.
- Not all discs will allow changing the alternate audio tracks during playback. In these cases, select audio tracks from the DVDs menu.
- There may be a delay before the selected alternate track begins to play.
Video CDs with multiplex audio
Touch [ ] (Audio).
The left and right channels will be output as shown below, each time the button is touched.
Audio: LL -Audio: RR Audio: LR Audio: LL
Switching the Subtitles (Subtitle Language)
DVD-V
With DVDs on which multiple subtitle languages are recorded, the subtitle language can be switched during playback; moreover, subtitles can be hidden.
Touch [ ] (Sub Title).
Touching this button repeatedly selects sequentially the subtitle languages recorded on the disc, and then turns the subtitles OFF.
- There may be a delay before the selected subtitle appears.
- Not all discs will allow changing the subtitles during playback. In these cases, select subtitles from the DVDs menu.
- The subtitle language selected becomes the default setting every time the power is turned on or the disc is replaced. If the disc does not include that language, the disc's default language is selected instead. However, the subtitle language may differ depending on the disc.
- For some discs, the subtitles will be displayed even when this is set to OFF. However, the subtitle language may differ depending on the disc.
Info Mode Function
You can display the DISC information.
1 During playback, touch [i] (Display). The playback status is displayed.
2 The playback status display closes when [i] (Display) is touched.
- For details on the display example, see Info mode in "DVD Video main screen example" (page 75) or "Video CD main screen example" (page 75).
Switching Display Modes
You can switch the Display Mode by touching [ ] (Display Mode). For details, see "Switching Display Modes (During Video File Play Back)" (page 59).
- You cannot operate them while driving.
HDMI Operation
WARNING
It is dangerous for the driver to watch the HDMI image while driving the vehicle. The driver may be distracted from looking ahead and an accident may occur.
Install the unit correctly so that the driver cannot watch the HDMI image unless the vehicle is stopped and the emergency brake is applied.
If the unit is not installed correctly, the driver will be able to watch the HDMI image while driving the vehicle and may be distracted causing an accident. The driver or other people may be severely injured.
iPhone, Smartphone, etc.
The output of your electronic device will be mirrored on this unit through the HDMI connector. Control from this unit is not possible.
• The electronic device must possess an HDMI output interface.
- Not all devices with an HDMI output interface can be recognised by this unit.
- Use only the Alpine Special HDMI connection cable.
1 Press the ♪ (AUDIO) button to select HDMI mode.
The display shows the HDMI mode screen.
- You can select and change the source in the Menu screen (page 22) or Favorite screen (page 25).
- For your safety, video is not displayed and only audio can be heard while driving.
2In HDMI player mode, the screen of the device displays the content of electronic equipment by mirror image.
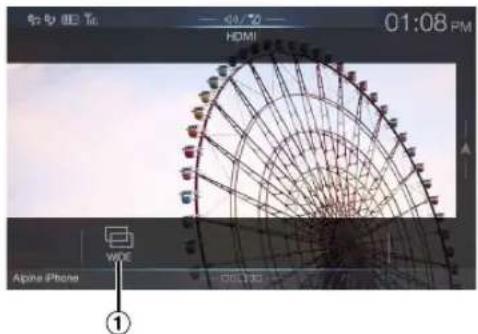
① You can select Display Mode.
For details, see "Switching Display Modes (During Video File Play Back)" (page 59).
- You cannot operate them while driving.
Switching the source when two HDMI devices are connected
You can switch the source only when you have connected the HDMI selector and "Setting the HDMI Selector On/Off" (page 50) is set to "On."
Screen example when the HDMI Setup is "HDMI 1"
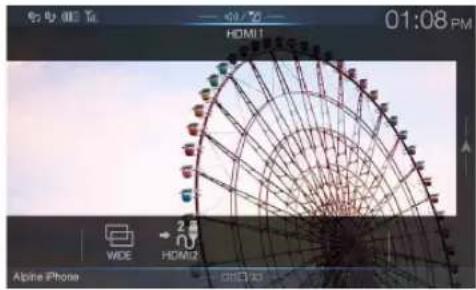
natural_image
Ferris wheel with visible sensor icons, displayed in an image editing interface (no readable text or symbols on the Ferris wheel itself)Touch [ - 25] (HDMI 2).
The HDMI source changes to HDMI 2, and the Function button changes to [-13] (H D M I 1). Each time you touch [+13] (HDMI 1)* or [-23] (HDMI 2), the HDMI source changes.
* When HDMI Setup is "DVD," the Function button is changed to [→] (DVD).
Bluetooth Operation
Setup Before Using
About Bluetooth
Bluetooth is a wireless technology allowing communication between a mobile device or personal computer over short distances. This enables a hands-free call or data transmission between Bluetooth compatible devices. Bluetooth transmission is available in the unlicensed 2.4 GHz spectrum if the distance between devices is within 10 meters. For details, refer to the Bluetooth website (http://www.bluetooth.com/).
- Depending on the Bluetooth version, a Bluetooth compatible device may not be able to communicate with this unit.
- Proper function of this unit with all Bluetooth compatible devices is not guaranteed. For handling of the Bluetooth compatible device, consult your Alpine dealer or Alpine website.
- Depending on the surroundings, Bluetooth wireless connection may be unstable.
- When you place a call, or perform setup operations, be sure to stop your car in a safe place.
- Depending on the connected Bluetooth compatible device(s), the function may differ. Also refer to the Owner's Manual of the connected device(s).
About the Hands-free Phone
Hands-free calls are possible when using a HFP (Hands-Free Profile) compatible mobile phone with this unit.
- Avoid performing a hands-free call in heavy traffic or on narrow or winding streets.
- Close the windows while calling to reduce background noise.
- If both calling parties are using hands-free devices, or the call is made in a noisy location, difficulty hearing the other person's voice is normal.
- Depending on telephone line conditions or certain mobile devices used, voices may sound unnatural.
- When using a microphone, speak as directly as you can into the microphone to obtain the best sound quality.
- Certain mobile phone features are dependent on the capabilities and settings of your service provider's network. Additionally, certain features may not be activated by your service provider, and/or the provider's network settings may limit the feature's functionality. Always contact your service provider about feature availability and functionality.
All features, functionality, and other product specifications, as well as the information contained in the Owner's Manual are based upon the latest available information and are believed to be accurate at the time of printing.
Alpine reserves the right to change or modify any information or specifications without notice or obligation. - Notice that when you connect an iPhone 5 or later/Android smartphone which installed Android Auto App, the operation screen may differ from this section.
Before Using Bluetooth
Before using the hands-free phone/audio function, the following settings need to be made.
1 Set "Bluetooth" to "On" (). √
2Register a Bluetooth device in this unit (page 31).
• See "Bluetooth Setup" (page 31).
- You can search for this unit using a Bluetooth compatible device, and then connect that Bluetooth compatible device to this unit. The device name of this unit is "X209D", "X208U" or "INE-W977HD" and the initial number of the passcode is "0000." Also refer to the Owner's Manual of the connected device(s).
Hands-free Phone Control
Touch [Phone] in the Menu screen to display the Phone menu screen (page 81).
![Radio FM 1 87.7 MHz USB Audio 6 wangho... HDMI 1/HDMI 2 Bluetooth Pandora Search Phone Camera Exit Acc Off Setup [Phone] button](/content/2026/05/950811/images/d91603ea471035a6a4b39fb46975bbb05cb8aeb564789b3e4d63a104d25a3a01.jpg)
■ Phone menu screen example
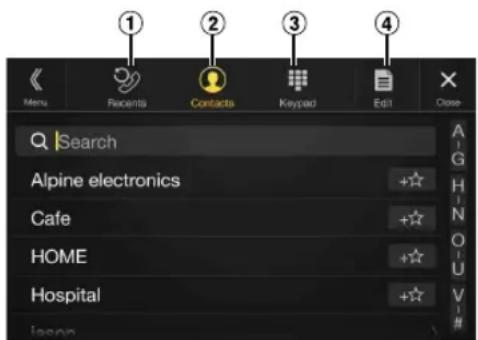
① Recent Events list*
You can display up to 60 items, such as phone numbers of the most recent incoming calls, missed calls and outgoing calls, and contact names that are registered in the Phone Book. When 60 items exist in the list, the oldest item is deleted when a further item is to be added.
② Contacts list*
You can make a phone call from the Phone Book, or edit the Phone book.
③ Keypad screen
Use to type a phone number.
④ Edit* Use to edit the Contacts list.
* When you connect two Hands-Free Phones, the information of the Bluetooth device set to Primary is displayed.
Answering a Call
Incoming calls are announced by the received call ring tone and a displayed message (PHONE No., etc.).
1 An incoming call triggers the ringtone and an incoming call display.
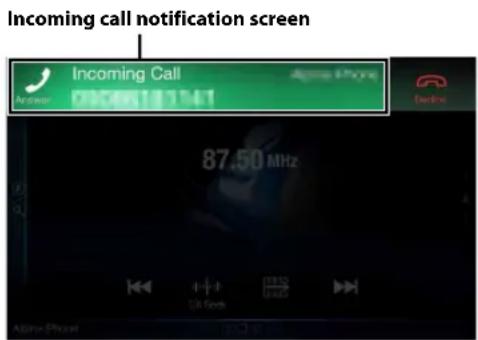
2 Touch incoming call notification screen. The call starts.
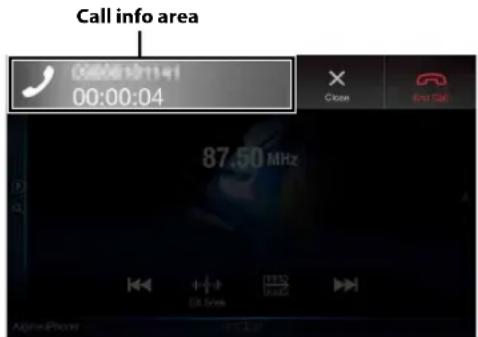
- During a call, the audio for the current mode on the unit is muted. After calling, playback will resume.
- When the caller's number is transmitted to the system, if the caller's name is stored in the phone book, the name is displayed. If the name is not stored, the number is displayed.
- Touch [icon] (Decline) to reject an incoming call.
- By touching the call info area during phone call, you can change to the Phone Operation screen and adjust the speech volume, etc. For details, see “Operations During a Conversation” (page 85).
- Touch [×] during a conversation to hide the call info area. To display it again, Touch or swipe downward on [ ] on the upper part of the screen.
- During an incoming call or a conversation on the Primary (Secondary) Hands-Free Phone, if there is an incoming call on the Secondary (Primary) Hands-Free Phone, you cannot answer the call on the Secondary (Primary) Hands-Free Phone without first ending the call on the Primary (Secondary) Hands-Free Phone.
Hanging up the Telephone
1 Touch [ ] (End Call). The call finishes.
Call Waiting Function
If a call comes in from another phone during a call, a notice is displayed on the screen. This function can only be used if the connected mobile phone has a call waiting function service included.
Second incoming call during a conversation in the call info area
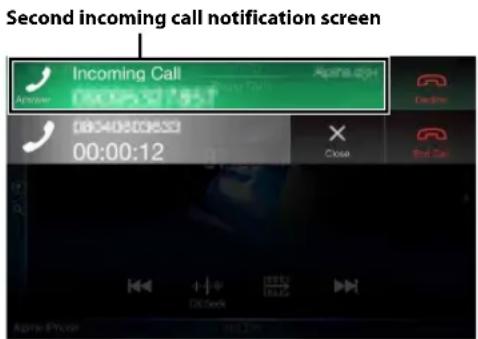
By touching the second incoming call notification screen, you can put the current call on hold and answer the second call.
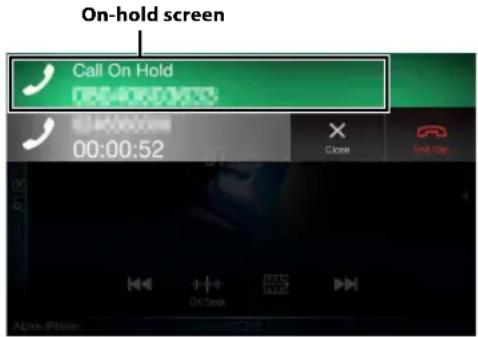
• To switch a party, touch the on-hold screen.
• T o f i n i s h a c a l l , t o u c h [ ] ( E
Second incoming call during a conversation in the Phone Operation screen
- The display or operation may differ depending on the connected mobile phone or the caller's mobile phone.
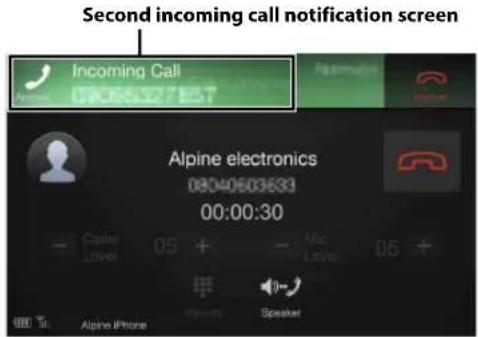
By touching the second incoming call notification screen, you can put the current call on hold and answer the second call.
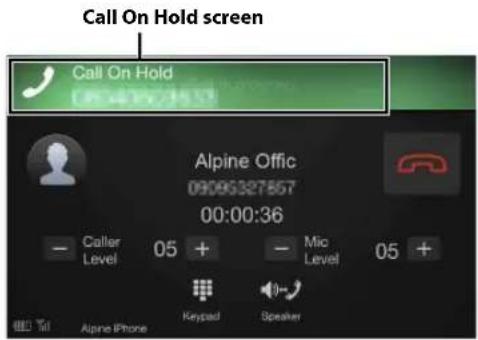
- To switch a party, touch the on-hold screen. - To finish a call, touch [] - This unit supports only the Call Waiting function of a mobile phone. The second call function and three-way calling function of a mobile phone cannot be operated from this unit. Also the screen display may malfunction.
Calling
Calling by Favorite Function
You can make a phone call using the Short Cut function of numbers that have been registered in Favorite. For details, see "Favorite Function" (page 25).
1 Press the ★ (Favorite) button.
The Favorite screen is displayed.
Favorite screen
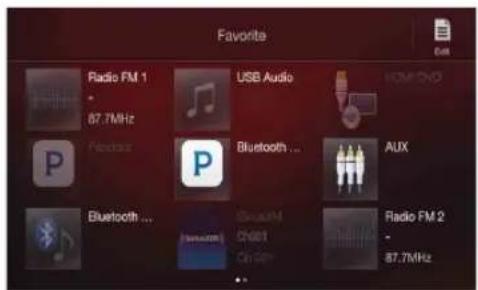
2 Touch the Short Cut icon.
A contact's name, phone number, and a confirmation message of the phone number are displayed.
3 Touch [Call].
The phone call is started.
Making a phone call using the Phone Menu
Making a phone call from the Recent Events list
1 Touch [?] (Recents) to change to the Recent Events list screen.
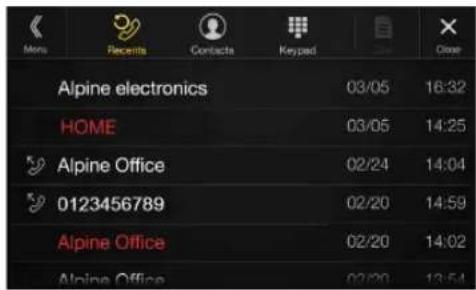
Dialed history:
Names or Numbers/Date
Received history:
Names or Numbers/Date
Missed Incoming history:
Names or Numbers/Date
2 Touch the name of the contact you want to call.
The Detail info screen is displayed.
E n d C a l l )
3 Touch [ ] .
The phone call is started.
Calling from the Contacts list (Phone Book)
1 Touch [icon] (Contacts) to change to the Contacts list screen.
2 Touch the name of the contact you want to call.
The Phone Operation screen is displayed.
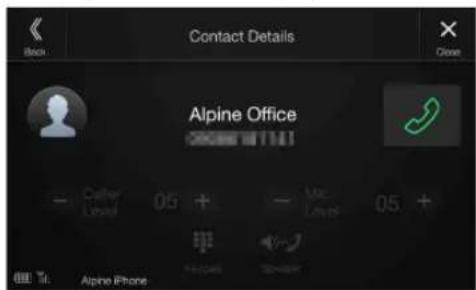
3 Touch [ ] .
The phone call is started.
Entering a Phone Number to Make a Call
1 Touch [ ] (Keypad).
The number input screen (Keypad) appears.
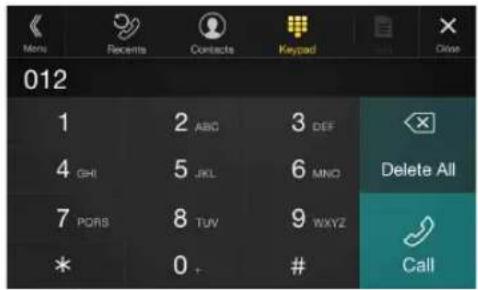
Touch[✗] to delete an entered number. Touch[Delete All] to delete all entered numbers.
2 Enter the phone number you wish to call.
• You can enter up to 31 digits.
A confirmation message of the phone number appears.
4 Touch [Call].
The phone call is started.
Using Voice Recognition function
You can use Siri function of your iPhone or make a telephone call by using voice operation of your smartphone.
- When using Apple CarPlay or Android Auto, the operation screen may differ from the screen design in the Owner's Manual.
Using Siri
You can use the Siri function of your iPhone. To use this function, set the Siri setting of your iPhone to ON.
- Connect your iPhone to the unit via Bluetooth, then set to "Hands-free" or "Both" (page 31).
• The available functions differ depending on the connected iPhone. - Siri and other streaming services are enabled by connecting to compatible smartphones that are able to receive data. Please ensure that cellular data and/or Wi-Fi is turned on in the smartphone to enjoy these features.
- Extensive use of Siri or other streaming services may increase your phone's data usage. Please check with your phone company to ensure you have an appropriate Data plan.
1 Press or VOICE button.
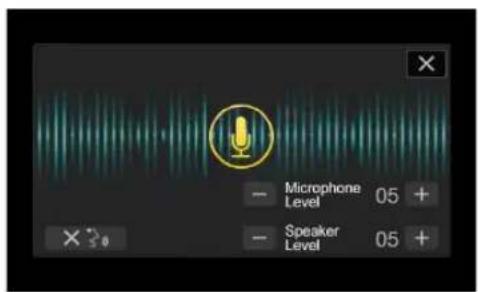
The Voice Control mode screen is displayed.
2 Speak into the microphone supplied with this unit.
- If no speech is detected, the unit may pause depending on version of the connected iPhone. In that case, touch the microphone icon [①] in the center of the Voice Control mode screen. You can continue to use the Voice Control mode.
3 To finish the Voice Control mode, touch [] or press or VOICE button.
- Depending on the iPhone, the Siri function may finish automatically.
Adjusting the volume
Adjust the speaker/microphone volumes in Voice Control mode. Perform the same procedure to adjust the speaker/microphone volumes of hands-free phone.
Touch [−] or [+].
Adjust the speaker and microphone volumes.
Stopping input to the microphone
If the surrounding sound (road noise, etc.) is loud, you may wish to cut input to the microphone for 3 seconds.
Touch [].× 30
Voice Dial Function
You can make a telephone call by using voice operation.
- Connect your smartphone to the unit via Bluetooth, then set to "Hands-free" or "Both" (page 31).
1 Press or VOICE button.
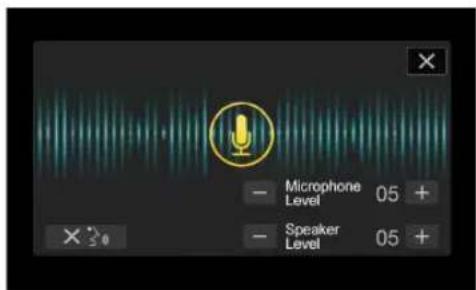
The Voice Dial mode screen is activated.
2 Say the telephone number\* or name\* you want to call, into the microphone.
* The number and name depend on the voice dial information stored in the smartphone.
3 To finish the Voice Dial mode, touch [] or press or VOICE button.
- You can perform this operation only when a voice dial compatible smartphone is connected.
- The Voice Dial function performance depends on the recognition range of the smartphone and mounting location of the microphone. Note when the microphone is mounted.
- Voice dial operation depends on the function being available on the smartphone. For details, refer to the owner's manual of the smartphone.
- Depending on the smartphone, the Voice Dial operation may finish automatically.
Adjusting the volume
Adjust the speaker/microphone volume in Voice Dial mode. Perform the same procedure to adjust the speaker/microphone volume of hands-free phone.
Touch [−] or [+].
Adjust the speaker and microphone volumes.
Stopping input to the microphone
If the surrounding sound (road noise, etc.) is loud, you may wish to cut input to the microphone for 3 seconds.
Touch [] X 3
Operations During a Conversation
Phone Operation screen
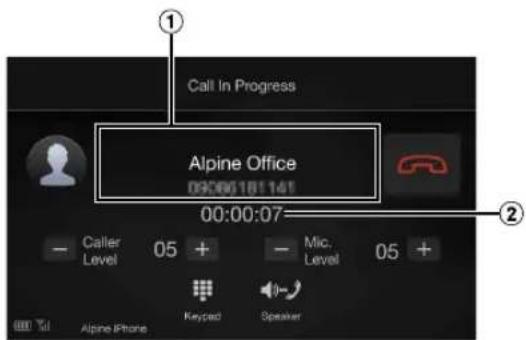
① Name and phone number
- If registered with a Group, the Group Name is also displayed. Although, depending on the connected mobile phone, it may not be displayed.
② Conversation time
Adjusting the Speech Volume
You can adjust Caller Level and Mic. Level (Microphone Level) during a phone call.
Touch [−] or [+].
You can adjust the volume in 11 levels.
Changing the Voice Output
The voice output for calls is switchable between car speakers and the mobile phone speaker.
Touch [◀-] (Speaker).
- Depending on the mobile phone, this operation may not be possible.
DTMF (Touch-Tone) Function
Transmits a DTMF (Touch-Tone) during a call.
1 Touch [■] (Keypad).
The number input screen (Keypad) appears.
2Input number.
- You can transmit a Touch-Tone signal during a call.
Phone Book Function
Phone Book screen example
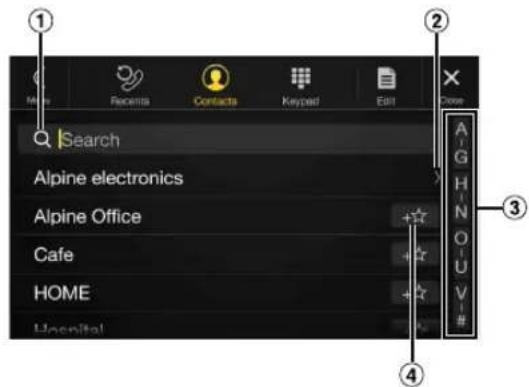
① Use to search by directly inputting a name or phone number with the Keypad.
For details, see "How to Input Characters and Numbers (Keypad)" (page 24).
② Displayed when multiple phone numbers are registered.
Touch[ ] to display the registered phone number list.
③ Use to narrow down your search for names, etc.
For details, see "Alphabet Search Function" (page 62).
④ Touch[ +★] to register as Favorite.
Synchronizing the Phone Book
You can synchronize the system's phone book with the mobile phone's phone book.
1 Touch [ ] (Edit).
2 Touch [Download].
3 Touch [Sync].
Synchronization of the phone books starts.
- You can store up to 1,000 registered name in the phone book.
- You can store up to 5 phone numbers by one person's name.
Adding the Phone Book
1 Touch [ ] (Edit).
2 Touch [Download].
3 Touch [Add].
Stays on standby for connection of the mobile phone.
- Touch [Cancel] to cancel the standby mode.
4The mobile phone accesses this unit and then transfers the phone book from the mobile phone to this unit.
- Mobile phone connection is canceled while the phone book is being transferred.
Deleting the Phone Book Entries
Deleting One Entry from the Phone Book
1 Touch [Edit].
2 Touch the checkbox [☐] of the contact name (or phone number) you want to delete. A tick (appears in the checkbox.
- You can choose up to 10 names and numbers at a time.
3 Touch [ ] (Delete).
The confirmation screen is displayed. If multiple phone numbers are registered, they are all deleted.
4 Touch [OK].
The selected number is deleted.
Deleting All Entries from the Phone Book
1 Touch [ ] (Edit).
2 Touch [图标] (Delete All). The confirmation screen is displayed.
3 Touch [OK]. All entries of the phone book are deleted.
Searching in the Phone Book
You can make a call using the phone book search function.
1 Touch [Q] (Search).
The Input User Name screen (Keypad) is displayed.
2 Input the string of letters of the name that you want to search, then touch [OK].
A list of names beginning with the string of letters you entered is displayed.
3 Touch the name you want to call.
The Phone Operation screen is displayed.
4 Touch [ √ ].
The phone call is started.
- For details of how to input characters using the keypad, see "How to Input Characters and Numbers (Keypad)" (page 24).
- If there are fewer than five registered items in the phone book, you cannot use the phone book search function.
Bluetooth Audio
If a Bluetooth compatible mobile phone, portable player, etc. is connected by wireless, you can play back a song (operation is controllable from the unit).
- Operation may vary, depending on the Bluetooth compatible device. - Before using Bluetooth Audio, turn Apple CarPlay to Off. (page 46)
Bluetooth Audio main screen example
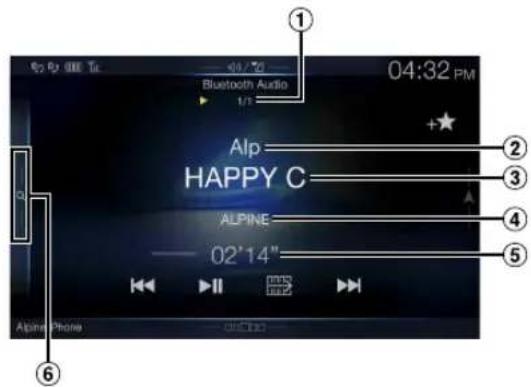
Function mode

① Current track no./Total song no.
② Artist title
③ Song title
④ Album title
⑤ Elapsed time
⑥ Touch or swipe to the right to use the Quick Search mode and Full Search mode.
■ Quick Search mode screen example
Swipe vertically in the list to change pages.
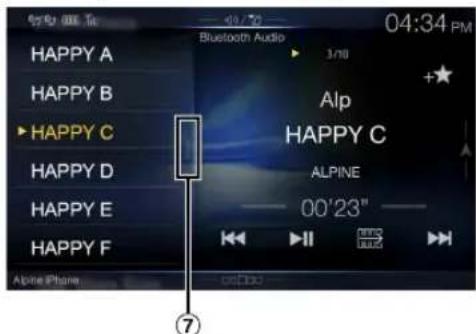
⑦ Full Search button
Swipe to the right when using Full Search mode.
- The displayed onscreen buttons may differ depending on the AVRCP version.
- Song title/Artist title/Album title/Elapsed time do not display for AVRCP Ver. 1.0.
- To play back audio, a mobile phone or a portable player conforming to A2DP (Advanced Audio Distribution Profile) or AVRCP (Audio/Video Remote Control Profile) is required. Not all functions work with all devices.
- During a call, sound on the Bluetooth audio source is paused.
Compatible AVRCP versions: 1.0, 1.3, 1.4, 1.5
• Available functions may differ depending on the AVRCP version.
Playback
1 Press the ♪ (AUDIO) button to select Bluetooth Audio mode.
The display shows the Bluetooth Audio mode screen.
- You can also select and change the source in the Menu screen (page 22) or the Favorite screen (page 25).
2 Touch [|◀◀] or [▶▶] to select the desired track (file).
Returning to the beginning of the current file:
Touch[◀] .
Fast backward the current file:
Touch and hold [◀◀]
Advance to the beginning of the next file:
Touch[▶▶]
Fast forward the current file:
Touch and hold [▶▶]
• The , functions provide the same functions above.
3To pause playback, touch []. ▶ II
Repeat Play
Available for AVRCP Ver. 1.3, 1.4 and 1.5 only.
1 Touch [↩].
The Repeat mode select pop up screen is displayed.
• [ ↻ displays the currently selected mode.
2Select your desired Repeat mode.
The selected Repeat mode changes the button.
All Track ALL: Once all of the songs have finished playing, play back is repeated, starting with the first song.
Group GRP: Only files in a group are repeatedly played back.
Single Track 📋: Only the track currently playing is repeatedly played back.
Off : Repeat mode Off.
• Operations may differ depending on the connected Bluetooth compatible device.
Random Play
Available for AVRCP Ver. 1.3, 1.4 and 1.5 only.
1 Touch [×].
The Random Play mode select pop up screen is displayed.
• T h ✗ [ ] button displays the currently selected mode.
2Select your desired Random Play mode.
The selected Random Play mode changes the button.
All Track ALL: All songs in the Bluetooth compatible devices are played back in random sequence. Any one song does not play back again until all songs have been played back.
Group GRP: A Group is selected randomly and songs in the Group are played back in order. After all songs are played in the Group, the next Group is selected randomly.
Off ✗: Random mode Off.
• Operations may differ depending on the connected Bluetooth compatible device.
Search Function
Available for AVRCP Ver. 1.4 and 1.5 only.
The displayed list differs with the connected Bluetooth device.
You can search for your desired song by using one of two modes; the Quick Search mode and the Full Search mode.
Quick Search mode
Touch your desired Group name or File name.
The selected Group ^*1 or file is played back.
*1 The first file in the selected Group is played back.
- To switch into Quick Search mode, see ⑥in "Bluetooth Audio main screen example" (page 86).
Full Search mode
Touch your desired Group name\*2 or File name.
When you select a File name, the selected song is played.
When you select a Group name, repeat the same procedure to select another Group name or File name.
*2 When you touch the [▶] by a Group name, the unit plays from the first song in the Group.
- To switch into Full Search mode, see ⑦in "Quick Search mode screen example" (page 86).
- To switch the displayed list or return to the previous page in the List screen, see "About Basic Operation for List Screen" (page 19).
Connecting a Bluetooth Device
Registering a Bluetooth device in the unit enables automatic connection. If it does not connect automatically, run through the connection procedure again.
1 Touch [icon] (Settings).
The Device Setting select pop up screen is displayed.
2 Touch [Reconnect].
Bluetooth connection will start.
Disconnecting the Bluetooth Connection
1 Touch [icon] (Settings).
The Device Setting select pop up screen is displayed.
2 Touch [Disconnect].
The Bluetooth connection is disconnected.
Changing the connecting Bluetooth Device
If multiple Bluetooth devices are registered in this device, you can change the connection among the registered devices.
1 Touch [icon] (Settings).
2 Touch [Change].
3 Touch [♪] (Audio) or [♪] (Hands-free) of the selected device.
The connection will transfer to the selected device.
Auxiliary Device (Optional)
Operating Auxiliary Devices (Optional)
To operate devices connected to the AUX terminals of the unit, follow the procedure described below.
- Set AUX to "On." See "AUX Setup" (page 45).
- Depending on the connected unit, the onscreen buttons may not work, or their operation may differ.
- When the iDataLink module (sold separately) is connected, the Auxiliary (AUX) mode is not available.

WARNING
It is dangerous (and illegal in many states) for the driver to watch TV/video while driving the vehicle. The driver may be distracted from looking ahead and an accident could occur.
Install the unit correctly so that the driver cannot watch TV/video unless the car is stopped and the parking brake is applied.
If the unit is not installed correctly, the driver will be able to watch TV/video while driving and may be distracted from looking ahead and cause an accident. The driver or other people could be severely injured.
Press the ♪ (AUDIO) button to select Auxiliary (AUX)\* mode.
The display shows the Auxiliary (AUX) mode screen.
* The name which is given as the mode name in "Setting the Auxiliary (AUX) Name" (page 45) is displayed.
- For your safety, video is not displayed and only audio can be heard while driving.
- You can select and change the source in the Menu screen (page 22) or Favorite screen (page 25).
- For details on the connected auxiliary device, refer to its owner's manual.
AUX Operation Screen Display During Video File Playback
Touch the screen.
The Auxiliary (AUX) operation screen is displayed.
- The operation screen changes to the visual screen in the Auxiliary (AUX) mode for 5 seconds after an operation has been performed. To hide the Auxiliary (AUX) operation screen, touch the video display area.
Operating an AUX, AUX DVD or GAME
Example for AUX, AUX DVD, GAME mode display
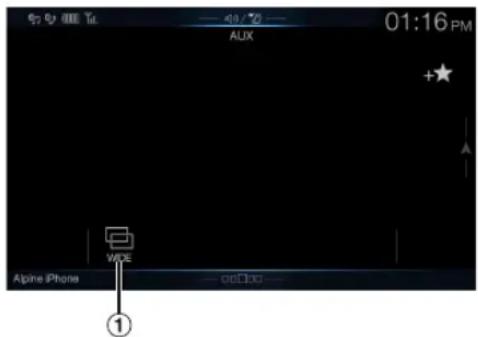
① [☐] ( D i s p l a y M o d e For details, see "Switching Display Modes (During Video File Play Back)" (page 59).
- You cannot operate them while driving.
Operating an External DVD Player
■ External DVD player display example
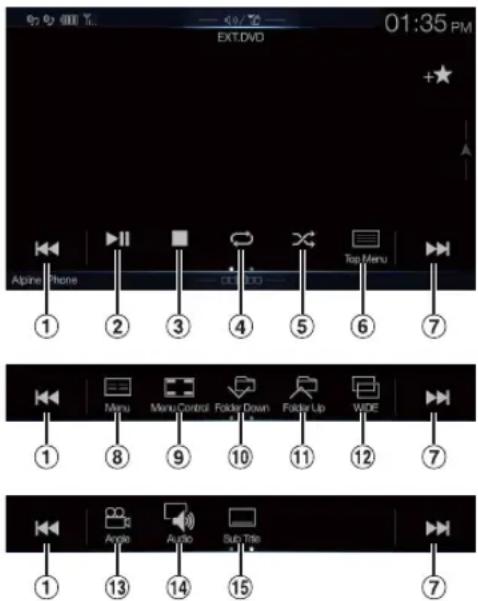
Touch the switch to go back to the beginning of the current chapter/track/file. Touch the switch once more to find the beginning of the previous chapter/track/file. Touch and hold to fast reverse.
Switches between play and pause.
Touching during play initiates a pre stop. Touching again stops play.
Starts/Stop repeat play.
Starts/Stop M.I.X. play.
Calls up the Top Menu screen.
① [◀◀]
② [▶ II]
③ [■]
④ [∅]
⑤ [×]
⑥ [≡] ( T o p M e n u )
⑦

Touch the switch to advance to the beginning of the next chapter/track/file. Touch and hold to fast forward.
⑧

(
M
•
i
)
[Non-Text]
[Non-Text]
[Non-Text]
[Non-Text]
[Non-Text]
[Non-Text]
[Non-Text]
Calls up the Menu screen.
⑨

(
M
e n
u
C
)
t
r
)
)
*
Calls up the menu operation mode.
10

F
。
I c
e
。
。
N
)
[Non-Text]
[Non-Text]
[Non-Text]
[Non-Text]
[Non-Text]
[Non-Text]
[Non-Text]
[Non-Text]
[Non-Text]
Switches the program/playlist/folder down.
⑪

F
。
1
e
(二)
p
)
Switches the program/playlist/folder up.
⑫

Moc
e)*
[Non-Text]
(No text)
[Non-Text]
[Non-Text]
[Non-Text]
[Non-Text]
[Non-Text]
[Non-Text]
[Non-Text]
[Non-Text]
[Non-Text]
[Non-Text]
[Non-Text]
[Non-Text]


A
n
g
e
(二)交易对方
[Non-Text]
[Non-Text]
[Non-Text]
[Non-Text]
[Non-Text]
[Non-Text]
[Non-Text]
[Non-Text]
[Non-Text]
[Non-Text]
[Non-Text]


A
u
i
)
[Non-Text]
[Non-Text]
[Non-Text]
[Non-Text]
[Non-Text]
[Non-Text]
[Non-Text]
[Non-Text]
[Non-Text]
[Non-Text]
[Non-Text]
[Non-Text]


(
S
b
T
i
1
e
广力云
[Non-Text]
[Non-Text]
[Non-Text]
[Non-Text]
[Non-Text]
[Non-Text]
[Non-Text]
[Non-Text]
a cannot operate them while driving.
-
Menu operation mode screen example
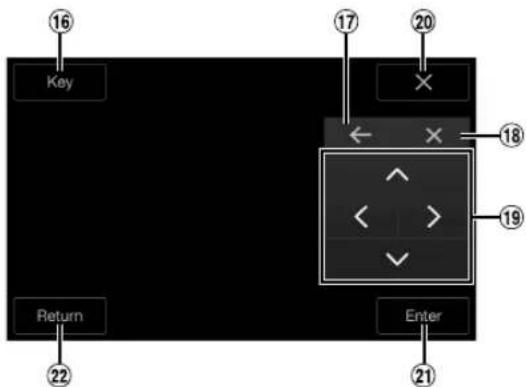
16
[Key]
lays t
e Key
oane
⑦. ⑱
广力云智慧零售收银系统
[Non-Text]
[Non-Text]
[Non-Text]
[Non-Text]
[Non-Text]
[Non-Text]
[Non-Text]
[Non-Text]
[Non-Text]
[Non-Text]
[Non-Text]
[Non-Text]
[Non-Text]
⑰


[ ]
[Non-Text]
(四)
广力云
[Non-Text]
[Non-Text]
[Non-Text]
[Non-Text]
[Non-Text]
[Non-Text]
[Non-Text]
[Non-Text]
[Non-Text]
[Non-Text]
[Non-Text]
[Non-Text]
[Non-Text]
[Non-Text]
[Non-Text]
Mov
s ke
pane
locat
1.
[Non-Text]
[Non-Text]
[Non-Text]
[Non-Text]
[Non-Text]
[Non-Text]
[Non-Text]
[Non-Text]
[Non-Text]
[Non-Text]
[Non-Text]
[Non-Text]
[Non-Text]
[Non-Text]
[Non-Text]
18
[×]
The Ground Truth image displays a single, solid horizontal line. According to Rule 2 (UNDERSCORE & LINE RULES), this is a stylistic or background line, not a placeholder underscore. Therefore, the OCR result must ignore it and output nothing or only meaningful text. The provided OCR content is "____", which consists of four underscores. This is an incorrect interpretation of the line as a placeholder, violating the rule that stylistic lines must be ignored. The OCR has hallucinated underscores where none should exist based on the GT's visual context. Hence, the OCR result is inconsistent with the Ground Truth.
(二)
[Non-Text]
[Non-Text]
[Non-Text]
[Non-Text]
[Non-Text]
[Non-Text]
[Non-Text]
[Non-Text]
[Non-Text]
[Non-Text]
[Non-Text]
[Non-Text]
[Non-Text]
[Non-Text]
[Non-Text]
[Non-Text]
[Non-Text]
[Non-Text]
Clos
s me
u op
ratio
ode
[Non-Text]
[Non-Text]
[Non-Text]
[Non-Text]
[Non-Text]
[Non-Text]
[Non-Text]
[Non-Text]
[Non-Text]
[Non-Text]
[Non-Text]
[Non-Text]
[Non-Text]
[Non-Text]
[Non-Text]
19
[×]
[Non-Text]
[Non-Text]
[Non-Text]
[Non-Text]
[Non-Text]
[Non-Text]
[Non-Text]
[Non-Text]
[Non-Text]
[Non-Text]
[Non-Text]
[Non-Text]
[Non-Text]
[Non-Text]
[Non-Text]
[Non-Text]
[Non-Text]
[Non-Text]
[Non-Text]
(No text)
Clos
s ke
oane
[Non-Text]
[Non-Text]
[Non-Text]
[Non-Text]
[Non-Text]
[Non-Text]
[Non-Text]
[Non-Text]
[Non-Text]
[Non-Text]
[Non-Text]
[Non-Text]
[Non-Text]
[Non-Text]
[Non-Text]
[Non-Text]
[Non-Text]
20
[小]
[ ]
1
[Non-Text]
[Non-Text]
[Non-Text]
[Non-Text]
[Non-Text]
[Non-Text]
[Non-Text]
[Non-Text]
[Non-Text]
[Non-Text]
[Non-Text]
[Non-Text]
[Non-Text]
[Non-Text]
[Non-Text]
[Non-Text]
[Non-Text]
[Non-Text]
Mov
s m
hu cu
Camera Operation (Optional)
When an optional camera is connected, the video of the camera's view can be output to the monitor.
Front camera, Rear camera or Side camera can be connected to this unit. Make the Camera Select setting (Front, Rear, Side or Other) according to your connected camera. For details, see “Setting the Camera Input” (page 47).
When using the optional Multi Camera Interface module, you can connect up to 3 cameras: Front Camera, Rear Camera, and Side Camera. When connecting the optional Multi Camera Interface module, you need to set each camera to On/Off in "Setting Multi Camera to On/Off" (page 49).
When displaying the camera view while connected to the optional Multi Camera Interface module, you can switch the camera view using the switch button at the top of the screen.
Front camera:
When the HCE-C257FD is connected, conditions in front of the vehicle, such as objects, people and other hazards, can be seen.
Rear camera:
If an HCE-C127D/HCE-C157D/HCE-C252RD camera is connected, when the vehicle is reversed, the rear camera view (guide marks for vehicle width and available distance) is displayed automatically on the screen of this unit.
Other camera:
Set when connecting to a camera other than the Front camera or Rear camera, such as a room camera and side camera.
You can adjust the quality of the camera image.
Setting items: Brightness / Color / Contrast
See "Picture Quality Setup" (page 40).
Rear Camera Operation
Displaying the Rear Camera Image from the Menu screen
1 Press the MENU button.
The menu screen is displayed.
![Radio FM 1 87.7 MHz USB Audio 6 wangho... HDMI 1/HDMI 2 Bluetooth Pandora Search [Camera] button](/content/2026/05/950811/images/5d0df1a675f53a8d6ed36802602bc08bc939fca57eca8b7c0590866b71a24639.jpg)
- You can also display the menu screen by touching the lower part of the Audio source screen or by swiping upward.
2 Touch [Camera].
The Rear Camera view is displayed.
- Touch the screen while the camera image is being displayed, and touch [×] or [«] to return to the main source screen or previous screen.
- You can perform a Guide Adjustment. For details, see "Adjusting the Rear/Front/Side Camera Guide" (page 47).
- If you connect a Front Camera and Side Camera using the optional Multi Camera Interface module, you can display the Rear camera image using the [Camera] button only when you set "Setting a Default Camera" (page 49) to "Rear". If you connect a Front Camera and Side Camera at the same time, touch [Front] or [Side] in the Rear Camera image to switch the Camera image.
Displaying the rear view video while the car is in reverse
1 Shift the gear lever to the reverse (R) position.
The rear view image is displayed while the car remains in reverse.
2If you shift the gear lever to a position other than reverse (R), the monitor returns to the previous screen.
- Never depend solely on the camera when backing up. Always turn and look and only use the camera for additional assistance.
- This function is effective when the reverse wire is properly connected.
- If you use the optional Multi Camera Interface module, be sure to set Rear Camera in "Setting Multi Camera to On/Off" (page 49) to "On" (If setting to "Off" (), you cannot display the Rear camera image.
- If you set to Front or Side in "Setting a Default Camera" (page 49), the Rear camera image is also displayed.
- You can perform a Guide Adjustment. For details, see "Adjusting the Rear/Front/Side Camera Guide" (page 47).
Switching the Image for the Rear Camera
If the camera has a view switch function, the Direct Change switch is displayed.
1 Touch the screen when the image from the rear camera is displayed.
The operation screen is displayed on the screen.
- After a 5-second time-out, the operation screen returns to the camera display screen.
2 Touch [Back], [Panorama], [Corner] or [Top].
The image pattern changes.
[Back]: Rear View
[Panorama]: Panorama View
[Corner]: Corner View
[Top]: Ground View
- For detailed information about image patterns, see the camera Owner's Manual.
- You can perform a Guide Adjustment. For details, see "Adjusting the Rear/Front/Side Camera Guide" (page 47).
Guide Display ON/OFF Setting
1 Touch the screen when the image from the camera is displayed.
The operation screen is displayed on the screen.
- After a 5-second time-out, the operation screen returns to the camera display screen.
2 Touch [Guide Off] or [Hitch Guide Off] on the Rear camera display screen. The guide disappears, and then the [Guide Off] or [Hitch Guide Off] switch changes to [Guide On] or [Hitch Guide On].
3 Touch [Guide On] or [Hitch Guide On] to turn on the guide.
Adjusting the Caution Display Location
1 Touch the screen when the image from the camera is displayed.
The operation screen is displayed on the screen.
• After a 5-second time-out, the operation screen returns to the camera display screen.
2 Touch [♦ Caution].
- For each touch, the caution location moves to the top or bottom of the screen.
About the Rear Camera Guide
To display the guide, set "Guide Display ON/OFF Setting" (page 91) to On. Also, to adjust the guide, see "Adjusting the Rear/Front/Side Camera Guide" (page 47). You can also turn off the guide in the Rear camera display screen.
■ Indication mark meaning
When the car is put into reverse gear, the monitor switches to the rear view camera image. Guides appear to help visualize the car's width and distance from the rear bumper.
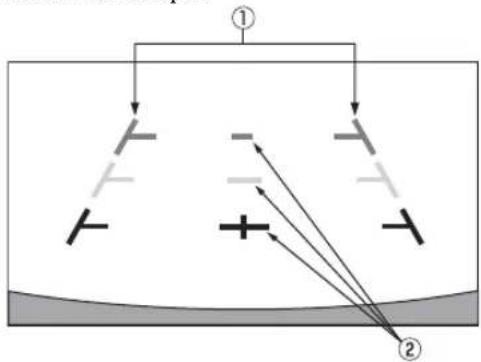
① Car width extension marks (red, yellow and green in order of distance)
If properly calibrated, the marks indicate the car's width. This helps guide the car's path when backing up in a straight line.
The marks represent the distance from the rear of the car (from the rear end of the bumper).
- The marks do not move in synchronization with the steering wheel.
- Set the marks to suit the car's width.
② Distance guidance marks
The marks represent the distance from the rear of the car (from the rear end of the bumper).
- The marks do not move in synchronization with the steering wheel.
• We recommend that you measure the actual distance to the marks when parked on a level surface.
- Depending on the condition of the car or road surface, the range of vision may vary.
- The camera has a limited range of vision. Objects at extreme angles to the camera (e.g. under the bumper or at opposite ends of the bumper) may not be in the its field-of-vision.
- The rear camera image may have a tint which is different from the actual surroundings.
- Depending on the car, the guidance may deviate to the right or left. This is not a malfunction.
Distance guidance mark
The distance guides represent the ground level distance from the rear bumper. It is difficult to accurately estimate the distance to objects above ground level.
In the following example, the distance to A is 0.5 m and the distance to B is 1 m.
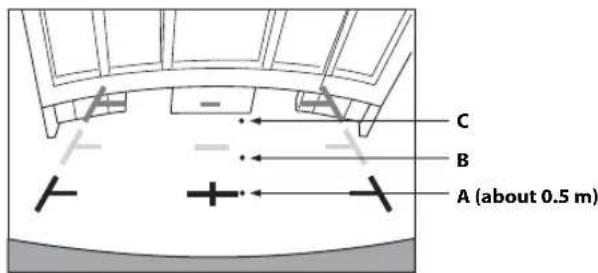
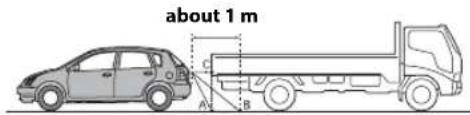
In the screen, according to the distance guidance marks, the truck seems to be parked about 1 m away (at the position B). In actual fact, however, if you reversed to position A, you would collide with the truck.
In the screen, positions A, B and C seem to be located in order of proximity. However, in actual fact, the position A and C are the same distance, and B is farther away than positions A and C.
- The car width extension mark represents the distance to the road surface. The distance to an object on the road is not accurately represented by the guides.
Error between the screen and the actual road surface
In the following conditions, errors are produced between the screen guidance and the actual road surface. (The illustrations represent a case when the camera is installed in the standard position.)
When there is a steep upward slope behind the car (example)
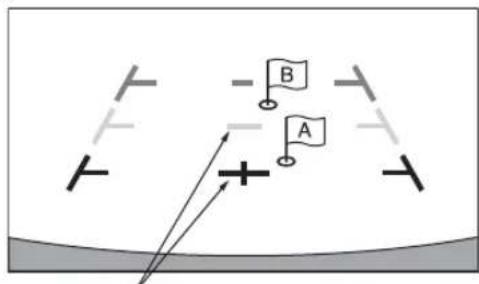
Distance guidance marks
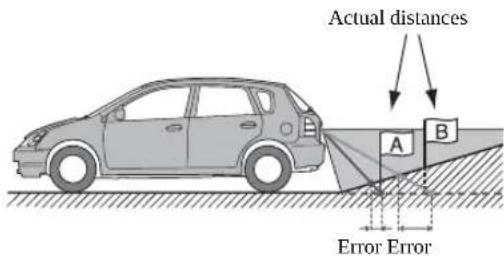
The distance guidance mark represents the distance to a flat road surface. Therefore in the case of an upward slope behind the car, the distance guides are displayed closer to the rear bumper than the actual distance. For example, if there is an obstacle on the upward slope, it may appear farther away than its actual position.
Also, an error may occur between the guidance and the actual path of the car on the road surface.
■ When there is a steep downward slope behind the car (example)
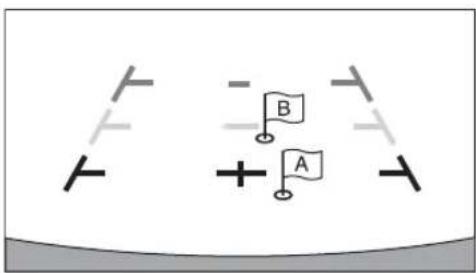
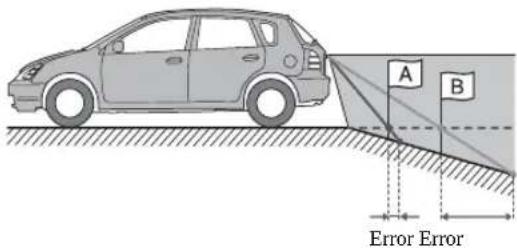
In the case of a downward slope behind the car, the distance guides are displayed farther from the rear bumper than the actual distance.
If there is an obstacle on the downward slope, it seems closer than its actual position.
Also, an error may occur between the guidance and the actual path of the car on the road surface.
Front Camera Operation
Displaying the Front Camera image from the Menu screen.
1 Press the MENU button.
The menu screen is displayed.
![Radio FM 1 87.7 MHz USB Audio 6 wingho... HDMI 1/HDMI 2 Bluetooth Pandors Search Phone Camera Break-Cl Stop [Camera] button](/content/2026/05/950811/images/3d44fb55af090d7e7447e3ce1b52cf8825da0257de291a963db8746127f8da4f.jpg)
- You can also display the menu screen by touching the lower part of the Audio source screen or by swiping upward.
2 Touch [Camera].
The Front Camera view is displayed.
- Touch the screen while the camera image is being displayed, and touch [×] or [«] to return to the main source screen or previous screen.
- You can perform a Guide Adjustment. For details, see "Adjusting the Rear/Front/Side Camera Guide" (page 47).
- If you connect a Front Camera using the optional Multi Camera Interface module, you can display the Front camera image using the [Camera] button only when you set "Setting a Default Camera" (page 49) to "Front". If you connect a Rear Camera and Side Camera at the same time, touch [Rear] or [Side] in the Rear Camera image to switch the Camera image.
Switching the Image Pattern for the Front Camera
If the camera has a view switch function, the Direct Change switch is displayed.
1 Touch the screen when the image from the front camera is displayed.
The operation screen is displayed on the screen.
• After a 5-second time-out, the operation screen returns to the camera display screen.
2 Touch [Panorama], [Corner] or [Top].
The image pattern changes.
[Panorama]: Panorama View
[Corner]: Corner View
[Top]: Ground View
- For detailed information about image patterns, see the camera Owner's Manual.
- You can perform a Guide Adjustment. For details, see "Adjusting the Rear/Front/Side Camera Guide" (page 47).
About the adjustment of guide display ON/OFF setting and adjustment of Caution display location
As with the rear camera, the front camera guide display ON/OFF setting and Caution display location can be adjusted. See "Guide Display ON/OFF Setting" (page 91) and "Adjusting the Caution Display Location" (page 92) for the operations.
Side Camera Operation
Displaying the Side Camera image from the Menu screen.
1 Press the MENU button.
The menu screen is displayed.
![Radio FM 1 87.7 MHz USB Audio 6 wangho... HDMI 1/HDMI 2 Bluetooth Pandora Search [Camera] button](/content/2026/05/950811/images/b436d15e974e63d8fb430e9bb7a6f967ce9f24745ca123ae35ec4a03a2314e03.jpg)
- You can also display the menu screen by touching the lower part of the Audio source screen or by swiping upward.
2 Touch [Camera].
The Side Camera view is displayed.
- Touch the screen while the camera image is being displayed, and touch [×] or [«] to return to the main source screen or previous screen.
- You can perform a Guide Adjustment. For details, see "Adjusting the Rear/Front/Side Camera Guide" (page 47).
- If you connect a Side Camera using the optional Multi Camera Interface module, you can display the Side camera image using the [Camera] button only when you set "Setting a Default Camera" (page 49) to "Side". If you connect a Rear Camera and Front Camera at the same time, touch [Rear] or [Front] in the Rear Camera image to switch the Camera image.
Switching the Image Pattern for the Side Camera
If the camera has a view switch function, the Direct Change switch is displayed.
1 Touch the screen when the image from the side camera is displayed.
The operation screen is displayed on the screen.
• After a 5-second time-out, the operation screen returns to the camera display screen.
2 Touch [Rear] or [Front].
The image pattern changes.
Rear: Vehicle Rear view
Front: Vehicle Front view
- For detailed information about image patterns, see the camera Owner's Manual.
- You can perform a Guide Adjustment. For details, see "Adjusting the Rear/Front/Side Camera Guide" (page 47).
iDataLink Operation
When the unit is connected to the car's iDataLink module, you can transfer and receive data between the car and the unit to check the car's status, or to make various operations from the unit.
When you use iDataLink mode, set each setting other than
"Aftermarket" in "Setting the Source Category" (page 49).
- An iDataLink module (sold separately) is required.
- Available functions differ depending on your vehicle. For details, refer to your vehicle's instruction manual.
About Audio Interrupt
Audio Interrupt is the function that outputs sound from the unit when Voice Information (audio reading from the phone book, etc.)* from the vehicle occurs.
- The Audio Interrupt function of the vehicle differs depending on the type and grade of the vehicle.
* For your safety, when interrupted with Voice Information, you cannot operate the buttons on the front panel or the touch buttons on the display, except for some operations.
- The operating restrictions may differ depending on which mode the unit is in during Voice Information.
- You can use the /+r+ (DOWN/UP) button to control the volume of Voice Information.
- Operation of the Remote Control unit (sold separately) is also restricted.
Access to iDataLink Mode
You can check the car's status, set the air conditioning, etc.
1 Press and hold the ★ (Favorite) button or touch [💡] (Vehicle Info.) in the Menu screen to activate iDataLink mode.
- The iDataLink mode screen selected in "Setting the Default Vehicle Screen" (page 49) is displayed.
2 Touch the desired tag on the top of the screen.
Select item:
Climate / Gauges / Park Sensor / Vehicle Info. / Car Setting
• The displayed tag options differ depending on the type of vehicle.
■ Climate screen example
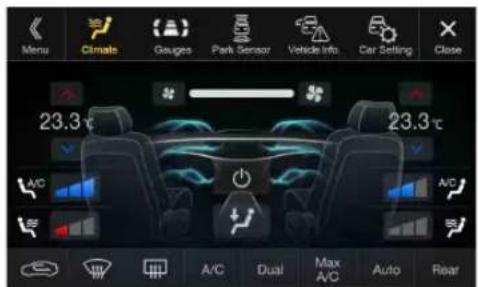
3 Adjust or confirm the item/information accordingly.
- Operable functions and displays may differ depending on the vehicle.
iDataLink Function Screen example
Climate screen example
You can control the temperature inside the vehicle, etc.
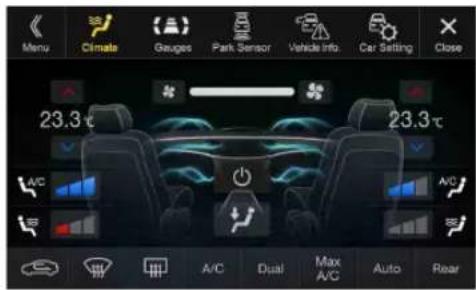
■ Gauges screen example
You can check the vehicle's speed, the engine's rotation speed, etc.
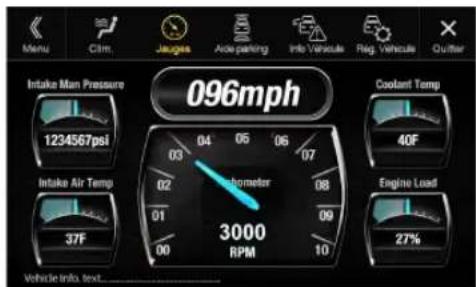
Parking sensor screen example
You can check the distance from the front and rear of the vehicle to an obstacle.
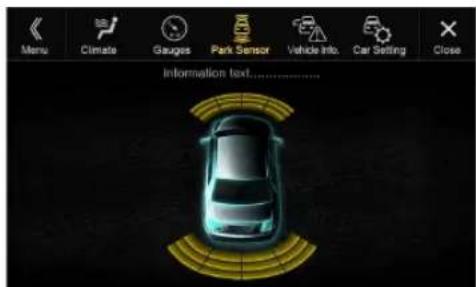
- If the car sensor detects an obstacle, the screen automatically changes to the Parking sensor screen. For details, see "About Parking Sensor screen" (page 96).
■ Vehicle Information screen example
You can check for open doors, check the tire pressure, the battery life, etc. for the vehicle.
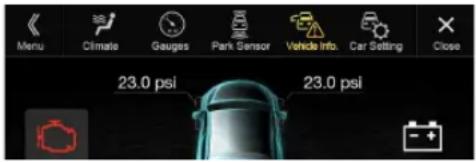
Car Setting screen example (Generic List screen)
The Generic List/Popup Window/Current source control screen is displayed.
About Parking Sensor screen
The Parking sensor screen turns on when the front or rear sensor on your vehicle detects an obstacle within a certain distance.
Parking Sensor Full screen example
When the front or rear sensor detects an obstacle within a certain distance, the Parking Sensor screen is displayed, and the indicator ( - ) that corresponds with that area lights up.
Parking Sensor Camera interlock screen example (Rear camera)
You can check for obstacles through an interlocked camera image by connecting a Front or Rear Camera.
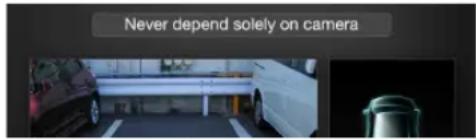
- Touch the Camera image area to switch to the Camera full screen. (While displaying the Camera full screen, touch the Camera screen, then touch [Sensor] to return to the Parking Sensor Camera interlock screen.)
- Touch the car icon to switch to the Parking sensor full screen. (Touch [ ] on the Parking Sensor full screen to return to the Parking Sensor Camera interlock display.)
- To use this function, set the Camera Select setting to "Front/Other" or "Rear." For details, see "Setting the Camera Input" (page 47).
- If you connect a Front Camera/Rear Camera/Side Camera using the optional Multi Camera Interface module, you can switch the Camera display. For details on the camera settings when connected to the Multi Camera Interface module, see "Setting Multi Camera to On/Off" (page 49). For details on how to switch the camera display, see "Camera Operation (Optional)" (page 91).
Indicator colors when an obstacle is detected.
Red: close distance
Orange: medium distance
Yellow: long distance
- Depending on the speed of the vehicle, when moving faster than a certain speed, the Parking Sensor screen may not be displayed.
- Vehicles that do not have the obstacle detection sensor cannot use this function.
* [ ] is displayed only when the Front camera or Rear camera is interlocked.
External Accessory Control Operation
You can set the headlights to ON/OFF or adjust the air suspension from this unit by connecting the optional External Accessory Control module.
- In order to keep external accessory control outputs on during the ignition cycle, please change "Accessory During Crank" to "On". Otherwise all switches will be turned off.
[Setup] +System] [Factory System Setup] [Maestro Module] → [Maestro Features] - [Maestro Module] [Accessory During Crank] → “On”
The following explains how to edit the control switches, because the functions that can be controlled differ depending on the type of vehicle.
You cannot edit the External Accessory screen while driving.
Your vehicle must be parked with the ignition key in the ACC or ON position. For details, see "To display the Setup Menu screen" in "Setup Operation" (page 30).
1 Touch [Ext Acc Ctrl] in the Menu screen to activate External Accessory screen.
The External Accessory screen is displayed.
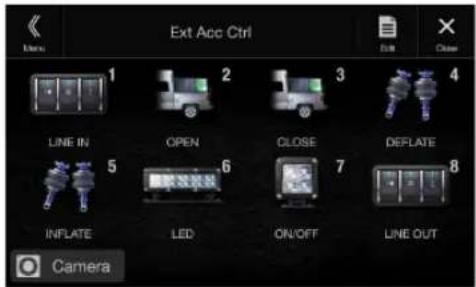
2 Touch [Edit].
The Edit Control Switches screen is displayed.
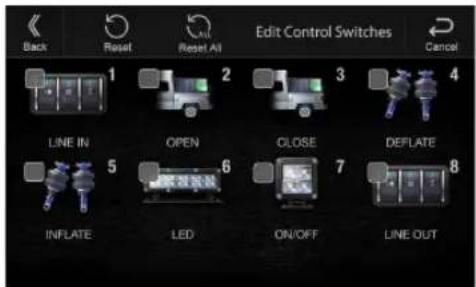
3 Edit each switch.
When changing an icon:
Touch the icon, and select your desired icon from the Icon Type list. After selecting the icon, set the Output Type (Timing) for each function.
* The Output Type (Timing) sets the operating time for that function when you touch the icon on the External Accessory screen.
Pulse: The operating time when you touch the icon. (Select from 11 steps, ranging 0.5 sec. to 10 sec.)
Latch: Switch On/Off by touching the icon.
Momentary: Operating time lasts from when an icon is touched to when it is released.
When changing the name:
Touch the icon name, then input characters into Edit Name (Keypad). You can also select a basic name from the [Template] of the Keypad. For details on how to input characters using the keypad, see "How to Input Characters and Numbers (Keypad)" (page 24). (When a basic name is selected from the Template, the icon will be changed according to the basic name.)
When changing the layout of the switches:
Drag and drop an icon to the desired location.
To revert to a default icon:
Touch the check box "of the icon that you want to revert to default, and then touch [] (Reset). If you touch [] (Reset All), all icons revert to default icons.
4 After editing is complete, touch [ « ] (Back).
5 After the caption for the confirmation is displayed, touch [OK].
- If you touch [←] (Cancel) while editing, the edits are reset and the screen returns to the previous Edit screen.
About Remote Control Operation (X209D only)
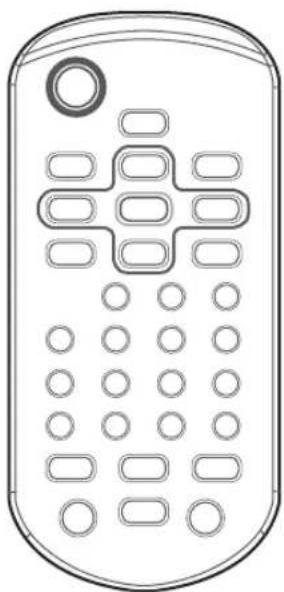
natural_image
Line drawing of a remote control with keypad and buttons (no text or symbols)When Using the Remote Control
- When you first use the remote control, please remove the insulation sheet in the battery case.
- Point the remote control at the remote sensor within about 2 meters.
- It may not be possible to operate the remote control if the remote control sensor is exposed to direct sunlight.
- The remote control is a small, lightweight precision device. To avoid damage, short battery life, operational errors and poor response, observe the following.
- Do not subject the remote control to excessive shock.
- Do not put in a trouser pocket.
- Keep away from food, moisture and dirt.
- Do not place in direct sunshine.
Battery Replacement
Battery type: CR2025 battery or equivalent.
1 Opening the battery case
Slide out the battery cover while firmly pressing in the direction of the arrow.
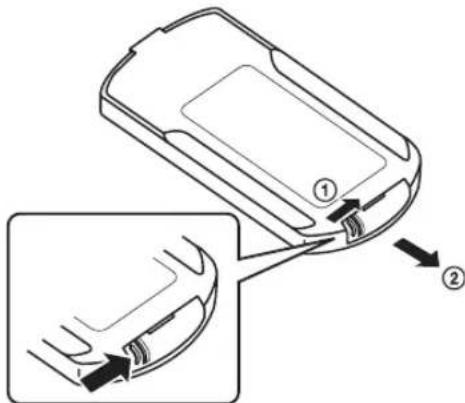
2Replacing the battery
Put the battery in the case with the (+) indication upward as shown in the illustration.
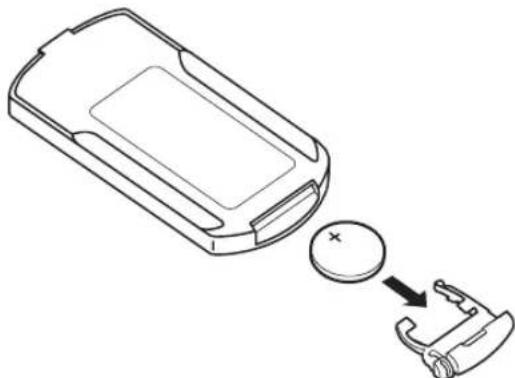
natural_image
Line drawing of a mobile phone casing with a battery and plug, showing internal components (no text or symbols)- Placing a battery in backwards way may cause a malfunction.
3 Closing the cover
Slide the cover as illustrated until a click is heard.
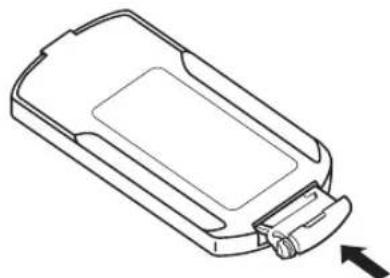
natural_image
Line drawing of a rectangular device with a handle and arrow indicator (no text or symbols)WARNING
DO NOT OPERATE ANY FUNCTION THAT TAKES YOUR ATTENTION AWAY FROM SAFELY DRIVING YOUR VEHICLE.
Any function that requires your prolonged attention should only be performed after coming to a complete stop. Always stop the vehicle in a safe location before performing these functions. Failure to do so may result in an accident.
Operating the DVD Player
button
Recalls the Menu screen.
DISP. button
Displays playback status on the screen.
ENT. button
Determines the selected item.
REPEAT button
Repeats playback.
button
Selects MP3/WMA/AAC/WAV folders.
AUDIO button
Video CD: Switches the audio output.
DVD: Switches the audio language.
SUBTITLE button
Switches the subtitle.
CLR (ALL CLR) button
Removes numbers (one character at a time) that have been selected and input.
Press and hold for 2 seconds. All the characters which were selected and input are erased.
ANGLE button
Switches the angle (DVD only).
button
CD mode:
Press the button to go back to the beginning of the current track. Press and hold to fast reverse.
MP3/WMA/AAC/WAV mode:
Press the button to go back to the beginning of the current file. Press and hold to fast reverse.
DVD/Video CD mode:
- Move to the desired position on the disc.
- During playback, press and hold for more than 1 second to reverse the disc at double speed. Hold for more than 5 seconds to reverse the disc at 8 times the normal speed. Hold for more than 10 seconds to reverse the disc at 32 times the normal speed.
- The picture is reversed by one frame each time the button is pressed in the pause mode (DVD only).
/ button
Switches between play and pause.
MENU button
Video CD:
Switches between PBC ON and OFF.
DVD:
Displays the DVD menu.
SETUP button
Displays the SETUP (initial setting) screen.
button
Selects MP3/WMA/AAC/WAV folders.
RETURN button
Returns to the selection screen just prior to the current screen.
, , ,
buttons
Selects the items displayed on the screen.
M.I.X. button
M.I.X. play for CDs and MP3/WMA/AAC/WAV.
Numeric Keypad
Inputs numbers.
LIST button
MP3/WMA/AAC/WAV Folder and File Search.
button
CD mode:
Press the button to advance to the beginning of the next track. Press and hold to fast forward.
MP3/WMA/AAC/WAV mode:
Press the button to advance to the beginning of the next file. Press and hold to fast forward.
DVD/Video CD mode:
- Move to the desired position on the disc.
- During playback, press and hold for more than 1 second to forward the disc at double speed. Hold for more than 5 seconds to forward the disc at 8 times the normal speed. Hold for more than 10 seconds to forward the disc at 32 times the normal speed.
- The picture is forwarded by one frame each time the button is pressed in the pause mode.
TOP M. button
Displays the Top Menu.
button
Stops the playback.
Information
Product Software Update
This product use software that can be updated through a USB flash drive. Download the software from the Alpine website and update the product using the USB flash drive.
Updating this product
Check the Alpine website for details on updating.
http://www.alpine-usa.com
Important information on the software
About the software license of the product
The software installed in the product contains open-source software. See the following Alpine website for details on the open source software.
http://www.alpine.com/e/oss/download
Cautions about Discs (X209D only)
Moisture Condensation
You may notice the disc playback sound wavering due to condensation. If this happens, remove the disc from the player and wait about an hour for the moisture to evaporate.
Damaged Disc
Do not attempt to play cracked, warped, or damaged discs. Playing a bad disc could severely damage the playback mechanism.
Never Attempt the Following
Do not grip or pull out the disc while it is being pulled back into the player by the automatic reloading mechanism.
Do not attempt to insert a disc into the unit when the unit power is off.
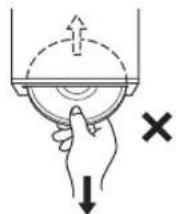
Inserting Discs
Your player accepts only one disc at a time for playback. Do not attempt to load more than one disc.
Make sure the label side is facing up when you insert the disc. "Disc error" will be displayed on your player if you insert a disc incorrectly. If "Disc error" continues to be displayed even though the disc has been inserted correctly, push the RESET switch with a pointed object such as a ballpoint pen.
Playing a disc while driving on a very bumpy road may result in skips, but this will not scratch the disc or damage the player.
Irregular Shaped Discs
Be sure to use round shaped discs only for this unit and never use any special shaped discs.
Use of special shaped discs may cause damage to the mechanism.

New Discs
To prevent the disc from jamming, "Disc error" is displayed if discs with irregular surfaces are inserted or if discs are inserted incorrectly. When a new disc is ejected immediately after initial loading, use your finger to feel around the inside of the center hole and outside edge of the disc. If you feel any small bumps or irregularities, this could inhibit proper loading of the disc. To remove the bumps, rub the inside edge of the hole and outside edge of the disc with a ballpoint pen or other such instrument, then insert the disc again.
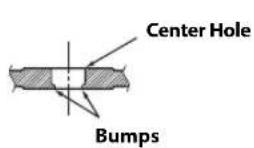
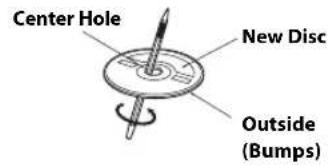
Installation Location
Make sure the unit will not be installed in a location subjected to:
- Direct sun and heat
• High humidity and water - Excessive dust
- Excessive vibrations
Correct Handling
Do not drop the disc while handling. Hold the disc so you will not leave fingerprints on the surface. Do not affix tape, paper, or gummed labels to the disc. Do not write on the disc.

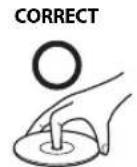
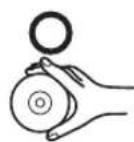
Disc Cleaning
Fingerprints, dust, or soil on the surface of the disc could cause the DVD player to skip. For routine cleaning, wipe the playing surface with a clean, soft cloth from the center of the disc to the outer edge. If the surface is heavily soiled, dampen a clean, soft cloth in a solution of mild neutral detergent before cleaning the disc.
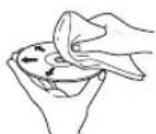
Disc Accessories
There are various accessories available on the market for protecting the disc surface and improving sound quality. However, most of them will influence the thickness and/or diameter of the disc. Using such accessories can cause operational problems. We recommend not using these accessories on discs played in Alpine DVD players.
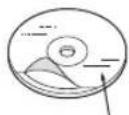
Transparent Sheet
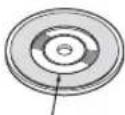
Disc Stabiliser
Discs Playable on This Unit (X209D only)
playable Discs
The discs listed below can be played on this unit.
| Mark (logo) Recorded Content Disc size | ||
| DVD Video Audi |  [cm*VIDEO] [cm*VIDEO] | |
| Music CD Audi |   | |
| Video CD Audi |   | 12 cm |
* Two-layer DVD disc compatible
Discs that cannot be played
DVD-ROMs, DVD-RAMs, CD-ROMs (excluding MP3/WMA/AAC/WAV files), photo CDs, etc.
DualDisc
This unit is not compatible with DualDisc.
Using a DualDisc may cause unit malfunction, and may cause disc damage when the disc is inserted/ejected.
DVD region number (playable region number)
This DVD player will play back any disc whose region number is 2 (or All). DVDs with a region number other than those listed below, cannot be played on this DVD player.


Video CDs
This DVD unit is compatible with playback control (PBC) compatible video CDs (version 2.0).
"PBC" is a function by which you can use menu screens recorded on the disc to find the scene you want to watch and view various types of information in dialog style.
Using compact discs (CD/CD-R/CD-RW)
If you use unspecified compact discs, correct performance cannot be guaranteed.
You can play CD-Rs (CD-Recordables)/CD-RWs (CD-
ReWritables) which have been recorded only on audio devices.
You can also play CD-Rs/CD-RWs containing MP3/WMA/AAC/WAV formatted audio files.
- Some of the following discs may not play on this unit: Flawed discs, discs with fingerprints, discs exposed to extreme temperatures or sunlight (e.g., left in the car or this unit), discs recorded under unstable conditions, discs on which a recording failed or a re-recording was attempted, copy-protected CDs which do not conform to the audio CD industry standard.
- Use discs with MP3/WMA/AAC/WAV files written in a format compliant with this unit. For details, see pages 102 and 103.
To customers using CD-R/CD-RW
- If a CD-R/CD-RW cannot be played back, make sure the last recording session was closed (finalized).
- Finalize the CD-R/CD-RW if necessary, and attempt playback again.
Tips for making your own discs
The unit plays DVD Video, Video CD, Audio CD and has a built in MP3/WMA/AAC decoder.
The following information is designed to help you create your own music CDs (either Audio CD or MP3/WMA/AAC encoded CD-R/RW files).
What is the difference between an Audio and MP3/WMA/AAC CD?
An Audio CD is the same format as the commercial CDs you buy in the store (also known as CD-DA). MP3 (MPEG Audio Layer 3)/WMA (Windows Media Audio)/AAC (Advanced Audio Coding) is a data file that uses a compression scheme to reduce the size of the music file*.
* If the first session on a disc containing both CD-DA data and MP3/WMA/AAC data is a CD-DA file, only CD-DA files will be played.
Multisession CD-R/RW:
Once a recording has been stopped, this is considered one session. If the disc is not closed (finalized), additional data may be added. Once this additional data has been recorded, this becomes a "multisession" CD.
Properly formatted MP3/WMA/AAC Discs:
Use ISO9660 formatting to insure proper playback. You may use standard ISO naming Level 1 (8.3 DOS standard), Level 2 (32 characters) or Joliet (Windows or Macintosh long filenames) file naming conventions*.
* Please consult the Owner's manual for additional information.
On handling compact discs (CD/CD-R/CD-RW)
- Do not touch the surface.
- Do not expose the disc to direct sunlight.
- Do not affix stickers or la
- Clean the disc when it is dusty.
- Make sure that the disc is smooth and flat.
- Do not use commercially available disc accessories.
Do not leave the disc in the car or the unit for a long time. Never expose the disc to direct sunlight.
Heat and humidity may damage the disc and you may not be able to play it again.
Using DVD-Rs/DVD-RWs/DVD+Rs/DVD+RWs
- This unit is compatible with discs recorded in the standard DVD-Video format.
- Note that discs not finalized (processed to enable to play on playback-only DVD players) cannot be played on this DVD player.
- Some discs may not play back, depending on the recording device and disc format.
- Discs or files utilising copy protection, may not be playable. Some recording systems may not properly format copied files to enable proper playback.
- In the following cases, the disc may not play on this unit: discs recorded by certain DVD recorders, certain irregular discs, flawed discs, dirty discs, when the pickup lens of this DVD player is dirty, or when moisture condensation has occurred inside the unit.
- Be sure to follow all cautions included with your DVD-Rs/DVD-RWs/DVD+Rs/DVD+RWs discs.
- Do not put stickers, seals, or tape on the label side of DVD-Rs/DVD-RWs/DVD+Rs/DVD+RWs.
- Compared to the regular discs, DVD-Rs/DVD-RWs/DVD+Rs/DVD+RWs are more affected by heat, moisture, and direct sunlight. If left in a car, etc., damage may occur and it might not play on this unit.
- The operable temperature range for disc playback is as follows: DVD-R/DVD-RW: -25 to +70°C DVD+R/DVD+RW: +5 to +55°C
About the Supported Formats
About MP3/WMA/AAC/FLAC

CAUTION
Except for private use, duplicating audio data (including MP3/WMA/AAC/FLAC data) or distributing, transferring, or copying it, whether for free or for a fee, without permission of the copyright holder is strictly prohibited by the Copyright Act and by international treaty.
What is MP3?
MP3, whose official name is "MPEG Audio Layer 3," is a compression standard prescribed by the ISO, the International Standardisation Organisation and MPEG which is a joint activity institution of the IEC.
MP3 files contain compressed audio data. MP3 encoding is capable of compressing audio data at extremely high ratios, reducing the size of music files to as much as one-tenth their original size. This is achieved while still maintaining near CD quality. The MP3 format realizes such high compression ratios by eliminating the sounds that are either inaudible to the human ear or masked by other sounds.
What is WMA?
WMA, or "Windows Media™ Audio," is compressed audio data. WMA is similar to MP3 audio data.
What is AAC?
AAC is the abbreviation for "Advanced Audio Coding," and is a basic format of audio compression used by MPEG2 or MPEG4.
What is FLAC?
FLAC (Free Lossless Audio Codec) is an audio file codec for lossless compression, developed and offered as open source software. Codecs with lossy compression forms, such as MP3 and AAC, reduce part of the data to improve compression efficiency. However, FLAC can reconstruct compressed data to be an identical copy of the original data by performing lossless compression. The compression ratio of FLAC is about 50%.
Method for creating MP3/WMA/AAC/FLAC (USB Flash drive) files
Audio data is compressed using software with MP3/WMA/AAC/FLAC (USB Flash drive) codecs. For details on creating MP3/WMA/AAC/FLAC (USB Flash drive) files, refer to the user's manual for that software.
MP3/WMA/AAC/FLAC (USB Flash drive) files that are playable on this device have the file extensions.
MP3: "mp3"
WMA: "wma"
AAC: "m4a"
FLAC: "flac"/"fla"
WMA is not supported for the following files, Windows Media Audio Professional, Windows Media Audio 10 std or Windows Media Audio 10 Pro Lossless.
There are many different versions of the AAC format. Confirm that the software being used conforms to the acceptable formats listed above. It's possible that the format may be unplayable even though the extension is valid.
Playback of AAC files encoded by iTunes is supported.
Supported playback sampling rates and bit rates
MP3 (USB Flash drive/Disc)
Sampling rates: 48 kHz, 44.1 kHz, 32 kHz, 24 kHz, 22.05 kHz, 16 kHz, 12 kHz, 11.025 kHz, 8 kHz
Bit rates: 8 - 320 kbps
WMA (USB Flash drive/Disc)
Sampling rates: 48 kHz, 44.1 kHz, 32 kHz, 22.05 kHz, 16 kHz, 11.025 kHz, 8 kHz
Bit rates: 48 - 320 kbps
AAC (USB Flash drive/Disc)
Sampling rates: 48 kHz, 44.1 kHz, 32 kHz, 24 kHz, 22.05 kHz, 16 kHz, 12 kHz, 11.025 kHz, 8 kHz
Bit rates: 16 - 320 kbps
FLAC (USB Flash drive)
Sampling rates: 96kHz, 88.2kHz, 48kHz, 44.1kHz, 32kHz, 24kHz, 22.05kHz, 16kHz, 8kHz
Channel number: 1ch, 2ch
This device may not play back correctly depending on sampling rates.
ID3 tags/WMA tags
This device supports ID3 tag v1.0, v1.1, v2.2, v2.3, v2.4, and WMA tag Ver.1.x. If tag data is in an MP3/WMA/AAC file, this device can display the title (track title), artist name, and album name ID3 tag/WMA tag data.
For non-supported characters, “?” is displayed.
The number of characters may be limited, or not correctly displayed, depending on the tag information.
Playing back MP3/WMA/AAC/FLAC
MP3/WMA/AAC files are prepared, then written to a USB flash drive.
• Maximum numbers of playable files/folders
USB Flash drive: 10,000 files/folders (including Root Folder)
• Largest playable file size: 512 MB
Playback may not be performed if a disc exceeds the limitations described above.
If a file/folder name is long, the maximum possible number of files may decrease.
- Both Audio and Video files are counted if their formats are playable on this unit.
Media supported
The media that this device can play back a USB flash drive.
Corresponding File Systems
This device supports FAT 16/32.
The maximum nested folder depth is 8 (including the root directory). File names are limited to 256 characters (including the extension).
Valid characters for folder/file names are letters A-Z (all caps), numbers 0-9, and '-' (underscore).
Order of files
Files are played back in the order that the writing software writes them to the disc. Therefore, the playback order may not be what's expected. Verity the writing order in the software's documentation. The playback order of the folders and files is as follows. (The following numbers may differ from actually displayed numbers.)
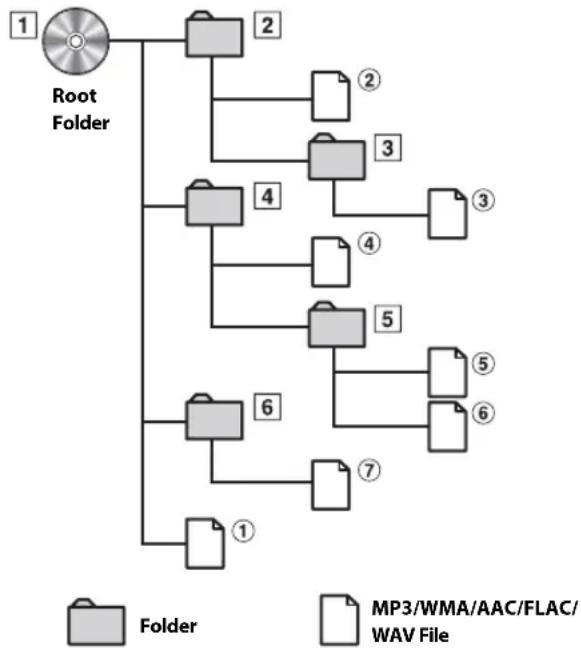
flowchart
graph TD
    A["Root Folder"] --> B["1"]
    A --> C["2"]
    A --> D["3"]
    A --> E["4"]
    A --> F["5"]
    A --> G["6"]
    A --> H["7"]
    A --> I["8"]
    B --> J["Folder ②"]
    C --> K["Folder ③"]
    D --> L["Folder ④"]
    E --> M["Folder ⑤"]
    F --> N["Folder ⑥"]
    G --> O["Folder ⑦"]
    H --> P["Folder ①"]
    I --> Q["Folder ②"]
    style A fill:#f9f,stroke:#333
    style B fill:#ccc,stroke:#333
    style C fill:#ccc,stroke:#333
    style D fill:#ccc,stroke:#333
    style E fill:#ccc,stroke:#333
    style F fill:#ccc,stroke:#333
    style G fill:#ccc,stroke:#333
    style H fill:#ccc,stroke:#333
    style I fill:#ccc,stroke:#333
    style J fill:#fff,stroke:#000
    style K fill:#fff,stroke:#000
    style L fill:#fff,stroke:#000
    style M fill:#fff,stroke:#000
    style N fill:#fff,stroke:#000
    style O fill:#fff,stroke:#000
    style P fill:#fff,stroke:#000
    style Q fill:#fff,stroke:#000
Terminology
Bit rate
This is the "sound" compression rate specified for encoding. The higher the bit rate, the higher the sound quality, but also the larger the files.
Sampling rate
This value shows how many times per second the data is sampled (recorded). For example, music CDs use a sampling rate of 44.1 kHz, so the sound is sampled (recorded) 44,100 times per second. The higher the sampling rate, the higher the sound quality, but also the larger the volume of data.
Encoding
Converting music CDs, WAVE (AIFF) files, and other sound files into the specified audio compression format.
Tag
Song information such as track titles, artist names, album names, etc., written into MP3/WMA/AAC/FLAC (USB flash drive) files.
Root folder
The root folder (or root directory) is found at the top of the file system. The root folder contains all folders and files. It is created automatically for all burned discs.
About WAV (Disc)
WAV, whose official name is "WAVE FORMAT" is a standard format of Windows* audio file.
Extension: ".wav"
Sampling rate: 44.1 kHz
Quantization bit number: 16
Channel number: up to 2ch
Format: PCM only
About DVDs
Music CDs and DVDs have grooves (tracks) in which the digital data is recorded. The data is represented as microscopic pits recorded into the track – these pits are read by a laser beam to play the disc. On DVDs, the density of the tracks and pits is twice that of CDs, so DVDs can contain more data in less space.
CDs
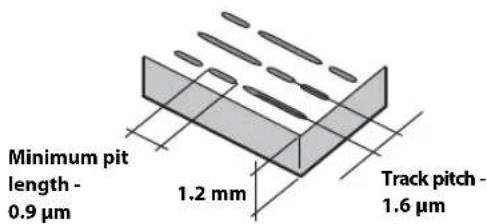
DVDs
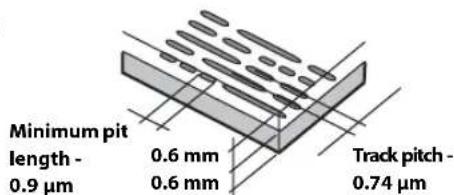
A 12 cm disc can contain one movie or about four hours of music. In addition, DVDs provide sharp picture quality with vivid colors thanks to a horizontal resolution of over 500 lines (compared to less than 300 for VHS tape).
In addition, DVDs offer a variety of functions.
Multiple audio\* (page 79)
Movies can be recorded in up to eight languages. The desired language can be selected from the unit.
Subtitles function\* (page 79)
Movies can include subtitles in up to 32 languages. The desired subtitle language can be selected from the unit.
Multi angle function\* (page 79)
When the DVD contains a movie shot from multiple angles, the desired angle can be selected from the unit.
Multi story function\*
With this function, a single movie includes various story lines. You can select different story lines to view various versions of the same movie. Operation differs from disc to disc. Story line selection screens including instructions appear during the movie. Just follow the instructions.
* These functions differ from disc to disc. For details, refer to the disc's instructions.
List of Language Codes
(For details, see page 72.)
| Abbreviation | Code | Language | Abbreviation | Code | Language | Abbreviation | Code | Language |
| AA | 6565 | Afar | IE | 7369 | Interlingue | RN | 8278 | Kirundi |
| AB | 6566 | Abkhazian | IK | 7375 | Inupiak | RO | 8279 | Romanian |
| AF | 6570 | Afrikaans | IN | 7378 | Indonesian | RU | 8285 | Russian |
| AM | 6577 | Amharic | IS | 7383 | Icelandic | RW | 8287 | Kinyarwanda |
| AR | 6582 | Arabic | IT | 7384 | Italian | SA | 8365 | Sanskrit |
| AS | 6583 | Assamese | IW | 7387 | Hebrew | SD | 8368 | Sindhi |
| AY | 6589 | Aymara | JP | 7465 | Japanese | SG | 8371 | Sangho |
| AZ | 6590 | Azerbaijani | JI | 7473 | Yiddish | SH | 8372 | Serbo-Croatian |
| BA | 6665 | Bashkir | JW | 7487 | Javanese | SI | 8373 | Singhalese |
| BE | 6669 | Byelorussian | KA | 7565 | Georgian | SK | 8375 | Slovak |
| BG | 6671 | Bulgarian | KK | 7575 | Kazakh | SL | 8376 | Slovenian |
| BH | 6672 | Bihari | KL | 7576 | Greenlandic | SM | 8377 | Samoan |
| BI | 6673 | Bislama | KM | 7577 | Cambodian | SN | 8378 | Shona |
| BN | 6678 | Bengali, Bangla | KN | 7578 | Kannada | SO | 8379 | Somali |
| BO | 6679 | Tibetan | KO | 7579 | Korean | SQ | 8381 | Albanian |
| BR | 6682 | Breton | KS | 7583 | Kashmiri | SR | 8382 | Serbian |
| CA | 6765 | Catalan | KU | 7585 | Kurdish | SS | 8383 | Siswati |
| CO | 6779 | Corsican | KY | 7589 | Kirghiz | ST | 8384 | Sesotho |
| CS | 6783 | Czech | LA | 7665 | Latin | SU | 8385 | Sundanese |
| CY | 6789 | Welsh | LN | 7678 | Lingala | SV | 8386 | Swedish |
| DA | 6865 | Danish | LO | 7679 | Laothian | SW | 8387 | Swahili |
| DE | 6869 | German | LT | 7684 | Lithuanian | TA | 8465 | Tamil |
| DZ | 6890 | Bhutani | LV | 7686 | Latvian, Lettish | TE | 8469 | Telugu |
| EL | 6976 | Greek | MG | 7771 | Malagasy | TG | 8471 | Tajik |
| EN | 6978 | English | MI | 7773 | Maori | TH | 8472 | Thai |
| EO | 6979 | Esperanto | MK | 7775 | Macedonian | TI | 8473 | Tigrinya |
| ES | 6983 | Spanish | ML | 7776 | Malayalam | TK | 8475 | Turkmen |
| ET | 6984 | Estonian | MN | 7778 | Mongolian | TL | 8476 | Tagalog |
| EU | 6985 | Basque | MO | 7779 | Moldavian | TN | 8478 | Setswana |
| FA | 7065 | Persian | MR | 7782 | Marathi | TO | 8479 | Tonga |
| FI | 7073 | Finnish | MS | 7783 | Malay | TR | 8482 | Turkish |
| FJ | 7074 | Fiji | MT | 7784 | Maltese | TS | 8483 | Tsonga |
| FO | 7079 | Faroese | MY | 7789 | Burmese | TT | 8484 | Tatar |
| FR | 7082 | French | NA | 7865 | Nauru | TW | 8487 | Twi |
| FY | 7089 | Frisian | NE | 7869 | Nepali | UK | 8575 | Ukrainian |
| GA | 7165 | Irish | NL | 7876 | Dutch | UR | 8582 | Urdu |
| GD | 7168 | Scots Gaelic | NO | 7879 | Norwegian | UZ | 8590 | Uzbek |
| GL | 7176 | Galician | OC | 7967 | Occitan | VI | 8673 | Vietnamese |
| GN | 7178 | Guarani | OM | 7977 | (Afan) Oromo | VO | 8679 | Volapuk |
| GU | 7185 | Gujarati | OR | 7982 | Oriya | WO | 8779 | Wolof |
| HA | 7265 | Hausa | PA | 8065 | Punjabi | XH | 8872 | Xhosa |
| HI | 7273 | Hindi | PL | 8076 | Polish | YO | 8979 | Yoruba |
| HR | 7282 | Croatian | PS | 8083 | Pashto, Pushto | ZH | 9072 | Chinese |
| HU | 7285 | Hungarian | PT | 8084 | Portuguese | ZU | 9085 | Zulu |
| HY | 7289 | Armenian | QU | 8185 | Quechua | |||
| IA | 7365 | Interlingua | RM | 8277 | Rhaeto-Romance |
In Case of Difficulty
If you encounter a problem, please turn the power off, then on again. If the unit is still not functioning normally, please review the items in the following checklist. This guide will help you isolate the problem if the unit is at fault. Otherwise, make sure the rest of your system is properly connected, or then consult your authorized Alpine dealer.
Basic
No function or display.
- Vehicle's ignition is off.
- If connected according to the instructions, the unit will not operate with the vehicle's ignition off.
- Improper power lead connections.
- Check power lead connections.
- Blown fuse.
- Check the fuse on the battery lead of the unit; replace with the proper value if necessary.
- Internal micro-computer malfunctioned due to interference noise, etc.
- Press the RESET switch with a ballpoint pen or other pointed article.
No sound or unnatural sound.
- Incorrect setting of volume/balance/fader controls.
Readjust the controls. - Connections are not properly or securely made.
- Check the connections and firmly connect.
Screen not displayed.
- Brightness/Contrast control is set at the minimum position.
- Adjust the Brightness/Contrast control.
• Temperature in the vehicle is too low. - Increase the vehicle's interior temperature to operation temperature range.
- Connections to the Auxiliary Device are not securely made.
- Check the connections and firmly connect.
• The Parking Brake Lead is not connected.
• The Parking Brake is not engaged. - Connect the Parking Brake Lead, then engage the Parking Brake.
Movement of displayed picture is abnormal.
• Temperature in the vehicle is too high.
- Allow the vehicle's interior temperature to cool.
The optional remote control is inoperative.
- The remote control sensor setting of "Remote Sensor Setting" (page 50) is not set to this unit ("Front").
- Set for "Front".
Radio
Unable to receive stations.
- No antenna, or open connection in the antenna cable.
- Make sure the antenna is properly connected; replace the antenna or cable if necessary.
Unable to tune stations in the seek mode.
- You are in a weak signal area.
Make sure the tuner is in DX mode. - If the area you are in is a primary signal area, the antenna may not be grounded and connected properly.
- Check your antenna connections; make sure the antenna is properly grounded at its mounting location.
• The antenna may not be the proper length. - Make sure the antenna is fully extended; if broken, replace the antenna with a new one.
Broadcast is noisy.
• The antenna is not the proper length.
Extend the antenna fully; replace it if it is broken.
• The antenna is poorly grounded.
- Make sure the antenna is grounded properly at its mounting location.
• The station signal is weak and noisy.
- If above solution does not work, tune in another station.
USB Audio
Unit does not operate.
- Condensation.
- Wait a while (about 1 hour) for the condensation to dry.
Picture is unclear or noisy.
- Vehicle's battery power is weak.
- Check the battery power and wiring. (The unit may malfunction if the battery power is under 11 volts with a load applied.)
Rear Seat Entertainment System
DVD sound is not being output from the rear monitor headphones.
- The external audio processor and DVD Player (DVE-5300) are optically connected.
- Set the Audio Out of the DVD Player to "LPCM."
Disc (X209D only)
Disc playback sound is wavering.
- Moisture condensation in the disc module.
- Allow enough time for the condensation to evaporate (about 1 hour).
Disc insertion not possible.
• A disc is already in this unit.
- Eject the disc and remove it.
• The disc is being improperly inserted.
- Insert the disc correctly. (See page 71)
Unable to fast forward or backward the disc.
• The disc has been damaged.
Eject the disc and discard it; using a damaged disc in your unit can cause damage to the mechanism.
Disc playback sound skips due to vibration.
- Improper mounting of the unit.
- Securely re-mount the unit.
- Disc is very dirty.
- Clean the disc.
- Disc has scratches.
- Change the disc.
• The pick-up lens is dirty.
- Do not use a commercially available lens cleaner disc. Consult your nearest Alpine dealer.
Disc playback sound skips without vibration.
- Dirty or scratched disc.
- Clean the disc; a damaged disc should be replaced.
CD-R/CD-RW/DVD-R/DVD-RW/DVD+R/DVD+RW playback not possible.
- Close session (finalization) has not been performed.
- Perform finalization and attempt playback again.
Error displays.
- Mechanical error.
- Press After the error indication disappears, insert the disc again. If the above-mentioned solution does not solve the problem, consult your nearest Alpine dealer.
MP3/WMA/AAC is not played back.
- Writing error occurred. The CD format is not compatible.
- Make sure the CD has been written in a supported format. Refer to “About MP3/WMA/AAC” (pages 102 to 103), then rewrite in the format supported by this device.
Unit does not operate.
- Condensation.
- Wait a while (about 1 hour) for the condensation to dry.
Playback does not start.
• Disc is loaded upside-down.
Check the disc and load it with the labeled side facing upward.
- Disc is dirty.
Clean the disc.
- A disc not able to play back with this unit is loaded.
- Check if the disc is able to be played back.
- Parental lock is set.
- Cancel the parental lock or change the rating level.
Picture is unclear or noisy.
• Disc is being fast-forwarded or fast-reversed.
The picture may be slightly disturbed, but this is normal.
- Vehicle's battery power is weak.
Check the battery power and wiring. (The unit may malfunction if the battery power is under 11 volts with a load applied.)
Image stops sometimes.
- Disc is scratched.
- Replaced with a non-scratched disc.
Navigation
The Navigation cannot work properly.
- Reset Navigation system.
- Turn the ignition key off, and then set to ON again.
If this Message Appears
Various messages are displayed on the screen during operation. In addition to the messages telling you the current status or providing guidance for the next operation, there are also the following error messages. If one of these error messages is displayed, carefully follow the instructions in the solution column.
System
If you are driving, please pull over and park before using this function.
- A setup operation, etc., was carried out while the vehicle was running.
- Move the vehicle to a safe location, stop, and engage the parking brake, then carry out this operation.
Over-current detected on the USB.
- Abnormal current is run to the USB connector device.
- Turn the ignition key off, and then set to ON again.
- Attempt to connect another iPod/iPhone/USB Flash drive.
USB Hub is not supported.
- A USB flash drive with a hub is connected.
- You cannot play back from a USB flash drive with a hub. USB hub connections are also not supported.
Audio/Visual
Connected USB Device is not compatible.
- An iPod/iPhone that is not supported by the unit is connected.
- Connect an iPod/iPhone that is supported by the unit.
- Reset the iPod.
- A USB device that is not supported by the unit is connected.
- Attempt to connect another USB flash drive.
- Communication error.
- Turn the ignition key off, and then set to ON again.
- Check the display by reconnecting between the iPod/iPhone and the unit, using the iPod/iPhone cable.
- Check the display by reconnecting between the USB flash drive and the unit.
- Caused by the iPod/iPhone Software Version not being compatible with this unit.
- Update the iPod/iPhone Software Version to be compatible with this unit.
• The iPod/iPhone is not verified. - Change to another iPod/iPhone.
No data.
• There are no data in the iPod/iPhone.
Download data to the iPod/iPhone and connect to the unit.
- There are no data in the USB flash drive.
- Download data to the USB flash drive and connect to this unit.
Un-readable song was skipped.
- A copy-protected WMA file has been detected.
You can only play back non-copy-protected files. - A sampling rate/bit rate not supported by the unit is used.
- Use a sampling rate/bit rate supported by the unit.
Bluetooth
Please connect a Bluetooth audio device.
• The Bluetooth audio device was not connected correctly.
- Check the settings for the unit and the Bluetooth audio device and reconnect.
Unable to download phonebook.
- Phonebook failed to read due to mobile phone disconnection, etc.
- Check the mobile phone connection, and then conduct synchronizing and adding again. (See page 85)
- The connected mobile phone does not support synchronizing of its phone book.
- Connect the mobile phone that supports synchronizing the phone book, then synchronize again. (See page 85)
HDMI
HDMI communication error,
Please check your device and try again.
- Communication error.
- Turn the ignition key off, and then set to ON again.
- Check the display by reconnecting between the HDMI and the unit, using the HDMI cable.
- Check the display by reconnecting between the HDMI device and the unit.
HDMI current error,
Please reconnect your device and try again.
- Abnormal current is run to the HDMI connector device.
- Turn the ignition key off, and then set to ON again.
- Disconnect the HDMI device from the unit, and then reconnect it.
HDMI monitor communication error.
Please check the connection or restart system.
• HDMI device communication error.
- Turn the engine (ACC) OFF/ON. Or, check the HDMI cable where it connects to the HDMI monitor.
Too many monitors are connected to the HDMI output.
Please check the connection.
- More than 4 HDMI monitors are connected.
- A cascade connection using more than 2 distributors is made.
- Use one distributor and less than 4 HDMI monitors when connecting.
iDataLink
CAN Communication error
- Communication error.
- Check the iDataLink module connection.
SiriusXM
Check Tuner
- The SiriusXM Tuner is disconnected or the unit is having trouble communicating with the Tuner.
- Connect the Tuner or check the Tuner connection to the back of the unit.
Check Antenna
- The SiriusXM Satellite Radio antenna or cable is either damaged or not connected correctly to the SiriusXM Tuner.
- Check that the SiriusXM antenna cable is connected to the SiriusXM Tuner and check that the antenna cable is not kinked or otherwise damaged. Replace the antenna if necessary.
- SiriusXM products are available at your local car audio retailer or online at www.shop.siriusxm.com.
No Signal
• The SiriusXM satellite signal is too weak at the current location.
- Move the vehicle to a location with a clear view of the southern sky.
- Make sure the Satellite Radio antenna is properly mounted and not obstructed by metal objects.
Channel Not Subscribed
Call SiriusXM to Subscribe
- The active channel has become unsubscribed or the requested channel is not available in your subscription package.
- In the U.S.A., visit www.siriusxm.com or call 1-866-635-2349 if you have questions about your subscription package or would like to subscribe to this channel. In Canada, visit www.siriusxm.ca or call 1-877-438-9677.
- The unit will revert to the previously selected channel or to channel 1 automatically.
Channel Not Available
- The active channel is no longer in the SiriusXM channel lineup or the user has entered an invalid channel number.
- Visit www.siriusxm.com for information on the current channel lineup.
- The unit will revert to the previous channel or to channel 1 automatically.
Subscription Updated
Press OK to Continue
- Yoursubscription has been upd
- Touch [OK] to clear this message.
Channel Locked
• A locked channel is selected.
- Input the passcode on the number keypad screen, see "Parental Lock Function" (page 70). If wrong passcode is entered, "Incorrect Pass Code entered" will be displayed and the unit will revert to the previous channel.
Updating...
• The Featured Favorites channels are currently updating.
Updating Teams, please wait
• The Game table is currently updating.
Replay Memory Full
- Replay Buffer is full.
Replay Memory Near Full
- Replay Buffer will be full within 11 seconds.
Applying Alpine Tunelt App
You can not use Sound App
Because External AP is on.
- "Setting the External Audio Processor" (page 50) is "On."
- When "External Audio Processor" (page 50) is set to "On," you cannot perform Sound Tuning from the Alpine TuneIt App. Set "External Audio Processor" to "Off" to perform Sound Tuning from the Alpine TuneIt App.
(X209D only)
DISC ERROR
- Mechanism error.
1) Press and eject the disc. If the disc does not eject, press again for at least 3 seconds and eject the disc. If the disc still does not eject, consult your Alpine dealer.
2) When the error indication remains after ejecting, press again. If the error indication still does not turn off after pressing a few times, consult your Alpine dealer.
LO-TEMP
- The temperature in the car is too low. - Raise the temperature in the car to normal temperature.
NO DISC
- No disc is inserted. - Insert a disc. - Although a disc is inserted, "NO DISC" is displayed and the unit does not start to play or eject the disc. - Remove the disc by pressing again for at least 3 seconds.
- Disc does not match regional code number. - Load a disc that matches the regional code number.
HI-TEMP
- Protective circuit is activated at high temperature. - The indicator will disappear when the temperature returns to within operation range. - Leave the power OFF until the temperature decreases and then turn the power ON again.
LOADING ERROR
EJECT ERROR
- Mechanical error. 1) Press and eject the disc. If the disc does not eject, press c again for at least 3 seconds and eject the disc. If the disc still does not eject, consult your Alpine dealer. 2) When the error indication remains after ejecting, press again. If the error indication still does not turn off after pressing a few times, consult your Alpine dealer.
PROTECTED
- A copy-protected WMA file was played back. - You can only play back non-copy-protected files.
ILLEGAL FORMAT
- A disc with an unsupported region code or other copyright infringement has been inserted. - Change to another disc.
READ ERROR
- The unit cannot read a disc's TOC because the disc has many scratches or is very dirty. - Clean the dirty disc, and insert it again. Damaged discs should be replaced.
Navigation
The vehicle's position is erroneous.
- The GPS reception is poor. - Drive the vehicle in an area of good GPS reception to allow the unit to recalibrate itself. Move to a location where strong GPS reception is possible.
No operation
- Moisture condensation - Allow enough time for the condensation to evaporate (about 1 hour). - Ambient Temperature - Make sure the temperature inside the vehicle is between 0^ and 45^ (32°F and 113°F).
Specifications
MONITOR SECTION
Screen Size 9" (X209D)
8" (X208U)
7" (INE-W977HD)
LCD Type Transparent type TN LCD
Operation System TFT active matrix
Number of Picture Elements 1,152,000 pcs. (800 × 480 × 3 (RGB))
Effective Number of Picture Elements
99% or more
Illumination System LED
FM TUNER SECTION
Tuning Range 87.7 - 107.9 MHz
Mono Usable Sensitivity 9.3 dBf (0.8 μV/75 ohms)
50 dB Quieting Sensitivity 13.5 dBf (1.3 μV/75 ohms)
Alternate Channel Selectivity 80 dB
Signal-to-Noise Ratio 65 dB
Stereo Separation 35 dB
Capture Ratio 2.0 dB
AM TUNER SECTION
Tuning Range 530 - 1,710 kHz
Usable Sensitivity 25.1 μV/28 dBf
USB SECTION
USB requirements USB 2.0
Max. Power Consumption 1,500 mA (CDP Support)
USB Class USB (Mass Storage Class)
File System FAT16/32
Number of Channels 2-Channels (Stereo)
Frequency Response ^* 1 5 - 20,000 Hz (±1 dB)
Total Harmonic Distortion 0.008% (at 1 kHz)
Dynamic Range 95 dB (at 1 kHz)
Signal-to-Noise Ratio 100 dB
Channel Separation 85 dB (at 1 kHz)
*1 Frequency response may differ depending on the encoder software/bit rate.
HDMI SECTION
Input Format 480p/VGA
Output Format 480p
GPS SECTION
GPS Reception frequency 1,575.42 ±1 MHz
GPS Reception sensitivity -130 dB max.
Bluetooth SECTION
Bluetooth Specification Bluetooth V3.0
Output Power +4 dBm Ave. (Power class 2)
Profile HFP (Hands-Free Profile)
OPP (Object Push Profile)
PBAP (Phone Book Access Profile)
A2DP (Advanced Audio
Distribution Profile)
AVRCP (Audio/Video Remote
Control Profile)
SPP (Serial Port Profile)
GENERAL
Power Requirement 14.4 V DC
(11-16 V allowable)
Operating temperature -4^ to +140^
(-20^ to +60^)
Power Output 16 W RMS × 4*2
*2 Primary amplifier ratings per CEA-2006 Standard
• Power output: measured at 4 Ohms and ≤ 1% THD+N
• S/N: 80 dBA (reference: 1 W into 4 Ohms)
Weight 1.54 kg (3 lbs. 6 oz) (X208U)
1.41 kg (3 lbs. 2 oz)
(INE-W977HD)
Audio output level
Preout (Front, Rear): 4V/10k ohms (max.)
Preout (Subwoofer): 4V/10k ohms (max.)
- Due to continuous product improvement, specifications and design are subject to change without notice.
- The LCD panel is manufactured using an extremely high precision manufacturing technology. Its effective pixel ratio is over 99.99% . This means that there is a possibility that 0.01% of the pixels could be either always ON or OFF.
NOSE/CHASSIS SIZE
X209D is sized exclusively for a certain car model.
X208U
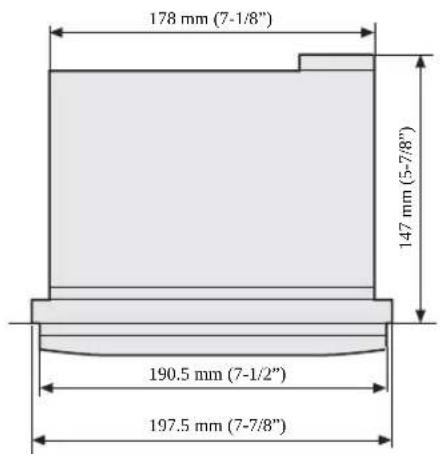
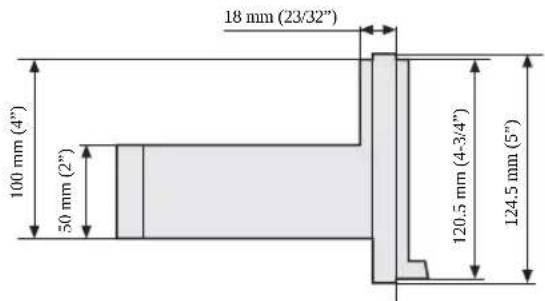
INE-W977HD
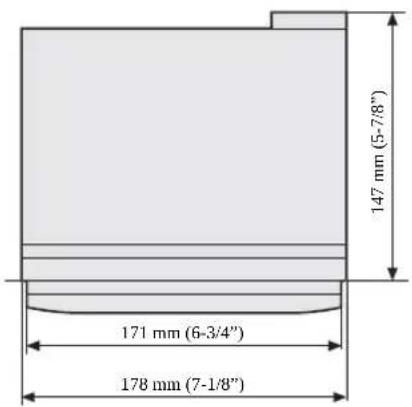
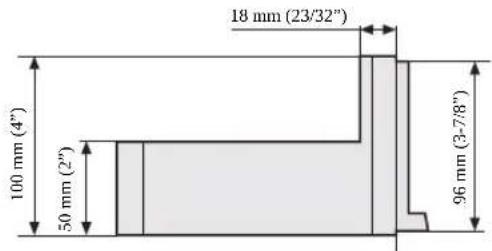
For X209D
CD/DVD SECTION
Frequency Response CD: 5 - 20,000 Hz (± 1 dB)
Wow & Flutter (% WRMS) Below measurable limits
Total Harmonic Distortion 0.02 % (at 1 kHz)
Dynamic Range 95 dB (at 1 kHz)
Channel Separation 65 dB (at 1 kHz)
Horizontal resolution 500 lines or greater
Video output level 1Vp-p (75 ohms)
Video S/N ratio DVD: 60 dB
Audio S/N ratio 95 dB
PICKUP
Wave length DVD: 665 nm
CD: 800 ~nm
Laser power CLASS II
REMOTE CONTROL
Battery Type CR2025 battery
Width 42 mm (1-11/16")
Height 90 mm (3-5/8")
Depth 11.6 mm (15/32")
Weight 50 g (2 oz) (battery excluded)
CAUTION-Laser radiation when open, DO NOT STARE INTO BEAM
(Bottom side of player)
END USER LICENSE AGREEMENT (HERE)
In using this Navigation System (hereinafter referred to as "System"), which includes Alpine Electronics, Inc. ("Alpine") Specifications, Space Machine, Inc. ("Space Machine") Software and HERE North America, LLC. ("HERE") Database, you are bound by the terms and conditions set forth below. By breaking the seal on the System and using your copy of the System, you have demonstrated your agreement to the terms and conditions of this Agreement. You should, therefore, make sure that you read and understand the following provisions.
The System may not be copied, duplicated or otherwise modified, in whole or in part, without the express written permission of Alpine, Space Machine and HERE.
The System may not be transferred or sublicensed to any third party for profit, rent or loan or licensed for reuse in any manner.
The System may not be decompiled, reverse engineered or otherwise disassembled, in whole or in part.
The System may not be used in a network or by any other manner of simultaneous use in multiple systems.
The System is intended solely for personal use (or internal use where the end-user is a business) by the consumer.
The System is not to be used for commercial purposes.
Neither Alpine, Space Machine nor HERE guarantees to the customer that the System meet the specific objectives of the user.
Neither Alpine, Space Machine nor HERE shall be responsible for any damages caused by the use of the System to the actual user and to any third party.
The warranty on the System shall not extend to an exchange or refund due to misspelling, omission of letters, or any other cosmetic discrepancy in layout found in the System.
The right to use the System shall expire either when the user destroys this software, or when any of the terms for use is violated and Alpine, Space Machine and/or HERE exercise the option to revoke the license to use this software.
The terms and conditions hereof apply to all subsequent users and owner's as well as to the original purchaser.
The HERE Database may include or reflect data of licensors, including Her Majesty The Queen in right of CANADA. Such data is licensed on an "AS IS" basis. The licensors, including Her Majesty The Queen, make no guarantees, representations or warranties respecting such data, either express or implied, arising by law or otherwise, accuracy or fitness for a particular purpose.
The licensors, including Her Majesty The Queen, shall not be liable in respect of any claim, demand or action, irrespective of the nature of the cause of the claim, demand or action alleging any loss, injury or damages, direct or indirect, which may result from the use or possession of the data or the HERE database. The licensors, including Her Majesty The Queen, shall not be liable in any way for loss of revenues or contracts, or any other consequential loss of any kind resulting from any defect in the data or the HERE database. End User shall indemnify and save harmless the licensors, including Her Majesty The Queen and the minister, and their officers, employees and agents from and against any claim, demand or action, irrespective of the nature of the cause of the claim, demand or action, alleging loss, costs, expenses, damages or injuries (including injuries resulting in death) arising out of the use or possession of the data or the HERE database.
LIMITED WARRANTY
ALPINE ELECTRONICS OF AMERICA, INC. ("Alpine"), is dedicated to quality craftsmanship and is pleased to offer this Warranty. We suggest that you read it thoroughly. Should you have any questions, please contact your Dealer or contact Alpine at one of the telephone numbers listed below.
● PRODUCTS COVERED:
This Warranty covers Car Audio Products and Related Accessories ("the product"). Products purchased in the Canada are covered only in the Canada. Products purchased in the U.S.A. are covered only in the U.S.A.
● LENGTH OF WARRANTY:
This Warranty is in effect for one year from the date of the first consumer purchase.
● WHO IS COVERED:
This Warranty only covers the original purchaser of the product, who must reside in the United States, Puerto Rico or Canada.
WHAT IS COVERED:
This Warranty covers defects in materials or workmanship (parts and labor) in the product.
WHAT IS NOT COVERED:
This Warranty does not cover the following:
① Damage occurring during shipment of the product to Alpine for repair (claims must be presented to the carrier).
② Damage caused by accident or abuse, including burned voice coils caused by over-driving the speaker (amplifier level is turned up and driven into distortion or clipping). Speaker mechanical failure (e.g. punctures, tears or rips). Cracked or damaged LCD panels. Dropped or damaged hard drives.
③ Damage caused by negligence, misuse, improper operation or failure to follow instructions contained in the Owner's manual.
④ Damage caused by act of God, including without limitation, earthquake, fire, flood, storms or other acts of nature. Any cost or expense related to the removal or reinstallation of the product.
⑤ Service performed by an unauthorized person, company or association.
⑥ Any product which has the serial number defaced, altered or removed.
⑦ Any product which has been adjusted, altered or modified without Alpine's consent.
⑧ Any product not distributed by Alpine within the United States, Puerto Rico or Canada.
⑨ Any product not purchased from an Authorized Alpine Dealer.
● HOW TO OBTAIN WARRANTY SERVICE:
① You are responsible for delivery of the product to an Authorized Alpine Service Center or Alpine for repair and for payment of any initial shipping charges. Alpine will, at its option, repair or replace the product with a new or reconditioned product without charge. If the repairs are covered by the warranty, and if the product was shipped to an Authorized Alpine Service Center or Alpine, Alpine will pay the return shipping charges.
② You should provide a detailed description of the problem(s) for which service is required.
③ You must supply proof of your purchase of the product.
④ You must package the product securely to avoid damage during shipment. To prevent lost packages it is recommended to use a carrier that provides a tracking service.
● HOW WE LIMIT IMPLIED WARRANTIES:
ANY IMPLIED WARRANTIES INCLUDING FITNESS FOR USE AND MERCHANTABILITY ARE LIMITED IN DURATION TO THE PERIOD OF THE EXPRESS WARRANTY SET FORTH ABOVE AND NO PERSON IS AUTHORIZED TO ASSUME FOR ALPINE ANY OTHER LIABILITY IN CONNECTION WITH THE SALE OF THE PRODUCT.
● HOW WE EXCLUDE CERTAIN DAMAGES:
ALPINE EXPRESSLY DISCLAIMS LIABILITY FOR INCIDENTAL AND CONSEQUENTIAL DAMAGES CAUSED BY THE PRODUCT. THE TERM "INCIDENTAL DAMAGES" REFERS TO EXPENSES OF TRANSPORTING THE PRODUCT TO THE ALPINE SERVICE CENTER, LOSS OF THE ORIGINAL PURCHASER'S TIME, LOSS OF THE USE OF THE PRODUCT, BUS FARES, CAR RENTALS OR OTHERS COSTS RELATING TO THE CARE AND CUSTODY OF THE PRODUCT. THE TERM "CONSEQUENTIAL DAMAGES" REFERS TO THE COST OF REPAIRING OR REPLACING OTHER PROPERTY WHICH IS DAMAGED WHEN THIS PRODUCT DOES NOT WORK PROPERLY. THE REMEDIES PROVIDED UNDER THIS WARRANTY ARE EXCLUSIVE AND IN LIEU OF ALL OTHERS.
● HOW STATE/PROVINCIAL LAW RELATES TO THE WARRANTY:
This Warranty gives you specific legal rights, and you may also have other rights which vary from state to state and province to province. In addition, some states/provinces do not allow limitations on how long an implied warranty lasts, and some do not allow the exclusion or limitation of incidental or consequential damages. Accordingly, limitations as to these matters contained herein may not apply to you.
IN CANADA ONLY:
This Warranty is not valid unless your Alpine car audio product has been installed in your vehicle by an Authorized Installation Center, and this warranty stamped upon installation by the installation center.
● HOW TO CONTACT CUSTOMER SERVICE:
Should the product require service, please call the following number for your nearest Authorized Alpine Service Center.
CAR AUDIO 1-800-ALPINE-1 (1-800-257-4631) NAVIGATION 1-888-NAV-HELP (1-888-628-4357)
Or visit our website at; http://www.alpine-usa.com
About the Rules of Bluetooth Electromagnetic Radiation Regulation
Don't forget to take a moment to protect your purchase by registering your product now at the following address: www.alpine-usa.com/registration.
- X208U/INE-W977HD
- X209D
- Contents
- Operating Instructions
- PRECAUTIONS
- WARNING
- Features
- Getting Started
- Favorite Function
- Applying Alpine Tunelt App
- Setup
- Wireless (Bluetooth) Setup
- General Setup
- Source Setup
- System Setup
- Apple CarPlay (Optional)
- Android Auto (Optional)
- Alpine Connect App (Optional)
- Radio/HD Radio™/RBDS
- Radio Basic Operation
- USB Flash drive (Optional)
- iPod/iPhone (Optional)
- Pandora® internet radio (optional)
- SiriusXM Satellite Radio Operation (Optional)
- HDMI Device
- DVD Player Operation
- CD/MP3/WMA/AAC/WAV
- DVD
- HDMI Operation
- Bluetooth Operation
- Hands-free Phone Control
- Bluetooth Audio
- Auxiliary Device (Optional)
- Camera Operation (Optional)
- iDataLink Operation
- About Remote Control Operation (X209D only)
- Information
- LIMITED WARRANTY
- IMPORTANT INFORMATION
- PLEASE READ CAREFULLY BEFORE USING THIS PRODUCT
- FCC COMPLIANCE STATEMENT
- Points to Observe for Safe Usage
- INSTALL THE PRODUCT CORRECTLY SO THAT THE DRIVER CANNOT WATCH TV/VIDEO UNLESS THE VEHICLE IS STOPPED AND THE EMERGENCY BRAKE IS APPLIED.
- DO NOT WATCH VIDEO WHILE DRIVING.
- DO NOT OPERATE ANY FUNCTION THAT TAKES YOUR ATTENTION AWAY FROM SAFELY DRIVING YOUR VEHICLE.
- DO NOT FOLLOW ROUTE SUGGESTIONS IF THE NAVIGATION SYSTEM INSTRUCTS YOU TO PERFORM AN UNSAFE OR ILLEGAL MANEUVER, OR PLACES YOU IN AN UNSAFE SITUATION OR AREA.
- KEEP THE VOLUME AT A LEVEL WHERE YOU CAN STILL HEAR OUTSIDE NOISES WHILE DRIVING.
- MINIMIZE DISPLAY VIEWING WHILE DRIVING.
- DO NOT DISASSEMBLE OR ALTER.
- USE ONLY IN CARS WITH A 12 VOLT NEGATIVE GROUND.
- KEEP SMALL OBJECTS SUCH AS SCREWS OUT OF THE REACH OF CHILDREN.
- USE THE CORRECT AMPERE RATING WHEN REPLACING FUSES.
- DO NOT BLOCK VENTS OR RADIATOR PANELS.
- USE THIS PRODUCT FOR MOBILE 12V APPLICATIONS.
- MAKE THE CORRECT CONNECTIONS.
- BEFORE WIRING, DISCONNECT THE CABLE FROM THE NEGATIVE BATTERY TERMINAL.
- DO NOT ALLOW CABLES TO BECOME ENTANGLED IN SURROUNDING OBJECTS.
- DO NOT SPLICE INTO ELECTRICAL CABLES.
- DO NOT DAMAGE PIPE OR WIRING WHEN DRILLING HOLES.
- DO NOT USE BOLTS OR NUTS IN THE BRAKE OR STEERING SYSTEMS TO MAKE GROUND CONNECTIONS.
- DO NOT INSTALL IN LOCATIONS WHICH MIGHT HINDER VEHICLE OPERATION, SUCH AS THE STEERING WHEEL OR GEARSHIFT.
- CAUTION
- HALT USE IMMEDIATELY IF A PROBLEM APPEARS.
- HAVE THE WIRING AND INSTALLATION DONE BY EXPERTS.
- USE SPECIFIED ACCESSORY PARTS AND INSTALL THEM SECURELY.
- ARRANGE THE WIRING SO IT IS NOT CRIMPED OR PINCHED BY A SHARP METAL EDGE.
- DO NOT INSTALL IN LOCATIONS WITH HIGH MOISTURE OR DUST.
- NOTICE
- Product Cleaning
- Temperature
- Maintenance
- Protecting the USB connector
- On Handling USB Flash drive
- X209D only
- About Swiping the Touch Screen
- Switching the Audio Sources Screen to a Dedicated Screen
- About Dual Screen
- Dual Screen Display Position
- Location of Controls
- (NAV) button
- Remote Sensor
- (Eject) button (X209D only)
- Controllable with Remote Control
- About the button descriptions used in this Owner's
- Manual
- Microphone (X208U/INE-W977HD only)
- (AUDIO) button
- or VOICE button
- / or / (UP/DOWN) button
- (Favorite) button
- MENU/ (Power Off) button
- button
- RESET switch
- Turning Power On or Off
- Turn the ignition key to the ACC or ON position.
- Press and hold the MENU/(Power Off) button for at least 5 seconds to turn the power off.
- Turning the System On
- Initial System Start-Up
- Turn off the unit power.
- Press the RESET switch with a ballpoint pen or similar pointed object.
- Adjusting the Volume
- Lowering Volume Quickly
- Touch Screen Operation
- Touch operation
- Swipe operation
- Drag & Drop operation
- Switching Sources
- Switching sources using the (AUDIO) button
- During audio/visual playback, press the ⏻AUDIO button repeatedly to switch to the desired source.
- Switching Sources from the Menu screen
- Press the MENU button.
- Touch your desired source in the Audio source selecting area.
- Operating the Function Button on the Audio/Video Main Screen
- About Basic Operation for List Screen
- About the Shortcut Setup Screen
- Sound Setup Function
- Adjusting Bass Level/Treble Level
- Setting item:
- Setting contents:
- Setting the BASS ENGINE SQ
- Setting the BASS ENGINE Type
- Adjusting the BASS ENGINE Level
- ■ About setup when the external power amplifier is connected
- Rear Seat Entertainment Function
- About the Menu Screen
- Edit Menu
- About the Indicator Display
- Opening screen Customization
- How to Input Characters and Numbers (Keypad)
- Using the Favorite Function
- Press the ★ (Favorite) button.
- - Favorite screen example
- Touch your desired Favorite registered item.
- Editing the Favorite Screen
- You cannot edit the Favorites screen while driving.
- Touch [ ] (Edit).
- After editing is complete, touch [《》(Back).
- After the caption for the confirmation is displayed, touch [OK].
- Editing is complete and the screen switches to the Favorite screen.
- Registering Items
- Touch [ ] (Add).
- Touch the desired item to be added (category).
- Choose the desired item to be added.
- Audio/Visual
- Navigation
- ■ Phone (Shortcut Dialing)\* 6
- Changing Item Names
- Touch the text area of the registered item.
- Input the name and touch [OK].
- Changing Icons (only the Shortcut Dialing and Navigation icons)
- Touch the icon that you want to change.
- Touch the icon you want to change from the icon list.
- Changing the Layout
- Deleting Items
- When deleting a selected item
- When deleting all items
- Adjusting the sound via the Smartphone
- Facebook Notification Function
- Receiving Notification
- Touch the desired button to operate.
- Displaying Facebook Screen
- ■ Facebook screen example
- Touch the poster's picture and name to switch to the Facebook screen.
- Displaying Notification List
- ■ Notification List screen example
- Setup Operation
- To display the Setup Menu screen:
- Touch [Setup].
- Touch the required setting icon on the upper part of the Setup main screen or swipe the list area vertically, then touch the setting item.
- Setting items:
- Select the desired item.
- To switch the setting, touch [<], [>], [+], [-], or mark the checkboxes "Off" (or "On").
- Touch [X] to return to the main source screen.
- Bluetooth Setup
- Displaying Bluetooth Information
- Pairing a Bluetooth Device
- Touch [Q] (Search) of "No Device."
- Touch [♪] (Audio), [♪] (Hands-free) or [♪/♪] (Both) of the device you want to connect from the list.
- When the device registration is complete, a message appears and the device returns to normal mode.
- Setting the Bluetooth Device
- Touch [♪] (Audio) or [♪] (Hands free) of the device you want to connect from the Paired Device list.
- Deleting a Bluetooth Device from the list
- Touch [图标] (Delete) of the Bluetooth compatible device to delete from the Paired Device list.
- Touch [OK].
- Hands-free Device Primary/Secondary Setting
- Touch the checkbox for Primary/Secondary of the device names that are registered to the unit to set them.
- iPhone Auto Pairing Setting
- Device Setup
- Setting the Passcode
- Enter a 4-digit passcode (old), and then touch [OK].
- Enter a 4-digit passcode (new), and then touch [OK].
- Changing the Character Code of the Phone Book
- Selecting the Output Speaker
- Setting the Microphone Select (X208U/INE-W977HD only)
- To switch the setting, touch [<], [>], [+], [-], or mark the checkboxes "Off" (☐ or "On" (). √
- Sound Setup
- Setting the Balance/Fader/Rear Speaker/Subwoofer
- Setting the Balance/Fader
- Touch the desired point within the image area. Or touch [∧] [∨][⟨⟩].
- Rear Speaker Setting
- Turning Subwoofer ON/OFF
- Adjusting the Subwoofer Level
- Setting the Subwoofer Phase
- Setting the Media Xpander (MX HD) Equalizer Presets
- ■ Adjustable source (media) and setting value
- HD-Radio™ (FM)/SiriusXM: Off (Initial setting) / Level1 / Level2 / Level3
- Compressed Media/Factory Audio: Off (Initial setting) / Level1 / Level2 / Level3
- HDMI/AUX: Off (Initial setting) / Compressed Media / Movie / Music
- (Movie)
- (Music)
- Adjusting the Parametric Equalizer Curve (Dual HD EQ)
- Adjust the Dual HD EQ to your preference.
- Adjusting the Band
- Adjusting the Frequency
- Adjustable frequency bands:
- Adjusting the Level
- Setting the Bandwidth
- Calling the Dual HD EQ adjusted value
- Touch [Preset 1], [Preset 2], or [Preset 3] on the Dual HD EQ screen.
- Adjusting the Crossover Settings (X-Over)
- Selecting the Cut-Off Frequency
- Adjusting the Slope
- Calling the X-Over adjusted value
- Touch [Preset 1], [Preset 2], or [Preset 3] on the X-Over screen.
- Adjusting the Time Correction (TCR)
- Touch the Correction mode button.
- Touch [ms], [cm] or [inch] to select the mode for making adjustments.
- Touch [−] or [+] for each speaker to adjust the time or distance.
- 4To store the adjusted setting value, touch and hold [Preset 1], [Preset 2], or [Preset 3] for at least 2 seconds.
- Calling the Time Correction Value
- Touch [Preset 1], [Preset 2], or [Preset 3] on the time correction screen.
- Setting Defeat
- Setting the Volume for Each Source
- Setting contents *6 :
- Setting the Volume for Apple CarPlay
- Setting contents for Media:
- Setting contents for Ringtones & Alerts:
- Setting contents for other items:
- Setting the Volume for Android Auto
- Adjusting the Caller Level
- Adjusting the Microphone Level
- Adjusting the Ring Tone Level
- Volume Setting
- Setting Audio Mute On/Off while Backing up
- Setting the Microphone Effect
- Default Sound Settings
- About the Crossover
- Crossover (X-Over):
- About Time Correction
- Example 1. Listening Position: Front Left Seat
- Example 2. Listening Position: All Seats
- Picture Quality Setup
- Selecting the Visual EQ Mode (Factory's setting)
- Adjusting Brightness
- Adjusting Color of Picture
- Adjusting Tint of Picture
- Adjusting Image Contrast
- Adjusting Picture Quality
- Saving and calling the adjusted picture quality
- Display/Key Setup
- Screen/Lighting Customize
- Touch [Screen/Lighting] in the Display/Key Setup Menu screen.
- Setting the Brightness of the Backlighting
- Adjusting the Dimmer of Button Lighting at Night
- Setting level:
- Adjusting the Minimum Level of Backlight
- Setting content:
- Switching the Display Color
- Switching the Illumination Color (X208U/INE-W977HD only)
- Setting the Text Scroll
- Switching the Artwork Position
- Setting the Menu Language
- Format settings
- Displaying the Product Information
- Initializing the System
- Setting Demo mode to Off/On
- Vehicle Setup
- Steering wheel Setting
- Installation Setup
- To switch the setting, touch [<], [>], [+], [-], or mark the checkboxes "Off" (or "On" (). √
- Radio Setup
- Setting the TUNER (FM) Tone Quality (Tuner Condition)
- Setting the TUNER (FM) Frequency Step
- SiriusXM Setup
- Setting the Alert individually for an Artist/Song/Favorite Team
- Setting ON/OFF of all Songs/Artists/Games Alert
- Deleting all stored Alert
- Setting the Favorite Sports Team Alerts
- When the number of registered Teams, Artist, and Songs exceeds 50
- Setting the Parental Lock
- Touch the numeric keypad to input a 4-digit passcode.
- Touch [Enter].
- Setting the Lock status of individual channels
- Touch [Locked Channels].
- Touch the checkboxes "On" (☑) or "Off" (☐) of the channels list to set the Parent Lock Off/On.
- Clearing the Lock of ALL the locked Channels
- Touch [Clear All Locked Channels].
- Touch [OK] to clear the lock of all the locked channels.
- Changing the Lock Passcode
- Touch [Edit Code].
- Use the keypad to enter the current (old) 4-digit passcode.
- Touch [Enter] to confirm the entry.
- Now use the keypad to enter the new 4-digit passcode.
- Touch [Enter].
- Then use the keypad to enter the new 4-digit passcode a second time to verify it.
- Touch [Enter].
- Signal Strength Information
- AUX Setup
- Setting the Auxiliary (AUX) Name
- Switching the Visual Input Signal System
- HDMI Setup
- Setting the Bluetooth Pandora®
- Apple CarPlay Setup
- System Setup Menu screen
- Touch [×] to return to the main source screen.
- Camera Setup
- Setting the Camera Input
- Setting the Camera Signal Input
- Further setting item:
- Switching Video Source for Multi View Camera
- Touch [Guide Adjustment].
- Multi View compatible Side Camera
- Touch [Front] or [Rear].
- Multi View compatible Front Camera/Rear Camera
- Touch [Back], [Panorama], [Corner], or [Top].
- Adjusting the Rear/Front/Side Camera Guide
- Touch [Adjust].
- Touch the guide you intend to adjust.
- ■ Rear Camera screen example
- When Hitch Guide is set to Off
- When Hitch Guide is set to On
- Camera Interrupt Setting (Power OFF Mode) (Rear Camera Only)
- Setting Multi Camera to On/Off
- Setting a Default Camera
- Factory System Setup
- Setting the Source Category
- Setting the Default Vehicle Screen
- Setting the Maestro Module
- Rear Seat Entertainment Setup
- Setting the Rear Seat Entertainment System
- Remote Sensor Setting
- External Accessories Setup
- Setting the External Audio Processor
- Setting the HDMI Selector On/Off
- Setting the External Accessory Control
- Smartphone Apps Setup
- Access to Apple CarPlay
- Touch [Apple CarPlay].
- What is Android Auto
- Activate Android Auto
- Touch [Android Auto].
- Activate Alpine Connect App
- Launch Alpine Connect App.
- Then connect the smartphone to this unit.
- Press the MENU button.
- Touch [Alpine Connect].
- Select the desired App.
- Radio/HD Radio™/ RBDS
- ■ HD Radio main screen example
- Function mode
- ■ Preset mode screen example
- Listening to the Radio
- Press the ♪ (AUDIO) button to select radio mode.
- Touch [icon].
- Select the desired band from FM1/FM2/AM.
- Touch [||||].
- Touch the desired tuning mode.
- Touch [|◀◀], [▶▶] or [◀◀], [▶▶] to change the radio frequency up or down respectively.
- Presetting Stations Manually
- Presetting Stations Automatically
- Select the desired band then touch and hold [≡↓] (Auto Preset).
- Tuning to Preset Stations
- Touch [ ]
- 2Select the desired band from FM1/FM2/AM.
- Touch any one of the Preset numbers you have already stored in the Preset mode screen.
- Inputting Frequency Directly and Receiving the Radio Station
- Touch [■] (Direct Tune).
- Touch a desired number.
- Touch [Enter] on the numeric keypad mode screen to confirm your selection.
- Receiving a Multicast (HD Radio™ Mode only)
- Touch [◀◀], [▶▶] or [◀◀], [▶▶].
- Selecting the Receivable Program Type (RBDS FM Radio mode only)
- Program Type list screen example
- Select the desired program type in the Program Type list screen.
- Forced Analog Mode
- Touch [ ] (Analog).
- Displaying Radio Text (RBDS FM Radio mode only)
- Tune in a radio station that transmits text messages.
- Touch [i] (Info) in the FM radio mode repeatedly to switch to the desired display.
- Using Ballgame Mode (HD Radio™ Mode only)
- About the Feature Logos
- Digital Sound
- PSD)
- HD2/HD3)
- Artist Experience)
- Artwork display
- Playback
- Press the ♪ (AUDIO) button to select USB mode.
- Touch [◀◀] or [▶▶] or to select the desired track (file).
- To pause playback, touch [▶ III].
- Fast-forwarding/Fast-reversing (USB Video only)
- During playback, touch and hold [ ] (Fast-reverse) or touch and hold [▶▶] (Fast-forward).
- Release [] or [] to return to normal playback.
- Stopping Playback (USB Video only)
- Touch [■] during playback.
- Repeat Play
- Touch [ ⟶ ].
- 2Select your desired Repeat mode.
- Random Play (USB Audio only)
- Touch [×].
- 2Select your desired Random Play mode.
- Searching for a Desired Song
- Quick Search mode
- Touch your desired Folder name or File name.
- Full Search mode
- Touch [Audio] or [Video] to switch whether the search list displays music files or video files.
- Touch your desired Folder name\* 2 or File name.
- Switching Display Modes (During Video File Play Back)
- Touch [ ]
- Fit mode
- Fill mode
- About USB Video format
- About iPod/iPhone models usable with this unit
- ■ iPod/iPhone main screen example
- Audio mode
- ■ Quick Search mode screen example
- Press the ♪ (AUDIO) button to select iPod mode.
- Touch [|◀◀] or [▶▶] or to select the desired track (file).
- Searching for a Music File
- In Quick Search mode, touch the desired list (for example, Album list).
- For example: Searching by Artist name
- Touch [Artists] in the Full Search mode screen.
- 2Select the desired artist.
- To play back the Artist directly
- To search for the Album of the Artist
- To search for a Song in the Album of the Artist
- Touch the desired album's name.
- 4Touch the desired song's name.
- Alphabet Search Function
- Touch "O-U" of the alphabet group.
- Touch "R" you want to search.
- Touch your desired artist name.
- Random Play (Shuffle)
- Listening to Pandora®
- Launch the Pandora® on the smartphone.
- Press the ♪ (AUDIO) button to select Pandora® or Bluetooth Pandora® mode.
- To skip to the next song, touch [▶▶].
- "Thumbs" Feedback
- During playback, touch [ 👍 ] for thumbs up, or touch [ ⬇ ] for thumbs down.
- Searching for a Desired Station
- Touch [Q] (Search) to activate the Search mode.
- Alphabet Search
- Touch [By A-Z].
- Touch the desired station.
- Search by Date Added
- Touch [By Date].
- Shuffle
- Touch [×] (Shuffle).
- Creating a New Station
- Free word
- During playback, touch [+] (New Station).
- Enter a keyword and touch [OK].
- Touch the desired list.
- Artist/Track
- During playback, touch [+_1] (Artist) or [+_2] (Track).
- Bookmarking a Desired Track or Artist
- During playback, touch [ˈɪk] (Artist) or [ˈjʊ] (Track).
- Connecting a Bluetooth Device (Bluetooth Pandora® Only)
- SiriusXM Tuner operation:
- SiriusXM main screen example (Song Info. Mode)
- Signal Indicator
- Preset mode screen example
- Preset buttons
- Receiving Channels with the SiriusXM Tuner
- About SiriusXM Satellite Radio
- Tuning Channels by Category
- Changing the Display
- Checking the SiriusXM Radio ID Number
- Storing Channel Presets
- Tuning Channels using Presets
- Touch any one of the Preset numbers you have already stored in the Preset mode screen.
- SmartFavorites Functions
- TuneStart™ Function
- TuneScan™ Function
- Search Function
- Searching by Channel
- Searching by Category
- Searching by My Music
- Touch [My Music]\*.
- Touch the desired artist/song.
- Searching by My Games
- Touch [My Games]\*.
- Touch the desired team.
- Searching by Featured Favorites
- Touch [Featured]\*.
- Touch the desired category.
- Touch the desired channel within the selected category.
- Selecting the Channel Directly
- Touch to input the channel number.
- Storing the desired Song/Artist
- Touch [≡↓] (Set Alert) on the SiriusXM mode screen.
- Touch the "Artist Saved" or "Song Saved" to choose to store the Artist or the Song.
- Receiving and Tuning to an Alert
- When stored information is broadcast, after displaying "Song Alert", "Artist Alert" or "Game Alert," a Pop up screen is displayed.
- Touch [Tune] to receive.
- Replay Function
- ■ Replay mode screen example
- Parental Lock Function
- Input the 4-digit passcode you set in "Setting the Parental Lock" (page 44).
- Using Jump Memory and Jump Recall function
- About HDMI selector (Optional)
- Inserting/Ejecting a Disc
- Inserting the Disc
- Removing the Disc
- Press ▲ (Eject) button.
- DVD Player SETUP
- You cannot perform DVD Player Setup while driving.
- Touch [💡] (Setup).
- Touch [∧] or [∨] to select the setting item.
- Touch [Enter], then touch [<], [>], [^] or [∨] to change the setting item.
- Touch [X] to return to the main source screen.
- Switching the Bar Color
- Setting the TV Screen Mode
- 4:3 LETTER BOX:
- 4:3 PAN-SCAN:
- 16:9 WIDE:
- Delaying Image Output
- Returning to the Initial Setting
- DVD Contents Setup
- Setting the language
- Further Setting contents:
- CD Contents Setup
- Playing MP3/WMA/AAC/WAV Data
- Setting the Video CD Play Mode
- Displaying the Disc Status Automatically (CD/MP3/WMA/AAC/WAV only)
- Audio Setup
- Setting the Digital Output
- Output Modes:
- Setting the Downmix Mode
- ■ MP3/WMA/AAC main screen example
- Stopping Playback
- MIX (Random Play)
- File/Folder Name Search (Concerning MP3/WMA/AAC/WAV)
- Selecting Folders (Concerning MP3/WMA/AAC/WAV)
- Info Mode Function
- Info mode
- The DVD operation screen display
- Playing a Disc DVD-V V CD
- If a Menu Screen Appears
- Direct Menu Operations DVD-V
- Touch the screen while the DVD menu is being displayed.
- Touch the DVD menu directly.
- Menu Operations DVD-V V CD
- Touch [☐] (Menu Control).
- Touch [Key].
- Select a desired menu item by touching [∨], [∧], [〈] or [〉].
- Touch [Enter] to confirm the selected item.
- Numeric Keypad Input Operations DVD-V
- Touch [Key] again in the menu operation mode. The numeric keypad input mode screen appears.
- Touch [Enter] on the numeric keypad input mode screen to confirm your selection.
- Displaying the Top Menu Screen
- DVD-V VCD
- Touch [≡] (Top Menu).
- Displaying the Menu Screen DVD-V V CD
- Touch [≡≡] (Menu).
- Playing Still Frames (Pausing) DVD-V V CD
- During playback, touch [▶ II].
- Touch [▶ III] to resume playback.
- Stopping Playback DVD-V VCD
- Fast-forwarding/Fast-reversing DVD-V V CD
- During playback, touch and hold [|◀◀] (Fast-reverse) or touch and hold [▶▶] (Fast-forward).
- Release [|◀◀] or [▶▶] to return to normal playback.
- Finding the Beginnings of Chapters/Tracks/Files
- DVD-V V CD
- During playback, touch [◀◀] or [▶▶].
- Supplementary explanations
- Forward/Reverse frame-by-frame Playback
- In the pause mode, touch [◀◀] or [▶▶].
- Touch [▶ II] to return to normal mode.
- Repeat Playback DVD-V V CD
- Touch [ ⟶ ] to repeatedly play back.
- DVD Video
- Video CD
- Searching by Title Number DVD-V
- Searching Directly by Chapter Number
- Switching the Angle DVD-V
- Touch [☐] (Angle).
- Switching the Audio Tracks DVD-V V CD
- Touch [ ] (Audio).
- Video CDs with multiplex audio
- Switching the Subtitles (Subtitle Language)
- Touch [ ] (Sub Title).
- Switching Display Modes
- iPhone, Smartphone, etc.
- Press the ♪ (AUDIO) button to select HDMI mode.
- 2In HDMI player mode, the screen of the device displays the content of electronic equipment by mirror image.
- Switching the source when two HDMI devices are connected
- Screen example when the HDMI Setup is "HDMI 1"
- Touch [ - 25] (HDMI 2).
- Setup Before Using
- About Bluetooth
- About the Hands-free Phone
- Before Using Bluetooth
- Set "Bluetooth" to "On" (). √
- 2Register a Bluetooth device in this unit (page 31).
- ■ Phone menu screen example
- Answering a Call
- Hanging up the Telephone
- Call Waiting Function
- Second incoming call during a conversation in the Phone Operation screen
- Calling
- Calling by Favorite Function
- Favorite screen
- Touch the Short Cut icon.
- Touch [Call].
- Making a phone call using the Phone Menu
- Making a phone call from the Recent Events list
- Touch [?] (Recents) to change to the Recent Events list screen.
- Touch the name of the contact you want to call.
- Touch [ ] .
- Calling from the Contacts list (Phone Book)
- Touch [icon] (Contacts) to change to the Contacts list screen.
- Entering a Phone Number to Make a Call
- Touch [ ] (Keypad).
- Enter the phone number you wish to call.
- Touch [Call].
- Using Voice Recognition function
- Using Siri
- Press or VOICE button.
- Speak into the microphone supplied with this unit.
- To finish the Voice Control mode, touch [] or press or VOICE button.
- Touch [−] or [+].
- Stopping input to the microphone
- Voice Dial Function
- Say the telephone number\* or name\* you want to call, into the microphone.
- To finish the Voice Dial mode, touch [] or press or VOICE button.
- Operations During a Conversation
- Adjusting the Speech Volume
- Changing the Voice Output
- Touch [◀-] (Speaker).
- DTMF (Touch-Tone) Function
- Touch [■] (Keypad).
- 2Input number.
- Phone Book Function
- Synchronizing the Phone Book
- Adding the Phone Book
- Deleting the Phone Book Entries
- Deleting One Entry from the Phone Book
- Deleting All Entries from the Phone Book
- Searching in the Phone Book
- Bluetooth Audio main screen example
- Press the ♪ (AUDIO) button to select Bluetooth Audio mode.
- Touch [|◀◀] or [▶▶] to select the desired track (file).
- 3To pause playback, touch []. ▶ II
- Touch [↩].
- Random Play
- Touch your desired Group name or File name.
- Touch your desired Group name\*2 or File name.
- Connecting a Bluetooth Device
- Disconnecting the Bluetooth Connection
- Changing the connecting Bluetooth Device
- Operating Auxiliary Devices (Optional)
- Press the ♪ (AUDIO) button to select Auxiliary (AUX)\* mode.
- AUX Operation Screen Display During Video File Playback
- Touch the screen.
- Operating an AUX, AUX DVD or GAME
- Example for AUX, AUX DVD, GAME mode display
- Operating an External DVD Player
- ■ External DVD player display example
- Menu operation mode screen example
- Front camera:
- Rear camera:
- Other camera:
- Rear Camera Operation
- Displaying the Rear Camera Image from the Menu screen
- Touch [Camera].
- Displaying the rear view video while the car is in reverse
- Shift the gear lever to the reverse (R) position.
- 2If you shift the gear lever to a position other than reverse (R), the monitor returns to the previous screen.
- Switching the Image for the Rear Camera
- Touch the screen when the image from the rear camera is displayed.
- Touch [Back], [Panorama], [Corner] or [Top].
- Guide Display ON/OFF Setting
- Touch the screen when the image from the camera is displayed.
- Adjusting the Caution Display Location
- About the Rear Camera Guide
- Error between the screen and the actual road surface
- Front Camera Operation
- Switching the Image Pattern for the Front Camera
- About the adjustment of guide display ON/OFF setting and adjustment of Caution display location
- Side Camera Operation
- Displaying the Side Camera image from the Menu screen.
- Switching the Image Pattern for the Side Camera
- Touch the screen when the image from the side camera is displayed.
- Touch [Rear] or [Front].
- About Audio Interrupt
- Access to iDataLink Mode
- Select item:
- iDataLink Function Screen example
- ■ Vehicle Information screen example
- Car Setting screen example (Generic List screen)
- About Parking Sensor screen
- Parking Sensor Full screen example
- Parking Sensor Camera interlock screen example (Rear camera)
- Indicator colors when an obstacle is detected.
- External Accessory Control Operation
- You cannot edit the External Accessory screen while driving.
- Touch [Ext Acc Ctrl] in the Menu screen to activate External Accessory screen.
- Touch [Edit].
- Edit each switch.
- When changing the name:
- When changing the layout of the switches:
- To revert to a default icon:
- After editing is complete, touch [ « ] (Back).
- After the caption for the confirmation is displayed, touch [OK].
- When Using the Remote Control
- Battery Replacement
- Opening the battery case
- 2Replacing the battery
- Closing the cover
- Operating the DVD Player
- DISP. button
- button
- REPEAT button
- AUDIO button
- SUBTITLE button
- CLR (ALL CLR) button
- ANGLE button
- / button
- MENU button
- SETUP button
- RETURN button
- buttons
- M.I.X. button
- Numeric Keypad
- LIST button
- TOP M. button
- Product Software Update
- Updating this product
- Important information on the software
- About the software license of the product
- Cautions about Discs (X209D only)
- Moisture Condensation
- Damaged Disc
- Never Attempt the Following
- Inserting Discs
- Irregular Shaped Discs
- New Discs
- Installation Location
- Correct Handling
- Disc Cleaning
- Disc Accessories
- Discs Playable on This Unit (X209D only)
- playable Discs
- Discs that cannot be played
- DualDisc
- DVD region number (playable region number)
- Video CDs
- Using compact discs (CD/CD-R/CD-RW)
- Tips for making your own discs
- What is the difference between an Audio and MP3/WMA/AAC CD?
- Multisession CD-R/RW:
- Properly formatted MP3/WMA/AAC Discs:
- On handling compact discs (CD/CD-R/CD-RW)
- Using DVD-Rs/DVD-RWs/DVD+Rs/DVD+RWs
- About the Supported Formats
- About MP3/WMA/AAC/FLAC
- What is MP3?
- What is WMA?
- What is AAC?
- What is FLAC?
- Method for creating MP3/WMA/AAC/FLAC (USB Flash drive) files
- Supported playback sampling rates and bit rates
- ID3 tags/WMA tags
- Playing back MP3/WMA/AAC/FLAC
- Media supported
- Corresponding File Systems
- Order of files
- Terminology
- Bit rate
- Sampling rate
- Encoding
- Tag
- Root folder
- About WAV (Disc)
- About DVDs
- In addition, DVDs offer a variety of functions.
- Multiple audio\* (page 79)
- Subtitles function\* (page 79)
- Multi angle function\* (page 79)
- Multi story function\*
- List of Language Codes
- In Case of Difficulty
- Basic
- No function or display.
- No sound or unnatural sound.
- Screen not displayed.
- Movement of displayed picture is abnormal.
- The optional remote control is inoperative.
- Radio
- Unable to receive stations.
- Unable to tune stations in the seek mode.
- Broadcast is noisy.
- USB Audio
- Unit does not operate.
- Picture is unclear or noisy.
- Rear Seat Entertainment System
- DVD sound is not being output from the rear monitor headphones.
- Disc (X209D only)
- Disc playback sound is wavering.
- Disc insertion not possible.
- Unable to fast forward or backward the disc.
- Disc playback sound skips due to vibration.
- Disc playback sound skips without vibration.
- CD-R/CD-RW/DVD-R/DVD-RW/DVD+R/DVD+RW playback not possible.
- Error displays.
- MP3/WMA/AAC is not played back.
- Playback does not start.
- Image stops sometimes.
- The Navigation cannot work properly.
- If this Message Appears
- System
- If you are driving, please pull over and park before using this function.
- Over-current detected on the USB.
- USB Hub is not supported.
- Connected USB Device is not compatible.
- No data.
- Un-readable song was skipped.
- Bluetooth
- Please connect a Bluetooth audio device.
- Unable to download phonebook.
- HDMI
- HDMI communication error,
- Please check your device and try again.
- HDMI current error,
- Please reconnect your device and try again.
- HDMI monitor communication error.
- Please check the connection or restart system.
- Too many monitors are connected to the HDMI output.
- Please check the connection.
- iDataLink
- CAN Communication error
- SiriusXM
- Check Tuner
- Check Antenna
- No Signal
- Channel Not Subscribed
- Call SiriusXM to Subscribe
- Channel Not Available
- Subscription Updated
- Press OK to Continue
- Channel Locked
- Updating...
- Updating Teams, please wait
- Replay Memory Full
- Replay Memory Near Full
- You can not use Sound App
- Because External AP is on.
- (X209D only)
- DISC ERROR
- LO-TEMP
- NO DISC
- HI-TEMP
- LOADING ERROR
- EJECT ERROR
- PROTECTED
- ILLEGAL FORMAT
- READ ERROR
- The vehicle's position is erroneous.
- No operation
- Specifications
- MONITOR SECTION
- FM TUNER SECTION
- AM TUNER SECTION
- USB SECTION
- HDMI SECTION
- GPS SECTION
- Bluetooth SECTION
- GENERAL
- NOSE/CHASSIS SIZE
- For X209D
- CD/DVD SECTION
- PICKUP
- REMOTE CONTROL
- END USER LICENSE AGREEMENT (HERE)
- ● PRODUCTS COVERED:
- ● LENGTH OF WARRANTY:
- ● WHO IS COVERED:
- WHAT IS COVERED:
- WHAT IS NOT COVERED:
- ● HOW TO OBTAIN WARRANTY SERVICE:
- ● HOW WE LIMIT IMPLIED WARRANTIES:
- ● HOW WE EXCLUDE CERTAIN DAMAGES:
- ● HOW STATE/PROVINCIAL LAW RELATES TO THE WARRANTY:
- IN CANADA ONLY:
- ● HOW TO CONTACT CUSTOMER SERVICE:
Brand : ALPINE
Model : X209D
Category : Browser