
Simple Press 3010 - Iron SUNBEAM - Free user manual and instructions
Find the device manual for free Simple Press 3010 SUNBEAM in PDF.


| Product Type | Steam/Dry Iron |
| Model | Simple Press 3010 |
| Brand | Sunbeam |
| Power Consumption | 1200 Watts |
| Voltage | 120 Volts AC |
| Soleplate Material | Non-Stick Coating |
| Water Reservoir Capacity | 10 ounces (295 ml) |
| Auto-Off Safety Feature | Patented MOTION SMART™ Auto-Off: 15 minutes upright, 30 seconds horizontal |
| Power Cord Length | 360° Tangle-Free Swivel Cord |
| Steam Control | On/Off Switch |
| Fabric Select Dial | Settings for Silk, Synthetics, Wool, Cotton, Linen |
| Ironing Modes | Dry Ironing and Steam Ironing |
| Water Fill Method | Large fill hole with sliding cover |
| Self-Cleaning Feature | Yes, to clean steam vents and reservoir |
| Heel Rest | TIP-RESISTANT™ with rubber feet |
| Power Indicator Light | Steady when powered, blinks when auto-off activated |
| Ergonomic Handle | Comfortable, ergonomic grip |
| Water Type | Accepts tap water; for very hard water, use demineralized/distilled monthly |
| Warranty | One-Year Limited Warranty |
| Included Accessories | None specified |
Frequently Asked Questions - Simple Press 3010 SUNBEAM
User questions about Simple Press 3010 SUNBEAM
0 question about this device. Answer the ones you know or ask your own.
Ask a new question about this device
Download the instructions for your Iron in PDF format for free! Find your manual Simple Press 3010 - SUNBEAM and take your electronic device back in hand. On this page are published all the documents necessary for the use of your device. Simple Press 3010 by SUNBEAM.
USER MANUAL Simple Press 3010 SUNBEAM
When using your iron, basic safety precautions should always be followed, including the following:
• READ ALL INSTRUCTIONS BEFORE USE.
• Use iron only for its intended use.
• To protect against risk of electric shock, do not immerse the iron in water or other liquids.
- The iron should always be turned to "OFF" before plugging or unplugging from outlet. Never yank cord to disconnect from outlet; instead, grasp plug and pull to disconnect.
- Do not allow cord to touch hot surfaces. Let iron cool completely before putting away. Loop cord loosely around iron when storing.
- Always disconnect iron from electrical outlet when filling with water or emptying and when not in use.
- Do not operate iron with a damaged cord or if the iron has been dropped or damaged. To avoid the risk of electric shock, do not disassemble the iron. Take it to an authorized service center for examination and/or repair. Incorrect reassembly can cause a risk of electric shock when the iron is used.
- Close supervision is necessary for any appliance being used by or near children. Do not leave iron unattended while connected or on an ironing board.
- Burns can occur from touching hot metal parts, hot water or steam. Use caution when you turn a steam iron upside down - there may be hot water in the reservoir.
- If the iron is not operating normally, disconnect from the power supply and have the iron serviced by an authorized service center.
- Your SUNBEAM ^® iron is designed to rest on the heel rest. Do not leave the iron unattended. Do not set the iron on an unprotected surface, even if it is on its heel rest.
SPECIAL INSTRUCTIONS
- This is a 1200-Watt appliance. To avoid a circuit overload, do not operate another high wattage appliance on the same circuit.
. If an extension cord is absolutely necessary, a IO-ampere cord should be used. Cords rated for less amperage may overheat. Care should be taken to arrange the cord so that it cannot be pulled or tripped over.
For products purchased in the United States and Canada only
To reduce the risk of electrical shock, this appliance has a polarized plug (one blade is wider than the other). This plug fits a polarized outlet only one way; if the plug does not fit fully into the outlet, reverse the plug. If it still does nor fit, contact a qualified electrician. Do not attempt to defeat this safety feature.
*In Mexico, the iron runs at 127 Volts, 1350 Watts. If an extension cord is necessary, a 13-Ampere cord should be used.
SAVE THESE INSTRUCTIONS
Table of Contents
Important Safeguards... ii
Special Instructions ....
Welcome....3
Learning About Your Iron.....4
Filling the Water Reservoir 5
Ironing ....7
Dry Ironing .7
Steam Ironing .7
Using the Iron's Special Features.....8
SPRAY MIST® (Models 3020 & 3030 only). .... 8
SHOT OF STEAM" (Model3030 only). .8
Vertical Steam (Model 3030 only) . .9
Patented MOTION SMART™ Auto-Off. 10
Caring For Your Iron After Use. 11
Turning Off Your Iron 1 1
Storing Your Iron 1 1
Maintaining Your Iron.....12
Cleaning the Soleplate 1.2
Using the Self-Cleaning Feature 12
Ironing Tips and Guide....15
Ironing Tips 15
Ironing Guide.. 16
One-Year Limited Warranty.....17
How to Obtain Warranty Service 1 8
Welcome
Congratulations on Your purchase of a SUNBEAM® iron! Sunbeam has designed your iron to provide the utmost in quality, ease of use and convenience. Sunbeam offers you an iron to fit your lifestyle:
SUNBEAM" Simple Press" irons offer the following features:
- SPRAY MIST® (Models 3020 & 3030 only) Provides a fine mist of water to dampen fabrics for creases or to remove wrinkles from heavy fabrics.
- Non-Stick Surface - Prevents starch residue and fabrics from sticking to the bottom, making the iron easier to clean.
- ONE PASS" Steam - Provides just the right amount of steam to remove wrinkles with one pass of the iron.
- 360" Tangle-Free Cord Keeps the power cord off of the fabric and out of your way, whether you are right or left handed.
- Self-Cleaning - Prevents mineral build up that can reduce the life of your iron.
- large Water Fill Hole - Allows you to fill the water reservoir faster while reducing water spills and drips.
- Accepts Tap Water Eliminates the necessity of keeping distilled water on hand for ironing.
- Comfortable Ergonomic Handle - Provides a more comfortable grip and easy handling
- Patented MOTION SMART" Auto-Off - Automatically turns the iron off if it is not moved after 15 minutes in the upright position or after 30 seconds in the ironing position.
- Power Indicator light - Lights steadily to let you know the iron is plugged in; blinks to let you know that the patented MOTION SMART™ Auto-Off has activated; and is unlit when the iron is unplugged.
- TIP-RESISTANT" Heel Rest - Reduces risk of accidental tipping of the iron from the upright position; rubber feet on heel rest add stability.
- Vertical Steam (Model 3030 only y) - Functions like a garment steamer to remove wrinkles from hung garments or drapes.
- Longer Power Cord (Model 3030 only) - Provides 12 feet of power cord to give you added flexibility when ironing
- SHOT OF STEAM® (Model 3030 only) - Offers a powerful burst of steam for removing stubborn wrinkles
Learning About Your Iron
- SPRAY MIST@ Release (Models 3020 & 3030 only)
- Sliding Water Reservoir Cover
- Water Fill Hole
- SHOT OF STEAM® Button (Model 3030 only)
- SPRAY MIST@ Button (Models 3020 & 3030 only)
- Steam Control
- Power Indicator Light
- Patented MOTION SMART" Auto-Off Indicator Blinking Light
- Comfortable, Ergonomic Grip
- 360" Tangle-Free Swivel Cord
- TIP-RESISTANT" Heel Rest with Rubber Feet
- Cord Wrap
- Fabric Select Dial
- Non-stick Soleplate
- 10-ounce, See-Through Water Reservoir

Filling the Water Reservoir
You must fill the water reservoir with water to use the SPRAY MIST® and SHOT OF STEAM features and to get steam out of your iron
Tip: Sunbeam tests each iron at the factory to ensure that they function correctly. The test may leave a small, harmless amount of water within the water reservoir.
Before you fill the water reservoir, please consider the following:
- While this iron was designed for use with tap water, very hard water will reduce the performance of the iron. If your water is very hard, Sunbeam recommends that you use tap water the first time, then consider using demineralized or distilled water for subsequent use. You should use tap water once a month, however, to maintain the iron's optimal steam performance.
Do not use water that has passed through a home water softening system. This type of water contains minerals that will decrease the performance and shorten the life of your iron. Use demineralized or distilled water, instead.
Important: When not ironing always set the Steam Control and the Fabric Select dial to OFF.
To fill the water reservoir:
- Make sure the Iron is unplugged and that both the Fabric Select dial and the Steam Control are set to OFF.

-
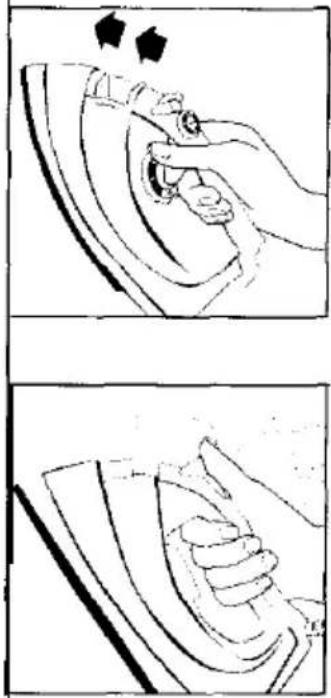
Slide the water reservoir cover open and hold the iron at an angle.
-
Fill the water reservoir with tap water until it reaches the maximum fill level (10 ounces).
WARNING: To prevent the risk of burns, be careful when filling a hot iron with water. Hot metal parts, hot water and steam can cause injuries.
- Close the water reservoir cover.
natural_image
Two-panel illustration showing a hand using an iron on a surface, with arrows indicating motion or pressure (no text or symbols)Ironing
Dry Ironing
-
Make sure that the Steam Control is set to OFF.
-
Plug the cord into a 102-Volt AC outlet. The Power Indicator will light.
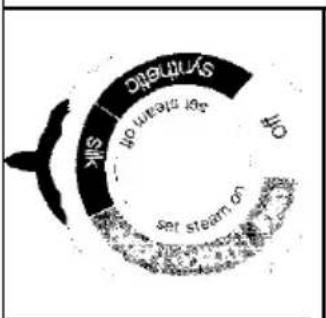
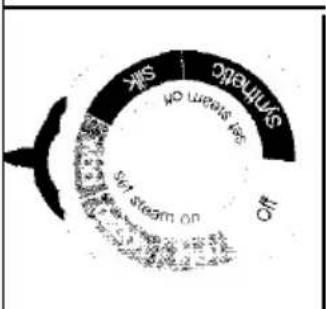
- Turn the Fabric Select dial to the Dry ironing fabric setting you desire (Silk or Synthetics) and allow the iron to heat for 2 minutes. While the Iron is heating, make sure it is sitting on its heel rest on a stable, protected surface.
Tip: Refer to the Ironing Guide on Page 16 for the recommended setting for your fabric.
Steam Ironing
- Follow the instructions for "Filling the Water Reservoir" on Page 5.
- Plug the cord into a 120.Volt AC outlet.
The Power Indicator will light. - Turn the Fabric Select dial to the Steam ironing fabric setting you desire (Linen, Cotton or Wool) and allow the iron to heat for 2 minutes. While the iron is heating, make sure It is sitting on its heel rest on a stable, protected surface.
Tip: Refer to the Ironing Guide on Page 16 for the recommended setting for your fabric.
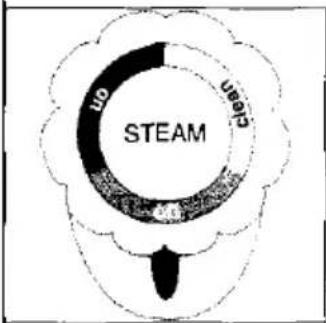
- After the iron has heated (2 minutes), turn the Steam Control to ON.
flowchart
graph TD
    A["STEAM"] --> B["Clean"]
    style A fill:#f9f,stroke:#333
    style B fill:#ccf,stroke:#333
Using the Iron's Special Features
SPRAY MIST® (Models 3020 & 3030 on/y)
The SPRAY MIST" feature dampens the fabric to aid in removing wrinkles from heavy fabrics and for setting creases.
To use the SPRAY MIST@ feature:
Press the SPRAY MIST ^® button firmly,
SHOT OF STEAM" (Model 3030 only)
The SHOT OF STEAM" feature provides an extra burst of steam for deep penetration of stubborn wrinkles. You can use this feature while Dry or Steam ironing, but the water reservoir must be at least 1/4 full of water.
To Use the SHOT OF STEAM" Feature:
- Press the SHOT OF STEAM" button several times to prime the pump.
- Place the iron on top of the wrinkle and press the SHOT OF STEAM® button each time you would like an extra burst of steam. The SHOT OF STEAM® feature may be used continuously with just a short pause between shots.

natural_image
Line drawing of a hand using a lathe iron to press a circular component (no text or symbols)
natural_image
Line drawing of a hand using a lathe iron to press or clean a surface, no text or symbols presentVertical Steam (Model 3030 only)
The vertical steam feature allows your iron to function as a garment steamer.
Tip: When using the vertical steam on clothing, hang the clothing on a clothes hanger for best results. Hanging curtains and drapes may also be steamed.
To use the vertical steam:
- Make sure that the iron has heated up (2 minutes).
- Hold the iron in a vertical position, with the iron close to but not touching the fabric you want to steam.
- With your other hand, pull the fabric tight.
- Press the SHOT OF STEAM" button at 2-second intervals as you move the iron across the wrinkled area.
WARNING: To prevent the risk of burns. keep your hand away from the area being steamed.
WARNING: DO NOT steangarments while wearing them; this may result in injuries.

natural_image
Line drawing of two hands holding a bottle, with abstract geometric shapes in the background (no text or symbols)Patented MOTION SMART" Auto-Off
When the iron is plugged in, the Power Indicator will light steadily, indicating that there is power to the iron.
If you leave the iron:
- in a vertical position (on its heel rest) without moving it, the iron will automatically turn off after 15 minutes. The Power Indicator will blink to let you know that the iron has stopped heating.
- in a horizontal position without moving it (or it accidentally tips over), the iron will automatically stop heating after 30 seconds. The Power Indicator will blink to let you know that the iron has stopped heating.
Important: The Power indicator will continue to blink until the iron is unplugged.
To restart the iron:
Move the iron back and forth and allow it to reheat for 2 minutes. The indicator will stop blinking and the iron will start heating again.
WARNING: The patented MOTION SMART" Auto-Off is a safety feature, not a recommended means for turning Your iron off. See "Caring for Your Iron After Use" on Page 11, for information on turning off your iron and storing it safely between use.


natural_image
Pure technical diagram of a mechanical component with no text or symbolsCaring for Your Iron After I Jse
Turning Off Your Iron
-
Turn the Steam Control and Fabric Select dial to OFF.
-
Unplug the iron from the power source.
WARNING: NEVER yank the power cord when unplugging the iron, this can damage the cord.
Storing Your Iron
- Allow the iron to cool.
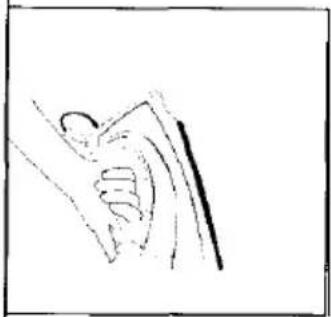
- If you do not use your iron on a daily basis, empty the water reservoir after each use for a longer iron life. To do so, open the water reservoir cover and turn the iron upside down to allow water to flow from the fill hole. Shake the iron gently to remove trapped water drops. Close the water reservoir cover.
- Loosely loop the power cord around the cord wrap and store the iron on its heel rest.
Important: Wrapping the card around the iron too tightly can damage the cord.
Tip: When not ironing, always set the Steam Control and the Fabric Select dial to OFF.

natural_image
Simple line drawing of a hand holding a piece of paper or tool (no text or symbols)
natural_image
Simple line drawing of a curved object with motion lines, no text or symbols presentMaintaining Your Iron
Cleaning the Soleplate
Clean the soleplate if starch or other residue accumulate.
To clean the Soleplate:
- Allow the iron to cool and then wipe it with a soft, damp cloth.
WARNING: DO Not use abrasive cleansers, scouring pads or vinegar to clean the soleplate, this will damage the finish.
- Run the iron over an all-cotton cloth to remove any residue.
Using the Self-Cleaning Feature
You should use the self-cleaning feature to maintain the optimal performance of your iron. The self-cleaning feature will clean the water reservoir and steam vents of accumulated minerals, dust and lint.
In general, clean the iron:
if the steam vents clog up, or
• once a month if you have hard water, or
. once every two months if you have soft water
To use the self-cleaning feature:
- Make sure that the Steam Control and the Fabric Select dial are set to OFF.

-
Fill the water reservoir with tap water (10 oz.) and close the water reservoir cover.
-
Plug the iron into a power outlet. The power indicator will light.
-
Set the Fabric Select dial to Linen and allow the iron to heat for 2 minutes.
-
Turn the Steam Control and the Fabric Select dial to OFF and unplug the iron.
-
Hold the iron over a sink in a horizontal position.
WARNING: Be careful not to touch the iron's hot surfaces.
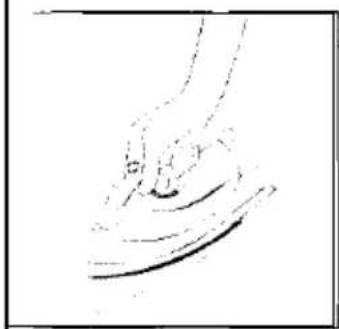
- Turn the Steam Control to CLEAN. Water will begin dripping from the steam vents. To make sure that all of the water is removed from the tank, slowly rock the iron side to side and front to back for 30 seconds. When rocking the iron, dip the nose of the iron slightly below the rear of the iron to make certain the water circulates completely.

natural_image
Line drawing of a hand pressing down on a circular object (no text or symbols)
pie
| Category | Value | |---|---| | Synthetic | 100 | | Off | 50 |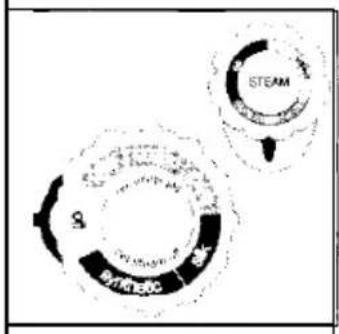
natural_image
Simple line drawing of a hand pressing down on a curved surface (no text or symbols)- Turn the Steam Control to OFF.
- Open the water reservoir cover, turn the iron upside down and allow the remaining water to flow out of the fill hole.
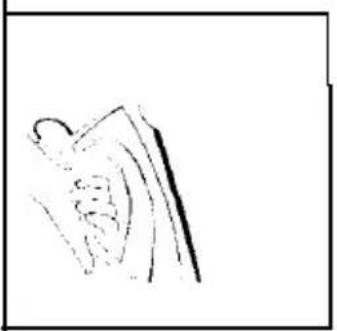
- Dry the soleplate with a towel.
- Plug in the iron and set the Fabric Select dial to Linen. Let the iron heat for 2 minutes to dry out the iron completely.
- Set the Fabric Select dial to OFF, unplug the iron and allow it to cool.

natural_image
Simple line drawing of a hand holding an object (no text or symbols)

Ironing Tips and Guide
Ironing Tips
- Always read garment labels and follow the manufacturer's ironing instructions.
- Sort the articles to be ironed according to the type of fabric.
You should first iron garments requiring low temperature (e.g., silks and synthetics) to avoid damaging them with an iron that is too hot.
- If you are unsure of the fabric content of the garment, test a small area, such as a seam or facing, before ironing a visible area. Start with a low temperature and gradually increase the heat to find the best setting.
- When changing the temperature from a high setting to a low setting, allow approximately 5 minutes for the lower temperature to be reached.
- When steam ironing, use long, slow passes over the fabric. This will allow the steam to penetrate the fabric while allowing the heat of the soleplate to dry out the moisture.
- To iron linens, turn garment inside out. Be careful not to use an iron that is too hot because the lining may melt or stick to the soleplate.
- To iron zippers, use an ironing cloth or make sure the zipper is closed and iron over the flap. Never iron directly over an unprotected zipper.
- Use the Ironing Guide on Page 16 to select the best setting and method for the fabric you plan to iron.
Ironing Guide
| Fabric Steam Setting Fabric Setting Ironing Recommendations | |||
| Acrylic DRY | Synthetic | Iron garment inside out | |
| Acetate Dry | Synthetic | Iron garment Inside out while still damp | |
| Silk Dry | Silk | Iron garment Inside out. Use an ironing cloth* to prevent shine marks. | |
| Viscose Dry or Steam | Silk | Mainly dry Iron steam may be used under garment manufacturer's instructions. | |
| Nylon Dry or Steam | Silk | Iron garment Inside out while still damp. | |
| Polyester Dry or Steam | Synthetic | Iron garment Inside out while still damp. | |
| Rayon Dry or Steam | Synthetic | Iron garment inside out. | |
| Wool Steam | Wool | Iron garment Inside out or use an ironing cloth.* | |
| Wool Steam blends | Wool | Iron garment inside out or use an Ironing cloth.” | |
| Cotton Steam blends | Cotton | Follow garment manufacturer's instructions. Use setting for the fiber requiring the lowest setting | |
| Corduroy Steam | Cotton | Iron garment inside out or use an Ironing cloth" and then brush the garment with Your hand to raise the texture of the fabric. | |
| Cotton Steam | Cotton | Iron dark fabrics inside out to prevent shine marks. | |
| Linen Steam | Linen | Iron garment inside out or use an ironing cloth* to prevent shine marks (especially on dark fabrics). | |
| Denim Steam | Linen | Use the SPRAY MIST@ feature and/or the SHOT OF STEAM® feature deeper penetration to remove wrinkles. | |
*An ironing cloth is a cotton, dry-cleaned cloth that you place over the garment you are ironing to prevent the fabric from looking shiny.
One Year Limited Warranty
Sunbeam Products, Inc. (“Sunbeam”) warrants that for a period of one year from the date of purchase, this product will be free from defects in material and workmanship. Sunbeam, at its option, will repair or replace this product or any component of the product found to be defective during the warranty period. Replacement will he made with a new or remanufactured product or component. If the product is no longer available, replacement may he made with a similar product of equal or greater value. This is your exclusive warranty.
This warranty is valid for the original retail purchaser from the date of initial retail purchase and is not transferable. Keep the original sales receipt. Proof of purchase is required to obtain warranty performance. Sunbeam dealers, service centers, or retail stores selling SUNBEAM" products do not have the right to alter, modify or any way change the terms and conditions of this warranty.
This warranty does not cover normal wear of parts or damage resulting from any of the following: negligent use or misuse of the product, use on improper voltage or current, use contrary to the operating instructions, disassembly, repair or alteration by anyone other than Sunbeam or an authorized service center. Further, the warranty does not cover acts of nature, such as fire, flood, hurricanes and tornadoes.
Sunbeam shall not be liable for any incidental or consequential damages caused by the breach of any express or implied warranty. Except to the extent prohibited by applicable law, any Implied warranty of merchantability or fitness for a particular purpose is limited in duration to the duration of the above warranty. Some states, provinces or jurisdictions do not allow the exclusion or limitation of incidental or consequential damages or limitations on how long an implied warrant) lasts, so the above limitations or exclusion may not apply to you. This warranty gives you specific legal rights, and you may also have other rights that vary from state to state or province to province.
How To Obtain Warranty Service
Take the product to an authorized Sunbeam service center. You may obtain a list of service centers and other repair/replacement instructions by calling:
(800) 458-8407
or send an e-mail to:
Consumeraffairs@consumer.sunbeam.com
Please include name, address, telephone number, product model number and description of the problem.
DO NOT RETURN THIS PRODUCT TO THE PLACE OF PURCHASE.
For product questions:
Sunbeam Consumer Service
PO BOX 948389
Maitland, FL 42794-8389
Do not send product to the above address.
www.sunbeam.com
02001 Sunbeam Products, Inc. All rights reserved.
SUNBEAM, SPRAY MIST" and SHOT OF STEAM" are registered trademarks of Sunbeam Products, Inc. MOTION SMART:" ONE PASS™ and TIP-RESISTANT™ are trademarks of Sunbeam Products, Inc. One or more of the following U.S. Patents may apply: 4,686,352; 5,619,8 12 and other patents pending.
Rev. 01/01
P. N. 107698
Made in China
Sunbeam
Planchas Simple Press™
Modelos 3010, 3020 y 3030
Manual del Usuario

natural_image
Line drawing of hands using a power iron to clean or install a component (no text or symbols)
natural_image
Line drawing of a hand holding a curved object, possibly a tool or device (no text or symbols present)Cómo Planchar
Planchando en Seco

natural_image
Line drawing of a hand using a power iron to press or install a surface (no text or symbols)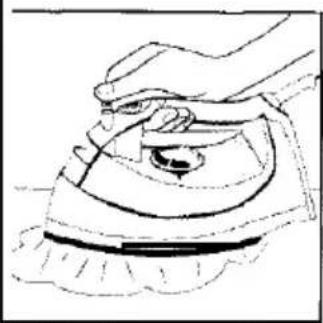
natural_image
Line drawing of a hand using a power iron to press or clean the surface (no text or symbols)Vapor Vertical (Modelo 3030 solamente)
natural_image
Line drawing of a person holding an object near a window (no text or symbols)natural_image
Simple line drawing of a rocket or missile with no text, numbers, or symbolsnatural_image
Simple line drawing of a hand holding a piece of paper or tool (no text or symbols)
natural_image
Simple line drawing of a curved object with a circular arrow, no text or symbols presentnatural_image
Simple line drawing of a hand pressing down on a circular object (no text or symbols)

natural_image
Simple line drawing of a hand holding a pen, with no text or symbols presentflowchart
graph TD
    A["STEAM"] --> B["on"]
    A --> C["clean"]
natural_image
Simple line drawing of a hand holding a piece of paper (no text or symbols)

flowchart
graph TD
    A["Raw Material"] --> B{Set steam of}
    B -->|No| C["Raw Materials"]
    B -->|Yes| D["Synthetic"]
    C --> E["Set Steam of"]
    D --> F["Silk"]
Consumeraffairs@consumer.sunbeam.com
Sunbeam Consumer Service
PO BOX 948389
Maitland, FL 42794-8389
- SPECIAL INSTRUCTIONS
- SAVE THESE INSTRUCTIONS
- Table of Contents
- Welcome
- SUNBEAM" Simple Press" irons offer the following features:
- Learning About Your Iron
- Filling the Water Reservoir
- Ironing
- Dry Ironing
- Steam Ironing
- Using the Iron's Special Features
- SPRAY MIST® (Models 3020 & 3030 on/y)
- SHOT OF STEAM" (Model 3030 only)
- To Use the SHOT OF STEAM" Feature:
- Vertical Steam (Model 3030 only)
- To use the vertical steam:
- Patented MOTION SMART" Auto-Off
- If you leave the iron:
- Caring for Your Iron After I Jse
- Turning Off Your Iron
- Storing Your Iron
- Maintaining Your Iron
- Cleaning the Soleplate
- To clean the Soleplate:
- Using the Self-Cleaning Feature
- To use the self-cleaning feature:
- Ironing Tips and Guide
- Ironing Tips
- One Year Limited Warranty
- How To Obtain Warranty Service
- Consumeraffairs@consumer.sunbeam.com
- DO NOT RETURN THIS PRODUCT TO THE PLACE OF PURCHASE.
- www.sunbeam.com
- Sunbeam
- Planchas Simple Press™
- Manual del Usuario
- Cómo Planchar
- Planchando en Seco
- Vapor Vertical (Modelo 3030 solamente)
Brand : SUNBEAM
Model : Simple Press 3010
Category : Iron