BH1-36R-L - Barbecue DCS - Free user manual and instructions
Find the device manual for free BH1-36R-L DCS in PDF.


| Product Type | Built-in Gas Barbecue |
| Brand | DCS |
| Model | BH1-36R-L |
| Fuel Type | Liquid Propane (LP) |
| Total Heat Output (Max) | 92,500 BTU/hr |
| Grill Burners | 4 (25,000 BTU/hr total) |
| Rotisserie Burner | 14,000 BTU/hr |
| Smoker Burner | 3,500 BTU/hr |
| Ignition | Electronic with battery backup (9V) |
| Cooking Grates | Double-sided porcelain-coated cast iron |
| Rotisserie | Included, up to 50 lb capacity |
| Smoker System | Included with smoker tray |
| Temperature Gauge | Built-in |
| Drip Tray | Removable, dishwasher safe |
| Exterior Material | Stainless steel |
| Installation Type | Built-in |
| Electrical Requirements | 120V AC, GFI protected circuit for rotisserie motor |
| Safety Features | Safety valve on rotisserie, leak testing |
| Certifications | ANSI Z223.1, NFPA 54, CSA B149.1 |
Frequently Asked Questions - BH1-36R-L DCS
User questions about BH1-36R-L DCS
0 question about this device. Answer the ones you know or ask your own.
Ask a new question about this device
Download the instructions for your Barbecue in PDF format for free! Find your manual BH1-36R-L - DCS and take your electronic device back in hand. On this page are published all the documents necessary for the use of your device. BH1-36R-L by DCS.
USER MANUAL BH1-36R-L DCS
- Shut off gas to the appliance.
- Extinguish any open flame.
- Open lid.
- If odor continues, keep away from the appliance and immediately call your gas supplier or your fire department.
WARNING!
- Do not store or use gasoline or other flammable liquids or vapors in the vicinity of this or any other appliance.
- An LP cylinder not connected for use must not be stored in the vicinity of this or any other appliance.
Safety and warnings 4
Installation requirements for Natural Gas 12
Product overview 13
Control panel 15
Planning your cook 16
Setting up the grill 18
Using the grill 19
Using the sear burner (some models only) 20
Using the smoker (some models only) 23
Using the grates 24
Using the rotisserie (Some models only) 26
Accessories 29
Cleaning 30
Cleaning the grill burners 31
Cleaning the sear burner 32
Cleaning the side burners 34
Leak testing 35
Changing the gas cylinder 36
Replacing the light and battery 37
Resetting flow limiting device 38
Troubleshooting 39
Customer care 41
Registration
To register your product visit our website:
USA: dcsappliances.com/us/register
Canada: dcsappliances.com/ca/register
To reduce the risk of fire, electrical shock, injury to persons, or damage when using the appliance, follow the important safety instructions listed below:
WARNING!
 | Hot Surface HazardFailure to follow this advice may result in burns and scalds or serious injury.Accessible parts may become hot during use.Hood must be opened before lighting the grill.Never let clothing or other flammable materials come in contact with or get too close to any grate, burner or hot surface until it has cooled. Fabric may ignite and result in fire or personal injury. Keep outdoor cooking gas appliance area clear and free from combustible materials, gasoline and other flammable vapours and liquids.Never lean over an open grill. When lighting a burner, always pay close attention to what you are doing. Be certain you are pushing the burner knob when you attempt to light the grill.When using the grill, do not touch surfaces such as grill burner, grate, or immediate surrounding areas as these become extremely hot and could cause burns.Grease is flammable. Never operate the grill without a drip tray. Let hot grease cool before attempting to handle it. Avoid letting grease deposits collect in the drip pan. Clean the grill with caution. Avoid steam burns; do not use a wet sponge or cloth to clean the grill while it is hot. Some cleaners produce noxious fumes or can ignite if applied to a hot surface. |
WARNING!

Hot Surface Hazard
Failure to follow this advice may result in burns and scalds or serious injury.
- Use only dry pot-holders; moist or damp pot-holders on hot surfaces may cause burns from steam. Do not use a towel or bulky cloth in place of pot-holders. Do not let pot-holders touch hot portions of the grill or burner grate.
- To avoid burns when cooking, use long handled BBQ tools.
WARNING!

Explosion Hazard
Failure to follow this advice may result in injury or death.
- If you smell gas, do not use the appliance.
- Do not use water on grease fires, a violent steam explosion may result. Turn all burners off, then smother fire use dry chemical or foam-type extinguisher.
- Do not heat unopened food containers such as cans – Build up of pressure may cause container to burst and result in injury.
- Leaking LP gas can cause a fire or explosion if ignited causing serious bodily injury or death.
- Contact LP gas supplier for repairs or disposal of the cylinder or unused LP gas.
WARNING!
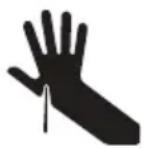
Cut Hazard
Failure to use caution could result in injury.
• Take care: some edges are sharp.
WARNING
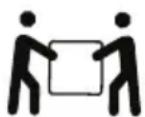
Excessive Weight Hazard
Failure to follow this advice may result in injury or death.
- Two or more people are required to move and install this unit.
WARNING
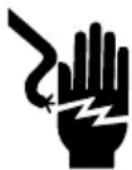
Electrical Shock Hazard
Failure to follow this advice may result in death or electrical shock.
- This appliance is equipped with a three-prong grounding plug for your protection against shock hazard and should be plugged directly into a properly grounded power outlet.
- Use only a Ground Fault Interrupter (GFI) protected circuit.
- Use only extension cords with a three-prong grounding plug, rated for the power of the equipment, and approved for outdoor use with a W-A marking.
- Do not immerse cord or plugs in water or other liquid.
- Do not under any circumstances cut or remove the grounding prong from this plug.
WARNING!
Fire Hazard
Failure to follow this advice may result in death or serious injury.
- Do not operate the grill under un protected combustible construction. Use only in well ventilated areas.
- Cylinders shall be stored outdoors and out of the reach of children.
- Do not store in a building, garage or any other enclosed area.
- An appliance is considered to be outdoors if installed with shelter no more inclusive than within a partial enclosure that includes an overhead cover and three side walls, as long as 30% or more of the periphery of the enclosure is permanently open.
- All openings must be permanently open; sliding doors, garage doors, windows, or screened openings are not considered as permanent openings
- Never leave the grill unattended when in use.
- Never store a spare LP cylinder under or near this unit.
- Never fill the cylinder beyond 80 percent full.
- If the information above is not followed exactly, a fire causing death or serious injury could occur.

To reduce the risk of fire, injury to persons or damage when using the appliance, follow the important safety instructions listed below. Read all the guidance before using the appliance. Do not use an outdoor cooking gas appliance for purposes other than intended.
General Use
- When using the appliance, be sure that all parts of the unit are firmly in place and that everything is stable.
- Do not locate, store, or operate the appliance on a slope.
- Do not move the appliance during use. On cart mounted units, never move cart without first allowing the appliance to cool, disconnecting the power cable, and ensuring that the gas supply is turned off.
- Children should not be left alone or unattended in an area where the product is being used. Never allow them to sit, stand or play on or around the unit at any time. When in use, portions of the grill are hot enough to cause severe burns.
- Do not store items of interest to children around or below the appliance.
- Never use the appliance in a windy area.
- Do not obstruct the flow of combustion and ventilation air to the appliance.
• To put out flare-ups, adjust the controls to lower the temperature. - Clean and perform general maintenance on the appliance regularly and after periods without use. Always turn off gas at the source prior to inspecting.
- Ensure all grill controls are turned off and the grill is cool before using any type of aerosol cleaner on or around the grill. The chemical that produces the spraying action could, in the presence of heat, ignite or cause metal parts to corrode.
- Unplug from the outlet when not in use and before cleaning. Allow to cool before putting on or taking off parts.
- Before each use, inspect the gas supply piping or hose prior to turning the gas "ON". If there is evidence of cuts, wear, or abrasion, it must be replaced prior to use.
- You must inspect the unit at least once a year. Check immediately if the smell of gas is present or the burner flames appear yellow, the appliance does not reach temperature or heats unevenly, or the unit makes popping noises.
- When refitting each burner after cleaning, correctly center the burner onto the gas jet and ensure it is level before lighting.
- When connecting to a power supply, first connect plug to the appliance, then plug appliance into the outlet.
- Do not try lighting this appliance without reading the lighting instructions in this guide.
- After lighting burners, make sure burners are operating normally. In sunny locations, it may be difficult to see when the rotisserie and sear burners are lit. Use caution.
- The sear burner is designed specifically for searing food. Do not use the griddle plate or charcoal insert over the sear burner or cover it with any utensil type.
- Do not place griddle plates side by side on the grill.
- Do not operate in enclosed areas. This could result in carbon monoxide build-up which could result in injury or death.
- This product must be installed by a licensed plumber or gas fitter when installed within the Commonwealth of Massachusetts.
Fire
- Have an ABC rated fire extinguisher accessible - never attempt to extinguish a grease fire with water or other liquids.
- Never leave the product unattended when in use.
- Always remove dust cover and open hood before lighting. Do not replace cover during cooking or before appliance has cooled.
- Do not use a flame to check for gas leaks.
- Do not smoke while leak testing.
- Do not attempt to disconnect any gas connections while your appliance is in use, or the gas supply is on.
- Never connect an unregulated gas line to the appliance.
Electrical Hazards
- Do not operate with a damaged cord or plug, after the appliance malfunctions or after the appliance has been damaged in any manner. Contact the manufacturer for repair.
- Keep any electrical supply cord, the rotisserie motor cord and the fuel supply hose away from the heated areas of the grill, sharp edges and water (pools, fountains, puddles).
- When connecting, first connect plug into the appliance and then plug appliance into the outlet.
- Do not let the cord hang over the edge of a table or touch hot surfaces.
Installation Warnings
- The installation of this appliance must conform with local codes or, in the absence of local codes, with the National Fuel Gas Code, ANSI Z223.1/NFPA 54. Installation in Canada must be in accordance with Natural Gas and Propane Installation Code, CSA B149.1, and/or Propane Storage and Handling Code, B149.2 and local codes.
- This appliance must be electrically grounded in accordance with local codes, or in the absence of local codes, with NFPA 70 or the Canadian Electrical Code, Part I.
- This appliance must only be used outdoors and must not be used in a building, garage or any other enclosed area.
- An appliance is considered to be outdoors if installed with shelter no more inclusive than within a partial enclosure that includes an overhead cover and three sidewalls, as long as 30% or more of the horizontal periphery of the enclosure is permanently open. All openings must be permanently open; sliding doors, garage doors, windows, or screened openings are not considered as permanent openings.
- If installed under overhead combustible construction, the appliance must be installed in conjunction with a suitable UL 710- or ULC S646-approved heavy duty vent hood only. The vent hood must be placed in operation when the appliance is in use.
- All gas connections, installations and leak testing should be made by a qualified technician.
- Installation must comply with clearances to combustible materials as noted in the Planning Guide.
- Do not attempt to remove, repair, or replace the regulator/hose assembly. This must be done by a qualified licensed technician only. The grill system arrives leak tested.
- If the connections are not perfectly sealed, you can have a small leak and therefore a faint gas smell. Some leaks can only be found with the burner control in the "ON" position - this must be done by a qualified technician.
- Keep the ventilation openings of the cylinder enclosure free and clear from debris.
- This outdoor cooking gas appliance is not intended to be installed in or on recreational vehicles, trailers and/or boats.
Gas Requirements
- Do not change the regulator/hose assembly from that supplied with the unit or attempt to use a Type 1 equipped regulator/hose assembly with a standard 510 POL cylinder/valve assembly.
- The cylinder pressure relief valve outlet must point away from the user when in use.
- An installer-supplied gas shut-off valve must be installed in an easily accessible location.
- All installer supplied parts must conform to local codes, or in the absence of local codes, with the National Electrical Code, ANSI/NFPA 70 or the Canadian Electrical Code, CSA C22.1, and the National Fuel Gas Code, ANSI Z223.1 or CSA-B149.1 Natural Gas Installation Code or CSA-B149.2 Propane Installation Code.
- In Massachusetts such shut-off valves should be approved by the Board of State Examiners or Plumbers & Gas Fitters.
- All pipe sealants must be an approved type and resistant to the actions of LP gases. Never use pipe sealant on flare fittings.
- A dented or rusty LP cylinder may be hazardous and should be checked by your LP supplier.
• Always check for leaks after every LP cylinder change. Check with a full cylinder. - Do not use the appliance until all connections have been checked and do not leak.
- Before each use, inspect the gas supply piping or hose prior to turning the gas ON. If there is evidence of cuts, wear, or abrasion, it must be replaced prior to use.
- The pressure regulator and hose assembly supplied with the appliance must be used. If replacements are needed, contact Customer Care.
Storage and maintenance
- Ensure the gas supply is turned off at the supply cylinder when not in use.
- Keep appliance covered when not in use.
- Storage of the appliance indoors is permissible only if the cylinder is disconnected and removed from the unit.
- Cylinders must be stored outdoors, out of reach of children and must not be stored in a building, garage, or any other enclosed area.
- After a period of storage or non-use, the appliance should be checked for gas leaks, deterioration, proper assembly, and burner obstructions before use.
- Keep the outdoor gas appliance area clear and free from combustible materials, gasoline, and other flammable vapours and liquids.
- Clean the outdoor gas appliance, including special surfaces with recommended cleaning agents and check burner/venturi tubes for insects and insect nests. A clogged tube can lead to a fire beneath the grill.
LP Cylinder Cabinet Requirements
For a cylinder enclosure having four sides, a top and a bottom, and intended for installation in a built-in enclosure:
- At least one ventilation opening shall be provided on the exposed exterior side of the enclosure located within 5" (127mm) of the top of the enclosure and unobstructed. The opening(s) shall have a total free area of not less than 1 ^2 /lb (14.2cm ^2 /kg) of stored fuel capacity.
- At least one ventilation opening shall be provided on the exposed exterior side of the enclosure 1" (25.4mm) or less from the floor level and shall have a total free area of not less than 1/2" ^2 /lb (7.1cm ^2 /kg) of stored fuel capacity. The upper edge shall be no more than 5" (127mm) above the floor level.
- Every opening shall have a minimum dimension so as to permit the entrance of a 3/16" (4.8mm) rod.
LP Cylinder Hazards
- Installation must conform with local codes or with the National Fuel Gas Code ANSI Z223.1 or the CSA-B149.2 Propane Installation Code.
-
This appliance can be used with any brand of 20 lb LP gas cylinder provided it is compatible with a proper retention device (not supplied for built-in installations).
• The LP gas cylinder must be: -
Designed for use with a Type 1 system only.
- Constructed and marked in accordance with the Specifications for LP gas Cylinders of the U.S. Department of Transportation (D.O.T.) or the Standard for Cylinders, Spheres and Tubes for Transportation of Dangerous Goods and Commission, CAN/CSA-B339.
• Provided with a listed overfilling prevention device. -
Provided with a cylinder connection device compatible with the connection for outdoor cooking gas appliances.
-
The cylinder must be provided with a shut-off valve terminating in an LP gas supply cylinder valve outlet specified, as applicable, for connection Type 1.
- Do not store a full cylinder in direct sunlight.
- Never use a cylinder with a damaged valve. Always check for leaks after every combustible gas cylinder change.
- The cylinder that is used must have a collar to protect the cylinder valve.
- If you intend to operate your built-in grill on LP gas utilizing a 20 lb Type 1 cylinder, an installer supplied built-in LP cylinder restraint must be installed prior to initial use of the grill.
- Gas piping and connectors must be clamped within the enclosure to avoid contact with moving parts and hot surfaces. Where the gas piping passes through an opening in the enclosure, the piping must be protected for a distance of at least 2" (50 mm) either side of the opening.
- Connection: LP gas hose with a Type 1 quick disconnect and regulator is included.
- Operating pressure: 11.0" W.C.
- All gas piping and connectors must conform to the Standard for Connectors for Outdoor Gas Appliances and Manufactured Homes, ANSI Z21.75/CSA 6.27.
- If the appliance is stored indoors, the cylinder must be disconnected and removed from the appliance.
- Grills orificed for use with combustible gas come equipped with a high-capacity hose/regulator assembly for connection to a standard 20 lb. combustible gas cylinder (Type 1). The combustible gas cylinder is not included.
- Do not use the grill until all connections have been checked and do not leak.
- If you own or use a spare cylinder, or have a disconnected cylinder, you should NEVER store it near or under the grill unit or heat box, or near any other ignition or heat source.
• Never fill the cylinder beyond 80% full. - If the information above is not followed exactly, a fire causing death or serious injury could occur.
Natural gas Installation and connection
- Check with your local gas utility company or local codes for instructions on installing gas supply lines. Be sure to check on type and size of run, and how deep to bury the line. If the gas line is too small, the grill will not function properly. Any joint or pipe sealant used must be an approved type and be resistive to the actions of combustible gases.
- Ensure that the regulator arrow points in the direction of gas flow away from the gas supply.
- The appliance and its individual shut-off valve must be disconnected from the gas supply piping system during any pressure testing of that system at test pressures in excess of 1.2 psi (3.5 kPa).
- The appliance must be isolated from the gas supply piping system by closing its individual manual shut-off valve during any pressure testing of the gas supply piping system at test pressures equal to or less than 1/2 psi (3.5 kPa).
- An installer-supplied gas shut-off valve must be installed in an easily accessible location.
- Use threading compound on male threads only.
- Never use pipe sealant on flare fittings.
- In Massachusetts such shut-off valves must be approved by the Board of State Examiners or Plumbers & Gas Fitters.
- All piping and hoses are to run away from the product and never against the product surfaces.
- Natural Gas: Operating pressure: 4.0" W.C. Supply Pressure 5" to 14" W.C. If in excess of 14", a stepdown regulator supplied by installer is required.
- All gas piping and connectors must conform to the Standard for Connectors for Outdoor Gas Appliances and Manufactured Homes, ANSI Z21.75/CSA 6.27.
Total gas consumption of the grill with all burners on HI - Input rates BTU/hr
| MODEL BH1-36R BH1-48R BH1-36RI BH1-48RI BH1-48RS BH1-36 BH1-48 | |||||||
| MAXIMUM 92500 | 121500 | 88000 | 117000 | 126500 | 78500 | 103500 | |
| GRILL | 25000 | 25000 | 25000 | 25000 | 25000 | 25000 | 25000 |
| ROTISSERIE | 14000 | 18000 | 14000 | 18000 | 14000 | N/A | N/A |
| SEAR | N/A | N/A | 24000 | 24000 | N/A | N/A | N/A |
| SIDE BURNER | N/A | N/A | N/A | N/A | 34000 | N/A | N/A |
| SMOKER | 3500 | 3500 | N/A | N/A | 3500 | 3500 | 3500 |
Servicing
- Do not repair or replace any part of the appliance unless specifically recommended in this guide. All other servicing should be undertaken by an authorized technician or qualified person.
- Only use the product with the type of gas specified on the rating plate. To change gas type, a factory conversion kit is required.
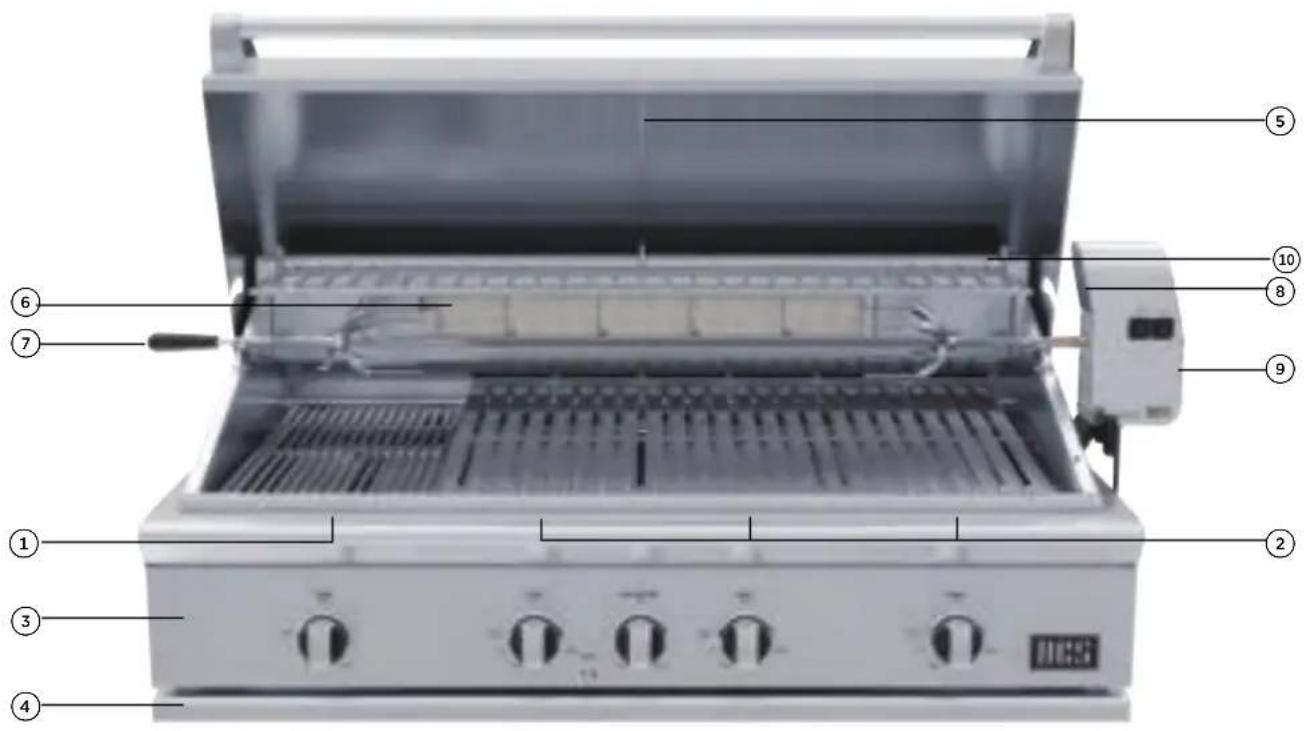
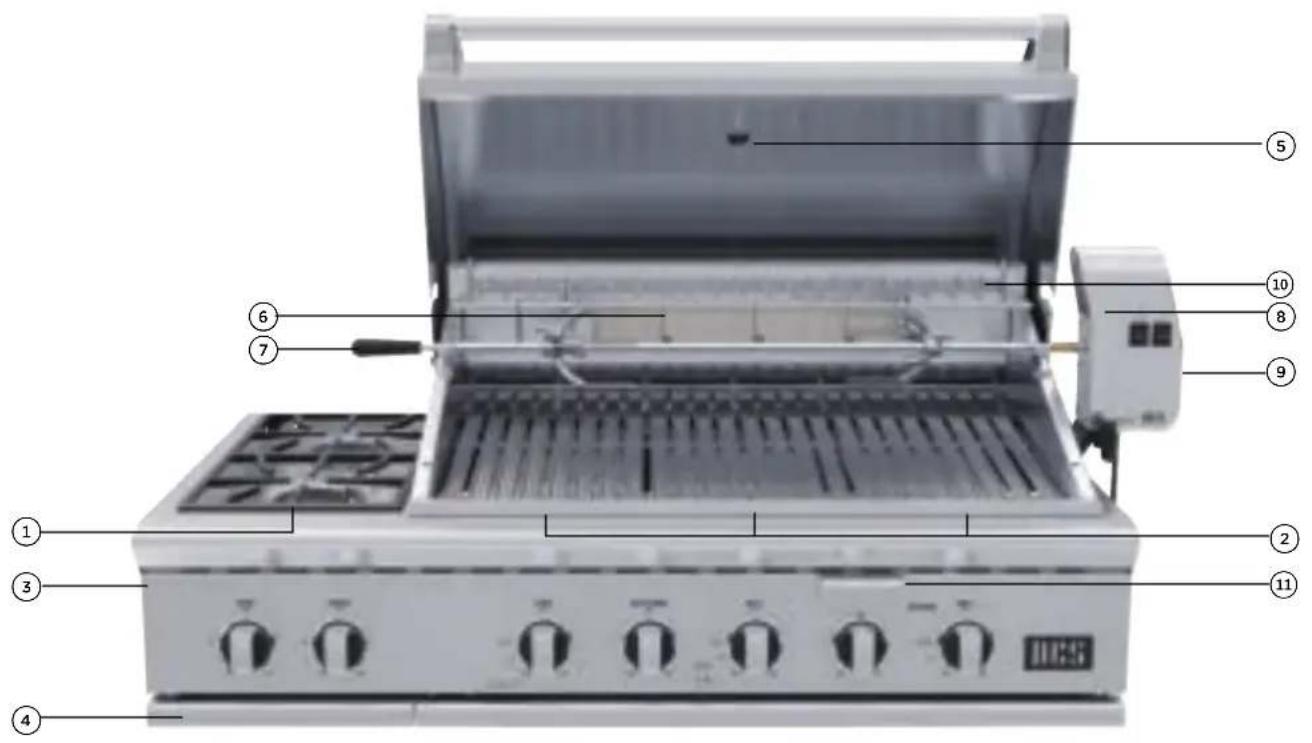
BH1-48RI model illustrated.
Features and accessories
① Sear burner*
② Grill burners
③ Control panel
④ Drip tray and removable insert
⑤ Temperature gauge
⑥ Rotisserie burner*
⑦ Rotisserie rod*
⑧ Rotisserie light*
⑨ Rotisserie motor*
⑩ Secondary cooking area
⑪ Tray (not shown)
BH1-48RS model illustrated.
Features and accessories
① Side burners*
② Grill burners
③ Control panel
④ Drip tray and removable insert
⑤ Temperature gauge
⑥ Rotisserie burner*
⑦ Rotisserie rod*
⑧ Rotisserie light*
⑨ Rotisserie motor*
⑩ Secondary cooking area
⑪ Smoker tray*
⑫ Tray (not shown)
CONTROL PANEL
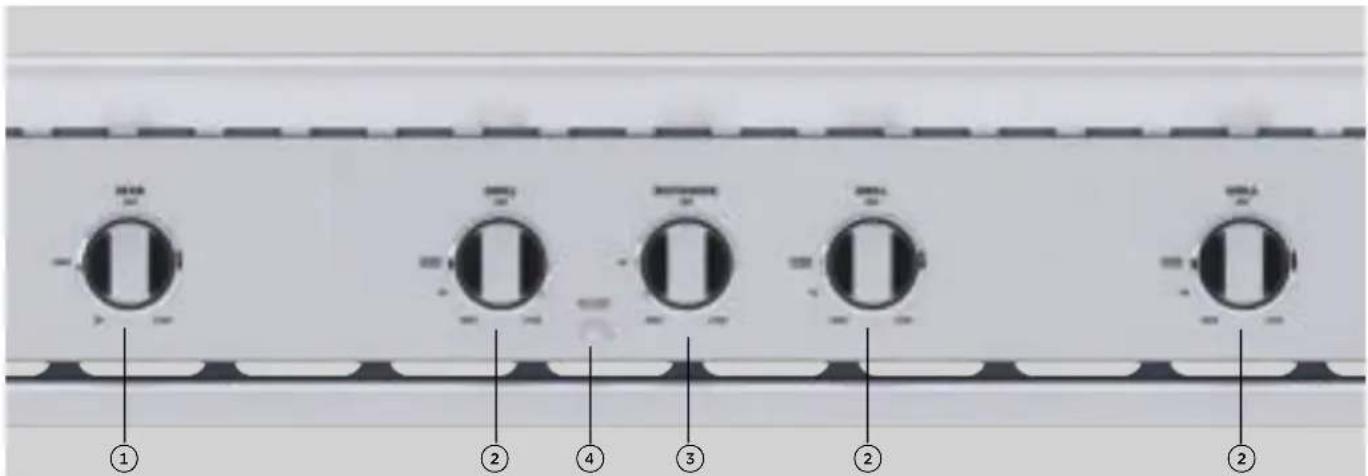
BH1-48RI model.
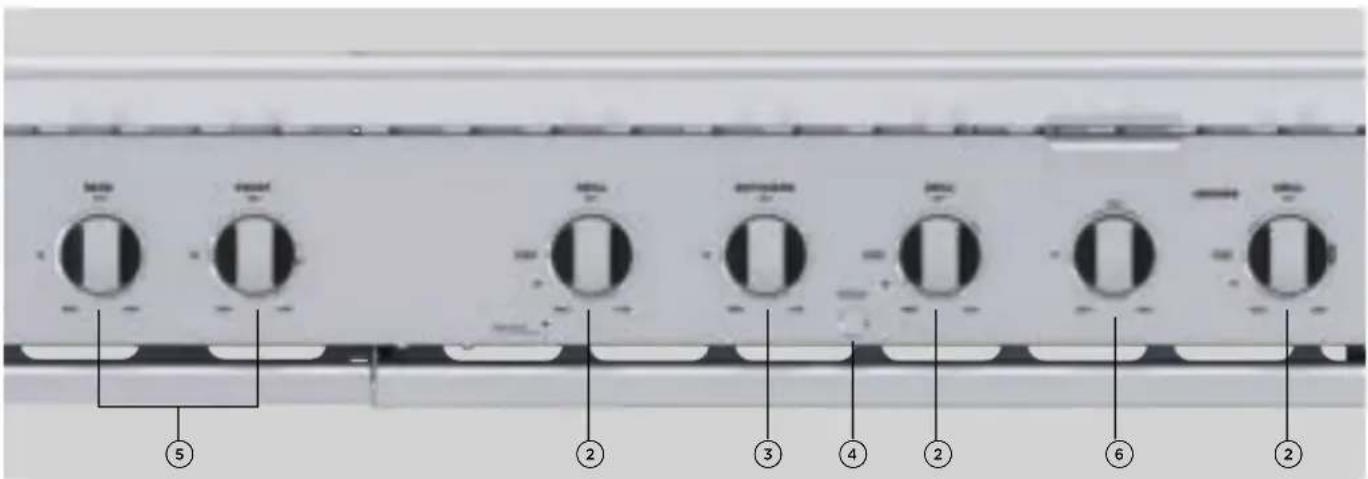
BH1-48RS model.
| Control panel | |
| 1 Sear burner dial* | Use to igniteear burner and select heat setting. |
| 2 Grill burner dials | Use to ignite grill burners and select heat settings. |
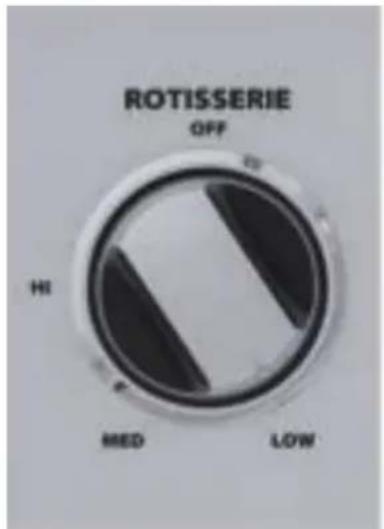
| 3 Rotisserie dial* | Use with rotisserie safety valve to ignite rotisserie burner and to select heat setting. |
| 4 Rotisserie safety valve* | Allows safe gas flow to rotisserie burner while lighting. Use with rotisserie burner dial to ignite rotisserie burner. |
| 5 Side burner dials* | Use to igniteide burners and select heat settings. |
| 6 Smoker burner dial* | Use to ignitemoker burner and to select heat setting. |
Before using the grill, plan what you want to cook and how you want to cook it.
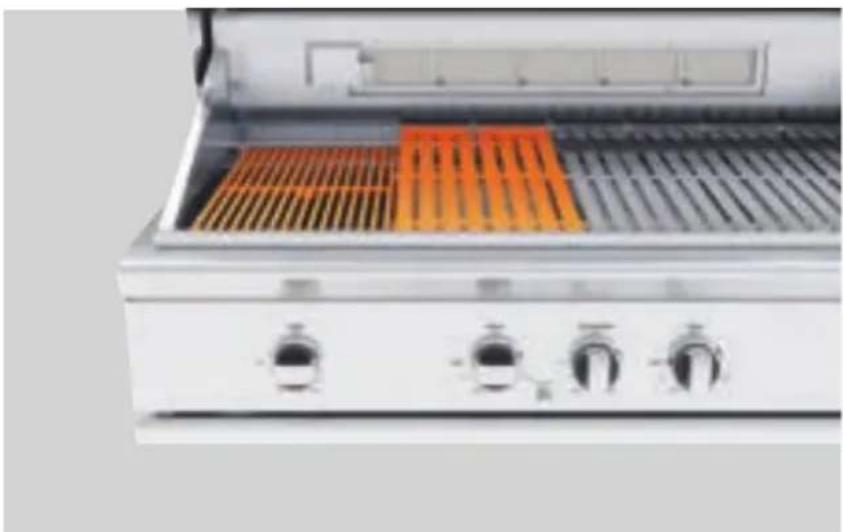
The grill design allows you to tailor your cook with different cooking methods, areas and grate types. For optimal results, take advantage of the entire grill to move food between high and low heat zones at different stages of the cook.
natural_image
Exterior view of a modern outdoor grill with orange grating and control knobs (no text or symbols visible)Direct grilling
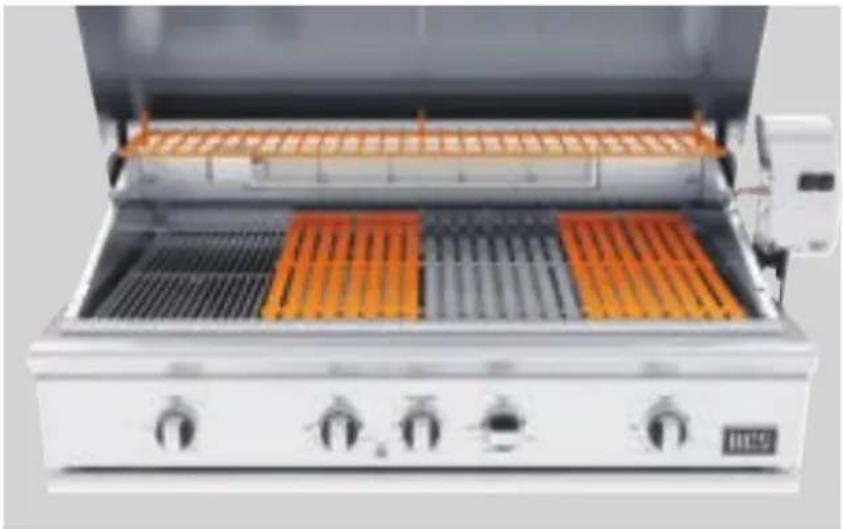
Food is cooked on grates directly over lit burners.
Use this method for food that takes less than 20 minutes to cook or for searing larger items before indirect cooking or further grilling at a lower heat setting.
natural_image
Exterior view of a modern outdoor grill with orange grating and control knobs (no visible text or symbols)Indirect cooking
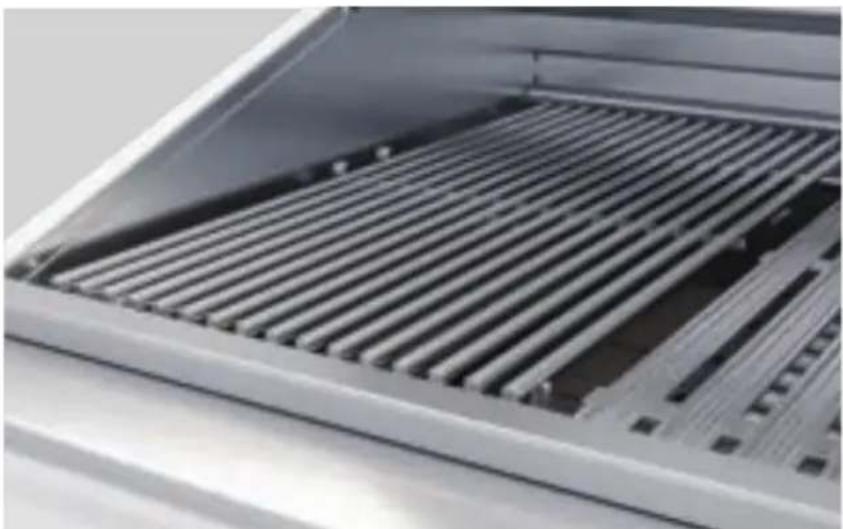
Food is cooked on grates beside the heat source, with hood closed to maintain heat.
Use for food that takes longer than 20 minutes to cook such as thicker pieces of meat.
natural_image
Close-up of a metallic stainless steel grater with parallel slats (no text or symbols visible)Sear burner (some models only)
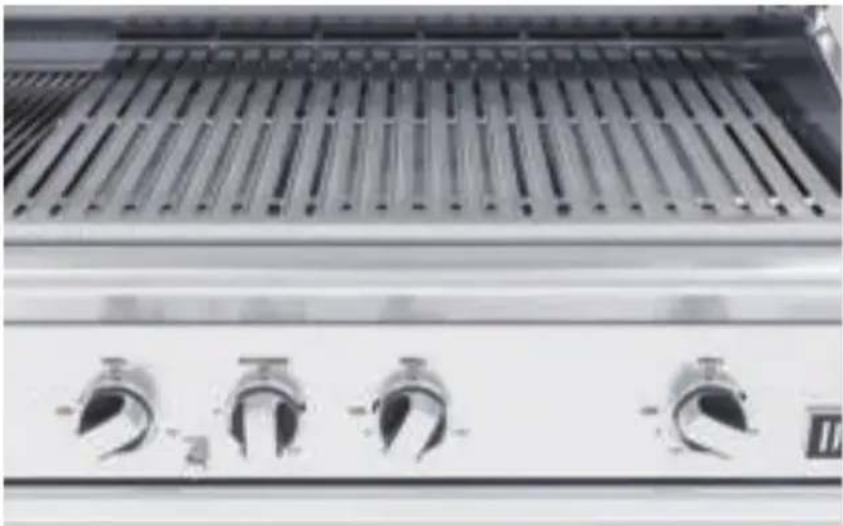
Delivers intense, even heat that builds flavor and texture. Use only with the sear burner grate to create perfect sear lines and surface browning.
Sear meat at a high heat, then move to a lower heat zone before resting to achieve required doneness. Switch order for reverse-sear method. See 'Using the sear burner.'
natural_image
Close-up of a stainless steel grill with three rotary switches (no visible text or labels)Grill burners
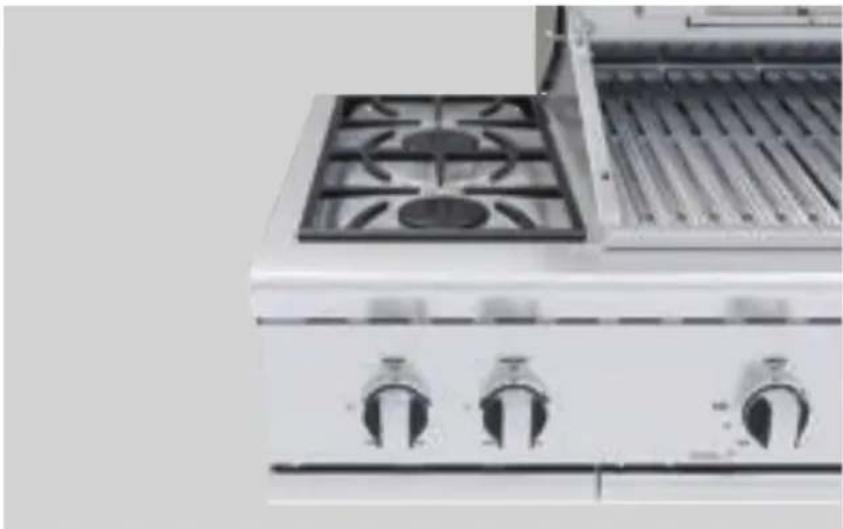
The grill burners deliver a range of heat intensities. Choose cooking zones and heat settings to cook a variety of foods using direct or indirect heat.
Use with radiant trays and double-sided grates to cook and brown food. See 'Using the grates.'
natural_image
Close-up of a white electric stove with two gas grilles and a side panel (no visible text or symbols)Side burners
Use the side burners to heat, boil or stir fry food.
natural_image
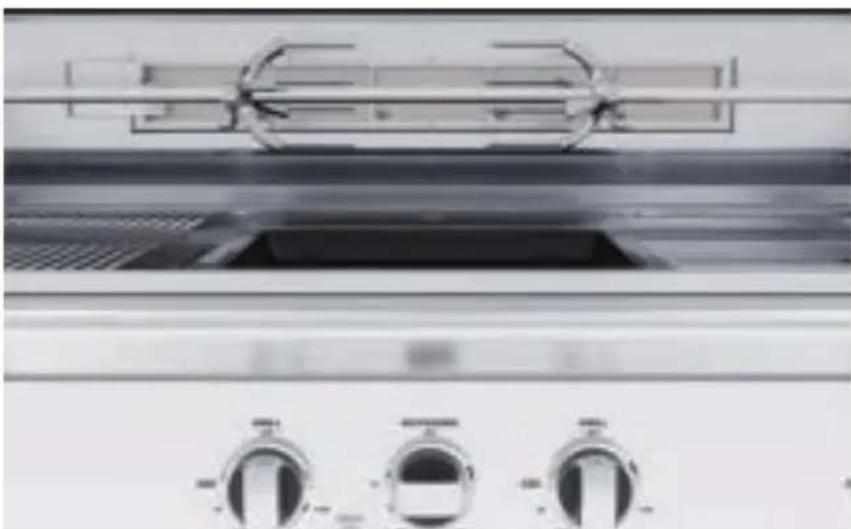
Close-up of a kitchen stainless steel counter with three rotary gauges (no visible text or symbols)Rotisserie (some models only)
Use the rotisserie to slowly cook food. Intense, even heat gives roasts a crust. See 'Using the rotisserie.'
Before you begin
- Inspect the gas piping or hose for signs of cuts, wear or abrasion before each use. Replace any damaged parts before using the grill.
• Season the grates. See 'Using the grates.'
natural_image
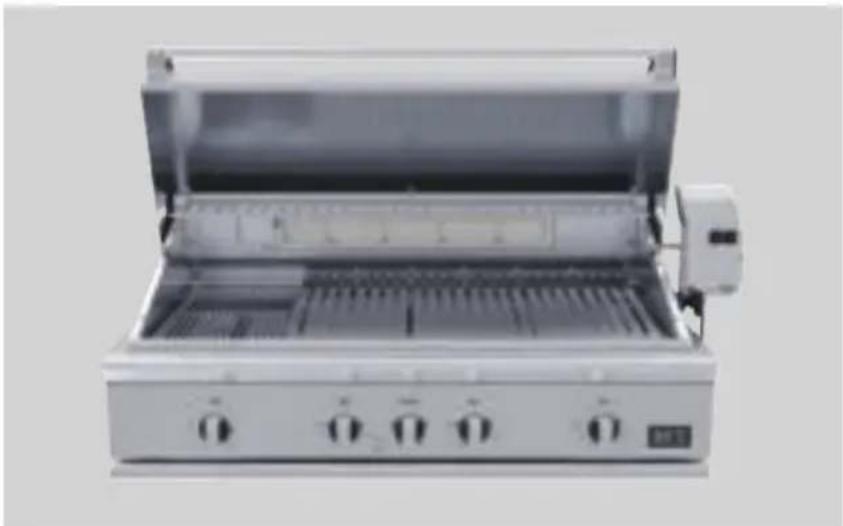
Exterior view of a stainless steel electrical heater with open lid and control panel (no visible text or symbols)- Ensure all dials are turned off, then lift the grill hood.
natural_image
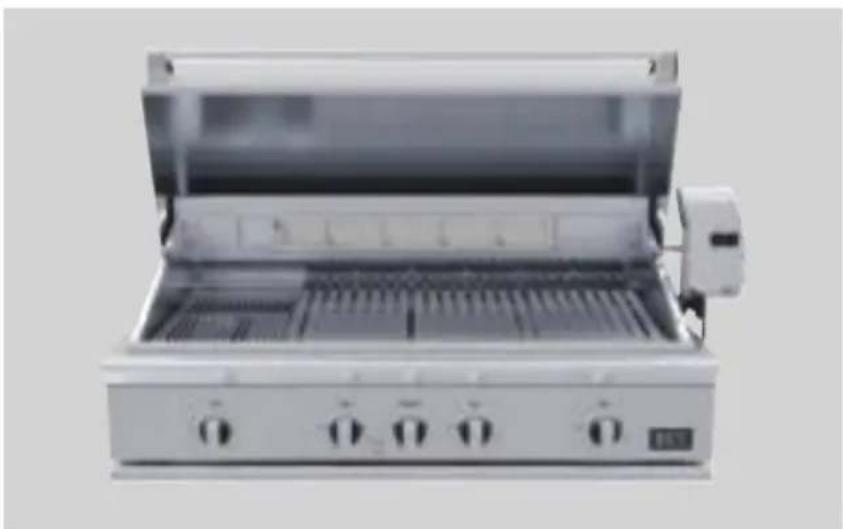
Exterior view of a stainless steel electric grill with open lid and control panel (no visible text or symbols)- Position the grates and secondary cooking rack according to your cooking plan. If using the rotisserie, set this up first. See 'Using the rotisserie.'
natural_image
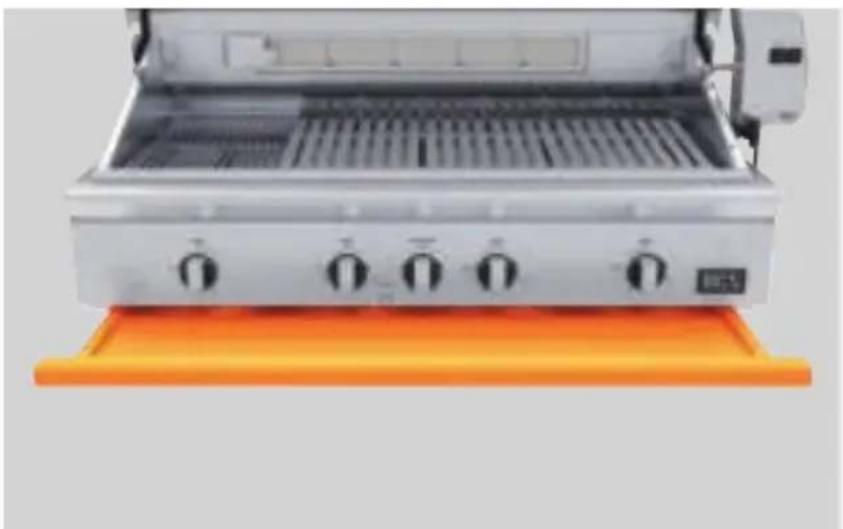
Exterior view of a stainless steel electric stove with orange base (no visible text or symbols)- Pull drip tray out to check insert is clean and in place before pushing tray back in. Turn on the main gas supply.
Preheating the grill
Preheat each zone according to the heat settings you plan to cook at. There will be minimal heat bleed from high heat to low heat zones.
Use high heat for searing and browning, and medium, low or indirect heat to cook food through without burning.
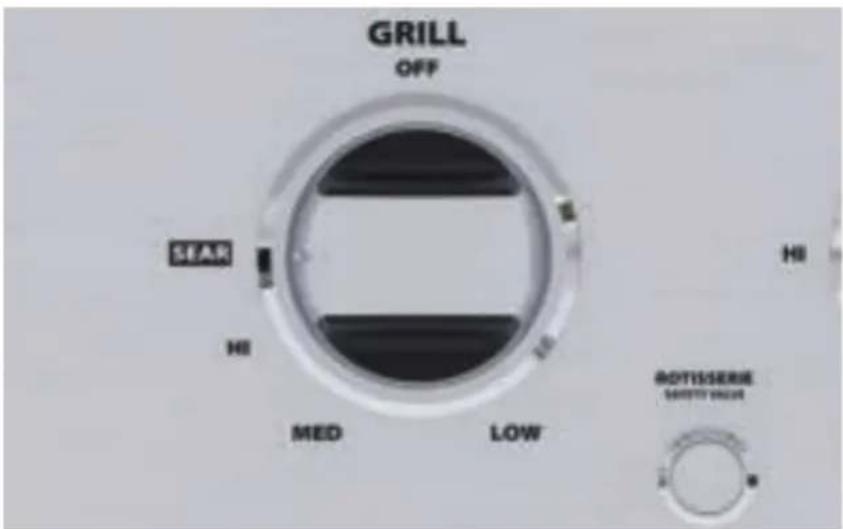
Lighting the grill
- Light one burner at a time. Push and turn dial to SEAR to ignite.
The ignitor will make a clicking sound. Once lit, turn dial to desired heat and release.
If burners do not light, wait 5 minutes for gas to dissipate, then start again or light manually.
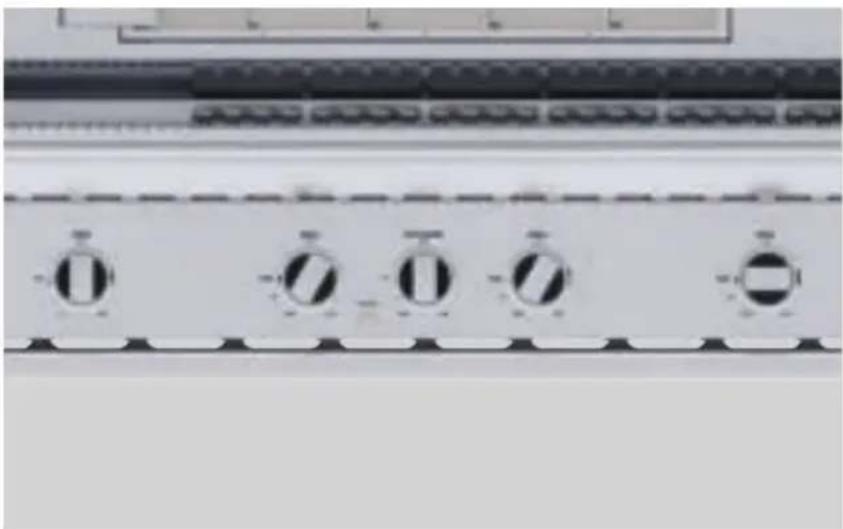
natural_image
Close-up of a wall-mounted industrial fan with four circular buttons (labeled O, Z, O, Z) and a black button, no visible text or symbols.- Light remaining grill burners, and select heat. Close hood and leave grill to preheat for 10 minutes, or longer if preheating to low heat setting.
If not using all burners, preheat planned burners and any adjacent burner at desired heat for 10 minutes.
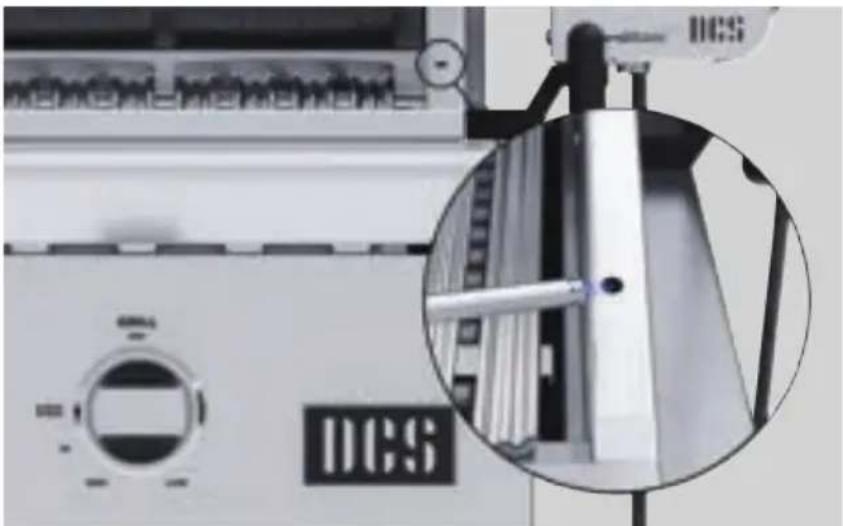
natural_image
Close-up of a washing machine control panel with DCS branding and a magnified inset showing a mechanical component (no readable text or symbols)Manual lighting
Turn dial to SEAR. At the same time, hold a lit match or lighter slightly below the opening on the side of the grill.
When burner ignites, turn dial to desired heat setting and release it. Remaining grill burners will cross light, but sear burner will not.
Do not use lighter fluid.
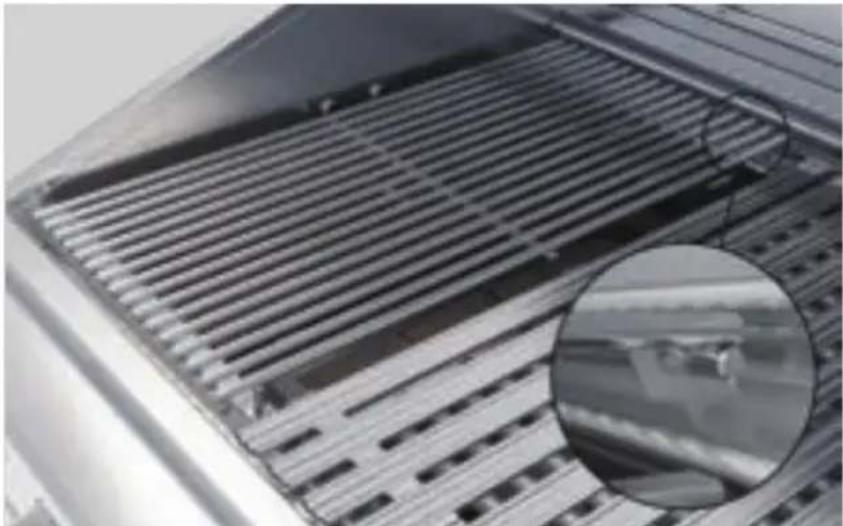
natural_image
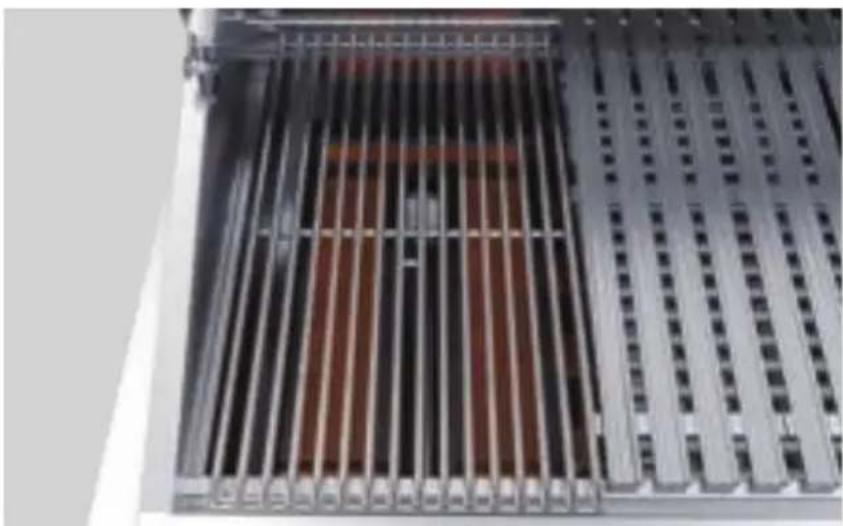
Close-up of a metal grate with a magnified inset showing a person in water (no text or symbols visible)- Make sure the sear burner grate is secured in the hooks at the back of the grill, with its legs on the ledge at the front.
natural_image
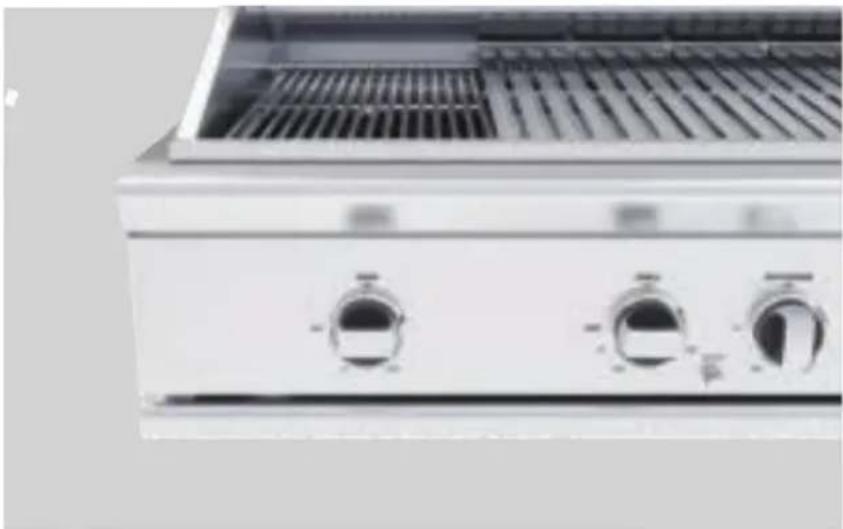
Close-up of a stainless steel oven with two rotary switches and a grating (no visible text or symbols)- Light one burner at a time. Push and turn dial to MAX to ignite. Light adjacent burner and set to SEAR. Light and set remaining burners as desired.
Preheat for 10 minutes with hood down. Preheat for 5 minutes if sear burner is already warm.
If burner does not light, wait 5 minutes for gas to dissipate, then start again or light manually.
natural_image
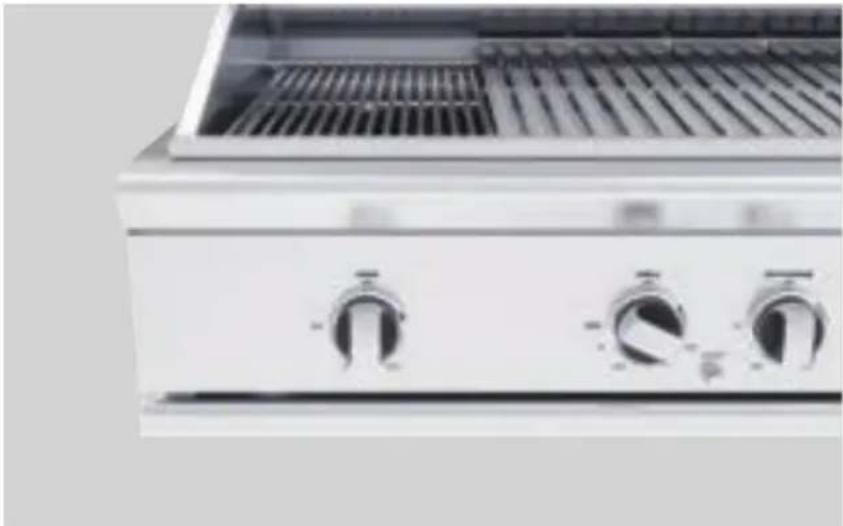
Close-up of a metal grating machine with multiple slots and a central control panel (no visible text or symbols)- Once burner is preheated, place food on the grate. If only using sear burner, turn off adjacent burner after preheat.
The sear burner produces intense heat. We recommend keeping a close eye on food and turning it frequently.
Adjust heat setting if required.
natural_image
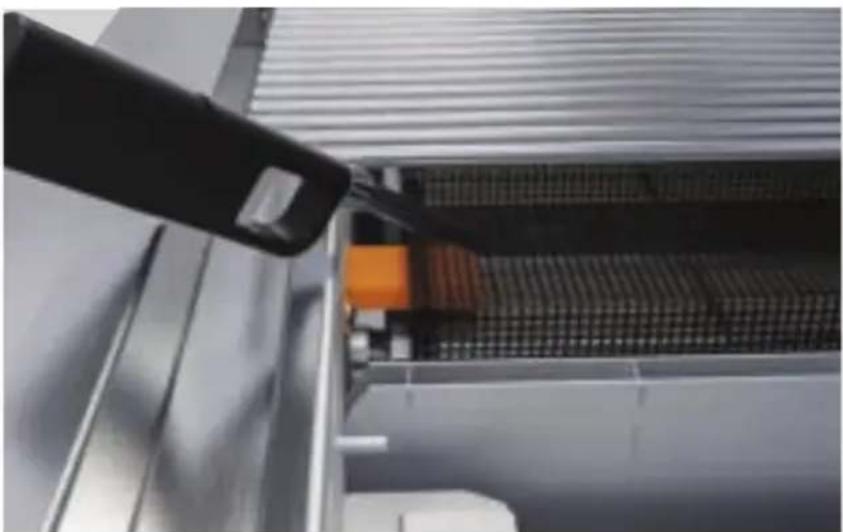
Close-up of a stainless steel electrical stove burner with three rotary switches (no visible text or labels)- Once browned, move the food to another area of the grill to finish cooking, if required. Turn sear burner dial to OFF.
natural_image
Close-up of a mechanical component with a black handle and orange internal block, no visible text or symbolsManual lighting
Turn dial to allow gas to flow. At the same time, hold a long match or lighter to the side of the sear burner, in the gap between grates.
When burner ignites, turn dial to desired heat setting, and release it.
natural_image
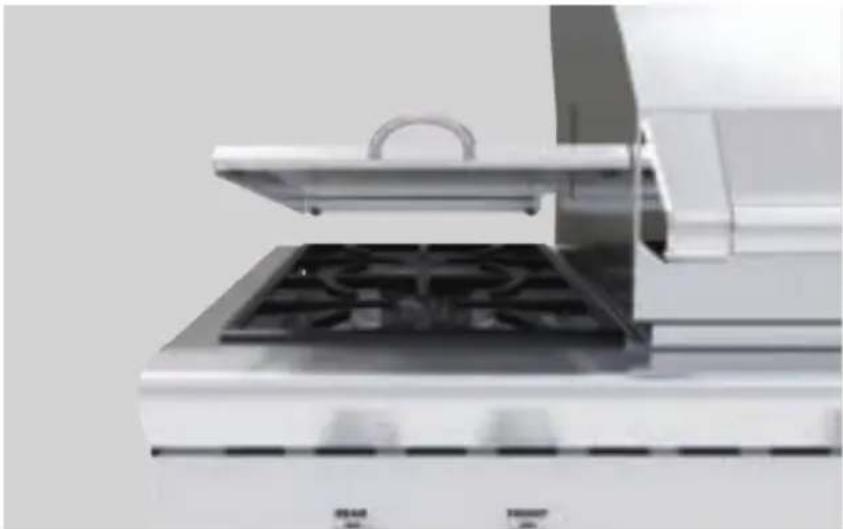
Close-up of a stainless steel kitchen appliance with a gas stove and lid, no visible text or symbols- Remove rotisserie rod and the side burner cover. Take care if grill is in use, as rod and cover may be hot.
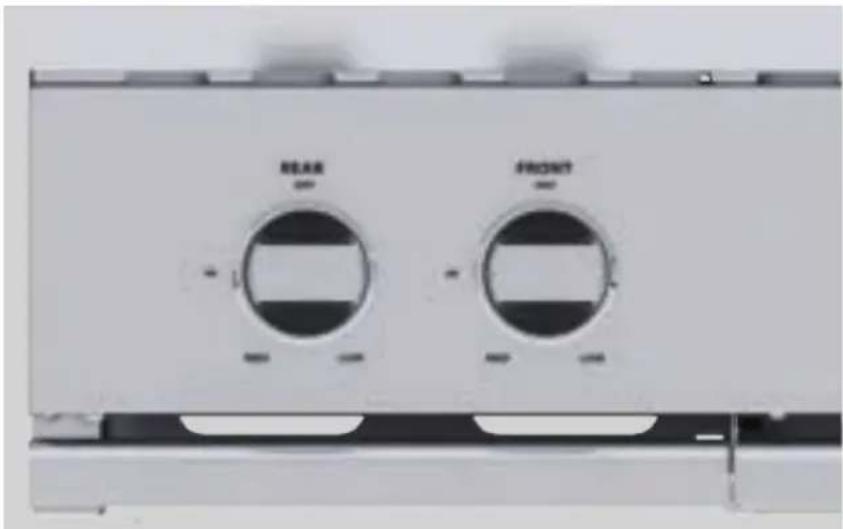
Lighting the side burners
- Light one burner at a time. Push and turn dial to HI to ignite.
The ignitor will make a clicking sound. Once lit, turn dial to desired heat and release.
If burners do not light, wait 5 minutes for gas to dissipate, then start again or light manually.
natural_image
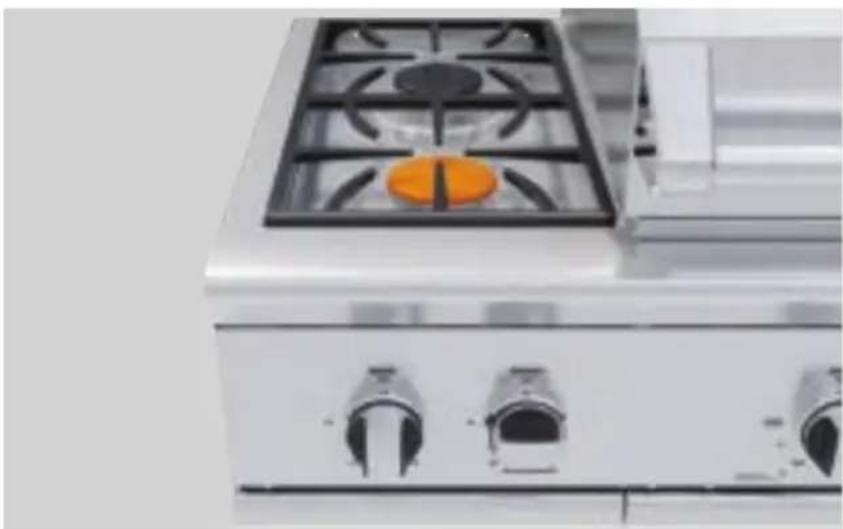
Close-up of a stainless steel kitchen appliance with two gas outlets and control knobs (no visible text or symbols)Manual lighting
Turn dial to allow gas to flow. At the same time, hold a long match or lighter to the side of the burner.
When burner ignites, turn dial to desired heat setting, and release it.
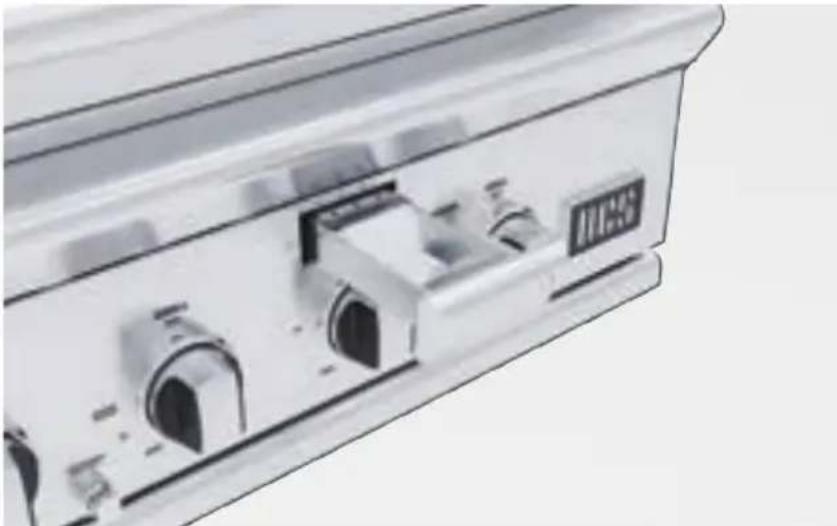
Use the smoker tray for short-time smoking or to add smoky flavor to food when used on its own or with grill burners or rotisserie. When using the smoker system with the rotisserie burner, set smoker burner to LOW to minimize the heat transfer to the rotisserie tray or position the meat away from the smoker burner.
natural_image
Close-up of a mechanical device with multiple ports and a label (no readable text or symbols)- Remove the smoker tray.
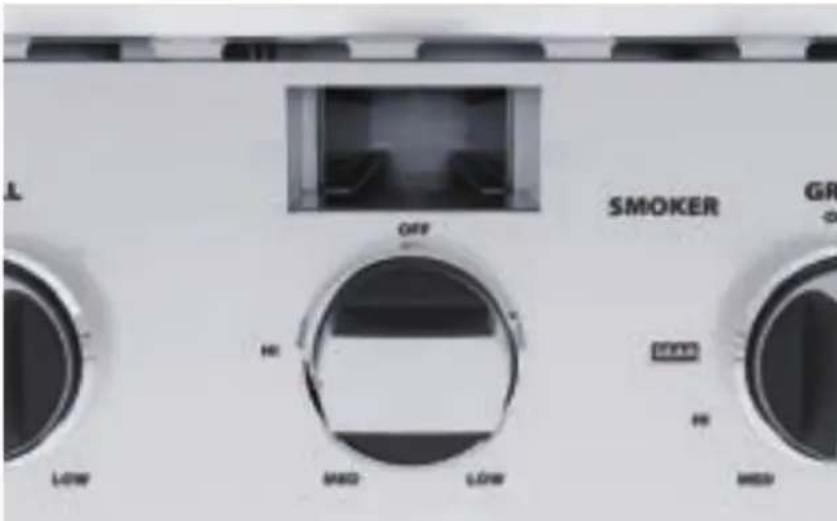
Lighting the smoker
- Push and turn smoker burner dial to HI. Watch through opening to see when burner ignites, then release dial.
If burner does not light, wait 5 minutes for gas to dissipate, then start again, or turn dial to HI and hold a lit match through the opening.
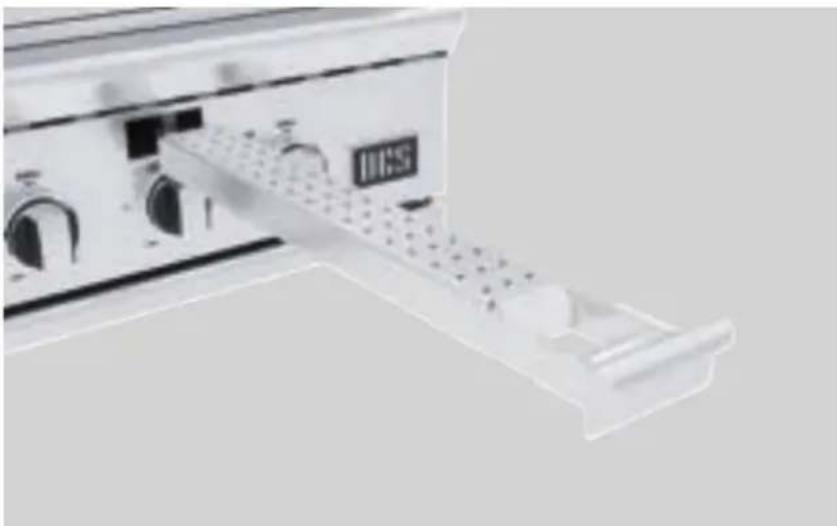
natural_image
Close-up of a white industrial machine with control panel and tray (no visible text or symbols)- Fill the smoker tray with woodchips, place the lid on, then refit the tray in the grill. Once woodchips start to smoke, turn dial to desired heat setting.
In case of flare-ups, carefully add water through the grate or pull tray out slightly and add water through smoker lid.
Do not fully remove the tray while hot.
Seasoning the grates
Season all grates before use to protect surface from corrosion and to stop food sticking. Repeat after cleaning or after long periods without use.
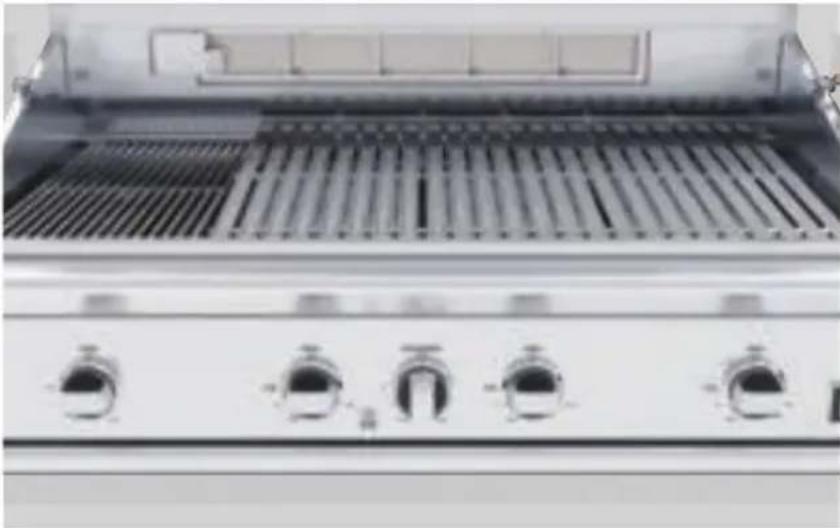
natural_image
Close-up of a stainless steel grill with multiple grilles and control knobs (no visible text or symbols)- Apply a light coating of high-heat cooking oil to all grates, then heat on MAX/SEAR with the hood down. See 'Lighting the grill'.
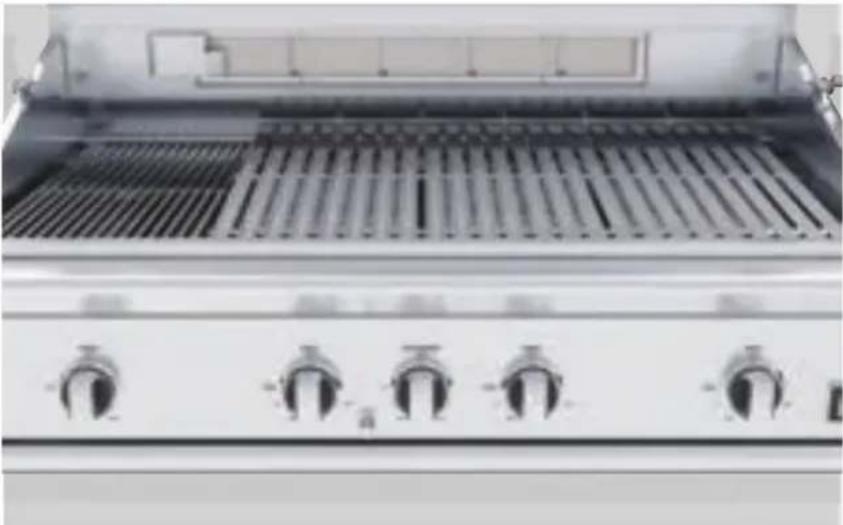
natural_image
Exterior view of a modern outdoor grill with multiple grilles and control knobs (no visible text or symbols)- Turn the dials OFF after 15 minutes or when grates begin to smoke. Allow to cool.
Grates will change color. This is normal.
natural_image
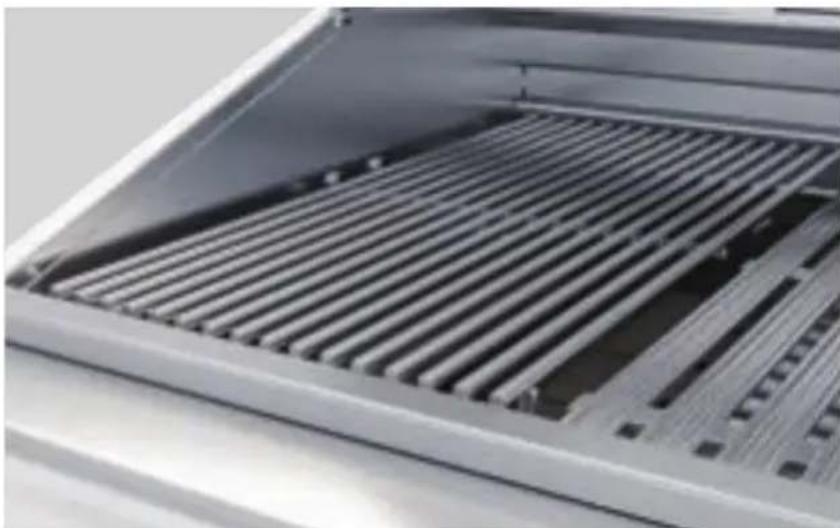
Close-up of a metallic stainless steel rack with parallel slats (no text or symbols visible)Sear burner grate
Designed for fast, even searing and clean sear lines.
Fits flat over sear burner. Rests on hooks at rear of grill.
natural_image
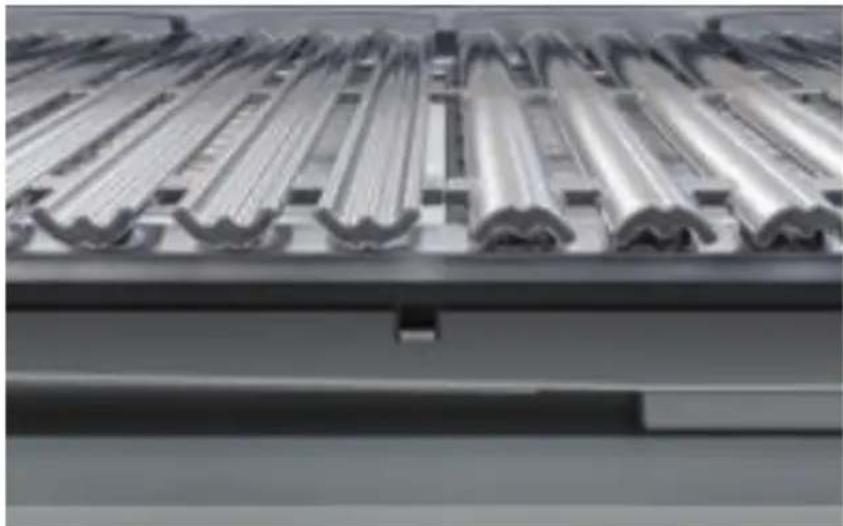
Close-up of a metallic industrial component with multiple parallel grooves and curved cutouts (no visible text or symbols)Double-sided grates
Use W-shaped side to createsear lines on food and channeljuice and grease away fromflame. Use the radius side tosupport and cook delicate fooditems like scallops and salmon.
The rotisserie delivers intense and even heat to food to achieve a crust on roasts or to slowly cook large food items up to 50 lb.
Do not ignite the grill burners while the rotisserie burner is lit. Avoid using the rotisserie in windy conditions.
Tying meat and poultry
Use butcher string or dental floss to tie meat and poultry before putting them on the rotisserie rod.
We recommend selecting a roast that is a consistent size and tying it in three areas to ensure even cooking. For poultry, tie the wings and legs to the body to secure them while the rotisserie is turning.
natural_image
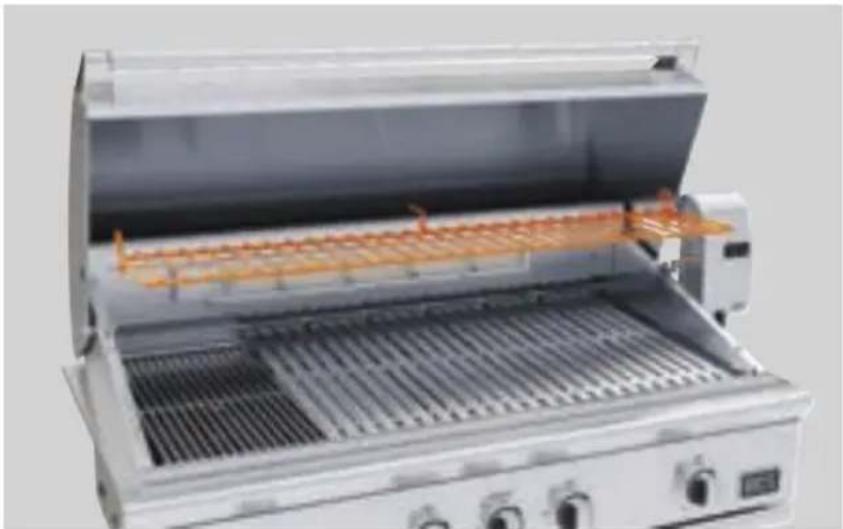
Exterior view of a stainless steel electric stove with open lid and internal grating (no visible text or symbols)Preparing the rotisserie rod
- Remove the secondary cooking rack.
natural_image
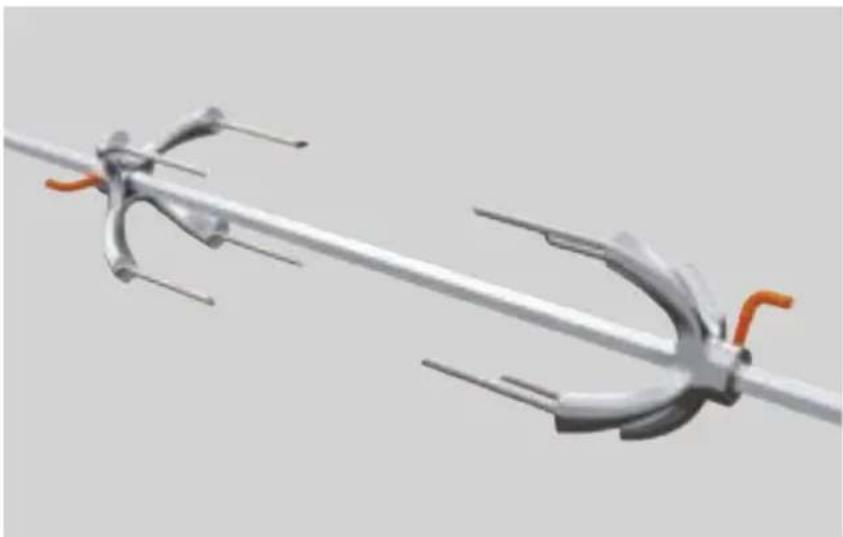
3D rendering of two metallic mechanical clamps attached to a rod, with no visible text or symbols- Slide first fork onto rotisserie rod far enough to allow food to be centered. Turn the L-shaped screw to secure it.
Slide food and second fork onto rod, with fork tines offset. Turn screw to secure.
Forks are sharp. Take care when handling.
natural_image
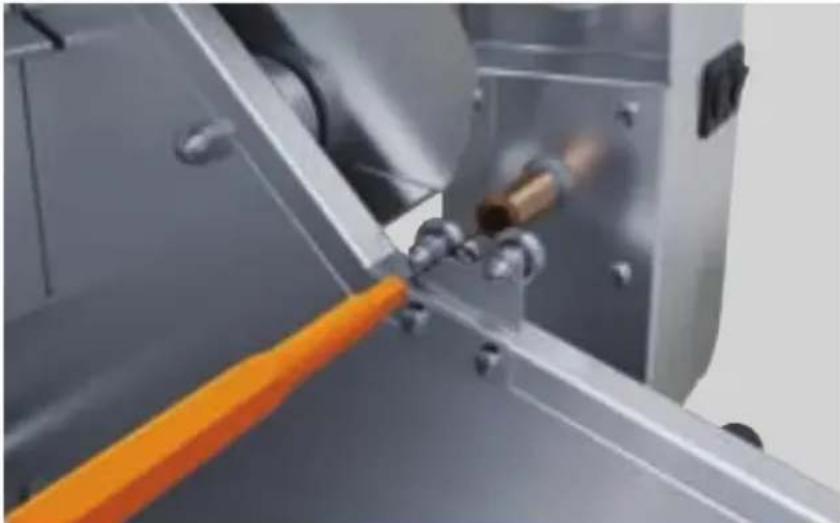
Close-up of a metallic industrial machine with a yellow tool inserted, showing internal components and no visible text or symbols.- Insert sharp end of rod into rotisserie motor. Rest other end on rollers at opposite side of grill.
Rod does not rest on rollers next to motor.
natural_image
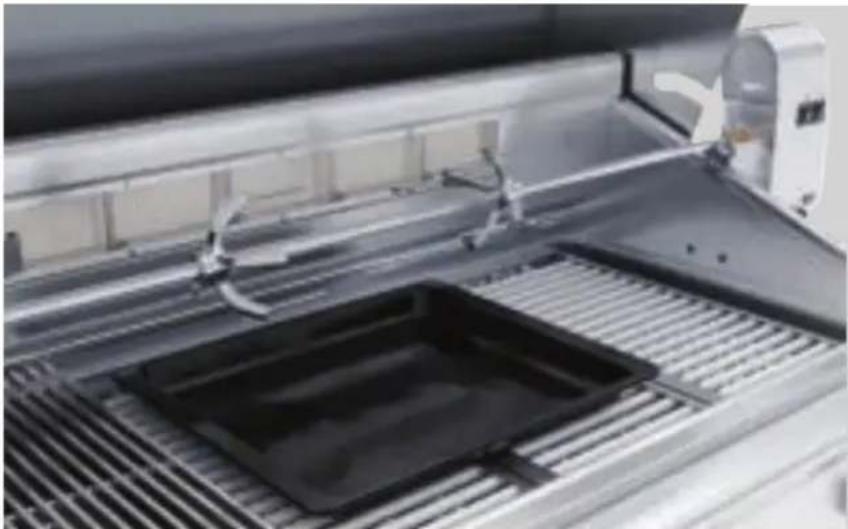
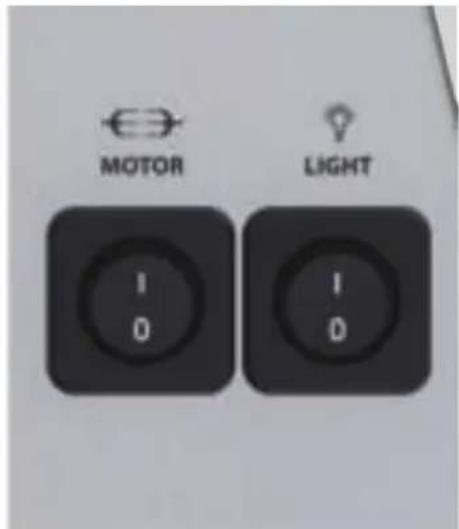
Close-up of a laboratory instrument with a black tray and metal frame (no visible text or symbols)- Place the tray beneath food to collect drips. Switch on rotisserie motor.
If required, switch off to adjust food for balance, and remove grates to create more space between food and tray.
natural_image
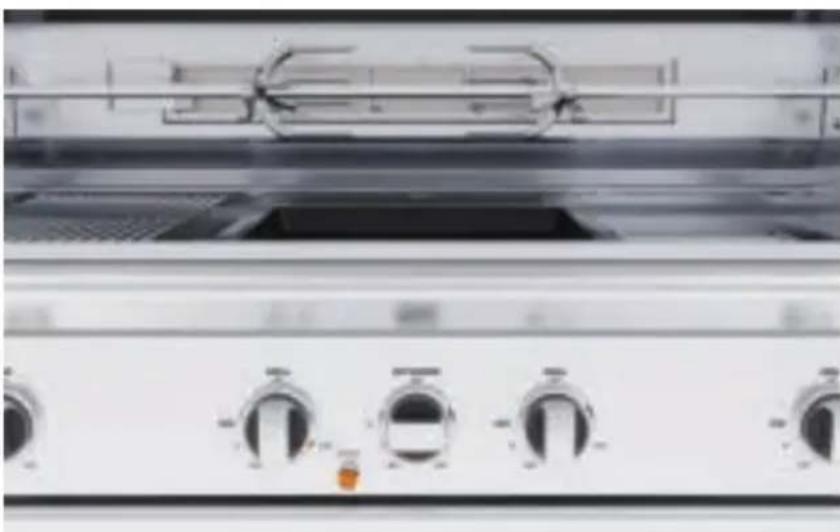
Close-up of a stainless steel oven with multiple control knobs and a handle (no visible text or symbols)Lighting the rotisserie
- Light one burner at a time. Push and turn dial to HI and, at the same time, press and hold the safety valve button for 10 seconds or until burner remains lit.
Once lit, turn dial to desired heat setting and release.
natural_image
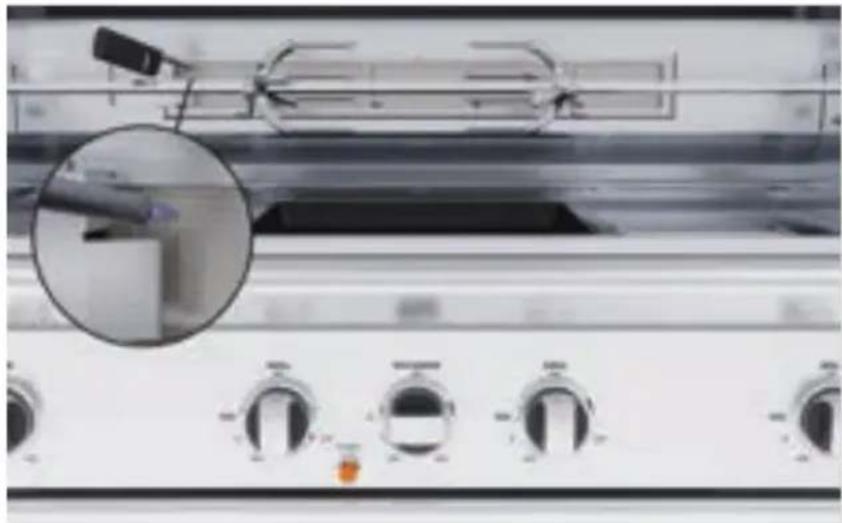
Close-up of a kitchen appliance with control knobs and a magnified inset showing a small mechanical component (no visible text or symbols)Manual lighting
Hold lighter to side of burner, then push and turn dial to HI. Release the dial, and press and hold the safety valve button for 10 seconds or until burner ignites.
Turn dial to desired heat.
Checking food temperature
Turn dial to LOW, switch off motor, and use a meat thermometer. If further cooking is required, turn dial to desired heat and restart motor.
When food is cooked, turn dial to OFF, and switch off motor. Remove rod, place food on a tray, then remove forks. Take care, as rod will be hot.
Cover and allow to rest.

USA
For a complete list of accessories, scan the QR code or visit dcsappliances.com/us/accessories.

Canada
For a complete list of accessories, scan the QR code or visit dcsappliances.com/ca/accessories.
General
Clean your grill regularly, and after periods without use, to maintain performance.
Stainless steel surfaces
Clean regularly with mild detergent, kitchen spray or stainless steel cleaner to maintain condition, especially if located near a pool or the coast. Cover when not in use.
Secondary cooking rack
Allow to cool, then remove from grill and wash with hot water and mild detergent.
Grates
While still hot and on grill, brush residue off with a grill brush. When cold, clean with hot water and mild detergent, then dry with a soft, clean cloth.
Re-season grates after cleaning to prevent rust.
Drip tray
Allow to cool. Clean after each use to prevent grease build-up. Dishwasher safe.
Rotisserie rod and forks
Clean with hot water and mild detergent, and dry with a soft, clean cloth. Take care when handling forks, as they are sharp.
Smoker tray
Do not touch or move the tray while hot. Scrape off food residue and use a brush to clean the bottom of the tray. Dispose of the ash in a fireproof container.
Grease Management System
Allow grease to set, then scrape it out. Wipe as needed.
Radiant trays
Rotate ceramic rods so they burn clean when next used. If required, use a brush to remove residue, or clean with hot water and mild detergent. For heavy soiling, heat radiant tray on HI for 10-20 mins. Trays may smoke. This is normal. Do not take trays apart.
Rotisserie burner
Self cleaning. Run the rotisserie burner for 10-20 minutes to burn off any residue. Do not use water.
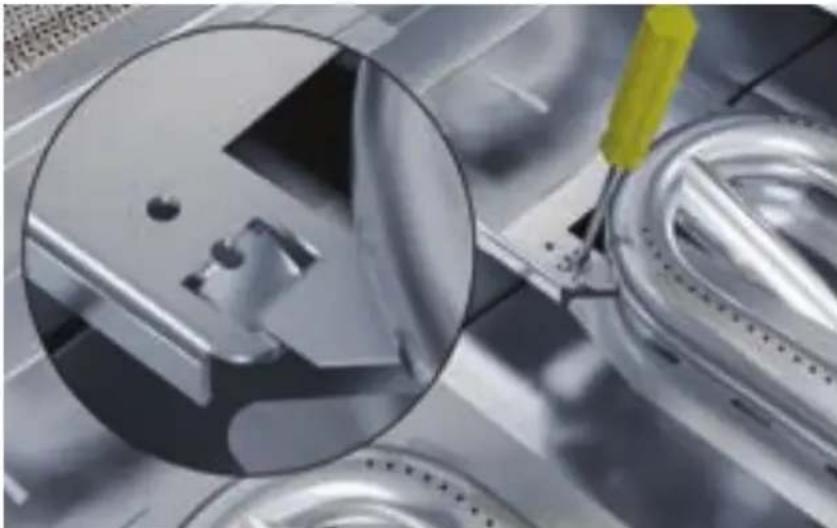
Grill burners should be removed regularly for cleaning and to check for blockages from food residue and insects. Always turn off gas supply before removing and cleaning burners.
natural_image
Close-up of a mechanical component with a magnified inset showing a close-up view of a metal bracket (no text or symbols visible)- Remove grates and radiant trays. Use a flathead screwdriver to loosen clamps, then carefully lift burner up and out of grill.
Shake gently to remove debris. Clean exterior with a grill brush.
natural_image
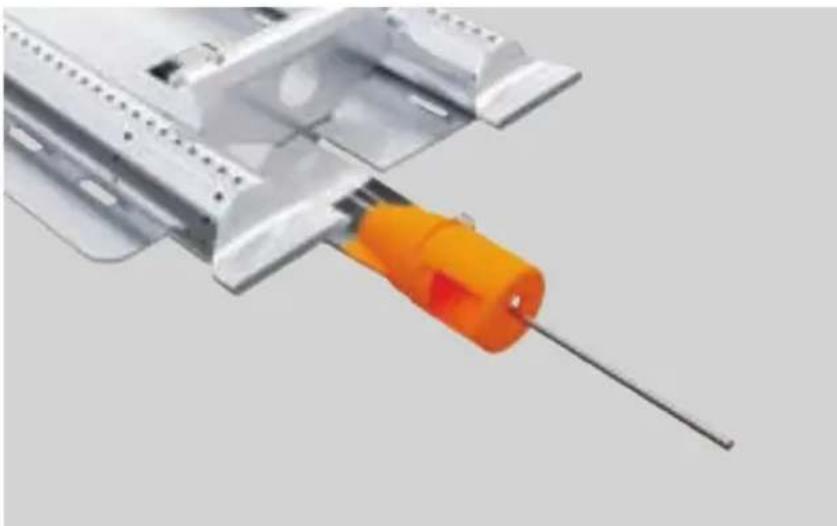
Close-up of a medical device with an orange cylindrical component inserted into a metallic housing (no visible text or symbols)- Use a flashlight to check if burner inlet is blocked. If so, use safety pin or straightened paper clip to unblock inlet and holes along burner tube.
You can unblock gas jet inside front of grill if required.
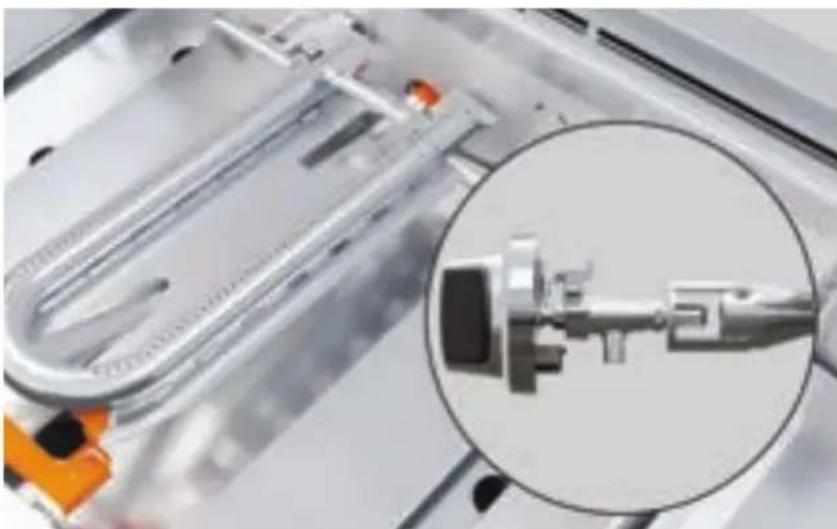
natural_image
Close-up of a mechanical component with a magnified inset showing internal components (no visible text or symbols)- Refit burner so inlet is centered on gas jet, then lower burner onto mounts at rear. Ensure it is level and secure.
Take care not to damage ignitor.
Burner must be properly located to ensure safe operation.
Run the sear burner for 10-20 minutes, then allow to cool. The sear burner is self-cleaning, but it can be removed for further cleaning if required. Do not use water as it can damage the sear burner and affect its performance. Always turn off gas supply before removing and cleaning burners.
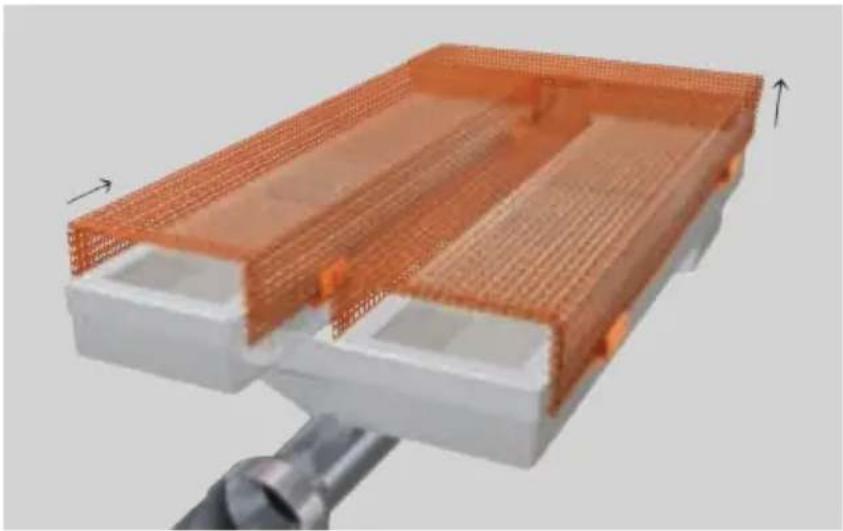
natural_image
3D diagram of a mechanical assembly with orange mesh structure and directional arrows (no text or symbols)- Unclip and remove mesh cover from sear burner. Brush or vacuum the mesh separately to remove any residue.
If required, rinse the mesh in warm water and dry thoroughly.
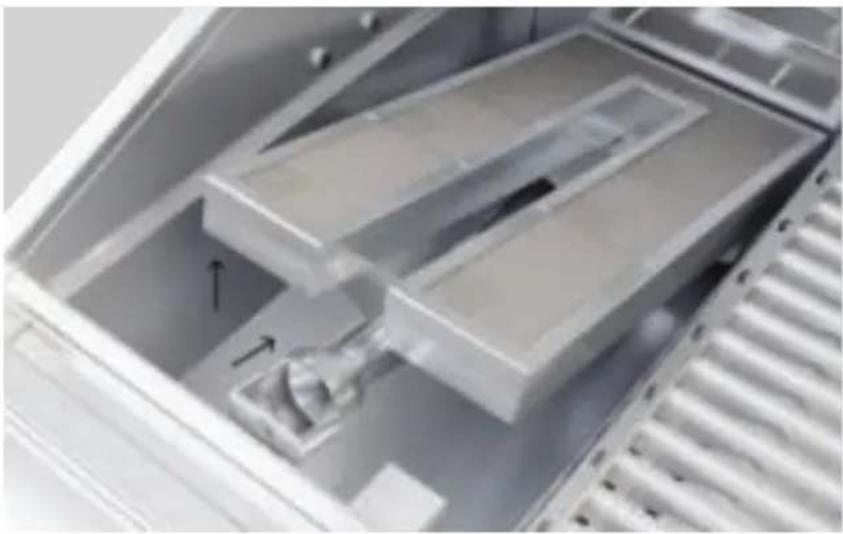
natural_image
Interior view of a white plastic enclosure with internal compartments and ventilation grilles (no visible text or symbols)- Hold burner at the sides and lift at the back to remove it from its mount.
Slide it towards rear of grill to separate it from the opening in the front of the grill, then lift burner to remove.
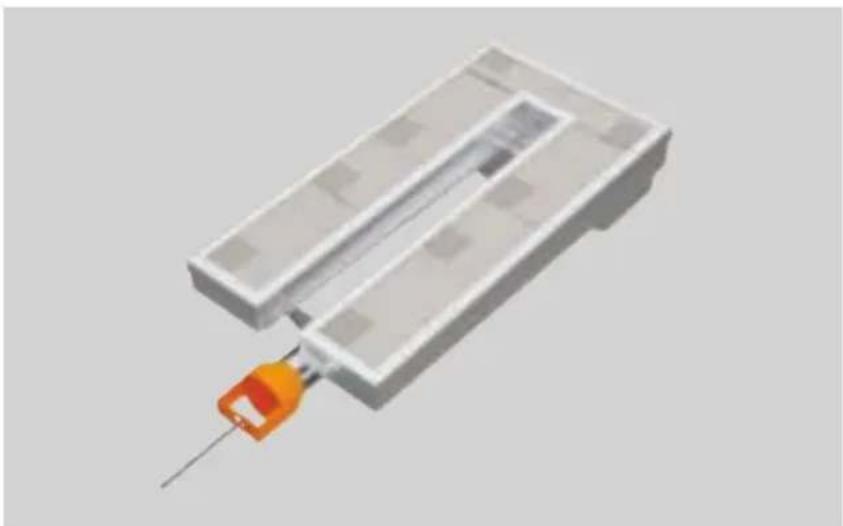
natural_image
3D rendering of a rectangular electronic component with a small orange sensor or probe inserted, no visible text or symbols.- Check the burner inlet for blockages. Use a safety pin or paper clip to unblock it.
Gently shake or vacuum the burner to remove debris. Do not use a brush. Do not use water.
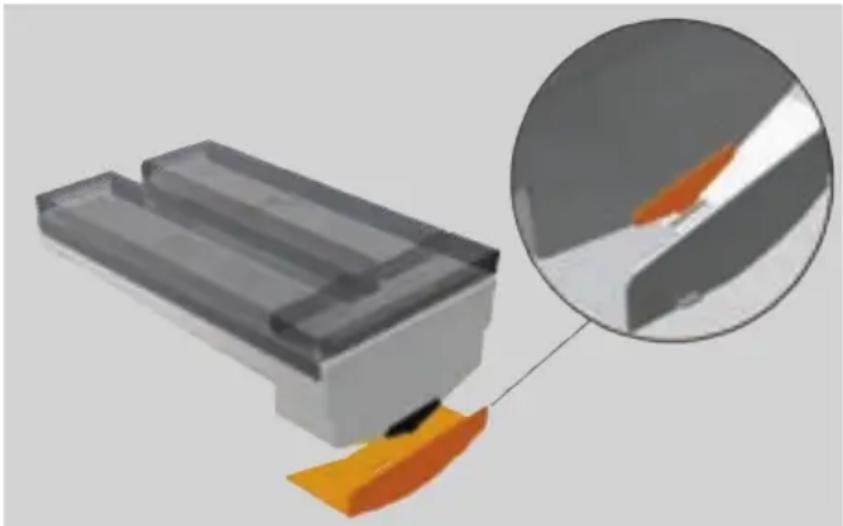
natural_image
3D rendering of a mechanical component with an inset magnified view showing a highlighted section (no text or symbols)- Hold sear burner at the sides and fit burner inlet back into opening at front of grill. Ensure it is aligned correctly on the valve inside the opening.
Lower at rear to refit it securely on mount. Refit mesh.
Burner must be properly located to ensure safe operation.
natural_image
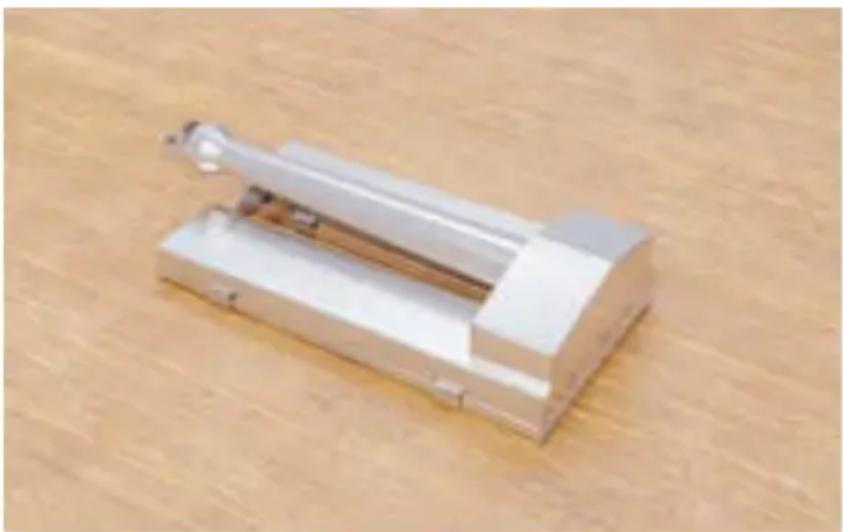
White metal stapler resting on a wooden surface (no text or symbols visible)If sear burner gets wet
Remove the burner. Rest it upside down to allow water to drain.
Allow burner to dry completely before reinstalling and using.
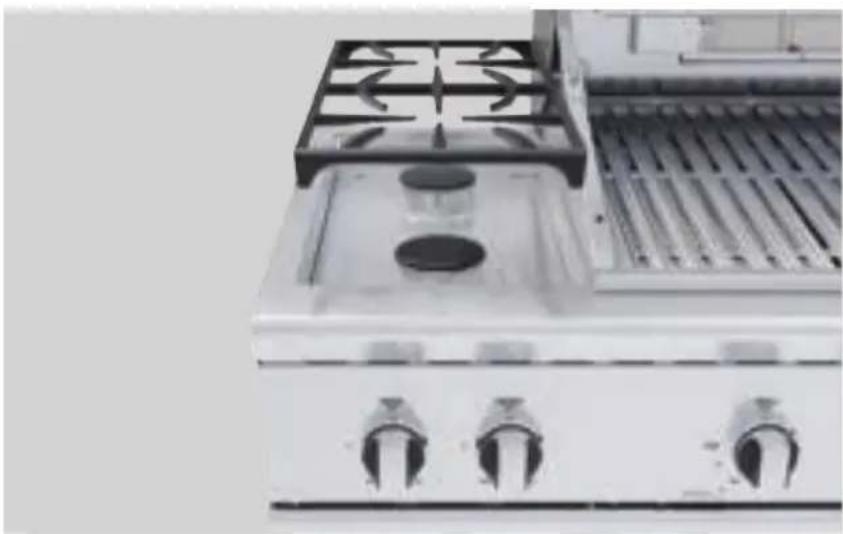
Side burners should be removed regularly for cleaning and to check for blockages from food residue and insects. Always turn off gas supply before removing and cleaning burners.
natural_image
Close-up of a modern stainless steel cooktop with three side outlets and a grater (no visible text or symbols)- Allow to cool, then remove grate, burner caps and brass rings. Wash these with hot water and mild detergent. Dry thoroughly.
If required, use a brush to clean burner ports.
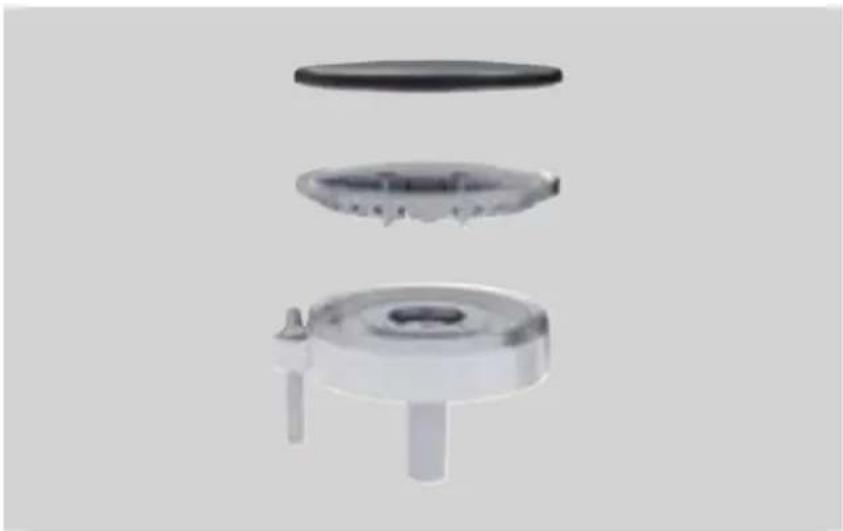
natural_image
Exploded view diagram of a mechanical component showing top, front, and side views (no text or symbols)- Refit brass ring so pins are aligned in the base of the burner. Place burner cap onto brass ring and ensure it is secure, then refit the grate.
Burners must be properly located to ensure safe operation.
Do not smoke while leak testing, and extinguish all open flames. Check with a full cylinder and make sure all dials are OFF.
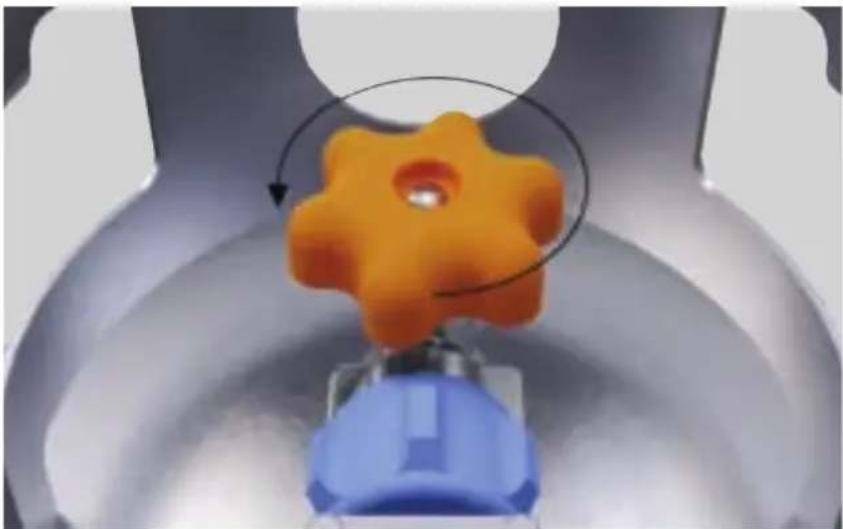
natural_image
Close-up of a mechanical valve component with orange and blue parts, no visible text or symbols- Open the gas cylinder valve.
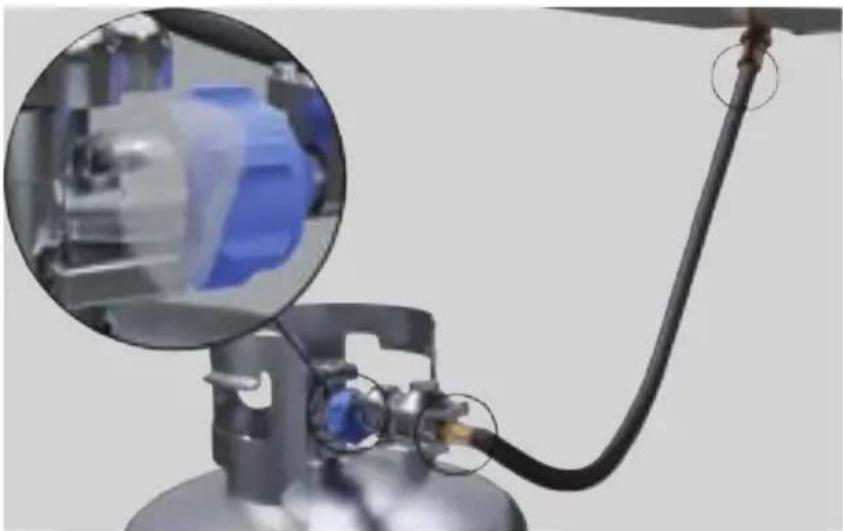
natural_image
Close-up of a gas stove burner with a blue internal component and attached cable (no visible text or symbols)- Apply a soap solution of 1:1 liquid soap and water to all connections, hoses and fittings from the cylinder to the connection at the grill.
Soap bubbles will appear where gas is escaping.
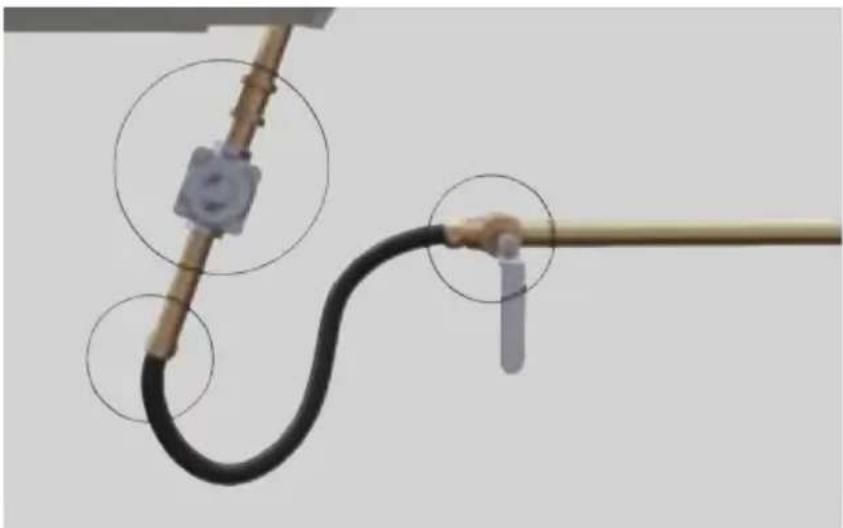
natural_image
Pure diagram of a cable with a connector and pipe, no text or symbols present- If leaking, turn gas off, tighten leaking connections and recheck.
If still leaking, turn gas off, and call your local gas utility or the dealer where you purchased the grill.
Inspect the gas connection hose every time you change the gas cylinder. Replace hose if there are any signs of damage.
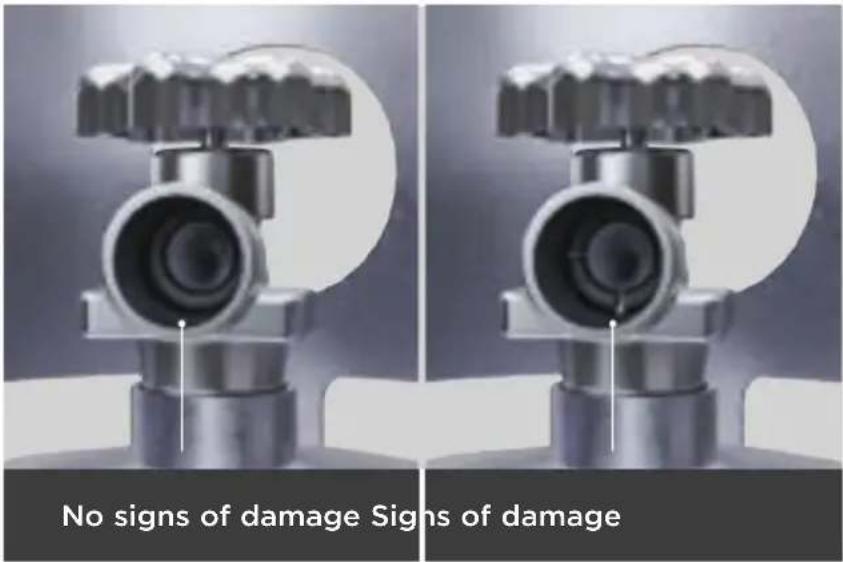
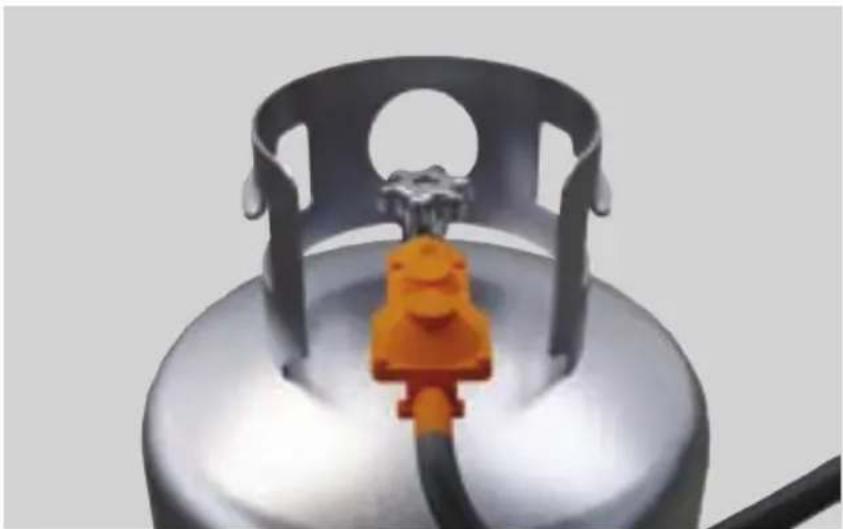
- Before connecting new cylinder, check the rubber O-ring. If O-ring is damaged, return it to gas supplier. Do not use damaged cylinder.
natural_image
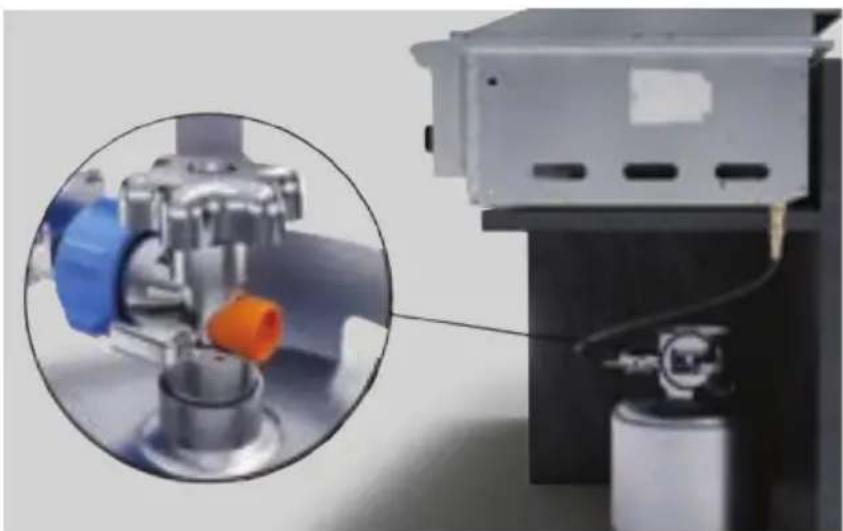
Close-up of a gas cylinder with orange plug inserted into the chamber, no visible text or symbols- If O-ring is in good condition, connect the grill regulator to the gas cylinder valve and turn gas on. Check for leaks. See 'Leak testing.'
natural_image
Close-up of a mechanical device with an inset close-up showing a component being inserted (no visible text or symbols)- If there is no leak, place the cylinder into the grill cabinet with the pressure relief valve facing away from you. Always close the cylinder valve after each use.
natural_image
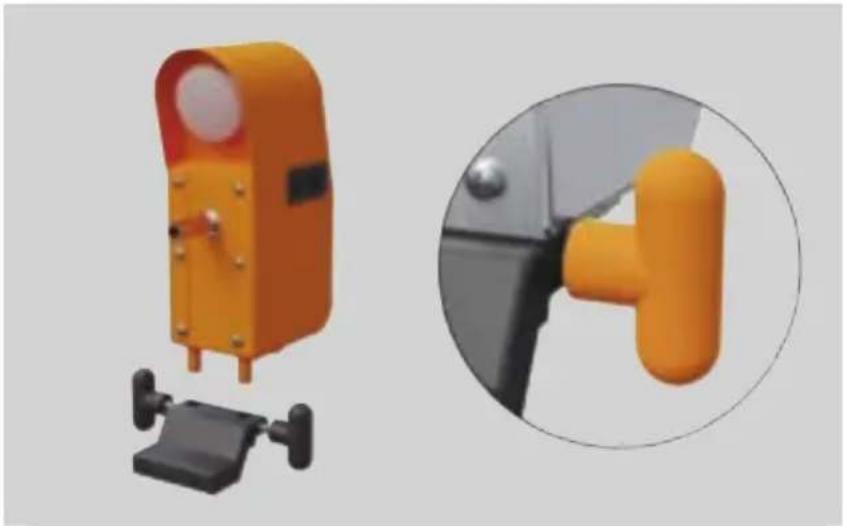
3D illustration of a yellow traffic light device with a close-up inset showing its orange component (no text or symbols)Replacing rotisserie light
- Disconnect rotisserie motor from power supply. Loosen handles, and lift motor off grill.
natural_image
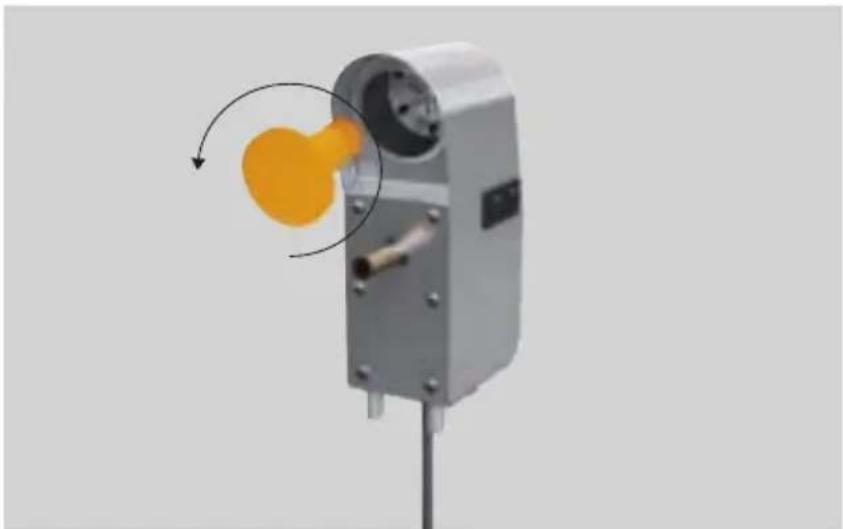
3D rendering of a mechanical device with a yellow-orange component and directional arrow (no text or symbols)- Unscrew and replace light bulb. The rotisserie uses a 50W (or its equivalent) Max. Halogen Narrow bulb.
Refit motor to grill, tighten lugs and reconnect the power supply.
natural_image
Close-up of a white industrial machine with control knobs and a magnified inset showing internal components (no visible text or symbols)Replacing the battery
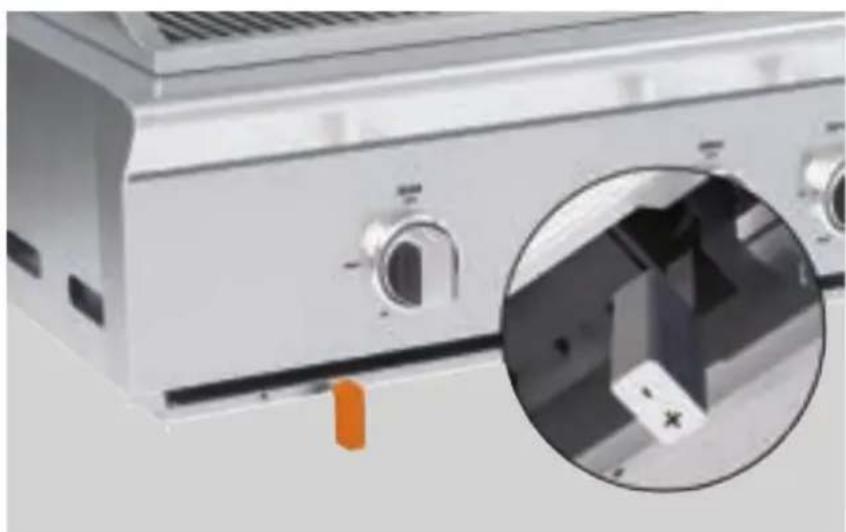
Remove the drip tray and pull battery downwards to remove. Use pliers if required.
Replace with new 9-volt battery.
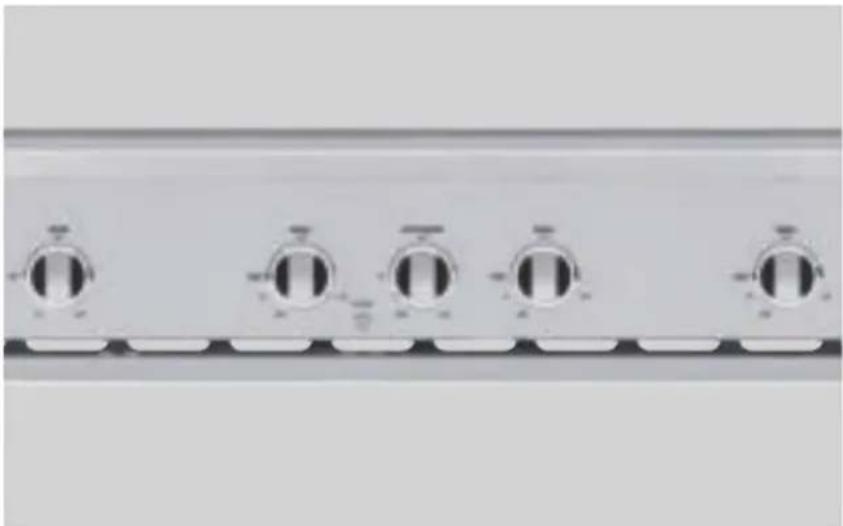
The flow limiting device on the gas cylinder may activate if the cylinder gets cold or is low on gas. This can affect gas flow and heat output and will need to be reset.
natural_image
Row of five circular pressure gauges with white and black markings, no visible text or symbols on the gauges themselves.- Turn all burner dials to OFF.
natural_image
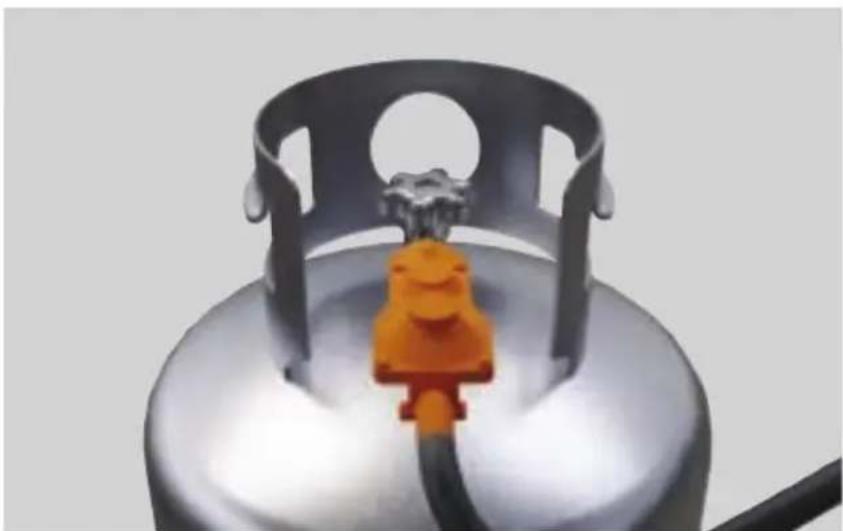
Close-up of a gas stove burner with orange fuel valve (no text or symbols visible)- Close cylinder valve, and disconnect regulator hose from the cylinder.
natural_image
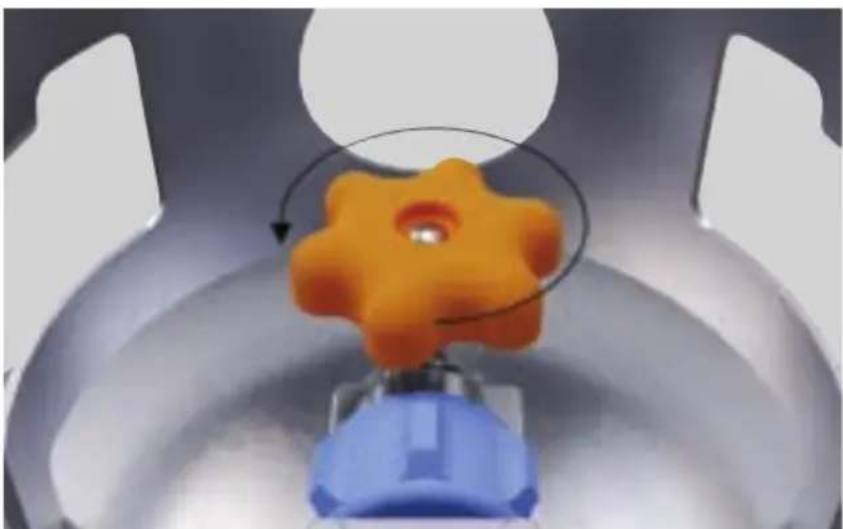
3D illustration of a mechanical component with orange and blue parts, no visible text or symbols- Reconnect regulator hose. Turn gas on with at least two full turns, and check for leaks. See 'Leak testing.'
Why is the burner flame yellow/orange?
Burner needs to be adjusted. See Install Guide.
Why won't the burners light when I turn the dial?
- Dial not pushed in when attempting to light grill. Push and turn to SEAR/MAX. See 'Using the grill.'
• Gas supply is turned off. Turn gas on. - Burner inlet or tube may be blocked. Remove burner and check for blockages. See 'Cleaning the grill burners', 'Cleaning the sear burner' or 'Cleaning the side burners.' If problem persists, call Customer Care or your Authorized Service Center.
- Ignitor battery is flat or ignitor has failed. Check if ignitor clicks when you push dial. If not, replace battery. See 'Replacing the light and battery.' If problem persists, call Customer Care or your Authorized Service Center.
Why does the grill keep having flare-ups?
- Radiant trays have grease on them. Wait for trays to cool, then rotate ceramic rods and heat on HI for 10-20 minutes. See 'Cleaning.'
- Sear burner has grease on it. See 'Cleaning the sear burner.'
- Rotisserie burner has grease on it. See 'Cleaning.'
Why can I smell gas?
- Burner dial is on but burner is not lit. Check the dial is turned to OFF. Wait 5 minutes before relighting. See 'Using the grill.'
• Gas is leaking. See 'Leak testing.'
Why isn't grill getting hot on HI/SEAR?
- Grill hasn't preheated enough. Preheat for full 10 minutes before cooking.
- Grill is being affected by wind gusts. Move to a more sheltered area if possible.
• LP gas cylinder is empty. Check cylinder, and get it refilled if empty. - A burner port is obstructed. See 'Cleaning the grill burners', 'Cleaning the sear burner' or 'Cleaning the side burners.
- 'Flow Limiting Device is activated on LP cylinder. See 'Resetting flow limiting device.'
Why is there smoke coming from the grill?
Residue or grease on the grates or radiant trays. Brush residue off the grates with a grill brush. Residue on radiant trays should burn off during the cook. See 'Cleaning.'
Why isn't the rotisserie staying lit when I release the safety valve button? (some models only)
Releasing button too soon. Keep pressing the safety valve button until the rotisserie burner stays lit.
Why isn't the rotisserie rotating? (some models only)
- Motor is off. Check that motor is switched on and plugged into a GFI outlet. Reset if tripped.
- Rod not inserted correctly. Check the rod is inserted correctly in the motor and balanced on the rollers at the side of grill. See 'Using the rotisserie'.
- Something is blocking it. Check that secondary cooking rack is not preventing rotisserie from turning. Check food is tied correctly and is centered and balanced on the rod. If not, switch motor off and turn burner to LOW while you readjust the food.
Why isn't the rotisserie light working? (some models only)
- Bulb has blown. Replace bulb. See 'Replacing light and battery.'
Before you call for service or assistance
Check the things you can do yourself. Refer to the installation instructions and your user guide and check that:
natural_image
Close-up of a mechanical device with a digital display showing 'DCS' and no visible text or symbols on the main subject.① Your product is correctly installed.
② You are familiar with its normal operation.
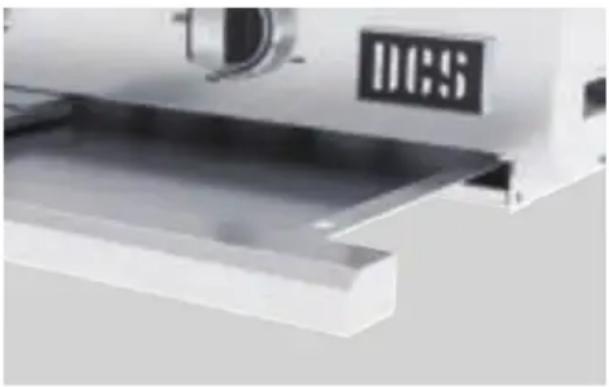
③ Model number (can be found on the inside, right side panel behind the drip tray handle).
④ Serial number (can be found on the inside, right side panel behind the drip tray handle).
⑤ Code (can be found on the inside, right side panel behind the drip pan handle).
⑥ Date of installation.
If you still need assistance or parts, please refer to the Service & Warranty book for warranty details and your nearest Authorized Service Center, Customer Care, or contact us through our website www.dcsappliances.com or email: customer.care@fisherpaykel.com.
Complete and keep for safe reference:
Model
Serial No.
Purchase Date
Purchaser
Dealer
City
State
Zip
Country
DCSAPPLIANCES.COM
© Fisher & Paykel Appliances 2024. All rights reserved.
Fisher & Paykel Appliances, 695 Town Center Drive
Suite 180, Costa Mesa, CA 92626, USA
The models shown in this guide may not be available in all markets and are subject to change at any time.
The product specifications in this guide apply to the specific products and models described at the date of issue. Under our policy of continuous product improvement, these specifications may change at any time.
For current details about model and specification availability in your country, please go to our website or contact your local DCS dealer.
DCSAPPLIANCES.COM
© Fisher & Paykel Appliances 2024. All rights reserved.
Fisher & Paykel Appliances, 695 Town Center Drive
Suite 180, Costa Mesa, CA 92626, USA
The models shown in this guide may not be available in all markets and are subject to change at any time.
The product specifications in this guide apply to the specific products and models described at the date of issue. Under our policy of continuous product improvement, these specifications may change at any time.
For current details about model and specification availability in your country, please go to our website or contact your local DCS dealer.
- WARNING!
- Registration
- Hot Surface Hazard
- Failure to follow this advice may result in burns and scalds or serious injury.
- Explosion Hazard
- Failure to follow this advice may result in injury or death.
- Cut Hazard
- WARNING
- Excessive Weight Hazard
- Electrical Shock Hazard
- Fire Hazard
- Failure to follow this advice may result in death or serious injury.
- General Use
- Fire
- Electrical Hazards
- Installation Warnings
- Gas Requirements
- Storage and maintenance
- LP Cylinder Cabinet Requirements
- LP Cylinder Hazards
- Natural gas Installation and connection
- Servicing
- Features and accessories
- CONTROL PANEL
- Direct grilling
- Indirect cooking
- Sear burner (some models only)
- Grill burners
- Side burners
- Rotisserie (some models only)
- Before you begin
- Preheating the grill
- Lighting the grill
- Manual lighting
- Lighting the side burners
- Lighting the smoker
- Seasoning the grates
- Sear burner grate
- Double-sided grates
- Tying meat and poultry
- Preparing the rotisserie rod
- Lighting the rotisserie
- Checking food temperature
- USA
- Canada
- General
- Stainless steel surfaces
- Secondary cooking rack
- Grates
- Drip tray
- Rotisserie rod and forks
- Smoker tray
- Grease Management System
- Radiant trays
- Rotisserie burner
- If sear burner gets wet
- Replacing rotisserie light
- Replacing the battery
- Why won't the burners light when I turn the dial?
- Why does the grill keep having flare-ups?
- Why can I smell gas?
- Why isn't grill getting hot on HI/SEAR?
- Why is there smoke coming from the grill?
- Why isn't the rotisserie rotating? (some models only)
- Before you call for service or assistance
- Complete and keep for safe reference:
- DCSAPPLIANCES.COM
Brand : DCS
Model : BH1-36R-L
Category : Barbecue