IVAPAC10KBTU - Air-conditioner Ivation - Free user manual and instructions
Find the device manual for free IVAPAC10KBTU Ivation in PDF.


| Product Type | Portable Air Conditioner |
| Brand | Ivation |
| Model | IVAPAC10KBTU |
| Cooling Capacity | 10,000 BTU (ASHRAE) / 7,000 BTU (SACC) |
| Coverage Area | Up to 300 sq. ft. |
| Dimensions (W x H x D) | 15 x 30 x 15 inches |
| Weight | 70 lbs |
| Power Supply | 115 V / 60 Hz / 8.5 A |
| Energy Efficiency Ratio (EER) | 8.5 |
| Modes | Cool, Dehumidify, Fan |
| Fan Speeds | Low, Medium, High |
| Thermostat Control | Remote control with digital display & 24-hour timer |
| Dehumidification Capacity | 2.5 pints per hour |
| Refrigerant | R410A |
| Installation | Window kit included; exhaust hose length 5 ft |
| Drainage | Continuous drain option or self-evaporative |
| Maintenance | Washable air filter; clean every 2 weeks |
| Safety Features | Auto shut-off timer, overheat protection, thermal overload |
| Noise Level | 52 dB (low) - 56 dB (high) |
| Spare Parts Available | Remote control, air filter, exhaust hose |
| Repairability | User-replaceable filter and remote; professional service for refrigerant |
| Certifications | ETL, Energy Star (depending on version) |
| Warranty | 1 year limited warranty |
Frequently Asked Questions - IVAPAC10KBTU Ivation
User questions about IVAPAC10KBTU Ivation
0 question about this device. Answer the ones you know or ask your own.
Ask a new question about this device
Download the instructions for your Air-conditioner in PDF format for free! Find your manual IVAPAC10KBTU - Ivation and take your electronic device back in hand. On this page are published all the documents necessary for the use of your device. IVAPAC10KBTU by Ivation.
USER MANUAL IVAPAC10KBTU Ivation
10,000 BTU Portable Air Conditioner
User Guide
IVAPAC10KBTU
natural_image
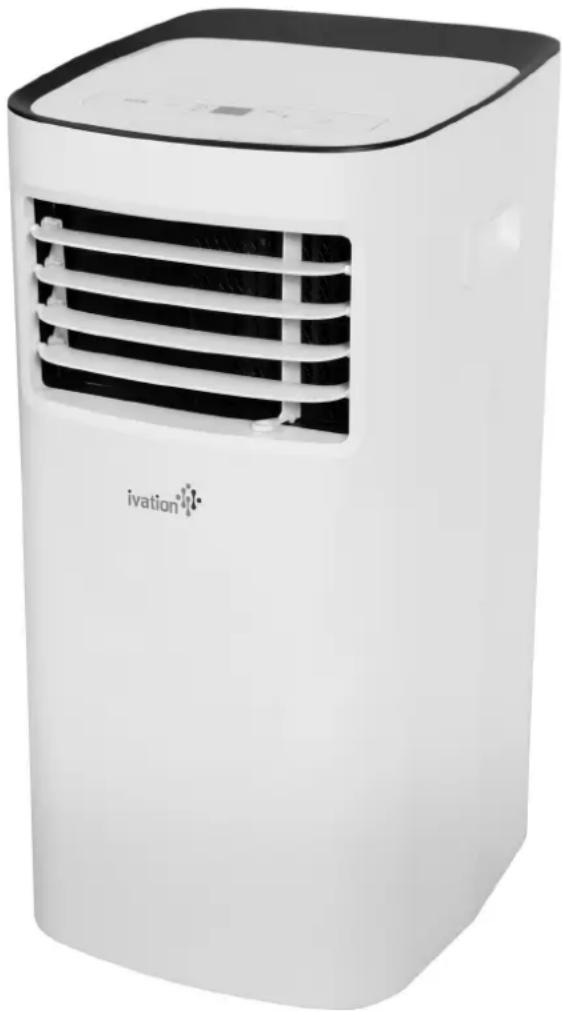
White portable air conditioner unit with black ventilation slots and 'ivation' logo on front (no text-heavy elements)Thank you for purchasing the Ivation® 10,000 BTU Portable Air Conditioner. This User Guide is intended to provide you with guidelines to ensure that operation of this product is safe and does not pose risk to the user. Any use that does not conform to the guidelines described in this User Guide may void the limited warranty.
Please read all directions before using the product and retain this guide for reference. This product is intended for household use only.
This product is covered by a limited one-year warranty. Coverage is subject to limits and exclusions. See warranty for details.
Box contents
Air conditioner
Assembly materials
Remote controller with 2 AAA batteries
User guide
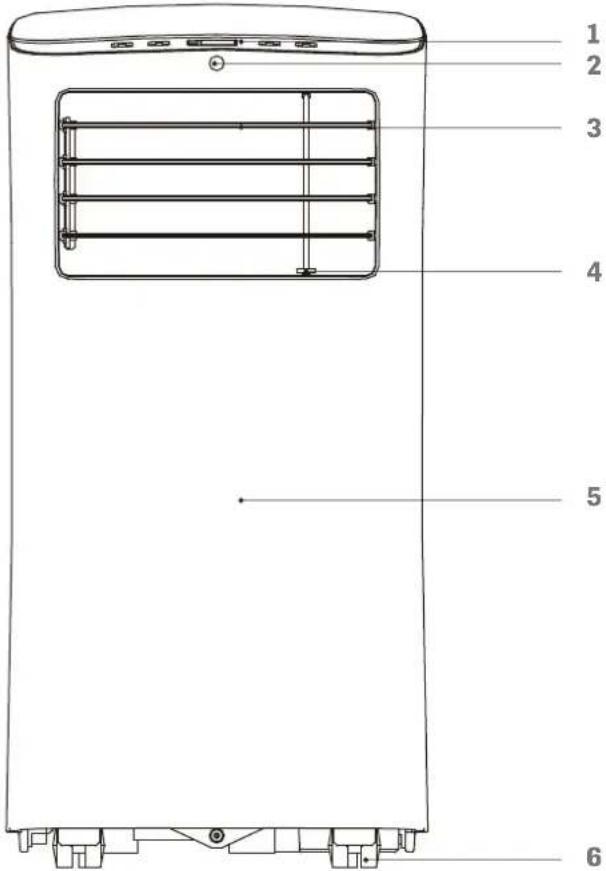
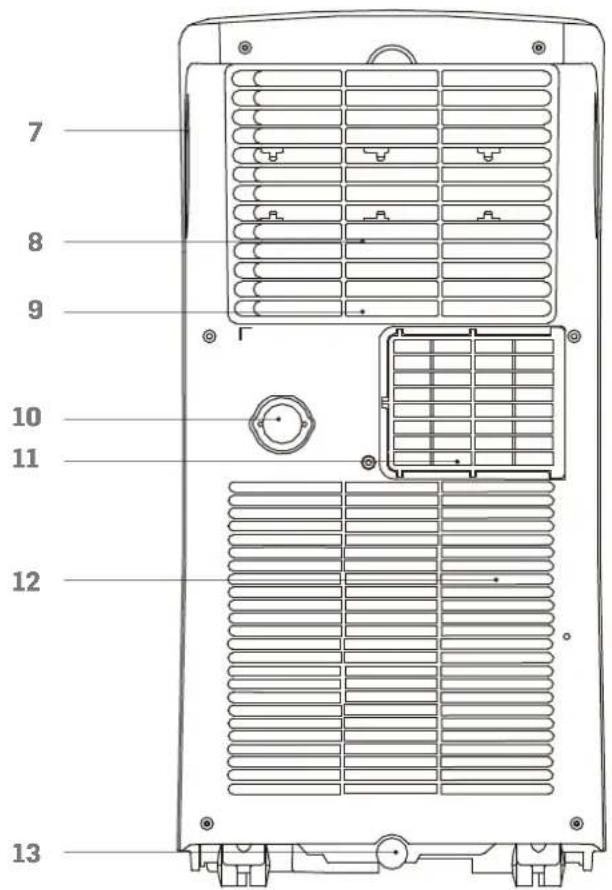
Parts
- Control panel
- Remote signal receiver
- Horizontal control lever
- Vertical control lever
- Panel
- Caster
- Handle
- Air filter
- Upper air intake vent
- Drain outlet
- Air outlet
- Lower air intake vent
- Bottom tray drain outlet
Hardware
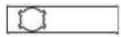
- Unit adapter
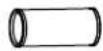
- Exhaust hose
- Window slider adapter
- Bolt
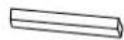
- Window slider A
- Window slider B
- Adhesive foam seal A (2)
- Adhesive foam seal B (2)
- Foam seal C
- Security bracket
- Screws (2)
- Drain hose
- Remote controller with 2 AAA batteries
1

2
3

4

5
6
7

8
9

10 11 1312



Safety precautions
- Only use the included accessories and parts. Using non-standard parts may increase the risk of leakage, electrical shock, fire, injury, or damage to the unit.
• Always use a grounded outlet with the appropriate voltage. - Only install the unit onto a flat, sturdy surface, or risk excessive noise and vibration.
- Do not block the intake or outlet vents.
- Do not modify the length of the power cord or use an extension cord to power the unit.
- Do not share a single outlet with other electrical appliances. Risk of fire or electric shock.
- Do not install the unit in an area where it may become wet or damp. Risk of short circuit.
- Do not install the unit in a room where it may be exposed to combustible gas. Risk of fire.
- Do not roll the unit over other objects or thick carpet or risk tipping the unit over.
- Do not operate the unit if it has been dropped or damaged.
- Keep out of reach of children and pets.
- If the unit is knocked over during use, turn off the power immediately and unplug it from the power supply. Check the unit for damage before turning on again.
- This appliance is not intended for use by children or people with reduced physical, sensory, or mental capabilities or lack of experience and knowledge, unless they have been given supervision or instruction concerning the use of the appliance by a person responsible for their safety.
- Do not use the unit if the power cord is damaged.
• Always disconnect the unit before performing maintenance. - Do not run the power cord under carpeting, rugs, furniture, or other coverings.
Installation Setup
Before installing the unit, be sure to have the following tools:
a. Medium Phillips screwdriver
b. Tape measure or ruler
c. Knife or scissors
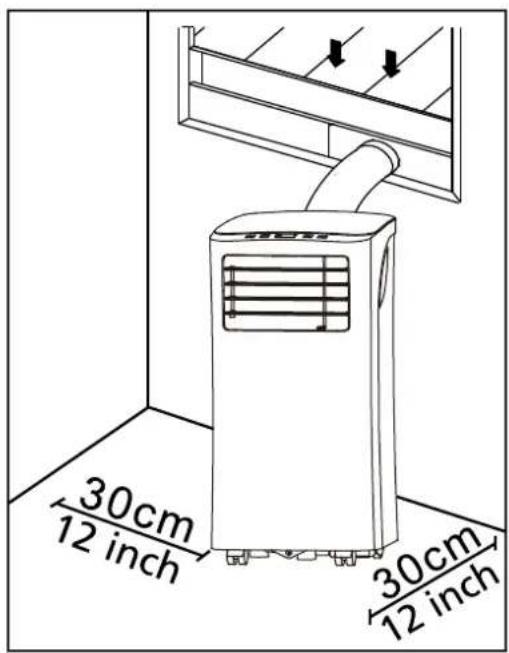
- When choosing an appropriate location to install the unit, keep in mind the following:
a. The surface should be flat and even.
b. It must be near a grounded plug.
c. The collection tray drain must be accessible.
d. The unit should be at least 12" (30cm) from the nearest wall to ensure proper air conditioning.
e. Do not cover the intakes, outlets, or remote signal receptor.
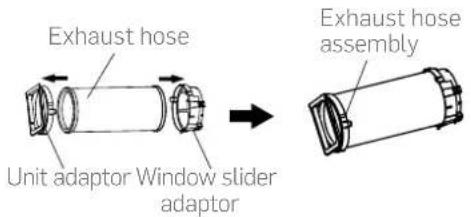
- Insert the exhaust hose into the window slider adaptor and unit adapter. Then clamp together with the elastic buckles of the adapter.
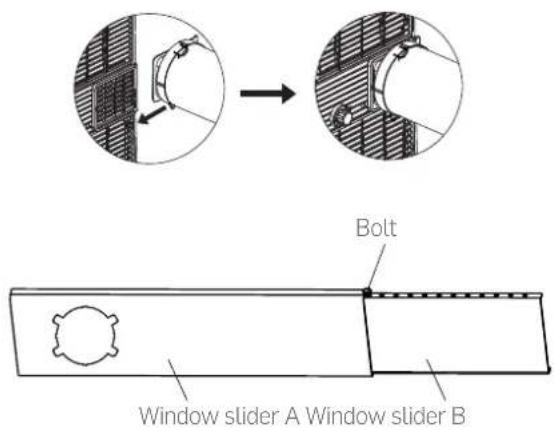
-
Adjust the size of the window slider according to the size of the window. If the length of the window requires two window sliders, use the bolt to fasten the window sliders, after adjusting to the proper length.
-
Insert the exhaust hose into the air outlet vent as seen below.
Hung window installation
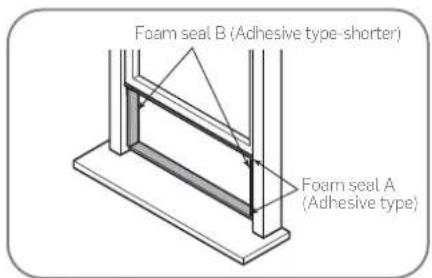
- Cut the adhesive foam seals A and B to the appropriate length, depending on the size of the window. Attach them to the window sash and frame as shown.
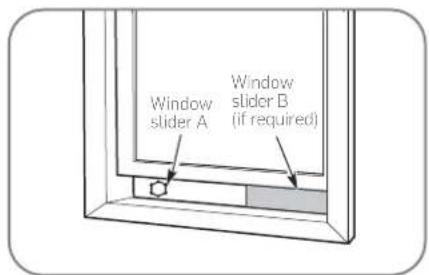
- Insert the window slider into the window opening.
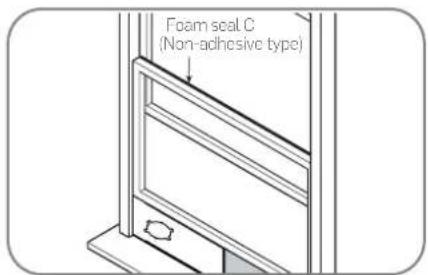
- Cut the non-adhesive foam seal C to match the width of the window. Then insert the seal between the glass and the window frame.
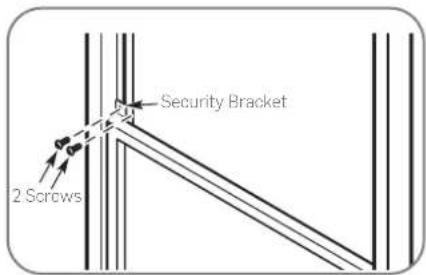
- Install the security bracket with 2 screws as shown (optional).
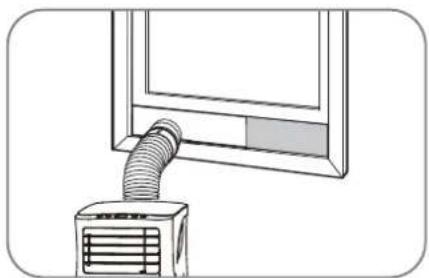
natural_image
Line drawing of a window with a coiled air tube inserted into the air gap (no text or symbols)- Insert the window slider adapter into the hole of the window slider.
Sliding window installation
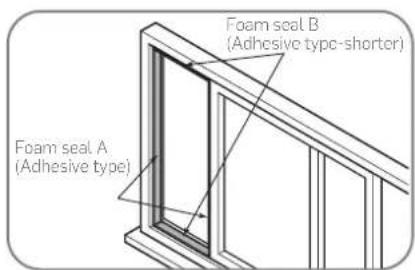
- Cut the adhesive foam seals A and B to the proper lengths. Then attach them to the window sash and frame as shown.
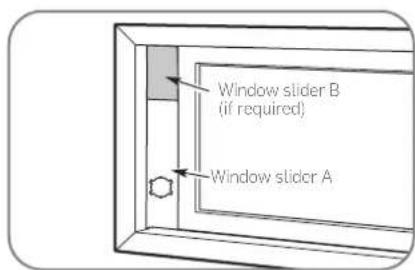
- Insert the window slider into the window opening.
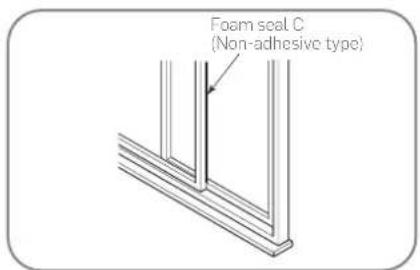
- Cut the non-adhesive foam seal C to match the window height. Then insert the foam seal between the glass and the window frame.
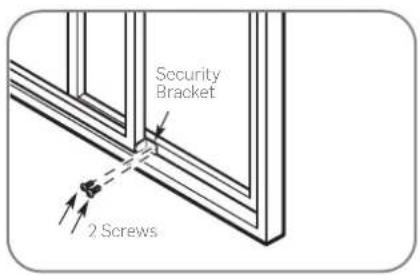
- Install the security bracket with 2 screws as shown (optional).
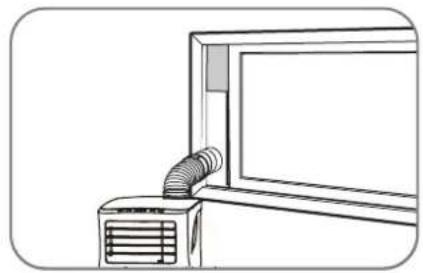
natural_image
Line drawing of a window with a coiled pipe and ventilation unit (no text or symbols)- Insert the window slider adapter into the hole of the window slider.
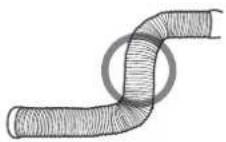
NOTE: do not overextend, bend, or block the hose. This will prevent the air conditioner from functioning properly.
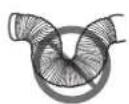
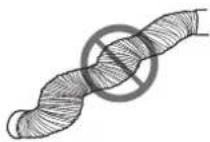
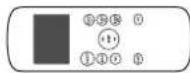
Control panel
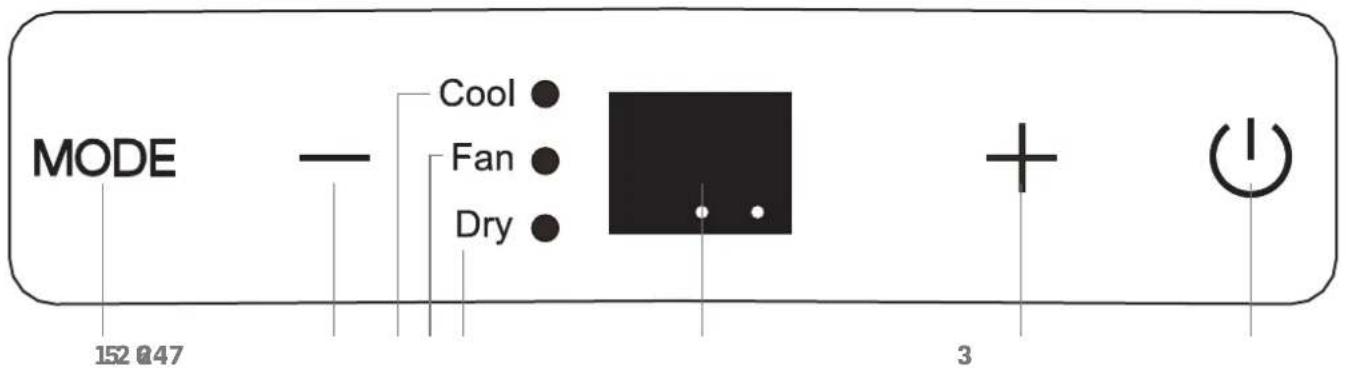
- Mode button: use this button to cycle through modes (cool, fan, dry). The indicator light will illuminate to show which mode the unit is currently in.
- +/ - buttons: use these buttons to increase or decrease the temperature setting by 1°F/1°C increments. The temperature can be adjusted from 62°F (17°C) to 86°F (30°C). To switch from Fahrenheit to Celsius, hold down the + and - buttons for 3 seconds.
- Power button: powers the unit on or off.
- LED display: shows the set temperature while on cool mode. Shows current room temperature while on dry or fan mode. If "P1" is displayed, the bottom tray is full and must be drained.
- Cool mode:
a. Press the mode button until the indicator light next to COOL turns on.
b. Press the + or - button to adjust the temperature.
- Fan mode:
a. Press the mode button until the indicator light next to FAN turns on.
b. Press the fan speed button on the remote controller to choose the fan speed. The temperature cannot be adjusted while in this mode.
- Dry mode:
a. Press the mode button until the indicator light next to DRY turns on.
b. When in this mode, the fan will be set to the lowest speed and the unit will act as a dehumidifier.
- Sleep mode:
NOTE: this mode is unavailable during fan or dry mode.
a. Use the remote controller to activate sleep mode.
b. When this mode is active, the temperature will increase by 2^ F/1°C after 30 minutes. Then the temperature will increase again by 2^ F/1°C after another 30 minutes.
c. The new temperature will be maintained for 7 hours before returning to the previously set temperature.
d. After this cycle, sleep mode will automatically end.
Auto-restart
If the unit stops unexpectedly due to a power cut, it will restart with the previous function setting 3 minutes after the power resumes.
Water drainage
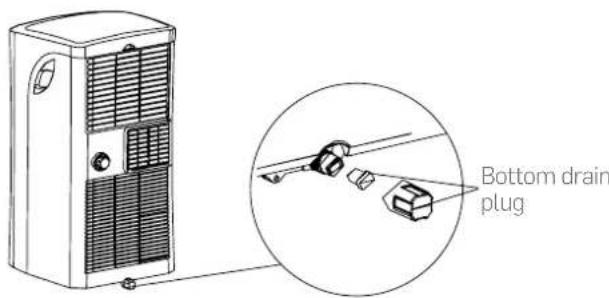
- When in dry mode, remove the drain plug from the back of the unit.
- Install the drain connector with the continuous drain hose, placing the open end of the hose directly over the drain area.
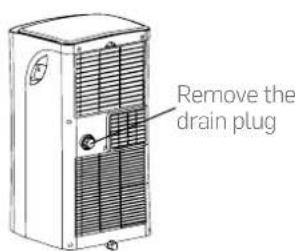
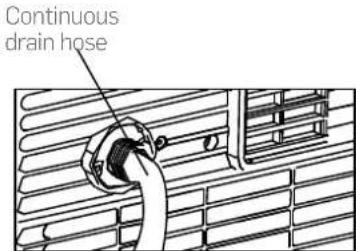
- When the collected water reaches the maximum level, the unit will beep 8 times and the digital display will read P1. The unit will stop dehumidifying until the collection tray is emptied.
- After emptying the collection tray, restart the unit.
Care and maintenance
Before performing any maintenance always keep in mind the following:
• Always unplug the unit before cleaning or servicing.
- Never use flammable liquids or chemicals to clean the unit.
- Do not wash the unit under running water. Risk of electric shock.
Cleaning the filter
- Remove the filter as shown.
- Wipe away any collected debris and replace.
The filter should be cleaned every 2 weeks for optimal performance.
Cleaning the unit
- Clean the unit with a damp cloth and mild detergent.
- Dry with a lint-free cloth.
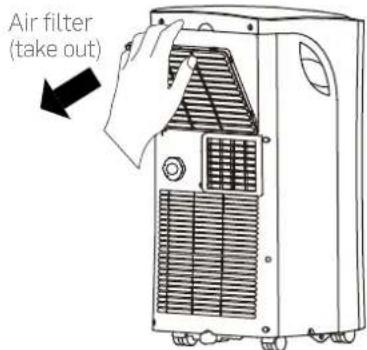
Remove the air filter
Storing the unit
- Drain the water collection tray before putting the unit into storage.
- Run the unit in fan mode for 12 hours in a warm room. This will dry the unit and prevent mold.
- Turn off and unplug the unit.
- Clean the filter as instructed above.
- Remove the batteries from the remote controller.
- Store the unit in a cool, dark place. Keep out of direct sunlight and extreme heat.
Troubleshooting
| Problem | Possible | cause |
| Unit will not turn on. P1 error code. | The water collection tray is full. | Turn off the unit, drain the water, and restart the unit. |
| If in cool mode, the room temperature may be lower than the set temperature. | Restart the temperature. | |
| The unit is not cooling adequately. | The air filter is blocked. Turn off the filter. | unit and clean the filter. |
| The exhaust hose is not connected or is blocked. | Turn off the unit, disconnect the hose and check for blockage. Then reconnect the hose. | |
| The unit is low on refrigerant. Call a service technician to inspect the unit and replace refrigerant. | ||
| The temperature setting is too high. | Decrease the set temperature. | |
| The windows or doors in the room are open. | Check that all windows and doors are closed. | |
| The room is too large. Double-check the cooling area. | ||
| There are heat sources inside the room. | Remove heat sources if possible. | |
| The unit is noisy and is vibrating excessively. | The surface is not level. Place the unit on a flat, level surface. | |
| The air filter is blocked. Turn off the unit and clean the filter. | ||
| The unit makes a gurgling sound. | This sound is caused by the flow of refrigerant inside the unit. | This is normal. |
Specifications
Rated voltage: 115V AC
Frequency: 60Hz
Rated current: 9.8A
Customer service
info@myivation.com
866-849-3049
Distributed by
C&A Marketing, Inc.
114 Tived Lane East
Edison, NJ 08837 USA
Europe: C&A Europe
167 Hermitage Road
Crusader Industrial Estate
London N4 1LZ
United Kingdom
info@myivaton.com
Made in China
Ivation and the Ivation logo are registered
trademarks of C&A Holdings, LLC in the U.S.
©2017 All rights reserved
- 10,000 BTU Portable Air Conditioner
- Box contents
- Parts
- Hardware
- Safety precautions
- Installation Setup
- Hung window installation
- Sliding window installation
- Control panel
- Auto-restart
- Water drainage
- Care and maintenance
- Cleaning the filter
- Cleaning the unit
- Storing the unit
- Specifications
- Customer service
Brand : Ivation
Model : IVAPAC10KBTU
Category : Air-conditioner