RC 212 BT - Alarm clock radio GoGen - Free user manual and instructions
Find the device manual for free RC 212 BT GoGen in PDF.


| Product Type | Alarm Clock Radio with Bluetooth |
| Brand | GoGen |
| Model | RC 212 BT |
| Dimensions (approx) | 15 x 10 x 5 cm |
| Weight (approx) | 300 g |
| Power Supply | AC 100-240V, 50/60Hz; DC backup (3 x AAA batteries) |
| Radio Band | FM 87.5-108 MHz |
| Bluetooth Version | Bluetooth 5.0 |
| Alarm Functions | Dual alarm, snooze (9 min), radio or buzzer wake-up |
| Display | LED with adjustable brightness |
| Audio Output | Built-in speaker, 3.5mm headphone jack |
| Additional Features | Sleep timer, volume control, battery backup for clock |
| Maintenance | Clean with a soft, dry cloth; avoid liquids |
| Safety Precautions | Do not expose to moisture or extreme temperatures |
| Spare Parts & Repairability | No user-serviceable parts; contact support for repairs |
| General Information | User manual available for free download at notice-facile.com |
Frequently Asked Questions - RC 212 BT GoGen
User questions about RC 212 BT GoGen
0 question about this device. Answer the ones you know or ask your own.
Ask a new question about this device
Download the instructions for your Alarm clock radio in PDF format for free! Find your manual RC 212 BT - GoGen and take your electronic device back in hand. On this page are published all the documents necessary for the use of your device. RC 212 BT by GoGen.
USER MANUAL RC 212 BT GoGen
natural_image
Abstract logo design with a stylized white 'S' inside a circle on black background (no text or symbols)RC 212 BT
GoGEN
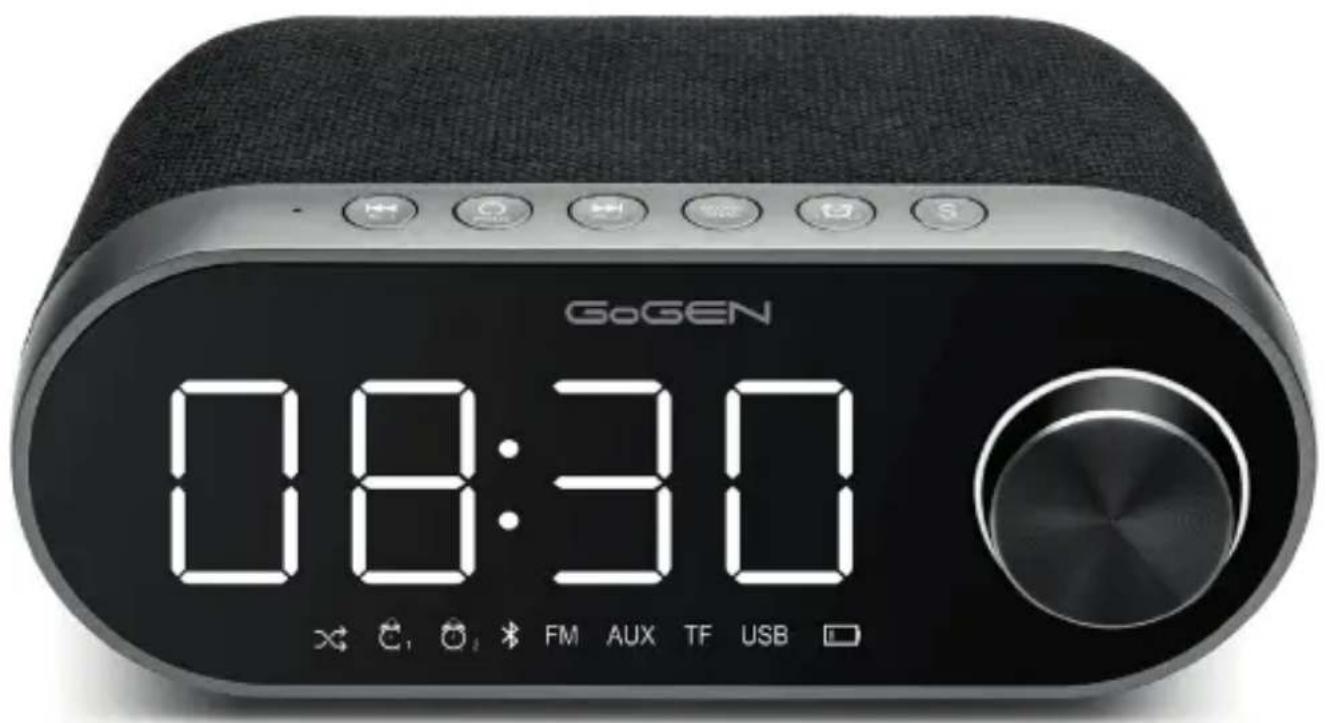
NÁKRES ZAŘÍZENÍ / NÁKRES ZARIADENIA / WYGLĄD URZĄDZENIA GUIDE TO THE APPLIANCE / KÉSZÜLÉK LEÍRÁSA
BEZPEČNOSTNÍ POKYNY
- Read this Instruction Manual before you attempt to connect or operate the appliance.
- Keep these instructions in good condition. Heed all warnings. Follow all instructions.
- Save this Instruction Manual for future reference.
- The apparatus shall not be exposed to dripping or splashing and no objects filled with liquids, such as vases, shall be placed on the product. Dry location use only.
- No naked flame source, such as candles, should be placed on the product.
• Children should be supervised to ensure that they do not play with the appliance. - Ventilation should not be impeded by covering the ventilation openings.
- Ensure that the unit is plugged into an AC 100-240 V 50 Hz power outlet. Using higher voltage may cause the unit to malfunction or even fire catching. Turn off the unit before unplugging it from power source to completely switch it off.
- Do not plug/ unplug the power plug into/from an electrical outlet with wet hands.
- If the power plug does not fit into your outlet, do not force the plug into an electrical socket if it does not fit.
- Use replacement parts, which are specified by the manufacturer.
- Install the unit in accordance with the manufacturer's instructions.
- Place the unit where there is good ventilation. Place the system on a flat, hard and stable surface. Do not expose to temperatures above 40 °C. Allow at least 30 cm clearance from the rear and the top of the unit and 5 cm from each side.
- Press the buttons of the unit gently. Pressing them too hard can damage the unit.
- Dispose of used batteries in an environmental-responsible manner.
- Always ensure that the product is unplugged from the electrical outlet before moving or cleaning. Clean it with dry cloth only.
- Unplug the product during lightning, storms or when it will not be used for long periods of time.
- This product has no user-serviceable parts. Do not attempt to repair this product yourself. Only qualified service personnel should perform servicing. Take the product to the electronics repair shop of your choice for inspection and repair.
- NEVER let anyone, especially children, push anything into holes, slots or any other openings in the unit's casing as this could result in a fatal electric shock.
- Don't mount this product on a wall or ceiling.
- Do not place the unit near TVs, speakers and other objects that generate strong magnetic fields.
- Do not leave the unit unattended when it is in use.
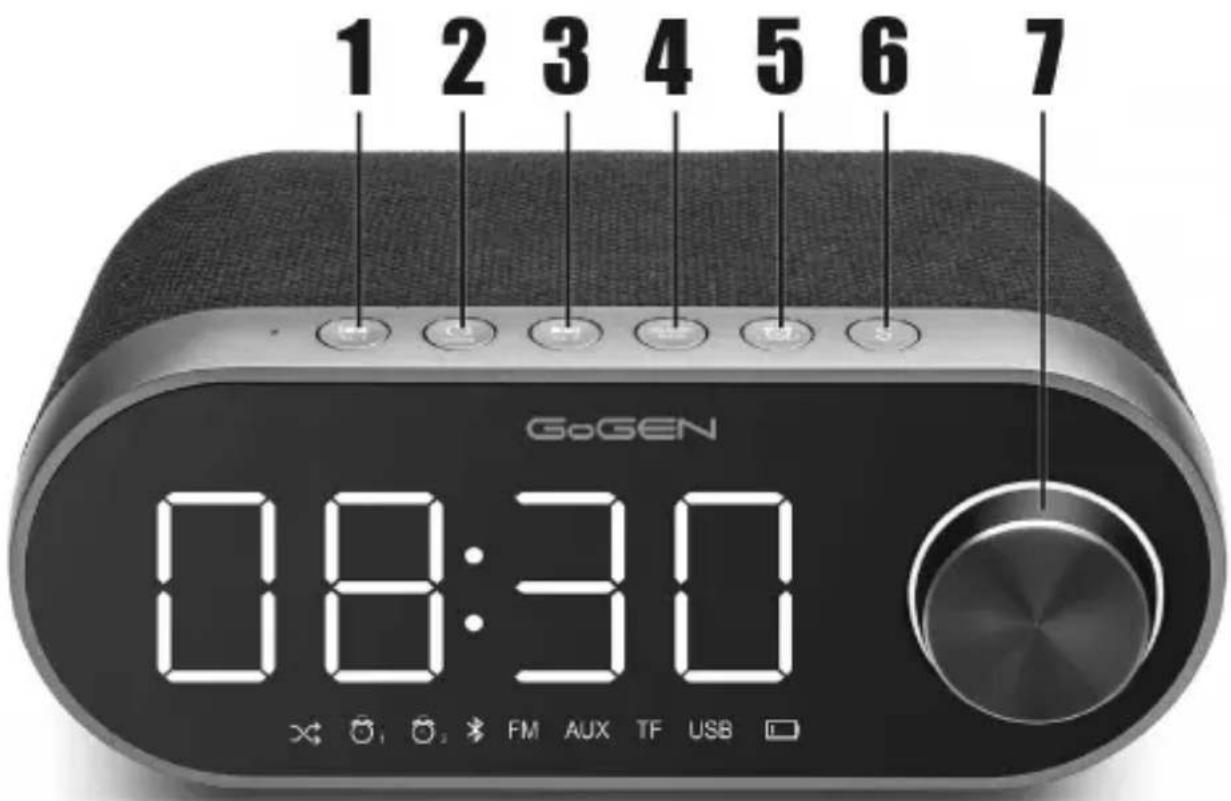
BUTTON FUNCTIONS
1) Skip back / Alarm 1 button
2) ON/OFF/Mode button
3) Skip forward / Alarm 2 button
4) Clock / Memory button
5) Alarm set button
6) Snooze / Sleep button
7) Volume knob, Play/Pause, Dimmer button
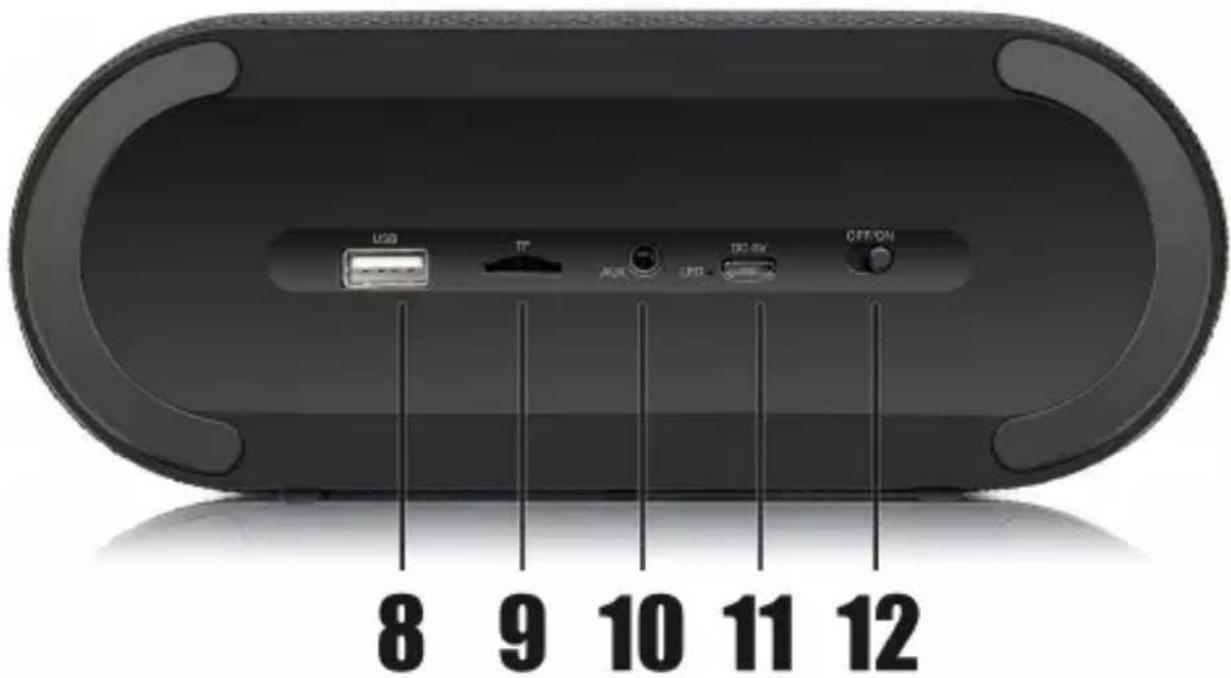
8) USB interface
9) Micro SD card (TF) slot
10) Aux in
11) Micro USB Charging Port, LED indicator
12) Power ON/OFF switch
Please connect the adapter to the Micro USB charging port to supply power to this product. Turn on the speaker by (12) switch, time is displayed. Press and hold (2) button to enter to the audio mode, default is BT mode. Press (2) button briefly to switch mode (FM/USB/TF/AUX). Press and hold (2) button to turn off the speaker to standby mode.
LED INDICATOR
Charging: LED indicator lights red, Charging completed: LED indicator turn off.
DIMMER
In standby state, press and hold (7) button to adjust the brightness of display (low, medium and high grade).
TIME / DAY / MONTH / YEAR SETTING
In standby state, press (4) button briefly to display day of the week / date (dd:mm) / year.
In standby state, press and hold (4) button, the display will blink. The order of setting is: Hour /Minute → Day/Month → Year.
- Press the (1) button to set hour, press the (3) button to set minute. Press the (4) button to confirm and enter the Day/Month settings.
- Press the (1) button to set day, press the (3) button to set month. Press the (4) button to confirm and enter the Year settings.
- Press the (1) or (3) button to set year. Press the (4) button to confirm and exit the setting mode. In case you do not press a button for 15 sec, the system automatically exits the setting mode.
ALARM SETTING
In standby state, press once and then press and hold (5) button, the display and alarm clock 1 icon will blink.
- Press the (1) button to set hour, press the (3) button to set minute. Press the (5) button to confirm and enter the alarm clock cycle setting.
- Press the (1) or (3) button to select alarm clock cycle > „1-7“ (week) > „1-5“ (working days) > „6-7“ (weekend). Press the (5) button to confirm and enter the ringtone setting.
- Press the (1) or (3) button to select the ringtone > "S 1, S 2, S 3" (ringtones), "S 4" (Micro SD (TF) card), "S 5" (USB disk), "S 6" (FM radio). Press the (5) button to confirm (the Alarm 1 setting is finished) and continue with the Alarm 2 settings.
Note: The volume of the S 1-S 3 alarm ring is fixed at 4. When the alarm rings, the volume will gradually change from 0 to 4. The volume of the S 4-S 6 alarm ring is the last playback volume.
In standby state, press the (5) button briefly to display ALARM1 / ALARM2
When the alarm sounds, press the (6) button to stop alarm sound for 9 minutes, after that time the alarm sounds again.
When the alarm sounds, press the (2) button twice briefly to deactivate ALARM1/ALARM2.
Note: Time and alarm function can not be set in the audio mode.
ALARM CLOCK SHORTCUT
In standby state, press the (1) or (3) button briefly to activate/deactivate the ALARM1/ALARM2.
ADJUST VOLUME
The default volume of the device is 4, the maximum volume is 15, and the volume can be adjusted by Volume knob (7). The last setting can be remembered after power off.
BT MODE
In order to pair your Bluetooth audio device to this unit for the first time, follow the steps below:
• Make sure your Bluetooth audio source is held within three meters of your speaker.
- Press the (2) button to select BT mode, the unit automatically goes into „Pairing Mode“, you will hear the sound (di) and the „BT” icon will blink.
- Go into your Bluetooth device settings menu and look for "GOGEN RC 212 BT". If the password is needed, input (0000).
- After the unit has paired and connected, you will hear the prompt sound (di), and "BT" icon will be light.
Press Volume knob (7) to PLAY/PAUSE music playback. Press the (1) or (3) button to skip to previous or next song. Turn Volume knob (7) to change the volume.
When the Bluetooth audio device is connected to unit follow the steps below to take calls hands-free. Press Volume knob (7) to answer/ hang up the call. Press and hold Volume knob (7) to reject the call. Press the (2) button twice briefly to end pairing.
FM MODE
Press the (2) button to select FM mode.
- Auto-scanning search and save Stations: press the Volume knob (7) to search and save the all FM stations. When search is complete, press the (4) button (the "Pxx" appears on the display) and then press the (1) or (3) button to select the saved FM station.
- Automatic Search Station: press and hold the (1) or (3) button to search previous/next FM station automatically.
- Manual Search Station: press the (1) or (3) button repeatedly to enter the required FM frequency.
Saving FM Station to memory: select the FM station you want to save, press and hold the (4) button (the "Pxx" will blink), press the (1) or (3) button to select the memory position, press the (4) button to confirm.
Micro SD (TF) CARD / USB MODE
In audio mode, insert Micro SD (TF) CARD or USB disk, the speaker automatically switches to the Micro SD (TF) CARD or USB disk mode, the TF or USB icon lights up.
Press Volume knob (7) to PLAY/PAUSE music playback.
Press the (1) or (3) button to skip to previous or next song.
Turn Volume knob (7) to change the volume.
Press and hold the (6) button to switch between random (SHU) and normal (ALL) playback.
AUX IN MODE
In the audio mode, connect the AUX-IN cable to the speaker, the speaker automatically switches to the AUX-IN mode, the AUX icon lights up.
Turn Volume knob (7) to change the volume.
SLEEP TIMER
The sleep timer function is designed to automatically turn off the speaker. In the audio mode, press the (6) button, "10" appears on the display. Repeatedly press the (6) button to select the sleep timer from "10-20-30-40-50-60-70-80-90-OFF" minutes.
The speaker will be turned off after the selected time has elapsed.
To check remaining sleep time, press the (6) button.
PRODUCT SPECIFICATION
Bluetooth version: 4.2
Bluetooth transmission distance: ≥ 10m
Bluetooth profile: A2DP / AVRCP / HFP / HSP
Bluetooth device name: GOGEN RC 212 BT
Bluetooth frequency: 2402 - 2480 MHz
EIRP: 0,43 mW
FM-band: 87.5 MHz - 108 MHz
The maximum capacity of Micro SD (TF) CARD / USB: 32G
Supported audio formats: MP3, WAV, WMA
Battery Li-ion Battery with 3,7 V / 4400 mAH
Power supply - USB adapter: AC 100-240V \~ 50/60Hz / DC 5V, 1A
Play time: 13,5 hours (60 % Volume)
Charging time: about 7,5 hours
Frequency response: 75Hz - 18 kHz
Rated power RMS: 2 x 4 W
Product size: 190 x 80 x 117 mm
Product weight: 790 g
Warranty
Our product is warranted for 2 full year from the date of purchase. The warranty is provided on all material defects and workmanship. Guarantee of 24 months does not apply to decrease in the accumulator's effective capacity caused by its use or age. Effective capacity gradually decreases depending on the method of use of the accumulator.
WE RESERVE THE RIGHT TO CHANGE TECHNICAL SPECIFICATIONS
WARNING: Do not use this product near water, in wet areas to avoid fire or injury of electric current. Always turn off the product when you don't use it or before a revision. There aren't any parts in this appliance which are reparable by consumer. Always appeal to a qualified authorized service. The product is under a dangerous tension.

To avoid danger of suffocation, keep the plastic bag away from babies And children. Do not use this bag in cribs, beds, carriages or playpens. This bag is not a toy.
Disposal of old Electrical & Electronic Equipment (Applicable in the European Union and other European countries with separate collection systems)
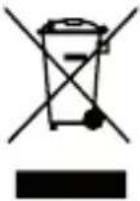
This symbol on the product or on its packaging indicates that this product shall not be treated as household waste. Instead it shall be handed over to the applicable collection point for the recycling of electrical and electronic equipment. By ensuring this product is disposed of correctly, you will help prevent potential negative consequences for the environment and human health, which could otherwise be caused by inappropriate waste handling of this product. The recycling of materials will help to conserve natural resources. For more detailed
information about recycling of this product, please contact your local Civic Office, your household waste disposal service or the shop where you purchased the product.
Hereby, ETA a.s. declares that the radio equipment type RC212BT is in compliance with Directive 2014/53/EU. The full text of the EU declaration of conformity is available at the following internet address: http://www.gogen.cz/declaration_of_conformity
BIZTONSÁGI UTASÍTÁSOK
Note: Time and alarm function can not be set in the audio mode.
ALARM GYORS BEKAPCSOLÁSA
natural_image
Abstract black and white logo with a stylized white 'S' inside a circle (no text or symbols)GoGEN

- GoGEN
- NÁKRES ZAŘÍZENÍ / NÁKRES ZARIADENIA / WYGLĄD URZĄDZENIA GUIDE TO THE APPLIANCE / KÉSZÜLÉK LEÍRÁSA
- BEZPEČNOSTNÍ POKYNY
- BUTTON FUNCTIONS
- LED INDICATOR
- DIMMER
- TIME / DAY / MONTH / YEAR SETTING
- ALARM SETTING
- ALARM CLOCK SHORTCUT
- ADJUST VOLUME
- BT MODE
- FM MODE
- Micro SD (TF) CARD / USB MODE
- AUX IN MODE
- SLEEP TIMER
- PRODUCT SPECIFICATION
- Warranty
- WE RESERVE THE RIGHT TO CHANGE TECHNICAL SPECIFICATIONS
- BIZTONSÁGI UTASÍTÁSOK
- ALARM GYORS BEKAPCSOLÁSA
Brand : GoGen
Model : RC 212 BT
Category : Alarm clock radio