
SmartBake Custom BM7850 - Bread maker SUNBEAM - Free user manual and instructions
Find the device manual for free SmartBake Custom BM7850 SUNBEAM in PDF.


| Product Type | Bread Maker |
| Brand | Sunbeam |
| Model | SmartBake Custom BM7850 |
| Loaf Sizes | 750g, 1.0kg, 1.25kg |
| Crust Settings | Light, Medium, Dark |
| Number of Baking and Dough Options | 76 total, including 12 preset menus |
| Preset Menus | Basic, Turbo, Gluten/Yeast Free, Wheat, Sweet, French, Cake, Extra Turbo, Jam, Bake, Pasta Dough, Pizza Dough/Dough |
| Control Type | Fully programmable with LCD display |
| Display | LCD window with sleep mode after 20 minutes |
| Time Delay Timer | Up to 15 hours |
| Keep Warm Function | 60 minutes automatic after baking |
| Power Interruption Protection | Retains program for up to 10 minutes during power failure |
| Automatic Fruit and Nut Dispenser | Yes, releases ingredients during second kneading |
| Viewing Window | Large, allows monitoring of baking process |
| Baking Pan | Non-stick, removable with handle |
| Lid | Removable for easy cleaning |
| Cord Storage | Cord wrap at back |
| Safety Features | Automatic shut-off, cool-down period required before restart, child supervision recommended |
| Care and Cleaning | Wipe exterior with damp cloth; wash non-stick pan in warm soapy water; do not immerse or use abrasives; lid removable for cleaning |
Frequently Asked Questions - SmartBake Custom BM7850 SUNBEAM
User questions about SmartBake Custom BM7850 SUNBEAM
0 question about this device. Answer the ones you know or ask your own.
Ask a new question about this device
Download the instructions for your Bread maker in PDF format for free! Find your manual SmartBake Custom BM7850 - SUNBEAM and take your electronic device back in hand. On this page are published all the documents necessary for the use of your device. SmartBake Custom BM7850 by SUNBEAM.
USER MANUAL SmartBake Custom BM7850 SUNBEAM
Programmable bread maker and dough maker with Automatic Fruit and Nut Dispenser
Instruction/Recipe Booklet BM7850
Please read these instructions carefully and retain for future reference.

natural_image
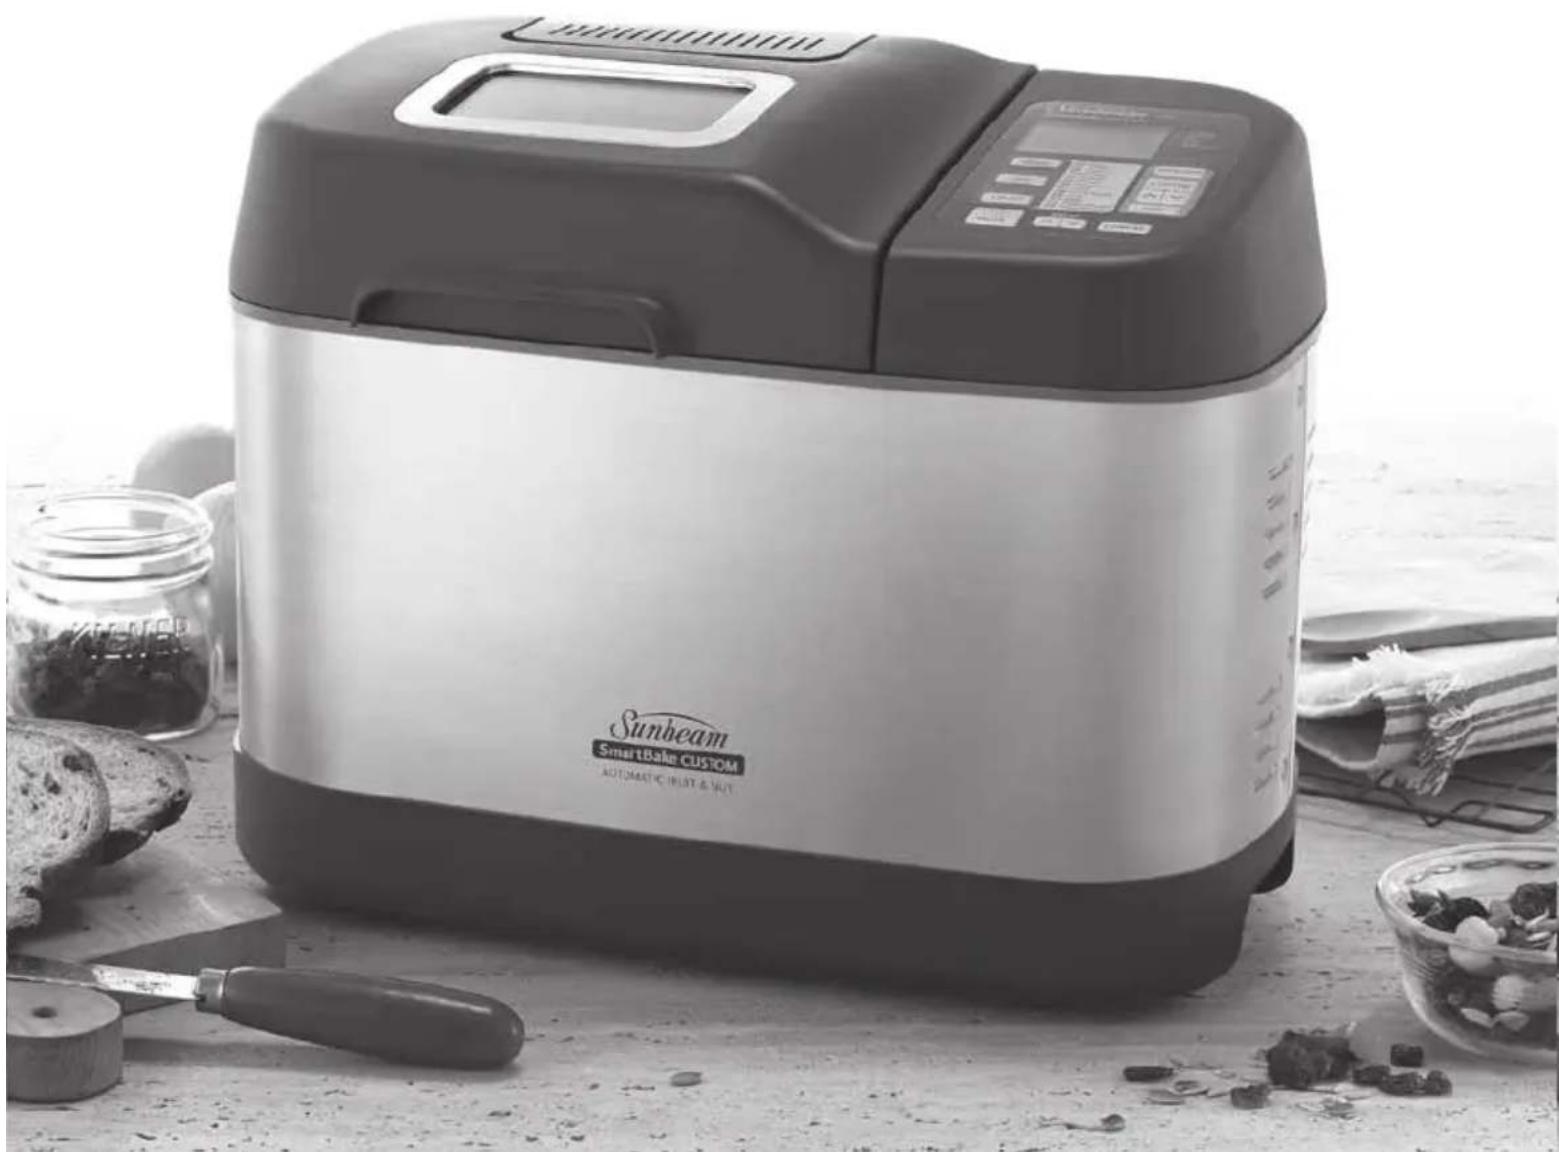
Black-and-white photo of a Sunbeam SmartBakir CUSTOM automatic dust-a-wet grain bread machine on a table, surrounded by food ingredients and kitchen utensils (no visible text or symbols on the device itself).Important instructions – retain for future use.
Using your SmartBake Custom Safely 2-3
Features of your Sunbeam SmartBake Custom 4-6
The Control Panel 7
Baking Process Monitor 9
Menu Settings 10-11
Using Your SmartBake Custom 12-13
Ingredients 14-15
Important Measuring Tips 16
Fruit and Nut Dispenser 17
The Baking Process 18
Programming your SmartBake Custom 19-22
How to use the Time Delay 23
Power Interruption Program Protection 24
Handy Hints 25
Care and Cleaning 26
Recipes 27
Program Setting Times 64-65
Program Setting Times and
Display Information 66
Troubleshooting: The Machine 67
Troubleshooting: The Recipes 68
New Zealand Supplement 70
Congratulations
You are just a few easy steps away from experiencing the aroma of fresh bread baking in your new Sunbeam SmartBake Custom.
We at Sunbeam understand the busy lifestyles that we live today and that's why when developing the SmartBake Custom we made baking a loaf of bread as easy as 1, 2, 3. Or for those with a little more time you can use the SmartBake Technology to create your own favourite recipes.
The SmartBake Technology ensures that your breadmaker is easy to use, fully programmable and has a Baking Progress Monitor, so that you know exactly what stage your machine is at in the bread making process.
The SmartBake Custom has been designed with a true Gluten Free Recipe. Specific program modifications have been developed with Coeliac Australia to ensure that your SmartBake Custom will allow those with Gluten intolerances, to bake successful Gluten Free recipes. The Gluten Free preset menu also acts as the basis for a Yeast Free recipe.
With your SmartBake Custom you have 76 baking and dough options including your Basic White, Gluten/Yeast Free, Wheat, Sweet, French, Pizza & Pasta dough and it even creates delicious fresh jam that tastes great on a freshly baked loaf.
You have a choice of 3 traditional horizontal loaf sizes from 750g up to a 1.25kg loaf and a choice of 3 crust settings to suit any size family and appetite. Baking with your SmartBake Custom is so easy to do and with the 15 hour pre-set timer you can set it the night before and wake up to a freshly baked loaf.
Before you start, we suggest that you read this booklet to ensure that you achieve the best results from your SmartBake Custom. We've done everything we can do to make bread baking a breeze, but if you have any concerns regarding the performance and use of your breadmaker, please call the
Sunbeam Customer Service
Australia 1300 881 861
New Zealand 0800 786 232
Sunbeam's Safety Precautions
SAFETY PRECAUTIONS FOR YOUR SUNBEAM BREAD MAKER
- Do not use attachments not recommended by Sunbeam. This may cause fire, electric shock or injury
- Do not use outdoors or for commercial use, or for any other purpose other than its intended use
• This unit is intended for household use only
Sunbeam is very safety conscious when designing and manufacturing consumer products, but it is essential that the product user also exercise care when using an electrical appliance. Listed below are precautions which are essential for the safe use of an electrical appliance:
- Read carefully and save all the instructions provided with an appliance.
- Always turn the power off at the power outlet before you insert or remove a plug. Remove by grasping the plug - do not pull on the cord.
- Turn the power off and remove the plug when the appliance is not in use and before cleaning.
- Do not use your appliance with an extension cord unless this cord has been checked and tested by a qualified technician or service person.
- Always use your appliance from a power outlet of the voltage (A.C. only) marked on the appliance.
- This appliance is not intended for use by persons (including children) with reduced physical, sensory or mental capabilities, or lack of experience and knowledge, unless they have been given supervision or instruction concerning use of the appliance by a person responsible for their safety.
- Children should be supervised to ensure that they do not play with the appliance.
- The temperature of accessible surfaces may be high when the appliance is operating.
- Never leave an appliance unattended while in use.
- Do not use an appliance for any purpose other than its intended use.
- Do not place an appliance on or near a hot gas flame, electric element or on a heated oven.
- Do not place on top of any other appliance.
- Do not let the power cord of an appliance hang over the edge of a table or bench top or touch any hot surface.
- Do not operate any electrical appliance with a damaged cord or after the appliance has been damaged in any manner. If damage is suspected, return the appliance to the nearest Sunbeam Appointed Service Centre for examination, repair or adjustment.
- For additional protection, Sunbeam recommend the use of a residual current device (RCD) with a tripping current not exceeding 30mA in the electrical circuit supplying power to your appliances.
- Do not immerse the appliance in water or any other liquid unless recommended.
- Appliances are not intended to be operated by means of an external timer or separate remote control system.
- This appliance is intended to be used in household and similar applications such as: staff kitchen areas in shops, offices and other working environments; farm houses; by clients in hotels, motels and other residential type environments; bed and breakfast type environments.
Using your SmartBake® Custom Safely
Before use
- Read all instructions, product labels and warnings. Save these instructions.
- Remove all foreign matter from the bread pan.
- Wipe over bread pan and kneading blade before use.
- Peel off plastic film from control panel and remove all static labels.
- Always use the breadmaker from a 230-240V AC power outlet.
- Do not allow anything to rest on the power cord or allow it to touch any hot surface. Do not plug in the cord where people may walk or trip on it or allow the cord to dangle over the edge of a table or benchtop.
Whilst in use
- This breadmaker does get warm during operation. Be careful to keep your hands and face away from the unit.
- Do not open the lid or remove the bread pan during operation except as indicated in the instructions.
- Do not place anything on the breadmaker lid. Do not cover vents.
- This breadmaker unit has built-in Power Interruption Program Protection to maintain your baking cycle, if there is an interruption in your power supply (black out). Any extended power outage may result in the program being cancelled see page 24 for full details.
- Do not touch moving parts.
Where to use
- Use only on a stable, heat-resistant surface.
-
Do not use the breadmaker where it will be exposed to direct sunlight or other heat sources, such as a stove or oven.
-
Do not place on top of any other appliance.
- Keep the breadmaker out of reach of children as it does get quite warm. Also, if any buttons are accidentally touched during operation, baking may stop.
- Place the unit at least 50 millimetres away from walls as they may discolour from the heat.
After use
- Always turn the unit off and remove the plug from the power outlet after use, and before cleaning.
- Use oven mitts when taking out the baking pan after baking.
- Allow the breadmaker to cool down before cleaning or storing.
- Read instructions before cleaning. Do not immerse the unit or plug in water. This will cause electric shock or damage to the unit.
Safety Precautions
- Do not use attachments not recommended by Sunbeam. They may cause fire, electric shock or injury.
- Do not use outdoors or for commercial use, or for any purpose other than its intended use.
- Do not operate the unit if the cord or plug is frayed or damaged. Do not operate if the appliance has been dropped or damaged in any manner. Return appliance to the nearest Sunbeam Appliance Service Centre for examination, repair or mechanical or electrical adjustment.
- Remove the plug by grasping the plug - do not pull on the cord.
Using your SmartBake Custom Safely continued
-
Use of extension cords: A short power supply cord has been provided to reduce the risk of injury resulting from becoming entangled in or tripping over a long cord. Extension cords should be used with care. The cord should be arranged so that it will not drape over the benchtop where it can be pulled by children or tripped over accidentally.
-
Electrical power: If the electric circuit is overloaded with other appliances, your breadmaker may not operate properly. The breadmaker should be operated on a separate electrical circuit from other operating appliances.
-
For safety reasons and to avoid maintenance by unskilled persons, some appliances are ‘Sealed’ using tamperproof means as specified by SAA (Standards Association of Australia). Such appliances should always be returned to the nearest Sunbeam Service Centre for adjustment or repair if required.
-
For additional protection Sunbeam recommend the installation of a Residual Current Device (RCD) on all electrical appliances with a rated current not exceeding 30mA is advisable in the electrical circuit supplying the power outlet in use.
- This appliance is not intended for use by young children or infirm persons unless they are adequately supervised by a responsible adult to ensure that they can use the appliance safely.
- Young children should be supervised to ensure that they do not play with the appliance.
This unit is intended for household use only
Features of your Sunbeam SmartBake® Custom
Automatic Fruit & Nut Dispenser
Automatically releases ingredients into the dough during the kneading cycle. Takes the guess-work out of recipes.
Large viewing window
Non-stick baking pan
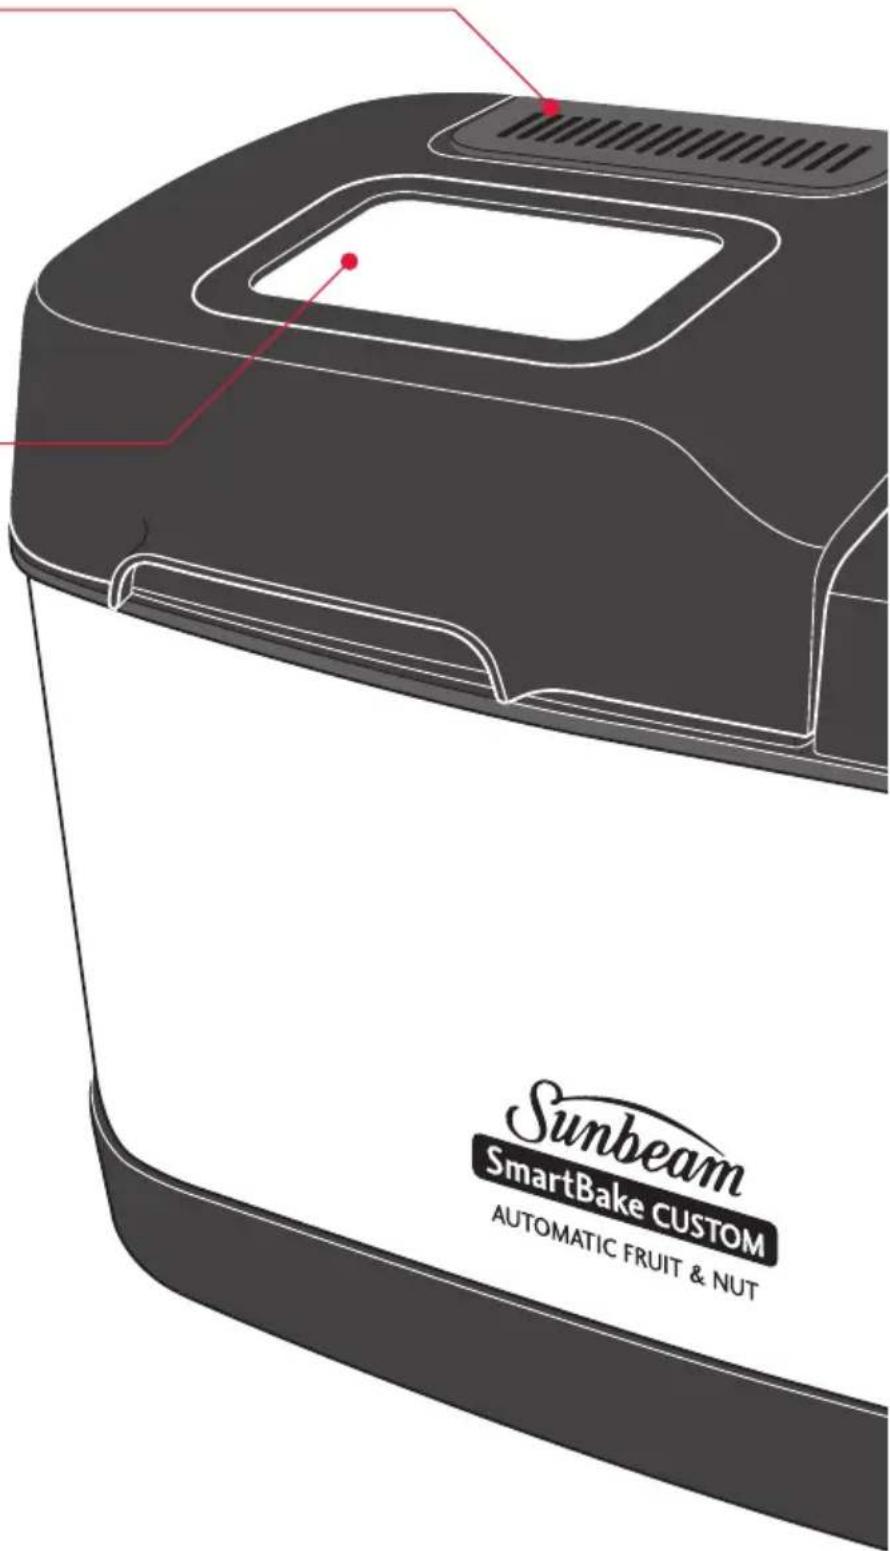
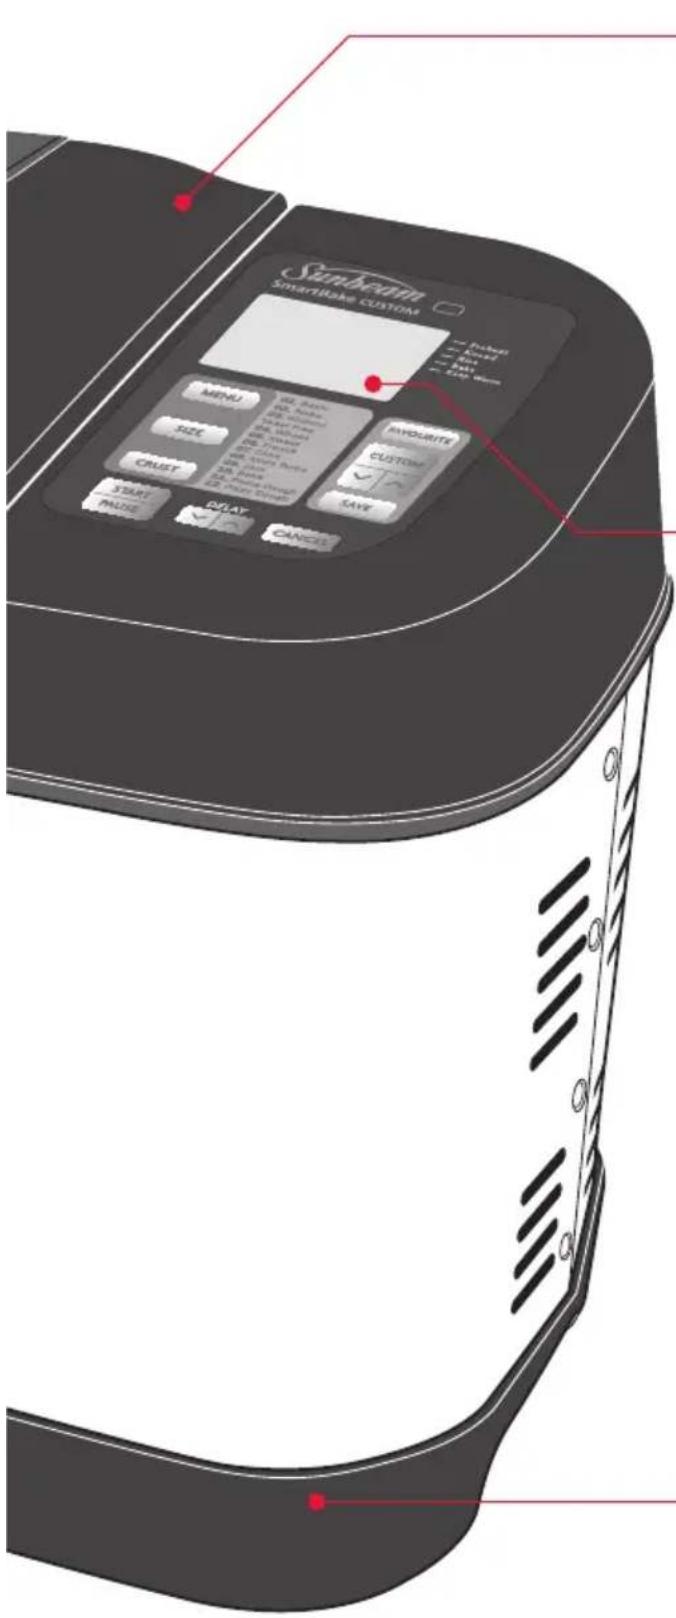
Removable lid
Fully programmable control panel
LCD window
Traditional Horizontal loaf
3 horizontal loaf sizes up to 1.25kg with a choice of 3 crust settings to suit any size family and appetite.
Cord Wrap
Tidy cord wrap stores unwanted cord at the back of the breadmaker when not in use
Features of your Sunbeam SmartBake Custom continued
Your Sunbeam SmartBake Custom is a fully programmable dough and bread making machine that allows you to easily make fresh bread in only a few hours.
There are a host of other features:
Automatic Fruit & Nut dispenser
Automatically releases ingredients into the dough during the kneading cycle. Takes the guess-work out of recipes. See page 17 for more information.
8 programmable memory settings
SmartBake technology enables full programmability and saving of your favourite 8 recipes. Either start your recipe from scratch, or base it on one of the first 8 preset menus. See page 19 for more information.
76 baking and kneading options
Including Basic White, Gluten/Yeast Free, Wheat, French, Sweet, Cake, Extra Turbo, Jam, Pasta & Pizza Dough.
Baking Progress Monitor
Shows each stage of the bread baking process. See page 9 for more information.
15 hour Time Delay
Wake up to the smell of fresh hot crusty bread in the morning with the 15 hour time delay setting. See page 23 for more information.
Power Interruption Program Protection
Stores your program in the advent of a black out or power surge. When power resumes so does your program. See page 24 for more information.
Large viewing window
Allows you to watch each stage of the breadmaking cycle.
Display Window Sleep Mode
As the bread maker can be used at night and in the early morning hours (especially on the Time Delay mode), the display window has a sleep mode. The screen will change to sleep mode after 20 minutes and the screen will darken. Simply pushing any button will light the screen again to monitor your baking progress.
60 minute Keep-Warm function
Keeps bread warm for 1 hour after baking.
The Control Panel
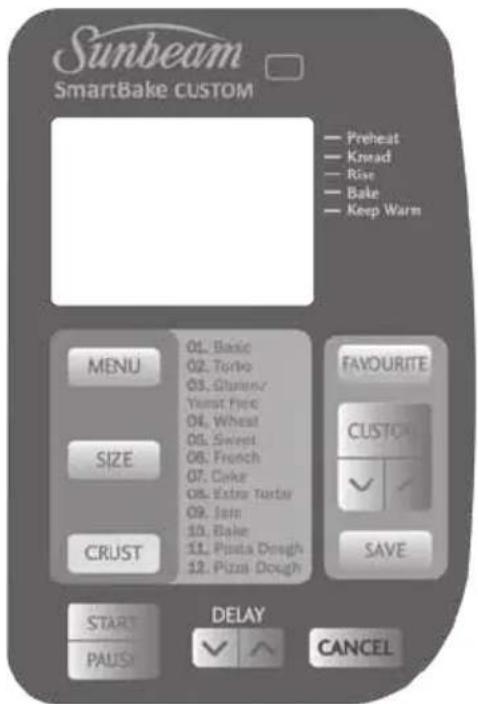
The control panel on the SmartBake Custom is designed to ensure easy use and make baking a loaf of bread a pleasure.
The simple to use control panel enables you to select your desired baking program and features a large LCD window making it easy to see your selected menu and the completion time for the setting.
Menu
Control Panel
Display Window
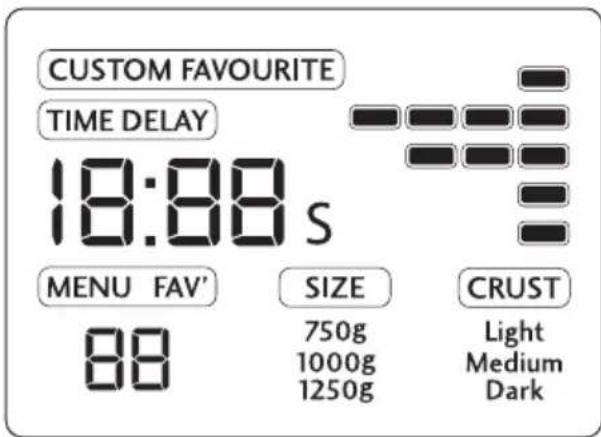
The LCD window indicates the MENU setting selected from (1) to (12), Loaf SIZE and the CRUST Colour.
The display will show the number of hours and minutes until the cycle is complete - "0:00".
The screen will change to sleep mode after 20 minutes, and the screen will darken. Push any button to light up the screen again.
1. Menu
Press the MENU button to select automatic breadmaking menus from (1) to (12). Each of these menu settings are explained further on page 10. Each time you press the MENU button it cycles through the menus from (1) to (12).
The default menu when the breadmaker is turned on is MENU 1.
2. Size
Press the SIZE button to select the loaf size - 750g, 1.0kg or 1.25kg.
The default setting is 1.0kg.
3. Crust
Press the CRUST button to select the desired crust colour - Light, Medium or Dark.
The default setting is Medium.
4. Favourite Recipes
Press the FAVOURITE button to cycle through your saved favourite recipes. FAV will be displayed on the LCD. If you have not saved any recipes the LCD window will read “0:00” for each of the 8 favourite recipes.
5. Custom
Allows you to create your own favourite recipes, or customise your program during the cycle. This button must be held for 2 seconds to activate any modifications.
6. Save
Allows you to save your favourite menus that you have customised to suit your own personal tastes. When a menu is saved it is indicated by a beep from the control panel.
7. Delay
Allows you to delay the completion of your desired menu up to 15 hours, or use it during programming to adjust the time of the current stage of your breadmaking cycle by pressing the buttons.
8. Cancel
This button allows you to instantly cancel out of programming or cancel the breadmaking process, or to completely delete a saved Favourite Recipe. Hold the button for 5 seconds. The breadmaker will beep to indicate the programme has been cancelled.
9. Start/Pause
Press the START/PAUSE button to commence selected menu or begin timer countdown for delay timer.
When the menu or timer countdown have commenced the timer colons: will flash indicating the machine has started.
If you would like to pause the current breadmaking cycle all you need to do is press the START/PAUSE button. The time will flash indicating that you are in 'PAUSE' mode. To resume the baking cycle you must press the button again.
Baking Progress Monitor
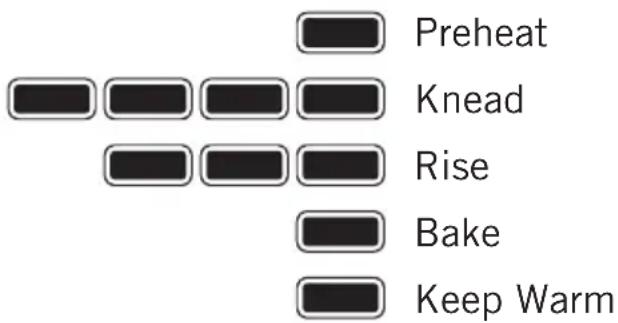
The baking progress monitor is located on the right of the LCD screen. The monitor displays each of the stages of the breadmaking cycle. During the breadmaking cycle one of these boxes is blacked out to indicate which stage of the cycle you are in.
Preheat
The preheat feature is part of the Wheat and Jam settings only. During the preheat stage the SmartBake is pre-warming the ingredients before the first kneading stage commences.
Knead
Signals that the loaf is in either of the 2 kneading or the 2 knock-down stages.
Baking Progress Monitor
Rise
Signals that the loaf is in one of the 3 rising stages. During the different rise stages a low temperature is used which assists the rising process.
Bake
Signals that the loaf is in the bake stage. This is the final stage of the breadmaking cycle at which a higher temperature is used to bake the bread.
Keep Warm
The Keep Warm feature starts when the bread has completed the baking stage and keeps the bread warm for up to 60 minutes.
Menu Settings
1. Basic
Press the MENU button once and the LCD window will show '1'. Use this menu to make traditional white bread. You have a choice of 3 crust colours - Light, Medium or Dark. The SmartBake Custom will default to a 1.0kg loaf with a Medium crust colour setting. To select a crust setting other than Medium, press the CRUST button. If you require a loaf size other than 1.0kg, press the SIZE button.
2. Turbo
Need bread in a hurry? The Turbo menu is used to decrease the overall completion time of your bread. Depending on your loaf size and crust colour, your bread will be ready in approximately 2 hours. The breads made using this menu may be shorter and more dense due to the reduced rising times. The default setting is 1.0Kg loaf with a Medium Crust. If you need your bread more quickly, use the Extra Turbo menu (8) which takes 80 minutes.
Tip: The Turbo menu should only be selected when baking Basic (1), Wheat (4), Sweet (5) & French (6) breads.
3. Gluten Free/Yeast Free
The Gluten Free menu on the SmartBake Custom has been tested thoroughly by Sunbeam with the assistance of Coeliac Australia, and has been specifically designed to meet the needs of many people who have intolerances to gluten. Due to the use of different ingredients in Gluten Free bread there are a few handy hints which you should read before you commence baking. Refer to the Gluten Free instructions in the recipe section. This menu can also be used for Yeast Free breads. Refer to the Yeast Free instructions in the recipe section. The default setting is 1.0Kg loaf with a Medium Crust.
4. Wheat
Use this menu for recipes with significant amounts of whole wheat, rye flour, oats or bran. This Wheat cycle begins with a 30 minute preheat cycle during which flours or grains absorb liquid ingredients. This causes flour or grains to soften and helps ingredients to combine. The machine will begin kneading after the preheat cycle is completed. Wheat breads also require more rising time to accommodate the slower rising action with whole wheat flour. It is normal for Wheat breads to be shorter and more dense in texture than Basic, French or Sweet breads. The default setting is 1.0Kg loaf with a Medium Crust.
5. Sweet
This cycle is for breads that require additional ingredients such as sugar, dried fruits or chocolate to sweeten the bread. The baking temperature is reduced to prevent burning. The default setting is 1.0Kg loaf with a Medium Crust.
Tip: To prevent the crust from becoming too dark, a Light crust colour is recommended.
6. French
This cycle is for breads that are lighter in texture and have crispier crusts, such as French and Italian breads. The default setting is 1.0Kg loaf with a Medium Crust.
Tip: This style loaf best suits loaves which are low in fat and sugar.
7. Cake
Make a variety of sweet and savoury homemade cakes on this menu. You can use this menu to mix and bake cakes. We recommend the use of pre-packaged cake mixes.
Tip: To prevent the crust from becoming too dark, a Light crust colour is recommended.
8. Extra Turbo
Use this Extra Turbo menu for ready made Basic bread in about 80 minutes. This menu is quicker than the Turbo menu (2). The crust colour is set to Medium, and is for 1.0kg loaf sizes only. This menu lets you save time on the bread recipes by reducing the completion time and is ideal for when you need bread in a hurry. Breads made using this menu may be shorter and more dense due to the reduced rising time.
9. Jam
You can now have fresh jam all year round. Use this menu to make fresh savoury and sweet jams.
Refer to the Jam instructions in the Recipe section.
Note: As with the Wheat menu (4) the Jam menu also features a preheat setting. The SmartBake Custom will begin to mix after this preheat setting is completed.
10. Bake
Use this menu for an immediate baking process. This menu is useful if the crust is too light or if your bread is not quite done and requires more baking time. This setting can be controlled manually by pressing the START/ PAUSE button to stop the function at any time.
This menu can also be used to complete the bread baking process in case of a power failure. If there has been a power failure, allow the dough to rise in the bread pan without power until it reaches 34 of the way up the bread pan. Reconnect electricity and select the Bake menu (10), and press START.
Note: You may need to wait 10-15 minutes for the machine to cool down, before you select the Bake menu. If you attempt to use the Bake menu before the machine has cooled down, an error message will appear on the display - "E:01".
11. Pasta Dough
This menu allows you to make pasta dough for fresh pasta. Feed the pasta through a pasta machine to make fettuccini, ravioli and lasagne. Refer to the Pasta instructions in the Recipe section.
12. Pizza Dough / Dough
This menu allows you to create a variety of doughs for breads, croissants, bread rolls and pizza, to bake in a conventional oven. Refer to the Dough instructions in the Recipe section.
Using your SmartBake® Custom
Before using your SmartBake Custom for the first time
We recommend that you remove the baking pan and wipe over the bread pan and kneading blade with a damp cloth and dry thoroughly.
Do not immerse the bread pan in water unless necessary. Do not use harsh abrasive cleaners as they may damage the non-stick surface. Do not place any parts of your breadmaker in the dishwasher.
Removing the baking pan
Open the lid of your SmartBake Custom and remove the baking pan by taking hold of the baking pan handle and lifting it straight up. It is a good idea to remove the baking pan before adding ingredients so that no ingredients are spilt into the baking chamber and onto the element.
Step 1. Adding ingredients
We recommend that you add the ingredients into the bread pan in the order listed. All ingredients should be at room temperature and measured carefully. All recipes listed in this booklet use local ingredients and Australian Standard Metric Measuring tools (spoons, cups and measuring scales).
Step 2. Replacing the baking pan
To return the baking pan to the baking chamber simply position the baking pan into the baking chamber and push down until it slots into position. Lay the handle flat toward the side of the bread pan. Close the lid securely, plug the machine into a 230-240 volt AC power outlet and turn the power ON. Note: When the machine is first plugged in, the LCD window will beep and flash “0.00” until a menu is selected.
Step 3. Add Fruit and Nuts if required
If your recipe includes extra ingredients such as fruit or nuts, add these to the automatic fruit and nut dispenser. Your SmartBake Custom will add the fruit and nuts automatically during the bread making process. Do not use the dispenser for ingredients such as cheese, as these will melt in the dispenser before it's released. Small grains & seeds may fall through the gaps. If using ingredients such as linseeds, sesame seeds etc, add these straight to the bread pan.
Step 4. Select Menu
Press the MENU button to make your desired selection. As you press the MENU button you move through each of the recipes from (1) to (12) and as you scroll through the recipes the number is displayed in the LCD window.
Step 5. Select Size
Press the SIZE button to select the desired loaf size - 750g, 1.0kg or 1.25kg. The default loaf size is 1.0kg.
Step 6. Select Crust
Press the CRUST button to select your choice of crust colour. You are able to choose from the Light, Medium or Dark crust colours on selected settings. The default crust colour is Medium.
Step 7. Press Start
Press the START button to commence selected setting. The LCD window will display the hours and minutes until the menu is complete.
Step 8. Hot fresh crusty bread
When the bread is finished baking, the SmartBake Custom will beep and "0:00" will appear in the LCD window. A red light located on the control panel, will flash for approximately 15-20 minutes.
Once the red light has stopped flashing, using oven mitts, remove the baking pan from the baking chamber by lifting it straight up. Note: the bread pan and loaf are very hot. Be careful not to place these on any heat sensitive surface that may scorch.
Allow the bread to cool in the bread pan for 10 minutes before removing. Then with the oven mitts tap the sides and base of the baking pan and turn upside down and gently shake until the bread slides out. If necessary, use a plastic spatula to loosen bread from the side of the pan. Place the bread on a wire rack and allow the bread to cool. We recommend that sufficient cooling time is approximately 15 minutes to ensure optimum bread texture and this also makes slicing easier.
Keep Warm
If the bread is not removed immediately after baking and PAUSE is not pressed, the SmartBake Custom will automatically switch to a Keep Warm cycle for 60 minutes. Warm air will circulate throughout the baking chamber to help reduce condensation. After 60 minutes on Keep Warm cycle, the machine will beep and the machine will go to a standby mode. The bread can be removed from the baking chamber at the end of the baking cycle or any time during the Keep Warm cycle. Simply press the PAUSE button for 3 seconds to end the Keep Warm period and turn off the bread maker at the powerpoint. Note: Keep Warm does not apply to the Pasta Dough and Pizza Dough menus.
After using your SmartBake Custom
Unplug the machine and allow it to cool for 30 minutes before commencing another program. If you attempt to use the SmartBake Custom too soon, it may beep and the display will read 'E:01', indicating the SmartBake Custom has not cooled sufficiently. Wait until the SmartBake Custom has cooled and then press START.
Tip: The screen will change to sleep mode after 20 minutes, and the screen will darken. Push any button to light up the screen again.
Ingredients
Yeast
Yeast is actually a microscopic plant. Simply stated, without yeast, your bread will not rise. When moistened by a liquid, fed by sugar and carefully warmed, yeast produces gases that power the dough to rise. If the temperature is too cold, the yeast will not be activated; if it's too warm, it will die. Your SmartBake Custom takes care of this worry for you by maintaining just the right temperature in the baking chamber at all times.
Some yeasts may require the use of a bread improver. The Bread Improver will provide additional gluten to the flour to produce a better loaf.
Tip: We do not recommend the use of fresh or compressed yeast in your breadmaker. Sunbeam recommends the use of dry yeast only. Always ensure it is used well within the use-by date, as stale yeast will prevent the bread from rising. We suggest that a small pocket be made in the top of the dry mixture to hold the yeast. This will ensure its activation when in contact with the liquid and sugar during kneading.
Flour
In order for the bread to rise, the flour has to have a sufficiently high protein content. Sunbeam recommends the use of a good quality plain or bread flour. The texture and height of the bread will be inconsistent if the flour is stored for long periods of time in unsatisfactory conditions. Purchase bulk packs of flour only if baking constantly. Unlike white flour, wheat flour contains bran and wheat germ which inhibit rising. Wheat breads therefore, tend to be heavier in texture and smaller in size. A lighter, larger loaf can be achieved by combining wheat flour with white flour for whole wheat bread recipes.
Bread Improver
The use of Bread Improver is recommended to achieve optimum results. Bread Improver will increase the gluten content of the flour mix. It will also influence the structure, size and texture of the bread, so that it does not collapse when baking. The suggested quantity to use is stated in all recipes. Bread Improver has a flour like texture and can be purchased through health food shops or through selected supermarkets.
Sugars
Sugars sweeten the bread, brown the crust, lend tenderness to the texture and supply the yeast with food. White or brown sugar, molasses, maple or golden syrup, honey and other sweeteners may be used in equivalent quantities. Artificial sweetener can be substituted in equivalent amounts, however the taste and texture of your bread will vary.
Liquids
When liquids are mixed with protein in flour, gluten is formed. Gluten is necessary for the bread to rise. Experiment with quantities of these liquids to obtain optimum results. Liquids should be used at room temperature. A recipe with too much liquid may cause the bread to fall during baking while a recipe with too little liquid will not rise.
Salt
In small amounts, salt adds flavour and controls yeast action. Too much salt inhibits rising, so be sure to measure amounts correctly. Any ordinary table salt may be used.
Eggs
Eggs are used in some bread recipes. They provide liquid, assist with the rising and increase the nutritional value of the bread. They add extra flavour and are usually used in the sweeter types of bread. Recipes in this booklet use extra large 59g eggs.
Fats
Many breads use fats to enhance the flavour and retain moisture. Typically, we use margarine in the recipes. Softened butter or oil may be used in equivalent quantities. If you choose not to add any fat, your bread may vary in taste and texture.
Bread mixes
A variety of bread mixes can be used in your bread maker. All brands of store bought bread mixes are different. Please use the baking instructions supplied with your breadmix rather than the SmartBake Custom menu. Some bulk bread mixes may require the use of a bread improver. We recommend you contact the Bread Mix manufacturer for further information on the use of their product.
Hints
- Different brands of yeast, used with different brands of flour, will influence the size and texture of your bread. Experiment with these ingredients to determine which combination of ingredients gives you the best result.
- It is normal for breads to be inconsistent in height and texture even if you are using the same ingredients time and time again. This inconsistency is usually influenced by the natural varying protein levels of wheat in the flour, the yeast and the humidity and temperature.
Important measuring tips
Each ingredient in a loaf of bread plays a specific role, so it is extremely important to measure the ingredients correctly to get the best results.
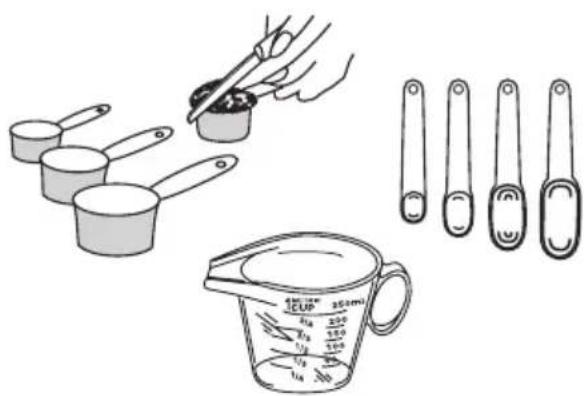
We recommend using Australian standard measuring jugs, cups and spoons. Weight measurements are provided if you wish to use a kitchen scale.
Australian standard
Teaspoon = 5mls
Tablespoon = 20mls
1 cup = 250mls
Dry ingredients
Use a metric measuring spoon or cup. Do not use tableware spoons or cups. Spoon the dry ingredients loosely into the spoon or cup and level off with a flat knife. This is particularly important with flour. Do not pack dry ingredients down into the cup or tap the cup unless otherwise stated in the recipe.
natural_image
Illustration of cooking preparation tools including measuring cup, beaker, and stand (no text or symbols)Liquids
Fill a metric measuring spoon or jug to the level indicated. Check your jug measurement by placing the measuring jug on a flat surface and reading the measurement at eye level.
1ml = 1g water
Solid fats
Fill a metric measuring spoon or cup to the level indicated and level off with a flat knife. Alternatively use kitchen scales.
Last Things Last!
Place the liquid in the bread pan first, the dry mix ingredients in next. Then, make a small pocket in the top of the dry ingredients and place the yeast in the pocket. Wipe away any spills from around the outside of the pan. This will ensure a well risen and evenly baked loaf.
Fruit and Nut Dispenser
Your SmartBake Custom has an Automatic Fruit and Nut dispenser which automatically releases dry ingredients into the dough during the kneading cycle. This will occur during the second kneading cycle, ensuring that the dried fruit and nuts are not crushed and the pieces remain whole and are evenly dispersed.
This option is available on all menus, however we recommend use only on the Basic (1), Gluten/ Yeast Free (3), Wheat (4) and Sweet Bread (5).
Do not overfill the dispenser and ensure the dispenser is closed prior to each use. The dispenser may be open from the previous time it was used.
The Baking Process
Mixing, Kneading, Rising, Baking.... Here's a glimpse of how your Sunbeam SmartBake Custom automatically does all the steps for you.
Mixing and kneading
In standard bread baking, the baker mixes the ingredients first by stirring, then by kneading the dough by hand. The SmartBake Custom mixes and kneads the dough automatically for you.
Rising
When making bread by hand, the dough is placed in a warm place to rise after mixing, so that the yeast can ferment and produce gas. After mixing the dough, the SmartBake Custom maintains the optimum temperature for rising during this part of the process. If you are using the Dough cycles, the SmartBake Custom will stop at the end of the first rising. The dough can then be removed and shaped - focaccia, pizza, bread rolls or any other creations, and placed in your own oven for baking.
Knock Down
Once the dough has risen, the baker will typically “knock down” the dough. This process helps to break apart large, unwanted pockets of air and gas that have developed through rising, giving the bread a more even and appetising texture. The SmartBake Custom handles this process automatically for you by turning on the kneading blade at just the right time.
Second Rise
After it is knocked down, the bread bounces back, and rises a second time. Some breads require shorter or longer rising times. For example, wheat breads require a long rising time because the flour contains bran and wheat germ which inhibits rising.
The SmartBake Custom regulates the temperature and timing of this second rise automatically for you based on your selection.
Bake
The SmartBake Custom automatically regulates baking time and temperature for perfect results every time.
Cool
In standard baking, the baker removes the bread from the pan immediately to keep the crust from turning soggy. The SmartBake Custom has a 60 minute keep warm feature which helps remove the hot air from the baking chamber after the bread is done. This keeps the crust from getting soggy. After removing the bread, leave to cool for at least 15 minutes before slicing.
Programming your SmartBake® Custom
The SmartBake technology of your breadmaker allows you to program 8 of your own recipes.
By following these few simple instructions your favourite recipes will be at your fingertips.
Before commencing programming of your favourite recipes, it's important that you have a good understanding of each of the stages of the breadmaking cycle.
Note: The order in which each of these stages are discussed below are not true to the sequence of the breadmaking cycle. They have been detailed in the below layout for ease.
Baking Progress Monitor
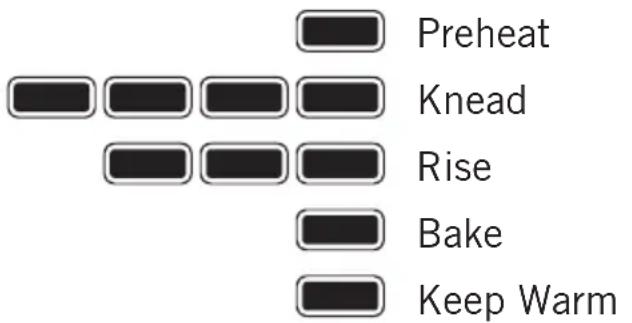
Preheat
Your SmartBake Custom features a Preheat function which helps to bring the ingredients to the optimum temperature for the yeast to activate when the kneading cycle begins. This is mainly used on Wheat breads and when making Jam, but is also handy to use on cold days.
The adjustable time for Preheat is: 0 - 99 minutes.
Kneading The Kneading cycle turns your ingredients to dough and is the most vital stage of breadmaking. It mixes the ingredients, activates the yeast and forms the frame work for the dough to rise
The adjustable time for Knead 1 is: 0 - 10 minutes.

he mixing paddle speed: Slow
The adjustable time for Knead 2 is: 0 - 30 minutes.
The mixing paddle speed: Fast
Although included as part of the kneading cycle, the knock down controls the expansion of gas in the rising cycles (ridding unwanted air pockets).
The adjustable time for Knockdown 1 is: 0 - 30 seconds.
The mixing paddle speed: Fast
The adjustable time for Knockdown 2 is: 0 - 30 seconds.
The mixing paddle speed: Fast
Programming your SmartBake Custom - continued
Rising
The temperature of your SmartBake Custom increases causing the dough to expand and rise.
The adjustable time for Rise 1 is: 0 - 99 minutes.
Temperature: Warm
The adjustable time for Rise 2 is: 0 - 99 minutes.
Temperature: Warm
The adjustable time for Rise 3 is: 0 - 99 minutes.

Temperature: Warm
Baking
The temperature of your SmartBake Custom increases again which encourages the dough to expand further.
The adjustable time for Baking is: 0 - 99 minutes.
Temperature: High
Keep Warm
The adjustable time for Keep Warm is: 0 - 99 minutes.

Temperature: Warm
When programming you can either adapt and customise one of the existing preset menus or you can start from scratch. To customise an existing preset menu, start at step 1 below. To program your own recipe from scratch, press the FAVOURITE button, and start at Step 3 below.
- Press the FAVOURITE button.
- To customise an existing menu, select from one of the existing menus from (1) to (8). This will be the basis of your new recipe. Simply press the MENU button to cycle through the menus.
Note: Refer to the Program Setting Times chart on page 64, so you can choose the most appropriate menu.
-
To commence programming press the CUSTOM button for 2 seconds.
The control panel will beep once, CUSTOM FAVOURITE will show on the LCD window and the first stage of the breadmaking cycle - Preheat will flash. -
To adjust times press the √ ∧ buttons. When you have selected the desired time, press the CUSTOM button to move to the next stage of the breadmaking cycle.
Then press the √ ∧ buttons again to select your desired times. Repeat this until all times have been entered. When you have programmed the times for all stages ending in the KEEP WARM stage, press the CUSTOM button to finalise your favourite menu.
Note: The process is completed when a longer double beep is heard, FAV will flash on the LCD window and the total breadmaking cycle time is displayed.
- Once you have finished programming, you can either save your recipe now, by simply pressing the SAVE button, FAV will stop flashing and the control panel will beep 3 times.
Your recipe has now been saved into one of the 8 Favourite Recipe slots.
OR
You can test your recipe first, without yet saving it by simply pressing START. If you then want to save the recipe you must ensure that you press SAVE during but before the end of the KEEP WARM mode.
Note: You can not save the recipe once the Keep Warm cycle is complete.
- To cancel the programming process at any stage simple press the CANCEL button.
Changing a Favourite Recipe
You can make changes to, or replace any of your saved Favourite Recipes at any time.
-
Select the recipe you wish to modify by pressing the FAVOURITE button. This will allow you to scroll through Favourite Recipes (1) to (8).
-
To commence programming press the CUSTOM button for 2 seconds.
The control panel will beep once and the first stage of the breadmaking cycle - Preheat will flash.
You can now follow the instructions as given in the programming section, steps 3 - 5.
Deleting a Favourite Recipe
You can completely delete a saved Favourite Recipe.
-
Select the recipe by pressing the FAVOURITE button and scrolling through to the recipe you wish to delete.
-
To delete press the CANCEL button for 5 seconds until you hear a beep and the screen changes to 00:00.
Previewing Menus and Favourite Recipes
-
You can preview any program prior to beginning the breadmaking process by pressing the CUSTOM button for 5 seconds until you hear a beep. Continuously press the CUSTOM button to scroll through all stages.
-
To exit from previewing a Menu or Favourite Recipes press the CANCEL button. This will automatically return you to the beginning of the current Menu or Favourite Recipes.
How to use the Time Delay
The SmartBake Custom allows you to delay the completion of your bread by up to 15 hours, so you can wake up to the smell of freshly baked bread, or go out for the day while your SmartBake Custom does all the work.
Note: Do not use the Time Delay when the recipe has perishable ingredients such as milk, eggs or cheese as these may spoil.
- Follow steps 1 - 6 on page 12.
- Press √ ∧ buttons in the DELAY menu until you reach the number of hours and minutes you want your bread to be ready. DELAY will show on the LCD window. Press to add or minus time in 10 minute intervals.
- Press START button to commence the program. The LCD window will display the hours and minutes until the menu is complete.
Note: You do not need to take into account the amount of time required to cook the program selected. This is automatically registered in the SmartBake Custom when it is selected.
Example
Before leaving for work at 8am, you decide to set the Time Delay so that the bread or selected program will be ready and completed by 6pm when you return home – which is 10 hours later. Set the timer for 10:00. This tells you that your bread or selected program will be complete in 10 hours. The SmartBake Custom will begin counting down and your selected program will be complete by 6pm.
Tip: In the Delay mode, the LCD window will darken and go into a sleep mode. To view the screen again and check your setting and remaining time, briefly press any button to illuminate the screen.
Power Interruption Program Protection
Your SmartBake Custom features a 10 minute Power Interruption Protection that protects the program memory from power surges, or short term power failure (blackout). This means that if there is a power interruption during your bread making, the machine will retain its memory for up to 10 minutes and continue cooking when the power supply returns.
If you experience a power failure greater than 10 minutes you may need to discard ingredients and start again. If the power interruption occurs in the baking cycle, you can use the Bake menu (10) setting to finish baking.
Handy hints
Order of ingredients
Place liquid in first, the dry ingredients in next and the yeast in last.
Freshness
Ensure all ingredients are fresh and used before the specified use-by date. Avoid using perishable ingredients such as milk, yoghurt, eggs or cheese, with the Time Delay function. Store dry ingredients in airtight containers, to keep them fresh.
Slicing bread
For best results, wait at least 15 minutes before slicing, as the bread needs time to cool. Place loaf on its side and cut in a sawing motion with a bread knife. For easy and even slicing we recommend the use of the Sunbeam Carveasy electric knife.
Freezing bread
To freeze fresh bread, let it cool completely and wrap in several layers of plastic. Slice bread before freezing and use at your convenience.
Toppings
Ingredients such as herbs, sesame seeds and chopped bacon can be added to the top of the bread during the baking stage. Open the lid of the SmartBake Custom, gently brush top of the loaf with a little milk or egg yolk and sprinkle with topping. (Do not allow ingredients to fall outside pan). Close lid and allow baking to continue.
Tip: This step needs to be done quickly and gently to prevent bread from sinking.
Crust colour
It is normal for the top of the bread to be lighter in colour than the sides. Different combinations of ingredients can encourage or discourage browning.
Baking at high altitudes
At high altitudes above 900 metres, dough rises faster. Therefore, when baking at high altitudes some experimentation is required. Follow the suggested guidelines. Use one suggestion at a time and remember to write down which suggestion works best for you.
Suggestions:
- Reduce the amount of yeast by 25%. This will stop the bread from over-rising.
- Increase the salt by 25%. The bread will rise slower and have less of a tendency to sink.
- Watch your dough as it mixes. Flour stored at high altitudes tends to be drier. You may have to add a few tablespoons of water, until the dough forms a nice ball.
Care and Cleaning
Before cleaning the SmartBake Custom, unplug it from the power outlet and allow it to cool completely.
To clean the exterior
Wipe exterior with a slightly dampened cloth and polish with a soft dry cloth.
Do not use metal scourers or abrasives as this may scratch the exterior surface.
To clean the non-stick baking pan
Gently wash bread pan in warm soapy water using a soft cloth and dry well before and after each use. Wipe baking pan and kneading blade with a damp cloth and dry thoroughly. Do not use any harsh abrasives or strong household cleaners as these may damage the non-stick surface.
Caring for your non-stick baking pan
Do not use metal utensils to remove ingredients or bread, as they may damage the non-stick coating. Do not be concerned if the non-stick coating wears off or changes colour overtime. This is a result of steam, moisture, food acids, mixing of various ingredients and normal wear and tear. This is in no way harmful and does not affect the performance of your SmartBake Custom.
Do not wash any part of your bread maker in a dishwasher.
Do not immerse the SmartBake Custom in water.
Remove and clean lid
To remove lid, simply raise the lid just short of the vertical position (approx. 70°). While holding the base of the unit with one hand, gently lift the lid out of the hinge. Wipe interior and exterior of lid with a damp cloth and dry thoroughly before replacing lid.
Storage
Make sure the SmartBake Custom is completely cool and dry before storing. Store the SmartBake Custom with the lid closed and do not place heavy objects on top of the lid.
Recipes: Basic Breads Menu 1
All the recipes have been specifically created and tested by our Sunbeam Test Kitchen for the SmartBake Custom. We hope you enjoy.
To use the Basic Bread setting:
- Ensure the kneading blade is in the bread pan.
- Place the ingredients into the bread pan in the order listed.
-
Wipe any spills from the outside of the pan. Place the pan into the bread maker and close the lid. Add the specified ingredients to the fruit and nut dispenser (if applicable).
-
Turn the power on from the power point.
- Press the MENU button to select menu 1 (Basic). Press the SIZE button to select the loaf size. Press the CRUST button to select your desired crust colour.
- Press START. Bread will be baked in the time indicated on the screen.
- On completion, use oven mitts to remove the bread pan from the baking chamber. Stand for 10 minutes before turning onto a wire rack to cool. When cool, ensure the kneading blade is removed from the base of the bread before cutting.
| Traditional White Loaf 750g | 1kg 1.25kg | ||
| Luke-warm Water 315mls | 380mls 515mls | ||
| Butter 20g 40g 60g | |||
| Salt 1 1⁄2 teaspoons 2 teaspoons | 2 1⁄2 teaspoons | ||
| Sugar 1 tablespoon 1 tablespoon | 1 1⁄2 tablespoons | ||
| Skim Milk Powder 1 tablespoon | 2 tablespoons | 3 tablespoons | |
| Bread Improver | 1 teaspoon | 1 teaspoon | 1 teaspoon |
| Plain Flour | 500g | 600g | 760g |
| Dried Yeast | 1 teaspoon | 1 1⁄2 teaspoons 1 1⁄2 | teaspoons |
| Milk Bread 750g 1kg 1.25kg | |||
| Milk 280mls 350mls 440mlsButter 20g 20g 30gSalt 34 teaspoon 1 teaspoon 114 teaspoonsSugar 112 tablespoons 2 tablespoons 2 tablespoonsBread Improver 1 teaspoon 1 teaspoon 1 teaspoonPlain Flour 465g 580g 725gDried Yeast | 1 teaspoon | 112 teaspoons | 2 teaspoons |
| Cornbread 750g 1kg 1.25kg | |||
| Luke-warm Water | 240mls 300mls 360mls | ||
| Butter | 20g 20g 30g | ||
| Cornmeal (polenta) | 55g (1/3 cup) | 55g (1/3 cup) | 110g (2/3 cup) |
| Sugar | 212 teaspoons | 1 tablespoon | 112 tablespoons |
| Salt 1 teaspoon 112 teaspoons | 2 teaspoons | ||
| Skim Milk Powder | 1 tablespoon | 1 tablespoon | 112 tablespoons |
| Bread Improver 1 teaspoon | 1 teaspoon 1 teaspoon | ||
| Dried Thyme | 1 teaspoon 112 teaspoons | 2 teaspoons | |
| Plain Flour 385g | 480g 575g | ||
| Dried Yeast | 1 teaspoon | 112 teaspoons | 112 teaspoons |
| Fruit & Nut Dispenser | |||
| Canned Corn Kernels, drained, pat dry | 80g ( 12 cup) | 110g ( ^2_3 cup) | 120g ( ^3/_4 cup) |
| Sunflower Loaf 750g 1kg 1.25kg | |||
| Luke-warm Water 250mls | 325mls 400mls | ||
| Butter 20g 30g 40g | |||
| Honey 1 tablespoon 1 12 | tablespoons 2 tablespoons | ||
| Salt 1 teaspoon 1 12 teaspoons | 2 teaspoons | ||
| Skim Milk Powder 1 tablespoon 1 12 tablespoons | 2 tablespoons | ||
| Bread Improver 1 teaspoon 1 teaspoon 1 teaspoon | |||
| Fine Cracked Wheat 12 | 3 cup | 13 cup | 12 cup |
| Plain Flour | 440g | 520g | 600g |
| Dried Yeast | 1 12 teaspoons 1 12 | teaspoons 2 teaspoons | |
| Fruit & Nut Dispenser | |||
| Sunflower Seeds | 13 cup | 13 cup | 12 cup |
| Herbie Cheese Bread 750g | 1kg 1.25kg | ||
| Luke-warm Water 235mls | 310mls 415mls | ||
| Butter 30g 40g 50g | |||
| Salt 1 teaspoon 1 1⁄2 teaspoons | 2 teaspoons | ||
| Sugar | 2 1⁄2 teaspoons | 1 tablespoon | 1 tablespoon |
| Bread Improver 1 teaspoon | 1 teaspoon 1 teaspoon | ||
| Skim Milk Powder 1 1⁄2 tablespoons | 2 tablespoons | 2 1/2 tablespoons | |
| Grated Mozzarella 1⁄4 cup | 1⁄2 | 3 cup | 1⁄2 cup |
| Dried Mixed Herbs | 1 teaspoon 1 1⁄2 teaspoons | 2 teaspoons | |
| Plain Flour | 350g | 460g | 610g |
| Dried Yeast | 1 teaspoon | 1 1⁄2 teaspoons 1 1⁄2 teaspoons | |
| Sour Cream and Chilli Bread | 750g 1kg 1.25kg | ||
| Luke-warm Water 120mls | 150mls 200mls | ||
| Sour Cream 12 cup 34 cup | 1 cup | ||
| Chilli Powder 1 teaspoon | 112 teaspoons 2 teaspoons | ||
| Salt 1 teaspoon 112 teaspoons | 2 teaspoons | ||
| Brown Sugar 212 teaspoons | 1 tablespoon 112 tablespoons | ||
| Skim Milk Powder 112 tablespoons | 2 tablespoons 3 tablespoons | ||
| Bread Improver | 1 teaspoon 1 teaspoon 1 teaspoon | ||
| Plain Flour | 430g | 540g | 780g |
| Dried Yeast | 1 teaspoon 112 teaspoons | 2 teaspoons |
| Garlic and Herb Bread | 750g 1kg 1.25kg | ||
| Luke-warm Water 235mls | 315mls 415mls | ||
| Butter | 20g | 30g | 40g |
| Garlic, crushed | 1 clove | 2 cloves 2 cloves | |
| Dried mixed Herbs | 2 teaspoons | 2 12 teaspoons 1 tablespoon | |
| Salt 1 teaspoon 1 12 teaspoons | 2 teaspoons | ||
| Sugar | 2 12 teaspoons 1 tablespoon | 1 12 tablespoons | |
| Skim Milk Powder 1 tablespoon | 1 12 tablespoons | 2 tablespoons | |
| Bread Improver | 1 teaspoon 1 teaspoon | 1 teaspoon | |
| Plain Flour | 450g | 560g | 610g |
| Dried Yeast | 1 teaspoon 1 12 teaspoons | 1 12 teaspoons | |
| Tomato and Basil Bread 750g 1kg 1.25kg | |||
| Luke-warm Water 235mls | 315mls 415mls | ||
| Butter 30g 40g 50g | |||
| Basil, fresh, chopped 14 cup 17 | 3 cup 12 cup | ||
| Tomato Paste 112 teaspoons | 2 teaspoons 1 tablespoon | ||
| Salt 1 teaspoon 112 teaspoons | |||
| Sugar | 2 teaspoons | 1 tablespoon | 112 tablespoons |
| Skim Milk Powder | 112 tablespoons | 2 tablespoons | 212 tablespoons |
| Bread Improver | 1 teaspoon 1 teaspoon | 1 teaspoon | |
| Plain Flour | 345g | 460g | 610g |
| Dried Yeast 1 teaspoon 1 | 12 teaspoons 112 teaspoons | ||
| Italian Herb Bread 750g 1kg 1.25kg | |||
| Luke-warm Water 235mls | 315mls 415mls | ||
| Butter 30g 40g 50g | |||
| Mixed Fresh Herbs, chopped | 1 12 tablespoons | 2 tablespoons | 3 tablespoons |
| Salt 1 teaspoon 1 12 teaspoons | 2 teaspoons | ||
| Sugar | 1 tablespoon | 1 12 tablespoons | 2 tablespoons |
| Skim Milk Powder | 1 tablespoon | 1 12 tablespoons | 2 tablespoons |
| Bread Improver | 1 teaspoon 1 teaspoon | 1 teaspoon | |
| Plain Flour | 345g | 460g | 610g |
| Dried Yeast 1 teaspoon 1 | 12 teaspoons 1 12 teaspoons | ||
| Rosemary and Olive Oil Bread | 750g 1kg 1.25kg | ||
| Luke-warm Water 180mls | 240mls 315mls | ||
| Olive Oil 55mls 75mls 100mls | |||
| Fresh Rosemary, finely chopped | 212 teaspoons 1 tablespoon 112 tablespoons | ||
| Salt 112 teaspoons 2 teaspoons | 212 teaspoons | ||
| Sugar 1 tablespoon 112 tablespoons | 2 tablespoons | ||
| Skim Milk Powder 112 tablespoons | 2 tablespoons | 212 tablespoons | |
| Bread Improver | 1 teaspoon | 1 teaspoon | 1 teaspoon |
| Plain Flour | 345g | 460g | 610g |
| Dried Yeast | 1 teaspoon | 112 teaspoons 112 teaspoons |
| Sundried Tomato and Olive Bread | 750g 1kg 1.25kg | ||
| Luke-warm Water | 235mls 315mls 400mls | ||
| Butter | 20g | 30g | 40g |
| Salt | 1 teaspoon | 1 12 teaspoons 2 teaspoons | |
| Sugar | 2 teaspoons 2 12 teaspoons 3 teaspoons | ||
| Skim Milk Powder | 1 tablespoon 2 tablespoons | 3 tablespoons | |
| Bread Improver | 1 teaspoon | 1 teaspoon | 1 teaspoon |
| Plain Flour | 450g | 600g | 650g |
| Dried Yeast | 1 teaspoon | 1 12 teaspoons 1 12 teaspoons | |
| Fruit & Nut Dispenser | |||
| Sundried Tomatoes, drained, chopped | 1 12 tablespoons 2 tablespoons | 3 tablespoons | |
| Pitted Kalamata Olives, sliced | 1 12 tablespoons 2 tablespoons | 3 tablespoons | |
| Salami Cheese Bread 750g | 1kg 1.25kg | ||
| Luke-warm Water 250mls | 315mls 415mls | ||
| Butter 30g 40g 50g | |||
| Dried Oregano 1 teaspoon | 1 12 teaspoons 2 teaspoons | ||
| Sliced Salami, chopped | 60g 80g 100g | ||
| Grated Mozzarella Cheese | 14 cup 17 | _3 cup 12 cup | |
| Salt 1 teaspoon | 1 12 teaspoons 2 teaspoons | ||
| Sugar 1 12 teaspoons 2 teaspoons | 1 tablespoon | ||
| Skim Milk Powder | 1 tablespoon | 1 12 tablespoons | 2 12 tablespoons |
| Bread Improver | 1 teaspoon 1 teaspoon | 1 teaspoon | |
| Plain Flour | 350g | 460g | 610g |
| Dried Yeast | 1 teaspoon 1 12 teaspoons | 1 12 teaspoons | |
| Lemon Poppy Seed Bread | 750g 1kg 1.25kg | ||
| Water | 250mls | 315mls 415mls | |
| Butter 20g 30g 40g | |||
| Lemon Zest 1 tablespoon | 2 tablespoons | 2 12 tablespoons | |
| Salt 1 teaspoon 1 12 teaspoons | 2 teaspoons | ||
| Sugar | 3 teaspoons | 1 tablespoon | 1 tablespoon |
| Poppy Seed | 1 teaspoon 2 tablespoons | 3 tablespoons | |
| Skim Milk Powder | 1 tablespoon | 1 12 tablespoons | 2 tablespoons |
| Bread Improver | 1 teaspoon 1 teaspoon | 1 teaspoon | |
| Plain Flour | 350g | 460g | 680g |
| Dried Yeast | 1 teaspoon | 1 12 teaspoons 1 12 teaspoons | |
| Crunchy Almond and Honey Bread | 750g 1kg 1.25kg | ||
| Luke-warm Water 250mls | 315mls 415mls | ||
| Butter 30g 40g 50g | |||
| Almonds, slivered 14 cup | 12 cup 34 cup | ||
| Salt 1 teaspoon 1 12 teaspoons | 2 teaspoons | ||
| Honey 2 tablespoons 2 12 tablespoons | 3 tablespoons | ||
| Skim Milk Powder 1 tablespoon | 1 12 tablespoons | 2 12 tablespoons | |
| Bread Improver 1 teaspoon | 1 teaspoon 1 teaspoon | ||
| Plain Flour | 350g | 460g | 610g |
| Dried Yeast | 1 teaspoon | 1 12 teaspoons 1 12 teaspoons |
Basic Turbo Breads Menu 2
Using this Turbo menu, basic breads will be ready in about 2 hours. If you need your bread more quickly, use the Extra Turbo menu (8) which takes about 80 minutes.
To use the Turbo Bread setting:
- Ensure the kneading blade is in the bread pan.
- Place the ingredients into the bread pan in the order listed.
Note: We only recommend using the Basic bread recipes (menu 1) on the Turbo setting. - Wipe any spills from the outside of the pan. Place the pan into the bread maker and close the lid. Add the specified ingredients to the fruit and nut dispenser (if applicable).
-
Turn the power on from the power point.
-
Press the MENU button to select menu 2 (Turbo). Press the SIZE button to select the loaf size. Press the CRUST button to select your desired crust colour.
- Press START. Bread will be baked in the time indicated on the screen.
- On completion, use oven mitts to remove the bread pan from the baking chamber. Stand for 10 minutes before turning onto a wire rack to cool. When cool, ensure the kneading blade is removed from the base of the bread before cutting.
Gluten/Yeast Free Breads Menu 3
To use the Gluten/Yeast Free Bread setting:
- Ensure kneading blade is in the bread pan.
- Place the ingredients into the bread pan in the order listed.
- Wipe any spills from the outside of the pan. Place the pan into the bread maker and close the lid. Add the specified ingredients to the fruit and nut dispenser (if applicable).
- Turn the power on from the power point.
- Press the MENU button to select menu 3 (Gluten/Yeast Free). Press the SIZE button to select the loaf size. Press the CRUST button to select your desired crust colour.
- Press START.
Note: Due to the density of the dough especially in cooler climates, breads on this setting may need assistance in the first 5 minutes of kneading. Scrape the sides and base of the pan with a plastic spatula. (If using the fruit and nut dispenser, hold the lid to avoid spillage when opening the bread maker lid). You may also wish to add more water.
- On completion, use oven mitts to remove the bread pan from the baking chamber.
Stand for 10 minutes before turning onto a wire rack to cool. When cool, ensure the kneading blade is removed from the base of the bread before cutting.
TIP: There are many factors that can influence the success of your Gluten Free loaf such as quality of ingredients and environment conditions – altitude, humidity and temperature.
We recommend experimenting with the programmability of the SmartBake Custom and customising the menu to your conditions and needs.
One suggestion that we have tested in different regions of Australia is to extend the second kneading stage – Knead 2. You can adapt the existing Gluten Free preset menu (Menu 3) and save as a Favourite. See page 19 for more information regarding Programming your SmartBake Custom.
TIP: Some Gluten Free loaves can become ‘doughy’ in the Keep Warm stage. You may wish to remove your loaf immediately after the Baking stage, and not allow it to stay in the Keep Warm stage.
| Gluten Free Rice Bread 750g 1kg 1.25kg | |||
| Luke-warm Water 270mls 340mls 440mlsEggs, lightly whisked 2 3 4Vegetable Oil 3 tablespoons 4 tablespoons 5 tablespoonsWhite Vinegar 1 teaspoon 1 teaspoon 1 12 teaspoonsSalt 1 teaspoon 1 12 teaspoons 2 teaspoonsSugar 1 12 teaspoons Brown Rice Flour 140g 150g 175gWhite Rice Flour 200g 240g 310gXanthan Gum 3 teaspoons 1 tablespoon 1 tablespoonDried Yeast 1 12 teaspoons 1 12 teaspoons 2 teaspoons | |||
| Gluten Free Grain Bread 750g 1kg 1.25kg | |||
| Luke-warm Water 210g 280mls 375mlsEggs, lightly whisked 2 2 3Vegetable Oil 80mls 100mls 125mlsWhite Vinegar 12 teaspoon 1 teaspoon 1 teaspoonArrowroot, sieved 140g 185g 250gXanthan Gum 2 teaspoons 3 teaspoons 1 tablespoonWhite Sugar 1 tablespoon 1 12 tablespoons 2 tablespoonsMixed Grain 14 cup 13 cup 12 cupBrown Rice Flour 40g 45g 60gSalt 34 teaspoon 1 teaspoon 1 12 teaspoons Besan Flour 40g 45g 60gWhite Rice Flour 150g 195g 260gDried Yeast 1 teaspoon 1 12 teaspoons 1 12 teaspoons | |||
** For mixed grain, we use a combination of sesame seeds, poppy seeds, sunflower seeds and pepitas.
| Gluten Free Rice & Besan Bread | 750g 1kg 1.25kg | ||
| Luke-warm WaterEggs, lightly whiskedVegetable OilWhite VinegarWhite Rice FlourArrowroot, sieved Not recommended | 185g 230g | 290mls 400mls2 33 tablespoons1 teaspoon 1 teaspoon220g 275g | 4 tablespoons |
| Xanthan GumWhite SugarBrown Rice FlourSaltBesan FlourDried Yeast | 3 teaspoons 1 12 tablespoons50g1 teaspoon 1 12 teaspoons50g 1 12 teaspoons | 1 tablespoon2 tablespoons60g60g 1 12 teaspoons | |
| Yeast-free Lemon & Banana Bread** | 750g 1kg 1.25kg | ||
| Vegetable oil 40mls 3 tablespoons 80mlsEggs, lightly whisked 1 2 3Buttermilk* 140mls 180mls 200mlsHoney 2 tablespoons 14 cup 17 Salt 14 teaspoon 14 teaspoonFinely grated lemon rindRipe banana, mashedSelf-raising Flour | 3 teaspoons3 teaspoons130g370g | 1 tablespoon150g450g | 3 cup1 tablespoon160g560g |
*We recommend you do not use buttermilk substitutes (ie: milk with lemon or vinegar) for this recipe as the un-controlled acid levels may have an impact on the flavour and texture of the bread.
**We recommend the light crust setting for this loaf
| Yeast Free Multigrain Loaf | 750g | 1kg | 1.25kg |
| Vegetable Oil | 2 1⁄2 tablespoons | 3 tablespoons | 4 tablespoons |
| Eggs, lightly whisked 2 | 2 | 3 | |
| Milk | 150mls 180mls | 225mls | |
| Salt 1⁄4 teaspoon | 1⁄4 teaspoon | 1⁄2 teaspoon | |
| White Sugar | 1 1⁄2 tablespoons | 2 tablespoons | 2 1⁄2 tablespoons |
| Mixed Grain | 1⁄4 cup | 1⁄3 cup | 1⁄2 cup |
| Self-raising Flour | 420g | 500g | 650g |
** For mixed grain, we use a combination of sesame seeds, poppy seeds, sunflower seeds and pepitas**
| Capsicum & Cheese Yeast Free Bread | 750g 1kg 1.25kg | ||
| Vegetable Oil 2 tablespoons | 3 12 tablespoons | 4 tablespoons | |
| Eggs, lightly whisked 2 2 | 3 | ||
| Buttermilk* 125mls 180mls | 225mls | ||
| Shredded Parmesan Cheese | 14 cup 14 cup 17 | 3 cup | |
| Salt 14 teaspoon 14 teaspoon | 1/2 teaspoon | ||
| Sugar 1 teaspoon 2 teaspoons | 3 teaspoons | ||
| Self-raising Flour | 375g | 500g | 625g |
| Fruit & Nut Dispenser | |||
| Red Capsicum, finely chopped | 14 cup 17 | 3 cup 12 cup |
*We recommend you do not use buttermilk substitutes (ie: milk with lemon or vinegar) for this recipe as the un-controlled acid levels may have an impact on the flavour and texture of the bread.
Wheat Breads Menu 4
To use the Wheat Bread setting:
- Ensure the kneading blade is in the bread pan.
- Place the ingredients into the bread pan in the order listed.
- Wipe any spills from the outside of the pan. Place the pan into the bread maker and close the lid. Add the specified ingredients to the fruit and nut dispenser (if applicable).
- Turn the power on from the power point.
-
Press the MENU button to select menu 4 (Wheat). Press the SIZE button to select the loaf size. Press the CRUST button to select your desired crust colour.
-
Press START. Bread will be baked in the time indicated on the screen.
Note: Mixing will not commence straight away as there is a 30 minute pre-heat feature on this setting.
- On completion, use oven mitts to remove the bread pan from the baking chamber. Stand for 10 minutes before turning onto a wire rack to cool. When cool, ensure the kneading blade is removed from the base of the bread before cutting.
| Wholemeal Bread 750g 1kg 1.25kg | |||
| Luke-warm Water 320mls 420mls 520mlsButter 30g 40g 50gSalt 1 1⁄2 teaspoons 2 teaspoons 2 1⁄2 teaspoonsBrown Sugar 1 1⁄2 tablespoons 2 tablespoons 2 1⁄2 tablespoonsSkim Milk Powder 2 tablespoons 3 tablespoons 4 tablespoonsBread Improver 1 teaspoon 1 teaspoon Wholemeal Plain Flour 540g 700g 860gDried Yeast 1 1⁄2 teaspoons 1 1⁄2 teaspoons 2 teaspoons | 1 teaspoon | 1 teaspoon | 1 teaspoon |
| 540g 700g 860g | |||
| 1 1⁄2 teaspoons 1 1⁄2 teaspoons 2 teaspoons | |||
| Multigrain 750g 1kg 1.25kg | |||
| Luke-warm Water 260mls | 350mls 440mls | ||
| Butter 20g 30g 40g | |||
| Salt 34 teaspoon 1 teaspoon | 112 teaspoons | ||
| Brown Sugar 1 tablespoon | 112 tablespoons 2 tablespoons | ||
| Skim Milk Powder 2 tablespoons | 212 tablespoons 3 tablespoons | ||
| Grain Mix | 13 cup | 12 cup | 34 cup |
| Plain Flour | 180g | 240g | 300g |
| Wholemeal Plain Flour | 215g | 285g | 360g |
| Dried Yeast | 1 teaspoon 112 teaspoons | 2 teaspoons |
** For mixed grain, we use a combination of sesame seeds, poppy seeds, sunflower seeds and pepitas**
| Soy and Linseed Bread | 750g 1kg 1.25kg | ||
| Luke-warm Water 240mls | 320mls 430mls | ||
| Butter 20g 30g 40g | |||
| Linseed Meal | 2 tablespoons | 3 tablespoons | 4 tablespoons |
| Soy Compound | 14 cup | 14 cup | 14 cup |
| Salt | 1 teaspoon | 112 teaspoons | 2 teaspoons |
| Brown Sugar 1 tablespoon | 112 tablespoons | 2 tablespoons | |
| Skim Milk Powder 1 tablespoon | 2 tablespoons | 212 tablespoons | |
| Bread Improver | 1 teaspoon 1 teaspoon | 1 teaspoon | |
| Wholemeal Plain Flour | 160g | 210g | 280g |
| Plain Flour | 220g | 285g | 380g |
| Dried Yeast | 1 teaspoon 112 teaspoons | 112 teaspoons | |
| Rye Bread 750g 1kg 1.25kg | |||
| Luke-warm Water 240mls | 320mls 430mls | ||
| Butter 20g 30g 40g | |||
| Salt 1 teaspoon 112 teaspoons | 2 teaspoons | ||
| Molasses 14 cup 14 cup 14 cup | |||
| Caraway Seeds 1 teaspoon 112 teaspoons 2 teaspoons | |||
| Milk Powder | 1 tablespoon | 112 tablespoons | 2 tablespoons |
| Bread Improver | 1 teaspoon | 1 teaspoon | 1 teaspoon |
| Wholemeal Plain Flour | 160g | 210g | 280g |
| Rye Flour | 220g | 285g | 380g |
| Dried Yeast | 1 teaspoon | 112 teaspoons 112 | teaspoons |
| Sunflower and Oatmeal Bread | 750g 1kg 1.25kg | ||
| Luke-warm Water 250mls | 315mls 415mls | ||
| Butter 30g 40g 50g | |||
| Salt | 1 teaspoon | 1 12 teaspoons 2 teaspoons | |
| Honey | 2 tablespoons | 2 12 tablespoons | 3 tablespoons |
| Skim Milk Powder | 1 tablespoon | 1 12 tablespoon | 2 12 tablespoons |
| Bread Improver | 1 teaspoon | 1 teaspoon | 1 teaspoon |
| Whole Wheat Flour | 100g | 150g | 200g |
| Plain Flour | 150g | 300g | 410g |
| Oatmeal 50g 70g 100g | |||
| Dried Yeast | 1 teaspoon | 1 12 teaspoons 1 12 teaspoons | |
| Fruit and Nut Dispenser Sunflower Seeds | 14 cup 12 cup | 23 cup | |
| Wholemeal Raisin and Nut | 750g 1kg 1.25kg | ||
| Luke-warm Water 250mls | 315mls 380mls | ||
| Butter 30g 40g 50g | |||
| Salt 1 teaspoon 1 1⁄2 teaspoons | 2 teaspoons | ||
| Brown Sugar 1 tablespoon | 1 1⁄2 tablespoons | 2 tablespoons | |
| Skim Milk Powder 1 tablespoon | 1 1⁄2 tablespoons | 2 1⁄2 tablespoons | |
| Bread Improver | 1 teaspoon 1 teaspoon | 1 teaspoon | |
| Wholemeal Plain Flour | 350g | 460g | 580g |
| Dried Yeast | 1 teaspoon 1 1⁄2 teaspoons | 1 1⁄2 teaspoons | |
| Fruit and Nut Dispenser | |||
| Raisins | 1⁄4 cup | 1⁄3 cup | 1⁄2 cup |
| Walnuts, chopped | 1⁄4 cup | 1⁄4 cup | 1⁄3 cup |
| Muesli Bread 750g 1kg 1.25kg | |||
| Luke-warm Water 320mls | 360mls 390mls | ||
| Butter 20g 40g 60g | |||
| Salt 1 teaspoon 1 1⁄2 teaspoons | 2 teaspoons | ||
| Brown Sugar | 1 tablespoon 1 1⁄2 tablespoons | 2 tablespoons | |
| Skim Milk Powder 1 tablespoon | 1 1⁄2 tablespoons | 2 tablespoons | |
| Bread Improver | 1 teaspoon 1 teaspoon | 1 teaspoon | |
| Wholemeal Flour | 150g | 175g | 225g |
| Plain Flour | 320g | 380g | 420g |
| Dried Yeast | 1 teaspoon 1 1⁄2 teaspoons | 1 1⁄2 teaspoons | |
| Fruit and Nut Dispenser Muesli, toasted | 1⁄2 cup | 2⁄3 cup | 3⁄4 cup |
| Pumpernickel Bread 750g | 1kg 1.25kg | ||
| Luke-warm Water 250mls | 270mls 360mls | ||
| Butter 30g 40g 50g | |||
| Skim Milk Powder 2 tablespoons | 3 tablespoons | 4 tablespoons | |
| Cocoa Powder, sieved 2 tablespoons | 212 tablespoons | 3 tablespoons | |
| Treacle 14 cup | 13 cup 12 cup | ||
| Salt 1 teaspoon 112 teaspoons | 2 teaspoons | ||
| Bread Improver | 1 teaspoon 1 teaspoon | 1 teaspoon | |
| Rye Flour | 90g 120g | 140g | |
| Wholemeal Flour | 300g | 405g | 460g |
| Dried Yeast | 1 teaspoon 112 teaspoons | 112 teaspoons |
Sweet Breads Menu 5
To use the Sweet Bread setting:
- Ensure the kneading blade is in the bread pan.
- Place the ingredients into the bread pan in the order listed.
- Wipe any spills from the outside of the pan. Place the pan into the bread maker and close the lid. Add the specified ingredients to the fruit and nut dispenser (if applicable).
- Turn the power on from the power point.
- Press the MENU button to select menu 5 (Sweet). Press the SIZE button to select the loaf size. Press the CRUST button to select your desired crust colour.
Note: Due to the amount of sugar in sweet bread, we recommend selecting light crust.
- Press START. Bread will be baked in the time indicated on the screen.
- On completion, use oven mitts to remove the bread pan from the baking chamber. Stand for 10 minutes before turning onto a wire rack to cool. When cool, ensure the kneading blade is removed from the base of the bread before cutting.
| Cinnamon and Raisin Bread | 750g 1kg 1.25kg | ||
| Luke-warm Water 240mls | 300mls 340mls | ||
| Ground Cinnamon 2 teaspoons | 2 12 teaspoons | 3 teaspoons | |
| Butter 20g 40g 60g | |||
| Salt 1 teaspoon 2 teaspoons | 2 12 teaspoons | ||
| Brown Sugar 2 tablespoons | 2 12 tablespoons | 3 tablespoons | |
| Skim Milk Powder | 1 tablespoon | 2 tablespoons 2 12 tablespoons | |
| Bread Improver | 1 teaspoon 1 teaspoon | 1 teaspoon | |
| Plain flour | 380g | 415g | 550g |
| Dried Yeast | 1 12 teaspoons 1 12 | teaspoons 1 12 teaspoons | |
| Fruit and Nut Dispenser | |||
| Sultanas or Raisins | 12 cup | 23 cup | 34 cup |
| Chocolate Bread 750g 1kg | 1.25kg | ||
| Luke-warm Water 250mls | 300mls 360mls | ||
| Butter 20g 40g 60g | |||
| Cocoa Powder, sifted 2 tablespoons 3 tablespoons 4 tablespoons | |||
| Salt 1 1⁄2 teaspoons 2 teaspoons 2 1⁄2 teaspoons | |||
| Sugar 2 tablespoons 3 tablespoons 4 tablespoons | |||
| Skim Milk Powder 1 tablespoon | 2 tablespoons 2 1⁄2 tablespoons | ||
| Bread Improver | 1 teaspoon | 1 teaspoon | 1 teaspoon |
| Chocolate Chips | 1⁄2 cup | 3⁄4 cup | 2⁄3 cup |
| Plain Flour | 410g | 440g | 480g |
| Dried Yeast | 1 teaspoon | 1 1⁄2 teaspoons 1 1⁄2 teaspoons | |
| Banana and Macadamia Bread | 750g 1kg 1.25kg | ||
| Luke-warm Water 100mls | 150mls 210mls | ||
| Butter 40g | 50g 60g | ||
| Ripe Banana, mashed | 170g | 200g | 250g |
| Eggs, lightly whisked | 1 | 1 | 1 |
| Salt 1 1⁄2 teaspoons 2 teaspoons | |||
| Sugar 3 tablespoons 3 1⁄2 tablespoons | 4 tablespoons | ||
| Skim Milk Powder 2 tablespoons | 2 1⁄2 tablespoons | 3 tablespoons | |
| Bread Improver | 1 teaspoon | 1 teaspoon | 1 teaspoon |
| Plain Flour | 390g | 450g | 510g |
| Dried Yeast | 1 teaspoon | 1 1⁄2 teaspoons 1 1⁄2 teaspoons | |
| Fruit and Nut Dispenser | |||
| Macadamia Nuts,Roughly Chopped | 1⁄3 cup | 1⁄2 cup | 3⁄4 cup |
| Apple Spice Bread 750g 1kg 1.25kg | |||
| Luke-warm Water 190mls | 280mls 375g | ||
| Butter 20g 40g 60g | |||
| Ground Cinnamon 2 teaspoons | 212 teaspoons | 3 teaspoons | |
| Ground Cloves 14 teaspoon | 12 teaspoon 12 teaspoon | ||
| Salt 112 teaspoons 2 teaspoons | |||
| Brown Sugar 2 tablespoons | 212 tablespoons | 3 tablespoons | |
| Skim Milk Powder | 1 tablespoon | 112 tablespoons | 2 tablespoons |
| Bread Improver | 1 teaspoon | 1 teaspoon | 1 teaspoon |
| Plain Flour | 360g | 510g | 660g |
| Dried Yeast | 112 teaspoons 2 teaspoons | ||
| Fruit and Nut Dispenser | |||
| Dried Apples, chopped | 13 cup | 23 cup | 34 cup |
| Apricot Bread | 750g 1kg 1.25kg | ||
| Luke-warm Water 175mls | 240mls 320mls | ||
| Butter 20g 40g 60g | |||
| Nutmeg, ground | 1 teaspoon | 212 teaspoons 3 teaspoons | |
| Salt 1 teaspoon | 2 teaspoons 212 teaspoons | ||
| Brown Sugar 112 tablespoons | 2 tablespoons | 3 tablespoons | |
| Skim Milk Powder | 1 tablespoon | 112 tablespoons | 2 tablespoons |
| Bread Improver | 1 teaspoon | 1 teaspoon | 1 teaspoon |
| Plain Flour | 340g | 450g | 550g |
| Dried Yeast | 1 teaspoon | 112 teaspoons 2 teaspoons | |
| Fruit and Nut Dispenser | |||
| Dried Apricots, chopped | 12 cup | 23 cup | 34 cup |
| Mixed Fruit Bread 750g 1kg 1.25kg | |||
| Luke-warm Water 175mls | 260mls 350mls | ||
| Butter 20g 40g 50g | |||
| Ground Cloves 12 teaspoon | 112 teaspoons 2 teaspoons | ||
| Ground Nutmeg 112 teaspoons | 212 teaspoons 3 teaspoons | ||
| Salt 112 teaspoons 2 teaspoons | 212 teaspoons | ||
| Brown Sugar 2 tablespoons | 2 tablespoons 3 tablespoons | ||
| Skim Milk Powder | 1 tablespoon | 112 tablespoons | 2 tablespoons |
| Bread Improver | 1 teaspoon | 1 teaspoon | 1 teaspoon |
| Plain Flour | 340g | 475g | 615g |
| Dried Yeast | 2 teaspoons 2 teaspoons | 212 teaspoons | |
| Fruit and Nut Dispenser | |||
| Mixed Dried Fruit | 13 cup | 23 cup | 34 cup |
| Maple Walnut Bread | 750g 1kg 1.25kg | ||
| Luke-warm Water 170mls | 190mls 255mls | ||
| Butter 20g 40g 60g | |||
| Salt 1 teaspoon | 1 teaspoon | 1 12 teaspoons | |
| Maple Syrup | 14 cup | 12 cup | 12 cup |
| Skim Milk Powder | 1 tablespoon | 1 12 tablespoons | 2 tablespoons |
| Bread Improver | 1 teaspoon | 1 teaspoon | 1 teaspoon |
| Plain Flour | 200g | 270g | 340g |
| Wholemeal Plain Flour | 200g | 270g | 340g |
| Dried Yeast | 1 12 teaspoons 2 teaspoons 2 teaspoons | ||
| Fruit and Nut Dispenser | |||
| Walnuts, chopped | 13 cup | 23 cup | 34 cup |
| Fig and Golden Syrup Bread | 750g 1kg 1.25kg | ||
| Luke-warm Water 210mls | 275mls 360mls | ||
| Butter 20g 40g 60g | |||
| Salt 1 teaspoon 2 teaspoons | 2 teaspoons | ||
| Ground Ginger 1 teaspoon | 1 teaspoon 1 12 teaspoons | ||
| Golden Syrup 14 cup 12 cup 12 cup | |||
| Skim Milk Powder 1 tablespoon | 1 12 tablespoons | 2 tablespoons | |
| Bread Improver | 1 teaspoon 1 teaspoon | 1 teaspoon | |
| Plain Flour | 380g | 440g | 550g |
| Dried Yeast | 1 12 teaspoons | 2 teaspoons | 2 teaspoons |
| Fruit and Nut Dispenser | |||
| Dry Figs, chopped | 12 cup | 23 cup | 34 cup |
| Ginger Spicebread 750g | 1kg | 1.25kg | |
| Luke-warm Water 240mls | 280mls | 375mls | |
| Butter 20g | 40g | 50g | |
| Salt | 1 1⁄2 teaspoons | 2 teaspoons | 2 1⁄2 teaspoons |
| Ground Ginger 2 teaspoons | 2 1⁄2 teaspoons | 3 teaspoons | |
| Golden Syrup 1⁄4 cup | 1⁄4 cup 1⁄4 cup | ||
| Ground All spice | 1 teaspoon | 1 teaspoon | 1 1⁄2 teaspoon |
| Bread Improver | 1 teaspoon | 1 teaspoon | 1 teaspoon |
| Plain Flour | 380g | 480g | 600g |
| Dried Yeast | 1 1⁄2 teaspoons | 2 teaspoons | 2 teaspoons |
| Fruit and Nut Dispenser | |||
| Sultanas 1⁄4 cup | 1⁄3 cup | 1⁄2 cup | |
| Slivered Almonds | 1⁄4 cup 1⁄4 cup | 1⁄3 cup |
French Breads Menu 6
To use the French Bread setting:
- Ensure the kneading blade is in the bread pan.
- Place the ingredients into the bread pan in the order listed.
- Wipe any spills from the outside of the pan. Place the pan into the bread maker and close the lid. Add the specified ingredients to the fruit and nut dispenser (if applicable).
-
Turn the power on from the power point.
-
Press the MENU button to select menu 6 (French). Press the SIZE button to select the loaf size. Press the CRUST button to select your desired crust colour.
- Press START. Bread will be baked in the time indicated on the screen.
- On completion, use oven mitts to remove the bread pan from the baking chamber. Stand for 10 minutes before turning onto a wire rack to cool. When cool, ensure the kneading blade is removed from the base of the bread before cutting.
| French Bread 750g 1kg 1.25kg | |||
| Luke-warm Water 260mls | 315mls 370mls | ||
| Butter | 30g | 40g | 50g |
| Salt | 1 teaspoon | 2 teaspoons | 3 teaspoons |
| Sugar | 1 tablespoon | 1 tablespoon | 1 12 tablespoons |
| Bread Improver | 1 teaspoon | 1 teaspoon | 1 teaspoon |
| Plain Flour | 460g | 610g | 755g |
| Dried Yeast | 1 teaspoon | 1 12 teaspoons | 2 teaspoons |
| Sourdough 750g 1kg 1.25kg | |||
| Luke-warm Water 170mls | 210mls 250mls | ||
| Butter | 15g | 20g | 30g |
| Natural Yoghurt | 12 cup | 2/3 cup | 34 cup |
| Lemon Juice | 2 teaspoons | 1 tablespoon | 1 12 tablespoons |
| Salt | 1 teaspoon | 1 12 teaspoons | 2 teaspoons |
| Sugar | 1 tablespoon | 2 tablespoons | 3 tablespoons |
| Bread Improver | 1 teaspoon | 1 teaspoon | 1 teaspoon |
| Wholemeal Plain Flour | 420g | 545g | 670g |
| Dried Yeast | 1 teaspoon | 1 12 teaspoons | 2 teaspoons |
To use the Cake setting:
- Ensure the kneading blade is in the bread pan.
- Place the ingredients into the bread pan in the order listed.
Note: We recommend using packet cake mixes on this setting. If using a packet cake mix, add the wet ingredients first and the packet pre-mix last.
-
Wipe any spills from the outside of the pan. Place the pan into the bread maker and close the lid. Add the specified ingredients to the fruit and nut dispenser (if applicable).
-
Turn the power on from the power point.
-
Press the MENU button to select menu 7 (Cake). Press the SIZE button to select the cake size. Press the CRUST button to select your desired crust colour.
Note: If using a packet cake mix, select 1kg size, light crust colour
-
Press START. Cake will be cooked in the time indicated on the screen.
-
On completion, use oven mitts to remove the bread pan from the baking chamber. Stand for 10 minutes before turning onto a wire rack to cool. When cool, ensure the kneading blade is removed from the base of the cake before cutting.
Handy hints for optimum results.
- It is normal for cakes to rise only 1/2 way up the bread pan. The texture should be nice and light.
- Due to the high sugar and fat content in cakes, we suggest you always use the Light crust colour setting to prevent the sides from burning.
- Avoid using double quantities of cake mix, the larger cake will not cook through and will be dense in texture in the bread maker.
- We recommend the use of packet cake mixes, available from all supermarkets.
- Allow the cake to cool in the bread pan for at least 10 minutes before removing to a cooling rack.
- Loosen the sides with a plastic spatula and gently slide out.
Do not use Time Delay Setting when baking cakes as the ingredients will spoil.
Extra Turbo Breads Menu 8
Using this Extra Turbo menu, basic breads will be ready in about 80 minutes.
To use the Extra Turbo Bread setting:
- Ensure the kneading blade is in the bread pan.
- Place the ingredients into the bread pan in the order listed.
Note: We only recommend using the Basic bread recipes (menu 1) on the Extra Turbo setting. - Wipe any spills from the outside of the pan. Place the pan into the bread maker and close the lid. Add the specified ingredients to the fruit and nut dispenser (if applicable).
-
Turn the power on from the power point.
-
Press the MENU button to select menu 8 (Extra Turbo). Press the SIZE button to select the loaf size. Press the CRUST button to select your desired crust colour.
- Press START. Bread will be baked in the time indicated on the screen.
- On completion, use oven mitts to remove the bread pan from the baking chamber. Stand for 10 minutes before turning onto a wire rack to cool. When cool, ensure the kneading blade is removed from the base of the bread before cutting.
Note: Due to the decreased rising time, it is normal for extra turbo breads to be quite dense.
To use the Jam setting:
- Ensure the kneading blade is in the bread pan.
- Prepare the fruit as instructed. Place the ingredients into the bread pan in the order listed.
- Wipe any spills from the outside of the pan. Place the pan into the bread maker and close the lid.
- Turn the power on from the power point.
- Press the MENU button to select menu 9 (Jam).
- Press START. Jam will be ready in the time indicated on the screen.
-
On completion, use oven mitts to remove the bread pan from the baking chamber. Immediately pour jam into sterilised jars; seal immediately and turn jars upside down until cold. This will sterilize the lid and help create a vacuum. Jam will set on cooling. Cool to room temperature before storing in the refrigerator.
-
Don't be tempted to increase these recipes, as they may overflow.
- If trying your own jam recipe in the bread maker for the first time, be sure to keep a close eye on your jam to make sure it doesn't overflow.
- To sterilise jars, place clean, glass jars, without any chips or cracks, in a large saucepan and cover with cold water. Place the lid on and bring to boil. Boil for 20 minutes. Remove the jars using tongs on the outside of the jar only. Stand upright on a heat-proof board. Do not dry, as their own heat will quickly dry them.
- Alternatively, place clean, glass jars, without any chips or cracks, into the oven at 100°C for 20-25 minutes. Remove from the oven using oven mitts and fill immediately with hot jam.
- Jam setta is a powder containing pectin that assists Jam to set and “gel”. It can be bought from supermarkets in 50g packets.
Apple & Rhubarb Jam Makes: 500mls
1 apple, washed, peeled and chopped
300g rhubarb, washed and chopped
150mls water
1 cup sugar
2 tablespoons lemon juice
3 tablespoon Jam Setta
Traditional Marmalade Makes: 500mls
500g Seville oranges, washed, halved and thinly sliced
1 12 cups sugar
2 tablespoons lemon juice
3 tablespoons Jam Setta
Strawberry Jam Makes: 500mls
500g strawberries, washed, hulled and chopped
1 12 cups sugar
3 tablespoons Jam Setta
Kiwi Jam Makes: 450mls
6 large kiwi fruit, peeled and chopped
1 cup sugar
1 tablespoon water
1 tablespoon lemon juice
3 tablespoons Jam Setta
Plum Jelly Makes: 500mls
500g fresh plums, washed, peeled, deseeded and chopped
1 12 cups sugar
1 tablespoon lemon juice
3 tablespoons Jam Setta
Pasta Dough Menu 11
To use the Pasta Dough setting:
- Ensure the kneading blade is in the bread pan.
- Place the ingredients into the bread pan in the order listed.
- Wipe any spills from the outside of the pan. Place the pan into the bread maker and close the lid.
- Turn the power on from the power point.
Basic Pasta Dough
500g plain flour
4 x 60g eggs
12 teaspoon salt
125mls water
-
Using a pasta machine, roll out dough into thin sheets. You may need to pass the pasta dough through the machine several times, reducing the thickness with each roll. Cut pasta into desired style. Hang over a rack or rolling pin to dry if not using immediately.
-
Press the MENU button to select menu 11 (Pasta Dough).
- Press START. Dough will be complete in the time indicated on the screen. Follow instructions given after each recipe.
Note: Pasta dough should feel soft but not sticky. If pasta dough feels sticky to touch, add some additional flour.
Pumpkin and Ricotta Ravioli Serves: 4
1 quantity basic pasta dough
Filling
150g pumpkin, peeled, baked and mashed
100g ricotta, mashed
Salt and pepper, to taste
300g breadcrumbs
Pinch of nutmeg
1 teaspoon garlic, minced
-
Combine all filling ingredients in a large bowl. Mix well to combine. If the mixture appears too dry, add an egg to combine. Season to taste with salt and pepper.
-
Divide dough into 4 portions. Roll each portion into a 25cm x 25cm square.
-
Place 2 teaspoons of filling 5cm apart on 2 sheets of the rolled out dough. Brush edges with a little water or beaten egg and top with remaining pieces of rolled pasta. Press firmly between the filling and sides to seal in filling. Cut ravioli into squares using a pastry wheel.
-
Cook ravioli in a large saucepan of boiling water for 5-8 minutes or until al dente. Drain well and serve with your favourite sauce.
Fettuccine with Tomato Sauce
1 quantity basic pasta dough
Sauce
3 tablespoons olive oil
1 onion, chopped,
2 x 400g cans crushed tomatoes
2 tablespoons tomato paste
Salt and pepper, to taste
^1/_2 cup parmesan cheese
-
To make the sauce, heat the oil in a frypan. Add onion and cook until transparent.
-
Add the tomatoes, tomato paste and salt and pepper to taste. Allow to simmer for 20 minutes.
-
To make pasta, using a pasta machine, roll out pasta dough into three 10cm x 40cm rectangular pieces. Using the pasta machine, roll the pasta through the fettuccini guide to cut pasta.
-
Bring a large saucepan of water to the boil. Add 1 tablespoon of oil and cook fettuccini for 5-8 minutes or until al dente. Serve with fresh tomato sauce and parmesan.
Spaghetti Carbonara
1 quantity pasta dough
Sauce
3 tablespoons olive oil
2 cloves garlic, crushed
6 rashes bacon, chopped
^1/_3 cup wine
14 cup cheddar cheese
12 cup parmesan cheese
4 eggs
Pepper to taste
2 tablespoons parsley, chopped
-
To make sauce, heat oil in a large frypan and add garlic. Stir until fragrant. Add bacon and cook until crisp. Add wine and simmer for 1 minute.
-
Whisk cheese, eggs, pepper and parsley in a bowl. Add mixture to the pan and stir until well combined over low heat.
-
Using a pasta machine, roll out pasta dough into three 10cm x 40cm rectangular pieces. Using the pasta machine, roll the pasta through the spaghetti guide to cut pasta.
-
Bring a large saucepan of water to the boil. Add 1 tablespoon of oil and cook spaghetti for 5-8 minutes or until al dente.
-
Return the cooked pasta to the pan and toss through sauce until well combined. Serve warm with extra parmesan cheese.
Pizza Dough / Dough Menu 12
This setting can be used for all types of dough, not just pizza dough.
This menu allows you to create a variety of doughs for breads, croissants, bread rolls and pizza to bake in a conventional oven.
Once the cycle is complete, place the dough onto a floured surface and using floured hands, shape as desired. Prepare your baking trays by greasing them lightly with butter or oil spray, or simply by dusting them with a little flour.
Place the shaped dough onto your prepared tray and allow it to proof. Proofing allows your bread to rise, making it light and airy.
To add interest to breads, try some different shaping techniques or mix and match different glazes and toppings. These should be applied just before baking, after the dough rises (proofs) for the final time.
Bake your bread in a moderately hot (200°C/180°C fan-forced) oven until cooked through. The easiest way to test bread is to tap the top. It will sound hollow when cooked through.
Remove cooked bread from the pan or baking tray and cool on a cooling rack. Allow to cool before slicing.
Toppings
Toppings can add character and flavour to bread, but be sure when using a topping, to brush the dough with a little milk (or other glaze), so the topping has something to “grip” to. Otherwise as your bread rises and bakes, the topping will fall off.
Toppings can include seeds, such as poppy, caraway, sesame, pepitas or sunflower seeds, mixed grain, oats, dry or fresh herbs, garlic, cinnamon sugar, salt, sliced olives, sundried tomatoes, crumbled fresh cheeses, grated melting cheeses. If adding melting cheese, you may want to add this in the last 10 minutes of cooking, so it doesn't burn.
Glazes
Glazes can be brushed over the dough before or after baking; by using a clean soft pastry brush.
Crisp, shiny crust, darker golden colour – brush with beaten egg yolk before baking.
Soft, rich golden, satiny crust – brush with egg white before baking.
Soft, matt finish – brush with milk before baking.
Moist glaze that highlights the golden colour – brush with melted butter or margarine after baking.
Sweet, glossy, sticky crust – brush with sieved apricot jam after baking.
Drizzle cooled, sweet tea rings or buns with icing or dust with icing sugar before serving.
Alternatively, for a rustic artisan look, you could just sprinkle with a little extra flour before baking.
Shaping Techniques:
Rustic loaf – Working on a lightly floured surface, use the palms of your hands (dusted with flour) to gently tuck dough under itself until you get a smooth rounded top surface. Place on prepared baking tray. Using a sharp knife, make 1cm deep slashes across the top of your dough. Allow to rise before baking.
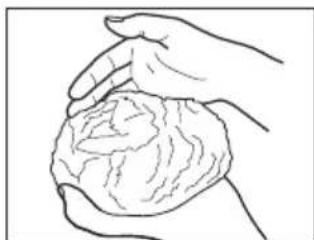
natural_image
Line drawing of two hands holding a textured, round object (no text or symbols)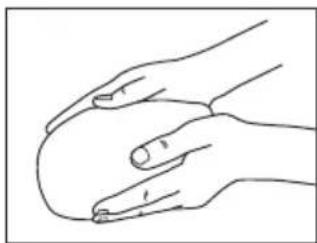
natural_image
Line drawing of two hands gently holding a rounded object (no text or symbols)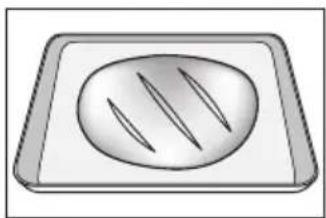
natural_image
Simple line drawing of a tray with an oval containing three diagonal lines (no text or symbols)Loaf Pan – Working on a lightly floured surface, roll the dough into a 1cm thick rectangle (the same width as your loaf pan). Starting at the shorter side, roll the dough to form a log (at this stage, you may like to brush with butter or spread/sprinkle with a flavouring such as pesto or cheese. Place log into a greased loaf pan. Allow the dough to rise to the top of the pan before baking, remembering it will rise some more as it bakes.
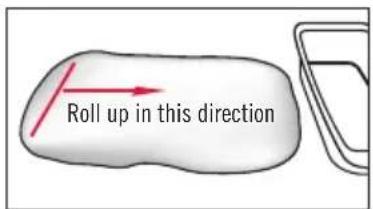
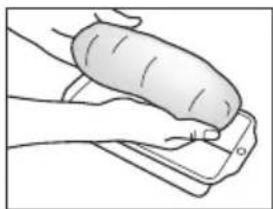
natural_image
Illustration of a hand holding a smartphone with a cylindrical object inserted (no text or symbols visible)Plaited loaf – Divide your dough into 3 equal portions. Shape into long sausages. Brush ends with a little milk or water and press together. Bring right sausage to centre, then left sausage to centre. Repeat until loaf is complete. Brush ends with milk or water to join. Tuck ends slightly under the loaf to neaten. Gently place on a prepared baking tray. Allow to rise before baking.
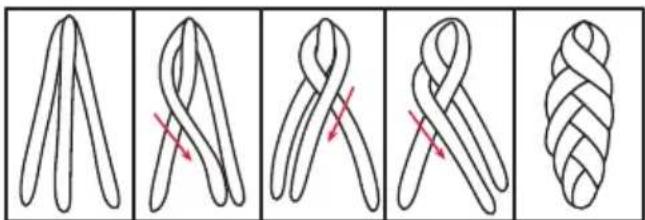
Flat bread/focaccia-style – Roll bread dough to the desired shape and size about 1cm thick. Allow to rise on a prepared baking tray. Before placing in the oven, use your knuckles or finger tips to make indents in the dough. Brush with a little oil and sprinkle with salt.
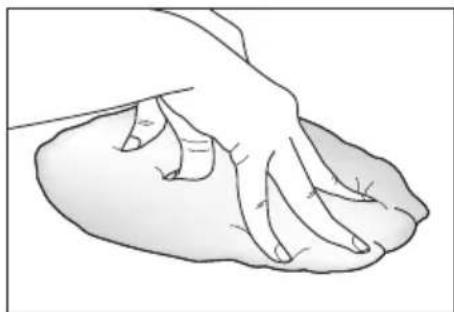
natural_image
Illustration of a hand pressing down on a smooth, rounded object (no text or symbols)Scrolls – Working on a lightly floured surface, use your fingers to flatten the dough into a 1cm thick rectangle. Starting at the shorter side, roll the dough to form a log. Spread/sprinkle with a flavouring of choice, such as pesto, cheese, brown sugar or nuts. Cut into 2cm wide pieces. Place, cut side down, touching one another in a greased lamington or cake pan. Bake.
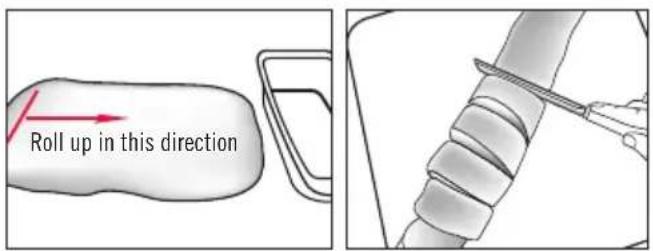
Bread sticks – roll small pieces of dough into long skinny sausages. Bake, separated on prepared baking trays until thoroughly dry and golden.
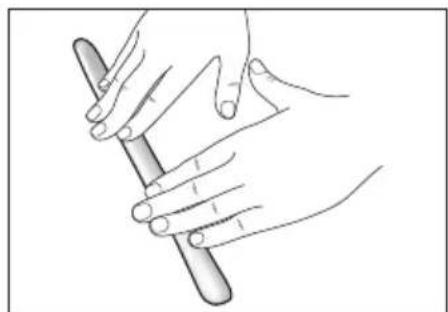
natural_image
Line drawing of two hands holding a cylindrical object (no text or symbols)Baguettes – Roll portions of dough into thick sausages. Place on prepared baking trays. Using a sharp knife, make 1cm deep slashes along the top of the dough. Allow to rise before baking.
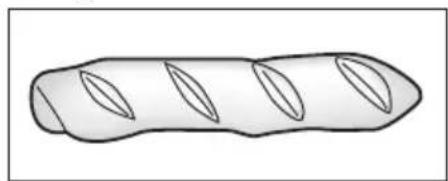
natural_image
Simple line drawing of a cylindrical object with three vertical oval cutouts (no text or symbols)Round bread rolls – Divide dough into equal portions (generally 6-8 portions). Working with one portion at a time, with floured hands, pinch and tuck dough under itself until you get a smooth rounded top surface. Place on prepared baking trays. Allow to rise slightly before baking.
Knotted bread rolls- Roll a small portion of dough into a sausage. Cross ends over and tuck one end through the loop. Place on prepared baking trays. Allow to rise slightly before baking.
Florets – Take 3 small portions of dough and roll into round balls. Place the 3 balls, side by side into a greased muffin pan. Allow to rise slightly before baking.
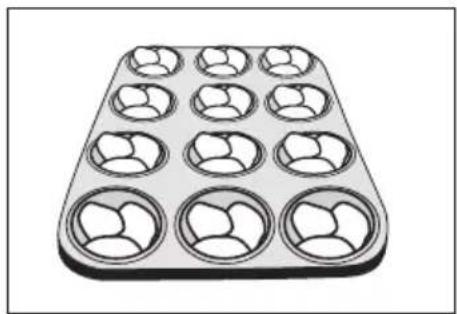
natural_image
Illustration of a 12-inch baking tray with nine circular cavities (no text or symbols)To use the Pizza Dough/ Dough setting:
- Ensure the kneading blade is in the bread pan.
- Place the ingredients into the bread pan in the order listed.
- Wipe any spills from the outside of the pan. Place the pan into the bread maker and close the lid.
- Turn the power on from the power point.
Pizza Dough Makes: 2 pizzas
290mls luke-warm water
1 teaspoon sugar
2 tablespoons olive oil
12 teaspoon salt
480g Plain flour
2 12 teaspoons Dried Yeast
-
Remove the completed dough from the bread pan. Divide dough into 2 equal portions. Roll dough on a lightly floured surface into large rounds. Place on pizza trays and top as desired.
-
Bake on 220C for 10-15 minutes or until base is crisp and cooked through.
-
Press the MENU button to select menu 12 (Pizza Dough/ Dough).
- Press START. Dough will be complete in the time indicated on the screen. Follow instructions given after each recipe.
Note: Pasta dough should feel soft but not sticky. If pasta dough feels sticky to touch, add some additional flour.
Herb Focaccia
330mls luke-warm water
1 tablespoon olive oil
12 teaspoon salt
1 tablespoon skim milk powder
2 teaspoons sugar
480g plain flour
2 12 teaspoons yeast
Topping
2 tablespoons olive oil
1 teaspoon oregano
1 teaspoon chopped basil
-
Preheat oven to 180C. Grease rectangular baking tray. Remove completed dough from bread pan.
-
Knead dough with a little extra flour until elastic and dough springs back when pressed. Shape to fit baking tray.
-
Cover and allow to rise for 30 minutes. Using your knuckles, press small indents into dough.
-
Brush surface with oil and sprinkle with herbs and bake in pre-heated oven for 30 minutes or until golden.
Hot Cross Buns Makes: 12
Dough
330mls luke-warm water
2 tablespoons Butter
1 egg
^3/_4 cup sultanas
^1/_2 teaspoon nutmeg
12 teaspoon salt
14 cup brown sugar
520g plain flour
2 12 teaspoons yeast
Crosses
80g plain flour
80mls water
2 teaspoons sugar
Glaze
2 tablespoons water
2 tablespoons sugar
1 teaspoon gelatine
-
Preheat oven to 180C. Line a baking tray with baking paper. Remove completed dough from bread pan.
-
Knead dough on a floured surface until elastic and springs back when pressed. Divide dough in 12 pieces. Shape each piece into a ball. Place close together on baking tray. Cover and allow to rise for 30 minutes.
3.CROSSES: Mix flour, water and sugar together until smooth. Pipe crosses over risen dough.
-
Bake buns for 30 minutes in pre-heated oven until golden brown.
-
GLAZE: Combine ingredients in a jug. Microwave on medium for 1-2 minutes. Brush over hot buns.
Bread Sticks
Dough
240mls luke-warm water
2 tablespoons butter
12 teaspoon salt
2 teaspoons sugar
^3/_4 teaspoon bread improver
480g plain flour
2 12 teaspoons yeast
Topping
1 teaspoon luke-warm water
1 egg white
Sesame Seeds
-
Preheat oven to 180C. Line a baking tray with baking paper. Remove completed dough from the bread pan.
-
Divide dough into 30 pieces. Roll each piece into a 20cm rope. Place 2.5cm apart on baking tray. Cover and allow dough to rise for 30 minutes.
-
Beat water with the egg white; brush dough. Sprinkle with sesame seeds. Bake for 25 minutes or until breadsticks are golden brown.
Bread Rolls
250mls luke-warm water
^1/4 cup sugar
1 egg
^3/4 teaspoon bread improver
2 tablespoons butter
520g plain flour
12 teaspoon salt
2 12 teaspoons yeast
1. Preheat oven to 180C. Line a baking tray with baking paper. Remove completed dough from bread pan.
2. Divide dough into 15 pieces and shape each piece into a ball. Place on baking tray, cover and allow to rise for 30 minutes or until doubled in size.
3. Brush with melted butter. Bake for 15 minutes or until golden brown.
Caramel Pecan Rolls
Dough
250mls luke-warm water
2 tablespoons Butter
1 egg
12 teaspoon salt
2 tablespoons sugar
520g plain flour
2 12 teaspoons yeast
Filling
100g butter, softened
^3/_4 cup brown sugar
1 cup pecan halves
2 teaspoons cinnamon
- Preheat oven to 180C. Grease and line a 22cm square baking pan. Remove completed dough from bread pan.
- Mix together butter, brown sugar, pecan halves and cinnamon.
- Roll out dough into 45cm x 22cm rectangle on lightly floured surface.
- Spread over filling. Roll up beginning at short side. Pinch edge of dough into roll to seal. Cut into 2.5cm slices and place cut sides up in pan.
- Cover and allow to rise for 1 hour or until doubled in size.
- Bake for 30 minutes until golden brown.
Chocolate Cherry Rolls
Dough
250mls luke-warm water
2 tablespoons butter
1 egg
12 teaspoon salt
2 tablespoons sugar
520g plain flour
2 12 teaspoons yeast
Filling
100g butter, softened
200g dark chocolate, chopped
1 cup glace cherries, chopped
Glaze
12 cup icing sugar
^1/_4 teaspoon vanilla essence
2 tablespoons milk
1 drop pink food colouring
-
Preheat oven to 180. Grease and line a 22cm square baking pan. Remove completed dough from bread pan.
-
Combine butter, chocolate and cherries.
-
Roll out dough into 45cm x 22cm rectangle on lightly floured surface.
-
Spread with filling. Roll up beginning at short side. Pinch edge of dough into roll to seal. Cut into 2.5cm slices and place cut side up in pan.
-
Cover and allow to rise for 1 hour or until doubled in size.
-
Bake for 30 minutes or until golden brown.
-
Combine all glaze ingredients and drizzle over rolls.
PROGRAM SETTING TIMES
| Setting No | FEATURE | LOAF CRUST | TIME | PREHEAT (hh:mm) | KNEAD1 (min.) | KNEAD2 (min.) | RISE1 (min.) | (min.) | Knock down1 (sec.) | RISE2 (min.) | Knock down2 (sec.) | RISE3 (min.) | BAKE (min.) | WARM (min.) |
| 1 | BASIC | 750g | LIGHT | 3:08 | - | 3 | 20 | 30(30°C) | 20S | 33(30°C) | 10S | 49(30°C) | 53(110°C) | 60(70°C) |
| MEDIUM | 3:16 | - | 3 | 20 | 30(30°C) | 20S | 33(30°C) | 10S | 49(30°C) | 61(110°C) | 60(70°C) | |||
| DARK | 3:26 | - | 3 | 20 | 30(30°C) | 20S | 33(30°C) | 10S | 49(30°C) | 71(110°C) | 60(70°C) | |||
| 1.0kg | LIGHT | 3:12 | - | 3 | 20 | 30(30°C) | 20S | 33(30°C) | 10S | 49(30°C) | 57(110°C) | 60(70°C) | ||
| MEDIUM | 3:20 | - | 3 | 20 | 30(30°C) | 20S | 33(30°C) | 10S | 49(30°C) | 65(110°C) | 60(70°C) | |||
| DARK | 3:30 | - | 3 | 20 | 30(30°C) | 20S | 33(30°C) | 10S | 49(30°C) | 75(110°C) | 60(70°C) | |||
| 1.25kg | LIGHT | 3:17 | - | 3 | 20 | 30(30°C) | 20S | 33(30°C) | 10S | 49(30°C) | 62(110°C) | 60(70°C) | ||
| MEDIUM | 3:25 | - | 3 | 20 | 30(30°C) | 20S | 33(30°C) | 10S | 49(30°C) | 70(110°C) | 60(70°C) | |||
| DARK | 3:35 | - | 3 | 20 | 30(30°C) | 20S | 33(30°C) | 10S | 49(30°C) | 80(110°C) | 60(70°C) | |||
| 2 | TURBO | 750g | LIGHT | 2:06 | - | 2 | 20 | - | - | - | - | 50(35°C) | 54(115°C) | 60(70°C) |
| MEDIUM | 2:09 | - | 2 | 20 | - | - | - | - | 50(35°C) | 57(115°C) | 60(70°C) | |||
| DARK | 2:14 | - | 2 | 20 | - | - | - | - | 50(35°C) | 62(115°C) | 60(70°C) | |||
| 1.0kg | LIGHT | 2:07 | - | 2 | 20 | - | - | - | - | 50(35°C) | 55(115°C) | 60(70°C) | ||
| MEDIUM | 2:10 | - | 2 | 20 | - | - | - | - | 50(35°C) | 58(115°C) | 60(70°C) | |||
| DARK | 2:15 | - | 2 | 20 | - | - | - | - | 50(35°C) | 63(115°C) | 60(70°C) | |||
| 1.25kg | LIGHT | 2:09 | - | 2 | 20 | - | - | - | - | 50(35°C) | 57(115°C) | 60(70°C) | ||
| MEDIUM | 2:12 | - | 2 | 20 | - | - | - | - | 50(35°C) | 60(115°C) | 60(70°C) | |||
| DARK | 2:17 | - | 2 | 20 | - | - | - | - | 50(35°C) | 65(115°C) | 60(70°C) | |||
| 3 | GLUTEN/YEAST FREE | 750g | LIGHT | 2:08 | - | 3 | 15 | - | - | 25(35°C) | 30S | 30(35°C) | 55(110°C) | 60(70°C) |
| MEDIUM | 2:16 | - | 3 | 15 | - | - | 25(35°C) | 30S | 30(35°C) | 63(110°C) | 60(70°C) | |||
| DARK | 2:26 | - | 3 | 15 | - | - | 25(35°C) | 30S | 30(35°C) | 73(110°C) | 60(70°C) | |||
| 1.0kg | LIGHT | 2:10 | - | 3 | 15 | - | - | 25(35°C) | 30S | 30(35°C) | 57(110°C) | 60(70°C) | ||
| MEDIUM | 2:18 | - | 3 | 15 | - | - | 25(35°C) | 30S | 30(35°C) | 65(110°C) | 60(70°C) | |||
| DARK | 2:28 | - | 3 | 15 | - | - | 25(35°C) | 30S | 30(35°C) | 75(110°C) | 60(70°C) | |||
| 1.25kg | LIGHT | 2:13 | - | 3 | 15 | - | - | 25(35°C) | 30S | 30(35°C) | 60(110°C) | 60(70°C) | ||
| MEDIUM | 2:21 | - | 3 | 15 | - | - | 25(35°C) | 30S | 30(35°C) | 68(110°C) | 60(70°C) | |||
| DARK | 2:31 | - | 3 | 15 | - | - | 25(35°C) | 30S | 30(35°C) | 78(110°C) | 60(70°C) | |||
| 4 | WHEAT | 750g | LIGHT | 3:37 | 30(35°C) | 3 | 20 | 38(35°C) | 20S | 25(35°C) | 8S | 50(35°C) | 51(110°C) | 60(70°C) |
| MEDIUM | 3:45 | 30(35°C) | 3 | 20 | 38(35°C) | 20S | 25(35°C) | 8S | 50(35°C) | 59(110°C) | 60(70°C) | |||
| DARK | 3:55 | 30(35°C) | 3 | 20 | 38(35°C) | 20S | 25(35°C) | 8S | 50(35°C) | 69(110°C) | 60(70°C) | |||
| 1.0kg | LIGHT | 3:42 | 30(35°C) | 3 | 20 | 38(35°C) | 20S | 25(35°C) | 8S | 50(35°C) | 56(110°C) | 60(70°C) | ||
| MEDIUM | 3:50 | 30(35°C) | 3 | 20 | 38(35°C) | 20S | 25(35°C) | 8S | 50(35°C) | 64(110°C) | 60(70°C) | |||
| DARK | 4:00 | 30(35°C) | 3 | 20 | 38(35°C) | 20S | 25(35°C) | 8S | 50(35°C) | 74(110°C) | 60(70°C) | |||
| 1.25kg | LIGHT | 3:48 | 30(35°C) | 3 | 20 | 38(35°C) | 20S | 25(35°C) | 8S | 50(35°C) | 62(110°C) | 60(70°C) | ||
| MEDIUM | 3:56 | 30(35°C) | 3 | 20 | 38(35°C) | 20S | 25(35°C) | 8S | 50(35°C) | 70(110°C) | 60(70°C) | |||
| DARK | 4:06 | 30(35°C) | 3 | 20 | 38(35°C) | 20S | 25(35°C) | 8S | 50(35°C) | 80(110°C) | 60(70°C) |
PROGRAM SETTING TIMES
| Setting . No | FEATURE | LOAF | CRUST | TIME (hh:mm) | PREHEAT (min.) | KNEAD1 (min.) | KNEAD2 (min.) | RISE1 (min.) | Knock down1 (sec.) | RISE2 (min.) | Knock down2 (sec.) | RISE3 (min.) | BAKE (min.) | WARM (min.) |
| 5 | SWEET | 750g | LIGHT | 3:15 | - | 3 | 20 | 40(30°C) | 20S | 24(30°C) | 10S | 51(30°C) | 57(105°C) | 60(70°C) |
| MEDIUM | 3:23 | - | 3 | 20 | 40(30°C) | 20S | 24(30°C) | 10S | 51(30°C) | 65(105°C) | 60(70°C) | |||
| DARK | 3:33 | - | 3 | 20 | 40(30°C) | 20S | 24(30°C) | 10S | 51(30°C) | 75(105°C) | 60(70°C) | |||
| 1.0kg | LIGHT | 3:17 | - | 3 | 20 | 40(30°C) | 20S | 24(30°C) | 10S | 51(30°C) | 59(105°C) | 60(70°C) | ||
| MEDIUM | 3:25 | - | 3 | 20 | 40(30°C) | 20S | 24(30°C) | 10S | 51(30°C) | 67(105°C) | 60(70°C) | |||
| DARK | 3:35 | - | 3 | 20 | 40(30°C) | 20S | 24(30°C) | 10S | 51(30°C) | 77(105°C) | 60(70°C) | |||
| 1.25kg | LIGHT | 3:21 | - | 3 | 20 | 40(30°C) | 20S | 24(30°C) | 10S | 51(30°C) | 63(105°C) | 60(70°C) | ||
| MEDIUM | 3:29 | - | 3 | 20 | 40(30°C) | 20S | 24(30°C) | 10S | 51(30°C) | 71(105°C) | 60(70°C) | |||
| DARK | 3:39 | - | 3 | 20 | 40(30°C) | 20S | 24(30°C) | 10S | 51(30°C) | 81(105°C) | 60(70°C) | |||
| 6 | FRENCH | 750g | LIGHT | 3:17 | - | 3 | 22 | 44(30°C) | 20S | 28(30°C) | 10S | 50(30°C) | 50(115°C) | 60(70°C) |
| MEDIUM | 3:25 | - | 3 | 22 | 44(30°C) | 20S | 28(30°C) | 10S | 50(30°C) | 58(115°C) | 60(70°C) | |||
| DARK | 3:35 | - | 3 | 22 | 44(30°C) | 20S | 28(30°C) | 10S | 50(30°C) | 68(115°C) | 60(70°C) | |||
| 1.0kg | LIGHT | 3:22 | - | 3 | 22 | 44(30°C) | 20S | 28(30°C) | 10S | 50(30°C) | 55(115°C) | 60(70°C) | ||
| MEDIUM | 3:30 | - | 3 | 22 | 44(30°C) | 20S | 28(30°C) | 10S | 50(30°C) | 63(115°C) | 60(70°C) | |||
| DARK | 3:40 | - | 3 | 22 | 44(30°C) | 20S | 28(30°C) | 10S | 50(30°C) | 73(115°C) | 60(70°C) | |||
| 1.25kg | LIGHT | 3:29 | - | 3 | 22 | 44(30°C) | 20S | 28(30°C) | 10S | 50(30°C) | 62(115°C) | 60(70°C) | ||
| MEDIUM | 3:37 | - | 3 | 22 | 44(30°C) | 20S | 28(30°C) | 10S | 50(30°C) | 70(115°C) | 60(70°C) | |||
| DARK | 3:47 | - | 3 | 22 | 44(30°C) | 20S | 28(30°C) | 10S | 50(30°C) | 80(115°C) | 60(70°C) | |||
| 7 | CAKE | 750g | LIGHT | 1:16 | - | 3 | 13 | - | - | - | - | - | 60(110°C) | 22(70°C) |
| MEDIUM | 1:21 | - | 3 | 13 | - | - | - | - | - | 65(110°C) | 22(70°C) | |||
| DARK | 1:26 | - | 3 | 13 | - | - | - | - | - | 70(110°C) | 22(70°C) | |||
| 1.0kg | LIGHT | 1:20 | - | 3 | 13 | - | - | - | - | - | 64(110°C) | 22(70°C) | ||
| MEDIUM | 1:25 | - | 3 | 13 | - | - | - | - | - | 69(110°C) | 22(70°C) | |||
| DARK | 1:30 | - | 3 | 13 | - | - | - | - | - | 74(110°C) | 22(70°C) | |||
| 1.25kg MEDIUM | 1:30 | - | 3 | 13 | - | - | - | - | - | 74(110°C) | 22(70°C) | |||
| 1:35 | - | 3 | 13 | - | - | - | - | - | 79(110°C) | 22(70°C) | ||||
| 1:40 | - 3 13 | - | - | - | - | - | 84(110°C) | 22(70°C) | ||||||
| 8 | EXTRA TURBO | 1.0kg | MEDIUM | 1:20 | - | 1 | 15 | 5 | 15S | 2 | 155 | 2(60°C) | 55(125°C) | 60(70°C) |
| 9 | JAM | - | 1:20 | 15 | - | - | - | - | - | - | - | 65(105°C) | 14(70°C) | |
| 10 | BAKE | 1:00 | - | - | - | - | - | - | - | 60(110°C) | 60(70°C) | |||
| 11 | PASTA | 0:23 | 3 | 20 | - | - | - | - | - | - | - | |||
| 12 | PIZZA | 1:50 | 3 | 20 | 37(30°C) | 20S | 50(30°C) | 20 | - | - | - | |||
Dispenser door opens at the time 8 minutes before the completion of KNEAD2.
Program Setting Times and Display Information
The LCD window will tell you if there is a problem with your SmartBake CUSTOM. Always use your SmartBake CUSTOM in a room free of drafts. Do not use your
SmartBake CUSTOM outdoors, near a heat vent or in direct sunlight.
| DISPLAY READS PROBLEM SOLUTION | ||
| “0:00” (:) flashing | Select program setting | Use the Menu button to select program. |
| “E:01” flashing hot to begin another | The baking chamber is too her cycle bread pan to cool the chamber. | Open the lid and remove chamber.After the panel message disappears, put the bread pan back into the chamber and press START again. |
| “E:02” flashing Sensor malfunction“E:03” flashing Sensor malfunction“E:04” flashing CPU malfunction“E:05” flashing Heater control malfunction“E:08” flashing Heater control malfunction | Sensor malfunctionSensor malfunctionCPU malfunctionHeater control malfunctionHeater control malfunction | Allow the baking chamber to cool, then restart your programming. If the error continues contact Customer Service on Australia 1300 881 861.New Zealand 0800 786 232 |
Note: After baking a loaf of bread, it is recommended to cool the breadmaker down to room temperature as temperatures above ambient reduce the rising height of the bread due to the sensitivity of yeast.
You will hear a beep when:
| The power is turned ON Long beep | |
| Select a setting from the Menu Short beep | |
| Completion of bread baking process | Short and Long beeps |
Tip: Display Window Sleep Mode. The Screen will change to sleep mode after 20 minutes and the screen will darken. Push any button to light up the screen again.
Troubleshooting: The Machine
| Please check the following: | Machine Malfunctions | ||||||||
| LED Time indicator does not turn on | Ingredients not mixed | Bread takes too long to bake | Sides of bread collapse and bottom is damp | Under-browned | Browned and centre sticky and raw or not baked | Sides brown but flour coated bottom | Slices unevenly and is sticky | ||
| Unplugged | ◆ | ||||||||
| Bread pan not inserted correctly | ◆ | ||||||||
| Ingredient spilled on heater element | |||||||||
| Lid was repeatedly open during operation or left open | ◆ | ◆ | |||||||
| Control Panel: | Program selection was wrong | ◆ | ◆ | ◆ | ◆ | ||||
| Mode selection was wrong (DOUGH mode was chosen) | ◆ | ||||||||
| Bread left in bread pan too long after baking | ◆ | ◆ | |||||||
| Bread sliced just after baking (steam was not allowed to escape) | ◆ | ||||||||
| Kneading process was not complete | ◆ | ||||||||
| Power Disruption | ◆ | ||||||||
Troubleshooting: The Recipes
| Please check the following: | Baking Results | |||||||||||
| Heavy Dense Texture | Not baked in centre | Open, coarse or holey texture | Collapse | Bread rises too much | Bread doesn't rise enough | Floured top | Over browned | Browned and floured sides, centre sticky and raw | ||||
| MEASUREMENT ERRORS | FLOUR | Not enough | ◆ | |||||||||
| Too much | ◆ | ◆ | ||||||||||
| YEAST | Not enough | ◆ | ◆ | |||||||||
| Too much | ◆ | |||||||||||
| WATER or LIQUID | Not enough | ◆ | ◆ | |||||||||
| Too much | ◆ | ◆ | ◆ | ◆ | ◆ | ◆ | ||||||
| SUGAR | Omitted | ◆ | ||||||||||
| Too much | ◆ | ◆ | ◆ | |||||||||
| SALT | Omitted | ◆ | ◆ | ◆ | ||||||||
| FLOUR: | Stale or generic brand flour used | ◆ | ◆ | |||||||||
| Self raising Flour was used | ◆ | ◆ | ◆ | |||||||||
| YEAST: | Old yeast used | ◆ | ◆ | ◆ | ||||||||
| Wrong type of yeast used | ◆ | ◆ | ◆ | |||||||||
| Hot water was used instead of water at room temperature | ◆ | ◆ | ||||||||||
Notes
Instruction/Recipe Supplement for New Zealand
NEW ZEALAND SUPPLEMENT
PLEASE READ THIS BOOKLET FIRST
This booklet covers the use and care of the following Sunbeam Bread makers: BM7850 SMARTBAKE CUSTOM which can produce loaf sizes 750g; 1.0kg and 1.25kg
New Zealand Instructions and Recipes
The main Instruction/Recipe Booklet was written in Australia. While most of the information in it is applicable to New Zealand, there are some ingredients and measurements that are different.
This Instruction and Recipe Supplement has been produced to ensure you get the optimum results with your Sunbeam Breadmaker.
How to use the recipes in the main instruction booklet
- Where it lists 'Tandaco Dry Yeast', you must use Edmonds Surebake Yeast instead (bottle with red lid).
- We recommend using 1 teaspoon of Edmonds Surebake Yeast to every cup of flour.
- Where it lists plain flour, you must use High Grade White Flour.
- Do not use 'Bread Improver' as listed in some recipes. The Edmonds Surebake Yeast contains 'improvers' which ensure excellent results.
The Supplement provides:
• Information on the best ingredients to use.
- Advice on measuring ingredients.
- Some popular recipes adapted for New Zealand.
- A guide for adapting the recipes in the main Instruction/ Recipe Booklet for your own use.
- You can check the consistency of the dough part-way through the initial kneading cycle (about 20 minutes after the machine has started). Lift the lid and have a quick look. The dough should be smooth, soft, and slightly sticky and have a tendency to flatten and catch the sides of the container.
- When making jam, instead of Jam Setta, use Jam Setting Mix, which is available at most supermarkets.
Ingredients to use
Flour
Use fresh, good quality flour. Do not use self-raising flour.
White Flour
Most large New Zealand milling companies produce two lines of white flour for the domestic market. One is finely milled 'weak' flour which is ideal for sponges, biscuits, shortbread and short pastry. This type of flour is labelled as standard or plain flour. The second is a strong flour which has been designed for general household baking, including fruit cakes, loaves, pizzas and bread. These 'strong' bread making flours are labelled by the two main milling companies as 'High Grade' and bread making is listed as a possible use. Some small independent mills also market 'strong' flour, labelled as suitable for bread making. We recommend the use of High Grade or bread flour for use in Sunbeam breadmakers. White Flour should be stored in its bag on a cool, dry airy shelf. If your kitchen is rather steamy and warm, keep your flour in an airtight container.
Wholemeal
Wholemeal should always be bought in quantities which can be used up within 8 weeks. Make sure you buy from a shop with a high turnover. Fresh wholemeal has a pleasant, almost sweet smell. Wholemeal which has been kept for too long or which has not been stored carefully has a sour or rancid smell. Store your wholemeal in a refrigerator (remember to allow measured wholemeal to return to room temperature before using to make bread). Wholemeal produced from 'stone ground' organically grown wheat may vary in bread making quality.
Gluten Flour
Gluten Flour is made from white flour and is used to increase the size of loaves made from 100% wholemeal flour. Its use is optional.
Yeast
The recipes in this booklet have been designed to use Edmonds Surebake dried yeast (red cap on bottle). This yeast mixture contains 'improvers' which ensure excellent results. Elfin Instant Dried Yeast may also be used instead. It is recommended that you add 50mg of vitamin C as an 'improver'. Use 1 12 teaspoons of Elfin yeast for 750g and 1kg loaves. Cut a 100mg tablet of vitamin C (not flavoured) in half. Crush in a dessertspoon with the back of a teaspoon. Dissolve in the measured warm water before adding to the bread pan after the dry ingredients. Use this type of yeast with Elfin bread premixes (as per the instructions on the premix packaging).
Sugars
White or brown sugar has been specified in the recipes in this booklet. Substitute honey, golden syrup, or treacle in the same amounts if desired. Do not use molasses as the New Zealand types may be too strong in flavour. Stiff honey, golden syrup or treacle should be warmed until just runny.
Fats
Fats are used to enhance flavour and retain moisture. Oil is specified in the recipes. Choose a mild flavoured oil. You may substitute the same amount of softened butter, margarine or lecithin granules.
Salt
Iodised New Zealand salt is used in all recipes. Salt controls the actions of the yeast so do not omit.
Water
Use warm water or comfortably warm water (40-46°C). When you dip a finger in the water, it should feel slightly warm. For delay start loaves, use cold tap water.
Jam
Instead of Jam Setta, use Jam Setting Mix, which is available at most supermarkets.
Measuring Ingredients
New Zealand standard metric kitchen measures have been used for all the recipes. All measurements should be level. Accuracy with measuring is important when making bread in a breadmaker.
To measure flour
For optimum results we recommend weighing flour. If scales are not available, use a set of standard metric cups and part cups. Do not use tableware cups. Stir the flour in the storage container, then using a scoop or a large spoon overfill the measuring cup without tapping or shaking. Use the back of a knife to scrape off the excess so that the flour is just level with the rim of the cup.
To measure water
Use a standard metric measuring cup graduated in 10 ml divisions. Place the cup at eye level on a flat surface and fill to the required level.
To measure other ingredients
Use standard metric spoons. A New Zealand metric teaspoon holds 5ml and a metric tablespoon holds 15ml. (note: an Australian metric tablespoon holds 20ml.
Abbreviations
g gram
ml millilitre
mg milligram
°C degrees Celsius
Tbsp tablespoon
tsp teaspoon
Dough consistency
When using a new recipe or a different batch of flour or if a recipe has not produced a satisfactory result, check the consistency of the dough, part way through the initial kneading cycle (about 10 minutes after the machine has started). Lift the lid and have a quick look. The dough should be smooth, soft and slightly sticky and have a tendency to flatten and catch the sides of the container. Dough which is too stiff will have ragged edges; it will not stick to the sides at all and forms a tight round ball. In this case add one tablespoon of extra water. Dough which is too soft will be sticky and be reluctant to form a ball. Add one tablespoon of extra flour.
Troubleshooting
Special Concerns
For important information on troubleshooting, please read the main Instruction/Recipe booklet. For further assistance, please phone Sunbeam Customer Services 0800 SUNBEAM (0800 786 232)
For Service in New Zealand
If your Sunbeam Breadmaker is within the 12 month warranty period, enquiries in the first instance should be directed to Sunbeam Customer Services. Please contact our Customer Services hot line 0800 SUNBEAM (0800 786 232)
Should your Breadmaker be outside the 12 month warranty period, please refer to an authorised Sunbeam Service agent. They will be able to assist you with any non-warranty concerns you may have.
12 Month Replacement Guarantee
In the unlikely event that this appliance develops any malfunction within 12 months of purchase (3 months commercial use) due to faulty materials or manufacture, we will replace it for you free of charge.
Should you experience any difficulties with your appliance, please phone our customer service line for advice on 1300 881 861 in Australia, or 0800 786 232 in New Zealand. Alternatively, you can send a written claim to Sunbeam at the address listed below. On receipt of your claim, Sunbeam will seek to resolve your difficulties or, if the appliance is defective, advise you on how to obtain a replacement or refund.
Your Sunbeam 12 Month Replacement Guarantee naturally does not cover misuse or negligent handling and normal wear and tear.
Similarly your 12 Month Replacement Guarantee does not cover freight or any other costs incurred in making a claim. Please retain your receipt as proof of purchase.
The benefits given to you by this guarantee are in addition to your other rights and remedies under any laws which relate to the appliance.
Our goods come with guarantees that cannot be excluded under the Australian Consumer Law and under the New Zealand Consumer Guarantees Act.
In Australia you are entitled to a replacement or refund for a major failure and for compensation for any other reasonably foreseeable loss or damage. You are also entitled to have the goods repaired or replaced if the goods fail to be of acceptable quality and the failure does not amount to a major failure.
Should your appliance require repair or service after the guarantee period, contact your nearest Sunbeam service centre.
For a complete list of Sunbeam's authorised service centres visit our website or call:
Australia
www.sunbeam.com.au
1300 881 861
Units 5 & 6, 13 Lord Street
Botany NSW 2019 Australia
New Zealand
www.sunbeam.co.nz
0800 786 232
26 Vestey Drive, Mt Wellington
Auckland, New Zealand
Need help with your appliance?
Contact our customer service team or visit our website for information and tips on getting the most from your appliance.
In Australia
Visit www.sunbeam.com.au
Or call 1300 881 861
In New Zealand
Visit www.sunbeam.co.nz
Or call 0800 786 232
is a registered trademark.
'SmartBake' is a registered trademark of Sunbeam Corporation.
Made in China.
Due to minor changes in design or otherwise,
the product may differ from the one shown in this leaflet.
© Copyright. Sunbeam Corporation Limited 2006.
ABN 45 000 006 771
Units 5 & 6, 13 Lord Street
Botany NSW 2019 Australia
Unit 3, Building D
26 Vestey Drive
Mt Wellington Auckland
New Zealand
Sunbeam Corporation is a division of GUD Holdings Ltd.
- Important instructions – retain for future use.
- Congratulations
- Sunbeam's Safety Precautions
- SAFETY PRECAUTIONS FOR YOUR SUNBEAM BREAD MAKER
- Sunbeam is very safety conscious when designing and manufacturing consumer products, but it is essential that the product user also exercise care when using an electrical appliance. Listed below are precautions which are essential for the safe use of an electrical appliance:
- Using your SmartBake® Custom Safely
- Before use
- Whilst in use
- Where to use
- After use
- Safety Precautions
- Using your SmartBake Custom Safely continued
- Features of your Sunbeam SmartBake® Custom
- Automatic Fruit & Nut Dispenser
- Traditional Horizontal loaf
- Cord Wrap
- Features of your Sunbeam SmartBake Custom continued
- programmable memory settings
- baking and kneading options
- Baking Progress Monitor
- hour Time Delay
- Power Interruption Program Protection
- Large viewing window
- Display Window Sleep Mode
- minute Keep-Warm function
- The Control Panel
- Display Window
- Menu
- Size
- Crust
- Favourite Recipes
- Custom
- Save
- Delay
- Cancel
- Start/Pause
- Preheat
- Knead
- Rise
- Bake
- Keep Warm
- Menu Settings
- Basic
- Turbo
- Gluten Free/Yeast Free
- Wheat
- Sweet
- French
- Cake
- Extra Turbo
- Jam
- Bake
- Pasta Dough
- Pizza Dough / Dough
- Using your SmartBake® Custom
- Before using your SmartBake Custom for the first time
- Removing the baking pan
- Step 1. Adding ingredients
- Step 2. Replacing the baking pan
- Step 3. Add Fruit and Nuts if required
- Step 4. Select Menu
- Step 5. Select Size
- Step 6. Select Crust
- Step 7. Press Start
- Step 8. Hot fresh crusty bread
- After using your SmartBake Custom
- Ingredients
- Yeast
- Flour
- Bread Improver
- Sugars
- Liquids
- Salt
- Eggs
- Fats
- Bread mixes
- Hints
- Important measuring tips
- Dry ingredients
- Solid fats
- Last Things Last!
- Fruit and Nut Dispenser
- The Baking Process
- Mixing and kneading
- Rising
- Knock Down
- Second Rise
- Cool
- Programming your SmartBake® Custom
- Programming your SmartBake Custom - continued
- Baking
- OR
- Changing a Favourite Recipe
- Deleting a Favourite Recipe
- Previewing Menus and Favourite Recipes
- How to use the Time Delay
- Example
- Handy hints
- Order of ingredients
- Freshness
- Slicing bread
- Freezing bread
- Toppings
- Crust colour
- Baking at high altitudes
- Suggestions:
- Care and Cleaning
- To clean the exterior
- Do not use metal scourers or abrasives as this may scratch the exterior surface.
- To clean the non-stick baking pan
- Caring for your non-stick baking pan
- Remove and clean lid
- Storage
- Recipes: Basic Breads Menu 1
- To use the Basic Bread setting:
- Basic Turbo Breads Menu 2
- To use the Turbo Bread setting:
- Gluten/Yeast Free Breads Menu 3
- To use the Gluten/Yeast Free Bread setting:
- Wheat Breads Menu 4
- To use the Wheat Bread setting:
- Sweet Breads Menu 5
- To use the Sweet Bread setting:
- French Breads Menu 6
- To use the French Bread setting:
- To use the Cake setting:
- Handy hints for optimum results.
- Extra Turbo Breads Menu 8
- To use the Extra Turbo Bread setting:
- To use the Jam setting:
- Apple & Rhubarb Jam Makes: 500mls
- Traditional Marmalade Makes: 500mls
- Strawberry Jam Makes: 500mls
- Kiwi Jam Makes: 450mls
- Plum Jelly Makes: 500mls
- Pasta Dough Menu 11
- To use the Pasta Dough setting:
- Basic Pasta Dough
- Pumpkin and Ricotta Ravioli Serves: 4
- Filling
- Fettuccine with Tomato Sauce
- Sauce
- Spaghetti Carbonara
- Pizza Dough / Dough Menu 12
- This setting can be used for all types of dough, not just pizza dough.
- Glazes
- Shaping Techniques:
- To use the Pizza Dough/ Dough setting:
- Pizza Dough Makes: 2 pizzas
- Herb Focaccia
- Topping
- Hot Cross Buns Makes: 12
- Dough
- Crosses
- Glaze
- Bread Sticks
- Bread Rolls
- Caramel Pecan Rolls
- Chocolate Cherry Rolls
- Program Setting Times and Display Information
- Troubleshooting: The Machine
- Troubleshooting: The Recipes
- Notes
- NEW ZEALAND SUPPLEMENT
- PLEASE READ THIS BOOKLET FIRST
- New Zealand Instructions and Recipes
- How to use the recipes in the main instruction booklet
- Ingredients to use
- White Flour
- Wholemeal
- Gluten Flour
- Water
- Jam
- Measuring Ingredients
- To measure flour
- To measure water
- To measure other ingredients
- Abbreviations
- Dough consistency
- Troubleshooting
- Special Concerns
- For Service in New Zealand
- Month Replacement Guarantee
- Australia
- New Zealand
- Need help with your appliance?
- In Australia
- In New Zealand
- is a registered trademark.
Brand : SUNBEAM
Model : SmartBake Custom BM7850
Category : Bread maker