
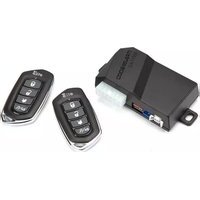
Code Alarm CA 1155 - Car alarm AUDIOVOX - Free user manual and instructions
Find the device manual for free Code Alarm CA 1155 AUDIOVOX in PDF.


| Product Type | Vehicle Security and Keyless Entry System |
| Brand | Code Alarm (Audiovox) |
| Model | CA 1155 |
| Power Supply | 12V DC (vehicle battery) |
| Remote Control Battery | CR2032 (approx. 1 year life) |
| Keyless Entry | Lock, Unlock, Trunk Release |
| Security Functions | Arm/Disarm, Shock Sensor, Starter Disable, Panic Alarm, Car Find |
| Carjack Mode | Anti-hijack with delayed siren and starter kill |
| LED Status Indications | Armed (slow flash), Disarmed (off), Valet (solid), Trigger zones (2-5 flashes) |
| User Selectable Chirps | Enable/disable arm/disarm chirps |
| Valet Mode | Disables security; LED solid |
| Manual Override | Valet button with ignition key |
| Passive Arming Option | Available (programmable) |
| Silent Choice | Optional silent arm/disarm |
| Remote Control Range | Varies; up to ~100 feet (typical) |
| Warranty (Main Module) | Limited lifetime (original vehicle) |
| Warranty (Transmitter) | 12 months |
| Maintenance | Replace remote battery; no other user serviceable parts |
| Safety Notes | Starter kill when triggered; Carjack mode |
| Compliance | FCC Part 15, Industry Canada RSS-210 |
Frequently Asked Questions - Code Alarm CA 1155 AUDIOVOX
User questions about Code Alarm CA 1155 AUDIOVOX
0 question about this device. Answer the ones you know or ask your own.
Ask a new question about this device
Download the instructions for your Car alarm in PDF format for free! Find your manual Code Alarm CA 1155 - AUDIOVOX and take your electronic device back in hand. On this page are published all the documents necessary for the use of your device. Code Alarm CA 1155 by AUDIOVOX.
USER MANUAL Code Alarm CA 1155 AUDIOVOX
Vehicle Security and
Keyless Entry System
IMPORTANT NOTE: The operation of the Security and Convenience System as described in this manual is applicable to most vehicles. However, due to the configuration of some vehicles, some functions AND/OR SAFETY PRECAUTIONS may not apply. Please see your installing dealer for more information.
Table of Contents
Using Your Remote Control .... 3
Arming the Security System....3
Bypassing the Shock Sensor 3
Disarming the Security System 3
Two Stage Door Unlock (optional)....3
Activating Trunk Release (optional)....3
Activating AUX 1 (optional)....4
Using the Progressive Car Finder Feature....4
Using the Personal Protection Alarm 4
Valet Mode 4
User Selectable Notification Chirps....4
User Selectable LED 5
Manually Overriding the Security System 5
Carjack Mode 5
Status LED, Light Flashes and Siren/Horn Indications ....6
Remote Control Buttons & Functions ....7
Replacing Remote Control Batteries 7
Warranty Information 8
Using Your Remote Control
Arming the Security System
To arm the system, exit the vehicle, close all doors, then press the ⏻ button. The parking lights will flash 2 times, indicating the system is armed, has locked the doors (if equipped and connected) and activated the starter disable feature. The LED status indicator will blink steadily, once per second.
NOTE: The system is equipped with a feature called Silent Choice. If enabled, the system requires a second press of the ⏻ button to activate an audible arming response from the vehicle.
Bypassing The Shock Sensor
To arm the system and ignore the shock sensor press 📋 button, then within 5 seconds press 🔒 + 🔔 the system will respond with 1 long chirp.
NOTE: The system will only change the shock sensor setting for one arm cycle and will be defaulted back to normal operation the next time the system is armed.
Disarming the Security System
To disarm the system press the ⏻ button. The parking lights will flash 1 time, indicating the system is disarmed and has unlocked the doors (if equipped and connected).
NOTE: The system is equipped with a feature called Silent Choice. If enabled, the system requires a second press of the ⏻ button to activate an audible disarming response from the vehicle. If your system is set up for 2 step unlock, a third press of unlock will activate the audible response.
Two Stage Door Unlock (Optional)
If this feature is enabled on your system, pressing the 📋 button one time will unlock only the driver's door. Press 📋 again within three seconds to unlock the remaining doors.
Activating the Trunk Release Feature (Optional)
If this feature is enabled on your system, pressing and holding the 📋 button for 3 seconds will open the vehicle's trunk or hatch.
Activating the AUX 1 Output (Optional)
If this feature is enabled on your system, pressing the 🔒 and ⏻ buttons simultaneously will activate an optional feature. This feature can be programmed for a wide range of functions like power window or sunroof automation, please consult your installing dealer to determine the functionality of your system.
Using the Progressive Car Finder Feature
Press the ◄ button to locate your vehicle. The system will flash the parking lights and sound 5 times at low volume, increasing in volume each time the button is pressed.
Using the Personal Protection Alarm (Panic)
Press and hold the 📋 button for 3 seconds to activate the personal protection alarm. During panic mode, the normal function of the transmitter buttons will be suspended. The transmitter's 🔒 and ⏻ buttons can be used to lock and unlock the door (if the option is installed). To stop the alarm, press and hold the 📋 button on the transmitter again for 3 seconds. The system will automatically stop after 30 seconds.
Valet Mode
When valet mode is activated the status LED will light solid, and all security functions will be disabled. To enter or exit valet mode simply follow the steps outlined below:
- Turn the vehicle's ignition ON.
- Push and hold the programming/valet button.
- The LED will turn on solid when valet mode is active
- Release the programming/valet button.
User Selectable Notification Chirps
System ARM / DISARM chirps can be toggled ON or OFF without entering the programming feature banks.
- Turn the ignition ON then OFF.
- Press and release the valet/programming button 3 times. The system will respond with 1 chirp for ON or 2 chirps for OFF.
User Selectable LED
This feature will control whether the LED is ON or OFF when the system is Armed/Locked and can be toggled ON or OFF without entering the programming feature banks.
- Turn the ignition ON, OFF, ON, OFF.
- Press and release the valet/programming button 3 times. The system will respond with 1 chirp for ON or 2 chirps for OFF.
Manually Overriding the Security System
Your system can be disarmed without the use of the transmitter. This is necessary, since you will need the ability to operate your vehicle if the transmitter is lost or its battery fails. To by-pass the alarm system;
- Open the vehicle door. The alarm will sound.
- Turn the ignition key to the ON position.
- Within 10 seconds, press and release the valet push button switch.
The alarm system will stop sounding and enter the (by-passed) mode. You can now start and operate the vehicle normally.
Carjack Mode (Anti-Hijack Mode)
This feature must be turned on in system programming, please consult your installing dealer.
Triggering Carjack mode: While the ignition is ON and press and hold Ⓞ + for 2 seconds, the parking lights will flash 1 time and the system will act as follows;
- 50 seconds after being triggered the siren will chirp for 15 seconds, during this 15 seconds you will be alerted to push the valet button to turn off Carjack mode. If Carjack mode is not turned off at this time it will advance to the next step.
- Following the 15 second chirps (total time now 65 seconds) the siren will go into full sound and the parking lights will start flashing.
- 90 seconds after trigger in, addition to the siren and parking lights, the system will activate the starter kill. THE SYSTEM WILL REMAIN IN THIS STATE UNTIL THE BATTERY IS DEPLETED.
OVERRIDE THE SYSTEM TO TURN OFF CARJACK MODE: Turn the ignition OFF then On and press the valet button within 10 seconds.
Status LED, Light Flashes, and Siren/Horn Indications
Status LED Flash Indications
| LED Flashes | Function | |
| OFF | Disarmed | |
| Slow Flash | Armed | |
| Fast Flash | Passive Arming Countdown | |
| ON (Solid) | Valet Mode | |
| 2 Flashes | Zone 2 Trigger, Hood / Trunk | |
| 3 Flashes | Zone 3 Trigger, Door | |
| 4 Flashes | Zone 4 Trigger, Shock Sensor | |
| 5 Flashes | Zone 5 Trigger, Ignition | |
Siren/Horn Chirp Indications
| Chirps | Function |
| 1 | Disarm |
| 2 | Arm |
| 3 | Door Ajar Upon Arming |
| 4 | Disarm / Triggered |
| 5 | Car Find |
Parking Light Flash Indications
| Flashes | Function |
| 1 | Disarm |
| 2 | Arm |
| 3 | Disarm / Triggered |
| 5 | Car Find |
Remote Control Buttons & Functions
| 4-Button Transmitter | Lock | Unlock | Trunk | Car Find / Panic | Operation Method |
| Lock | X | Press and Release | |||
| Unlock | X | Press and Release | |||
| Trunk X | Push and Hold (3 Sec) | ||||
| Car Finder | X | Press and Release | |||
| Panic | X | Push and Hold (3 Sec) | |||
| AUX 1 X X | Push and Hold (3 Sec) | ||||
| Shock Bypass X | X | Press and Release Lock then Pre ss Lock + Car Find (within 5 Sec) |
Replacing Remote Control Batteries
4-Button Remote Control (part # CAT4P)
The battery (model CR2032) inside each remote control should last approximately 1 year under normal use. When the battery becomes weak you will notice the remote control range (the distance from the vehicle the remote control will work) deteriorate and the small LED on the remote control will dim. To replace the remote control battery:
- Unsnap and disassemble the halves of the remote control.
- Remove the old battery, observing the +/- symbols on the battery and replace with a new CR2032 battery.
- Reassemble the halves of the remote control.
- Test operation of the remote control.
CODE/ALARM
LIMITED LIFETIME WARRANTY
Applies to Code Alarm Series Control Modules, Sirens, Sensors, and Relays.
Voxx Electronics Corporation (the Company) warrants to the original purchaser of this product that should this product or any part thereof, (other than transmitters) under normal use and conditions, be proven defective in material or workmanship during the lifetime of the vehicle, in which it was originally installed from the date of original purchase such defect(s) will be repaired or replaced with new or reconditioned product, (at the Company's option) without charge for parts or repair labor. A transmitter is warranted for 12 months from the date of original purchase.
To obtain repair or replacement within the terms of this Warranty, the product is to be delivered with proof of warranty coverage (e.g. dated bill of sale), specification of defect(s), transportation prepaid, to an approved warranty station. This Warranty is not transferable.
This Warranty does not cover damage to the vehicle's electrical system or costs incurred for removal or reinstallation of the product. This Warranty does not cover batteries, broken LCD or OLED display screens, nor apply to any product or part thereof which, in the opinion of the Company, has suffered or been damaged through alteration, improper installation, mishandling, misuse, abuse, neglect, accident, or by removal or defacement of the factory serial number/bar code label(s).
This Warranty is in lieu of all other express warranties or liabilities. ANY IMPLIED WARRANTIES, INCLUDING ANY IMPLIED WARRANTY OF MERCHANTABILITY, SHALL BE LIMITED TO THE DURATION OF THIS WRITTEN WARRANTY. IN NO CASE SHALL THE COMPANY BE LIABLE FOR ANY CONSEQUENTIAL OR INCIDENTAL DAMAGES FOR BREACH OF THIS OR ANY OTHER WARRANTY. No person or representative is authorized to assume for the Company any liability other than expressed herein in connection with the sale of this product.
The company does not warrant that this product cannot be compromised or circumvented. THE EXTENT OF THE COMPANY'S LIABILITY UNDER THIS WARRANTY IS LIMITED TO THE REPAIR OR REPLACEMENT PROVIDED ABOVE AND, IN NO EVENT, SHALL THE COMPANY'S LIABILITY EXCEED THE PURCHASE PRICE PAID BY PURCHASER FOR THE PRODUCT WITHOUT COST OF INSTALLATION.
Some states do not allow limitations on how long an implied warranty lasts or the exclusion or limitation of incidental or consequential damage so the above limitations or exclusions may not apply to you. This Warranty gives you specific legal rights and you may also have other rights which vary from state to state.
Voxx Electronics Corporation, 180 Marcus Blvd., Hauppauge, New York 11788 / 1-800-645-4994
Voxx Electronics Corporation.
Customer Service 1-800-421-3209
WWW.CODE-ALARM.COM
FCC COMPLIANCE
This device complies with Part 15 of the FCC rules and with RSS-210 of Industry Canada. Operation is subject to the following two conditions:
- This device may not cause harmful interference, and
- This device must accept any interference received, including any interference that may cause undesired operation.
Warning!
Changes or modifications not expressly approved by the party responsible for compliance could void the user's authority to operate the equipment.
PATENTED: www.voxxintl.com/company/patents

1024405
STARTER INTERUPT RELAY & HARNESS

ORANGE
RED
BLACK
WHITE / BLACK
OPEN
85 - IGNITION (+
87 - OPEN
86 - ARMED OUTPUT (-)
87A - STARTER OUTPUT - MOTOR SIDE
30 - STARTER INPUT - KEY SIDE
SHOCK SENSOR & HARNESS
4700023

RED
BLACK
BLUE
GREEN
BATTERY 12V (+)
GROUND WHEN ARMED (-)
FULL TRIGGER (-)
WARN AWAY TRIGGER (-)
Adjusting the Shock Sensor

Increase sensitivity by turning the adjustment dial clockwise.

Decrease sensitivity by turning the adjustment dial counter clockwise
Testing the Shock Sensor
Arm the system and wait 6 seconds for the zone to stabilize, then firmly strike the vehicles bumper:
Security Trigger Zones
If the security system has been triggered the LED will flash one of the patterns below indicating the zone.
LED FLASHES
2 Flashes
-
Flashes
-
Flashes
-
Flashes
TRIGGER ZONE
Hood / Trunk Input
Door Input
Shock Sensor
ignition Input
CODE ALARM
PROFESSIONAL
SERIES
Security and Keyless Entry
Installation Quick Reference
Guide
for model:
ca1155
Complete guides also available at
www.voxxuniversity.com
2017 Yee Electronics Corporation. All rights reserved
Feature Bank 1 - 3 Chips
Refer to transmitter programming.
| Feature Rank 2 - 4 Charges Security Control | 1 LED Flash | 2 LED Flash | 3 LED Flash | 4 LED Flash | 5 LED Flash | 6 LED Flash | |
| 1 | Blot Choice | ON | OFF | ||||
| 2 | Passive Links | Active | Passive | ||||
| 3 | Passive Arming | Active | Passive | ||||
| 4 | Steel / Hot Arm/BOARD/ARM Chips | Steen Match | Steen | Hill | |||
| 5 | Slee Duration | 30 Seconds | 30 Seconds | ||||
| 6 | Security | ON | OFF | ON at OEM Remode Start Competitive | |||
| 7 | Anti-Hisack Marks | OFF | ON | ||||
| 8 | Orange - Ground or Anned Output | Ground White Armed | Ground White Disinjured | ||||
| 9 | DBI Port Protocol | DBI Protocol | ABS Protocol | ||||
| 10 | Any/Glassm Chip / Parking Light Pattern | Standard: 1 - Air 1 - Diagram | Standard: 1 - Air 2 - Diagram | ||||
| 11 | L.E.D. Outlet when Anned / Lacked | ON | OFF | ||||
| 12 | Automatic Re-Lock | OFF | ON - Lock Only | ON - Rear & Lock | |||
| 13 | 3D Seared Slabeled Parking Light Digital ATTR Lock / Static | OFF | 3D P. Light Output After Quick | 3D Seared P. Light Output After Lock | 3D Second P. Light Output After Lock & Quick | ||
| 14 | Parking Light Relay / Truck Outputs Use P. Light Relay for Turn Use Store Output as P. Lights (-) | OFF | ON | ||||
| Features Book 3 - 6 Charge Output Control | 1 LED Flash | 2 LED Flash | 3 LED Flash | 4 LED Flash | 5 LED Flash | 6 LED Flash | |
| 1 | Standard Lock Pulse | 1 Second | 3.4 Second | 1 SecondLeft, Double Pulse Unlock | 8 SecondLeft, Double Pulse Unlock | Double Pulse Left, 1 Second Slides | 0.5 Second Pulse |
| 2 | Factory Drill | Factory Drill | One Unlock | Factory Drill600m Double Pulse | Factory DrillSlides Pulse | Factory DrillSlides Pulse | Factory DrillUp/Down Unlock Timing |
| 3 | Ignition Controlled Locks | OFF | Lock and Unlock | Lock Only | Unlock Only | ||
| 4 | Dark Output TimingRest / White Output | Push and Hold | 10 Second | 25 Seconds | Latched UnitCH-OU | Latched ONUnit Button Pulse | |
| 5 | New Output Timing | Years | Years | Bene | Bene | Bene | |
| 6 | New Pack | ON | OFF | ||||
| 7 | ACR 1Vertical / Black Output | Push and Hold | Latched | Latched until ICR ON | Done Light Output | ||
Set Up & Programming
Transmitter Programming - Feature Bank 1
- Turn the ignition ON
- Press and hold the valet/override button.
3 Within 10 seconds the system will chip (3) three times. - Press 1 button of each transmitter you wish to program.
- The system will respond with 1 chip for each accepted transmitter.
- Pressing the override button at anytime during programming will advance to the next bank.
NOTE: The system will exit transmitter programming after 15 seconds of inactivity NOTE: This system has 1 button programming which programs all channels of the system.
NOTE: The system will hold up to 4 transmitters in memory, programming a 5th transmitter will erase the oldest transmitter in memory.
NOTE: This system has PTN - Programmed Transmitter Notification. Each time the ignition is turned ON, the LED will flash the number of transmitters programmed to the system.
Manual Feature Programming - Feature Bank 2 - 5
- Tum the ignition ON
2 Press and hold the valet/override button. - Within 10 seconds the system will chirp (3) three times.
- Use the valet/override button to advance through each option bank. For feature programming advance to Feature Bank 2, or 3, which is (4) four, and (5) five chirps.
- Use the transmitter ☐ button to scroll through the selections in each
feature bank, the system will chirp to match the feature number. - Press the transmitter ① button to change the desired feature. The LED will flash indicating the changed feature.
Defaulting All Features: Pressing the button anytime while in any of the feature banks will default all features and return you to feature bank 2 - 4 chirps.
NOTE: The system will remain in feature programming mode as long as the ignition is on, there is no time limit. To exit programming turn the IGNITION OFF.
Chirp Delete - User Accessible
System ARM/DISARM chips can be toggled ON or OFF without entering the programming feature banks.
- Turn the ignition ON then OFF
- Press and release the valet/programming button 3 times. The system will respond with 1 chirp for ON or 2 chirps for OFF.
User Selectable LED
This feature will control whether the LED is ON or OFF when the system is Armed/Locked. This will be selectable in feature programming OR on-the-fly without entering the programming feature banks.
-
Turn the ignition ON, OFF, ON, OFF
-
Press and release the valet/programming button 3 times. The system will respond with 1 chirp for ON or 2 chirps for OFF.
Dome Light Delay / Theater Dimming
The system can be programmed to delay arming after the lock button is pressed (60 second max) for vehicles with a dome light delay or theater dimming feature. Once programmed the system will 'learn' the timing of the dome light delay and add 2 seconds before arming.
- Close all doors with ignition off.
- Using the transmitter press LOCK, UNLOCK, LOCK, UNLOCK, LOCK, UNLOCK, LOCK. The LED will light sold to indicate the system has entered DOME DELAY LEARN MODE.
- Immediately OPEN then CLOSE the door WITHOUT disarming the system. The system will then monitor the door trigger wire. Once the dome light turns off, the system will then add 2 seconds and then exit the learning mode.
- The LED will begin to flash indicating the system has exited the learning mode and is now armed.
Defaulting the Dome Light Delay: Turn the ignition ON then OFF 3 times then press and hold the valet button for 5 seconds, the system will chirp 1 time indicating the learned delay time has been cleared.
PC Based Feature Programming / Firmware Updates
When using the NEW Code Alarm Utility App along with a VEPROG Programming tool you may program selectable features or update the firmware of this module.
- To download the Code Alarm Utility App visit the Voxx University website at voxxuniversity.com.
- Select VOXXTECH and locate the utility app under the heading Software Downloads.

Technical Support (800) 421-3209
or visit xxuniversity.com
- Table of Contents
- Using Your Remote Control .... 3
- Status LED, Light Flashes and Siren/Horn Indications ....6
- Remote Control Buttons & Functions ....7
- Replacing Remote Control Batteries 7
- Warranty Information 8
- Using Your Remote Control
- Arming the Security System
- Bypassing The Shock Sensor
- Disarming the Security System
- Two Stage Door Unlock (Optional)
- Activating the Trunk Release Feature (Optional)
- Activating the AUX 1 Output (Optional)
- Using the Progressive Car Finder Feature
- Using the Personal Protection Alarm (Panic)
- Valet Mode
- User Selectable Notification Chirps
- User Selectable LED
- Manually Overriding the Security System
- Carjack Mode (Anti-Hijack Mode)
- Status LED, Light Flashes, and Siren/Horn Indications
- Remote Control Buttons & Functions
- Replacing Remote Control Batteries
- 4-Button Remote Control (part # CAT4P)
- CODE/ALARM
- LIMITED LIFETIME WARRANTY
- FCC COMPLIANCE
- Warning!
- 4120402
- 1024363
- 4120403
- 1024405
- 4700023
- Adjusting the Shock Sensor
- Testing the Shock Sensor
- Security Trigger Zones
- CODE ALARM
- PROFESSIONAL
- SERIES
- Set Up & Programming
- Transmitter Programming - Feature Bank 1
- Manual Feature Programming - Feature Bank 2 - 5
- Chirp Delete - User Accessible
- Dome Light Delay / Theater Dimming
- PC Based Feature Programming / Firmware Updates
Brand : AUDIOVOX
Model : Code Alarm CA 1155
Category : Car alarm