
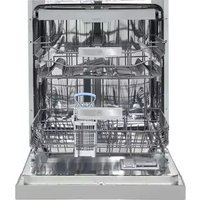
DW24PR - Dishwasher BERTAZZONI - Free user manual and instructions
Find the device manual for free DW24PR BERTAZZONI in PDF.


| Product Type | Built-in Dishwasher |
| Brand | Bertazzoni |
| Model | DW24PR |
| Dimensions (Width x Depth x Height) | 23.6 in x 22.8 in x 32.5 in (600 mm x 580 mm x 825 mm) |
| Power Supply | 120 V, 60 Hz |
| Water Pressure | 5.80 – 145.04 PSI |
| Hot Water Temperature | 120 °F – 149 °F (49 °C – 65 °C) |
| Installation Type | Built-in under counter |
| Electrical Connection | Hardwired (no plug) |
| Water Supply | Hot water only |
| Drain Hose Diameter | 21 mm internal |
| Maximum Drain Hose Length | 9.8 ft (3 m) to sink |
| Cabinet Opening Minimum | Width 23.6 in, Depth 23 in, Height 32.5 in |
| Cabinet Opening Maximum Height | 34.6 in |
| Leveling Leg Adjustment Range | Up to 1.968 in (50 mm) |
| Door Spring Tension Adjustment | Yes, via adjusting screw |
| Decoration Door Compatible | Yes, hooks and brackets included |
| Condensation Strip Included | Yes |
| Installation Brackets Included | Yes |
| Safety Features | Grounding required, tip-over hazard warning |
| User Manual Available | Yes, 25 pages in English |
Frequently Asked Questions - DW24PR BERTAZZONI
User questions about DW24PR BERTAZZONI
0 question about this device. Answer the ones you know or ask your own.
Ask a new question about this device
Download the instructions for your Dishwasher in PDF format for free! Find your manual DW24PR - BERTAZZONI and take your electronic device back in hand. On this page are published all the documents necessary for the use of your device. DW24PR by BERTAZZONI.
USER MANUAL DW24PR BERTAZZONI
Installation Instructions
DW 24PR

SAFETY INSTRUCTIONS
Throughout this manual, you'll see Warning and Caution notes. These warnings, cautions, and the important safety instructions that follow do not cover all possible conditions and situations that may occur. It's your responsibility to use common sense, caution, and care when installing, maintaining, and operating the dishwasher. M anufacturer is not liable for damages resulting from improper use.
Important Safety Instructions
What the icons and signs in this installation guide mean:
 WARNING WARNING | Hazards or unsafe practices that may result in severe personal injury or death. |
 CAUTION CAUTION | Hazards or unsafe practices that may result in personal injury or property damage. |
 CAUTION CAUTION | To reduce the risk of fire, explosion, electric shock, or personal injury when using the dishwasher, follow these basic safety precautions: |
 | Make sure the machine is grounded to prevent electric shock. |
These warning signs are here to prevent injury to you and others.
Please follow them explicitly.
After reading this section, keep it in a safe place for future reference.
Read all instructions before using the appliance.
Install and store the dishwasher inside, away from exposure to weather.

Do not install the dishwasher near electrical components. Keep the dishwasher away from open flames.
Do not install the dishwasher on a carpet as this is a fire hazard.
Do not install the dishwasher in a location where the water may freeze (where the temperature falls below 32^ F( 0^ C). Frozen water in the hoses or pipes may damage the dishwasher.
As with all equipment using electricity, water and moving parts, potential hazards exist. To safely operate this appliance, become familiar with its operation and exercise care when using it.
The dishwasher must be properly grounded. Never connect it to an ungrounded outlet.

Prior to removal of original dishwasher and the installation of your new unit, make sure to switch off your circuit breaker. Do not connect the dishwasher until you have completed the installation. Connecting the power cable is the last step when installing the dishwasher.
All wiring and grounding must be done in accordance with the electrical code applicable to the region.
GROUNDING INSTRUCTIONS
For a permanently connected appliance:
This appliance must be connected to grounded metal, a permanent wiring system, or an equipment-grounding conductor must be run with the circuit conductors and connected to the equipment-grounding terminal or lead on the appliance.
The dishwasher is very heavy. Do not attempt to move or carry a dishwasher alone. Two or more people are needed to move a dishwasher and avoid potential injuries.

If the power cable is damaged, it must be replaced by the manufacturer, a service agent or similarly qualified person in order to avoid a hazard.

Do not touch the power cable with wet hands.

Do not connect another appliance to the same power outlet as the dishwasher.
Make sure to use a new water supply line. Old lines are susceptible to breakage because they become hardened and may cause property damage due to a water leakage.
The dishwasher must be connected to a hot water supply with a temperature between 120 °F(49°C) and 149 °F(65°C) . This temperature range provides the best washing result and shortest cycle time. Temperature should not exceed 149 °F(65°C) to prevent damage to dishes.
Ensure that the water supplied to the dishwasher does not freeze. Frozen water can damage the hoses, valves, pump, or other components.
For a full list of safety information, please refer to the User Manual.

WARNING
Tip-Over Hazard
• Do not use the dishwasher until it is correctly installed.
• Do not push down on the door when it is open.
• Do not place excessive weight on the open door.

Electric Shock Hazard
Failure to follow these instructions can result in death, fire, or electric shock:
• Electrically ground the dishwasher
- Connect the ground wire to the green ground connector in the junction box.
• Do not use an extension cord.
To reduce the risk of electric shock, fire, or injury to persons, the installer must ensure that dishwasher is completely enclosed at the time of installation.
CONTENTS
01
PREPARING THE DISHWASHER CABINET
Product dimensions
Cabinet dimensions
02
INSTALLING THE DISHWASHER
STEP 1 Check the parts and tools
STEP 2 Select the best location for the dishwasher
STEP 3 Check water supply requirements and cautions
STEP 4 Check the electrical requirements and cautions
STEP 5 Unpacking and inspecting the dishwasher
STEP 6 Preparing the dishwasher
STEP 7 Placing the dishwasher and connecting the hot water supply line
STEP 8 Leveling the dishwasher
STEP 9 Securing the dishwasher
STEP 10 Connecting the drain hose
STEP 11 Wiring connections
STEP 12 Completing the installation
03
SPECIFICATIONS
Product Dimensions
Side view

Front view
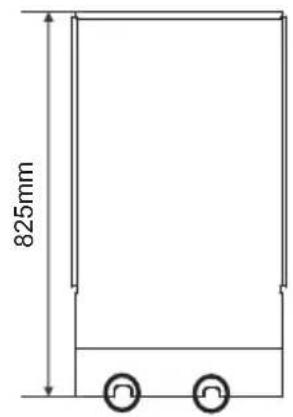
Back view

The water supply line, power cable and drain hose should go through this space behind the dishwasher. Then, the power cable run in channels under the dishwasher to connections in the Front.
Enclosure Dimensions
This dishwasher is designed to be enclosed on the top and on both sides by a standard residential kitchen cabinet unit.
The installation space must be clean and free of any obstructions.
The cabinet opening must be at least 23.6 inches wide, 23 inches deep, the height must be at least 32.5 inches and not exceed 34.6 inches.
For the front door of the dishwasher to be flush with the leading edge of the counter top, the counter top must be at least 23 inches deep.

INSTALLING THE DISHWASHER
Be sure that you or your installer follow these instructions closely so that the new dishwasher works properly and that you're not at risk of injury when washing dishes.
Step 1 Check The Parts And Tools
Before starting on the installation, prepare all the necessary tools and parts required to install the dishwasher. This will save installation time and simplify the installation process.
Parts Required
Provided with the dishwasher. Check when you unbox the dishwasher in Step 5.

Installation brackets 1 X2

ST4*14 X10 (For installation Brackets 1 & 2)

Installation brackets 2 X2

ST3.5*9 X2 (For the installation bracket)
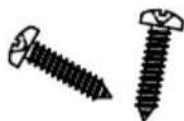
ST3.9*13 X2 (for the kick plate)

ST3.5*45 X4 (For the decoration door)

ST3.5*25 X2 (For the decoration door hook)
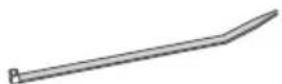
Cable Tie (for the drain hose)
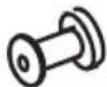
decoration door hook X2

Kick plate

Adjustment cap X2
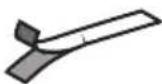
Condensation strip

Twist on wire
connector

Hot water supply line

Air gap

Power cable

Strain relief
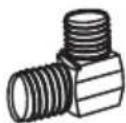
90^ Elbow

Rubber connector

Teflon tape or sealing compound

Electrical tape & Standard duct tape

Tube fittings

Hose clamp

Decoration door
For the hot water supply line, We strongly recommend using copper tubing with a compression fitting or a flexible stainless steel braided hot water supply line.

Do not use plastic tubing. Plastic tubing can deteriorate over time and cause a leak inside the tube fitting.
Tools required
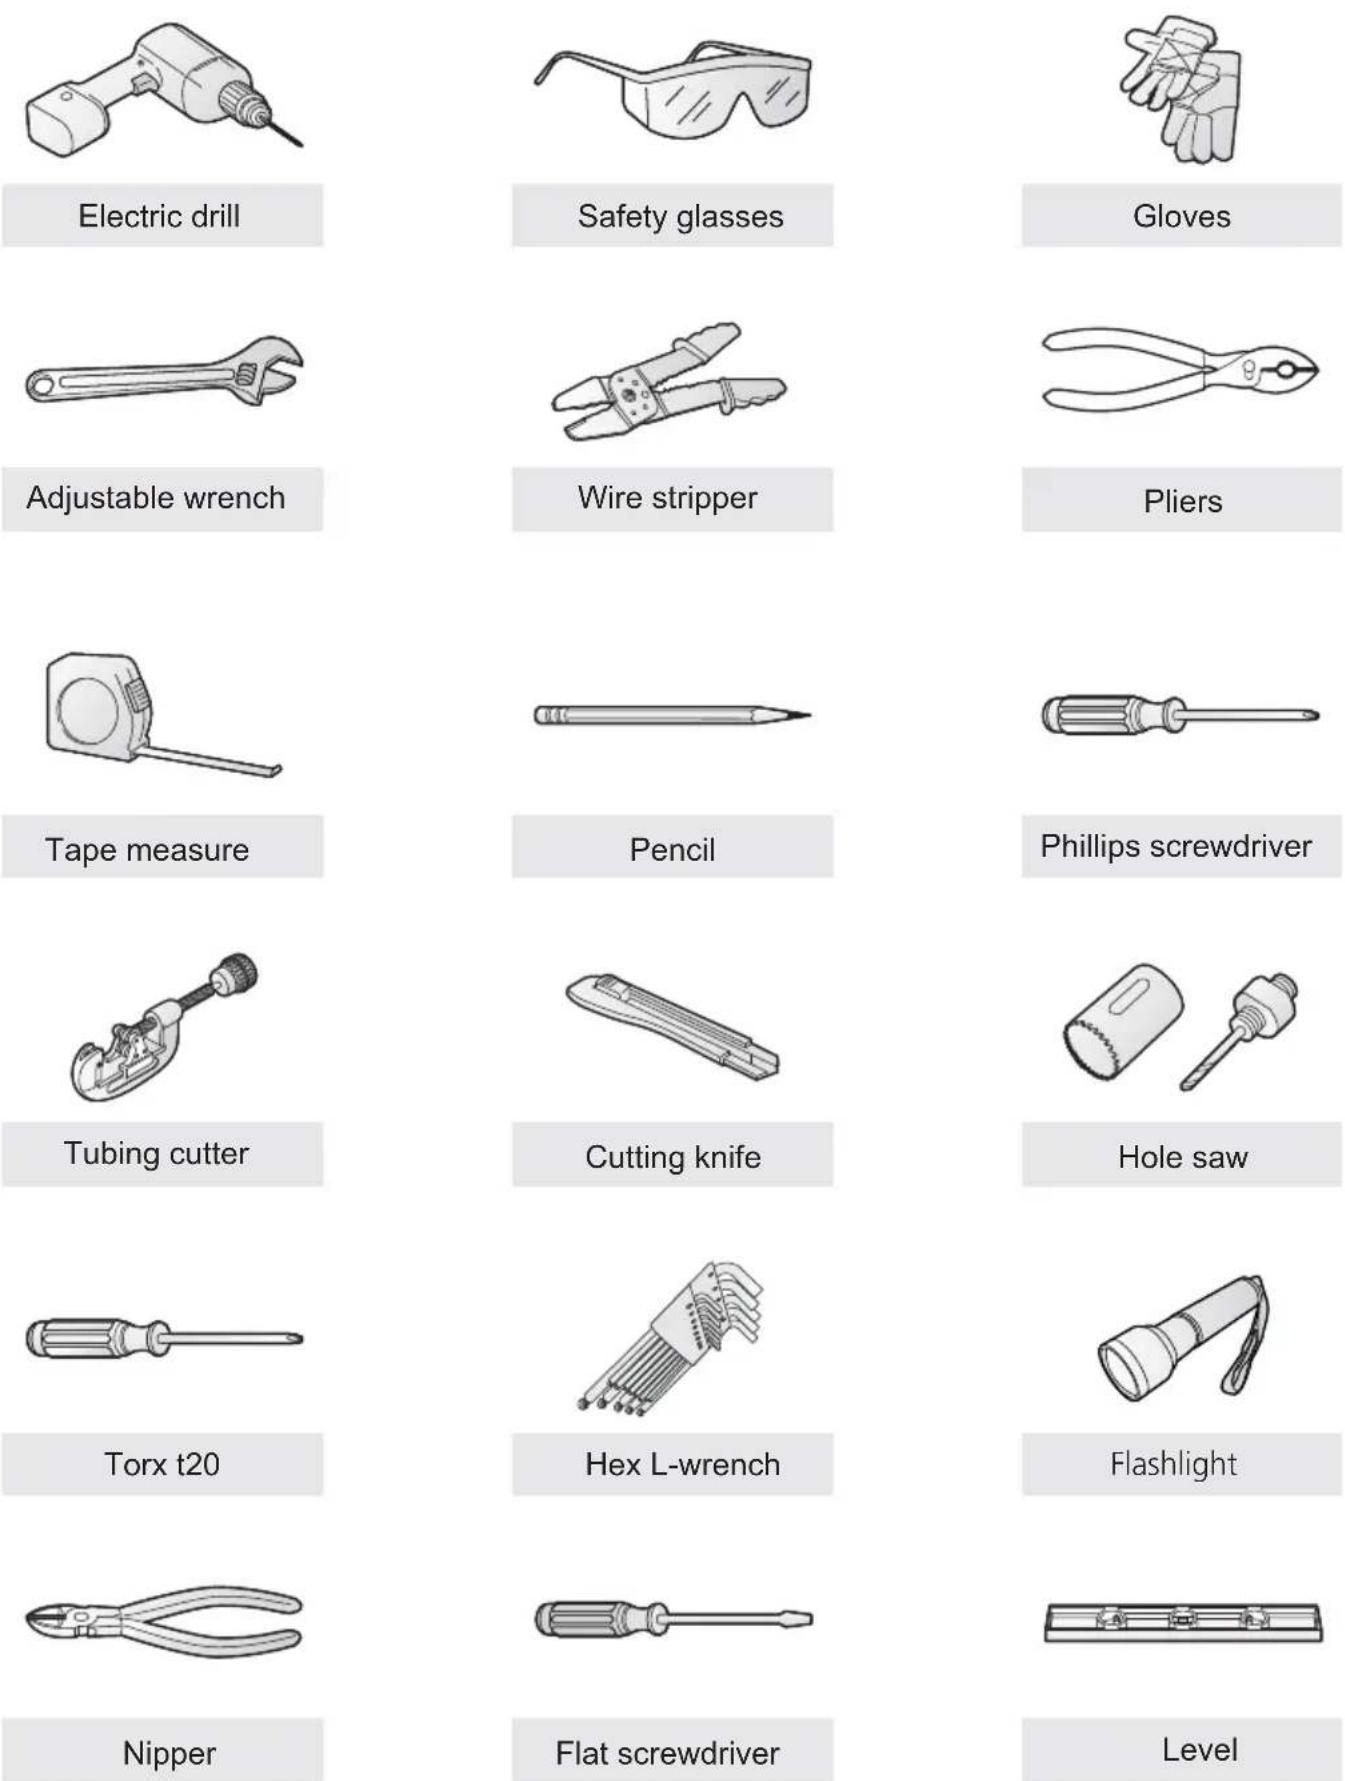
New installation
If the dishwasher is a new installation, most of the installation work must be done before the dishwasher is moved into place.
Replacement
If the dishwasher is replacing an old dishwasher, you must check the existing dishwasher connections for compatibility with the new dishwasher. Repace the existing connections as necessary.
Step 2 Select The Best Location For The Dishwasher
The following criteria are important to ensure the best location for the dishwasher:
• The location must have a solid floor that is able to support the weight of the dishwasher.
- The location must be near a sink with easy access to the water supply, drain, and electrical outlet.
For the drain to operate properly, the dishwasher should be installed within 9.8 ft (3 m) of the sink.
• The location must let allow you load your dishes into the dishwasher easily.
- The location must have sufficient space for the dishwasher door to open easily and provide enough space between the dishwasher and the cabinet sides (at least 0.1 in (2 mm)).
If the dishwasher is installed in a comer, ensure that the side of the dishwasher is more than 2 in (50 mm) from the wall or cabinet to its right or left.
- The wall at the back must be free of obstructions.
If this is a new installation, follow these steps:
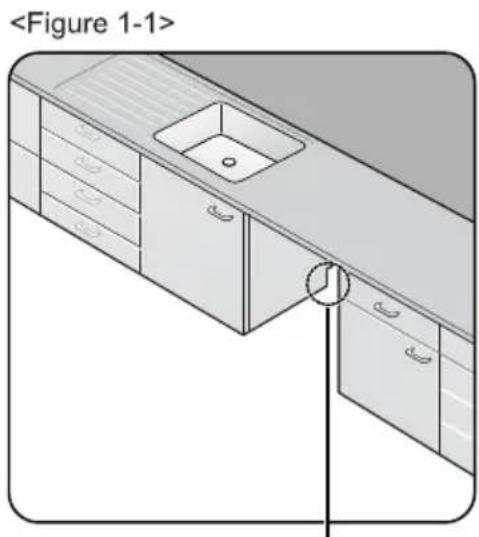
- Using a hole saw, cut a hole into the side of the cabinet that hold the sink as shown in Figure 1-1 below.
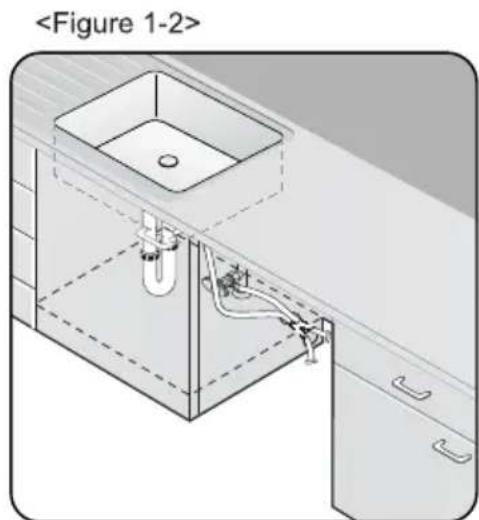
- If the base inside the sink cabinet is raised above the kitchen floor and is higher than the connections on the dishwasher, make a hole in the base inside the cabinet and in the cabinet side as shown in Figure 1-2.
Depending on where your electrical outlet is, you may need to cut a hole in the opposite cabinet side.
natural_image
Isometric line drawing of a kitchen sink with drawers and a circular component, no text or symbols presentThe hole for the water supply line, drain hose and power cables.
natural_image
Isometric technical diagram of a kitchen sink with piping and fixtures, labeled asS Supply Requirements And Cautions tep 3 Check Water
- The hot water supply line pressure must be between 5.80\~145.04 PSI
- Adjust the water heater to deliver water between 120^(49^) 149^(65^)
- The dishwasher must be connected to a hot water supply between 120 °F(49°C)\~149 °F(65°C). This temperature range provides the best washing result and shortest cycle time. Temperature should not exceed 149 °F(65°C) to prevent damage to dishes.
- Ensure that the water supply valve is turned off before connecting the hot water supply line to the dishwasher.
- Seal the hot water supply line connections using teflon tape or sealing compound to stop any water leakage.
- When you install the dishwasher, ensure there is nothing on the drain hose and be careful not to tear it during the installation process.
Step 4 Check The Electrical Requirements And Cautions
The electrical requirements for the dishwasher are as follows: - In the United States, install in accordance with the National Electric Code/State and Municipal codes and/or local codes. - In Canada, install in accordance with the Canadian Electric Code C22.1-latest edition/Provincial and Municipal codes and/or local codes. - For cable direct connections. Hard wire installation. - Use flexible, armored or non-metallic sheathed, copper wire with a grounding wire that meets the wiring requirements for your local codes and ordinances. - Use the strain relief method provided with the wiring junction box or install a U.L.-listed/CSA-certified clamp connector to the wiring junction box. If using conduit, use a U.L.-listed/CSA-certified conduit connector.Unboxing
1. Unbuckle or cut the four straps securing the carton top. 2. Lift the top of the telescoping carton clear of the carton tray and the contents, and then turn it over and place it on the floor. 3. Put the straps and all of the packing materials from around the dishwasher inside the carton top, inspecting them for any signs of damage. 4. Lift the dishwasher from the carton tray, and then place it on the floor. Put the tray into the carton top. 5. Remove the bag that protects the dishwasher during shipping.  CAUTIONALWAYS LIFT THE Dishwasher TO MOVE IT.
Sliding it over rough surfaces can damage the dishwasher's feet and sliding the feet over finished surfaces can, in some cases, damage that finish or the underlying surface. 6. There is also packing inside the dishwasher that you may want to leave in place until the dishwasher is installed. 7. DO not, under any circumstances, remove the sound-absorbent padding that surrounds the exterior of the tub of the dishwasher.Inspecting
Mechanical
1. Check the plastic base assembly to ensure that it is intact 2. Check the dishwasher's feet to ensure they are in place and can be adjusted so you can level and secure the dishwasher. 3. Check all the visible components on the bottom of the dishwasher to ensure they are intact and secure. 4. Check the door latch, the operation of the hinges, and confirm the door is properly secured to the dishwasher.Plumbing
1. Check the hot water connection on the front left-side of the base of the dishwasher. The mountingplate should be secured to the front of the base, the threads inside the connection should be smooth and shiny, and the area should be clean and free of any debris. 2. Check the plastic Brake and Sensor cases to ensure these assemblies are not cracked and that all nconnections are secure. 3. Check the drain hose for any holes or deformities that could allow a water leak during draining.Electrical
1. Confirm the junction box cover is secured to the junction box on the front right-side of the base of the dishwasher. 2. Confirm the electrical box was not damaged during shipping and that it is secured to the base of the dishwasher.Appearance
1. Confirm there are no dents or scratches on the front of the dishwasher 2. Check the edges of the doors for any roughness or cracking 3. Check the control panel to ensure it is clear and unscratched, and that all the control markers are in their proper places.Parts
1. Confirm you have all the parts listed in Step 1 an page 6. 1. Ensure that the circuit breaker and water supply valve are turned off before proceeding with the following steps.  Before you move or lay down the dishwasher for installation, make sure to adjust the height of the legs so the legs are as short as possible. This prevents the legs from breaking. Level the dishwasher by adjusting the height of the legs after you have the dishwasher in place. 2. Make sure there are no kinks and that the hose is not bent at any extreme angles that could constrict the flow of water. 3. Remove the junction box cover located at the bottom front right of the dishwasher using a screwdriver, and then Install the strain relief (Figure 4 - C). Make sure to keep the junction box cover you removed. It is used in Step 11, Wiring Connections. 4. If the countertop is made of wood or a material that is not damaged by drilling, attach the two installation brackets that were supplied with the dishwasher using the supplied screws (Figure 4 - A). They will be used in Step 9. Securing the Dishwasher.Step 7 Placing The Dishwasher And Connecting The Hot Water Supply Line
1. Adjust the three leveling legs at the bottom of the dishwasher after measuring the height of the cabinet opening from under the countertop to the floor. (See Step 8, Leveling the Dishwasher.) 2. Locate the hot water supply line and the power cable. 3. Place the dishwasher so that the power cable is in the right channel of the base of the dishwasher. Use standard duct tape or cable ties to secure the electrical cable to their adjacent channels in the base. This can prevent the electrical cable from being squeezed when you push the dishwasher into place. 4. Pull the drain hose through the hole in the sink cabinet side wall. Keep it free of kinks. 5. Make sure the hot water supply line is not twisted, and then connect the hot water supply line to the elbow joint. 6. Slide the dishwasher carefully into the installation space. If possible, gently pull any excess lengths of water supply line, drain hose, or power cable back as you move the dishwasher. Get a second or third person to help you do this if necessary.  Do not place the dishwasher on the water supply line, drain hose, or power cable.  Also, make sure they are not folded or twisted. Step 8 Leveling The Dishwasher
1. Open the door and place the level against the top of the tub on the inside and check if the the dishwasher is level. If it is not level, rotate the leveling legs at the bottom front of the dishwasher until the dishwasher is level. See the first note below for instructions on adjusting the height of the front legs. natural_image
Line drawing of a hand holding a device with a handle and two circular buttons (no text or symbols)natural_image
Simple line drawing of a door handle and panel with no text or symbolsnatural_image
Diagram showing a 3D block being cut with an arrow indicating compression or force application (no text or symbols present)natural_image
Hand holding a tool interacting with a car (no text or symbols visible)natural_image
Line drawing of a person kneeling beside a large appliance with a hand interacting with the front panel (no text or symbols visible)Step 9 Securing The Dishwasher
You must fix the dishwasher to the countertop or cabinet side walls for additional stability and safety. 1. If the countertop is made of wood or the material will not be damaged by drilling, follow the instructions in 2-1 below. If the countertop is made of granite, marble, or any other material that can be damaged by drilling, follow the Instructions in 2-2 below. 2-1. Put a large towel into the bottom of the dishwasher to prevent wood shavings or a dropped screw from falling into the dishwasher. Carefully drill screw holes Into the counter top bottom by passing the drill bit through a screw hole in each bracket, and then drilling into the counter top bottom beneath. Make sure the hole you drill is smaller than the diameter of the screw. Firstly, put the installation bracket into the slot of the side plane and tighten to the dishwasher with screw ST3.5\*9. Secondly, insert the provided screws into the brackets, and then tighten to secure the dishwasher to the counter top. 2-2. Put a large towel into the bottom of the dishwasher to prevent wood shavings or a dropped screw from falling into the dishwasher. Remove the adjustment cap with the tip of a screwdriver. The caps are just inside the tub near the middle of the tub an both sides (Figure 9 on the next page). Drill a hole into the sides of the kitchen cabinet on both sides by carefully passing a drill bit through the screw holes exposed by the removal of the spacer caps, and then drilling into the cabinet side beneath. Make sure the hole you drill is smaller than the diameter of the screw. Also make sure the drill bit does not strike the sides of the spacer cap holes. Firstly, put the installation bracket into the slot of the side plane and tighten to the dishwasher with screw ST3.5\*9. Secondly, Insert the provided screws into the holes, and then tighten to secure the dishwasher to the cabinet. Make sure the tub is not distorted by pressure from the screws. If the tub is distorted, loosen the screws a little. Replace the tub spacer caps. - The screws or tub spacer cap may fall into the dishwasher while you are working with the door open. Cover the interior of the dishwasher with a towel to prevent any screws from falling into the dishwasher. If any foreign items such as a screw get into the dishwasher, it may cause noise, an abnormal operation, damage, or a malfunction. \- Use a magnetic screwdriver to help prevent screws from falling into the dishwasher. \- If a foreign item such as a screw gets into the dishwasher and you are unable to remove it. the dishwasher needs to be disassembled. Contact a qualified service technician for this.Step 10 Connecting The Drain Hose
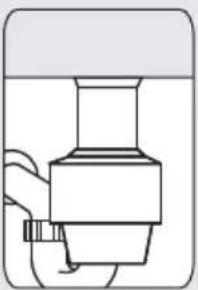
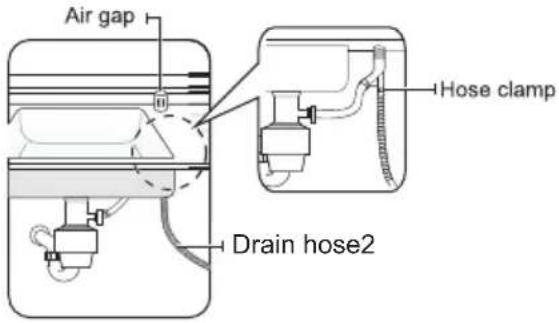
1. Check the parts on the sink to which the drain hose will be connected. 2. There are several ways to insert the drain hose into the drain hose connector of the sink, as shown in the following figures. You must connect the drain hose in accordance with the water pipe installation regulations in your region.| Without disposal | With an air gap/without disposal | Without an air gap |
 |  |  |
| With disposal Disposal with an air gap | Without an air gap | |
 |  |  |
natural_image
Technical line drawing of a pipe sink with coiled tubing and a valve (no text or symbols)Step 11 Wiring Connections
1. Before connecting the power cable to the dishwasher, make sure the circuit breaker is off. 2. In the junction box located at the front bottom right of the dishwasher, find the three power wires from the dishwasher including the grounding line. 3. Pass the power cable through the strain relief, and then into the junction box (Figure 14). 4. Connect the black wire of the dishwasher to the black wire of the power cable by inserting both into a wire nut and then rotating the wire connector as shown in Figure 15. Connect the white wire to the white wire and the green to the green in the same manner. 5. Recheck each wire to ensure it is connected correctly and securely. Each colored wire should be connected to the corresponding wire of the same color. White should be connected to white, black to black, and green to green. 6. Replace the junction box cover on the dishwasher.natural_image
Diagram illustrating the process of coiled cable and twisted cable assembly (no text or symbols)WARNING
Electrical Shock Hazard
To avoid electrical shock, do not work on an energized circuit. Doing so could result in serious injury or death. Only qualified electricians should perform electrical work. Do not attempt any work on the dishwasher electric supply circuit until you are certain the circuit is de-energized.WARNING
Fire Hazard
To avoid a fire hazard, make sure electrical work is properly installed. Only qualified electricians should perform electrical work. Recheck each wire to ensure it is connected correctly and securely. Each colored wire should be connected to the corresponding wire of the same color.Step 12 Completing The Installation
1. Open the door and remove all foam, paper packaging, and unnecessary parts. 2. Turn on the circuit breaker you turned off before you began the installation. 3. Open the water supply valve to supply water to the dishwasher. 4. Turn on the dishwasher, and then select and run a cycle. Check if the power turns on correctly and if there is any water leakage while the dishwasher is operating. If no errors occur while it is operating, turn off the dishwasher, and then go to Step 5,6,7 below. If an error has occurred, turn off the dishwasher, close the water supply valve, and then refer to the user manual or contact local service center.  Make sure to check for water leakage on both ends of the water supply line and drain hose connector. 5. Confirm that the kick plate gasket is on the bottom of the kick plate. To install the kick plate with screw ST3.9\*13, refer to the figure 16.natural_image
3D diagram of a screwdriver inserted into a flat surface with mounting holes, showing no text or symbolsnatural_image
Architectural line drawing of a multi-level kitchen or oven structure with no visible text or symbolsnatural_image
Technical diagram showing a device interior with a screwdriver inserted into a rack, and a close-up of the rack being lifted by a tool (no text or symbols present)SPECIFICATIONS
| Power supply | 120 V 60 Hz |
| Water pressure | 5.80~145.04 PSI |
| Dimensions (Width x Depth xHeight) | 23.6inx22.8inx32.5in |
| Nominal inlet water temperature | 120 ° F(49° C)~149 F(° C)65 |

- Installation Instructions
- SAFETY INSTRUCTIONS
- Important Safety Instructions
- GROUNDING INSTRUCTIONS
- WARNING
- Tip-Over Hazard
- Electric Shock Hazard
- CONTENTS
- 01
- PREPARING THE DISHWASHER CABINET
- 02
- INSTALLING THE DISHWASHER
- 03
- SPECIFICATIONS
- Product Dimensions
- Enclosure Dimensions
- Step 1 Check The Parts And Tools
- Parts Required
- Tools required
- New installation
- Replacement
- Step 2 Select The Best Location For The Dishwasher
- S Supply Requirements And Cautions tep 3 Check Water
- Step 4 Check The Electrical Requirements And Cautions
- Unboxing
- ALWAYS LIFT THE Dishwasher TO MOVE IT.
- Inspecting
- Mechanical
- Plumbing
- Electrical
- Appearance
- Parts
- Step 7 Placing The Dishwasher And Connecting The Hot Water Supply Line
- Step 8 Leveling The Dishwasher
- Step 9 Securing The Dishwasher
- Step 10 Connecting The Drain Hose
- Step 11 Wiring Connections
- Electrical Shock Hazard
- Fire Hazard
- Step 12 Completing The Installation
Brand : BERTAZZONI
Model : DW24PR
Category : Dishwasher