AH2424 - Pet Supplies Pet Lodge - Free user manual and instructions
Find the device manual for free AH2424 Pet Lodge in PDF.


User questions about AH2424 Pet Lodge
0 question about this device. Answer the ones you know or ask your own.
Ask a new question about this device
Download the instructions for your Pet Supplies in PDF format for free! Find your manual AH2424 - Pet Lodge and take your electronic device back in hand. On this page are published all the documents necessary for the use of your device. AH2424 by Pet Lodge.
USER MANUAL AH2424 Pet Lodge
AH2424, AH3030, and AH3036 Rabbit Hutch
Features:
| Easy to clean, rust resistant galvanized steel construction |
| Bottom panel with 1/2 x 1” spacing |
| Side and top panels with 1 x 2” spacing |
| Spring tension door latch•Vinyl door guard•Available in three sizes•Stackable using Pet LodgeTM •Frame KitsComplete line of accessories •available |
Each Rabbit Hutch Contains:
| 1 Bottom Panel | 2 Side Panels | 1 Spring |
| 1 Back Panel | 1 Top Panel | 1 Door Latch |
| 1 Front Panel | 4 Vinyl Door | 1 Package Wire |
| 1 Door Panel | Guards | Clips |
Tools Required:
1 ACP2 Wire Clip Pliers. See instructions below. NOTE: Ordinary pliers do not work -- they will mash rather than curl the clip around the wire.
Using the ACP2 Wire Clip Pliers:
- Place ACC1 Wire Cage Clip in the pliers.
- Position clip next to wires to be fastened.
- Close the pliers to form clips around wires
CAUTION: Avoid pinching skin in pliers.
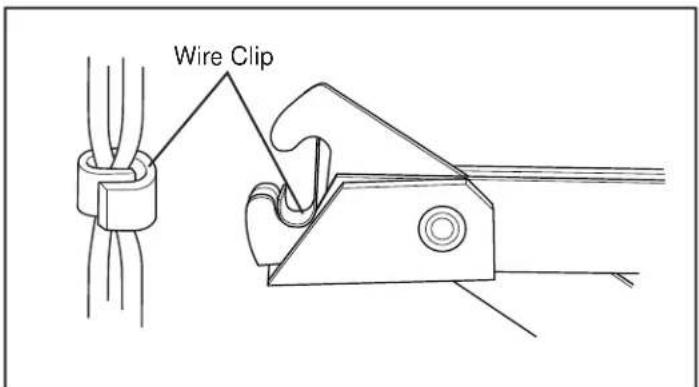
text_image
Wire ClipAssembly Instructions:
- Lay out the hutch panels as shown in Figures 2 - 4. Use the illustration that matches your model hutch. You can put the door on the right or left side of the front of the hutch.
- Fasten a clip at each ●. Do not put clips where ○ appears. NOTE: You do not need to be exact in placing the clips.
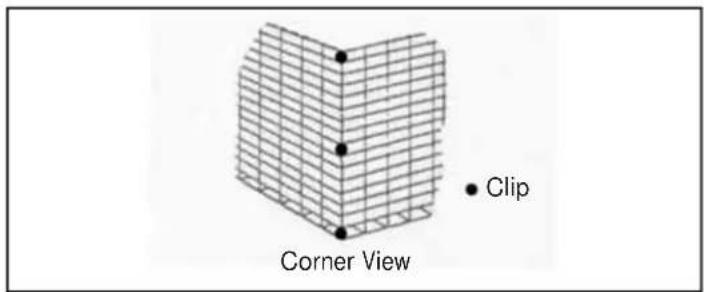
- Raise two panels so that they meet at the corner. Fasten clips at each ● shown in Figure 5. Repeat for the other corners.
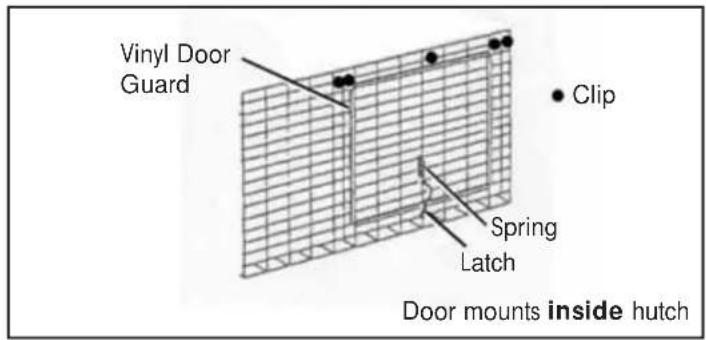
- Attach the door on the inside of the hutch using clips at each shown in Figure 6.
- Attach the spring and door latch as shown in Figure 6.
- Slide the vinyl door guards over the edge of the door opening.
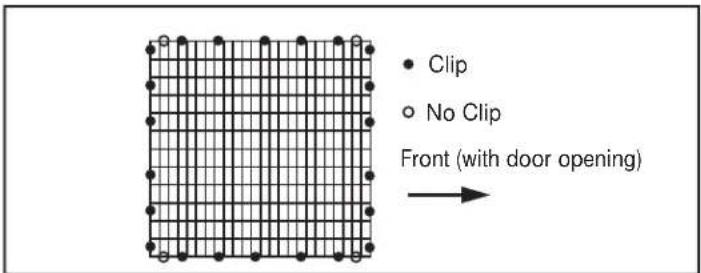
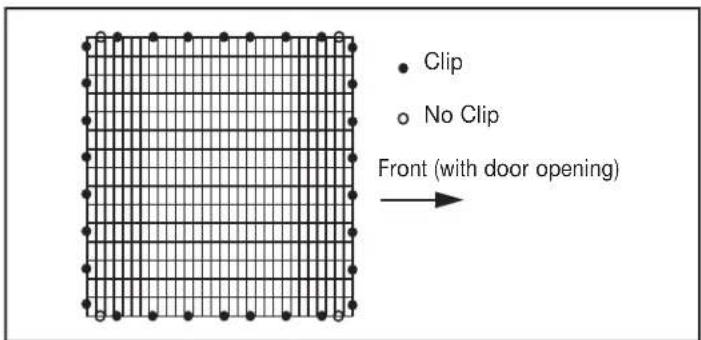
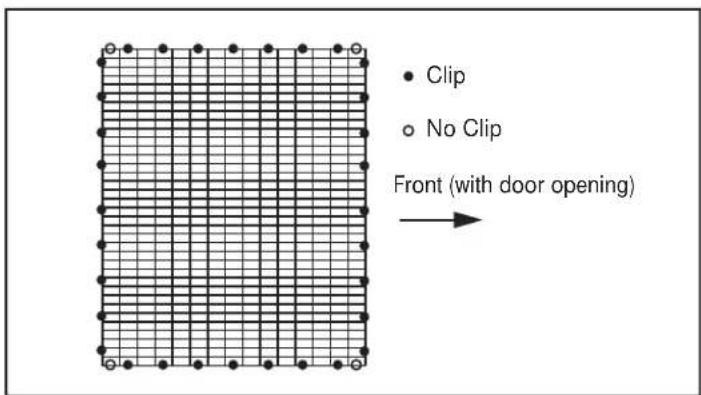
- Place the top panel on top of the side panels. Fasten clips at each ● shown in Figures 7 - 9. Do not put clips where the ○ appears.
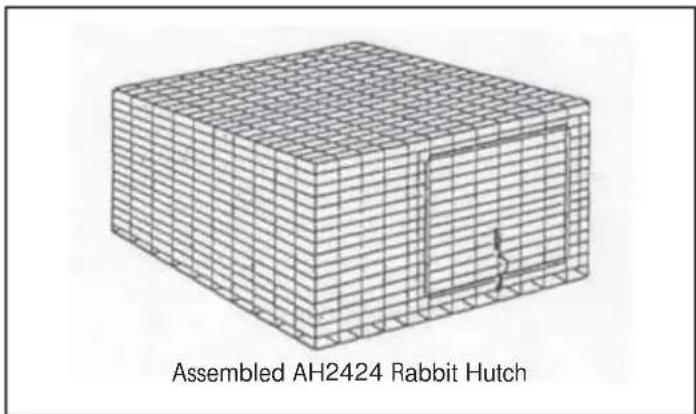
natural_image
3D wireframe model of an assembled AH2424 Rabbit Hutch housing (no text or symbols on the diagram itself)Figure 1

text_image
Clip No ClipFigure 2 (Model AH2424)
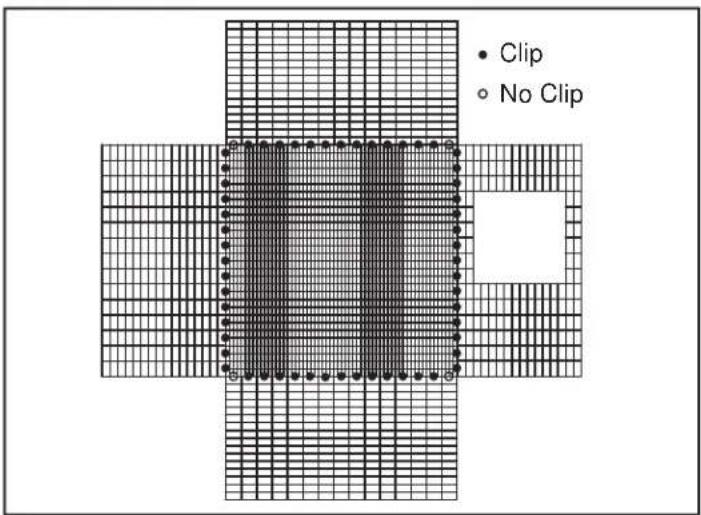
text_image
Clip No ClipFigure 3 (Model AH3030)
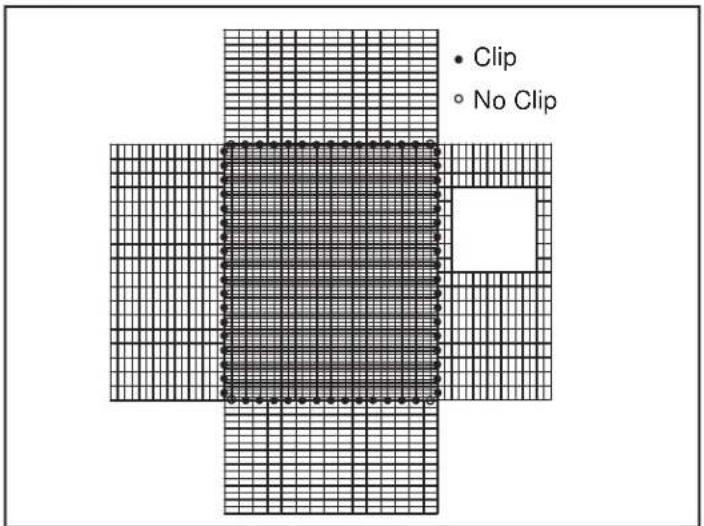
text_image
• Clip ◦ No ClipFigure 4 (Model AH3036)
text_image
Clip Corner ViewFigure 5
text_image
Vinyl Door Guard Clip Spring Latch Door mounts inside hutchFigure 6
text_image
Clip No Clip Front (with door opening)Figure 7 (Model AH2424 Top Panel)
text_image
Clip No Clip Front (with door opening)Figure 8 (Model AH3030 Top Panel)
text_image
Clip No Clip Front (with door opening)Figure 9 (Model AH3036 Top Panel)
Accessories
Wire Cage Clips• (ACC1)
Wire Clip Pliers• (ACP2)
Small Animal Water Bottles• (AW8, AW16, and AW32)
Clear Series Water Bottles• (CPB8, CPB16, and CPB32)
Plastic Cage Cups• (ACU1, ACU2, and ACU4)
Galvanized Cage Cup• (ACU5)
Salt Spool and Hanger*
• Hay Rack (153171)
• Frame Kits (AHFK24, and AHFK30)
(SSH2)
- Small Animal Feeders with metal bottom and lid (AF3ML, AF5ML, and AF7ML)
- Small Animal Feeders with sifter bottom (AF3S, AF5S, and AF7S)
- Small Animal Feeders with sifter bottom and lid (AF3SL, AF5SL, and AF7SL)
• Urine Guard Kits (AUG2424, AUG3030, and AUG3036)
• Galvanized Dropping Pans (ADP2424, ADP3030, and ADP3036)
• (H4R124D40pping Pan